
If you are creative and work with Adobe, you already know: Illustrator and Photoshop do not compete, they complement each other. Today we propose a practical journey for you to start working with both and combine the best of both worlds.
But before we start…
If you want to combine both programs to get the most out of them, there are some aspects you should keep in mind, such as compatibility. From Photoshop, go to Preferences > File Handling and look for the section Maximize PSD and PSB File Compatibility. Choose the Ask option so that Photoshop allows you to decide whether or not to enhance the compatibility of the files when they are saved. This way, you can decide based on the situation.
Also use the same color settings in both Photoshop and Illustrator to avoid surprises with the appearance of your projects.
How to open Photoshop files in Illustrator
Opening a PSD file in Illustrator is a much simpler process than you think. With this method we will teach you now, you will be able to convert the layers of Photoshop into Illustrator objects.
- Open Adobe Illustrator and go to File > Open.
- Search your computer for the .PSD file and click Open.
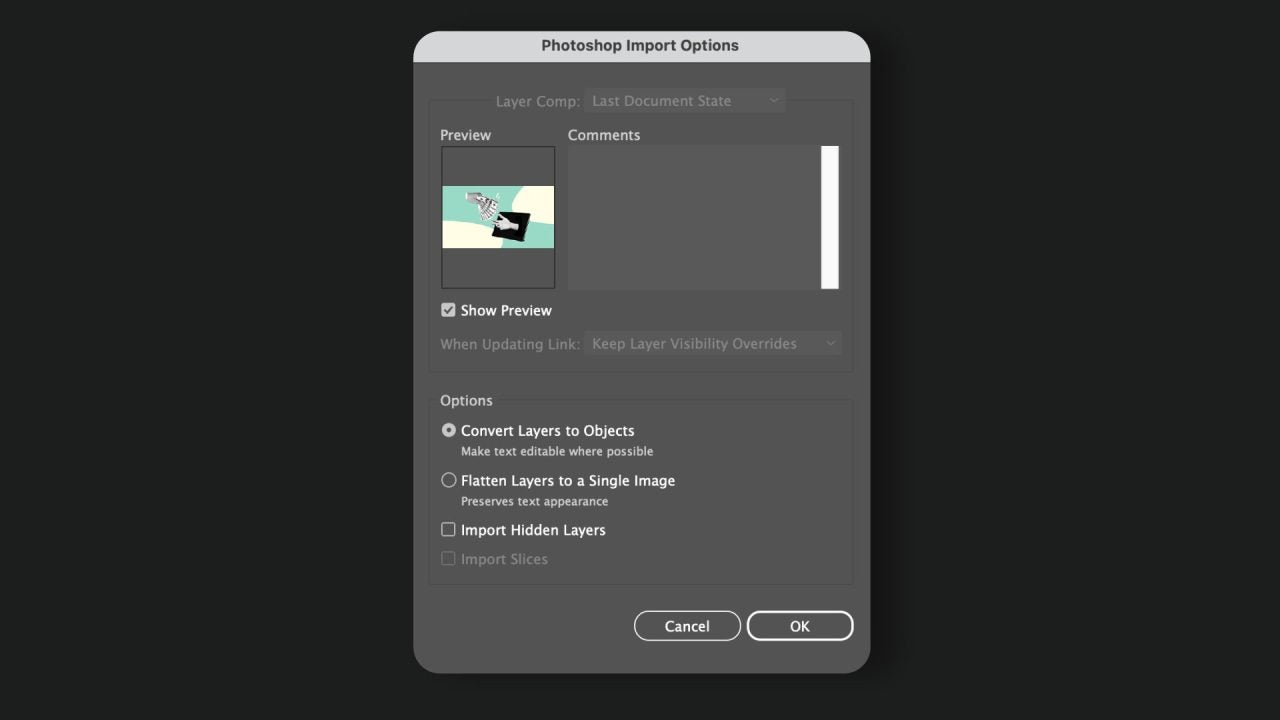
- Next, you will see the Photoshop Import Options dialog box. Once here, you can choose from these options:
- Convert Layers to Objects: Recommended if you want to edit your PSD. It preserves masks, blending modes, and transparency; when possible, it allows you to edit the texts. Keep in mind that it DOES NOT support adjustment layers or layer styles: those parts will be merged/rasterized to maintain the appearance.
- Flatten Layers to a Single Image: This will be useful if you only need the image to be flat. Everything will be in a rasterized layer and disables layer editing.
- Further down, you will find the options for Import Hidden Layers and Import Slices. These will only be active if your PSD has hidden layers or slices. You can select them if you deem it necessary.
- Accept to start working. The Photoshop layers will appear as sub-layers in the Layers panel of Illustrator.
This is how you can place a Photoshop image in your Illustrator project
If you work with Photoshop and Illustrator at the same time, inserting your Photoshop images directly into your Illustrator project can save you a lot of time. For example, you can choose to place the PSD file as linked or embedded:
Place a PSD as linked
When you place a PSD as linked, any changes you make in Photoshop will automatically update in Illustrator. It’s a very convenient way to work, as everything you do in Photoshop will be instantly reflected without having to re-import that file again. To insert a PSD as linked within your Illustrator project, follow these steps:
- Open your Illustrator file within Illustrator and click on File > Place.
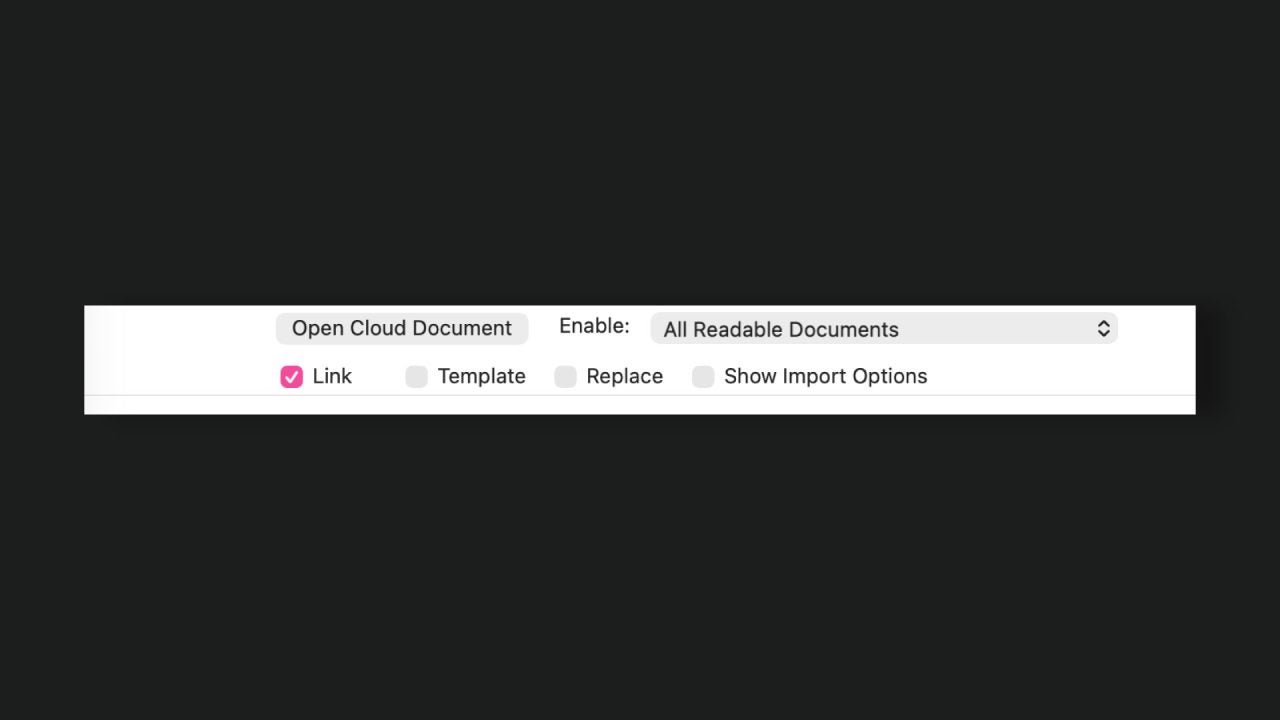
- Select the PSD you want to link, check the Link box, and press the Place button.
- Place it on the canvas. You will see the link icon from the Links panel. If you don’t see it, go to Window > Links. From now on, updating the PSD in Photoshop will update the link in Illustrator.
This is how an embedded PSD works
The main advantage of embedding a PSD within an Illustrator project is that it does not depend on the original file or its location. This way, you also avoid annoying messages like Missing Link and ensure that the PSD in question does not change when moving the Illustrator file around. Here’s how you can embed a PSD:
- Go to File > Place and choose the PSD to place. Here, make sure to uncheck the Link option and check Show Import Options. Then, click on Place.
- Within the Photoshop Import Options box, choose how you want your PSD to be imported.
Move a path created in Photoshop to Illustrator
The most experienced with Photoshop know well that the use of vectors is not something exclusive to Illustrator. And if you have ever wondered if it is possible to transfer a vector drawing made in Photoshop to Illustrator, the answer is yes, it is possible:
- Within Photoshop, select the layer that contains the path. Then go to File > Export > Path to Illustrator.
- You can also copy the path itself from the Paths panel. If you don’t see it, click on Window > Paths.
- Now, the path will be saved as a new file with the .ai extension.
You have already seen how both programs can help you work on the same canvas without suffering along the way. Use the best of Photoshop and Illustrator to apply it to your designs and give them a more professional touch.
