You don’t need to be a sustainability expert to see how climate change is rapidly altering our daily lives. However, you also don’t need to be an expert ecologist to work in a more environmentally friendly way.
Through Adobe Illustrator, we will explore practical and simple ideas you can apply to your designs. From optimizing the use of colors to choosing formats that save resources when printing, creativity, and commitment to the planet can go hand in hand, and here we will show you how.
Reduced color palettes
The colors of a project tell us everything: they serve to convey a message, transmit emotions, and much more. Having appropriate color palettes will help us streamline the work and be more concise with what we want to convey. Within Illustrator, we can create, save, and use custom palettes to ensure everything has the same visual line.
To access the palettes, we will need to go to Window > Swatches. Here, you can see a collection of basic colors already preset. If you click on the library symbol that you will see in the panel in the lower left corner, other thematic libraries will open.
If you want to create a custom palette manually, do the following:
- Select the folder symbol to create a new group that contains all the colors you want. Name it and select OK.
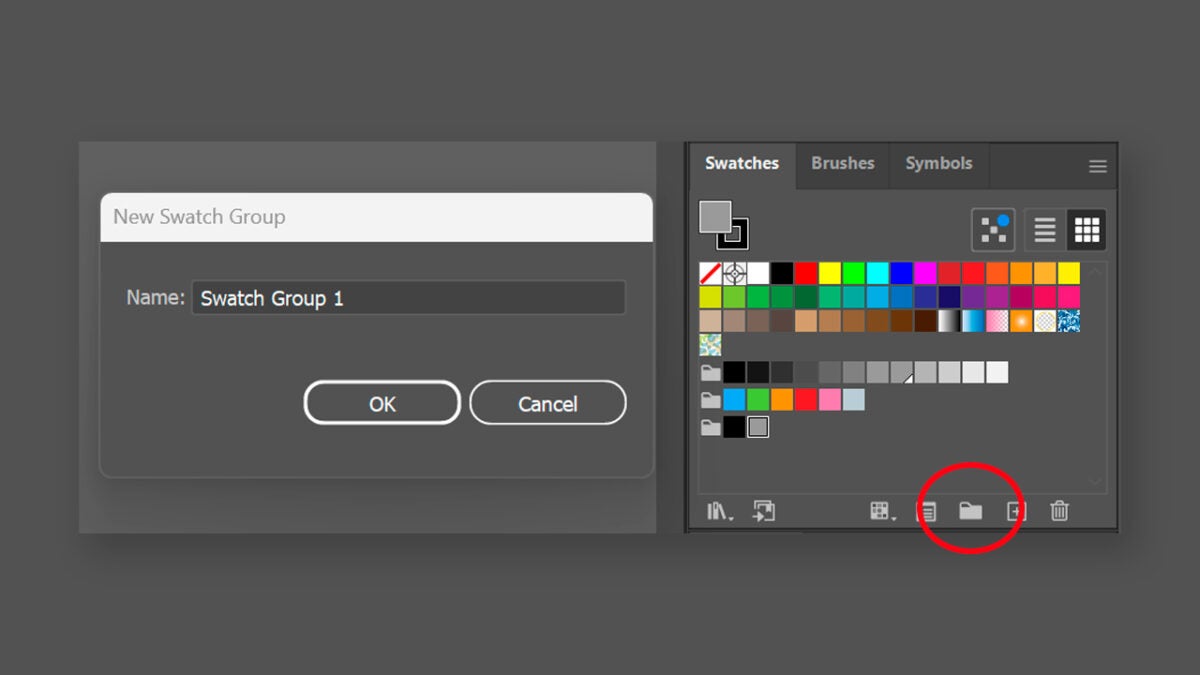
- Choose a color from the Color panel or with the eyedropper (I). Finally, click on the “+” button (New swatch) to save it in your group. Do it individually with the colors you want to group.
You can also use Adobe Color to extract color palettes directly from an image. This online platform allows us to create completely customized color palettes.
Keep in mind that when working, you can make some more “eco-friendly” decisions, such as using solid colors. Effects and gradients require more ink and can also be more prone to printing errors. Reducing the color range and using lighter tones will make your projects consume less ink in the long run.
Save your projects in CMYK
If your work is intended to be printed, it is important to work in CMYK. This color model is the standard used in professional printing processes. If we work with it from the beginning, we will ensure that the colors are reproduced much more accurately.
While you can work in RGB and then convert it to CMYK, it is really not ideal as you will see how your projects lose details and consistency in the process. This is how we can prepare our documents for printing:
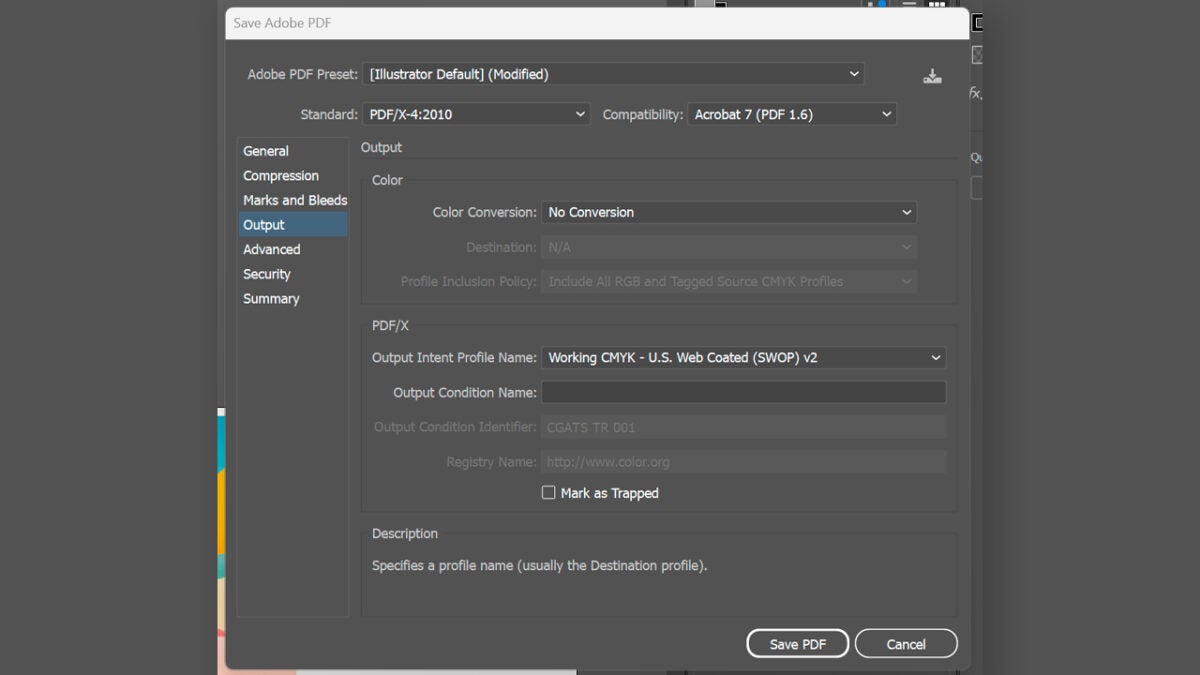
- Go to File > Save As.. and select Adobe PDF.
- In the Save Adobe PDF panel, choose a preset like PDF/x-4.
- From Output, you will see in the PDF/X section that you are in Working CMYK.
- Here, we can also include the bleed, which is something we will see better below. Finally, click on Save PDF to finish.
Optimize your projects and make the most of the paper area
Creating compact designs and organizing space on paper will help you make the most of the surface and use less material, saving costs. Additionally, correctly setting up printer marks and bleed areas will help you avoid additional cuts. Here’s how you can add printer marks in Illustrator:
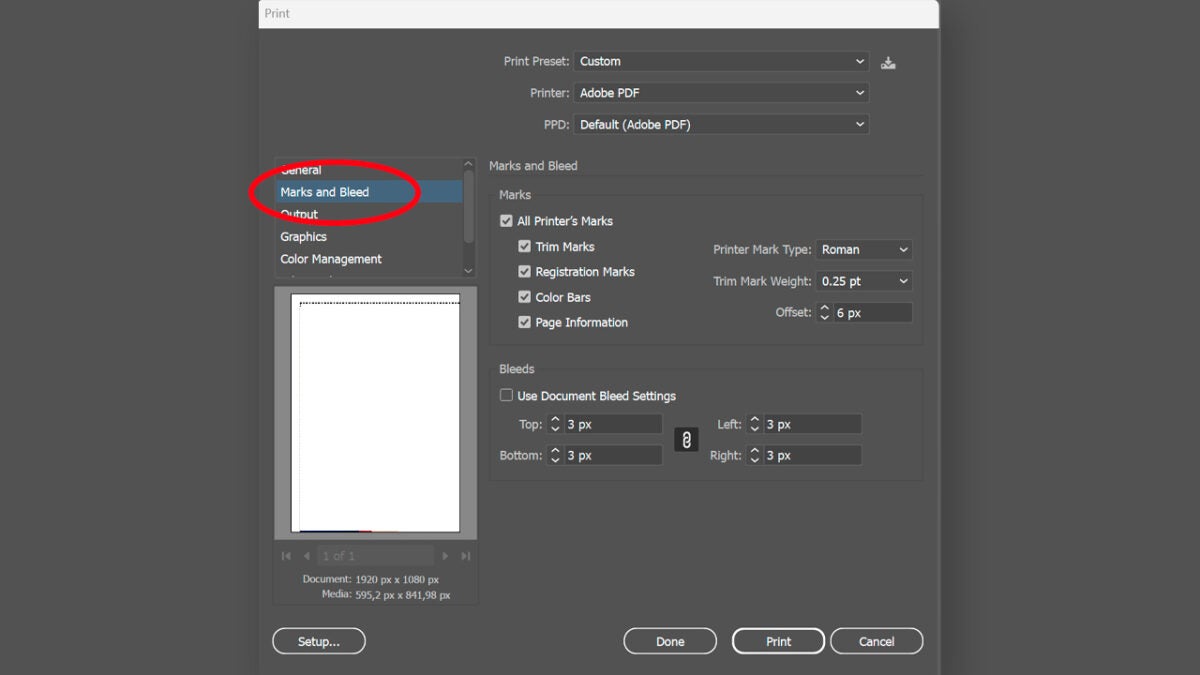
- Go to File > Print.
- A new panel will appear where you must select the Marks and Bleed section.
- Here, you need to select the type of bleed you want for your document. If you choose Trim Marks, specify the line width and the offset distance between the artwork and the boundary marks.
To add indentation, you will need to do the following:
- Again, select File > Print.
- Click again on the Marks and Bleed section.
- In Bleeds, enter values for Top, Left, Bottom, and Right. This will specify the placement of the bleed marks.
- If you want to use the predefined settings, click on Use Document Bleed. The maximum bleed you can set is 72.
- To export the document with bleed lines, select File > Export As… and choose Adobe PDF. In the export options, select Marks and Bleeds and check the settings.
Make sure your designs reach the bleed edge. This will prevent white borders from appearing when trimming the print.