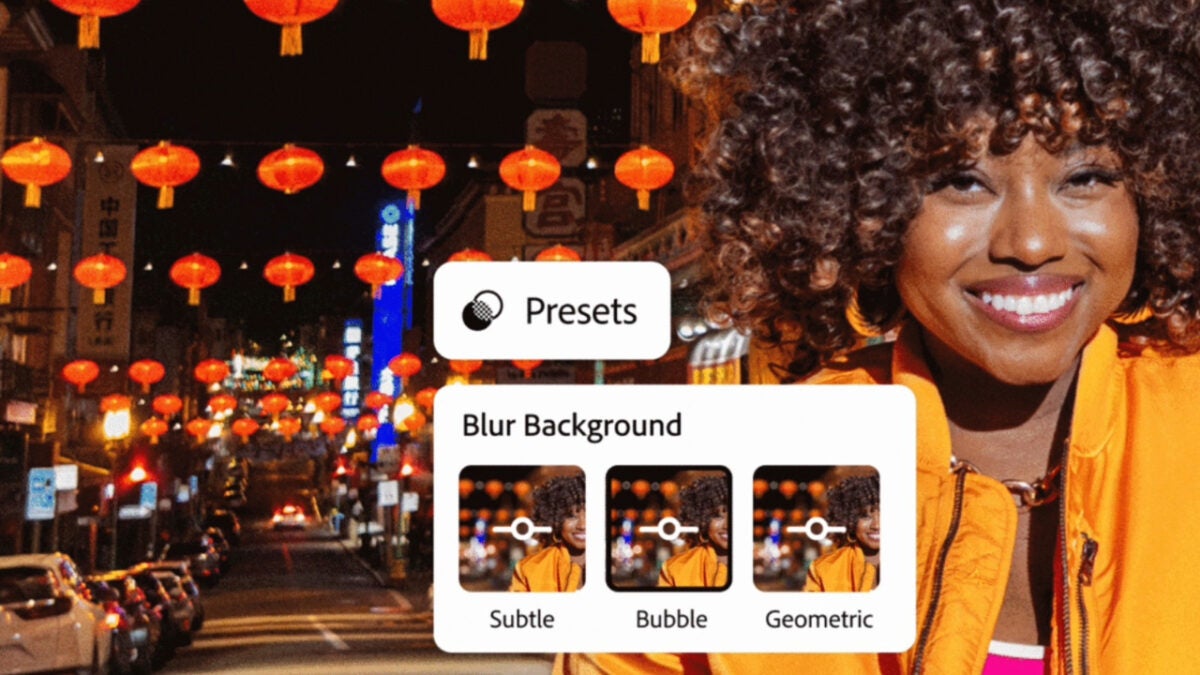
When it comes to photography, having the right tools can make all the difference. Adobe Lightroom, with its powerful AI capabilities, transforms ordinary photos into masterpieces. Considered the go-to choice by professionals, this powerful photo editing software is crucial for both amateur and seasoned photographers. It offers a wide range of tools that enable users to transform ordinary photos into stunning, professional-quality images.
Photo editing is essential in photography, allowing photographers to refine their vision, correct imperfections, and enhance the overall impact of their images. With the advancements in technology, the capabilities of photo editing software have grown significantly, and Adobe Lightroom is at the forefront of these innovations.
In today’s article we’ll delve into what sets Adobe Lightroom apart from its competitors: Its seamless integration of Artificial Intelligence (AI). Adobe’s AI initiatives are designed to make complex editing tasks more accessible, efficient, and creative. Whether you’re removing unwanted elements, enhancing portrait features, or applying creative effects, Lightroom’s AI-powered tools are here to elevate your editing workflow. Would you like to know more?

Lightroom vs. Photoshop: Understanding the Differences
No. Adobe Lightroom and Photoshop serve different purposes, often complementing each other in a photographer’s workflow. Lightroom excels at managing and processing large batches of photos, offering powerful organizational tools and non-destructive editing capabilities. It’s ideal for initial edits, global adjustments, and workflow efficiency. Photoshop, on the other hand, is a pixel-level editor best suited for detailed retouching, compositing, and graphic design tasks. While Lightroom handles most of the heavy lifting in photo editing, Photoshop is often used for fine-tuning and specialized edits. Together, they form a comprehensive toolkit for photographers.

Exploring Adobe Lightroom: Key Features and Tools
With a solid understanding of the basics, let’s delve into Lightroom’s core features that make it indispensable for professional photographers.
Navigating Lightroom’s Interface
Upon launching Lightroom, users are greeted with a clean, intuitive interface designed to streamline the photo editing process. The main sections of the interface include:
- Library Module: This is where you manage and organize your photos. You can sort, rate, and keyword your images, making it easy to find specific photos later.
- Develop Module: The heart of Lightroom’s editing capabilities. Here, you’ll find all the tools needed for adjusting exposure, contrast, color, and more.
- Map, Book, Slideshow, Print, and Web Modules: Additional modules that offer specific functionality for geotagging photos, creating photo books, slideshows, printing, and sharing online.
The interface is divided into several panels:
- Left Panel: Contains the Navigator, Presets, Snapshots, History, and Collections.
- Right Panel: Houses the editing tools in the Develop module, including Basic adjustments, Tone Curve, HSL/Color, Split Toning, Detail, Lens Corrections, Transform, Effects, and Calibration.
- Bottom Panel: Displays the Filmstrip, providing quick access to all photos in the current collection or folder.
- Center Area: The main workspace where your photo is displayed for editing.
Organizing Your Photos with the Library Module
Efficient organization is crucial for productivity:
- Collections: Group related photos without moving them from their original locations.
- Keywords: Tag photos for easy searching and filtering.
- Rating and Flagging: Identify best shots and those needing review.
- Smart Collections: Automatically update based on specified criteria, such as ratings or keywords.
Editing Tools in the Develop Module
Lightroom offers a range of tools that cater to various aspects of photo editing:
- Basic Panel: Adjust exposure, contrast, highlights, shadows, whites, blacks, and presence (clarity, vibrance, saturation).
- Advanced Adjustments:
- Tone Curve: Fine-tune the tonal range of your image with precision.
- HSL/Color: Adjust the hue, saturation, and luminance of individual colors.
- Detail: Sharpen your image and reduce noise.
- Lens Corrections: Correct lens distortions, chromatic aberration, and perspective.
- Transform: Adjust the geometry of your image to fix perspective issues.
- Effects: Add vignettes and grain for creative effects.
- Calibration: Fine-tune the overall color balance of your image.
- Retouching: Spot removal, clone, and heal tools.
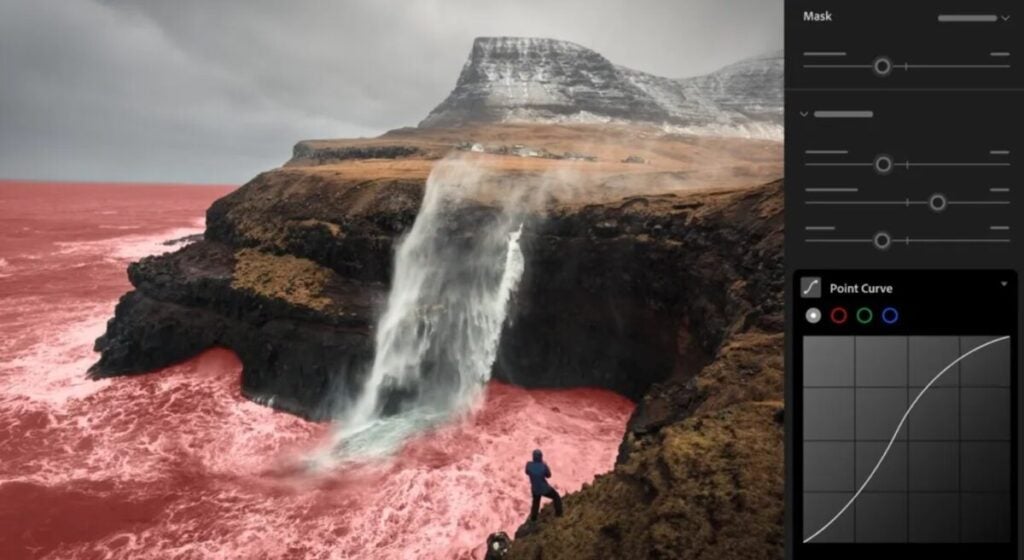
- Masks: Local adjustment masks and range masks for precise control
Presets and Profiles
Presets and profiles streamline the editing process:
- Presets: Pre-configured settings for quick edits.
- Creating Presets: Save custom settings for consistent adjustments.
- Profiles: Alter the overall look without changing adjustment sliders. Browse and apply profiles from the Profile Browser.
The Power of AI: Elevate Your Lightroom Edits
Adobe has long been at the forefront of integrating AI into its suite of creative tools. By harnessing the power of AI, Adobe aims to simplify complex editing tasks, enhance creativity, and improve efficiency for photographers and creatives. Adobe’s AI powers the intelligent features found in Lightroom, making advanced photo editing accessible to everyone.
How AI is Transforming Photo Editing in Lightroom
AI is revolutionizing photo editing in Lightroom by automating repetitive tasks, providing intelligent suggestions, and enabling new creative possibilities. With AI, photographers can achieve professional-quality results faster and with less effort, allowing them to focus more on their creative vision.
AI in photo editing encompasses a range of features that enhance the editing process, from automatic adjustments and intelligent cropping to more advanced capabilities like content-aware fill, generative removal, and AI-based masking. These features help photographers save time and achieve precise edits that would be challenging to accomplish manually.
Firefly-Powered Generative Remove: Effortlessly Remove Unwanted Elements
Generative Remove is an innovative AI feature that allows users to effortlessly remove unwanted elements from their photos. Whether it’s an unwanted person in the background, distracting objects, or blemishes, Generative Remove can intelligently fill in the gaps, ensuring a seamless result.
- Select the Photo: Open the photo you want to edit in the Develop module.
- Choose the Spot Removal Tool: Select the Spot Removal tool from the right panel.
- Select Generative Remove Mode: In the tool options, choose the Generative Remove mode.
- Highlight the Unwanted Element: Use the brush to paint over the element you want to remove. Adjust the brush size as needed.
- Apply the Remove Command: Once the area is highlighted, Lightroom will automatically analyze the surrounding pixels and fill in the area seamlessly.
- Refine if Necessary: If the initial result isn’t perfect, you can refine the selection and reapply the tool.

AI-Powered Portrait Editing: Enhance Facial Features with Precision.
AI-powered portrait editing tools in Lightroom offer photographers the ability to enhance facial features, adjust skin tones, and retouch portraits with precision and ease. These tools are designed to maintain a natural look while saving time on detailed adjustments.
- Open a Portrait Photo: Select the portrait photo you want to edit and open it in the Develop module.
- Select the Portrait Tools: Choose the portrait enhancement tools from the right panel. These might include skin smoothing, eye enhancement, and teeth whitening.
- Apply Adjustments: Use the sliders to adjust the intensity of each feature. The AI will ensure that the enhancements look natural and balanced.
- Fine-Tune Details: Use local adjustment tools like the Adjustment Brush for any specific refinements.
Custom Blur with AI: Create Stunning Depth-of-Field Effects
The AI-powered custom blur feature in Lightroom, such as Lens Blur, allows you to instantly create stunning portrait effects by focusing on your subject and blurring out the background. This feature is perfect for creating depth-of-field effects that make your subject stand out, akin to the results typically achieved with high-end lenses.
- Select the Photo: Open the photo you want to edit in the Develop module.
- Choose the Lens Blur Tool: Select the Lens Blur tool from the right panel.
- Apply the Blur Effect: Use one-tap presets to automatically focus on your subject and blur the background. You can also manually adjust the blur intensity and area.
- Fine-Tune the Blur: If necessary, use the adjustment brush to refine the edges of the blur effect, ensuring a natural transition between the focused subject and the blurred background.

AI Adaptive Presets: Quick Edits Tailored to Your Photos
Adaptive Presets use AI to quickly search for and find the best filter for your image. By analyzing the content of the photo, such as subjects, skies, or backgrounds, Lightroom’s AI can suggest and apply the most suitable preset to enhance the image instantly.
- Open the Photo: Select the photo you want to edit in the Develop module.
- Navigate to Presets: In the right panel, go to the Presets section.
- Select Adaptive Presets: Choose from portrait, sky, and subject presets. These presets are tailored to enhance specific elements of your photo based on AI analysis.
- Apply the Preset: Click on the desired adaptive preset to apply it. The AI will automatically adjust the settings to optimize the look of your photo.
- Fine-Tune if Necessary: You can further adjust the settings manually to perfect the final look.
AI-Powered Denoise: Clearer Photos in Low Light Conditions
AI-powered Denoise in Lightroom removes distortion from images taken with high ISO settings or in low-light conditions. This feature uses advanced algorithms to reduce noise while preserving details, resulting in clearer and sharper photos.
- Select the Photo: Open the photo you want to edit in the Develop module.
- Choose the Detail Panel: Navigate to the Detail panel on the right side of the interface.
- Apply Denoise: Locate the Noise Reduction section. Use the sliders to apply noise reduction. The AI will automatically analyze the image and reduce noise while maintaining detail.
- Fine-Tune the Settings: Adjust the Luminance, Detail, and Contrast sliders to refine the noise reduction effect to your preference.
Content-Aware Fill and Healing
Content-aware fill and healing tools use AI to swiftly remove or replace unwanted elements in your photos. These tools analyze the surrounding areas to fill in gaps seamlessly, making retouching quick and effortless.
AI-Based Masking and Selection Tools
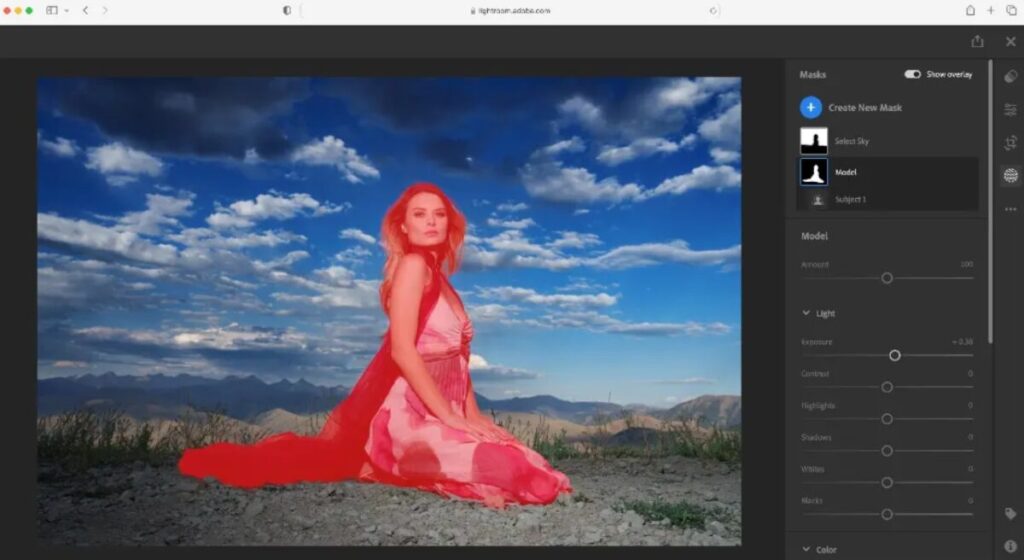
AI-based masking and selection tools in Lightroom allow for precise and accurate selections of complex subjects. These tools use machine learning to identify edges and differentiate between foreground and background elements, simplifying the process of applying local adjustments.
Enhancing Your Workflow with Adobe Creative Cloud
Lightroom’s integration with other Adobe Creative Cloud applications enhances the overall editing and creative experience, providing a seamless workflow for photographers.
Photoshop Integration: Advanced Retouching and Compositing.
- Round-Trip Editing: Lightroom and Photoshop work together seamlessly, allowing photographers to transfer images between the two applications for advanced editing. Edits made in Photoshop are saved back to Lightroom, maintaining a non-destructive workflow.
- Advanced Retouching: For detailed retouching and compositing tasks, photographers can leverage Photoshop’s powerful tools. This integration ensures that Lightroom handles batch processing and global adjustments, while Photoshop takes care of pixel-level edits.
Adobe Portfolio: Showcase Your Work Online
- Showcase Your Work: Photographers can use Adobe Portfolio to create custom websites to showcase their work. Lightroom collections can be directly published to Adobe Portfolio, making it easy to keep online galleries up to date.
Adobe Express: Create Engaging Content
- Create Engaging Content: Adobe Express allows photographers to create engaging content such as social media posts, web pages, and videos. Lightroom photos can be seamlessly imported into Spark projects, enabling photographers to enhance their visual storytelling.
Premiere Pro and After Effects: Integrate Photos into Video Projects
- Video Integration: Photographers who also work with video can benefit from Lightroom’s integration with Premiere Pro and After Effects. Edited photos can be incorporated into video projects, ensuring a consistent visual style across both media.
Lightroom: Elevating Your Photography with AI
Adobe Lightroom stands out as an essential tool for professional photographers, offering powerful AI-driven features that streamline the editing process and enhance creativity. With its comprehensive suite of editing tools, robust organizational capabilities, and seamless integration with other Adobe Creative Cloud apps, Lightroom enhances workflow efficiency and creativity.
The AI-powered features, such as Generative Remove, AI-Powered Portrait Editing, Custom Blur, and Adaptive Presets, significantly reduce the time spent on complex tasks while providing intelligent suggestions and creative enhancements.
As AI technology continues to evolve, Lightroom’s capabilities will only become more sophisticated, making photo editing faster, more precise, and more accessible. If you’re a photographer, we definitely encourage you to explore and experiment with Lightroom’s diverse features, leveraging AI to push the boundaries of their creativity. By embracing these advancements, you can easily turn your photos into stunning, professional-grade images, staying ahead in the ever-evolving field of photography. Why don’t you give it a try today?
