Adobe Lightroom is one of the best photo editing programs (or the best) you can find today. This old favorite of the photography community has been improving year after year, with the inclusion of new features and functionalities that will help you edit faster and better.
Just like in almost all Adobe programs, AI has become another companion in our creative routine with new editing effects. Besides that, Lightroom makes our work easier thanks to batch editing and the creation of our own presets, as you will see below.

Edit large batches of photos within Adobe Lightroom
The process known as Batch Editing is the method through which we can edit a large number of photographs without the need to go through them one by one. This is very useful if you have a series of similar images or those that require the same touch-ups.
Una forma muy simple de hacer esto es a través de preajustes. Estos ya incluyen una serie de ediciones (niveles específicos de exposición, saturación, luz, etc.) que puedes aplicar a muchas fotos a la vez sin tener que cambiar nada. Sin embargo, también puedes copiar y pegar ediciones de una foto a otra.
Para hacer esto, sigue estos simples pasos:
- Once you have an edited photo with the parameters you want in Adobe Lightroom, select it and copy its edit by clicking on Copy Edit Settings. You will find the option at the bottom of Lightroom.
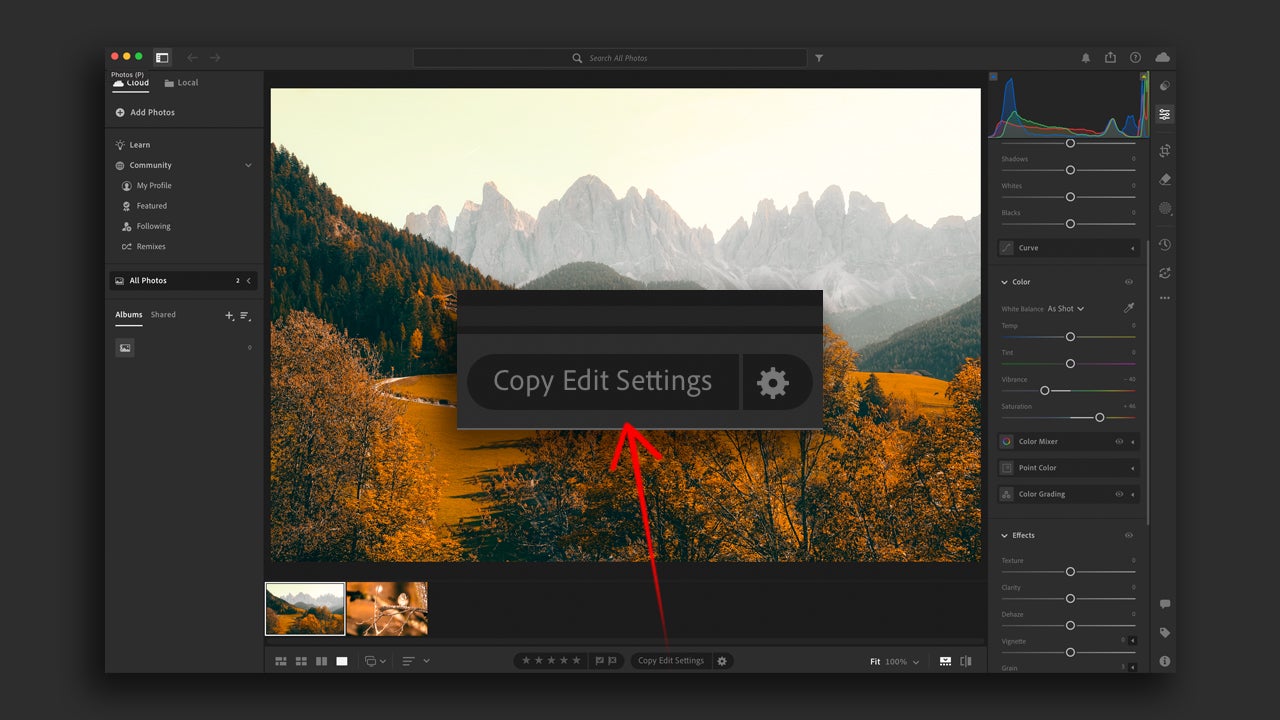
- Go to another one of your photos, click on it and then select the option Paste Edit Settings.
- If you only want to copy some specific adjustments, use the shortcuts command + Shift + C (macOS) or Ctrl + Shift + C (Windows). A new panel will appear where you can choose the specific edits you want to save for another image.
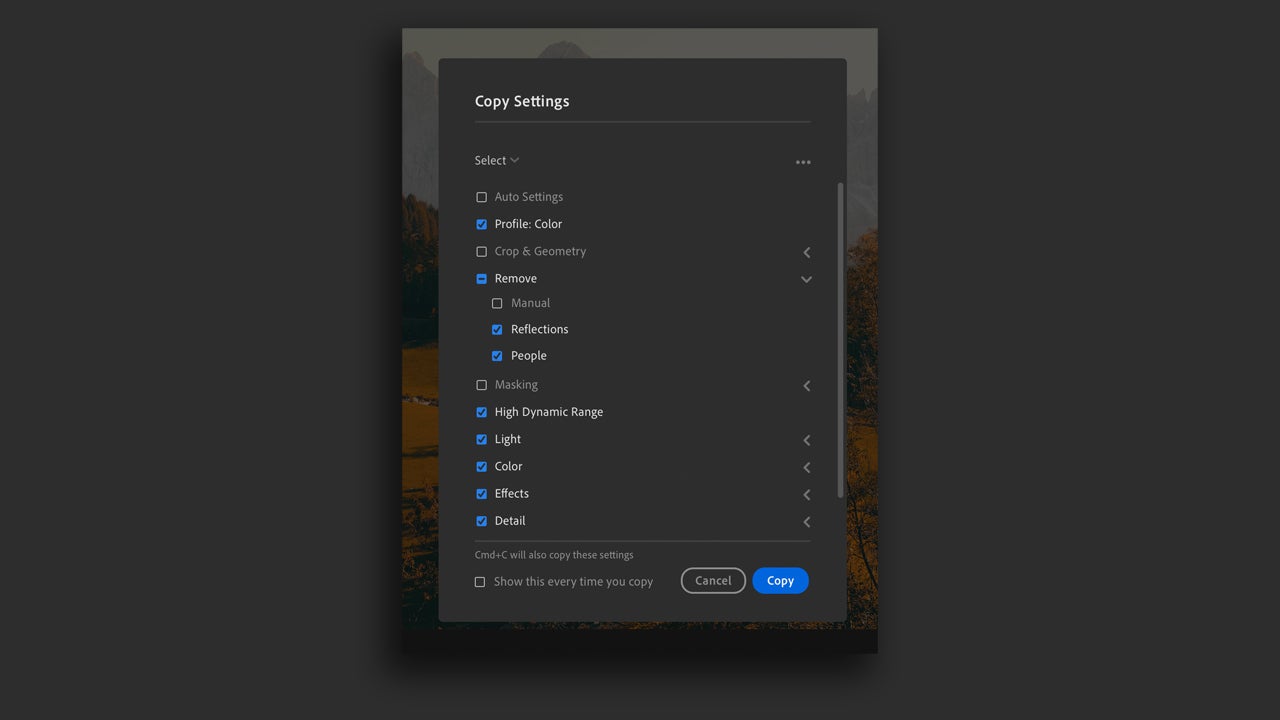
If you want to apply any type of adjustment to a group of photos as you import them into Lightroom, simply go to Adobe Lightroom > Preferences > Import (macOS) or Edit > Preferences > Import. Then, change the RAW Defaults option to a setting of your choice. Here you can use a preset that you have previously configured or one of the default ones included in Lightroom.
Create your own presets
Previously, we mentioned the fact that you can create your own custom settings. If you don’t know how to do it or where to start, follow these steps:
- Edit a photograph just the way you like it. Adjust the color, light, contrast, etc.
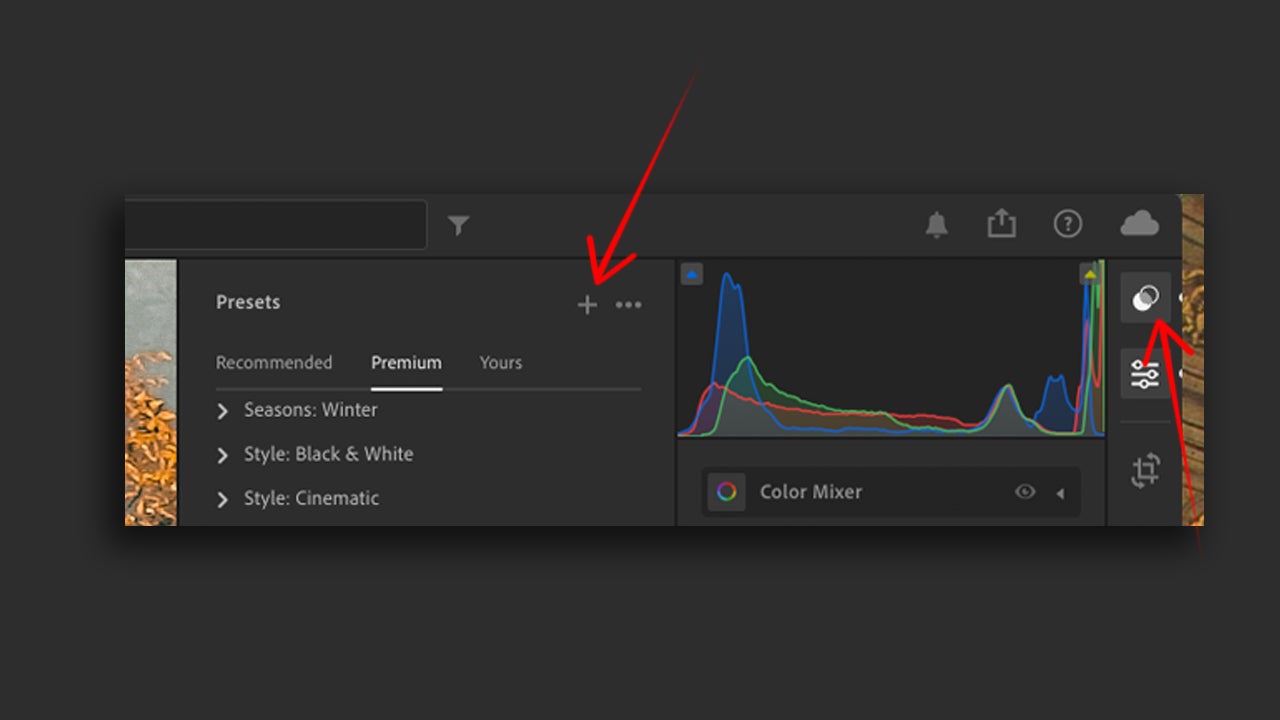
- When you’re done, go to the panel on the right and click the Presets button. Once inside, select the + button.
- A new window will pop up where you will need to check the settings you want to include in the new one we are going to create. Above, you will also need to write a name for that setting.
AI Editing Status: Learn How It Works
As we mentioned at the beginning, Adobe Lightroom allows you to edit your photographs with the help of artificial intelligence. Tools like Denoise, Masking, or Generative Remove rely on it and deliver quite spectacular results.
- Open your photographs in Adobe Lightroom and edit them with one of the AI options that the program already has.
- By doing so, you will see that AI Edit Status will be activated. The button will be highlighted in yellow to alert you that you should take a look and update some settings for the editing to be effective.
- If you have made any changes, simply select Update All within AI Edit Status. There you will also be able to see in detail the editing you have done with AI.
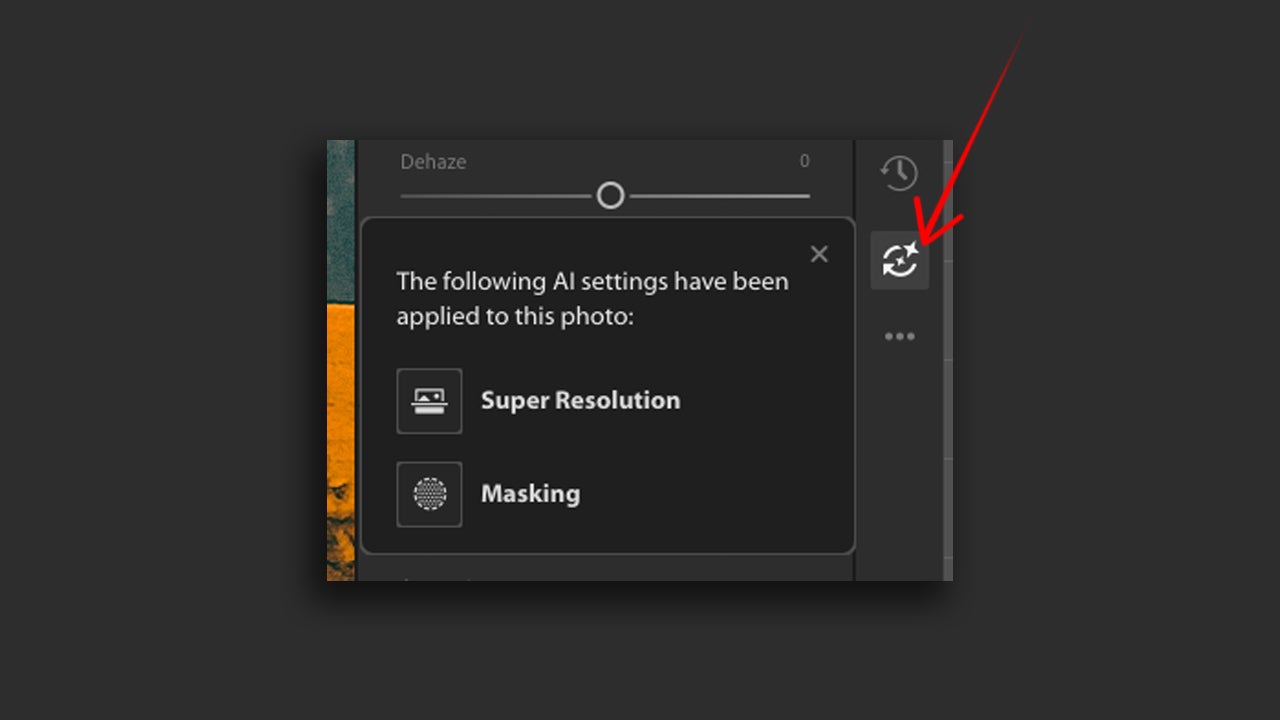
Some of the effects that will help you improve the quality of your images the most are Denoise, RAW Details, and Super Resolution. The first will help you reduce noise in your images without losing details along the way. On the other hand, with RAW Details, your photos will have sharper details and improved color reproduction, among other things. Finally, Super Resolution will help your photograph have double the linear resolution. Very useful for “enlarging” images that are cropped or excessively small.
Adobe itself recommends on its website the order you should follow when using effects and edits that involve AI in your images. It would be as follows:
- HDR
- Denoise, RAW Details, Super Resolution
- Reflections Removal
- Distracting People Removal
- Generative Expand
- Generative Remove, Content-Aware Remove, Heal and Clone
- Lens Blur
- Lens Profile
- Crop and Transform
- Adaptive Profiles
- Global Adjustments
- Masking