How to Update Winrar in 4 Fast Steps

WinRAR is available on Windows and Mac. Both of the operating systems come with their own onboard file extraction capabilities. Still, these are usually very limited, which is why you would consider a separate and complete file compression tool. For the program to work effectively, you should make sure to update Winrar regularly.

How to Update Winrar

As with most software, it is vital to keep it up to date to keep the program functioning correctly and keep your computer safe. Software that is not updated regularly opens your computer up to harmful threats. Unfortunately, WinRAR doesn’t have an option to update automatically, so you will have to initiate the update manually.

Let’s look at how you can check your version and update it.

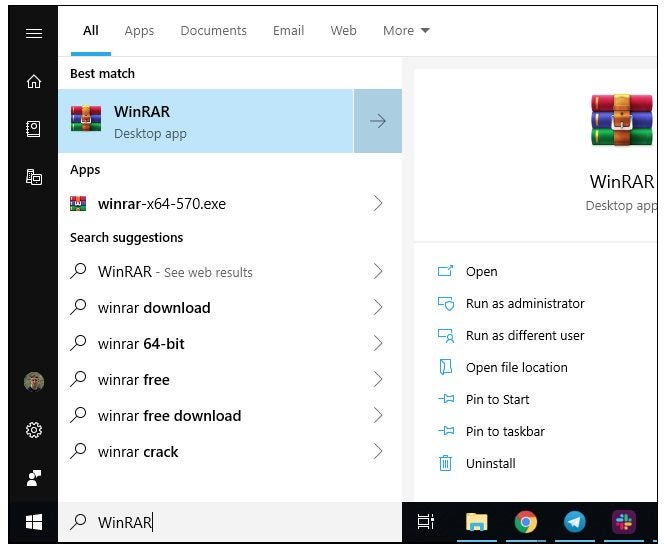
Step 1: Open WinRAR

Open WinRAR on Windows 10 or your Mac computer.
How to Update Winrar in 4 Fast Steps

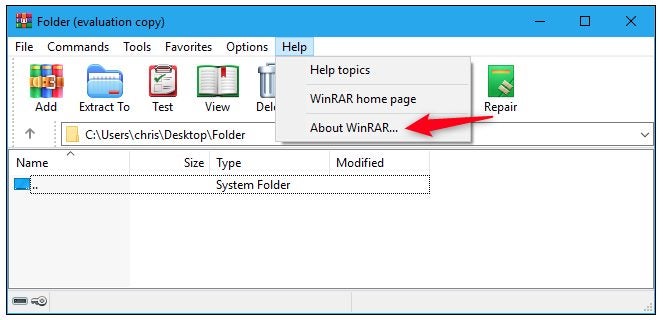
Step 2: Click on ‘Help’ and Then ‘About WinRAR’

Click on the ‘About WinRAR’ option found in the ‘Help’ drop-down list. 
How to Update Winrar in 4 Fast Steps

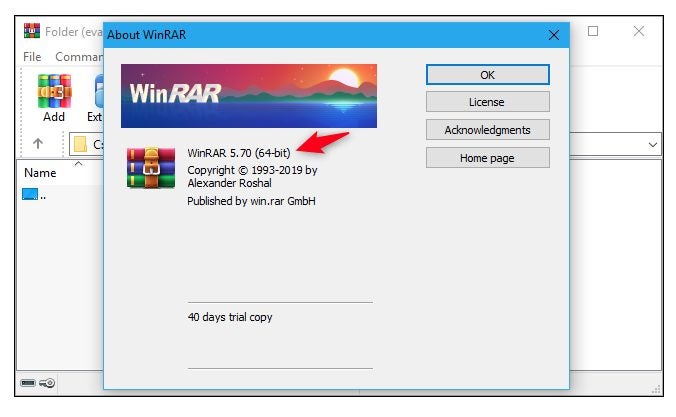
Step 3: Check Your Version

When you click on this, a window will pop up showing the details and version of your software. Anything older than 6.01 is outdated and will need to be updated.
How to Update Winrar in 4 Fast Steps

Step 4: Download the Latest Version of WinRAR

If your version is outdated, you will need to download the latest version from a reputable source such as Softonic and re-install it. 

It is important to note that WinRAR is not entirely free. They have a trial version available for free, but you will need to purchase the full version or search for other extraction software once your trial ends.
How to Update Winrar in 4 Fast Steps

Extract With Ease

It is vital to keep your software updated to run properly and keep your computer secure. WinRAR doesn’t have an option to update automatically, meaning you have to do it manually, but it is not difficult to update the program, as you can see from the above steps. Why not check to see if yours is up to date?

How to Take Attendance in Google Classroom in 3 Fast Steps

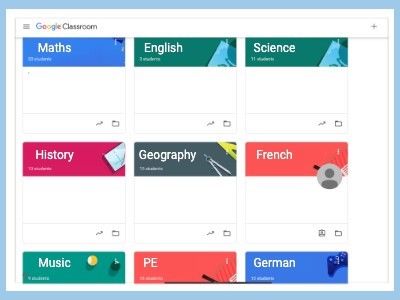
So you’ve started teaching on Google Classroom, and you have the lessons all set up. The students start pouring in thanks to the class code that you provided. The problem is, how do you keep track of who is participating and completing assignments. We’re going to quickly show you how you can take attendance to overcome this obstacle.

How to Take Attendance in Google Classroom

Google Classroom automatically provides you with student details when they sign up for your courses. Therefore, knowing how many should be at the lessons is easy. Let’s show you how you can actually count how many are actually taking part in your classes and discussion sessions.

Step 1: Open your class

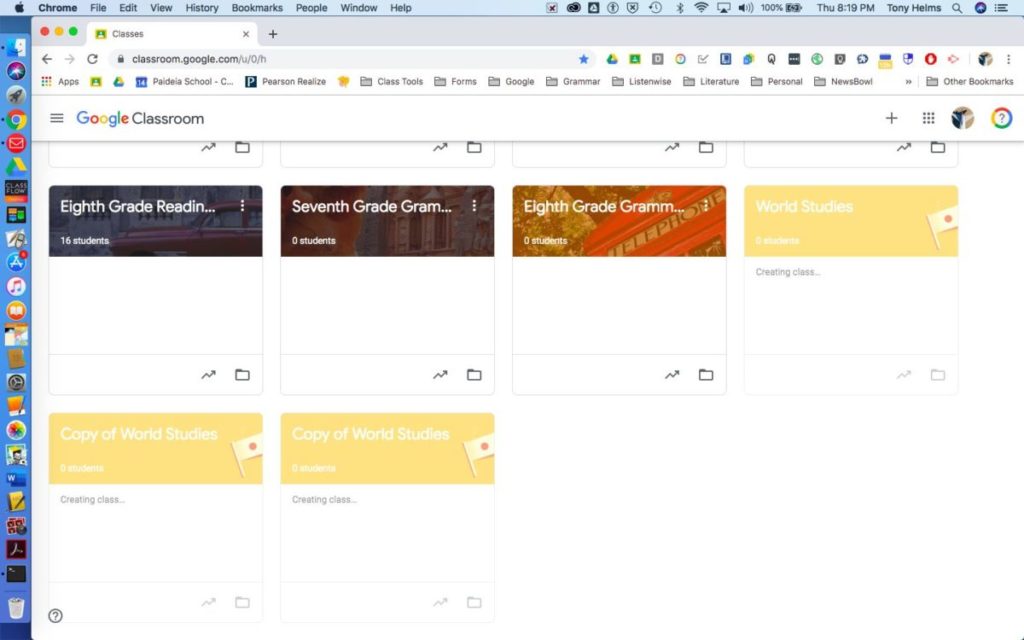
You’ll start by signing into your account and heading to your courses. Search for the appropriate class and open it. If set up correctly, you should be able to see a full list of students for the assignments and lessons.

How to Take Attendance in Google Classroom

Step 2: Ask who is in attendance

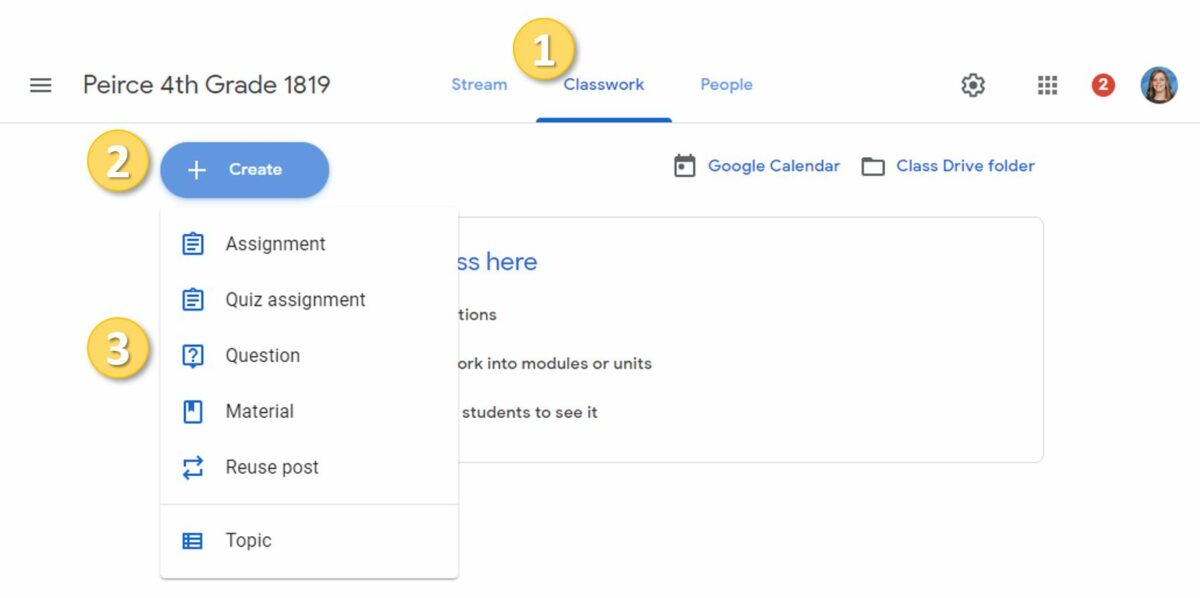
Now, head to the Classwork tab. You’ll need to hit the ‘Create’ button that’ll let you set an assignment or question. You can now ask who is in attendance in your own creative way to get their attention. Try to do this a few minutes ahead of schedule, and again just before class starts.

How to Take Attendance in Google Classroom

Step 3: Capture the names

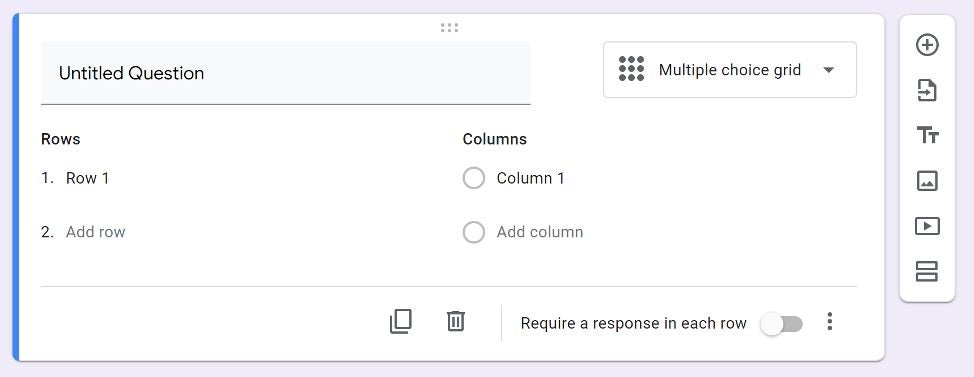
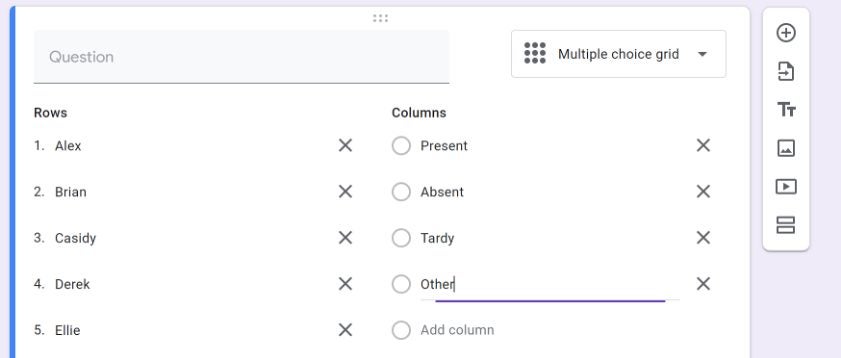
You should start seeing the students’ replies. It’s best if you issue a classroom policy whereby these responses are mandatory. When the names appear, you can record them on your attendance sheet.

How to Take Attendance in Google Classroom

Wake up, students!

Sometimes, Google Classroom students might delay in responding if their preparing or running late. Even after the lesson has started, make sure to always head back to the question. You can also make note of someone that speaks up in class who didn’t reply to you, and give them a stern warning privately.

How to Create an Assignment in Google Classroom in 3 Fast Steps

While Google Classroom has tons of features to make teaching easier, you’ll eventually need to learn how to create assignments. They are fundamental to your students passing your classes, as you’ll be grading them based on the results. It’s your responsibility to ensure that they’re developed and uploaded in time so that they don’t fail.

How to Create an Assignment in Google Classroom

If you’re new to Google Classroom, we know the experience can be daunting. We’ve seen many online teachers getting confused with some of the settings, which is why we issue so many guides for this app. In today’s lesson, we’ll guide you on creating assignments for your courses.

Step 1: Open your class

Before you can assign anything, you’ll need to open the relevant course. Sign into your account and find the class where you need to craft some new assignments. Ensure that you select the right one so that you don’t confuse your students.

How to Create an Assignment in Google Classroom in 3 Fast Steps

Step 2: Create the assignment

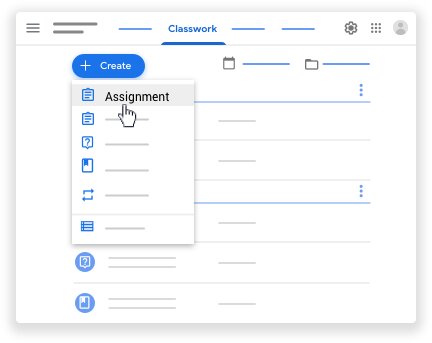
Open the Classwork tab. You’ll see a button that says ‘Create.’ When you click on it, a list of options will appear. You’ll want to select the one that states ‘Assignment,’ obviously.

How to Create an Assignment in Google Classroom in 3 Fast Steps

Step 3: Enter the details

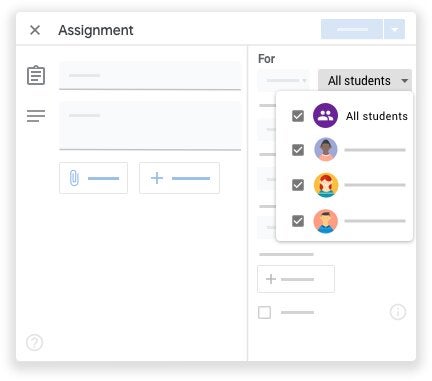
With the new assignment window open, you’ll need to insert the title and all the relevant instructions. Ensure that everything is clear before you save it and post it to your students. It should also indicate the due date.

How to Create an Assignment in Google Classroom in 3 Fast Steps

Class is in session!

With your Google Classroom assignments in place, the rest of the work is up to your students. You’ll watch as the projects steam in while keeping a close eye on late submissions. You should also check regularly if anyone has questions, as it could delay them in completing the work.

How to Find Google Classroom Code in 3 Fast Steps

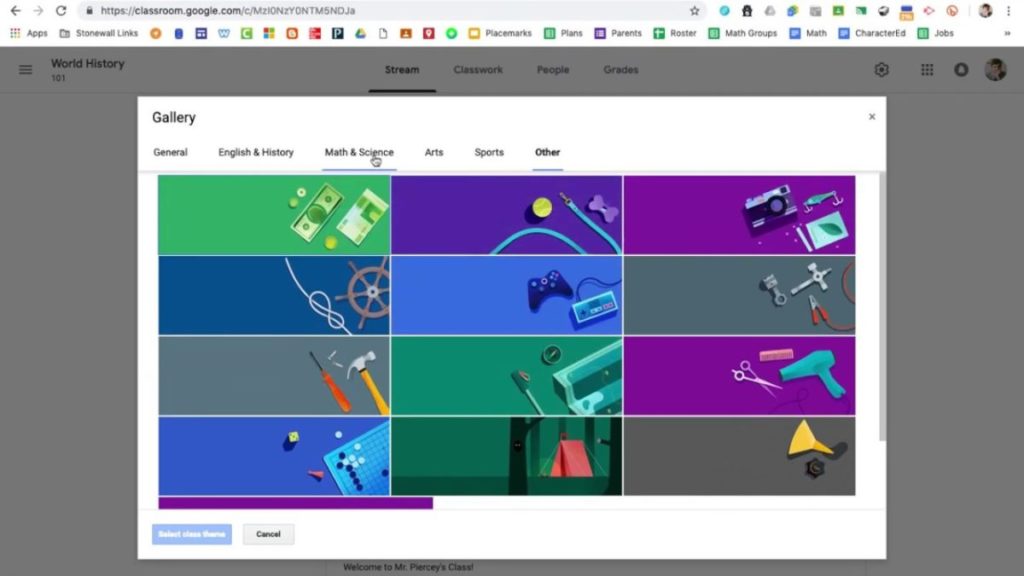
Google Classroom has made it easier for teachers to assign tasks and discuss topics with students on its app. You can easily add students to your classes by sending them a unique card linked to the lessons. Without these details, they won’t be able to access any content, which can be devastating to their studies.

How to Find Google Classroom Code

Each Google Classroom code is unique, consisting of random numbers and letters that sets it apart from other virtual classes. If the students get one digit wrong, they won’t be able to enter the lesson. Make sure that you copy the text correctly before sending it out.

Step 1: Access your account

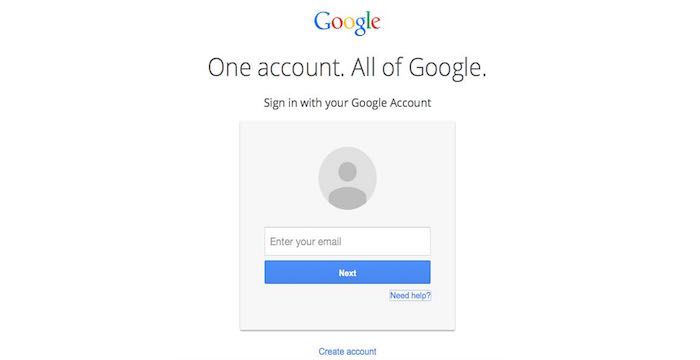
Firstly, you’ll need to head to the website or app and log into your account. It will show you which classes you have available.

How to Find Google Classroom Code in 3 Fast Steps

Step 2: Select the class card

When you’re ready to invite your students to your class, select the appropriate card. Don’t make the mistake of choosing one that’s doesn’t relate to your other students, as this will cause confusion.

How to Find Google Classroom Code in 3 Fast Steps

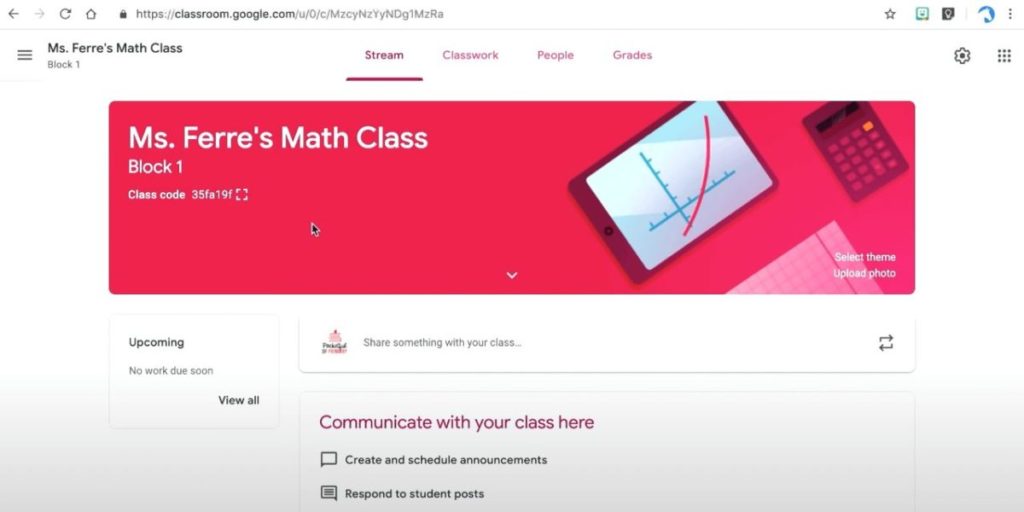
Step 3: Find the class code

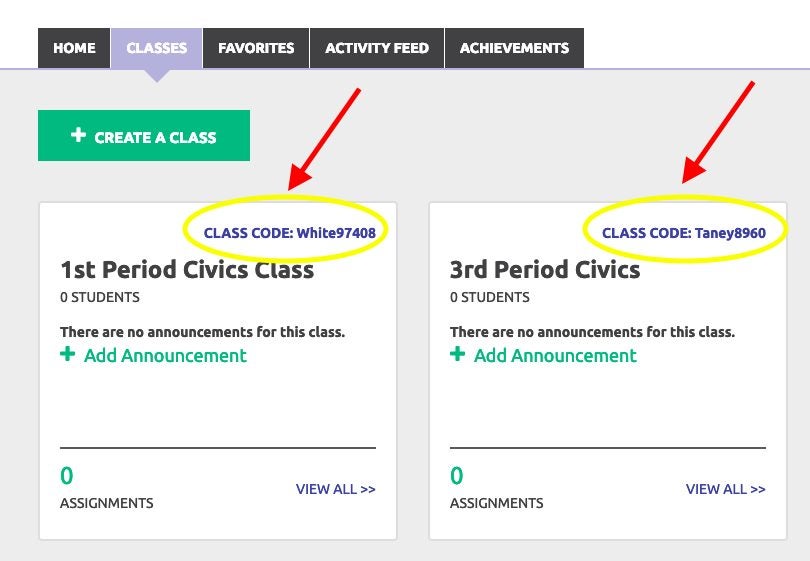
Finally, look under the class name. You’ll see a string of numbers and letters that represents the code. You can now send those details to the students for that specific lesson so that they can join.

How to Find Google Classroom Code in 3 Fast Steps

Are you ready to teach?
Now that you’ve found your Google Classroom code, you can begin your lessons. Remember, it offers tons of features for your students to complete assignments and meet in groups to discuss relevant topics. However, they won’t be able to participate if you don’t give them the correct text during the invitation stage.

How to Delete Tubemate Search History in 5 Easy Steps

You may want to delete your search history from time to time. Any app that you browse on YouTube, Tubemate, Facebook or even your internet browser stores information about you. Advertisers and hackers can use this information. You might also want your data and searches to remain confidential. These are both reasons why you may want to clear your history.

How to Delete Tubemate Search History

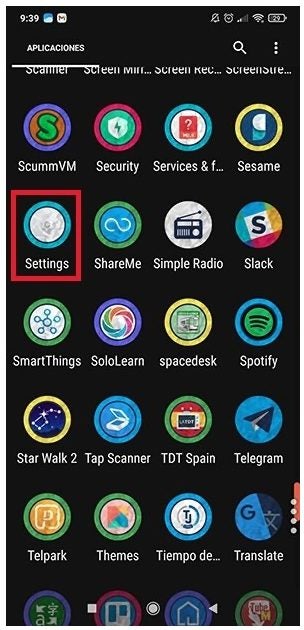
Step 1: Launch ‘Settings’

Open Settings on your Android device.

How to Delete Tubemate Search History in 5 Easy Steps

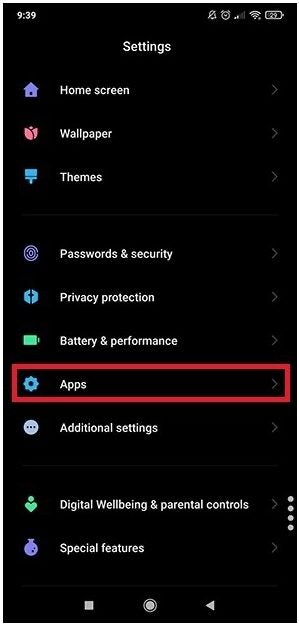
Step 2: Go to ‘Apps’

Next, navigate to the Apps section in the list.

How to Delete Tubemate Search History in 5 Easy Steps

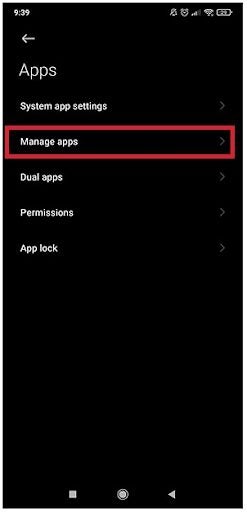
Step 3: Tap on ‘Manage Apps’

In the following list, tap on the ‘Manage Apps’ option.

How to Delete Tubemate Search History in 5 Easy Steps

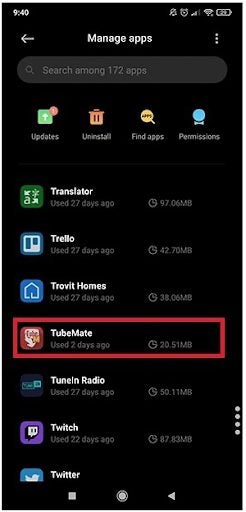
Step 4: Search for the ‘Tubemate’ App

A list of all your apps will appear. In this list, search for Tubemate and tap on it.

How to Delete Tubemate Search History in 5 Easy Steps

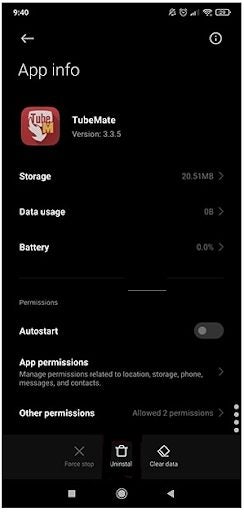
Step 5: Clear Data

On Tubemate’s app info screen, at the bottom will be an option to clear data. Tap on this option. This will clear your search history, cookies and cache all in one go. The next time you open Tubemate, it will be fresh like it has been newly installed.

How to Delete Tubemate Search History in 5 Easy Steps

Stream, Download and Enjoy

TubeMate is currently available on Android devices. Not only can you download videos, but you can also decide how to download them, choose only to download the audio, and many other features. It has a very intuitive user interface, making it very easy to use the app. However, if you are unsure about how to start downloading videos from Youtube, we have a guide with instructions to get you started.

Netflix Shuffle Feature “Play Something”

You Can Now Shuffle Shows On Netflix To Find Somethin To Watch

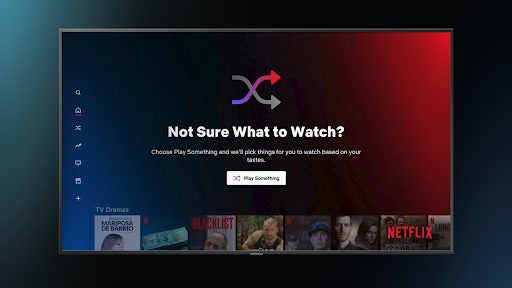
Entertainment giant Netflix has announced a new shuffle feature called “Play Something” to help you find a movie or show to watch when you’re struggling to decide. When you choose the option, it’ll select one for you based on your viewing history. If you don’t like that option, you can click on the button again for a reshuffle.

Netflix Shuffle Feature “Play Something”

While the official announcement was yesterday, you might have seen the “Play Something” option on Netflix over the last few months. The company has slowly been releasing it worldwide to test whether it would work effectively. With some success behind its name now, the feature is being completely unveiled across all accounts.

You won’t be able to miss it, as Netflix has made sure it’s very prominent. There are three main locations that the button will appear, namely, beneath your profile name, on the 10th row, and in the left navigation menu bar. If you’re a picky viewer, try not to let its visibility annoy you too much.

Netflix Shuffle Feature “Play Something”

Fortunately, you can use text-to-speech if you have a screen reader installed. Since Netflix noticed that a slow decline in subscriber growth over the last year, it’s been doing everything in its power to keep the numbers flowing in. While many looked at COVID for the main reason, chances are that the rise in competitors is the real cause.

Be that as it may, we have yet to see numbers of how many users will actually click on the new shuffle feature. It’ll also be interesting to see whether you can disable the functionality.

Telegram’s Group Video Calls

Group Calls To Appear As A New Feature In Telegram Soon

In a new message to Telegram users yesterday, the chat app announced that a new group video call feature will be appearing in May 2021. It will offer several handy tools, designed to make web-based video conferencing easier. This update is set to rival its competitors, namely WhatsApp and Zoom, combining elements from both platforms.

Telegram’s Group Video Calls

If you think it’ll only focus on video calls, think again. It’ll integrate noise canceling, screen sharing, and tablet support, to name a few. You’ll also receive the same data encryption, speed, and Telegram user interface that you’re familiar with.

The Telegram developers had mentioned this new group video call feature before, but there are several reasons for the delay. Besides letting you manage settings are required, they wanted to ensure that encryption remains the most prominent aspect. Securing video calls from several members simultaneously has been a daunting task to overcome.

Telegram’s Group Video Calls

After some security issues arose last year, Zoom introduced end-to-end encryption for its video conferencing app. However, it caused many features to disappear or become disabled in the process. We have yet to see what effect Telegram’s new update will have on the current communication tools.

One of the best aspects is that you won’t need to download any extra applications to access the group video calls. You can log in via the browser, which is ideal for regions or devices that don’t permit the installation of certain apps. We’ll be keeping a close eye on how this feature develops.

How to watch a movie on Zoom in 5 easy steps

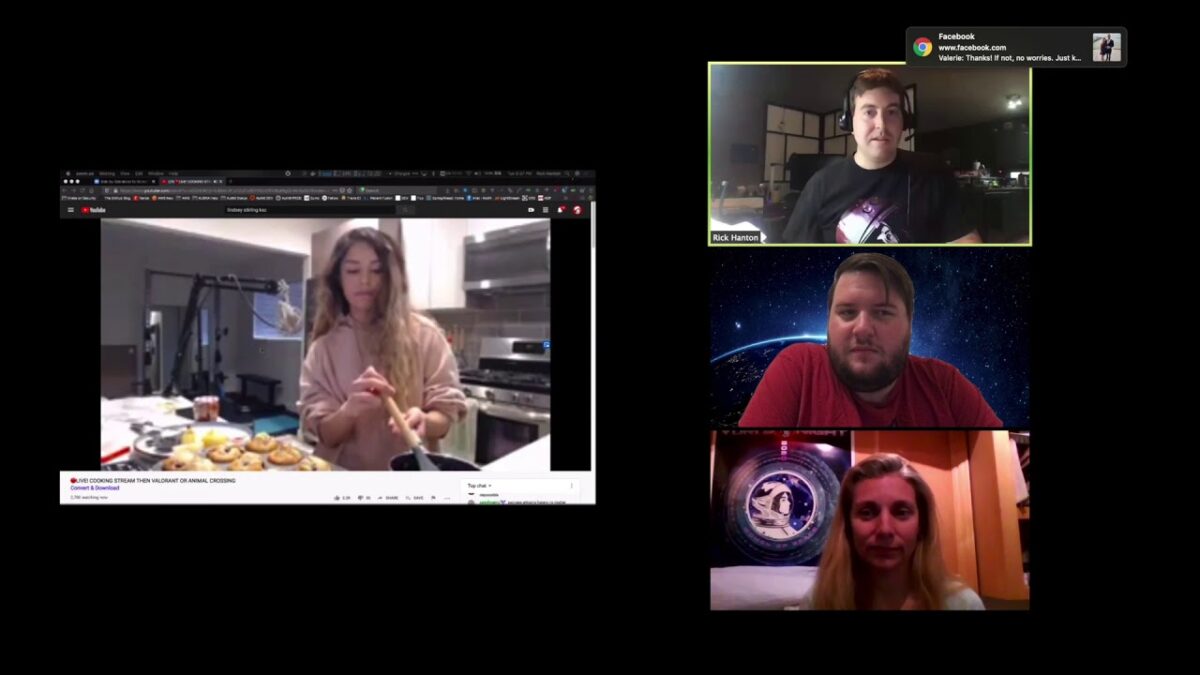
Zoom is a video conferencing platform used by many companies. It’s helpful for Zoom meetings and other things, but you can also use it to watch movies. It’s an excellent way to watch Netflix or YouTube on your TV screen if you have an HDMI cable or adapter.

Zoom DOWNLOAD

Just download the Zoom app onto your phone or tablet, connect it with the HDMI cable (or adapter) to your TV, and then open up Netflix or YouTube on your device. You’re ready to rock!

How to watch a movie on Zoom

  1. Open the video in a separate application or browser window

    How to watch a movie on Zoom 1

    Open the video in full-screen mode in one browser window, then use Zoom in another window. (remember, not in the same browser as Zoom)

  2. Host or join a Zoom meeting

    How to watch a movie on Zoom 1

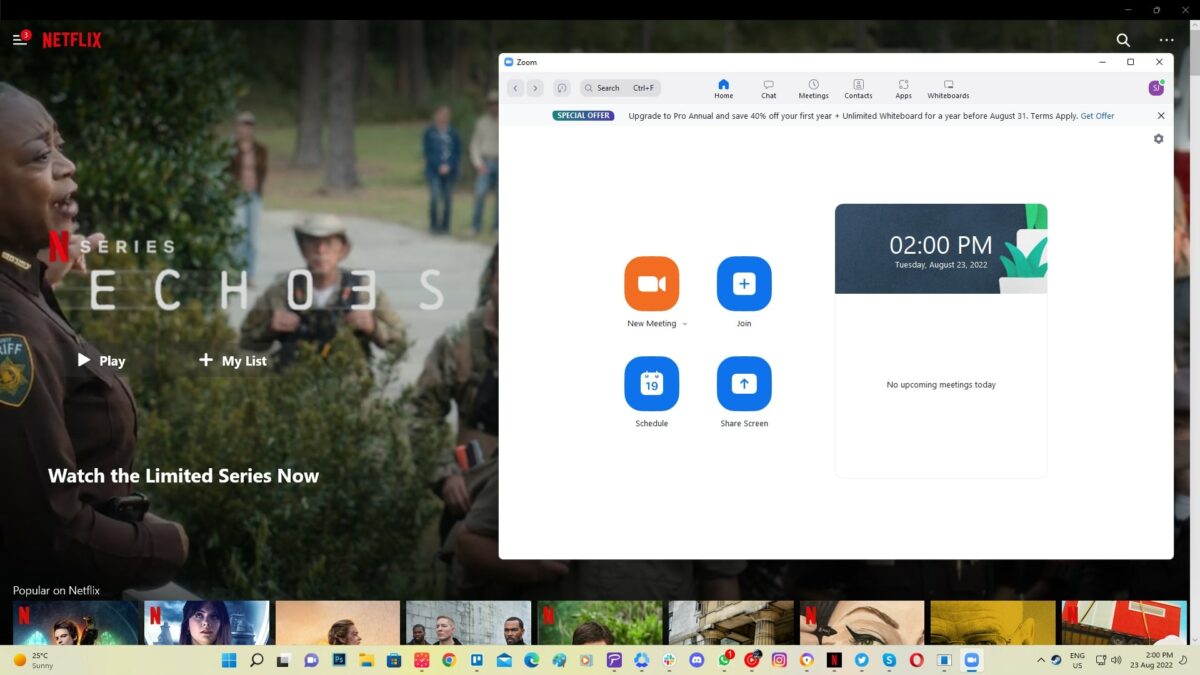
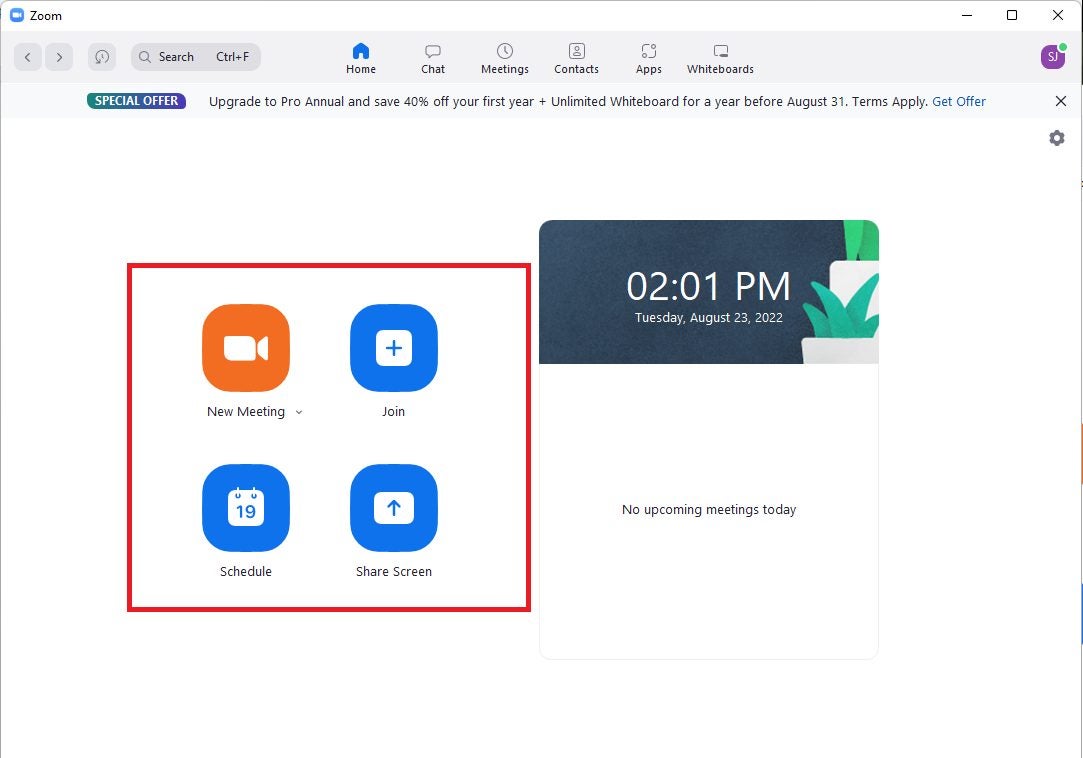
    Join a meeting by accessing the app on your phone or computer and clicking “Join” under the main menu screen. Enter the passcode that the person hosting the video will provide to enter the room. 

    If you want to host the event on Zoom:

    – Select “Schedule” at the top of the main menu to start your meeting.

    – Fill in all necessary information for your new event. You can invite participants by selecting them from a list you created through “Personal Contacts” on Zoom.

    – Remember to give the participants the passcode and an invitation link to join the meeting.


  3. Click the Share button on Zoom

    How to watch a movie on Zoom 1

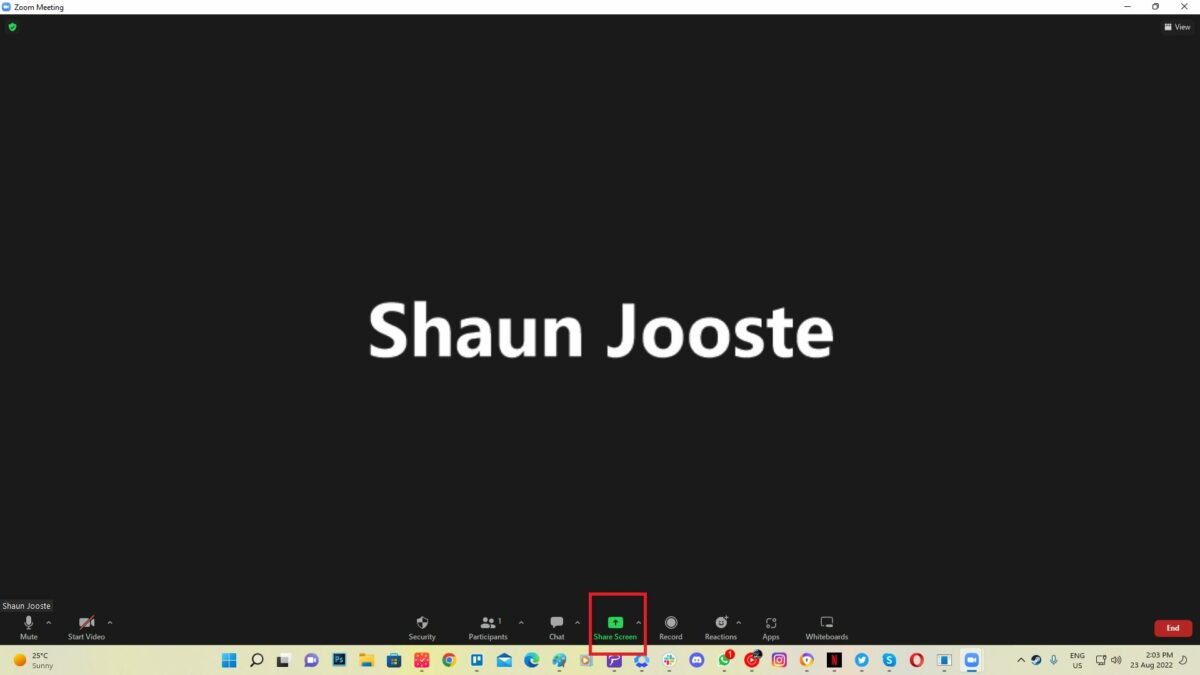
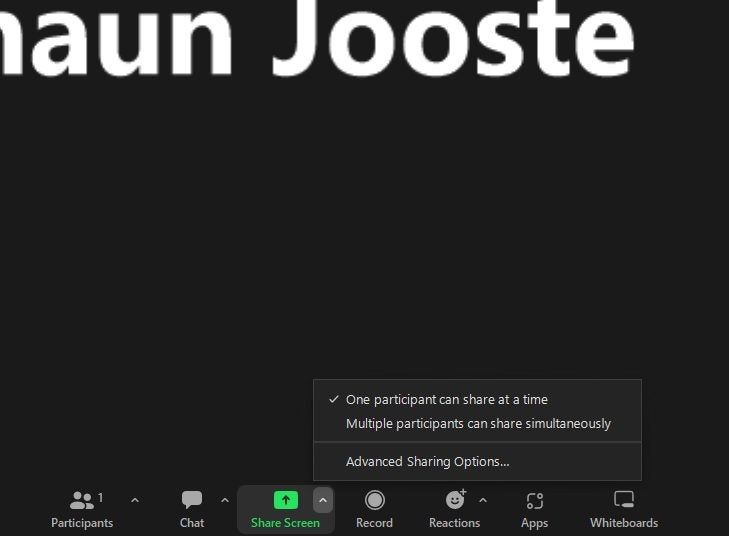
    To share your screen as a host, click “Start.” This selection will open a new window where you can choose which participants to invite from your stored information in Zoom’s “Personal Contacts.”  Tell the participants the meeting passcode and give them the link to join. Click “Share” at the bottom of the screen.

  4. Check the box next to “Share Sound” and “Optimize for Video Clip”

    How to watch a movie on Zoom 1

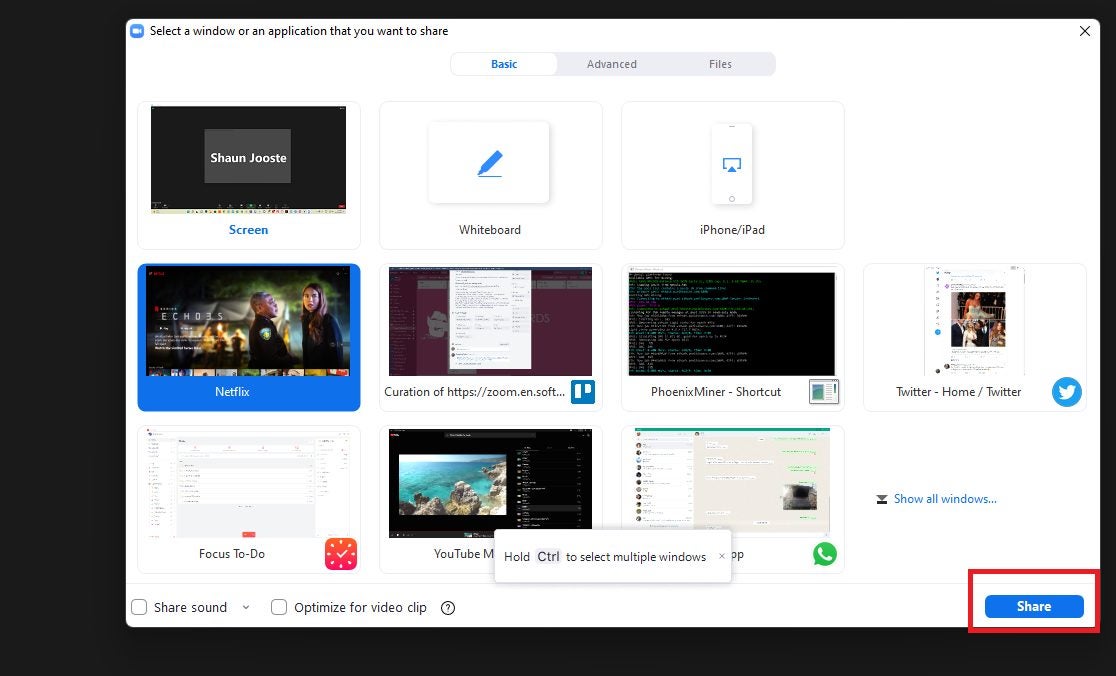
    On the share screen of Zoom, you’ll find two settings: “Share Sound” and “Optimize for video clip.” Check them both because they are essential if you want the best viewing experience possible. This selection will ensure that your audience can hear the video sound.

  5. Select your video on the pop-up screen

    How to watch a movie on Zoom 1

    Select the window or application that contains your video and choose “Share” on the pop-up screen. If you are watching a YouTube video, you can click the full-screen option underneath the video. You can select pause or play on this screen.

How to Download Willa in 3 Easy Steps

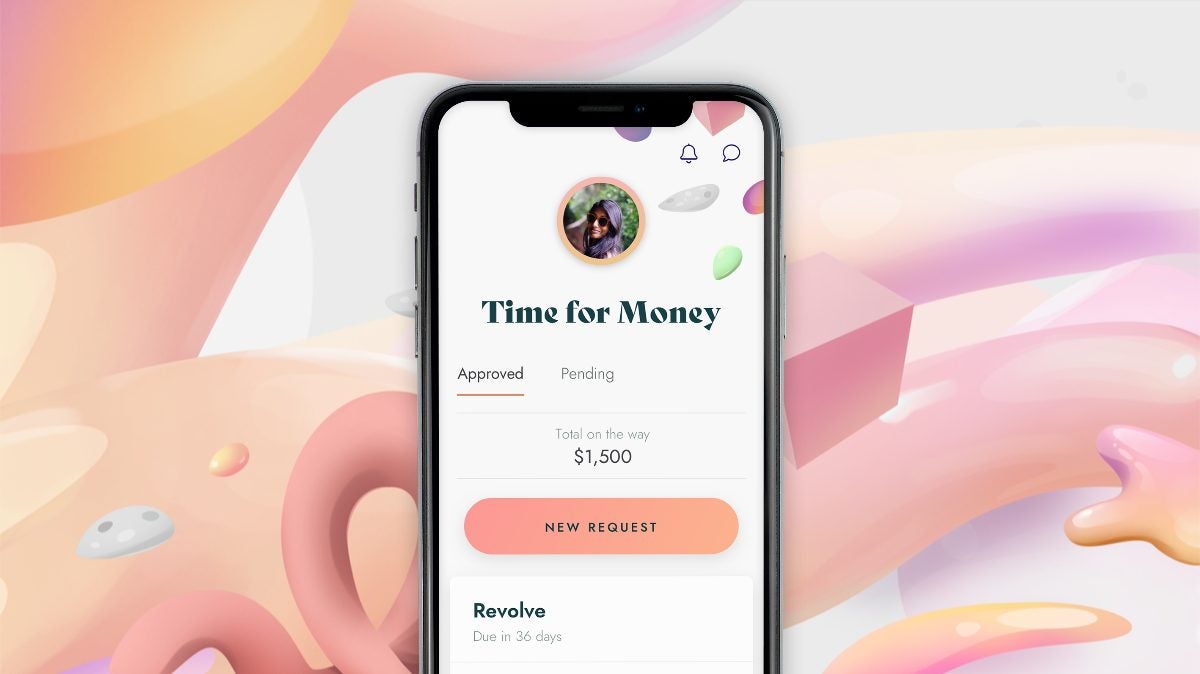
If you’re a freelancer looking for a way to invoice your clients via mobile, Willa could be the ideal solution for you. We know what it’s like performing services and then waiting eagerly for that payment. Not only does it help you with invoicing, but it’ll request payments on your behalf. Fortunately, learning how to download Willa is straightforward.

How to Download Willa

At the moment, Willa is mainly available on iPhone, making it a convenient financing tool for iOS devices. Your client won’t need to have the app installed for the payments to be effective, as they can simply use their credit card details. Most important is not sharing any of your account details with anyone.

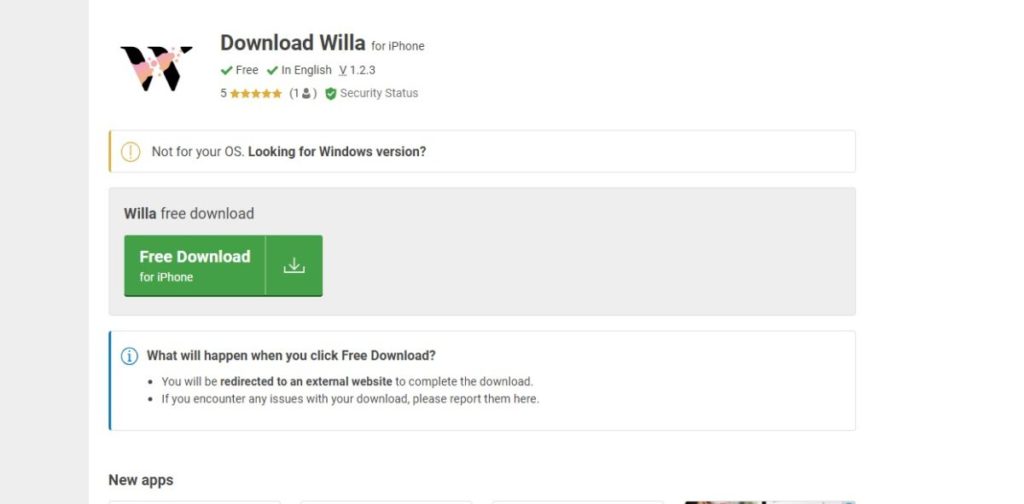
Step 1: Find a reliable download link

The internet is rife with harmful download links. Ensure that you only use the valid Willa app for these transactions so that no one steals your information. If you’re in doubt, you can use our download link.

How to Download Willa in 3 Easy Steps

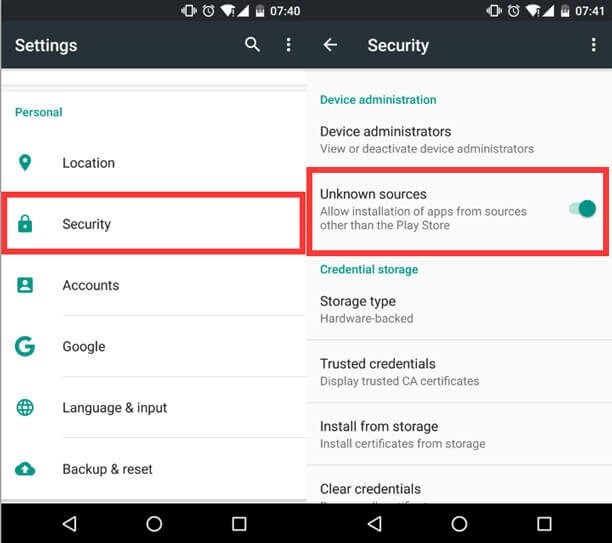
Step 2: Enable installations from unknown sources

Your iPhone might not let you download Willa from foreign locations. You can head into settings and enable “Unknown Sources”. In this way, you can obtain the app without any unnecessary complications.

How to Download Willa in 3 Easy Steps

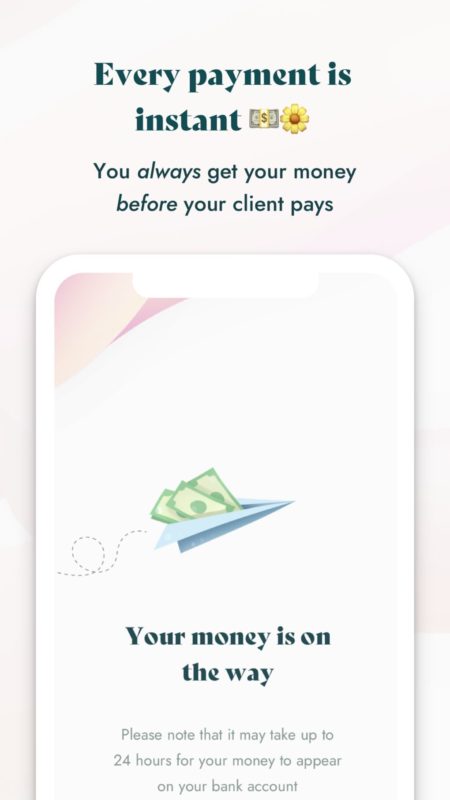
Step 3: Install Willa

With Willa downloaded, you can now install it on your device. The installation should happen automatically, but you may need to approve some permissions. Ensure that you’re comfortable with what you’re agreeing to beforehand so that you don’t give the application access to media and content you don’t want it to have.

How to Download Willa in 3 Easy Steps

Financing from your phone

It’s challenging enough for freelancers to find work and income to pay the bills and feed their bellies. Creating a new invoice from scratch can be just as daunting, especially if you’re not a pro at it. Fortunately, Willa makes your life easier by covering all the financial aspects for you. Of course, it comes down to preference since you may enjoy using PayPal instead.

How to Use Snap Camera on Zoom in 3 Fast Steps

Zoom has taken the entertainment aspect seriously on Windows, Mac, Android and iOS devices by introducing features to keep the app fun and fresh. Some of these features include filters to change your background or even give you a funny animal face, as well as the option to play games with others on the app.

How to Use Snap Camera on Zoom in 3 Fast Steps

Using your camera app on Zoom gives you so many different filter options that make using the app fun. Let’s take a look at how you can use this camera app with Zoom.

Step 1: Install Snap Camera and Zoom

You will need to have the latest version of Zoom, and Snap Camera installed. You can download the camera app on your mobile device or computer. Without the latest version of both of these apps, Snap Camera won’t work.

How to Use Snap Camera on Zoom in 3 Fast Steps

Step 2: Launch Zoom and Go to Settings

Launch your Zoom app and log in to your account. Next, click on ‘Settings’. Once in settings, click on ‘Video’ and select ‘Snap Camera’ as your camera.

How to Use Snap Camera on Zoom in 3 Fast Steps

Step 3: Change Lenses from the Meeting Screen

When you are in a meeting, you will see a camera app icon that allows you to select your chosen filter.

How to Use Snap Camera on Zoom in 3 Fast Steps

Start Having Fun With Your Meetings

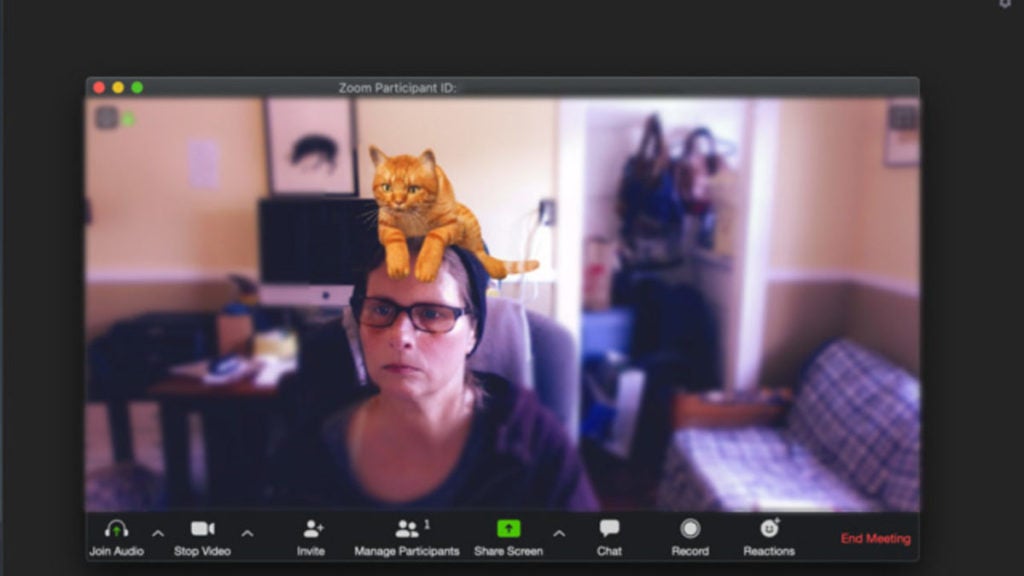
Using the camera app allows you to have some fun in your meetings and express your creativity. These filters allow you to change yourself into a potato, a cat, or anything else you want. Snap Camera adds more features to the app, so you can be sure they have some exciting filters for you to choose from. If you would like to learn some more valuable tips and tricks, we have a great guide to help you.