Making stickers on Canva in 5 easy steps

Did you know Canva lets you design and print your own custom stickers? With Canva original stickers, you’re able to do everything from labeling food to marketing your small business. Though making stickers on Canva isn’t super complex, it does take a little time to learn how to use the program. Don’t worry, though. Once you get the hang of things, the process is simple.

Discover Canva DOWNLOAD

If you’re interested in learning how to make a sticker on Canva, all you need to do is follow these steps.

  1. Launch the Canva program

    Launch the sticker design program

    Start by launching Canva. Canva does have a free website version you are able to use for basic designs. However, we find it a little easier to use the downloadable version when making stickers. It has more features than the base website. You have the option of launching the program from your desktop or using the app version of it. To enter the sticker design area, click the Design tab and select Stickers from the drop-down menu.

  2. Explore the Canva templates

    Pick a premade template

    Most users start by looking at Canva templates. You are able to filter these templates based on things like size, style, theme, and shape. The great thing about the templates is that they’re perfectly sized for printing. When you work with a template, it guarantees the end results look fantastic. Even if you want original stickers, looking at templates is often a great place to start. Canva lets you adjust a template’s colors and various design elements. Even if you start with a very commonplace template, you are able to customize it to create something unique.

  3. Create your own unique design

    Create your own custom design

    Canva also gives you the option of designing from scratch. You begin by choosing a base shape, like Canva circle stickers, and then adding your own design. Canva allows you to customize everything from color to text to style. Check the “Elements” tab on the right to find a variety of cute graphics and basic shapes and lines. You have the option of using the basic lines and shapes to draw custom art if you don’t see any graphics you like. For example, you could create a pig by combining a few pink circles, triangles, and dots.

    Canva also allows you to upload photos, generate QR codes, and add interesting borders to the edge of your sticker sheet.

  4. Get to know the Canva interface

    Find many ways to edit your design with shortcuts

    Canva lets you shape and position elements however you want, so take some time to explore the interface. Clicking on an individual element opens up a menu where you are able to do things like orient an element to the middle, lock an element in place or adjust transparency. The Position option makes it easy to put an element in front of or behind other design elements. When working with Canva, don’t forget about helpful keyboard shortcuts that allow you to adjust things quickly.

    • Shift + arrow keys: Move an element 10 pixels in your selected direction
    • Esc: Deselect an element
    • Ctrl/Cmd + C: Copy an element or text box
    • Ctrl/Cmd + V: Paste an element or text box
    • Ctrl/Cmd + Z: Undo an action
    • Ctrl/Cmd + Z + Shift: Redo an action
    • Ctrl/Cmd + G: Group elements together
    • Ctrl/Cmd + D: Duplicate an element
    • Shift + click: Resize an element proportionally
  5. Print your stickers

    Order printed stickers directly from Canva

    When you’re satisfied with your sticker shape, it’s time to print. You have a few different printing options. If you have a printer at home that works with sticker paper, download your Canva design. Make sure you carefully select the download size so that you get a design that works with your intended sticker design. You also have the option to let Canva deal with the printing for you. Look in the upper right corner for the Print Stickers button. This lets you order stickers straight from Canva. You select your size, finish, and sticker count, and Canva will ship the finished product straight to you.

Enjoy a variety of techniques for making stickers

Ultimately, making stickers on Canva is a fun way to design the perfect sticker for your situation. The process is as simple or as complex as you want. Some people like to design Canva original stickers from scratch while others add their own text to a premade template. Either way, you’re sure to get great results. Ready to make your own awesome stickers? Download the Canva app now or explore our blog for more graphic design topics.

Fix and restart the Touch Bar when it stops working in 4 steps

While many users don’t use the Touch Bar on their Mac daily, it is still a useful tool to have available…when it works. The Touch Bar offers many useful shortcuts that make navigating your Mac much easier and more convenient. Certain apps, games, and documents benefit from the efficiency of this tool.

However, it can sometimes give unexpected behaviors or stop working altogether. So, how can you get your Touch Bar to start working again? This article will look at how to fix and restart the Touch Bar when it stops working.

Why is my Mac Touch Bar not working?

Issues like your Touch Bar not working, freezing, or not responding to your touch is not uncommon. There are a few different reasons why you may be experiencing these issues. The most common culprits causing problems with your Touch Bar include:

  • Software bugs
  • Malfunctioning apps
  • Resource heavy apps
  • Outdated MacOS
  • Certain settings
  • Hardware issues
  • Working on Mac in high temperatures

Fixing and restarting the Touch Bar in 4 steps

Let’s look at one of the easiest and most effective solutions to fix and restart your Touch Bar. This solution works on macOS Catalina and newer versions, including Big Sur and Monterey. If you have an older version, try some of the other solutions listed below.

  1. Open the Terminal native app on your Macbook

    Fix and restart the Touch Bar

    The Terminal app is already pre-installed on Mac. You can search for it with Spotlight. Or navigate to ‘Finder,’ then click on ‘Applications’ and ‘Utilities.’ Here, you’ll find the Terminal shortcut.

  2. Type in the restart commands

    Fix and restart the Touch Bar

    The app will open in a new window. The Terminal app is a command-line system similar to Command Prompt in Windows. Type in the command ‘sudo pkill TouchBarServer;’ then press ‘Enter’ and in the new line type ‘sudo killall “ControlStrip”;.’ Pree the ‘Return’ key to continue.

  3. Type in your password

    Fix and restart the Touch Bar

    As a security measure, the Terminal app will ask for your password before restarting the Touch Bar. Type in your password. Please note that it won’t appear on the screen while you type. This is another security measure. Once you’ve typed in your password, press the ‘Return’ key to continue.

  4. Restart the Touch Bar

    Once you’ve pressed the return key on your keyboard, the system will instantly restart your Touch Bar. You should see the Touch Bar flicker on and off, and it should start working again.

Alternative Touch Bar solutions to give a try

The above method is one of the simplest and most effective solutions to get your Touch Bar working again. However, if you’ve tried it and it still doesn’t work, there are a few more solutions you can try. Some of these solutions include:

  • Restart your MacBook
  • Reset the Control Bar and Control Strip
  • Checking your settings
  • Updating macOS to the latest version
  • Take to an Apple Store

Restart your MacBook

Restarting your PC is a tried and true solution to many issues, including a Touch Bar that’s not working correctly. Reboot your PC so it can reload and reboot all settings fresh, which often solves any problems. All you do is click on the Apple icon in the top-left of the screen. In the drop-down list, click on ‘Restart.’ You can also try restarting in recovery mode if needed.

Reset the Control Bar and Control Strip

For this solution, you can reset the Touch Bar from your ‘Activity Monitor’ rather than ‘Terminal.’ In the activity monitor, look for ‘TouchBarServer’ and stop it. Once stopped, select ‘Quit’ to confirm your choice. Then look for “Control Strip’ in the list and stop it in the same way. You may be prompted for a password during the process to complete the steps.

Checking your Touch Bar settings

If your Touch Bar is still giving issues, we might be honing in on a more particular issue. These previous solutions effectively rule out software bugs and problematic applications. What’s left is to check your settings. Navigate to ‘System Preferences’ and click on ‘Keyboard.’ Under the ‘Touch Bar Shows’ drop-down list, ensure that both ‘App Controls’ and ‘Show Control Strip’ are enabled.

Fix and restart the Touch Bar

Updating macOS to the latest version

An outdated MacOS can also cause quite a few issues on your computer. If all other solutions have failed, check your OS and ensure it’s fully updated. Navigate to ‘System Preferences’ and click on ‘Software Update.’ Here you’ll see if there are any updates you have to install and if there are, install them.

Take to an Apple Store

If none of the solutions in this guide work for you, then it might be time to take your Macbook to the nearest Apple Store or contact Apple Support and have their technicians look at the problem. The chances are that you’re looking at a hardware problem or a unique issue that Apple technicians will have to solve.

Be more organized and enable tabs in File Explorer in Windows 11 build 25136

Windows 11 is one of the most intuitive operating systems on the market. Microsoft is permanently working to bring you more features that make Windows 11 an even more capable and powerful operating system. One such feature is tabs within the Windows 11 file explorer interface. From what we’ve experienced with this new feature, it turns your file explorer into something more akin to a browser, like Microsoft Edge.

Windows 11 DOWNLOAD

Traditionally, you can only access features like this by joining the Windows Insider program. From here, you’ll be able to access features that the company is still testing out and finalizing for a future wider launch. In the article that follows, we’re going to walk you through accessing this development feature right now!

How to get tabs in Windows 11 File Explorer: 5 super-simple steps

Before we get into the steps, just bear in mind that updating your system OS via the Windows Insider Dev Channel carries some risks. This software is still a work in progress, and as with any feature that isn’t at a point where it can be rolled out globally to all users, there may be some bugs.

As we’ve seen in the past, these early access Windows features can sometimes break the functionality of your PC. Therefore, it’s also never advised to test out Dev Channel builds on your primary device. 

Important: In order for the feature update to take effect, your Windows 11 OS needs to be updated to build 25136 via the Windows Insider Dev Channel.

  1. Get ViVeTool

    enable tabs in File Explorer in Windows 11

    To kick things off, you’ll have to download Vivetool from its Github repository. Scroll down to Assets, and then hit the first file you see; ViVeTool-v0.3.1.zip.

  2. Extract

    enable tabs in File Explorer in Windows 11

    Once you’ve got the tool in your downloads, you’ll need to extract the files wherever you choose. I extract a ton of custom content for games, so I actually have a go-to sub-folder for extraction purposes within my documents folder in my C drive.

    However, to make the next steps easier, I’d suggest saving your extracted files in a folder on your C drive named Vivetool

    Your Windows 11 PC has a built-in extraction utility, but for a little more control over the extraction process, try a free dedicated tool like 7zip.

  3. Command and Conquer

    enable tabs in File Explorer in Windows 11

    This next step requires you to run a command. This is slightly less intimidating than the boot menu, but for many general PC users, this bit may feel like you’re messing with forces you shouldn’t be touching.

    Essentially, while the command interface, and commands in general, look like some kind of low-level programming, it’s often just an easier way to get specific tasks done on your computer without having to go through the traditional menus and settings. 

    Press the Windows key + R to open the command utility. Next, you’ll need to type cmd into the dialogue box and then hit Ctrl +Shift + Enter. Your computer will now launch the Command Prompt utility as an Administrator.

  4. Command Prompt

    enable tabs in File Explorer in Windows 11

    Command Prompt may look like a daunting utility too. Its bark is worse than its bite; don’t let the black screen intimidate you. All you need to do is type CD followed by the path to Vivetool’s location. In my case, I’ll type in CD C:\Vivetool. Hit Enter, and you should see a new string of values generated. At the end of the new string, type the following: 

    vivetool addconfig 37634385 2 

    Now hit Enter again. 

    Top tip: Many users say that simply using one configuration command isn’t enough to ensure that you get the new feature. To ensure that you get the new tabbed file explorer interface upon startup, use the following commands in addition to the one provided above:

    vivetool addconfig 39145991 2

    vivetool addconfig 36354489 2

  5. Restart

    enable tabs in File Explorer in Windows 11

    You’ll need to restart your PC for the changes to take effect, but once your system has restarted you should have the new tabbed interface for file explorer

    Just as a reminder, in order for any of these steps to work, you’ll need to have updated your Windows 11 version to build 25136. You can still go through the motions if you haven’t updated, it won’t break your system or anything, but it won’t add the new features upon startup.

Facebook updates Groups as well as how to find them

Although Facebook is beset with challenges such as a whole host of new and modern social communication platforms, and a seemingly never-ending list of scandals it is still the biggest social network on the planet. The size of Facebook means it might move slower than new specialized platforms like Discord, but it also means that it can simply copy new features and bring them to a much wider audience. That is exactly what is happening here, Facebook is copying one of Discord’s best features. Let’s check it out now.

Facebook Download Now

Facebook’s parent company Meta has announced updates to how Facebook will organize Groups in the future and how you will be able to find them. The announcement also includes news about “channels”, which is what it is calling smaller and more casual environments, within Facebook Groups. Channels are a prominent feature of Discord servers, which allow Discord mods to compartmentalize and organize different conversations with their communities.

The Meta announcement also says that these Community channels will also have audio channels where, “admins and members can casually jump in and out of audio conversations in real time.” Again, this is a prominent Discord feature and we recently reported on how Discord has improved its audio channel feature.

The other big news from Meta is that Facebook will soon get a new sidebar, which will make it much easier to find Facebook Groups and move between them more quickly. The sidebar will, “… list your groups and the latest activity within them, like new posts or chats you haven’t yet seen. [It will also allow you to] pin your favorite groups so they show up first, discover new groups or even create your own.”

All-in-all this news marks a rather useful update to Facebook Groups. It is no secret that Discord has grown exponentially in recent years, moving on from being a primarily gamer-focused service to becoming the hub for many different types of online communities that used to call Facebook Groups their home. It will be interesting to see if Facebook is able to recapture some of these lost communities.

If you are still a regular Facebook user, be sure to stay vigilant while on the social network. Lots of scammers have been targeting Facebook users recently and just yesterday we reported on a phishing scam involving Facebook Messenger chatbots. Be careful out there.

Snapchat officially launches Snapchat+: here are all the details

 It is the era of premium messaging services. Telegram officially announced Telegram Premium recently and then soon after that, the rumors about Snapchat+ Snap’s premium subscription model for Snapchat started to surface. Well, now we can tell you that Snap has officially launched Snapchat+ and we can bring you all the details of the new premium plan.

Snapchat Download Now

Snapchat has published a blog post announcing Snapchat+ and there are one or two surprises. First off is the news that Snap is already rolling out the premium service so it should already be available to some of the 332 million Snapchat users around the world.

There is a limit, however, to the roll-out and Snap isn’t pushing it out universally just yet. To start with the company is concentrating on users in the United States, Canada, the United Kingdom, France, Germany, Australia, New Zealand, Saudi Arabia, and the United Arab Emirates. If you don’t have the option on your phone yet, don’t worry, Snap will get it to you soon, it is just that pushing out updates to hundreds of millions of devices takes time. Snap promises to move onto other countries over time.

The next bit of news is the price. Access to Snapchat+ will cost users $3.99 a month, which is lower than the price that popped up in the Snapchat leak we covered not long ago. The blog post doesn’t specifically mention the features included, beyond saying, “this subscription will allow us to deliver new Snapchat features to some of the most passionate members of our community and allow us to provide prioritized support.”  It seems then, Snapchat+ may actually look something like paid access to a beta version of the app, but this remains to be seen.

It is also highly likely, however, that Snapchat+ users will get access of the features that came up in the recent leak including:

Be able to pin a friend as a #1 BFF

Get access to exclusive Snapchat icons

Be able to display a badge in your profile

Be able to see your orbit with BFF

Be able to see your Friend’s whereabouts in the last 24 hours

Be able to see how many friends have rewatched your story

It’s an interesting development from Snap, giving their most passionate users early access to new features that are still being tested. We are looking forward to seeing how it will work and if it will be a slightly technical offering like the WhatsApp beta or Windows Insider programs or if it will be much more user-friendly. Make sure you stick with us for all the latest Snapchat News.

WhatsApp update giving you more privacy control when you send images

WhatsApp’s image-sharing tool is already well-featured and easy to use. You can already rotate, crop, and resize images as well typing text and drawing on top of them in a whole spectrum of colors. Well now, WhatsApp is adding another cool tool to its image-sharing toolbox that will make shy people and privacy-focused users very happy. Let’s check it out.

WhatsApp Download Now

The latest beta version of WhatsApp for desktop shows us that a blur tool is on the way for the WhatsApp media editor. This will bring a handy privacy-based feature into the app that users would normally have to use a third-party app to implement.

The screenshot above, which we can share with you thanks to the people at WABetaInfo, shows the new blur tool showing up in the image editing toolbar at the top of the screen. When implemented the feature will allow you to quickly blur different parts of the image. This means you will be able to cover up any parts of the images you are sending that you don’t want people to see, whether that be for privacy issues or just maybe to cover up something embarrassing.

This new feature is still under development and isn’t actually available for use just yet. This means that, unfortunately, we can’t give you any details about when we can expect to see it rolling out to all WhatsApp users. As it is in active development, however, we can say that there is a very good chance it will receive a wide roll-out to all users.

 Recently, we have covered a wide range of WhatsApp updates to WhatsApp voice notes, larger file transfer sizes, message reaction improvements, better WhatsApp group call functionality, and more. With so much WhatsApp news coming thck and fast and so many interesting and useful WhatsApp features on the horizon, make sure you stick with us to stay up to date with all the latest WhatsApp news and updates.

Image via: WABetaInfo

Pokémon Go developer Niantic says it’s in a state of financial crisis, canceling four projects

After announcing the NBA All-World AR game, Pokémon Go developer Niantic informed its staff recently that they’ll be making budget cuts. What that meant for some of the employees is that they’ll have to leave. Part of the announcement is that it’s canceling four projects. But…is everything as it seems?

Pokémon GO DOWNLOAD

John Hanke, Chief Executive Officer of Niantic, wrote an email to several staff members where he told them the company is making some changes. Apparently, it’s facing financial difficulties and has to let some of the staff go. However, he did mention that the company will continue to support them while looking for new work.

Niantic has been striving to replicate the success of Pokémon Go. According to SensorTower, the company makes about $1 billion per year on the AR game, which is not a surprise. Even during the pandemic, it changed the game so you could still catch Pokémon from home and remotely battle others in theirs.

The news of Niantic’s financial difficulties does come as a surprise. The four projects it’s canceling are Heavy Metal, Hamlet, Snowball, and Blue Sky. You may also recall that they dropped Harry Potter: Wizards Unite earlier this year.

What pecks me as strange is that they’re continuing with the development of the AR Lightship and NBA All-World AR games. If you ask me, it feels as if they know these will be massively successful projects, so they’re diverting all their funds and resources there. The metaverse promises to be financially rewarding to any company that makes a brilliant game in it. 

Niantic shifts focus to NBA All-World READ MORE

So perhaps the financial difficulty is simply not having enough resources to pump more funds into those potential cash-cow projects. Or maybe they’re really having funding issues. I guess only time will tell.

Pac-Man World Re-Pac will feature Pac-Mom instead of Ms Pac-Man

In a strange turn of events, the upcoming Pac-Man World Re-Pac is set to have Pac-Mom as the main female character instead of Ms Pac-Man. The new trailer reveals that she looks similar to the former female protagonist, with a hat instead of a hair bow. Is there a reason they’re suddenly hiding the hero and not presenting her in the game?

PAC-MAN WORLD Re-PAC Download Now

Well, yes, it appears there is. Bandai Namco struggled with a 2019 lawsuit from AtGames who currently holds the license for Ms Pacman. AtGames makes arcade cabinets and mini consoles, and the yellow munching hero is one of its top gaming characters. Bandai Namco is already in trouble for using her in a previous title.

When you watch the trailer for Pac-Man World Re-Pac below, the scenes showing Pac-Mom should have had Ms Pac-Man instead. It seems this will be the way to go for now, unless Bandai Namco can get permission to use Ms Pac-Man again.  

Let’s take a look at the actual game for a moment. If you read my Teenage Mutant Ninja Turtles: Shredder’s Revenge review yesterday, you’ll know I’m a nostalgic gamer. Pac-Man was one of the titles I often played on my Atari console in the early 90s. Of course, the games have changed from top-down 2D to a completely 3D environment.

Pac-Man World Re-Pac will set you off in different worlds where you need to collect items and defeat monsters along the way. As you can tell from the trailer, the main objective is to save your family. It looks like it should be a whole lot of fun to play, so here’s hoping I can grab a copy upon release.

For other Pac-Man news, the small yellow hero was recently spotted in Fortnite as part of the store packs, mostly as bling. However, with the new Call of Duty season upon us, I’ve shifted most of my attention there, while still trying to find some time for Fishing Planet and Elder Scrolls Online: The High Isles chapter. The troubles of a gamer….

Pac-Man set to come to Fortnite READ MORE

Present the best sound with Volume Master Chrome extension

There are few things as frustrating as struggling with volume when trying to listen to something. Whether you’re in a meeting, listening to music while you work or trying to watch a video, we can all agree that issues with sound and volume are incredibly exasperating. While PCs and devices give us basic volume controls, sometimes we wish we had more. Thankfully, we have a Chrome extension like Volume Master.

Volume Master DOWNLOAD

In this article, we’ll look at how to use the Volume Master Chrome extension to get more control over your volume. We’ll also touch on why you might be having these sound issues.

Why are you experiencing issues with sound volume?

Quite a few factors can affect your browser’s sound quality and volume. The most obvious factor is the hardware used, such as speakers, headphones, etc. These items are not all created equal; some brands have better quality than others. Also, even if you have the best brand, hardware can still malfunction, causing issues with sound and volume.

Other factors that also have an effect are the file format and original recording quality. Although personal recording has come a long way, with many YouTubers and content creators having easy access to mics and recording equipment at home, a few videos and audio clips online suffer from low volume. This can be because of recording, editing, or uploading issues.

Certain virtual meeting platforms, like Skype or Google Meet, can also have their own bugs and issues that can affect the sound quality and volume of meetings. So many factors could affect how hard or soft audio is that volume can be a real issue for many. 

5 Steps to use the Volume Master extension for Chrome

With the ability to boost volume up to 600% and adjust the volume of different tabs independently, this Chrome extension is a must-have for anyone who enjoys having more control. Let’s look at how to start using this add-on for Chrome browsers.

  1. Download and install Volume Master

    Present the best sound with Volume Master Chrome extension

    If you head to our article on the best volume booster extensions for Chrome, you’ll notice we have Volume Master as one of the options. Simply click on the link, and then Add to Chrome.

  2. Pin the extension to the toolbar

    Present the best sound with Volume Master Chrome extension

    Pin the extension to the toolbar so you can easily access the volume controls. Click on the puzzle piece icon, scroll down until you see Volume Master and click on the pin icon.

  3. Open the platform where you want to play sound

    Present the best sound with Volume Master Chrome extension

    Open the audio or video file you want to listen to. This can be YouTube, Spotify, Vimeo, Facebook or any other online platform.

  4. Activate the extension to adjust the volume

    Once you play the video or audio, click on the extension. A small window will appear. Here you can drag the slider to increase the volume.

  5. Adjust different platforms individually

    Present the best sound with Volume Master Chrome extension

    If you have multiple platforms open that play sound, you can easily switch between them from the extension window and adjust the volume independently.

Teenage Mutant Ninja Turtles: Shredder’s Revenge | Retro Arcade Fighter

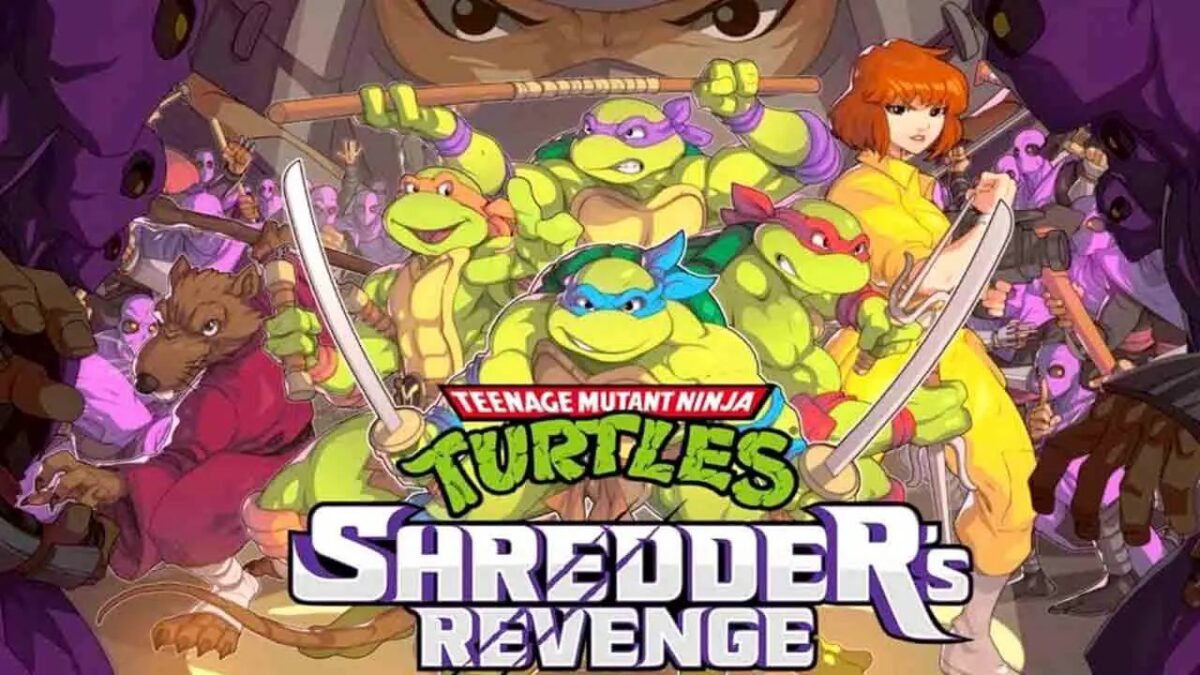
Teenage Mutant Ninja Turtles: Shredder’s Revenge is a retro action fighting game set in a 2D environment. The developer is Tribute Games Inc. while the publishers are Dotemu and Gamera Games. The title launched for gamers on June 16, 2022, as a tribute to the arcade games of the 80s and 90s.

Teenage Mutant Ninja Turtles: Shredder's Revenge DOWNLOAD

You can now play Teenage Mutant Ninja Turtles: Shredder’s Revenge on your Windows PC, taking on Shredder, Krang, and all their goonies as the mutated heroes. There are plenty of easter eggs to enjoy, and it has more features than the original arcade games. Stay tuned as I share my excitement in this review!

Excellent campaign in Teenage Mutant Ninja Turtles: Shredder’s Revenge

It’s such a joy for me to see Teenage Mutant Ninja Turtles: Shredder’s Revenge appear at my age. I grew up with the original Turtles game in our local arcade center. My brother Clayton and I would save our coins, eager to hit the machines and defeat Shredder’s cronies

Follow me on a nostalgic journey as I compare Teenage Mutant Ninja Turtles: Shredder’s Revenge to those memories.

Choose your hero

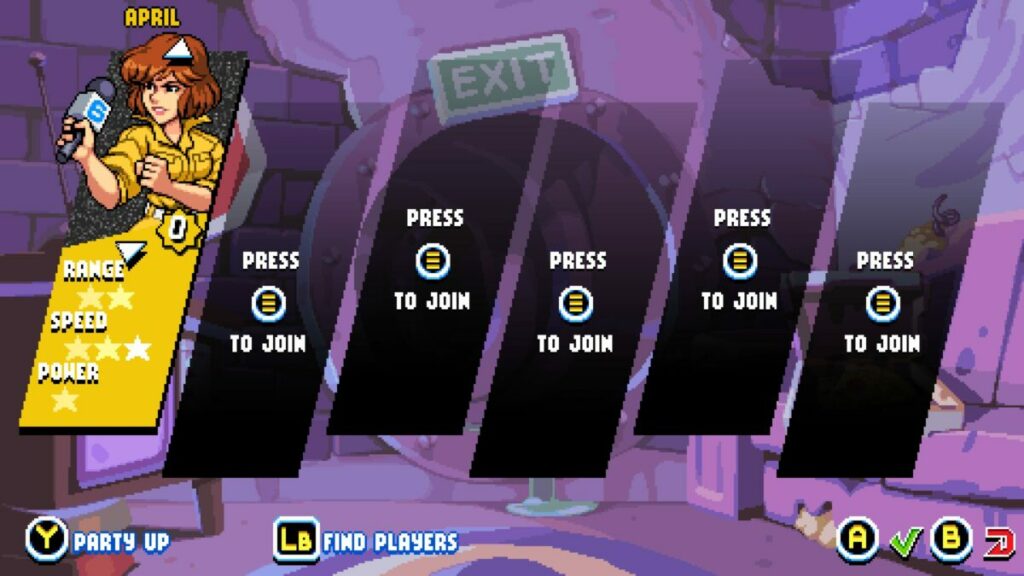
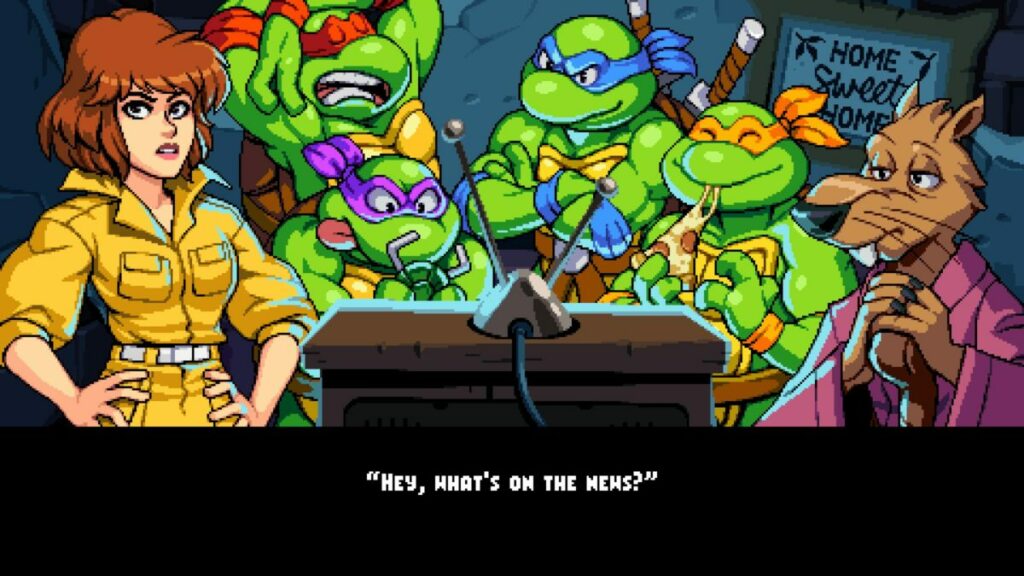
The first element that made me smile when I started the campaign mode was being able to choose which Turtle I wanted to fight with. I was pleased to see you can also choose April and Splinter. They have whole new combat arsenals, and April can help save the day as in the movies.

Teenage Mutant Ninja Turtles Shredder's Revenge

Saving the day, once again

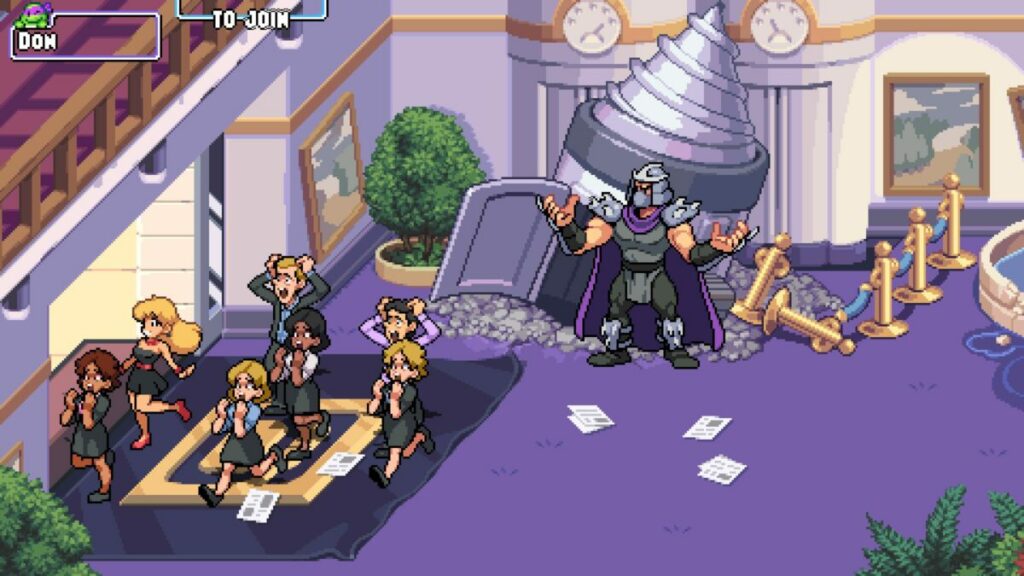
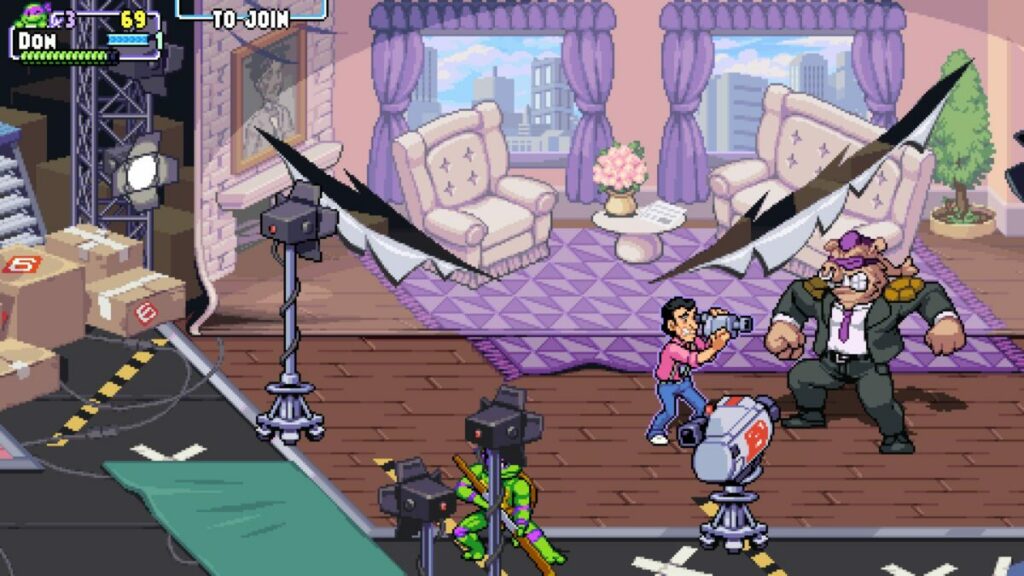
The story in Teenage Mutant Ninja Turtles: Shredder’s Revenge almost felt familiar, but it’s not the same. In the original arcade game, you faced Rocksteady in a burning building on the first level. This time around, you’ll try to save Vern the news guy from Bebop. So, while the developer makes me remember the good old times, it’s a new story to enjoy.

Of course, you’ll still have to travel the streets and buildings, kicking ninjas and robot butt along the way. Each level is a chapter in the campaign, giving it that storytelling element that this author thrives for in games. 
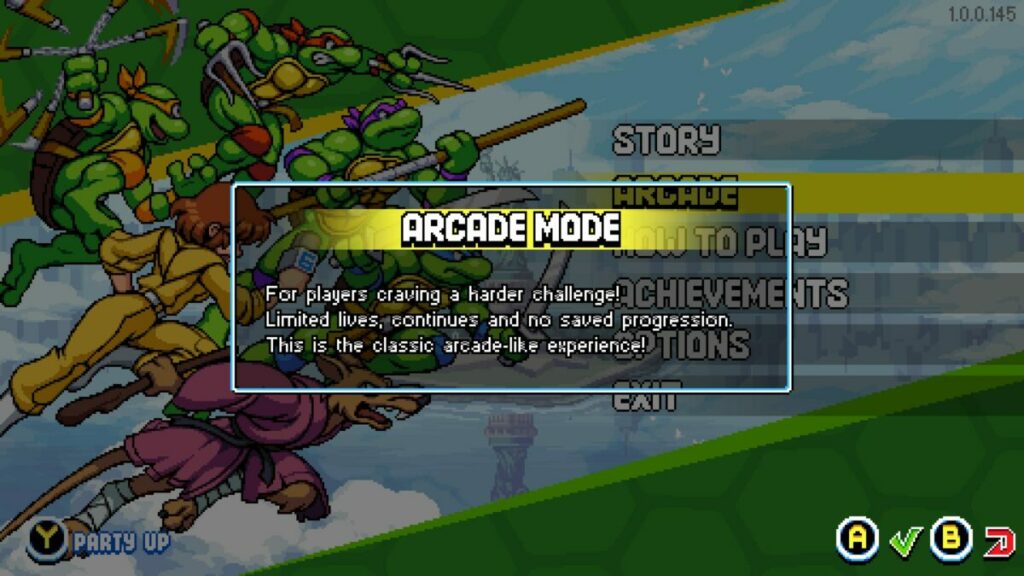
Teenage Mutant Ninja Turtles Shredder's Revenge

Arcade mode

With the Teenage Mutant Ninja Turtles: Shredder’s Revenge campaign mode, you have infinite lives. The arcade mode lets you play the same chapters but with limited lives. It’s like keeping your coins at hand just in case you don’t make it to the end of the level.

Teenage Mutant Ninja Turtles Shredder's Revenge

How long to play Teenage Mutant Ninja Turtles: Shredder’s Revenge?

The length of time it will take to complete Teenage Mutant Ninja Turtles: Shredder’s Revenge depends on you. If you only want to destroy your enemies and finish the game in no time, it will take you about 2 to 3 hours. For completionists like me that want to collect every item and achievement, you’ll go well into 9 to 10 hours

Teenage Mutant Ninja Turtles: Shredder’s Revenge extended features

Have you enjoyed your taste of Teenage Mutant Ninja Turtles: Shredder’s Revenge yet, or are you dying for more? I’m only getting started, as I’d like to share some of the gameplay mechanics with you. Here’s what my experience was like with the controls and features.

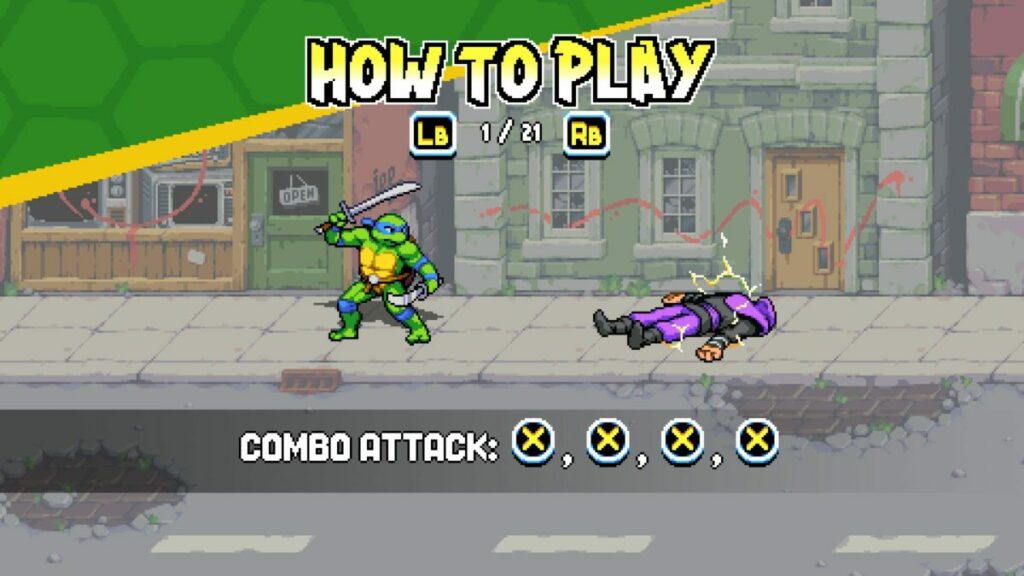
Teenage Mutant Ninja Turtles: Shredder’s Revenge tutorial

There are so many modern AAA titles today that don’t have a basic tutorial at the start. Somehow, this retro game managed to include one. There’s a video at the beginning that shows you about 21 moves you can do in Teenage Mutant Ninja Turtles: Shredder’s Revenge. Just a pity you can’t practice them on a bot before you head out, like in Mortal Kombat 11.

Teenage Mutant Ninja Turtles Shredder's Revenge

New combat moves for the Turtles

For those who aren’t as old as I am or are part of the new generation, the original arcade Turtles game only had a few moves. If I remember correctly, it was jumping and striking. There was also a combination of the two buttons for a powerful attack.

Teenage Mutant Ninja Turtles: Shredder’s Revenge uses the same abilities, but adds more to the combat moves. You can dodge and strike, while you can quickly jump up after the Foot Clan knocks you down. You also have a power bar, delivering an almighty blow that hits everyone around you. There are a few other skills, but I’ll leave them up to you to discover.

Teenage Mutant Ninja Turtles Shredder's Revenge

Enemies making prop appearances

One aspect that made me laugh is how the developer made the enemies appear as props in some scenarios. For example, some of the Foot Clan were sitting by the telephones and desks in the news building pretending to take calls. As soon as you approach, they jump up and attack you. It’s a brilliant moment that will stay with me for a long time.

Teenage Mutant Ninja Turtles Shredder's Revenge

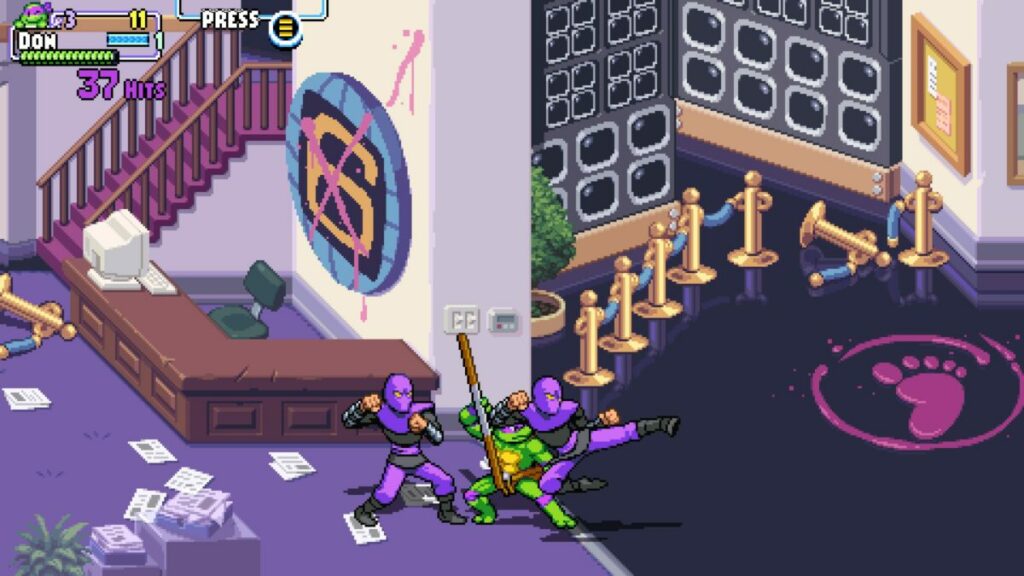
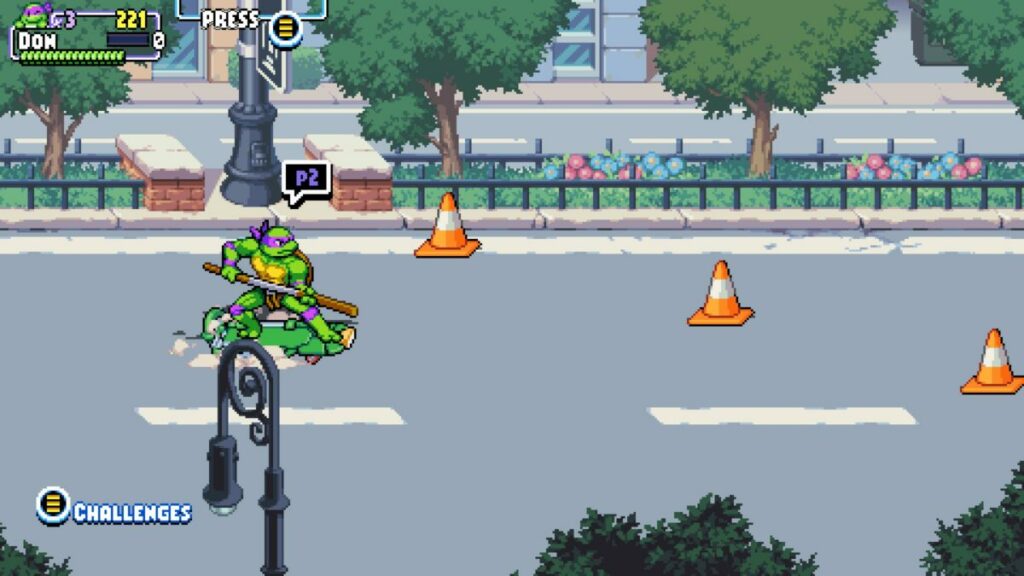
Using the environment

Here’s a nod to the original Turtles arcade game I enjoyed. You can once again use the environment to your advantage. Feel free to hit a hydrant for water to squirt in your enemy’s face or a parking meter to slam into their faces. I even tested what would happen if I fell down a manhole. Donatello actually said, “Who turned the lights out?”, which is exactly what I wanted to hear.

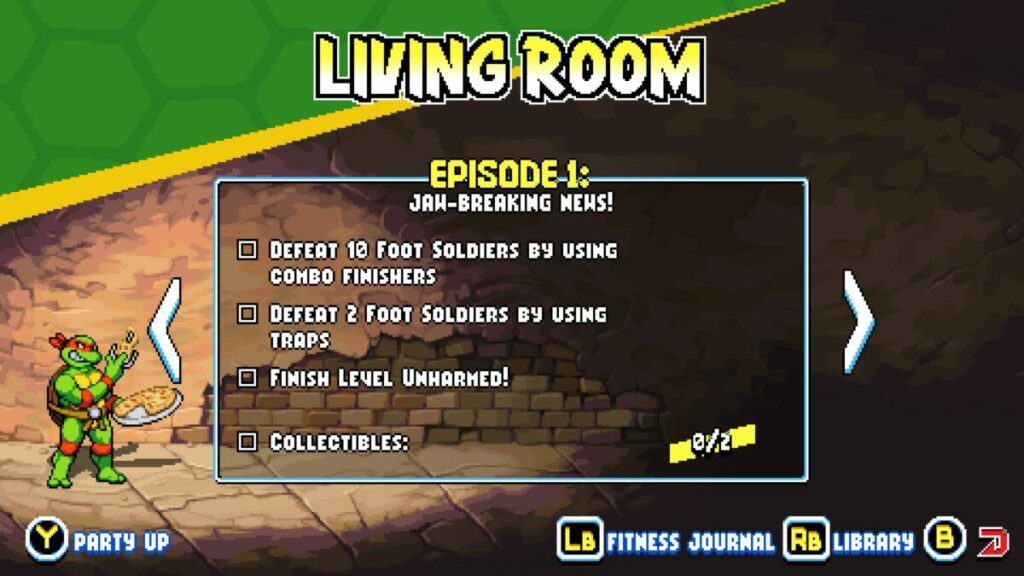
Completionist’s dream

If you’re a fan of GTA V and The Elder Scrolls V: Skyrim, you’ll know exactly what I’m about to say. Teenage Mutant Ninja Turtles: Shredder’s Revenge lets you find collectables in each stage, and there are achievements to attain. You can go back to levels to tick the items you’ve missed off the list, which is why the game can take so long to complete.

Teenage Mutant Ninja Turtles Shredder's Revenge

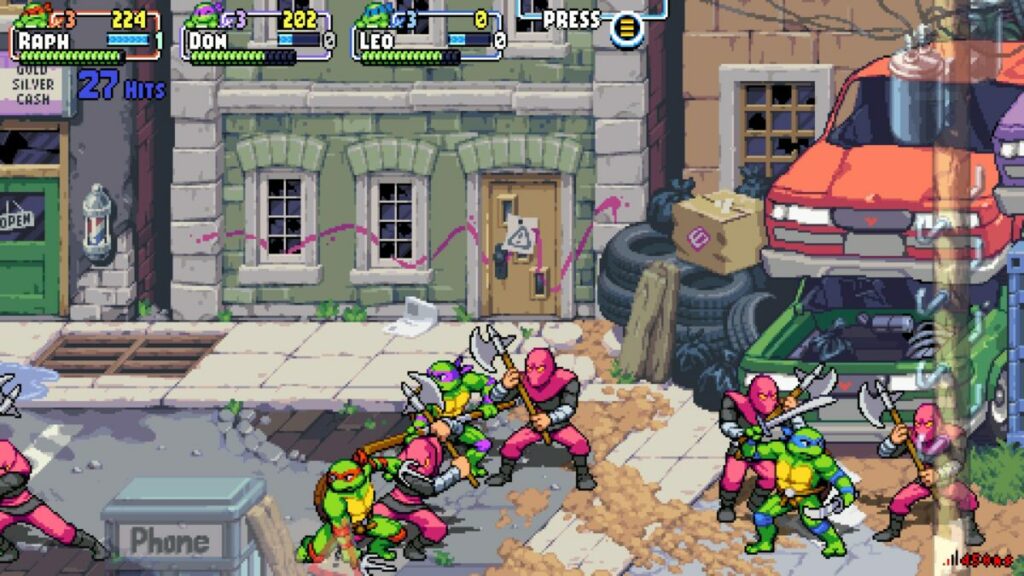
Local and online multiplayer

To give you that feeling of standing at the arcade and playing with friends, the latest action title lets you play up to four players. You can use four PC or Xbox controllers on the same computer or join up with others online to combat Shredder and his minions. 

It’s fun watching others join you as you battle the Foot Clan. The only issue with the online mode is you sometimes wait a while for the other players to get done with whatever they’re doing.

Teenage Mutant Ninja Turtles Shredder's Revenge

Other games similar to Teenage Mutant Ninja Turtles: Shredder’s Revenge

It’s challenging to find modern retro games that hark back to the good old times like Teenage Mutant Ninja Turtles: Shredder’s Revenge does. Most of them are remade with modern visuals, losing that nostalgic feeling. If you’d like to go down memory lane with some arcade games, you can try Street Fighter 2, Sonic the Hedgehog, or Deluxe Pacman.

What you’ll need on your PC

There aren’t demanding requirements for Teenage Mutant Ninja Turtles: Shredder’s Revenge. The storage needed is low, and you won’t need an expensive graphics card. Here are the minimum requirements for this retro action game.

  • OS: Windows 7, 64-bit
  • Memory: 4 GB RAM
  • Processor: Intel Core i3-2100 or AMD FX-4300
  • Graphics: NVIDIA GeForce GT 320, 1 GB or Intel HD 4600 or AMD Radeon HD 5570, 1 GB 
  • Storage: 1 GB 

Teenage Mutant Ninja Turtles: Shredder’s Revenge goes back to retro effects

Let’s get to the part that really counts. In this section of my Teenage Mutant Ninja Turtles: Shredder’s Revenge review, I’m going to discuss how the graphics and sound effects live up to the original game.

Beautiful retro environments and characters

If anything, Teenage Mutant Ninja Turtles: Shredder’s Revenge improved on the original retro design. You have similar visuals with completely new environments. The colors pop on the screen, and you’ll want to take a moment to take some of the scenes in before you battle. I also loved the character designs of allies and enemies.

Teenage Mutant Ninja Turtles Shredder's RevengeTeenage Mutant Ninja Turtles Shredder's Revenge

Fast-paced effects and interactive maps

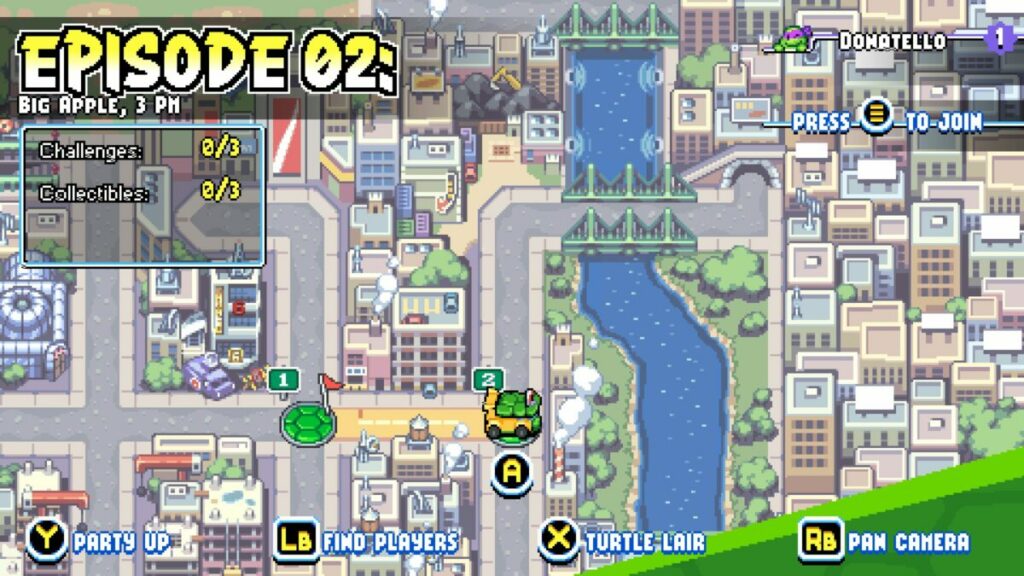
Even though it’s a retro arcade game, the action is fast, and you’ll need to be on your feet, so to speak. There are some stages that move incredibly quick, such as the one where you’re on a skateboard. I also love the map design where you can select your level.

Teenage Mutant Ninja Turtles Shredder's Revenge

Bringing back the glory of the Turtles’ arcade sound

There was joy in my heart when I heard each of the Turtles speaking. Michaelangelo’s “Cowabunga!” is back, and they’ll sometimes have some snarky comments when you do something wrong. The music is just as energetic as the battles, and you can actually hear them singing about Turtle themes if you listen closely.

Teenage Mutant Ninja Turtles Shredder's Revenge

Final Verdict of Teenage Mutant Ninja Turtles: Shredder’s Revenge

As you can tell from my Teenage Mutant Ninja Turtles: Shredder’s Revenge review, I utterly love this game. It’s exactly the fix I need when I’m heading down memory lane. Sure, it’s easier to play now, except when the Foot Clan are all over the screen and I’m waiting for my power bar to max out. It’s a thrill of a ride, and I can’t wait to head back in.

Before you leave, please go check out some of my more recent reviews, namely, Starship Troopers: Terran Command and Dune: Spice Wars, both of which also sent me back to my childhood.

Starship Troopers: Terran Command review READ MORE
Dune: Spice Wars Preview READ MORE

Pros

  • Stunning retro graphics and sound effects
  • Brilliant storyline with chapters
  • Plenty of easter eggs
  • Excellent items for completionists
  • Nostalgic combat and scenes
  • Fun to play online together
  • Includes arcade mode

Cons

  • Online multiplayer lobby makes you wait for other players

Developer: Tribute Games Inc.

Publisher: Dotemu, Gamera Games

Game Modes: Single-player, Multiplayer, Arcade

Platform reviewed: Windows 11 – Steam