SpaceX has made the surprising decision to modify its priorities in space exploration, setting aside the colonization of Mars to focus on building a self-sustaining city on the Moon within less than ten years. This news, confirmed by the company’s CEO, Elon Musk, responds to the need for more immediate and pragmatic advances, given the logistical complexity of missions to Mars. For nearly two decades, Mars was the center of SpaceX’s vision, a goal that has now undergone a radical change. A change of story for […]
SpaceX has made the surprising decision to modify its priorities in space exploration, setting aside the colonization of Mars to focus on building a self-sustaining city on the Moon within less than ten years.
This news, confirmed by the company’s CEO, Elon Musk, addresses the need to make more immediate and pragmatic advances, given the logistical complexity of missions to Mars.
For nearly two decades, Mars was the center of SpaceX’s vision, a goal that has now undergone a radical change.
For those unaware, SpaceX has already shifted focus to building a self-growing city on the Moon, as we can potentially achieve that in less than 10 years, whereas Mars would take 20+ years.
The mission of SpaceX remains the same: extend consciousness and life as we know it to…
The main reason lies in orbital physics; missions to Mars can only be carried out every 26 months due to planetary alignment, which severely limits the number of launches and experiments that can be conducted in a given time frame.
In contrast, the proximity of the Moon allows for more frequent launches, approximately every ten days, thus facilitating a more agile development in space engineering.
SpaceX’s plan includes making a first unmanned moon landing by 2027, with the intention of establishing a permanent presence on the Earth’s satellite in less than ten years. This transition also aligns SpaceX’s interests with NASA’s objectives, as the company has a multimillion-dollar contract with the U.S. space agency under the Artemis program.
Musk December 2024
“We’re still re-affirming our timeline to send Starship to Mars by the end of 2025, and astronauts in 2027”
One Year Later…
“We’re adjusting our focus to land on the moon by 2027”
Despite this shift towards the Moon, Musk still maintains the ambition of building a city on Mars within five to seven years. However, he has admitted that the Moon will become the first critical step in developing the necessary capabilities that allow humanity to live autonomously outside of Earth.
This approach not only promises a significant advance in space exploration but also meets the expectations of investors, who see greater security and clearer revenue models in SpaceX’s new lunar roadmap.
Rockstar Games has decided to delay the release of Grand Theft Auto VI to improve the quality of the game, following the presentation of its most recent trailer. The new release date has been set for May 26, 2026, aimed at the PlayStation 5 and Xbox Series X|S platforms. Although the company has not provided a specific reason for this delay, industry experts believe that the decision reflects a commitment to quality and user experience. Polishing over investor profits Mike Dailly, original designer of the GTA saga and […]
Rockstar Games has decided to delay the release of Grand Theft Auto VI to improve the quality of the game, following the presentation of its latest trailer. The new release date has been set for May 26, 2026, aimed at PlayStation 5 and Xbox Series X|S platforms. Although the company has not provided a specific reason for this delay, industry experts believe that the decision reflects a commitment to quality and user experience.
Polishing before investor benefits
Mike Dailly, original designer of the GTA saga and co-founder of Rockstar North, has praised this decision, emphasizing that the studio was aware that the game would have been successful even if it had been released in an imperfect state. In recent posts on Bluesky, Dailly commented that “it’s impressive” that Rockstar prioritized polish by delaying the release, highlighting the notable evolution of the environments and character movements compared to the early demonstrations. “That environment is lovely, and things move much better,” he pointed out.
Dailly also referenced the fiasco of Frontier: Elite II in 1993, where greed affected the quality of the launch, commenting that many remember how the game, despite receiving positive reviews, was plagued by bugs that affected the experience. This reminder underscores the importance of Rockstar’s decision in its current context, where video game companies face pressure to release titles long before they are ready.
Although GTA 6 has generated high expectations, the development is focused on providing a polished and error-free experience as they approach the new release date. Although a PC version has not been announced, it is expected to arrive after the console debut.
GTA 6 is the new installment of the action-adventure sandbox in an open world by Rockstar Games. Wrapped in expectation and mystery, the sixth Grand Theft Auto marks the return of this legendary franchise 10 years after GTA 5 was released. Although little has been confirmed about the gameplay or the release date of this new GTA, everything seems to indicate that we are facing what will be the most expensive game in history. Still, with each passing day, new rumors and juicy leaks are coming to delight the entire gaming community. Would you like to know more? This is everything we know about GTA VI to date.
Currently, distinguishing between truth and falsehood has become more complex than ever. Although generative artificial intelligence has brought great advances in productivity, it has also managed to increase another problem: disinformation. The truth is that, to a greater or lesser extent, the vast majority of the content we consume on the Internet is manipulated.
To overcome this obstacle, a new technology has emerged, content credentials. Thanks to them, we can verify the origin of any audiovisual product. Is it a generation by AI? What program was used? And who was the sender? The answers to all these questions can be found in the credentials.
Next, we will explain what content credentials are and how they work within the Adobe universe.
Within Adobe, Content Credentials are essentially a feature designed to provide authenticity to digital content. The technology is based on the C2PA (Coalition for Content Provenance and Authenticity) protocol, supported by companies such as Adobe, Leica, Nikon, and Intel, among others.
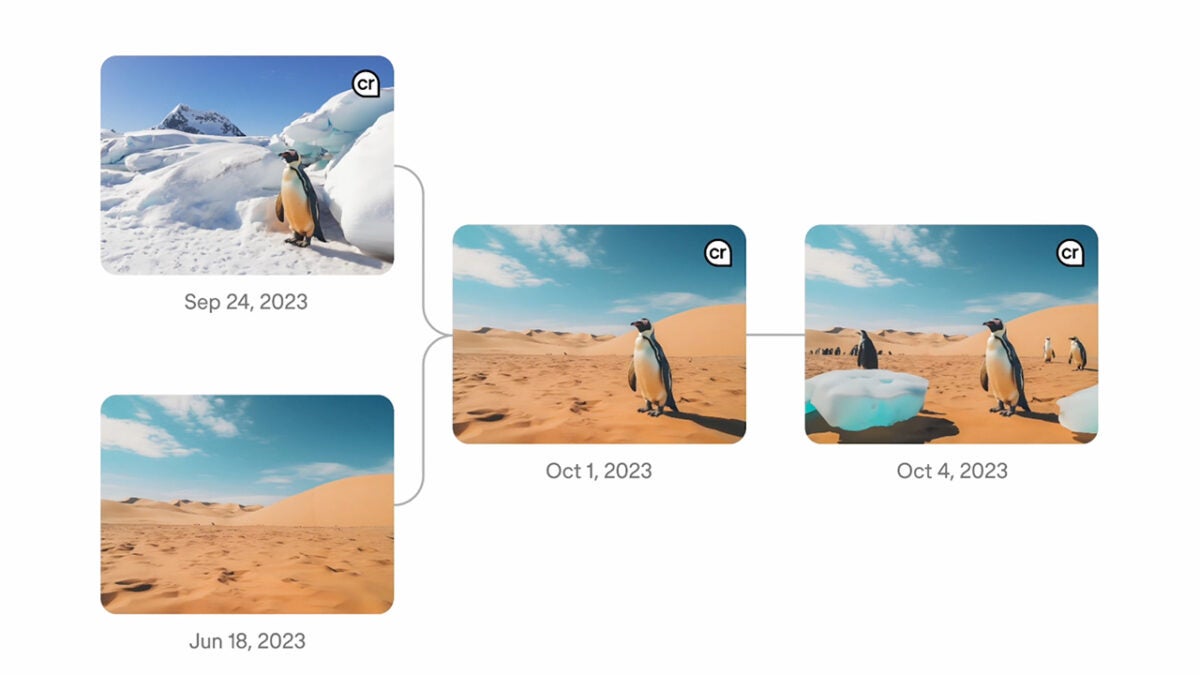
Thanks to content credentials, we can verify the origin of the digital files we see online. In the case of an image, credentials serve us to know if it was generated by artificial intelligence, when it was created, if it has been edited, and much more.
In addition, checking these credentials is very simple. We just have to click on the pin with the CR symbol located in the upper right corner of an image.
The main purpose of credentials is to protect and prevent manipulation to users through fake images and videos. A function that will be essential in an increasingly digitized future.
How can I use content credentials in Photoshop?
From Adobe programs, you can easily integrate content credentials into your files. Here’s how you can do it in Adobe Photoshop:
With your project open in Photoshop, go to Window and then select Content Credentials (beta).
A new panel named Content Credentials (beta) will appear. Here, click on Enable Content Credentials.
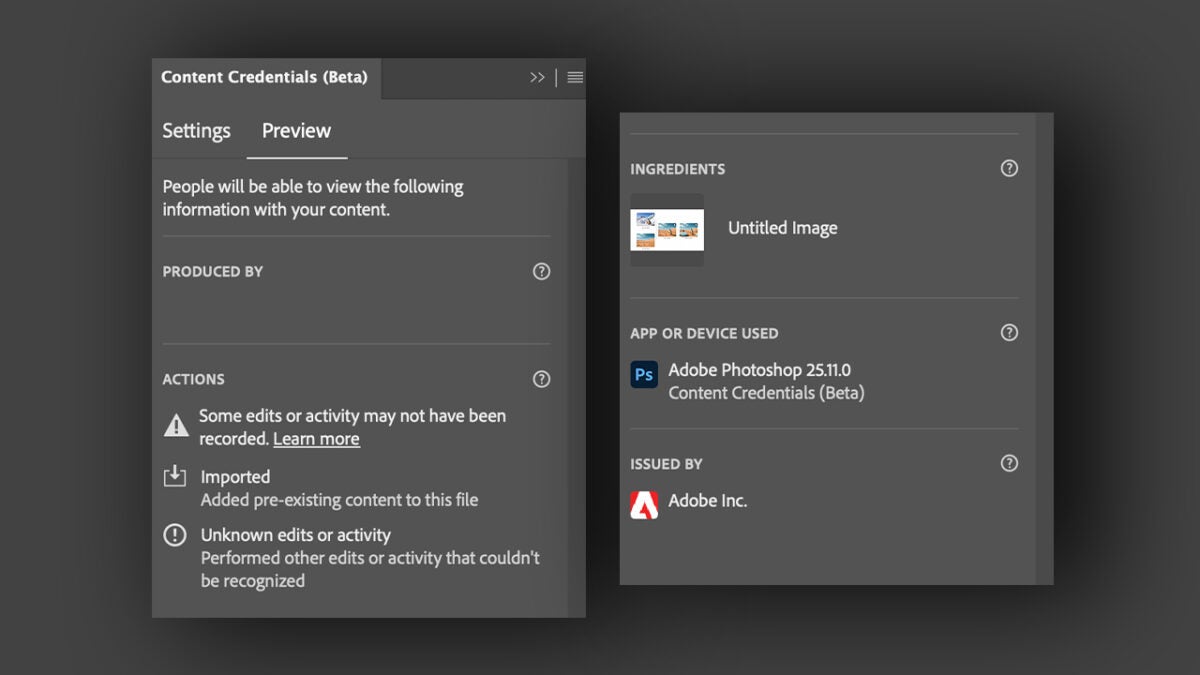
Set what information you want to include in the Content Credential of your file. This includes:
Producer (or author): Here will appear the name of the Adobe account used.
Produced by: The program used to create the document will be displayed. In this case, it would be Adobe Photoshop.
Edits and activities: Here you will see the editing actions you have performed.
Assets: The assets used to create the image.
Signed by: The organization responsible for issuing the Content Credential will be displayed.
Remember that everything you decide to include can be accessed by any user publicly. Now, we will see how we have to save our files so that they have their corresponding content credentials associated with them.
Go to File > Export > Export as. A new panel will appear to configure the export.
Within Content Credentials, we can decide how they will be included in the image, choosing between three options:
Publish to Content Credentials cloud
Attach to file
Do not include them
How Adobe Firefly Content Credentials Work
Previously, we have talked about how we could include content credentials in our Photoshop projects. However, there are cases where Adobe applies these credentials automatically. This happens, for example, with Adobe Firefly generations.
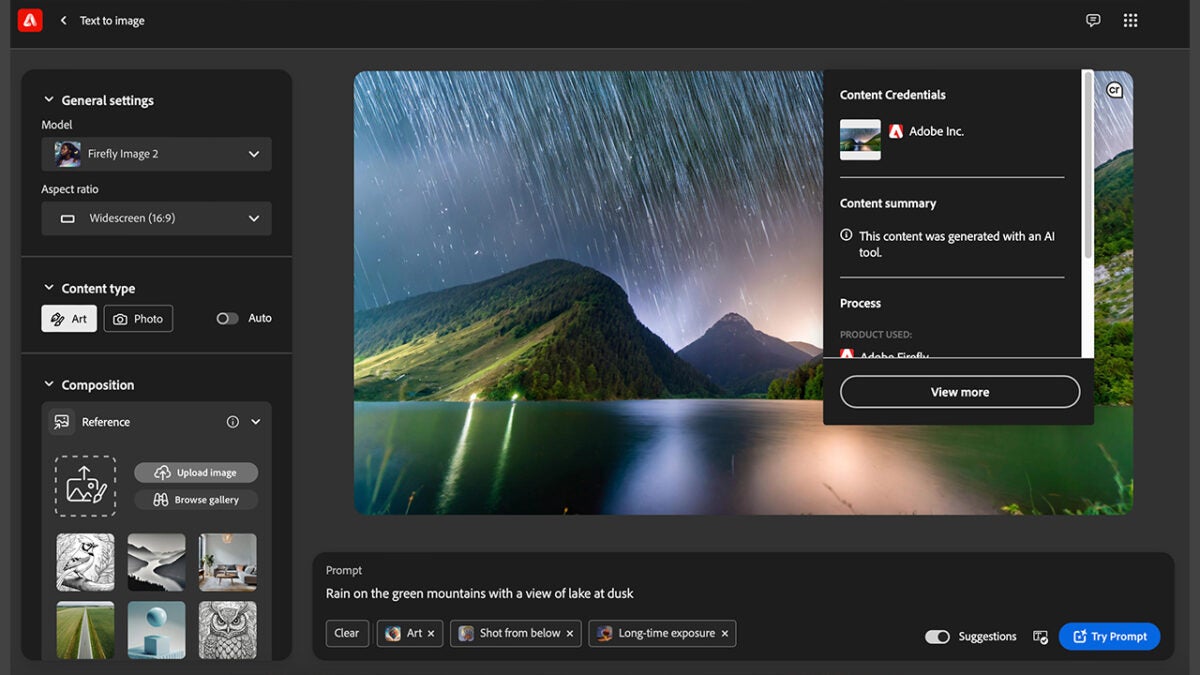
Here we refer to any asset that has been generated with the functions of Text to image, Generative Fill and Text to Vector Graphic. The information included is as follows:
A thumbnail of the image (exclusive for images generated with Text to image from the Adobe Firefly website).
Sender, which in this case is Adobe.
Summary of the content, specifying that Adobe’s generative technology was used.
Application that has been used. It can be Photoshop, Illustrator, Firefly…
AI function used to generate the image.
General editing actions. In the case of Firefly creations, only the Created or Other edits tags will be displayed.
On the other hand, in the credentials the assets you used to create your image will not be shown nor will it be mentioned if content with already included credentials has been used.
And in Adobe Premiere?
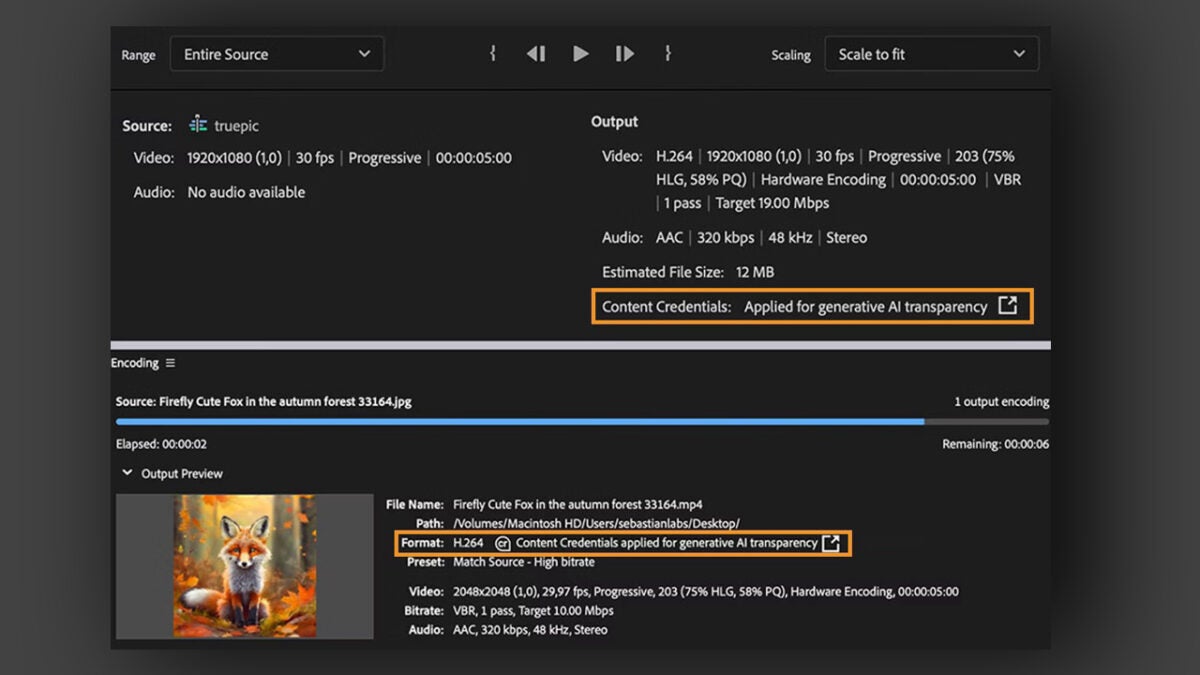
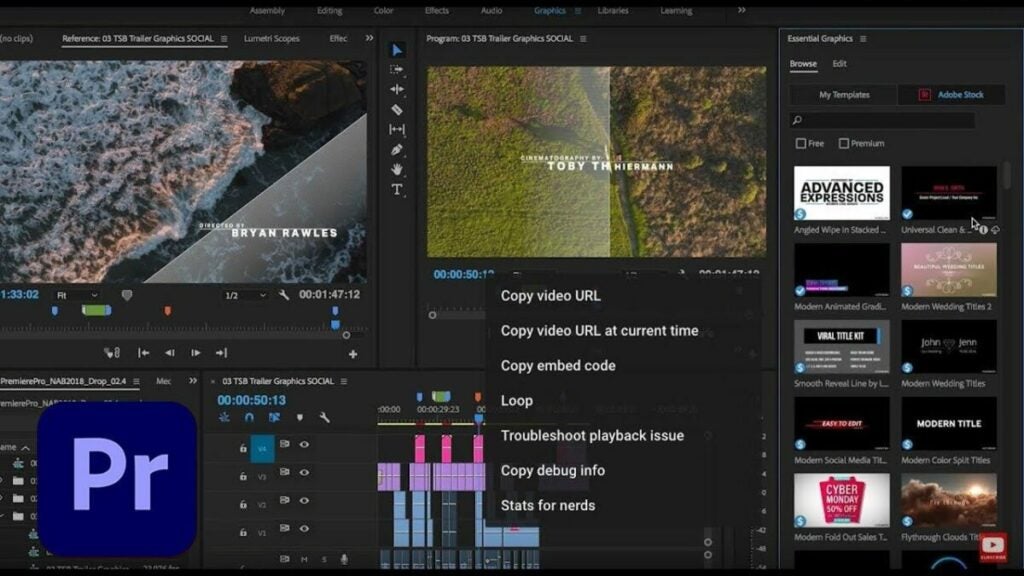
Credentials are not exclusive to images: they are also integrated into your videos created with Adobe Premiere. This way, credentials will be included in the exported sequences with content generated by Adobe’s AI.
This refers to any element created through Firefly, for example. This also includes AI generations made through Photoshop or Illustrator (such as those created with Generative Fill, for example).
To view the credentials, select a sequence that contains elements generated by Adobe AI. Then, click on File > Export > Media. The keyboard shortcut Ctrl/Cmd + M will also work. Now, a new panel will appear. In the Output section, you will see the applied content credentials.
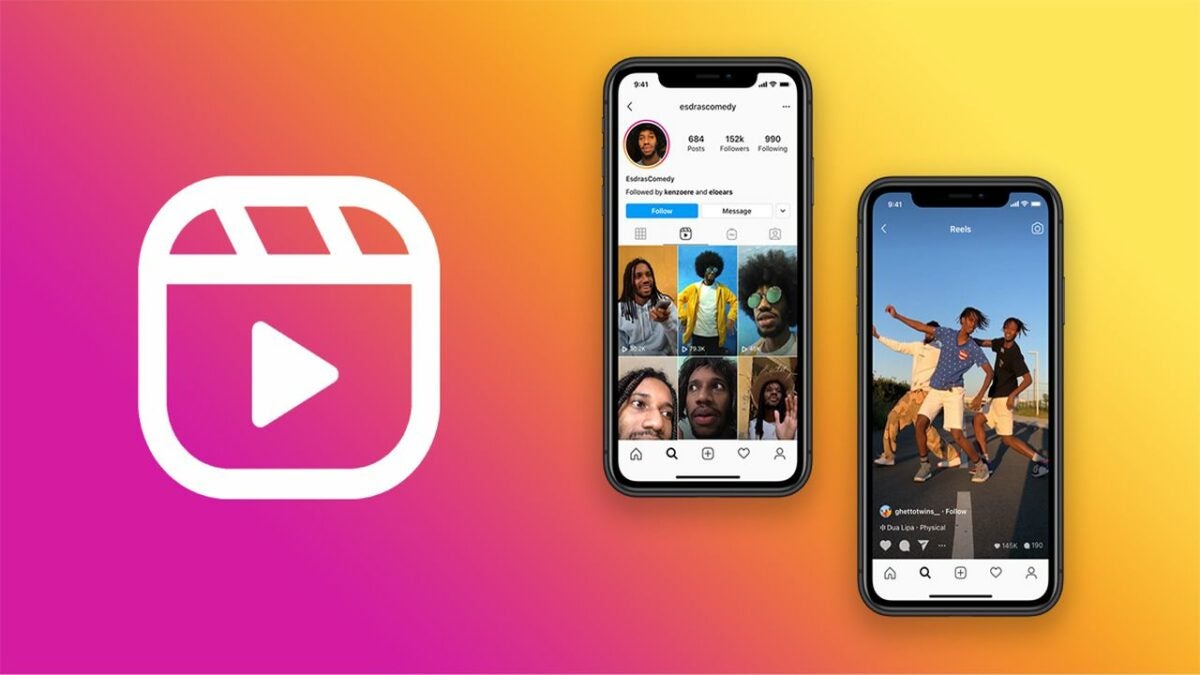
Since its introduction in 2020, Instagram Reels has quickly become a cornerstone for content creators aiming to expand their reach and engagement on the platform. Whether you’re an aspiring influencer, a digital marketer, or just someone who loves creating engaging content, mastering Instagram Reels can be both fun and rewarding. This comprehensive guide will show you how to create high-quality Instagram Reels using Adobe Premiere Pro, ensuring your videos stand out in a crowded social media landscape.
Whether you are trying to increase followers on the platform or just want to level up your production skills, here’s how to make high-quality Instagram Reels stand out with Adobe Premiere Pro.
Why Use Adobe Premiere Pro?
Adobe Premiere Pro is a powerful video editing software used by professionals across the film and television industries. Its robust features allow for precise editing, color correction, and the addition of effects that can elevate the quality of your Instagram Reels significantly above what can be achieved with simpler mobile apps.
Advanced Editing Tools: Premiere Pro offers a vast array of tools for cutting, trimming, and refining your video clips.
Color Correction: With the Lumetri Color panel, you can perform professional-grade color correction and grading.
Special Effects: Add transitions, text overlays, and other effects to make your Reels visually stunning.
Audio Editing: Premiere Pro also includes comprehensive audio editing features, allowing you to fine-tune the sound quality of your Reels.
Getting Started: Essential Filming Techniques
Study Basic Mobile Phone Filming Techniques
Before diving into the editing process, it’s crucial to capture high-quality footage. Here are some tips to get you started:
Stability: Use a tripod or a stabilizer to keep your shots steady.
Lighting: Shoot in well-lit environments. Natural light is best, but if you’re shooting indoors, use soft, diffused lighting to avoid harsh shadows. Avoid filming under direct sunlight as it can create harsh shadows and overexpose parts of your video.
Framing: Follow the rule of thirds to make your shots more dynamic. Ensure your subject is well-positioned within the frame.
Resolution: Always shoot in the highest resolution possible, typically 4K, to ensure the best quality for editing. Higher resolution footage gives you more flexibility in post-production, such as cropping and zooming without losing quality.
Pre-Production: Storyboard Your Clips
Plan Your Content
Storyboarding isn’t just for Hollywood blockbusters. Planning your Instagram Reels can save you a lot of time in the editing process and help you create more cohesive and engaging content.
Concept: Define the main idea or theme of your Reel. What story do you want to tell? What message do you want to convey?
Shot List: Outline the different shots you need. This can be as simple as sketching or writing down each scene. For example, list wide shots, close-ups, and any specific actions or dialogues.
Timing: Instagram Reels can now be up to 90 seconds long (Later) (Vista Social). Plan the timing of each shot to keep your Reel within this limit. Ensure you have a mix of shorter and longer clips to maintain viewer interest
Choosing Your Filming Locations and Times
The right location can add a lot to the mood and tone of your video. Here are some tips:
Location: Choose locations that match the theme of your video. This could be anywhere from a scenic park to your own backyard.
Timing: Film during the golden hours (early morning or late afternoon) for the best natural light. Avoid shooting in the harsh midday sun to prevent overexposed footage.
Background: Ensure the background is clean and uncluttered. A busy background can distract viewers from the main subject of your Reel.
Creating a Rough Cut Edit
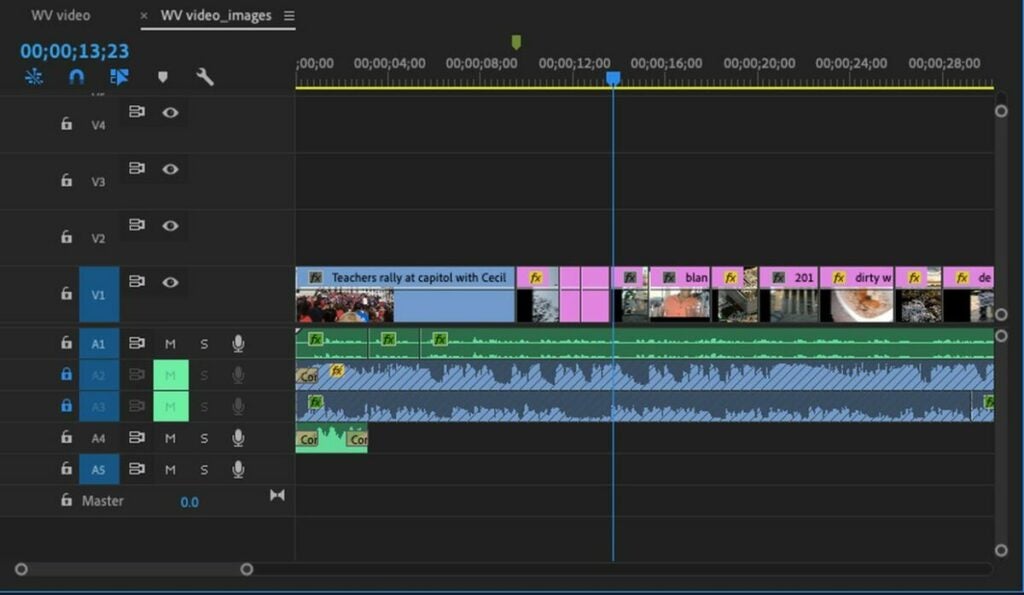
Import and Arrange Your Clips
Once you have your footage, it’s time to start editing. Adobe Premiere Pro provides a comprehensive set of tools for this purpose.
Import Your Footage: Open Premiere Pro and create a new project. Import your video clips into the project bin.
Create a Sequence: Go to File > New > Sequence. Select the preset DSLR 1080p and adjust the settings:
Arrange Clips: Drag your clips onto the timeline and arrange them in the order of your storyboard. This is your rough cut.
Editing Your Fine Cut
Fine-Tuning for Impact
Once you have a rough sequence, it’s time to refine your edit.
Trim Unwanted Footage: Use the razor tool or keyboard shortcuts to cut out unnecessary parts of your clips. Ensure each clip starts and ends at the right moment.
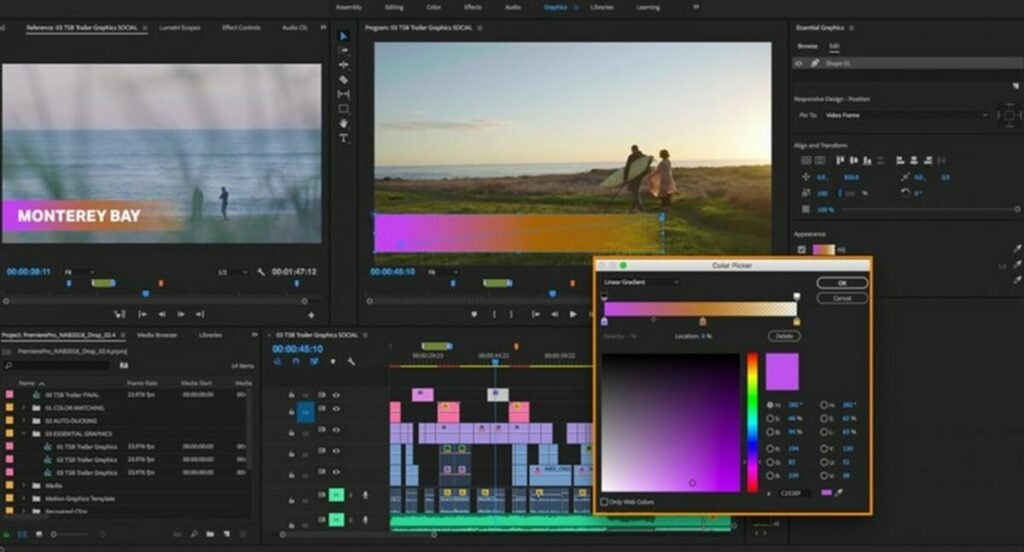
Transitions and Effects: Add transitions between clips for smoother viewing. Use Premiere Pro’s built-in effects to enhance your video. The Lumetri Color panel is excellent for color correction and grading (SocialPilot). Apply color grading to give your Reel a consistent look and feel.
Adjusting Framing: If your clips aren’t in the traditional 9:16 aspect ratio, you can adjust the framing by clicking on the clip and selecting the Effect Controls tab. Under Motion, find Position and Scale. Adjust the Scale to 105 to fill the frame horizontally and set the Position for ideal framing (SM Marketing Dashboard) (Keyhole).
Sound Editing: Add background music or sound effects to enhance the mood of your Reel. Premiere Pro allows you to adjust audio levels and apply effects like reverb or EQ to improve sound quality.
Adding Text and Graphics
Text and graphics can add valuable context or emphasis to your Reels.
Text: Use the Text tool to add titles, subtitles, or annotations. Ensure the text is large enough to be readable on small screens and positioned away from the edges to avoid being cut off (Riverside).
Graphics: Add logos, icons, or other graphical elements to make your Reel visually appealing. Use motion graphics templates for dynamic text animations.
Exporting and Posting Your Reel
Optimal Export Settings
To ensure the highest quality for your Instagram Reels, follow these export settings:
Set In and Out Points: On the timeline, drag to the beginning of your clip and press I. Drag to the end and press O.
Export: Go to File > Export > Media. Choose H.264 for the format. For preset, select Match Source High Bitrate.
Bitrate Settings: Choose VBR 2 Pass. Set the Target Bitrate to 2 Mbps and the Maximum Bitrate to 3 Mbps (Later) (SocialPilot).
Use Maximum Render Quality: Check this option for the best export quality. Save your settings as a preset for future use and export the file.
Transfer and Upload
Transfer the exported video to your mobile device using AirDrop (for Mac users), Dropbox, or Google Drive. Open the Instagram app, navigate to the Reels section, and upload your video. Here are some additional tips:
Cover Image: Choose a cover for your Reel. You can select a frame from the video or upload a custom image. Ensure the cover image is 1080×1920 pixels for optimal display (Riverside).
Caption and Hashtags: Write an engaging caption and include relevant hashtags to increase discoverability. Instagram allows up to 2,200 characters for captions, but keeping it concise is often more effective (SocialPilot) (Vista Social).
Tagging: Tag relevant accounts and locations to broaden your reach. This can help your Reel appear in more feeds and increase engagement.
To maximize the reach and engagement of your Reels, consider these tips:
Timing: The best time to post on Instagram is generally early in the morning when there’s less competition and users are starting their day (Vista Social). Experiment with different times to see when your audience is most active.
Hashtags: Use popular and relevant hashtags to increase discoverability. Research trending hashtags and incorporate them into your post. Tools like Hashtagify or Instagram’s Explore page can help identify popular hashtags in your niche (Vista Social).
Engagement: Respond to comments and engage with your viewers. Building a community around your content can significantly boost its performance.
Analyze and Adapt
Use Instagram Insights to track the performance of your Reels. Look at metrics such as likes, comments, shares, and watch time to understand what works best with your audience. Adapt your content strategy based on these insights to continuously improve your engagement.
View Insights: Navigate to the Reels tab on your profile and select the Reel you want to analyze. Tap the three dots and choose “View Insights” to see detailed performance metrics.
Metrics to Watch: Pay attention to metrics like reach, impressions, engagement rate, and watch time. Higher engagement
Elevate Your Instagram Reels with Professional Techniques
Creating stunning Instagram Reels with Adobe Premiere Pro involves a combination of good filming techniques, meticulous planning, and precise editing. By following the guidelines outlined in this article, you can produce high-quality content that stands out and captures the attention of your audience. Remember to stay updated with the latest trends and platform changes to keep your content relevant and engaging. For more detailed tips and expert advice, be sure to check out our comprehensive Adobe Premiere Pro review and other related resources.
Transform you apps into personalized experiences thanks to IP Stack, the world leading real time location API that will boost customer satisfaction to the max.
Real-time location APIs have revolutionized the way apps interact with users by providing geographical data in real time. These allow applications to pinpoint the location of a user based on an IP address, creating a relevant, personalized, and efficient experience. Ipstack transforms basic applications into smart and location-aware platforms, suggesting convenient interactions with the environment. This significantly elevates any app’s functionality and user experience to the max, becoming an absolute game-changer in how we explore and discover a real-time location through an app.
Whether it’s for delivering location-specific content, enhancing security measures, or providing targeted marketing, Ipstack makes a dramatic difference in how a user interacts with an app. This is achieved by making experiences more tailored to the user’s interests and intents as well as making all interactions more intuitive. In today’s article, we’ll delve deeper into how Ipstack will become a life-changing experience in how you’ll see apps from now on. Would you like to know why?
Ipstack is not just another tool in the realm of Real-Time Location APIs, it’s a comprehensive solution designed to empower apps with instant location. With it, users are able to specialize in determining the user’s location simply by their IP address, becoming crucial data for businesses looking to offer sensitive and meaningful features in their apps. But what makes Ipstack stand out over its competitors?
Ipstack is more than just a Real-Time Location API provider; it’s a versatile, reliable, and secure tool that can significantly enhance the capabilities of your app, irrespective of its scale or user base. These are just a few of the reasons that made Ipstack the go-to choice for anyone looking for a powerful geolocation API.
Unmatching Accuracy
One of the standout features of Ipstack is its geolocation accuracy compared to competitors thanks to leveraging years of data and partnerships with large Internet Service Providers (ISPs). These ensure that the information provided is always reliable, something crucial to significantly impact user experience or business outcomes. Another of its key aspects is its extensive coverage. Boasting over 2 million unique locations in over 200.000 cities around the world, Ipstack is the only service that truly offers a global solution.
Intuitive Interface
In addition to its accuracy and coverage, Ipstack is known to be a program that is very easy to use. The API boasts an intuitive and streamlined interface, perfect both for seasoned developers as well as those who are starting and aim to become professionals. With its comprehensive documentation and quickstart guide, you’ll be able to start running Ipstack in no time.
Keeping your Data Secure
Security is another cornerstone of Ipstack’s service. In an era where data breaches are a constant threat, Ipstack prioritizes the security of the data it handles. By employing robust 256-bit SSL encryption, it ensures that all data is transmitted securely, giving both developers and end-users peace of mind.
Flexibility and Scalable Infrastructure
Lastly, the flexibility of Ipstack is worth noting. Whether your application needs to handle a hundred requests a month or a million a day, Ipstack’s scalable infrastructure is designed to accommodate varying levels of demand seamlessly. Plus, with the option to receive data in either JSON or XML format, Ipstack caters to diverse development needs and preferences.
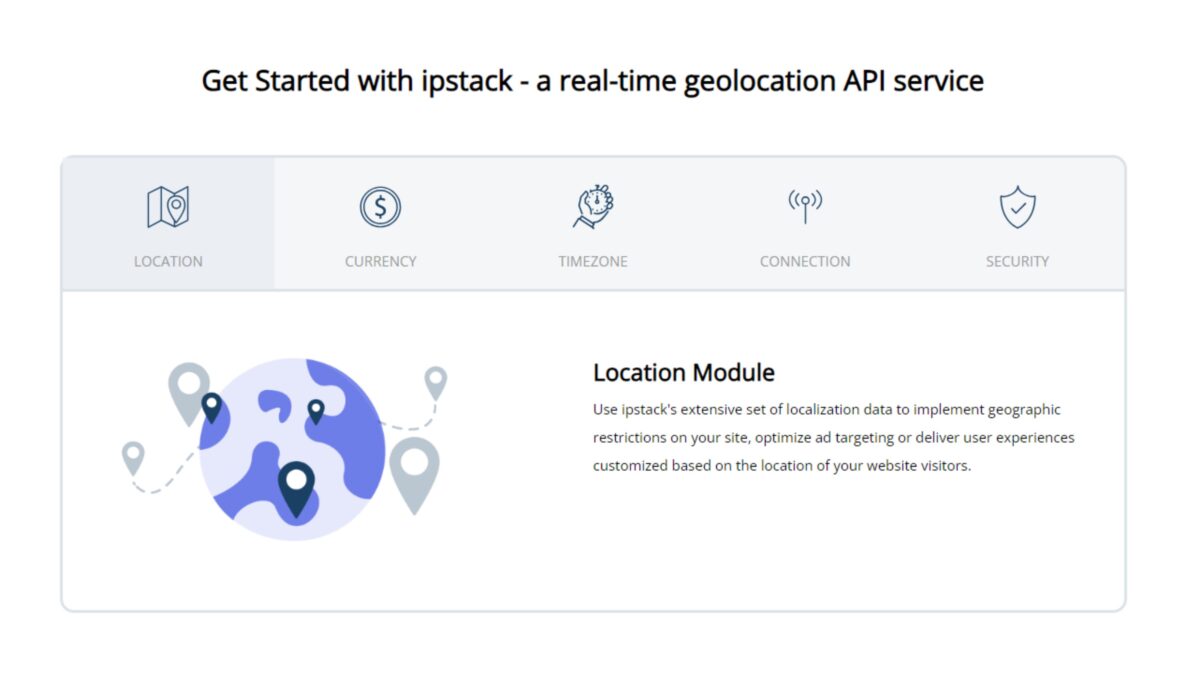
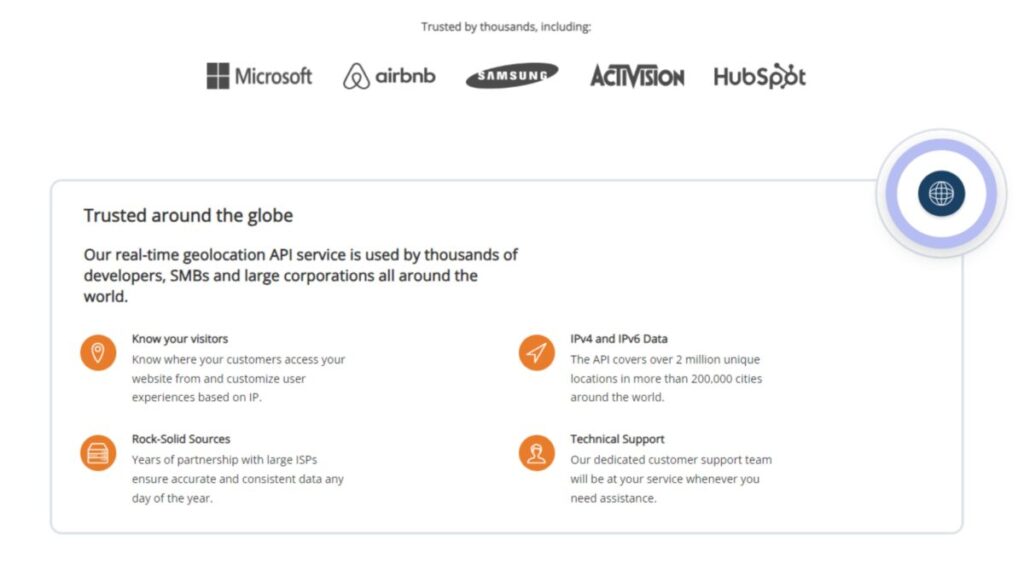
Use Ipstack to Customize User Experiences Through Geo-Location
Using geo-location to customize user experiences is a growing trend and this is where Ipstack truly shines. By pinpointing where customers access an app or a website, Ipstack shares with businesses a whole new world of personalized interactions. These offer companies a better understanding of their geographical context, being a great opportunity to increase user engagement.
Imagine a retail app that adjusts its content based on the user’s location. A customer in Paris sees promotions and products relevant to their locale, while at the same time, a user in Tokyo gets a completely different set of offerings tailored to their regional preferences. This level of customization, enabled by Ipstack’s real-time location data, not only enhances the user experience but also boosts the relevance of the content, making interactions with the app more engaging and meaningful.
Furthermore, geo-location data can be instrumental in enhancing security. By detecting and flagging activities from unusual locations, Ipstack can help businesses implement additional security measures. For instance, if a login attempt is made from a location that’s inconsistent with the user’s typical pattern, it can trigger a verification process, adding an extra layer of security and protecting the user’s account.
Integrating real-time geolocalization into your application might seem daunting at first, but with Ipstack, the process is straightforward and accessible to all kinds of users. Do you want to know how it works? Here’s a simplified overview of how you can enhance your app with geolocation capabilities using Ipstack’s API:
API Key Registration: The first step is to sign up with Ipstack and obtain an API key. This key is essential for accessing the service and is unique to your account, ensuring secure and personalized use of the API.
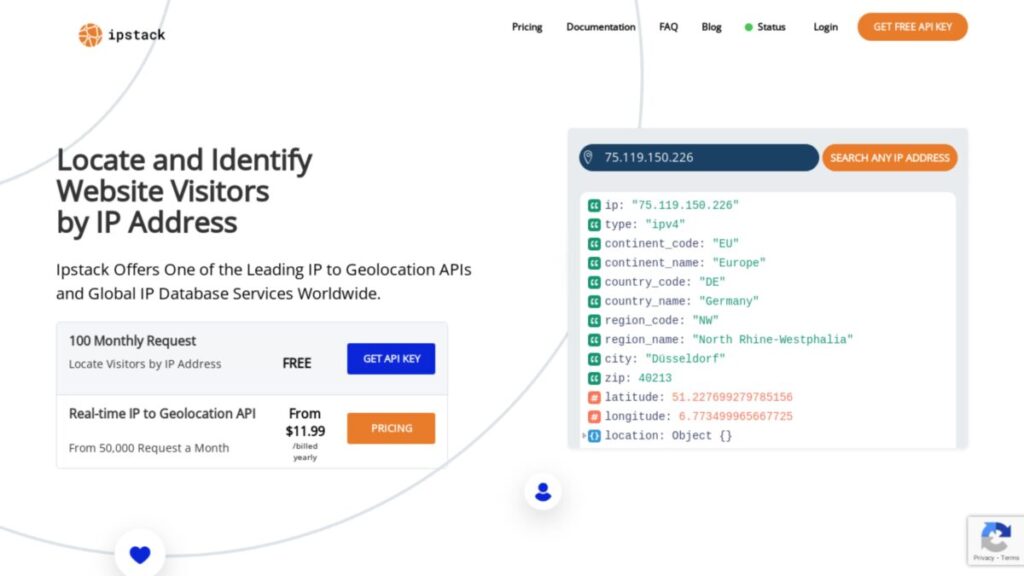
Making a Request: Once you have your key, making a request to the Ipstack API is as simple as sending a web request to a specific URL. This URL includes the IP address you wish to geolocate and your API key. The request format looks something like this: http://api.ipstack.com/{IP_ADDRESS}?access_key=YOUR_ACCESS_KEY. Now you’ll simply have to replace {IP_ADDRESS} with the IP address you’re interested in, and YOUR_ACCESS_KEY with your actual API key.
Receiving and Interpreting the Response: After sending the request, Ipstack quickly processes it and returns a response in your chosen format (JSON or XML). This response contains detailed geographical data related to the IP address, such as country, city, zip code, latitude, longitude, and more. Here’s an example of how a JSON response might look:
This data can then be parsed and utilized within your application to tailor content, enhance user experience, or implement location-based security measures.
Integration into Your App: Integrating this process into your application typically involves using backend services to make requests to the Ipstack API and then using the response data as needed. Most programming languages and platforms can easily handle these requests, making Ipstack compatible with virtually any web, mobile, or desktop application.
Leveraging Geolocation Data: Once integrated, you can use the geolocation data to customize user experiences significantly. For instance, you could direct users to region-specific pages, show them local offers, or even adjust the app’s language and currency based on their location.
The beauty of using Ipstack for geolocation lies in its simplicity. There’s no need for a complex setup or deep technical knowledge. With just a basic understanding of how web requests work and the ability to process JSON or XML data, any developer can integrate Ipstack into their app. This ease of use, combined with the API’s reliability and accuracy, makes Ipstack a powerful tool for enhancing your digital offerings and allows you to focus on creating personalized and dynamic user experiences.
Enhancing User’s Experiences Anytime, Anywhere
In the realm of marketing, Ipstack’s geolocation capabilities enable businesses to run location-specific marketing campaigns. But that’s not all that this amazing API is about. Ipstack’s geo-location service goes beyond identifying where users are; using that information to create a more personalized, secure, and efficient user experience. This approach not only delights users but also provides businesses with a powerful tool to enhance engagement, security, and marketing precision.
Accurate Data Through Years of ISP Partnerships
Ipstack holds a long-standing partnership with large Internet Service Providers (ISPs) that play a pivotal role in ensuring the data offered is accurate. These collaborations are essential for these key reasons:
They Provide Rich, Dynamic Data- Ipstack gains access to a live, ever-evolving repository of local information, ensuring that the data it offers reflects the latest changes in IP allocations and user movements.
Comprehensive Geographic Coverage- Thanks to its ISP partnerships, Ipstack’s data covers various regions of the world as well as accounts for local variations in IP address distributions.
Non-Stop Data Refinement- Long-term relationships with ISPs enable Ipstack to continuously refine and validate its location data. This allows the API to maintain a flawless up-to-date and predictive database.
Ipstack’s API Covers Over 2 Million Locations
Ipstack covers over 2 million unique locations across more than 200.000 cities worldwide. This enables the service’s ability to cater a diverse and global audience, making it an invaluable asset for businesses working on an international scale. These are some of its main benefits.
Worldwide User Engagement- Ipstack enables businesses to identify and engage with users from any location in the world. This is crucial for companies wanting to expand their audience and enter successfully in the international market.
Dependable Localized Services- Whether it’s displaying a website in the local language, adjusting pricing to the local currency, or providing region-specific offers, Ipstack’s global reach empowers businesses to create truly localized experiences for their users.
Enhanced Marketing Strategies- Businesses can launch effective geo-targeted marketing campaigns with ease, no matter where they are located.
Compliance with Regional Regulations- Ipstack’s extensive coverage assists businesses in identifying user locations and ensuring that their services comply with local regulations.
Global Analytics and Insights- Thanks to its broad reach, Ipstack offers interesting insights and data on global behavior. This information is extremely valuable to understanding market dynamics across different regions and helps make informed decisions based on a diverse set of user data.
Customer Support When You Need It
At the heart of Ipstack’s service we can find its unwavering commitment to customer support. Its team is not only knowledgeable about all the technical aspects of the API, but also are able to help users to implement it across different business applications. Whether a client is facing a technical challenge, needs guidance or best practices, Ipstack’s customer support team is always available to provide comprehensive and timely support.
A Scalable Real Time Location API for Every Need
Ipstack’s infrastructure has been designed with scalability at its core, adapting to a wide range of request volumes. From small-scale operations to enterprise-level demands, Ipstack will meet the diverse needs of its varied clientele.
If you’re a small business or a startup, Ipstack will provide a robust platform capable of handling hundreds of thousands of requests per month. As businesses grow and they need to expand, Ipstack’s infrastructure seamlessly scales to match its increase and demand, being able to handle even the most demanding workloads. Whether a company is just starting or is an established player with high-volume demands, Ipstack’s infrastructure is ready to meet their real-time location API needs effectively and efficiently.
A Location API Dedicated to Data Security
With nowadays constant data breaches and cyber threats, Ipstack employs robust security measures, including 256-bit SSL encryption. This powerful security standard is used in protecting online transactions and sensitive data transfers, to safeguard the data transmitted through its API. By implementing this level of encryption, Ipstack ensures that the location data and any other information transmitted between clients’ systems and its servers are secured against interception or tampering.
Ipstack’s Real-Time Location API is an essential tool for enhancing app functionalities. Its ease of use and integration, commitment to data security and scalability make it the stand out choice for businesses all over the world. Its extensive coverage across millions of locations globally, combined with its precision and reliability make it an strategic asset for any digital endeavor. Choosing Ipstack means accessing a tool that isn’t just powerful and versatile, but also user-friendly and secure, making it the ideal choice for companies aiming to excel in the digital world.
Learn how to use generative AI in Adobe Stock with FireFly and Motion Graphics templates to enhance your videos and images
Adobe Stock is adding value to videos and images with several new features. Firefly-powered workflows. Team leaders and individuals can now use the power of generative AI to move their imagination to the screen in front of them. As for the new stock of video templates, Motion Graphics combines the worlds of Adobe Premiere Pro and Adobe After Effects to bring you an updated library with superb content.
With an Adobe Stock membership, you’ll have access to more royalty-free assets numbering over 355 million. You’ll find images, music, video templates, illustrations, vectors, 3D assets, and more for your projects. Here’s what FireFly and the new video templates have to offer.
FireFly Text-to-Image: Transform Your Text Into Stunning Graphics
Creating stunning visual elements for your content can be incredibly challenging, especially if you’ve never done a marketing design course in your life. Fortunately, there’s an easier way to transform your ideas and concepts into something tangible within a few seconds with Adobe Stock’s FireFly platform.
FireFly lets you use text prompts to state what you’re looking for, producing concept images within a matter of moments. From there, you and your team can develop the picture further if you need to add a few elements or change some aspects. In this way, you’ll have an array of banners, graphic ads, infographics, and more in almost no time at all.
Extend Visual Assets with FireFly’s Expand Image Tool
While Adobe Stock has plenty of images that you can use for your marketing campaigns, you may want to extend the picture to match the size of your banner. Stretching or resizing the image doesn’t work well, as you lose quality and pixel density. A better option is to use FireFly’s Expand Image tool.
Not only can you set the required dimensions of your image, but FireFly can also expand the picture into the additional space with generative AI. You won’t even need to use a prompt for this feature, as the tool analyzes the image content provided and then uses machine learning and design to produce the extra visuals.
Concept to Motion with After Effects Templates
Let’s say you’ve developed the main content of your video, but that’s not the end of the process. You need an intro and conclusion, transitions from one scene to another, better fonts for text over video, and other minor details. If you’ve worked on enough videos as I have, you’ll know that adding all these elements is what takes up a lot of your time. If only there were a way to speed up the process without losing quality.
Fortunately, Adobe Stock has After Effects templates for precisely this reason. You’ll have stock intros and conclusions that you can completely customize to match your vision for the final product. Also, you can play around with typography and transition effects in a much easier way to save you time in the long run.
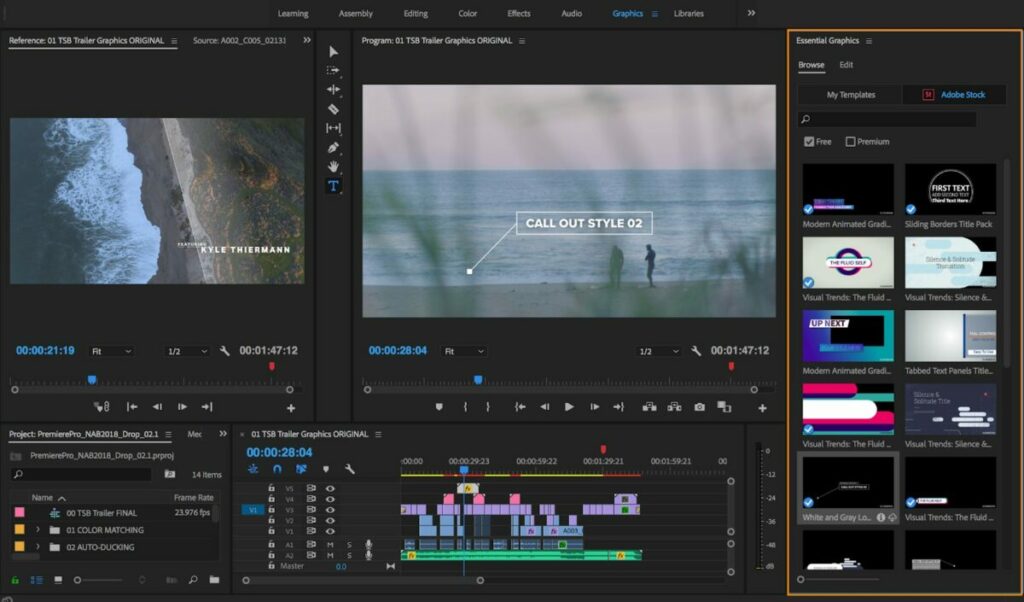
Premiere Pro Templates: Enhanced Style and Structure
As with After Effects, Adobe Stock also supplies Premiere Pro templates where you can drag and drop various elements into your video. Whether you need a title sequence, lower thirds, dynamic slideshows, or stunning effects, these templates have exceptional styles and structures that will draw in your viewers.
The best part is how much time you’ll save with these ready-to-use Adobe Stock structures at any time. It streamlines your video-editing process, making sure you have more time in the day to make more content or spend time with your family. It’s all about enhancing the value to life while getting stuff done.
Put it all Together with Adobe Stock Motion Graphics Templates
Another exciting feature in Adobe Stock is Motion Graphics. With this tool, you can take static images with text and make them move with animations. You’ll find these MOGRT content files beneficial when you want to add exciting moving images or videos to social media. Also, you’ll be able to share episodic content throughout the week to keep the audience engaged.
Now, you have an entertaining way to take bland stock images and transform them into content that catches the eye. Say goodbye to dull filters and effects that you take hours to apply, and hello to Motion Graphics that you can quickly add in Premiere Pro with Adobe Stock.
Adobe Stock: Generative AI and Enhanced Videos at Your Disposal
With Adobe Stock, it’s more than simply creating better content with templates and generative AI on one platform. What’s more, you’ll be more productive and create more images and videos in less time. You’ll be working with a brand that’s known worldwide for its spectacular tools and solutions for your video-content challenges.
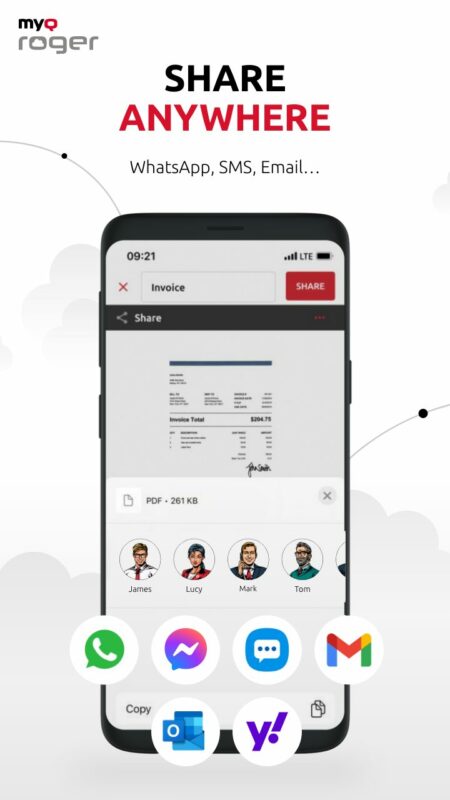
Are you tired of running around with papers, moving them from office to office or even to another building, just to have them signed, scanned, and then sent via email from your PC? Such a traditional way of working wastes hours of the day, especially when you have plenty of other tasks to complete. Fortunately, MyQ Roger may be the solution you’ve been looking for, especially at this crazy time of the year.
In this quick guide, I’ll show you how MyQ Roger can help you become more efficient with paperwork and notes in various industries. Even if you work remotely for a company overseas, it’s the ideal solution to deal with those documents you need to print, sign, scan, and send. Let me show you how this mobile application can make your life and career easier.
MyQ Roger Print and Scan On a Whole New Level
Let me begin with one of MyQ Roger’s top features. If you have documents saved on the cloud (OneDrive, GDrive, etc), you can quickly access them on your smartphone and connect them to your office or home printer. It helps if you’ve saved a contract or important document on your online storage platform and quickly need to print it from someone else’s printer. Say goodbye to emailing it to yourself for later retrieval.
What if someone has signed a document before you or you see a poster you want to save? MyQ Roger also has an advanced scan feature. This element is especially useful when you’re out on the job or on-site, and you need to save a document to your company’s ERP system. You don’t have to stress about losing those invoices anymore!
The best part is that you don’t have to worry about troublesome drivers for your printer. MyQ Roger connects directly with your printer’s system. And even better is that you can scroll through your cloud files on the printer’s touchscreen!
Transform Your Workplace into a Digital Environment
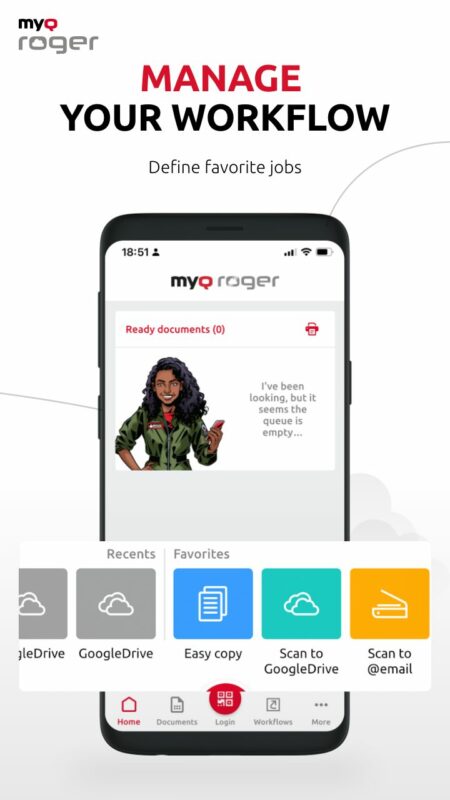
MyQ Roger is more than a simple print and scanning mobile app. It can help transform your workplace into the digital sphere. If you’re in a meeting, you and your team can quickly access any of your cloud files for discussion. It also lets you automate many of your business processes to make your work day more effective and enjoyable.
Are you worried about hygiene and everyone touching your phone or the same IT equipment in your office? With MyQ Roger, you don’t have to stress about that anymore. It has a built-in virtual assistant that you can speak to, and the voice commands provide excellent service for your multiple tasks. Simply tell it to scan a document and email it to someone, and it will do so!
Of course, such efficiency brings about the question of data security. Don’t worry; MyQ Roger also has that covered. The app creates dynamic QR codes for anyone logging into your multifunctional printer. Also, it encrypts the documents or information you save so that no one can tamper with them while you scan, print, or email them.
Place Optical Character Recognition in Your Pocket
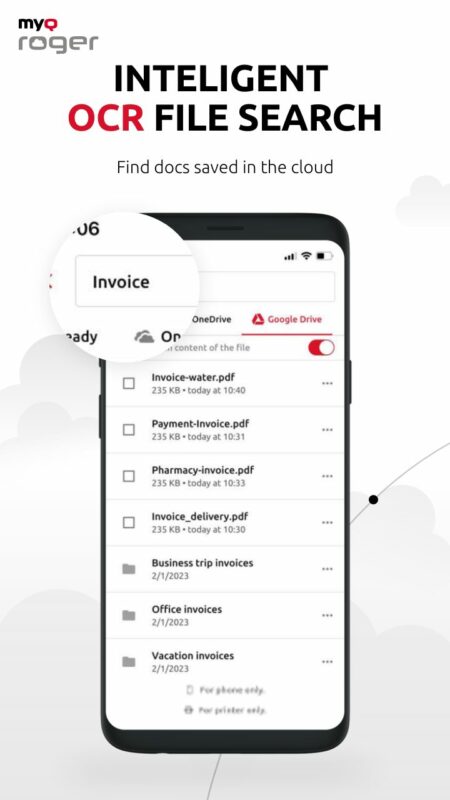
This feature is one that tickles my fancy as an author. Have you ever taken notes on paper that you then have to retype later onto your laptop or PC? It’s annoying, right, needing to do the same thing twice and waste time? With MyQ Roger, you can simply scan your notes using the OCR feature. It has advanced technology to recognize texts and scan them into a document on your phone.
From there, you can save it to your OneDrive, GDrive, or other cloud storage platform. I usually use OneNote for planning my novels, so it’s good to know I can scan and send my handwritten notes to this platform to work through later when I get to my laptop.
The same principle applies in the traditional or virtual office. It doesn’t only work in English, but also in several other languages and localizations. The best part is that you carry MyQ Roger around in your pocket on your smartphone, so you don’t have to worry about bulky devices with OCR features. All you do is whip out your phone and access the app, scan the images with text or notes, save the new document, and search for it anytime for easy access!
Once everyone on your team has MyQ Roger on their smartphones, your mobile becomes the heart of your business. You can easily collaborate on documents, quickly save invoices to company systems, check and print workflows or automated tasks, and so much more!
There are also useful extensions you can download for the app. For example, MyQ X Mobile Client is useful for flexible solutions to document processing. If you need to print a document for a meeting you’re in quickly, you can use this extension to change some variables before sending it to a nearby MFP for printing.
What if you would like to move all documents and files from traditional storage on your company servers to the cloud? Guess what? MyQ Roger can assist with that, too. It helps with cloud migration services much quicker than most conventional methods. Plus, you obtain more advanced security for your files while still retaining quick access at any time.
Alright, so I’ve thrown a lot of information about MyQ Roger at you in a short amount of time, and this article only covers some of the features. As a quick overview, here are some key points:
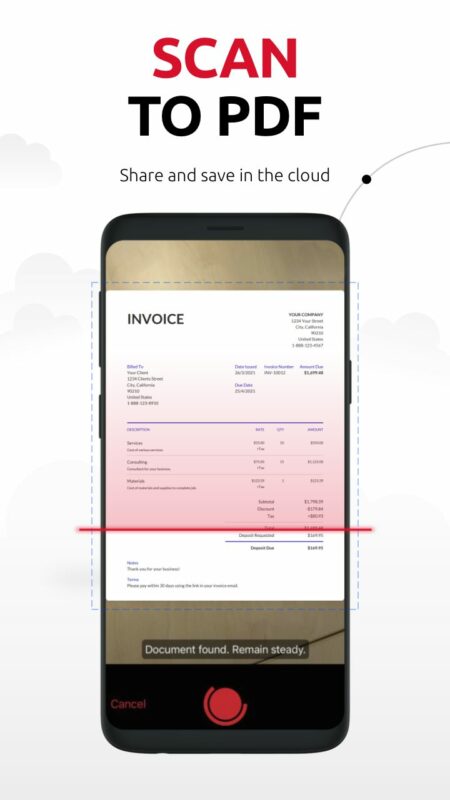
Scan a document from anywhere using your phone
Turn that document into a PDF for lighter storage and easier reading
Save that document in the cloud directly from the app (GDrive, OneDrive, DropBox)
Access that document in the cloud and request printing using the phone
Password protect the document before sharing
Use OCR technology to search for documents and extra text from images
Are You Ready for a Digital Workplace Revolution with MyQ Roger?
It’s time to make your work and personal lives easier and move into the digital era. I know it can be scary at first, but you’ll see just how beneficial MyQ Roger is if you give it a try. So, the next time your boss asks you to scan a signed document or run to your PC to print the agenda for a meeting, impress them with your newfound knowledge and efficiency. Pull out your phone and perform the tasks right there!
Being an Exchange administrator, one of the biggest problems you can face is Exchange Server downtime. You cannot prevent Exchange Server downtime, especially when your company/organization depends on standalone Exchange Server.
The Exchange Server can get down at any point in time due to different reasons, including server crash, hardware failure, software-related issues, malware/virus attacks, database corruption, and human errors.
This can affect the productivity and result in data loss, thus impacting your organization’s business. However, you can reduce Exchange Server downtime if you keep regular verified backups and implement some best practices that can help in restoring the data and services when an issue occurs or a disaster strikes.
In this guide, we’ll mention some best practices that you can follow to minimize Exchange Server downtime, recover the server and data, and restore the services without any impact on the users.
Best Practices to Minimize Exchange Server Downtime
The following best practices can help you minimize Exchange Server downtime in case of a disaster and also help to recover the data and restore the services without any impact.
1. Maintain Regular Verified Backups
To prevent data loss and avoid downtime, you must maintain regular backups and also verify them periodically. In case of an issue with the server, backups will ensure that the company will not lose the data. You must also verify the backups from time-to-time to make sure that they’re healthy and can be restored when the need arises.
On the other hand, it’s important to purchase and install an application-aware backup solution/software, which is compatible with the operating system and the version of Exchange Server installed. Before purchasing any backup software, it’s best to consult with your vendor and supplier.
2. Ensure Sufficient Storage Space
With continuous storage of emails and other mailbox data, database size may increase over time. Also, generation of large number of transaction logs can quickly consume the entire storage on the drive. Lack of disk space may cause database corruption. Therefore, it is critical to have enough free space on the drive, storing the database and the transaction logs.
Thus, it is always recommended to keep the databases and the transaction logs on different volumes or drives, especially if you’ve standalone Exchange Server. This can help in conserving the storage space and recovering the database in case of inconsistencies or uncommitted transaction logs. You can also use a proper backup software that can take the backups regularly and automatically truncates the transaction logs, thus freeing up the storage.
3. Install Powerful and Application-Aware Antivirus Program
It is important to have an antivirus program installed, which is application-aware and compatible with the version of your Exchange Server. The antivirus program must be powerful enough to mitigate known viruses and day-one mitigations, and ensure that no virus, ransomware, or malware attacks the server. It should protect and mitigate an infection immediately.
In addition, the database files should be excluded from the real-time scanning as these will be locked by the Exchange Server. The antivirus software must be constantly updated and renewed.
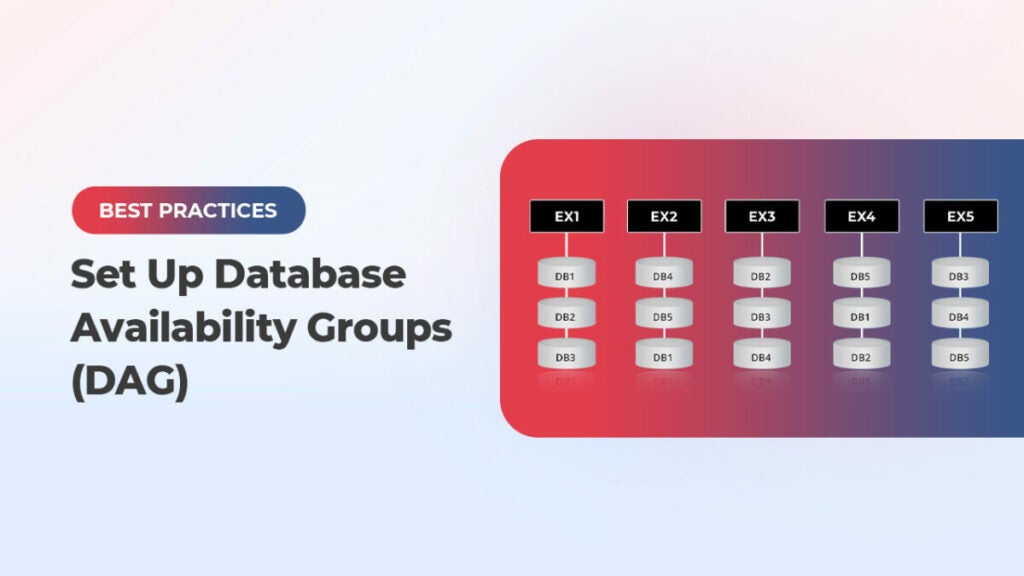
4. Set Up Database Availability Groups (DAG)
You can consider setting up the Database Availability Groups (DAG). In a DAG setup, you can have a group (at least two) of Exchange mailbox servers that can host a set of databases. This will provide automatic recovery in case of a disaster. This means you will have another server in your setup with an Exchange Server installed that constantly synchronizes the databases from the active server to it. In case something happens to the first server, the services and database will automatically switch to the other node/s in the cluster with no user or client intervention.
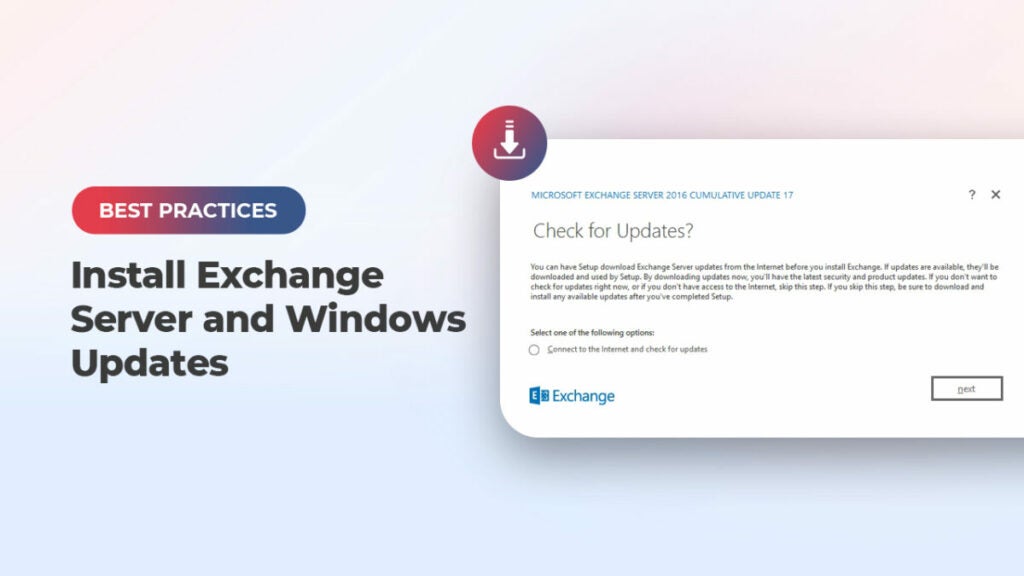
5. Install Exchange Server and Windows Updates
It is crucial to install the Exchange Server and Windows updates as and when they arrive. These updates, periodically released by Microsoft, boost the security of the services and contain patches or fixes for known vulnerabilities and other issues. Such updates also include new feature updates.
However, you need to be careful when installing such updates as the process is tricky. Interruption during the updates installation may lead to issues with the server and impact the services.
When having the DAG setup, you should first put a node in maintenance mode, install the update, and then test the update for at least a week. When everything is fine, move to the other node. You should not install updates on all nodes at once. If there is an issue with the update, it can affect the entire setup.
6. Ensure Uninterrupted Power Supply
Sudden loss of power can damage the Exchange Server database and transaction logs. In case of sudden outage, the database wouldn’t get enough time to smoothly shut down and commit the changes. This can lead to Exchange Server downtime. Therefore, it is essential to have a stable and uninterrupted power supply. You must have an Uninterrupted Power Supply (UPS) system with enough backup batteries to ensure that the server is turned off properly in case of a power outage. Alternatively, you can have a generator that can immediately start when the power is lost.
7. Install a Monitoring System
It’s best to prevent the issue before it happens. So, it is important to have a monitoring system installed to constantly monitor the Exchange Server’s operating system, resources, storage, network performance, and internet connection bandwidth. In case of an issue, the system will sent an SMS, email or even a call to the support team. This will help take preventive measures in case something is failing or about to fail. You can also put in place a monitoring system to monitor the event logs for any critical report.
8. Be Ready for Exchange Server Recovery
As you can’t avoid disasters, the best you can do is to keep yourself ready to recover from eventualities, without much impact. Disasters, such as crashing of server, failure of hardware or software, corruption of databases, etc. can lead to Exchange Server downtime and loss of data. When the disaster strikes, the first priority is get the services up and running. Depending on the eventuality, you can take steps to recover the server or the database. In case of server failure, you can rebuild the server using the setup /m:RecoverServer command. You can use the EseUtil (Soft Recovery or Hard Recovery) to recover the database from the Dirty Shutdown state. You can also use the Recovery Database (RDB) and perform Dial Tone Recovery.
For quick recovery of data and minimizing the Exchange Server downtime, you can keep specialized Exchange Recovery applications in hand. One such tool is Stellar Repair for Exchange. It can recover user mailboxes, archives, disabled mailboxes, shared mailboxes, and public folders from crashed servers and corrupt databases. It is a GUI-based application, which is easy-to-use and can recover multiple databases of any size and from any version of Exchange Server. The application can directly export data from corrupt Exchange database files to a live Exchange Server or Office 365, thus reducing the downtime.
The video below demonstrates how Stellar Repair for Exchange works.
Conclusion
You can experience Exchange Server downtime due to various known and unknown reasons. However, you can minimize the downtime by following the best practices mentioned in this guide. You must maintain regular database backups. These can come in handy in case of corruption or any other issue. It is highly recommended to test the backups to ensure that they are working fine. If the backups are obsolete or not available, you can use the EseUtil to repair the database. However, EseUtil may not always work or result in data loss (in case of Hard Recovery). In such a case, you can rely on an Exchange recovery application, such as Stellar Repair for Exchange. This can help you extract data from corrupt database and export it directly to a live Exchange Server database, thus minimizing the downtime.
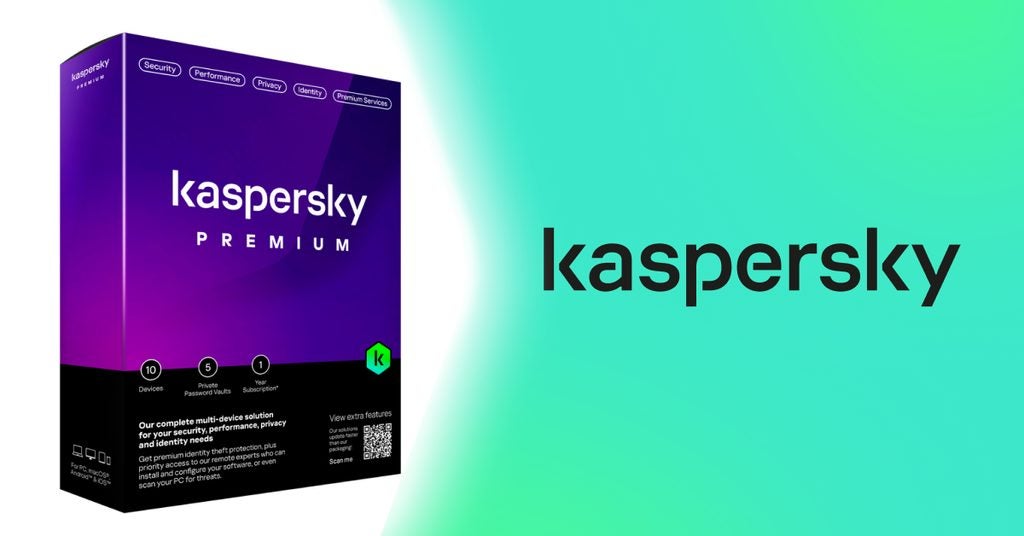
In a world where hackers thrive, you’ll want a solution like Kaspersky Premium to defend your devices. Learn more here!
In today’s world, our lives are integrated with tech. You very likely have your credit card information stored on your smartphone. You also probably use e-banking platforms to manage your account. The list goes on and on. With Kaspersky Premium, you don’t have to risk having these details stolen.
In such an environment, it’s logical to assume data theft is a potential issue. What’s not so easy to envision is the many ways in which this can happen. From phishing to viruses and other types of malware, you’re at constant risk.
You can mitigate those risks with an all-inclusive antivirus such as Kaspersky Premium. In this article, we’ll delve into what Kaspersky Premium can do for you so you can decide for yourself whether it’s worth it.
A Bit About Kaspersky
Let’s check out what Kaspersky is first. With over 400 million users, Kaspersky is a globally renowned security company operating in 200 countries. It has a team of more than 4,000 security experts working to provide cybersecurity tools and solutions.
Besides its in-house team, Kaspersky collaborates with other IT security vendors and even law enforcement, both national and international, to fight cybercrime.
The first thing you can notice about Kaspersky Premium is its simplicity. Unlike other software, it requires no activation codes. You can do it online if you need to change your settings or renew your license.
Kaspersky’s approach to sharing is also commendable. Your subscription lets you share its protection features with friends and family. This is immensely helpful when monitoring several devices at home.
Now, what can Kaspersky Premium do for you? Roughly speaking, its features can be divided into several areas, including security, performance, and identity. Let’s explore what’s available under such categories.
Security features are pretty robust in Kaspersky Premium, as it offers many options to keep malware at bay.
As an antivirus, Kaspersky Premium can detect, block, and remove viruses, worms, CryptoLockers, rootkits, spyware, and Trojans fast and efficiently. This is thanks to several technologies, including “a rapid threat detection feature. It makes a real-time analysis of files, websites, and apps on all devices.
Whenever you visit a dangerous website, it displays a warning and colors the URL codes based on the threat level. This is done in combination with data from Kaspersky Security Network, which means updated information.
If someone’s attempting to hack your system, Kaspersky Premium has also got you covered. It scans your PC in real time to prevent suspicious activities and ransomware. It also has an “incoming and outgoing network request” feature, which allows you to track inbound and outbound connections. This software also warns you of phishing links.
And, of course, it excels at removing existing malware from your system. It also lets you download “Kaspersky Rescue” on a flash drive to retrieve your data if the system is compromised.
One of the ways it does so is by checking your passwords against the ones found in compromised databases. It also stores valuable documents, such as your ID, in an encrypted format.
Thanks to its Stalkerware tool, your privacy is also boosted in other ways. This tool prevents unauthorized ads and the unauthorized tracking and use of peripherals. Kaspersky Premium keeps social media and other sites at bay by not allowing them to extract private information.
But what if someone’s trying to access your WiFi network? The software sends you an alert whenever a new WiFi device is detected. It also prevents access to your webcam.
An ingenious way in which hackers access data is via keyloggers. They send your keystrokes to hackers, who can check your passwords and everything you type. Kaspersky Premium, naturally, prevents keyloggers from recording.
It also has a competent, unlimited VPN that masks your IP and prevents the device from accessing the Internet when disconnected to prevent data exposure.
Keep Your System in Top Shape
Kaspersky Premium is also the best “housekeeper” for your devices. It helps to manage your storage space by eliminating unnecessary data, showing the less-used apps, creating alerts for faulty hard drives, and more.
Also, it disables unnecessary apps at the startup so your PC boots faster; it removes invalid registry entries, empties the recycling bin, and more.
A major source of hacking is outdated software. Kaspersky Premium knows this, and it monitors your system to check for new updates. If found, it prompts you to install them.
Sometimes, annoying software is using your system resources. Kaspersky Premium detects them and allows you to close them to improve performance. The software won’t run virus scans or updates if you’re low on battery.
How Kaspersky Works
If you’re interested in Kaspersky Premium, you should know it’s a subscription model. You simply pay for the initial period, and the number of devices is informed, as well as when the period ends and the renewal price for the next period.
You don’t need to do anything extra after that initial payment. Kaspersky will charge you the renewal costs 15 days before the end of the current period, so the protection isn’t interrupted. You also get email reminders about the upcoming auto-renewal.
As you can see, Kaspersky Premium isn’t just an antivirus. It’s a fully-fledged suite for protection and performance improvement. It helps millions feel safe online and can do the same for you.
TeamViewer, a titan in secure remote connectivity, unveils an exhilarating Black Friday offer. Right now, new subscribers can receive up to 40% discount awaits. This is not just a promotional event—it’s your gateway to the forefront of remote connectivity technology.
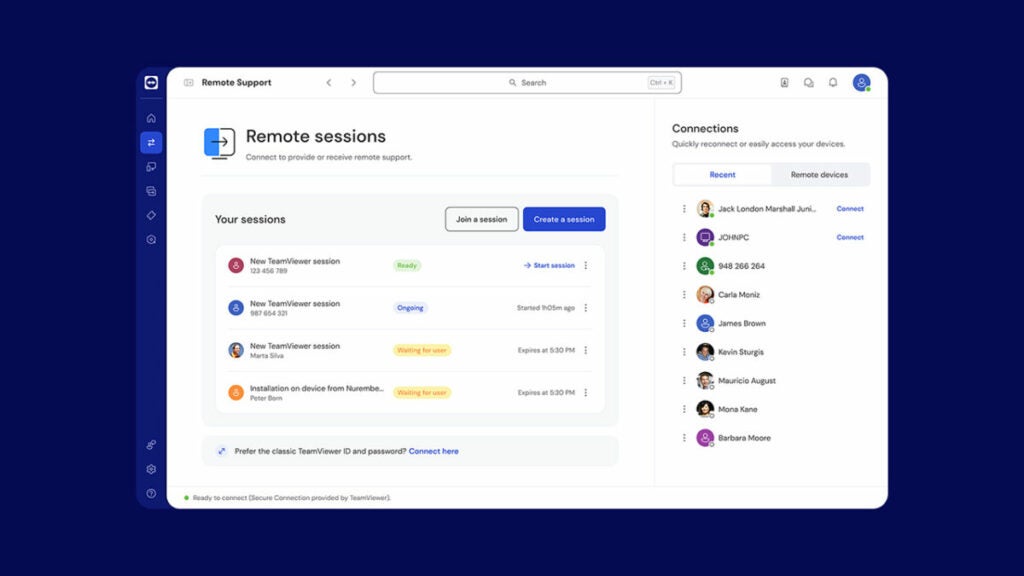
The Quintessence of Remote Access: TeamViewer Remote
TeamViewer Remote is a multifaceted tool for remote access and support. Its prowess in connecting devices globally anytime has revolutionized traditional IT management and support paradigms.
Transforming Downtime Dynamics
Minimizing Operational Interruptions
In today’s tech-driven world, delays due to technical glitches carry hefty costs. With TeamViewer Remote, swift and secure remote support facilitates fast issue resolution, reducing costly downtime and safeguarding operational efficiency and financial stability.
Fostering Remote Work Culture
Eradicating Geographical Constraints
TeamViewer Remote pioneered the remote work revolution, enabling users to perform IT tasks from any location. This adaptability enhances productivity while promoting work-life-balance. Secure, VPN-free access to your systems ensures uninterrupted work, regardless of your physical location.
Streamlining Device Management
Effortless Handling of Distributed Networks
TeamViewer Remote stands out for its ability to overcome challenges and reduce costs associated with managing widespread device networks. From screen sharing on iOS to supporting Android devices and overseeing POS systems and digital signage, TeamViewer provides a comprehensive solution.
Proactive IT Maintenance
Boosting Infrastructure Efficiency
TeamViewer Remote empowers IT support teams to work proactively by enabling constant monitoring of devices and ensuring timely interventions. Regular deployment and updates of applications and operating systems are key to maintaining a robust IT infrastructure.
Advancing with TeamViewer Augmented Reality
Innovative Solutions with Assist AR
TeamViewer integrates augmented reality via Assist AR, bringing comprehensive support to the field. This feature allows on-site personnel to receive expert guidance through smartphones, effectively addressing hardware and operational challenges. This innovative approach reduces travel costs, enhances process efficiency, and boosts customer satisfaction.
TeamViewer Tensor elevates remote connectivity, offering a robust solution tailored for enterprises. It integrates seamlessly with complex corporate networks, enhancing management and security. Tensor’s advanced protocols and standards-compliant design safeguard sensitive data, while its scalable architecture meets diverse business needs, making it an ideal choice for expanding remote capabilities in large organizations efficiently and securely.
TeamViewer Frontline: Revolutionizing Workforce Interactions with AR
TeamViewer Frontline transforms frontline worker interactions using industrial augmented reality (AR). This platform enables hands-free access to information, simplifying complex tasks and enhancing efficiency. Frontline’s real-time data visualization aids in quick decision-making, boosting operational efficiency and workforce productivity, marking a significant advancement in industrial and manufacturing settings.
Diverse Applications Across Industries
After-sales Service Solutions
TeamViewer is an exceptional tool for enhancing after-sales service. By providing efficient customer support and enabling remote access to machines and devices, TeamViewer significantly reduces downtime and elevates customer satisfaction. This functionality is crucial in industries where timely support and maintenance are key to operational success.
Vision Picking in Warehousing
In warehousing logistics, TeamViewer’s vision picking solutions, leveraging smart glasses and real-time data visualization, transform inventory management and operational processes. These advanced tools not only enhance efficiency, but also contribute to reducing errors and streamlining workflows. The use of AR technology in these solutions represents a leap forward in how warehouse operations are managed, setting a new standard for the industry.
TeamViewer’s commitment to security is evident in its robust design, incorporating advanced features like conditional access, two-factor authentication (2FA), and single sign-on (SSO). These security measures are crucial for maintaining the integrity and safety of remote connections.
Moreover, TeamViewer’s compatibility with a wide range of devices and operating systems enhances its versatility, making it an ideal solution for various environments and user needs. Whether you are an individual user or large organization, TeamViewer ensures secure, flexible, and accessible remote connectivity that aligns with the evolving demands of the digital landscape.
Comprehensive Remote Management and Mobile Device Support
TeamViewer provides an extensive array of remote management capabilities, catering to a diverse range of needs. This includes specialized support for mobile devices, ensuring seamless management and troubleshooting across various platforms. Additionally, TeamViewer emphasizes security with robust endpoint protection, safeguarding devices against potential threats.
A notable feature is its support for embedded devices and the unique ability to facilitate iOS screen sharing, a functionality that greatly enhances remote support and collaboration possibilities. This comprehensive support framework makes TeamViewer an invaluable tool for maintaining and managing a wide array of devices effectively.
User Reach and Reliability
TeamViewer’s reliability is exemplified by its remarkable global user reach, with 320 million active devices and a staggering 2.5 billion downloads, underlining its widespread popularity and trust. The platform’s impressive average uptime of 99.99% demonstrates its commitment to providing consistent and reliable service, ensuring users have access whenever they need it.
Accolades and Recognition
TeamViewer’s excellence has been widely recognized in the industry. It was named a leader in Remote Desktop at G2 Fall 2023, awarded the title of Top Remote Desktop Software 2023 by TrustRadius, and won the Best Automotive Solution at the XR Awards 2023, reflecting its innovation and quality in providing remote connectivity solutions.
TeamViewer: A Modern Digital Necessity
TeamViewer’s Black Friday offer invites you to join a platform revolutionizing remote connectivity. With its comprehensive features designed to boost productivity, streamline management, and foster innovative problem-solving, TeamViewer is an indispensable tool in today’s digital landscape.
Act Now with TeamViewer Black Friday Deals
To take advantage of this limited-time offer, visit TeamViewer’s homepage for details and direct access to the discounts. Special discounts up to 40% f are accessible through the respective links provided.
Affiliate Disclaimer: We may receive a commission for purchases made through the links in this post.


