Racing games are a great way to get a rush of speed and adrenaline, and you don’t even have to leave your living room. Relax, turn on your PC, and instantly find yourself behind the wheel of the best race cars on the planet.
The possibilities are endless, from professional racing on Formula 1 tracks to urban drag racing, where you have to burn asphalt to become champion (or die trying). There are many kinds of racing games, but they all have one thing in common: they’re incredibly fun.
In today’s article, we’re going to look at some of the best free-to-play racing games out there. As incredible as it may seem, you don’t have to spend a lot of money to enjoy some of the best video games on the market. You don’t believe us? Keep reading to find out more!
Do I need to install a program to play these video games?
A number of the games on our list work through Valve’s digital gaming platform, Steam. That means you’ll need to install the client program on your computer and download the game from the platform. If you don’t have Steam on your PC, don’t worry. You can download it securely by clicking below. It’s completely free!
And now, without further ado, here’s the list of our favorite free-to-play racing games.
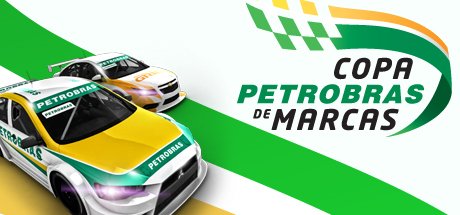
Copa Petrobas de Marcas
Unless you’re a fan of Brazilian racing, the name probably won’t ring a bell, but the Copa de Marcas is one of the country’s most famous races. Its official game, Copa Petrobas de Marcas, is a great racing simulator. It’s completely free-to-play and has no annoying microtransactions. You can drive a wide assortment of cars from different manufacturers and race on the best tracks in Brazil (Interlagos, Curtiba and Goiânia).
Copa Petrobas de Marcas is a decent game as far as graphics go, and it’s clear that special care was taken to perfectly recreate the race cars. Its physics engine, which does a pretty good job of imitating drifting on the track, also deserves special mention. Although the game’s rendering engine may seem old, it still amply meets our requirements, especially considering that this game is completely free.
Finally, keep in mind that Copa Petrobas de Marcas isn’t an easy racing simulator, but it’s quite fun and challenging. To crush your rivals, you’ll have to configure your car to the letter and even choose the kind of fuel you want to use. If we had to criticize something about this game, it lacks a multiplayer mode, so you always have to play against its AI. Want to check it out? You can download it quickly and safely by clicking below.
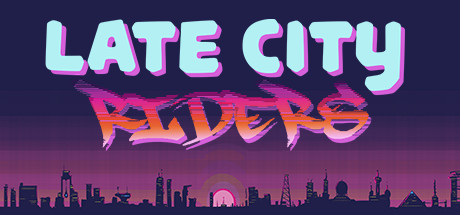
Late City Riders
When driving home after a hard day’s work, have you ever fantasized about flooring the gas to reach your destination as soon as possible? If so, Late City Riders is the game for you. Here, instead of competing against other vehicles, you’ll race against the clock at full speed, trying to finish the course in one piece.
While Late City Riders is no graphical wonder, it’s truly fun. Its courses are wild, full of dangers, and designed to keep your eyes glued to the screen. The slightest blunder or false move will send your poor alter ego flying out of the car! You’ll need lightning-quick reflexes to pass its 20 challenging stages.
Late City Riders is a different choice for racing fans who want a good, free-to-play video game for hours of fun. Click below to download it quickly and securely.
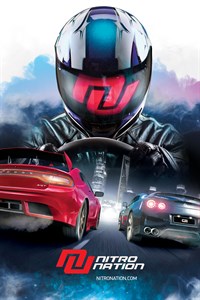
Nitro Nation Drag & Drift
Nitro Nation Drag & Drift is a tough racing game where the important thing is not to overtake your opponents on a track, but to finish the course long before they do. To succeed, you have to be familiar with every detail of your car and know exactly when to enter curves. Only the best driver will win.
If you’re one of those people who can’t enjoy a racing game unless it has good graphics, you can breathe easy. Nitro Nation Drag & Drift has stunning visuals and perfectly recreates all of its vehicles. What’s more, all the cars that appear in the game are real, so with a bit of luck, you’ll be able to choose the one you’ve been dreaming about for so long.
As for gameplay, Nitro Nation Drag & Drift features an interesting mix: unlimited customization of its more than 100 cars and a simple driving experience where all that matters is fun. Finally, keep in mind that this game has many playing options and an incredibly fun multiplayer mode to compete with friends all over the world. And it’s completely free! If you want, you can play it on both PCs and Android phones.
- PC version
- Android version
Project CARS – Pagani Edition
Racing game veterans are probably more than familiar with Project CARS, but… is there a completely free version? We’re pleased to inform you that the answer is yes: Pagani Edition offers the best of the original game, and you won’t have to pay a dime for it. The only “drawback,” if you could even call it one, is that all the cars are Pagani models.
Although the game is a few years old (2016), Project CARS – Pagani Edition continues to thrill us with its realistic graphics and breathtaking scenery. You can even drive along the French Riviera! What’s more, it perfectly combines the simulation experience with high-speed driving. As for playing modes, Project CARS – Pagani Edition has two: Quick Race Weekend and Time Trial, which fully immerse you in the best driving scenarios.
As you can see, Project CARS – Pagani Edition is a perfect way to get a “taste” of Project CARS if you’re interested in buying the game but want to try it out first. It’s also a great option if you’re simply looking for a good, free-to-play racing game. In addition, the game supports the Oculus Rift helmet, so you can literally feel like you’re behind the wheel of its race cars. Interested? Download it for free by clicking below.
RaceRoom Racing Experience
RaceRoom Racing Experience is a free racing game that you’ll never get tired of playing. Since the developers are constantly improving it, this game always has interesting new features. Even if you have played it before, be sure to download it again to check out its latest updates.
The game has heart-stopping graphics, and unlike similar options, RaceRoom Racing Experience claims it was developed by true motorsport experts. In fact, the game’s controls are easy to learn but hard to master, and only expert drivers will be talented enough to finish the race.
As for features, RaceRoom Racing Experience offers a basic free game that you can improve through the online store. Choose from five vehicles and two free tracks where you can compete. Every once in a while, official championships are organized so you can show off your driving skills. It’s perfect if you want a game that will improve over time.
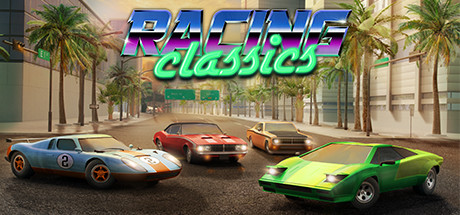
Racing Classics: Drag Race Simulator
Like Nitro Nation Drag & Drift, Racing Classics: Drag Race Simulator is a racing game where the goal is not to race other cars, but to finish the course as fast as possible. So what makes this game different from the rest? One simple thing: Here, instead of driving the latest models, we are offered a choice of the most iconic race cars of the ’70s and ’80s.
Although Racing Classics: Drag Race Simulator doesn’t have the best graphics of the games on our list (in fact, its shiny cars look a bit funny), it’s truly entertaining. Choose from 16 different cars, an arcade mode, a challenges mode and even a story mode with more than 45 stages to beat.
Racing Classics: Drag Race Simulator is still being developed, but it’s completely free-to-play. And even when the final version arrives, it will remain free. That said, the game has a store where you can improve and customize your vehicle through microtransactions. Want to check it out? Click below to download it.
Speed Dreams
Using the popular open-source driving simulator TORCS, Speed Dreams certainly deserves its spot on our list of today’s best free-to-play racing games. This game has everything it needs to become one of your favorites: good graphics, lots of tracks and courses, and obviously, it’s completely free.
If you have TORCS installed on your computer, you are probably wondering if it’s worth it to download Speed Dreams. The answer is definitely yes! It adds many improvements to the basic game, including more tracks and new rivals to defeat.
Speed Dreams is a good racing game that promises hours of fun, and you don’t need an especially powerful computer to play it. Also, those pesky micropayments are nowhere to be found. Click below to install it on your PC. Enjoy!
Top Speed 2: Racing Legends
Top Speed 2: Racing Legends isn’t your old-school racing game. Here, the goal is not to be the first car to cross the finish line or to get the fastest lap time. Instead, you’ll have to defeat your rivals by reaching dizzying speeds and skillfully using your car’s gearshift and nitro engine. Interested?
Even though the game is still in development, Top Speed 2: Racing Legends is completely playable. You’ll have a blast! With three different game modes and a choice of more than 70 cars, this is an essential game for speed addicts. Of course, if you want to customize and improve your vehicle, you’ll have to make use of the game’s micropayment system.
Top Speed 2: Racing Legends is a good option for anyone who’s tired of classic racing but doesn’t want to give up speed. Also, keep in mind that the game will only improve over time. Want to try it?
VDrift
VDrift is a little treasure for fans of Formula 1 tracks. This open-source racing game offers 45 real tracks where you can drive up to 39 different cars. And it’s all free!
Although VDrift’s graphics may seem a bit dated at first, they are still quite stunning. As it’s a classic racing simulator, it takes a lot of practice to master the game. The controls may seem simple at first, but technique is fundamental, and you need hours of practice to fully master them.
One interesting aspect of VDrift is that besides your keyboard, mouse, or joystick, it supports steering wheels. This makes the game far more challenging but really fun. And since it’s open source, the possibilities are endless! What are you waiting for? Test it today.
Yorg
Don’t be misled by its name or simplistic graphics. Yorg is one of the most entertaining racing games you can download on your computer. This open-source game will have you behind the wheel for hours, defeating the computer or your rivals in multiplayer mode.
Like we said, Yorg doesn’t have the most impressive graphics on this list. In fact, its appearance is really dated. Unlike the rest of the games, Yorg features races with a third-person visual perspective, but keep one thing in mind: Yorg isn’t looking to impress you with its graphics, but rather with how fun it is. So get ready for some crazy races, cars crashing and flying through the air, and lots and lots of speed.
Offering a choice of eight cars, Yorg is the perfect game for a few laughs with your friends or to help you unwind after a stressful day at work. Download it now! You won’t regret it.
We hope you liked our selection of free-to-play racing games. Do you have a recommendation that isn’t on our list? Tell us about it!
The 5 best games for surviving the apocalypse
READ MORE