These apps are draining your battery

Does your smartphone battery hardly ever last a full day? These five apps are killing your battery.

Smartphones are amazing and there is absolutely no doubt that the phones we have today are much better than the phones we had just a few years ago. That is not true, however, for the batteries that power them. Battery life is the same as it ever was. Mobile phone manufacturers haven’t been able to move beyond a simple truth. For more battery power, you’re going to need a bigger battery. It really is that simple. You can’t have more power without having a bigger phone and phones are about as big as they can get.

As a phone owner, however, there are things you can do to help squeeze a bit more power out of your Android or iPhone’s battery. Yep, you should be familiar with your device’s battery saver mode and of course things like screen brightness, Bluetooth and Wi-Fi usage, and battery health will have an effect too, but you also need to know that certain third-party apps will be placing a massive strain on your battery usage. If you delete these apps, you will immediately notice a difference. Let us show you then, the apps that are draining your battery.

Biggest battery draining apps

All the apps below are draining more than their fair share of battery. If you regularly find your phone dying before the end of the day, consider deleting any of the following apps that you have installed on your Android or Apple mobile device.

Facebook

Mark Zuckerberg doesn’t just want all your private data, seemingly, he wants all of your battery power too as he owns the top three apps to make it into our battery draining list. Facebook, however, is by far and away the biggest of the lot though, and deleting Facebook from your phone will have the biggest effect of any action we’ll recommend you today.

The main reason behind Facebook’s excessive battery drain is that it is constantly trying to spy on everybody all over the world. This means that the app on your phone is constantly tracking what you do and constantly trying to notify you about what everybody else on your network is doing. Think about it, Facebook is always running in the background, it syncs and updates whenever it wants to, and it is constantly updating contacts and software. This means you can limit Facebook’s power usage by turning off all internal notifications for the app. Or you can just delete it altogether.

Facebook Messenger
Hot on the heels of Facebook is Facebook Messenger. You know that app that extra Facebook decided you had to download as it was no longer ok to send messages to your friends using the Facebook app. Yeah that app that you shouldn’t even need but do because a global corporation forces you to download it. That app is a massive battery hog that is likely causing your phone to run out of battery long before it needs to.

The reasons for this are much the same as they are for Facebook. Messenger is a busy app, constantly buzzing away in the background and using a lot of your phone’s hardware in the process. Fortunately, for anybody looking to save battery without losing access to the biggest social network on earth, you can download the Lite versions of Facebook and Facebook Messenger, which will use a lot less power than their bigger siblings.

WhatsApp

WhatsApp

We’re now at number three on our list and as you can see, we’re still talking about a Zuckerberg-owned app. WhatsApp is an incredibly useful app, so much so, that it is the most popular messaging app in the world. That comes as no surprise too, when you consider that you can use WhatsApp to text and call your friends and family, make video calls, easily send photos and videos, and effortlessly create messaging groups with lots of different people. Not too bad at all for a free app.

The catch, however, is that WhatsApp uses a lot of battery power. The internet modem on your smartphone is one of the most power-hungry pieces of hardware it has. By sending all your messages and transferring all your social data over the internet rather than the phone antenna, you’re placing more of a strain on your device’s battery. The real kicker here, though, is that there’s no real alternative. If you want WhatsApp to use less of your battery, you’re going to have to use it less.

Google Maps

Just like with your data, the other big guilty party when it comes to hogging your battery power is Google. In particular, out of all the Google apps, Google Maps is the one that is using the most of your juice. Google Maps needs a lot of data to accurately keep you up to date on your whereabouts. As we mentioned above, more data means more power.

To limit the amount of power that Google Maps needs you need to go into Settings on your mobile and then scroll down until you find the Google Maps option. Once you’re there select Location and adjust to While Using the App. Another quick battery-saving measure you can do is turn off notifications too.

Snapchat
Snapchat makes it onto our list today by being guilty of a number of the crimes we’ve mentioned above. Basically, Snapchat is always on and constantly tracking and looking for something to notify you about. On top of that, Snapchat is constantly tracking your location so that it can tell your friends where you are and what you’re up to.

As you’ve probably guessed, the best way to stop Snapchat hogging all your battery is to delete it from your phone altogether. If you don’t want to do that, however, you can limit certain features and functions. You need to go into the Snapchat app and open Settings and select the Who Can… option and hit My Location. When you’ve done that hit Ghost Mode and you should start to notice your battery lasting a little longer at the end of the day.

5 ways to free up space on your Android device

5 ways to free up space on your Android device

It does not make a difference if your Android phone has a lot of internal disk space or ha a microSD card slot – there is never enough space, regardless of whether it is 32GB or 200GB. In this article, we will discuss how to free up space on your Android device – looking at both internal storage and microSD cards. If you’ve got a Pixel, Samsung, or any other device running a version of Android this guide will help you clear data on your smartphone and free space for more Android apps and media files from the likes of Spotify and Netflix. This guide will only concentrate on Android devices, though, so Apple iPhone users will have to check one of our other guides.

Android phones and tablets can quickly fill up as you download applications, stock up on media documents like music and videos, and store information. Numerous lower-end devices only contain a couple of gigabytes of capacity, making this issue even more frustrating for some users.

Not much in life is as irritating as finding that your Android gadget will not let you download that new app because it does not have enough space. To counter this, you can quickly clear out several megabytes or even a gig or two by deleting unused apps, finding disconnected maps and records, clearing storage, and wiping unneeded music and video documents. Let’s got through this now but don’t worry, we’re not just going to tell you to uninstall all your favorite apps.

How to clear space on Android

1. Clear the cache

Some Android applications utilize stored data, called Cache so that they can offer a smooth experience. The cache saves time, but the files stored in the cache are not necessary. If you want to wipe space from your mobile, the first thing you should do is to clear the cache.

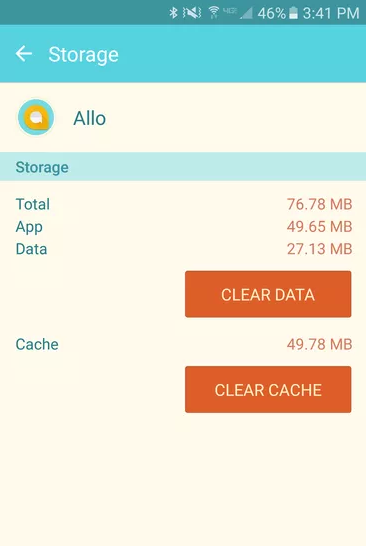
To free cached data from a specific application, navigate to Settings > Applications > Applications Manager and click on the app cache you want to alter. In the app’s info menu, select storage and then tap Clear Cache to clear the app data.

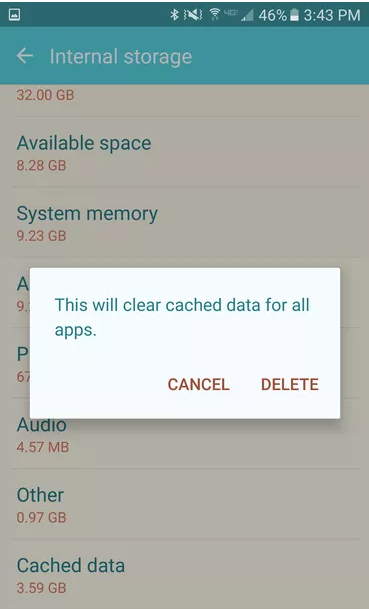
To wipe cached data from all the apps on your device, go to Settings > Storage and select Cached data to clean the caches stored on your phone.

2. Delete your downloads

An Android phone contains a download folder that stores everything you download, ranging from photos to documents. You are probably not too attached to a lot of the files you have downloaded over the day, weeks, months, and years. If this is the case, then there is much space here just waiting to be cleared.

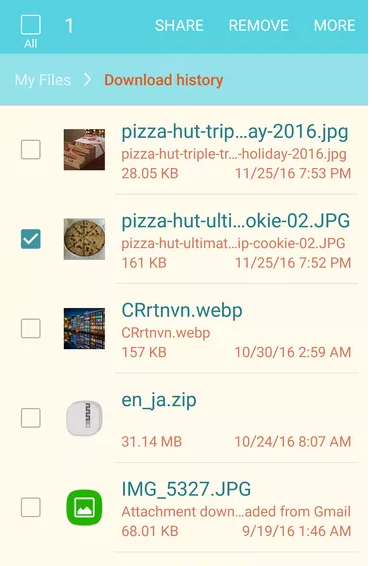
You will find your downloads record, called My Files, in your app drawer. Hold a file for a second to select it and delete it by touching on the trash icon.

3. Utilize Google Photos

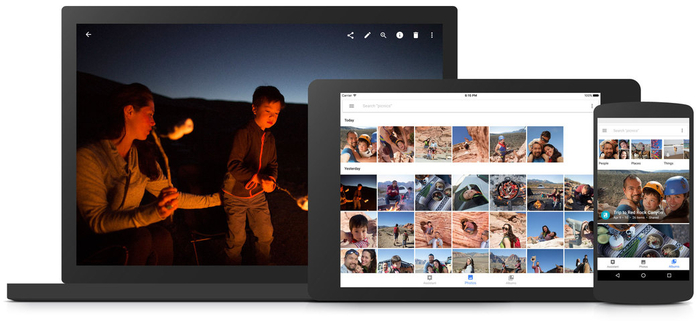
You know what? Google Photos allows you to back up an infinite number of photos. You can back up every single picture you take on your Android phone and store it on your Google Drive. When you have backed up your photos, delete them from your Android device to free up space.

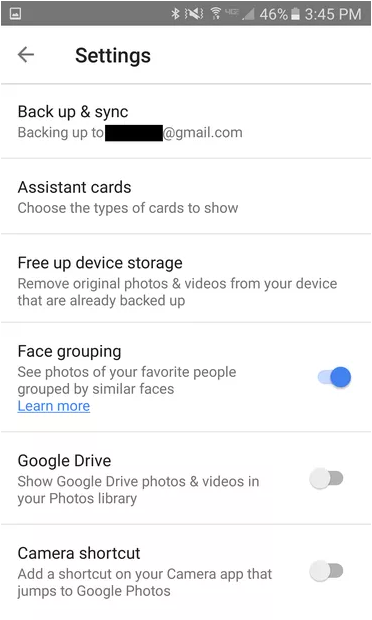
Turn Google Photos’ Back up & Sync feature on to benefit from this free cloud storage space. Open the Google Photos App, navigate to Settings > Back up & sync to turn it on.

You can choose to back up your photos at a higher resolution, of up to 16 megapixels, or at their original size. Google Photos offers the unlimited capacity to store high-quality pictures and images backed up at the original size will stand apart from your Google Drive storage limit.

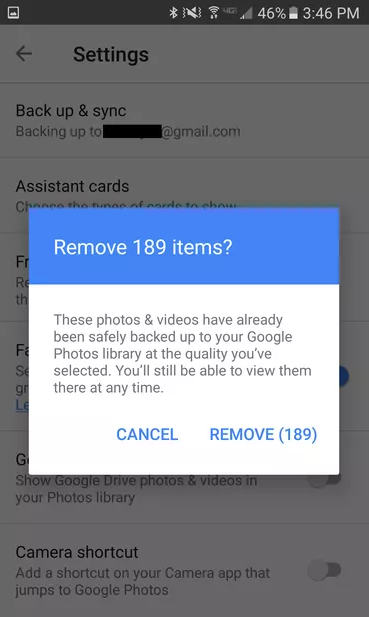
When you have backed up your images through Google Photos, navigate to Settings > Free up device storage, and Google Photos will automatically delete the multimedia that has been backed up.

Google Photos Download Google Photos
7

4. Transfer apps to the microSD card

Applications take up the most storage on your mobile phone. In most Android phones, you can insert a microSD card to add extra memory. You can then use this extra memory to store some of your disk-space-hogging apps.

To enable this, open Settings > Applications > Application manager and select the application you want to transfer.

If you can transfer the app, you will see a prompt button stating Move to SD card – this button will transfer the app to the microSD card. Not all of the app will be moved to the microSD card. How much depends on the app itself.

5. Delete some apps

Have you been through all these tips and tricks and you still lack space? Start deleting. There are apps on your Android mobile phone which you never use.

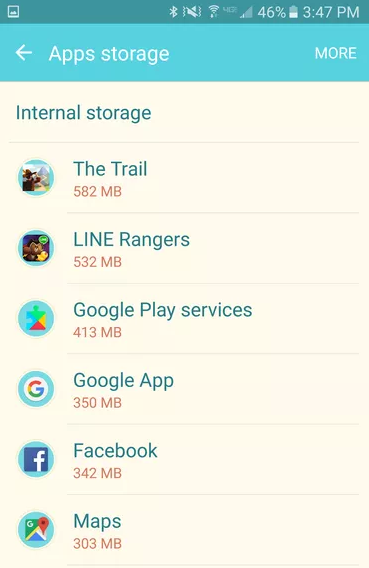
To see which applications are occupying the most space, open Settings, and navigate to Storage > Apps. There, you will see a list of apps in descending order by size.

To delete an application you do not use, select the App, and tap on the i icon located next to the app’s name.

Conclusion

These tips and tricks will help you to have a little more space on your Android. You can then use this space to store the things that are most important to you, but if you are still facing storage issues, buy an Android phone with higher internal storage.

How to clean up your Google storage

Is your Google account overflowing? Here’s how to cut down the clutter.

Google Drive

Modern life revolves more and more around data and data storage: with rapidly growing files for movies, video games, photos, and all the high-quality digital programs we know, love, and live on, the question becomes: how do we make everything stack together? How can we not send some of it to the trash folder and even worse delete forever when we empty trash! We all have a storage limit on our devices.

If you’re like us, Google provided a solid answer with Google Drive storage, our favorite online storage database. Once you have a Google account, Drive gives you access to all sorts of cool features like Google Docs, Google Sheets, and more. It’s the free space your Google Drive account gives you that we love the most, though, but…

There is a limit!

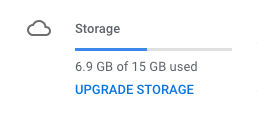
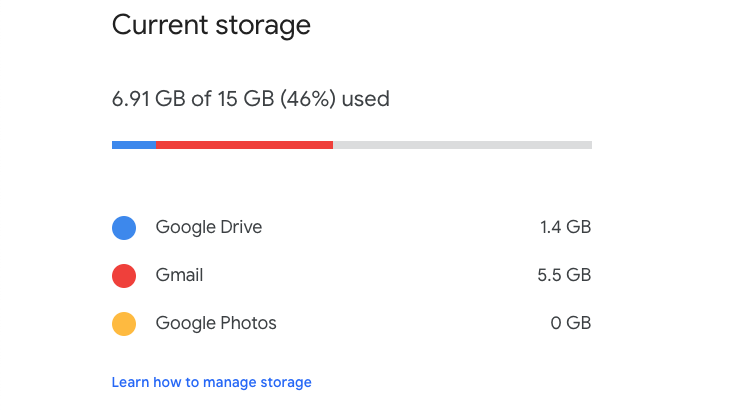
Specifically, a 15 Gigabyte limit, which can be seen at the bottom left corner of your Google Drive page:

If you’re like us, it seems like only yesterday the bar showed just megabytes taken up. Now it’s 6.9 gigabytes! Where did all of that data come from? Where did all your Google Drive Space go?

We’re going to answer that crucial question, and help you manage this cloud space easier and free up space you need.

How to take care of your Google storage

What Makes Up Google’s Storage?

First things first; what is Google Drive made of? The simple answer is that it is comprised of just three things:

  1. Google Drive
  2. Gmail
  3. Google Photos

Looking at storage in Google Drive alone, you may have been surprised at the amount of data you use! Alternatively, in Gmail, you may suddenly run up against an unexpected data limit. If that’s the case…

First, let us help you get a better visual. Head into My Drive and right-click and then click “UPGRADE STORAGE” on the data graphic:

You’ll be shown a far more useful graph:

Doesn’t that make more sense?

There are now two options: manage storage, or upgrade storage. We’ll first focus on how to manage Drive, Gmail, and Photos in the coming section. Then, just in case, we’ll quickly mention the possibility of a storage subscription!

If you really want to make your computer run faster, we would recommend MacPaw. Don’t be fooled by the name, MacPaw products are available for both Mac and PC. 

Google Drive

Manually check through Drive to see which things you want to get rid of. If you’re not sure how to start, we have a few suggestions:

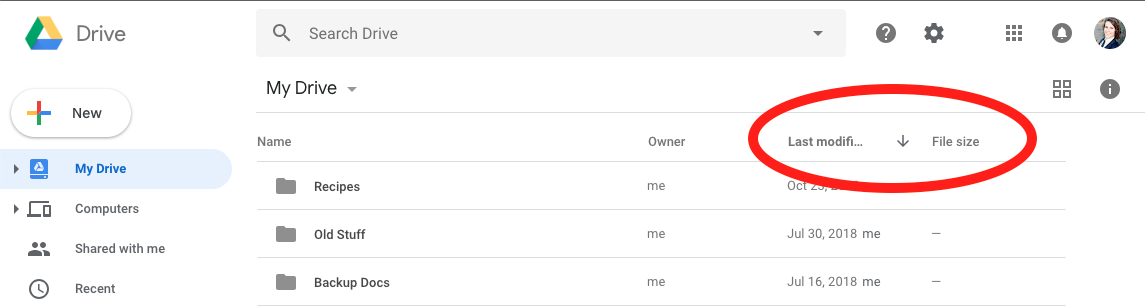
1. By date used: on the main Google Drive page, within any folder, you can arrange files by their “Last modified” date. There’s a general rule that older files are often less important! (On the other hand, if you don’t want to throw away your copy of 2014 tax returns, there are other ways…)

2. File size: an even better option, located right next to the Last-Modified button! While some files may be more important, you may not want to clear up Google storage kilobytes at a time… so organize them by size, and see if there’s anything you no longer need!

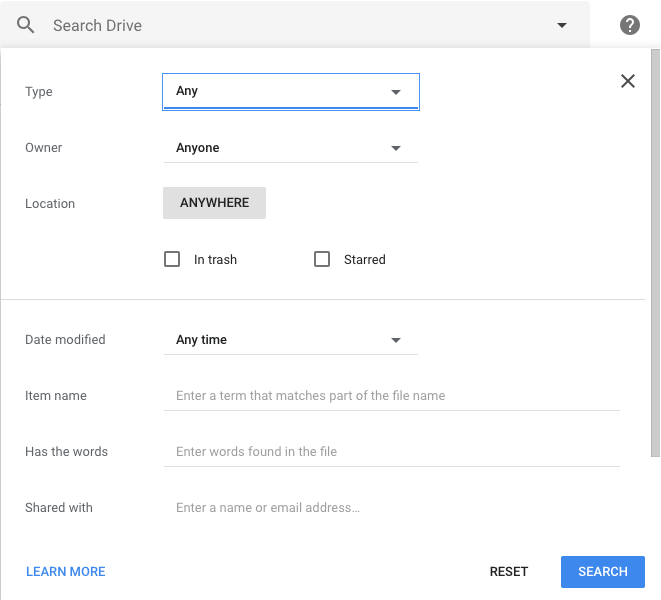
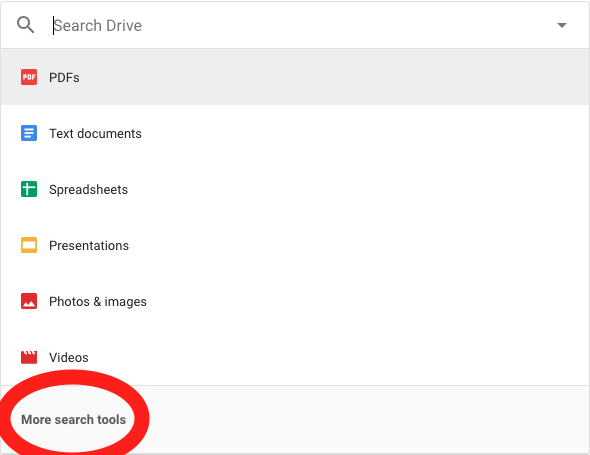
3. The Search Bar: if you’re looking for something more specific – perhaps documents shared with certain people, or keyword specific – the search bar has some cool stuff!

7

For the full experience, make sure to check out “More search tools” at the bottom of the drop-down menu:

Gmail

Gmail has fewer tools to find files for a number of reasons. For example it’s hard to tell what emails will become important later, and they generally are small messages that take up little space.

However, emails pile up quickly!

If you need to keep the storage down, there are functions called search operators, which help you look through the Gmail inbox by altering the results of a Gmail search. For an extensive list of search operators, visit this page.

However, we recommend this one:

In the Gmail search, enter “size:” and then a number. Gmail brings up all messages larger than that number, in bytes! Now, you can search for files of any size, and get rid of the most cumbersome emails.

(And if you need an easy conversion calculator, try this!)

Finally, Gmail storage management can be a defensive rather than an offensive act. Proactively create a system to stop your inbox from overflowing with unnecessary mail:

1. Block spam, and periodically empty the folder completely. While “spam” blocks certain messages from reaching your inbox, they still take up storage space.

2. If you think an email will be important in the future, mark it as “important” or “flagged”. This will ensure you don’t erase it in the future, leaving you free to delete less pressing messages.

The key here is to make sure you block unnecessary emails ahead of time. If they pile up into the thousands, it will be time-consuming to go through everything and sort the good from the bad!

Google Photos

Ah, finally! Google photos…

Frankly, it’s better that you organize photos however you see fit. Pictures are often precious to people: look at each image individually and decide if you should throw it out. A picture of family? Probably keep. An old recipe screenshot? Probably throw away.

Google Photos Download Google Photos
7

In the end, the decision’s yours.

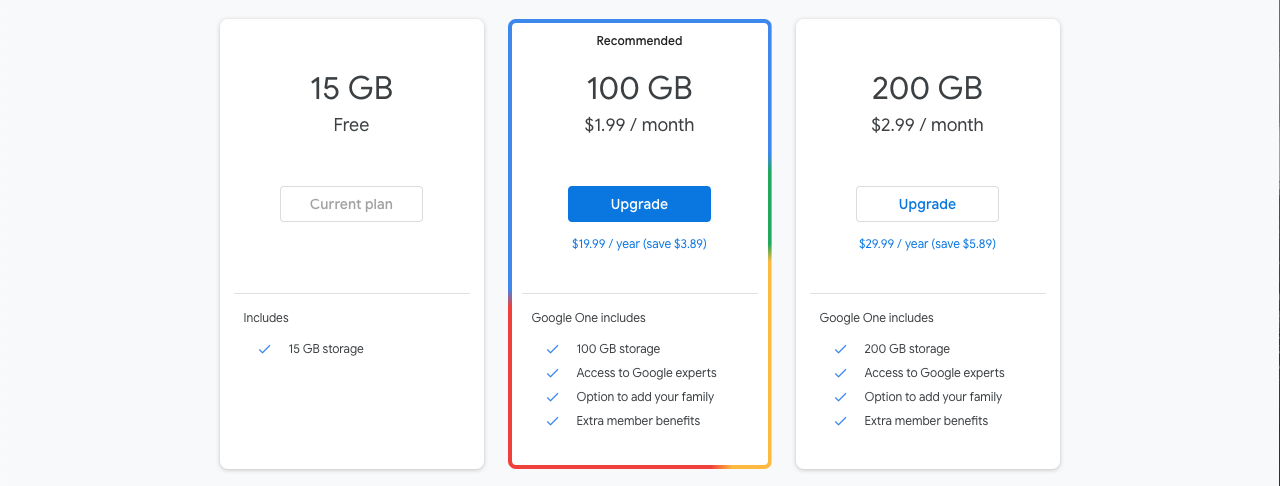
If your storage reaches the 15-gigabyte limit due to photos and other documents you can’t part with, you may want to upgrade your cloud storage, our final option.

Upgrade Storage

While we’re still scraping the underside of Google’s copious 15-gigabyte allowance in the “Free” category, the upgrade to 100 gigs doesn’t cost too much, possibly just $20 a year.

If that sounds good, there are additional benefits to the subscriptions beyond storage! Get advice from Google professionals, add family members that can share your cloud data, and more!

Thanks for reading!

5 tips and 3 programs for cleaning up your PC and making it good as new

Do you know that moment when you realize that your computer is no longer running as well as it did when you got it? If you’re not there yet, it will come soon. Unfortunately, all computers go through situations where their owners will get many headaches – from basic crashes to the most unbearable slowdowns.

Fortunately, there are ways to make your Microsoft Windows PC and Apple Mac work like new once again, and you don’t even have to format your hard drive, install expensive antivirus or anti-malware programs, to get that level of performance back. Yes, there are high-quality tools like PC Cleaner that ensure computers recover quickly. More than that, some manual procedures and digging into your computer’s taskbar, task manager, control panel, and other startup programs can really contribute to the process too. We’re here to help you through it all.

Ready to get started? Let’s go.

Best ways to speed up your PC

Tip 1: Always keep enough space clear

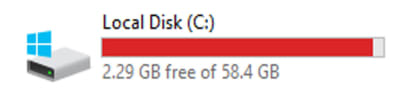
Your computer needs disk space to work properly! Because of this, it’s always important that you keep a few gigabytes of your hard drive free – something between 20% and 30% of reserve is recommended. This is due to the fact that new system files and uploads require free space for them to function properly. Free up space by deleting unnecessary files and emptying the recycle bin. If your hard drive is currently in the red, this simple trick will make a big difference.

Tip 2: Uninstall Unused Programs

Imagine your house’s garage. In it, you have a car that you use to move around and a car without a motor that has been unused for years. By the way, the garage is not organized, so whenever you need to pick up your car, you need to take out the old car as well, which causes huge delays.

5 tips and 3 programs for Cleaning up your PC and Making it Good as New

This is more or less what happens with unused applications on your computer. They take up space without a reason and can still interfere with other software processes – especially on disks that are very fragmented. Uninstall programs that you no longer use.

Tip 3: Optimize disks

Defragmenting the disk has always been a time-consuming process. Yes defragmentation sounds like a daunting process but in newer versions of Windows this has been changed, thanks to the operating system optimization features. Important: if you have an SSD, it is recommended that you do not defragment.

Enabling disk optimization is easy: open the File Explorer option and click  This Computer. Then right-click the storage drive – Local Disk (C: ) in most cases. Under the properties, General and Tools tabs, activate the Disk Cleanup and Optimize functions, respectively.

Tip 4: Keep your boot-up clean and simple

If too much software is booted when you activate Windows, you can turn on the PC and then go out for a coffee while waiting for everything to load. Having a lot of software loading while booting is a bad idea. This is because Windows ends up booting very slowly. Fortunately, it is quite easy to change.

5 tips and 3 programs for Cleaning up your PC and Making it Good as New

To define which programs should be started with Windows, open the Start Menu, type msconfig in the search bar, and hit Enter. On the Program Startup tab, mark only the really necessary software, keeping updates running in the background disabled. But be careful: Check each item and do not clear items unless you know exactly what they are.

It is worth mentioning that some applications also allow the software management to be initialized automatically.

Tip 5: Use programs to clean

After all this, it could be very interesting to use registry cleaner applications that also delete temporary files that may be taking up space on your computer. Some options are very secure and ensure great results for users whose PCs need a tune-up. Here are some recommendations:

Auslogics Registry Cleaner is an application used to analyze Windows records in search of invalid entries. This way, you can keep the system more organized by cleaning the items that have been left behind by uninstalled programs and other operations performed on the machine. All this is done in a very simple and fast way, allowing users without prior knowledge in the registry to clean it up.

Auslogics Registry Cleaner Download now
7

CCleaner is one of the most complete tools you can install on your PC today. CCleaner brings together many functions in one interface, ensuring that any consumer can take full advantage of its features.

CCleaner Download Now
8

Another piece of software that brings together many tools is Advanced SystemCare. It brings several features for cleaning files and the computer registry and is a great option for those who want to optimize their hard drive. The program promises to improve the performance of the internet on analyzed machines.

Advanced SystemCare Download now
8

How to save battery on your Android

Don’t get caught with a dead battery. Try these tips!

draining batteries

Have you noticed your Android smartphone battery isn’t lasting as long as it used to? There are many reasons your Android phone could be draining the battery more quickly than usual. These include problems with your Wi-Fi network or Bluetooth connection, excessive screen brightness, aggressive haptic feedback wasteful widgets, and more. There’s no need to worry though because we’re with some great battery saver tips that will go way beyond only using your phone charger when your device is in airplane mode, turning off auto-brightness, and limiting your location services. They’re all great by the way and should not be overlooked, it’s just we’re going to go a little deeper into battery optimization to help you save battery life much easier.

We’re focusing these tips today on Android battery use and Android apps but many of these features will also work on Apple iPhones too. If you want iPhone specific information, however, click the link below.

How to save battery on your Android

1. Target the most wasteful apps

Not all apps use the same amount of battery. To find out which specific apps are sucking up the most battery, you can go to your phone’s Settings and then select Battery. This will show you an organized breakdown of which third-party apps use your phone’s battery. The applications and features that consume the most power will be at the top of the list, while the apps that use the least will be at the bottom. You’ll likely find that Facebook, Messenger, social media apps in general, Google Assistant, and Google Maps will be having the biggest effect on your Android phone’s battery life.

If you see an application or feature you never (or rarely) use at the top of the list, you should uninstall the app. Getting rid of those battery hogs is a great way to ensure your battery will last longer.

2. Utilize power-saving mode

Did you know that Android phones now have a built-in power mode that optimizes your battery pack to use less power? This power-saving mode limits all your phone’s background features that eat into your power bank. Although your phone use will be limited, the battery drain will be much lower than it would otherwise. If you know you will need your phone later in the day to make a call, try turning on the power saving mode to ensure your battery will last.

3. Adjust the brightness

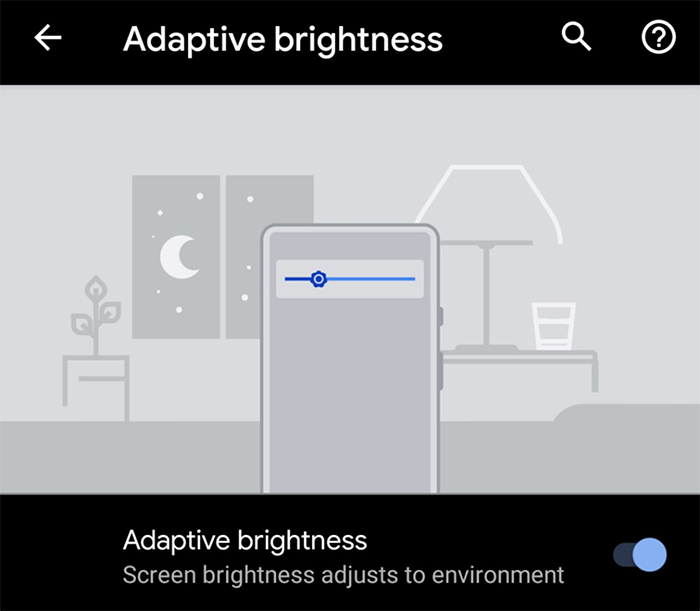
One common culprit for eating up battery power is your Android device’s screen brightness. Particularly, the adaptive brightness setting. You would be surprised at how much you can improve your battery life simply by turning down your phone’s brightness. Open your phone, go to settings, disable adaptive brightness, and then manually lower the brightness. Again, if you do this whenever you think your battery won’t make it home, you’ll be much likely to have power by the end of the day.
4. Update your apps

Did you know that outdated versions of apps actually use more of your battery? Ensuring all your apps are up to date can save hours of battery life. To make sure your phone is always up to date, turn on auto-update for all of your applications. To see if any apps need updating, go to Google Play, hit the menu key, and go to My Apps.

5. Consider Lite apps

Many app developers offer “lite” versions of their programs. These are usually designed for people who live in areas where the wireless networks aren’t as strong, but that means there’s less drag on your data and fewer background processes eating up your battery. FacebookInstagram, and Spotify are just some of the popular apps with a lite version.

There’s no need to struggle with a phone that’s constantly dying. If the battery life on your Android isn’t lasting as long as you think it should, try these battery-saving solutions.

How to convert videos to different formats

Converting video files can sound intimidating but there’s nothing to be worried about. Here we’ll show you five ways to convert video formats.

Converting videos from one file type to another may sound like some sort of technical nightmare but actually. It is a lot easier than you’d think. There are a million and one reasons you might need to do it too. You may want to upload your video to the internet or maybe that video you took on your iPhone is too large as you now have a camera that can capture in 4K.

Whatever the reason doesn’t matter as there are a lot of great programs out there that can help you take a video saved as one format and convert it into another. We’ll now walk you through the best of them and show you just how easy it can be to convert video files.

Video converters

Unlike with pictures, there is no single file type for video that everybody uses. There is no JPG of video, and instead, there are many different video formats including MP4, AVI, MOV, WMV, MKV, MPEG, WebM, AAC, and FLV to name but a few. This is how to convert them all into each other.

iMovie

iMovie for Mac offers a rather robust entry-level video editing suite for all budding movie makers fortunate enough to have a Mac. iMovie has a plethora of cool features that will allow you to take your home movies and camera phone recorded videos and bring them all together into a polished final product.

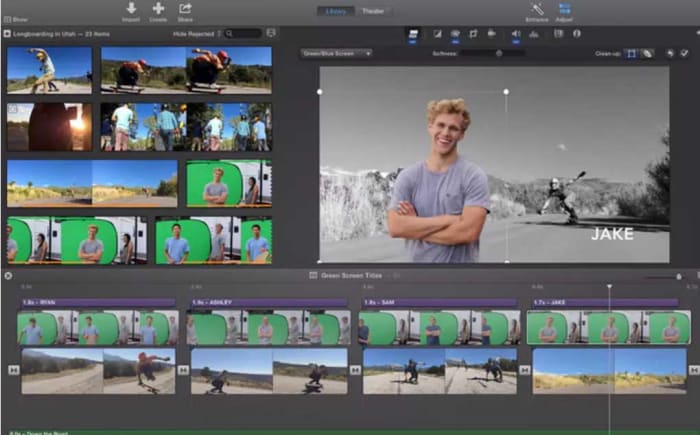
Another of the key features iMovie has to offer is the video conversion tool. With this tool you simply need to import the video file of your choice and add the video to your storyboard. From there you need to hit Share and then choose File. This will then give you the option to save the video with a new name, new resolution, new quality, level, and a new file format.

iMovie Download now
7

MiniTool Movie Maker

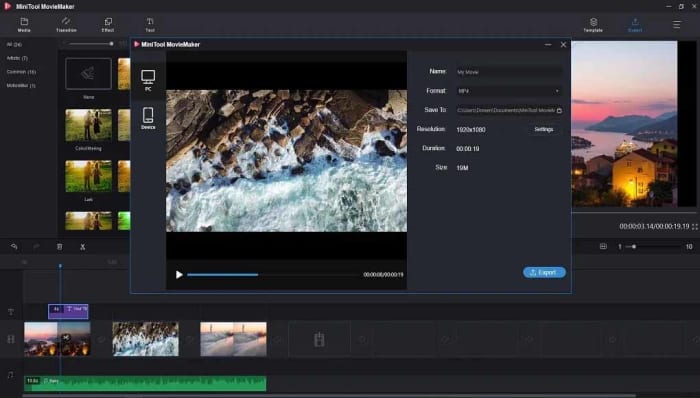
We like MiniTool Movie Maker here at Softonic because gives away a lot of great video editing features for free. Furthermore, as well as offering anybody looking to make their first movie the tools they need to do so, the app also lets you make your videos for free without having to display a watermark, like most other free video editing apps, do.

The video converter on MiniTool Movie Maker allows you to convert almost all different video file types and even gives you the option to edit the videos you’re converting too by adding various elements such as subtitles or filters. It is easy to use too. You simply import your video and set your target format and the app does the rest.

MiniTool Movie Maker Download now
9

Total Video Converter

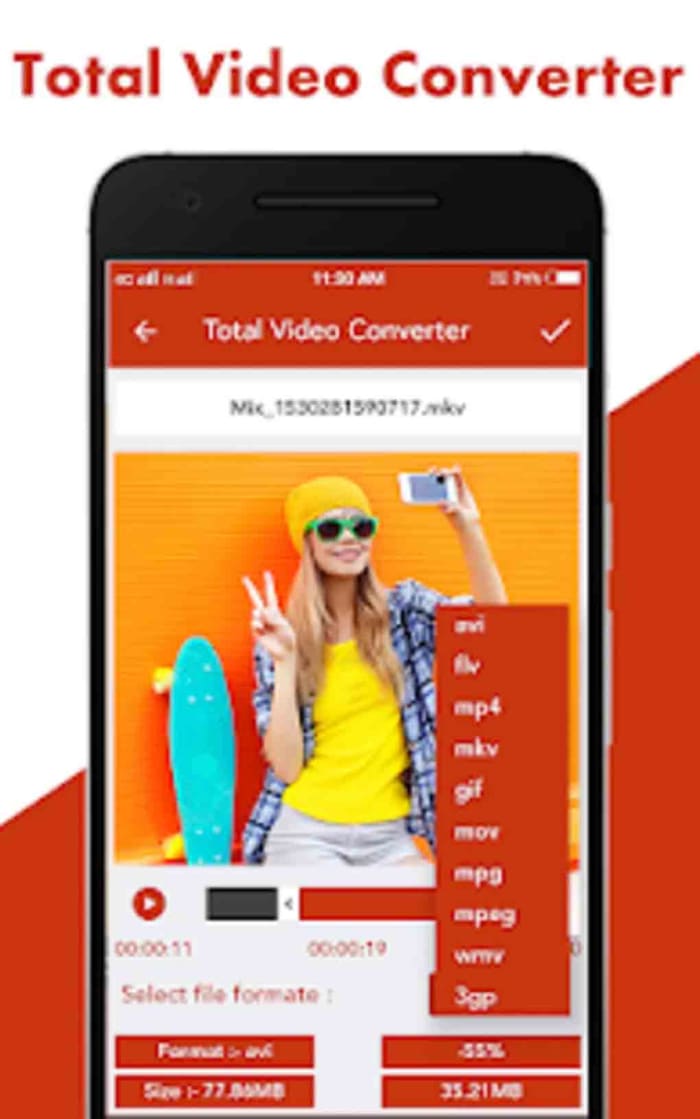
This app for Android offers a quick and simple video conversion solution for mobile users. There’s also a Windows version of the program and a version for Apple Macs too. Sadly, however, there’s no iOS version available at the moment so iPhone users can’t use this program to convert their videos.

Converting videos on mobile couldn’t be easier. When you open the app, it will automatically show you all the video files you have on your device. This means you don’t have to go searching around your device or copying and pasting files from one place to another. The app just shows you everything you need right there in one place. From there it is simply a case of selecting the video you want to convert and the format you want to convert it to and then hit Convert. The app will do the rest. The app converts files quite quickly and also offers a video player too so that you can watch the videos you’re converting too.

Total Video Converter Download now
8

Online Video Converter

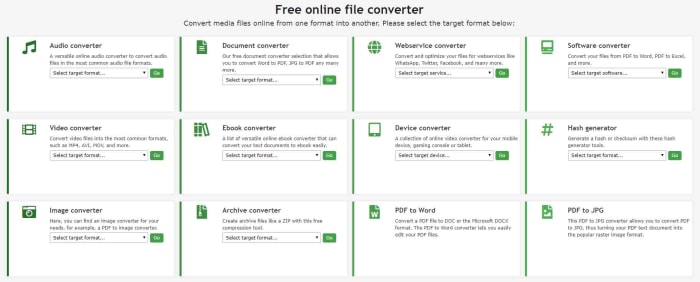
As well as showing you the best apps for Android, iPhone, Windows, Linux, and Mac for converting videos, we thought it would also be helpful to show you the best website for converting videos too. Online-Convert is an absolute beast of a site that will help you convert almost any type of file, not just videos. Here you can easily convert Word files to PDF and vice versa as well as easily converting software, images, eBooks, audio, and more.

We’re here though for video and the process couldn’t be simpler. All you need to do is go to the site and find the Video Converter box. There you need to open the drop-down menu and select the type of video file you want to convert your video into. Once you’ve done that, click Go, upload your video, and then hit Start Conversion. There are more advanced video conversion settings you can play around with, but these are optional. This method can be as simple or as complicated as you like.

VLC Media Player

VLC converter MP4

VLC Media Player is the internet’s favorite video and media player. It can play almost every type of video format and codec and barely breaks a sweat while other video players would struggle or simply crash. VLC is the don and always has been. VLC also offers a pretty robust video conversion solution too, which we’ve gone into in greater detail before.

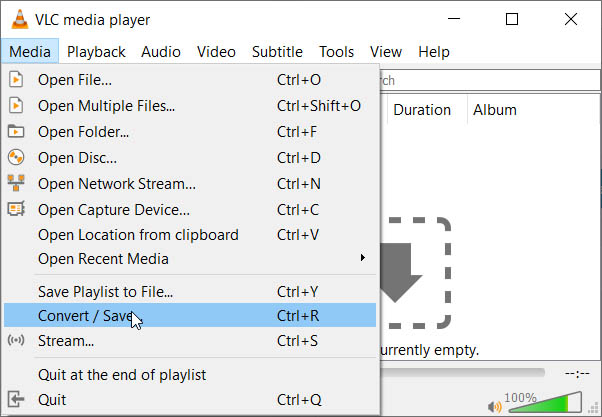
The video conversion process on VLC Media Player couldn’t be easier. If you open the program and go to the Media menu, you’ll see the Convert/Save button. You simply need to click this and then click the Add button to select the video file you want to convert. After that, you click Convert and select the destination of the converted file, the file name, and the new file type. As you’d imagine with VLC there are an awful lot of compatible file types here for you to choose from. From there it is as simple as hitting Start.

VLC media player download free ►
8

Best Chromecast apps

Have you just bought a new Chromecast? These are the must-have apps you need on your Android or iOS device to get the most out of your purchase.

The Google Chromecast is a fantastic little device that makes it possible to wirelessly “cast” media from your Android and iOS mobile device onto your TV. You simply plug the Chromecast into one of your TV’s spare HDMI ports, hook it up to a USB-based power supply, and then you’re good to go. The connection then works over Wi-Fi, which means you can control apps on your phone that are then run through the Chromecast.

The way the system works then relies on compatible apps. Not all apps will stream wirelessly from your mobile device your TV via the Chromecast. Instead, you need to find Chromecast compatible apps and that is what we’re here for today. Today, we’re going to walk you through all the best Chromecast apps.
Best apps for Chromecast

These are the Chromecast apps you need to download right now. They will help you stream your content wirelessly from your mobile device to your TV.

Google Home

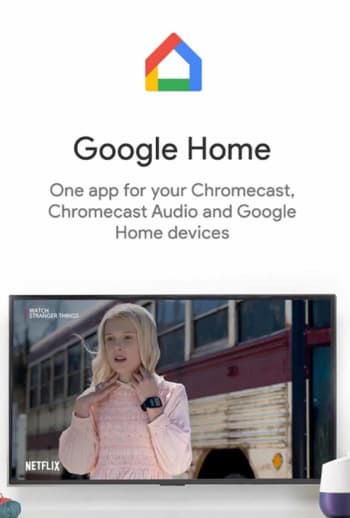
This list will mostly revolve around media. The Chromecast is a fantastic little device that makes it really easy for you to take the media content you have or are streaming onto your phone and have it display on your much bigger TV. In truth, however, there’s more to the device than that and the Google Home app is how you unlock what else the Chromecast has to offer.

The Google Home allows you to run all your smart home connected devices and also allows you to enjoy features such as content discovery, universal search, and app recommendations. If you’ve just got your first Google Chromecast, you should definitely download the Google Home app as, in truth, it is more like the official companion app to the Chromecast. In fact, the app used to be called the Chromecast app.

Google Home Download now
8

Netflix

Netflix in the living room

So, we’ve already mentioned that one of the top uses for the Google Chromecast is casting media such as videos and photos to your big screen TV. You’ll no doubt be relieved and in no way surprised then to learn Netflix is compatible with your Google Chromecast and is one of the best Chromecast apps around today. You can, of course, download Netflix on Android smartphones and iOS iPhones.

What’s great about the Netflix mobile app is that it allows you to cast your movies or TV shows to the TV and then use your mobile phone as a remote control. You can control playback, skip scenes, and of course browse the Netflix library all while sat on the sofa using your phone. Other great Chromecast media playing apps include HBO Go, Hulu, Roku, Plex, and if you’re in the UK, the BBC iPlayer. By connecting your phone to your TV the Chromecast turns your television into a smart TV.

8

YouTube

YouTube on the TV really is a treat. In truth, the platform has long been a big-screen platform with well-produced content that’s easily able to compete with more established networks coming from a wide variety of professional media outlets as well YouTube’s army of popular bedroom content producers.

The YouTube Chromecast app is simple yet effective and it couldn’t be easier to cast any video you find onto your TV. YouTube also has a premium model now too that includes being able to download videos but that also gives access to premium content, much like Netflix has Netflix Originals.

8

AllCast

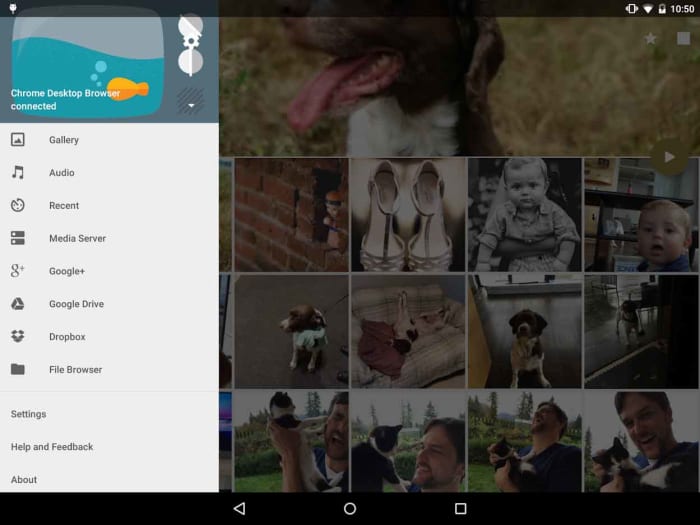
AllCast is probably the most versatile Chromecast app out there and is available on both iOS and Android devices. AllCast offers an easy and effective way to cast all the photo and video media you have on your phone onto your lounge TV. The app also makes it possible for you to cast photos you have stored on cloud storage solutions like Dropbox.

You can try AllCast for free, but all the best features are hidden behind a paywall. Furthermore, you can only cast videos up to five minutes in length on the free version, which means you’re going to have to pay to get any real value out of the app.

AllCast Download now
7

TED

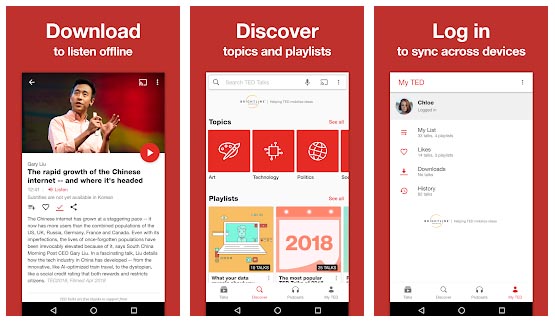
TED talks are a cultural phenomenon these days. Instantly shareable and infinitely inspiring, everybody has watched and shared at least one TED talk. That’s what makes the TED app so perfect for using with your Chromecast. TED talks can inspire you on a personal level, but so often you want to share the experience with somebody else and that is the Chromecast comes in.

Whether you’re watching a brand-new lecture on your living room TV or sharing one of your old favorites with your family, the Chromecast-enabled TED app makes it easier than ever to watch TED talks as a group.

Google Photos

How to Breathe New Life into your Old Phone Get a cloud based photo sync app google photos

It probably comes as no surprise that there are many great Google apps that are Chromecast compatible. We’ve already mentioned YouTube and Google has recently made its native Files app for Android Chromecast-compatible too, which offers another great way for you to display the photos and videos you hold on your phone on a much larger screen.

The final app we’re highlighting today, though, is Google Photos, which deserves a special mention all on its own. As well as turning your TV into a giant picture frame, the Chromecast compatible Google Photos app can also help you broadcast all the magical creations you can build on the app. As well as slideshows and albums, Google Photos can help you turn the photos and videos you’ve captured on your smartphone into dynamic movie-like experiences, complete with transition effects, music, and even special integration elements from other Google apps such as Google Maps.

Google Photos Download Google Photos
7

5 Hidden Features in VLC Player That You Need to Know

VLC can play online video files like YouTube videos, play almost all video codecs,  is available on almost every platform including Windows, Mac, Linux, Android, iPhone, and more. It can easily control playback framerate, bookmark exact moments in media files, and can even boost its out-the-box media playback features with extensions and plugins. VLC Media Player is an absolute beast of a program that can even be set up as your webcam.

In truth, though, VLC Media Player is so much more than just an open-source media player and does more than simply play video files or other media files. In fact, VideoLan can be used as a video editor as it has editing capabilities, advanced controls, and much more. Unfortunately, many of these hidden features may not be apparent unless you read up on all that VLC Player has to offer. tick with us for the best VLC tricks. Here are some hidden VLC tips that can make VLC Media Player much more powerful and save you tons of time.

VLC media player download free ►
8

More than a video player: Top 5 hidden VLC features

1. Creating Audio and Video Effects

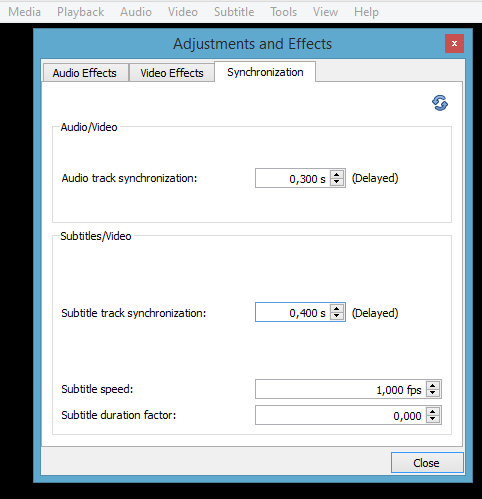
Sometimes when streaming, the audio file isn’t correctly synced up with the video, and this can be incredibly annoying. To fix this issue (or just to create some cool audio/video effects of your own,) open VLC Player and select Tools, then click on Effects and Filters. Next, choose Audio Effect or Video Effect. Here you can play around with the effects that are available and see the changes you make live. This menu item also allows you to change the Brightness, Hue, and other effects. Change the tab to Synchronization to correct the audio-video syncing problem.

VLC Sync

2. Take a snapshot of a Video

Taking a snapshot of a video is usually a tedious process involving Print Screen and Microsoft Paint. To take a snapshot with VLC, play a video and right-click on the desired screenshot. Hover the cursor over the Context drop-down Menu on the option that says Video. To enter capture mode and open capture device you need to select Take Snapshot in the popup menu. That’s all there is to it.

3. Use a Video as Your Desktop Wallpaper

Screen recorder and desktop recording. No other media player offers this particular feature. Open VLC Player and go to the Preferences window. Choose the icon that says Video. Next, choose the Output box and select DirectX (DirectDraw). Restart VLC. Then load the video you wish to use and click the Video menu again. Choose Set as Wallpaper. When you are finished, change the Output setting back to Automatic and restart.

Convert/save files with VLC. Follow the link below to learn how to convert video and convert media files using VLC Media player.

4. Listen to Online Radio Stations

Nullsoft Shoutcast

Literally hundreds of SHOUTcast radio stations are available in VLC Player, but these stations have to be enabled to be accessible. Go to Media and select Services Discovery, then choose SHOUTcast. Finally, open the Playlist and find the station you wish to play. This feature can turn any compatible audio device into a powerful internet radio

5. Stream Podcasts
Forget downloading extra software to stream the podcasts you want to see. Open VLC Player and select the View menu. Then choose Playlist. Hover your cursor over the Podcast selection area in the sidebar. Click the + button, and then paste the address of the podcast feed into the box. VLC Player can then stream that podcast.

Check out VLC for Windows 10 to get a jump on the future of audio and video!

The best apps for making videos from photos

Want to turn your photo collections into videos? These five apps, programs, and websites will help you create epic slideshow videos.

According to Facebook users on the social network engage with videos an awful lot more than they engage with photos. Furthermore, we’ve now also got social networks like Snapchat and Tik Tok that encourage users to create short and snappy videos and photo videos to share across the network. We’re transitioning from a photo first world to a video-first world. Hell, we might even be living in a video-first world right now and we simply haven’t caught up yet.

It isn’t easy for many of us, I included, to simply create fun and engaging videos at the drop of hat. If like me, you’re still a photos first person, you will be looking to make videos out of your photos. Today, we’ll walk you through some of the best apps to help you make videos from photographs.

How to make videos with pictures

Below we’ve laid five of the best ways to turn your photographs into slideshow-like videos. You don’t need impressive video editing skills or experience. These Android and iPhone apps, programs, and websites have all been designed to be user-friendly and with ease of use in mind.

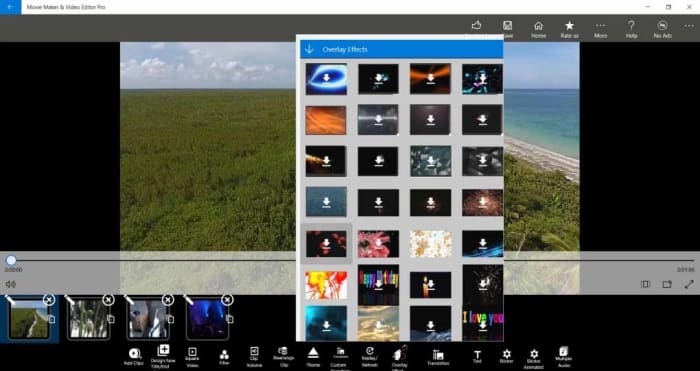
MiniTool Movie Maker

Our top choice today is the MiniTool Movie Maker, which offers a fantastic and free solution to anybody looking to turn their photos into videos. What stands out about the MiniTool solution is that it gives you the freedom to create your movies without imposing a company watermark. Normally, these tools make you include their branding on free versions and will only remove them if you pay for a premium version.

Other standout features of the MiniTool Movie Maker app, which is available to download on Windows include fun and easy to use Hollywood-style movie templates and an impressive array of effects including transitions titles. Editing tools to go with your slideshow capabilities include splitting and trimming clips and combining multiple clips together. When you’re done and your video is complete, MiniTool can export your creation to all major video file formats.

MiniTool Movie Maker Download now
9

Google Photos

Google Photos is a great tool for making videos out of your photos. The app is so good at making videos from Photos that it can do it by itself. Google Photos can automatically group your photos together, based on a number of different categories it can recognize, and then add music and transition effects to create short videos from your pictures. This means that once you have the app installed on your Android phone or tablet, or iOS iPhone or iPad you’ll automatically receive notifications from the app telling you whenever it makes movies from your photos.

These automatic movies are great but obviously you’re going to want to make your own too. There’s nothing stopping you at all from making your own photo slideshow movies using Google Photos and you can include all the cool effects that go into the automatic movies too. These features include music, text, transition effects, and even Google Maps integrations showing where you were when the photos were taken and even including your travel details too.

Google Photos Download Google Photos
7

Slideshow Maker

Slideshow Maker is another video editor for Windows 10 that offers a lot of video editing features that will help you take your static photographs and give them a new life. Similar to the MiniTool Movie Maker, Slideshow Maker has some really great features including slow-motion effects, color filters, and more. Impressively, Slideshow Maker is even capable of outputting videos that can work with VR headsets too.

Another key feature of Slideshow Maker is that it is free although you will have to deal with a number of adverts if you use the free version. Another negative point that you need to consider is that the app isn’t compatible with MP4 video files, which is a very common video format. If most of your files are MP4, you might want to look at one of the other apps on today’s list.

Slideshow Maker Download now
9

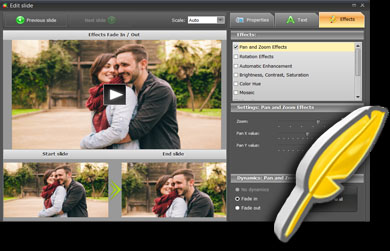
Photo Slideshow

This classic Windows program offers a wide array of professional-level movie-making features. The kicker here, however, is that the program isn’t free, and you’ll only get access to its features for a very short free trial period.

If you do decide to go with Photo Slideshow, however, you’ll get access to features like transition effects, music tracks for your slideshows, face focusing effects, and even animation. The animation effects, in particular, add a lot of possibilities to your videos allowing you to pan in and zoom into your photos. Other cool animations adding vignettes and retro film-like effects to your movies too.

Photo Slideshow Download now
7

Animoto

Our final solution today for turning photos into videos is the Animoto site. Animoto does have professional and team plans but, fortunately, it also offers a free plan for casual users like you and me. The only catch with the free version is that your videos will include an Animoto watermark. If you don’t mind that, however, then Animoto offers a simple solution that doesn’t require you to download any apps or programs at all.

What’s great about the Animoto solution is just how simple it is. You will have to create an account on the site but once you’ve done that everything will run smoothly. All you need to do is select the template you want from the many available on the site and then upload your photos. After that is just a case of putting your photos in order and letting Animoto do the rest. If you’re a technophobe, then we suggest you look at Animoto as it couldn’t be simpler to use and still impressive results.

Best VLC add-ons

If you have VLC but think it is missing a key feature, check out our list of the best VLC extensions, plugins, and addons.

VLC Media Player is a verifiable institution. The ever-reliable media player has been around on Windows, Mac OS X, Linux, and Android and iPhones for what feels like forever and can play pretty much any video type or codec that has ever been invented is as popular now as it has ever been. It is the versatility that has always made VLC so popular with so many users but did you know that VLC is even more versatile than most people know. VLC can do so much more that think it can because of something very simple: extensions.

Yep, there are many VLC extensions, add-ons, and plugins that you can install to further augment VLC’s features. There are lots available too. If something about VLC has been frustrating you, there is likely an extension to fix the problem. If you’ve ever thought the VideoLan video player was missing a vital feature, there’s a good chance there is a VLC addon or plugin available that will add that feature to your version of VLC. Let’s take a look then at some of the best VLC Media Player add-ons, extensions, and plugins.

VLC media player download free ►
8

VLC plugins, extensions, and addons

These are all the best VLC Media Player extensions we’ve found to help you get more from the most popular and versatile video and media player available today.

SyncPlay

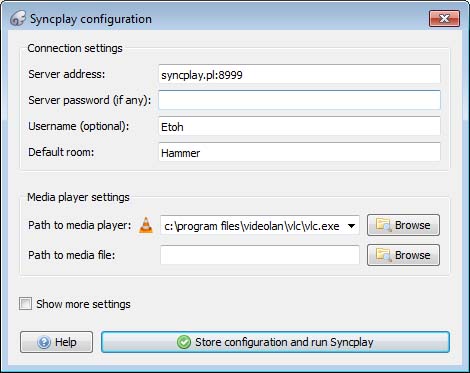
SyncPlay for VLC Media Player truly is an extension for our times. We’ve all had to deal with being away from loved ones recently, stuck at home and unable to spend time with friends and family. Sure, apps like Zoom and Skype have allowed us to chat with each other but when it comes to actual activities, it’s been tough. SyncPlay solves this problem, for one activity anyway, by making it possible to watch the same video concurrently on multiple computers at the same time. Yep, SyncPlay allows you to watch the same movie with friends and family even if you’re not in the same house.

To work you need to install VLC Media Player and the SyncPlay extension on all the different computers. Each PC then needs to connect to the same server and you’re ready to go. Once it has begun, one user can control playback on all the systems at once.

TuneIn Radio

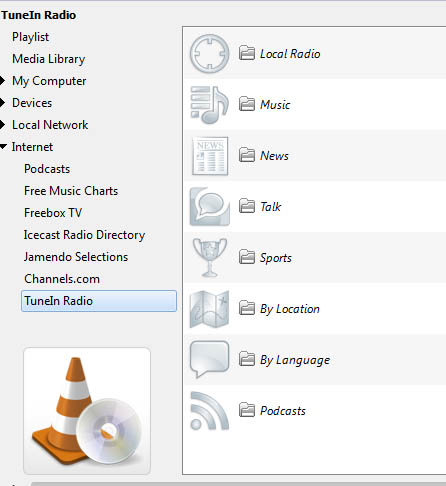
The TuneIn Radio plugin for VLC does exactly what you think it does. The plugin automatically grabs and displays all available TuneIn Radio stations instantly turning your VLC Media Player console into a massive and powerful internet radio. This means you can browse TuneIn’s extensive list of active radio stations without having to open Google Chrome, go to the radio stations web page, or look for it on a search engine.

With TuneIn installed on your VLC console you can easily browse radio stations by Music Genre, Local Radio Stations, News, Talk, Sports, and more. This extension basically puts radio stations from all around the world at your fingertips.

VLC for mobile Download now
8

Remember “Now Playing”

This simple extension works a little like Shazam but with audio tracks, you listen to while using internet radio stations. Yep, this extension will work perfectly alongside the TuneIn Radio extension we’ve just told you about. Basically, whenever you’re listening to internet radio you can use this extension to grab all of the metadata relating to that song so that you can then go and search for it and play it on your own. This extension keeps track of everything you’ve listened to so that you don’t have to.

Resume Media V3.4

The thing with VLC is that you usually use it to consume large media files. Whether they be movies, TV shows, or podcasts they all can last well over an hour. Sometimes you might not have all the time you need to get from start to finish and have to interrupt your playback. Of course, you can try to remember where you left off so that you can get back to it later, but wouldn’t it be much better to have VLC do that for you?

The Resume Media V3.40 plugin does exactly that. Whenever you close VLC Media Player with an active video or audio file, the extension will automatically start that file at the exact moment you left it when you open it up again.

Click to Play/Pause

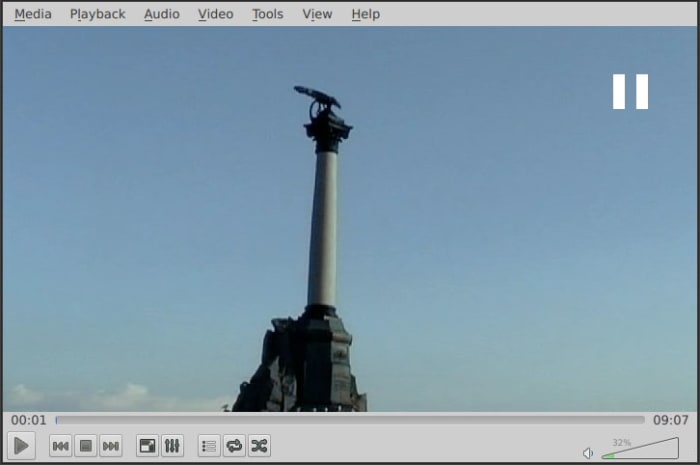
As more and more online streaming platforms have launched a number of them have added cool new features that make so much sense. We’ll get to the Skip Intro button in a minute but first we’re going to show you a simple extension that will make a big difference to how you use VLC. Straight out the box, VLC offers two ways for you to control playback. You can hit the tiny Play/Pause button in the bottom left of the screen or you can hit the space bar on your keyboard.

This extension makes it much easier to control playback by allowing you to click anywhere on the video to play or pause the action. As we said, it might not sound like much but trust us, it will make a big difference.

Skipper

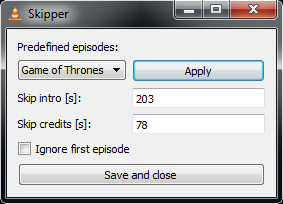
Please don’t misunderstand this as hyperbole or fluff. We think that the Skip Intro button might just be one of the greatest inventions of the 21st Century. Show intros and credits are incredibly annoying when all you’re trying to do is binge a season or two of your favorite show. Even if you like the intro, watching it 10-20 times in a single day is going to drive you crazy.

Well, the Skipper extension for VLC brings this wonderous innovation to the world’s most versatile media player. You can simply type I the amount of time you want skipping at the beginning and end of every media file and you’re good to go.