How to Use Plex

If you landed here due to the comPLEXities you’re experiencing using Plex, rest assured you’re not alone. Plex is one of the best entertainment hubs currently available, but get ready for a steep learning curve, guys and gals. The excellent news is that once you’ve mastered it, you’ll have a superb looking tool to manage your multimedia on one platform.

Why choose Plex?

Well, firstly, it’s free and safe to download on Android, Mac, iPhone, and Windows. There’s an array of reasons why you want to grab the manual and get it mastered, such as:

  • It’s a multi-lingual platform
  • It’s an open-source development.
  • You can customize Plex with a variety of third-party plug-ins, such as Netflix.
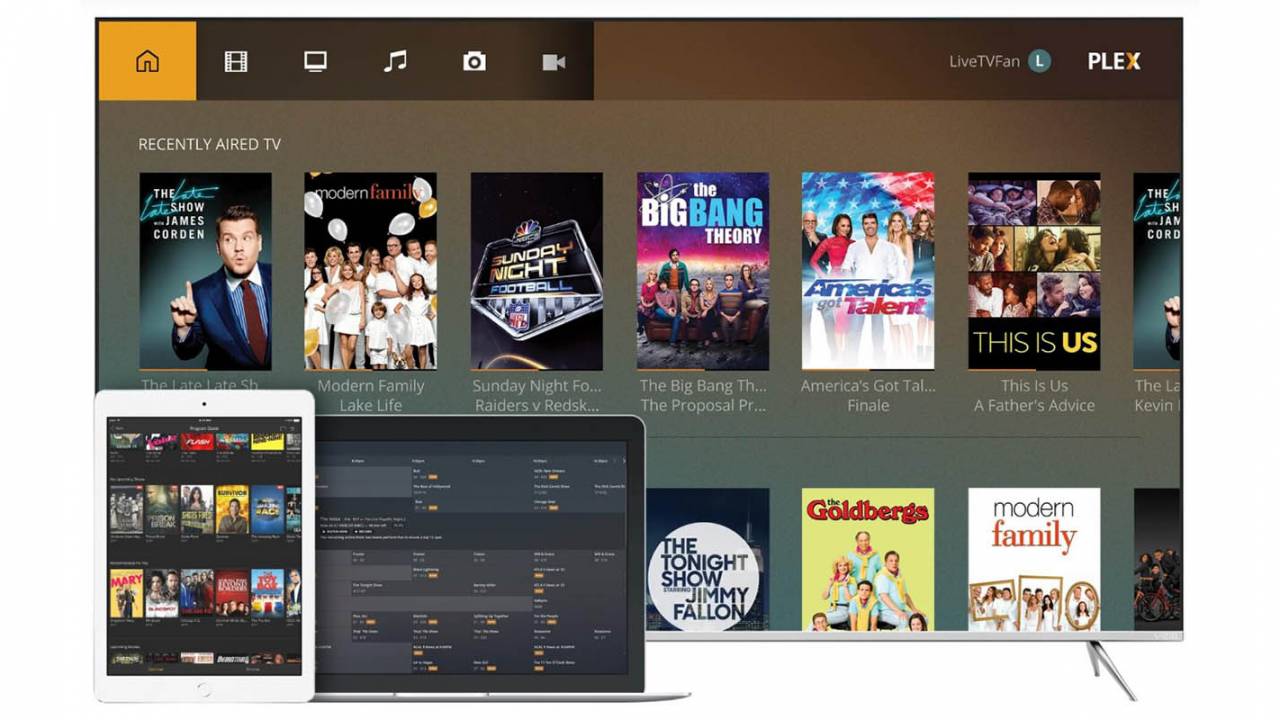
  • It optimizes all your media in one place.
  • You can stream between devices.
  • You can stream and record free TV channels.

How to get started and use Plex?

Let’s begin your journey with this entertaining app:

  1. Install the app on all your devices you want to connect to Plex, starting with your primary PC or laptop.
  2. When the installation is complete, select ‘Launch’ to redirect to a new browser window.
  3. Create your new Plex account by following all prompts. If you skip this step, you’ll only access limited functionality. It’s advisable to complete your new account and make use of the full suite of features.
  4. Add your libraries by following the straightforward prompts on Plex. It’s handy at this point to know that you can continue following more setup steps while your media syncs from all devices.
  5. You can choose the option to send all user data to Plex automatically moving forward. It’s a great time saver when you have multiple devices. 
  6. In the L-side menu, you’ll see a notice to ‘Claim your current network.’ Click on the alert to identify your server in the future.
  7. Click on the alert next to ‘Remote Access’ > ‘Enable Remote Access.’ It allows all other devices to connect to your Plex hub.
  8. Select the ‘Channels’ option on the side menu. Click on each channel you want and press ‘Install.’
  9. Now you can move on to your other devices and follow the setup prompts. It’ll show you how to share media between devices.
  10. You can customize your account to your heart’s content. Don’t worry; you can’t break Plex, so be creative and have fun creating your playlists.

Other platforms to consider

You can also consider another open-source multimedia platform such as Kodi or Stremio.

How to Make a Quiz on Google Classroom

Most teachers had to pick up the pace and join the new age of virtual teaching recently. If you fall into this category, you’ve probably met the superb teaching tools that Google Classroom offers. With 2021 still wobbling under the pandemic’s extreme pressure, many parents and teachers have come to accept that virtual teaching is here to stay. 

Once you’re used to teaching virtually, it might get harder to return to a brick and mortar classroom. Even when you do, Google Classroom’s advantages can help you streamline and monitor your student’s assignments.

What is Google Classroom?

Google Classroom is a free app that allows you to interact with your students in a virtual environment, assign tasks, like quizzes, and do one-on-one tutoring or group studies. It has loads of productivity tools that help you stay connected with all your students and track their progress. It integrates seamlessly with all other Google applications offering you one user-friendly platform to teach from.

The best part about using Google Classroom is that it’s free and safe to download, and you can easily use it from your mobile device to keep in touch while you’re on the go. 

How to create a quiz on Google Classroom?

  • Launch your web browser and navigate to Google Classroom.
  • Sign in on your Google account.
  • Select an existing class, or ‘Create a class.’
  • Once you’re in the classroom, tap on the ‘Classwork’ button.
  • Choose ‘Create’ > ‘Quiz Assignment.’
  • You’ll find that the quiz form looks exactly like the standard assignment form. The difference is that it has a blank Google form to serve as your quiz form.
  • Name your quiz in the assignment menu and type in all relevant instructions.
  • You can also attach additional files to the quiz by clicking on ‘Add.’

How to share a quiz in Google Classroom?

  • Once you’ve created the quiz, save it.
  • Press the ‘Visible To’ tab.
  • Click on ‘Share on Google Classroom.’
  • In the new pop-up window, log in to Google Classroom again.
  • Please select the class you want to share the quiz with and click on it.
  • The quiz will now be visible to the members of that classroom.

Are there more apps like Google Classroom?

Other apps also allow you to share group information such as assignments and grades online. College professors often use Canvas to assign tasks virtually, while Moodle offers loads of features and plug-ins.

How to Make a Crew on GTA V

While many Grand Theft Auto games have risen and fallen in popularity over the years, none have reached GTA V’s development scale. Besides the intense campaign mode, GTA Online offers exciting multiplayer action that has had gamers looting, killing, racing down mountains, and committing heists for the last few years. There’s even a GTA V manual for Android!

The time has come for you to take action against the other gangs. You can create a new crew on GTA V to wipe the streets clean from the litter of newbies and professionals alike. So jump in your Cheetah vehicle, and let’s go for a ride.

How many crews can you create for GTA Online?

Rockstar Games lets you become members of up to five gangs at a time, so choose your groups wisely. However, you can only create and lead one crew at a time. In essence, it means you can run one team while being a street soldier for four other gangs. 

Joining the Social Hub

While the Rockstar Games launcher gives you access to the GTA V game, you’ll need to register for a Social Hub account if you want to create a new crew. You’ll be able to customize your crew name, choose your gang type, select tags and mottos, and so much more. 

How to make a crew on GTA V

Now that we’ve hyped you up, let’s show you how to create a crew on GTA V:

  • Open Social Hub and log into your account;
  • Select “Crews” in the top menu;
  • Click on “Create a Crew” on the right of the screen;
  • Type in your crew name, which needs to be unique;
  • Input your crew details as indicated;
  • Click on “Save this Crew.”

Now that you have your crew set up, you can establish the ranks, design the rules, and invite your friends!

Take on the world

Running the streets and beaches can be enjoyable if you have gang members taking on other teams in exciting competitions and events. You’ll earn crew rewards, and you can accept unique challenges. Remember to find your strongest members for the best missions.

How to Install Shaders for Minecraft

Minecraft provides an extremely enjoyable experience for casual gamers that love sandbox titles. It’s mellow, and you can choose whether you want to just be creative or survive against the nightly hordes of monsters. 

Did you know that you can also install shaders for Minecraft to change the visual aspects of the game? In essence, you’ll receive new lighting, improved graphics, unique textures, and so much more!

A quick guide for how to find, download and install these exciting elements.

Step 1: Download and install Optifine

Optifine is a free mod platform for this game that helps optimize your settings. If you’re wanting to install shaders for Minecraft, installing this program is your first step. It will assist in placing the shaders in your saved worlds without stressing you out too much.

You can read more about Optifine and find a download link in our guide.

Step 2: Find and download your favorite shaders

Now that you have Optifine, it’s time to locate your favorite shaders pack. The online world is saturated with content from gamers and developers alike. However, here’s our list of the top six shaders you can try for Minecraft:

Step 3: Open the shaders folder

Here come’s the tricky part. You’ll need to launch Minecraft with your launcher of choice before opening the Optifine version. 

  • In the main menu, select Options;
  • Click on Video Settings, and then Shaders;
  • Select Shares Folder, and wait for the new window to appear.

How to install your Minecraft shaders pack

You’ve reached the most challenging step of installing shaders for Minecraft. Everything you’ve done so far has led you to this point. Ensure that you follow this process carefully, otherwise it won’t work.

  • Once you’ve downloaded your shaders pack, move the folder to the Shares Folder window you found in the previous section;
  • Close the folder and restart Minecraft;
  • Ensure that you open the Optifine version again;
  • Follow the same steps as before, but stop when you select Shaders;
  • You’ll see you’re selected pack, which you can now run.

Behold beauty and majesty

Shaders present a new appearance to your saved world if you’re bored of the vanilla look. If you’d like to learn more about crafting, feel free to read our Minecraft guide. You can also check out how to allocate more RAM in Minecraft if you need more memory for your shaders.

How to Allocate More Ram to Minecraft

Minecraft has been bringing joy to family and friends since 2009, breaking into PC screens first before moving to consoles and finally mobile devices with the Pocket Edition. Who would have thought that destroying blocks just to reorganize them elsewhere could be so much fun? 

The primary issue with computer gaming is that you sometimes need to allocate the correct amount of memory for the title to function properly. Today, we’re going to show you how to do that with Minecraft.

How much memory should you allocate to Minecraft?

Depending on how much effort you’re going to put into this casual sandbox game, there are different RAM allocations you can try. For instance, starting out and playing randomly will need at least 2GB of memory. If you’re going to be building more advanced features or playing online with friends, you’ll need between 4GB and 6GB. 

Allocating more RAM to Minecraft 

Your computer won’t automatically assign the right amount of memory to Minecraft. In order to adjust the settings, you’ll need to access the game launcher you use to start the game. Here’s a look at the top three Minecraft launchers and how you can allocate more RAM through them.

Premium Launcher

The Premium Launcher is the default Minecraft launcher you’ll receive with the vanilla game when you purchase it for Windows. To allocate more memory, you’ll need to follow these steps:

  • Open the launcher;
  • Select Launcher options before proceeding;
  • Enable the Advanced settings;
  • Choose the version you want to change;
  • Enable the JVM Arguments;
  • Exchange “-Xmx1G” with the amount of ram need;
  • Save your settings.

Other launchers

Of course, there are other launchers you can use for optimized settings and mods. Both TLauncher and ATLauncher provide the ability to allocate more RAM to Minecraft. While you may need to head into preferences or tools, you can change the memory assignment using either one of them in the same way.

Get your craft on

Playing Minecraft is one of the most enjoyable experiences for any sandbox casual gamer, whether your a teenager or an adult. There are so many items you can craft, so be sure to check out our Minecraft guide for the latest tips.

How to turn off Chrome Notifications

We are spoilt for choice today when choosing a default Web browser. With excellent options available such as Chrome, Firefox, and Opera, it’s genuinely a matter of personal taste that decides which one you apply. 

That said, more than 310 million Web surfers (that’s almost 40% of the total market share) all opt for Google Chrome presently, and for a good reason. Most Steamers also use Google Chrome as it’s quick and easy to migrate to Chrome on all devices powered by Android, Mac, and Windows. Chrome is omnipresent due to its robust features, expansive extension possibilities, and dedicated mobile apps.

Okay, so now that we know why Chrome is such a firm favorite, we can get down to the business of managing the non-stop and disturbing onslaught of notifications. We understand how disruptive it can be if you’re busy with a significant attack in your favorite game, and Chrome feels it’s necessary to tell you that you have to run a security check. As if you don’t know it already, right?

How to disable Chrome notifications

  • Open Chrome on your device.
  • Go to ‘More Settings’ in the top R corner.
  • Go to the ‘Privacy and Security’ tab > click on ‘Site Settings.’
  • Click on ‘Notifications.’
  • Here you can manage the notifications. ‘Allow or Block All’ > select each site individually and turn it ‘On’ or ‘Off.’

How to block a website in Chrome

If you want to block a website from contacting you altogether or preventing your eight-year-old from seeing unsavory sites when researching school projects, follow the steps:

  • Search for the Chrome extension to ‘Block Site’ and add it to your browser.
  • Select ‘Add Extension’ in the pop-up box.
  • Find the new extension icon on the top R corner of your screen.
  • Open the website that you want to block – don’t feel bad; you can undo it later.
  • Click on the extension icon and select ‘Block this Website.’

How to unblock a website in Chrome

If you need to access the blocked site again, you can undo your previous actions effortlessly.

  • Click on the ‘Edit your List’ tab in the top R corner of your screen.
  • All your blocked websites will appear with a minus (-) next to them. Press on the minus to unblock that specific site. It will turn into a plus sign when the site is freed.

How to Share Games on Steam

We’ve all been bummed out at one time or another because we may not sell our Steam accounts. Maybe you needed some extra cash, and you’re sitting with a massive game collection worth thousands. Well, we’ve made peace with this fact and moved forward. Although you can’t sell your account, you’re more than able to share your games on Steam with family and friends. 

If your little brother has been on your case about a game you have, it’s time to practice the age-old saying: sharing is caring. So, get your family or friends to register personal Steam accounts on Android, Mac, or Windows now, and let the family games begin.

How to share my games on Steam?

Before you can allow other players to access your games library, you have to make a few quick setting changes on your account. Then, in a few clicks, your little brother can download whatever game of yours he wants directly from your collection. As easy as that.

  • Click on ‘Settings’ in your Steam menu.
  • In the ‘Account Tab,’ you must turn on ‘Steam Gaurd.’
  • Now, log into your Steam account from the family member’s device.
  • Click on the ‘Steam Menu’> ‘Settings.’
  • Select the ‘Authorize library sharing on this device’ option.
  • Log out of your Steam account on the device and let the owner sign in to their Steam account. Your game library will be available to them to play on.

Can I play a shared Steam game with other players?

The profound answer to this simple question is no. It’s crucial that you only share your Steam games with people close to you, preferably under the same roof. Steam doesn’t allow the same Steam library to be used on various devices simultaneously. We understand Valve’s reasoning for this decision. If we could share our game libraries with multiple people and all play together, nobody would be buying games anymore. So, choose your friends and family you want to share with wisely and take turns having fun.

Other gaming platforms like Steam?

Xbox Beta is another excellent gaming platform that offers interactive gaming with users from around the globe. Also, take a look at what GOG Galaxy provides you in organizing and accessing all your gaming platforms on one site.

How to Refund a Game on Steam

If you’ve ever been to a Black Friday sale, you’ve undoubtedly experienced buyer’s remorse, as we all have. It’s all the hype of not missing out that often crashes out credit cards in an unguarded moment. A rather clever acronym for this is FOMO (fear of missing out), and yes, we all have it to a degree. Although this tongue-in-cheek reference brings a smile to your face, what you need is a refund.

When may I request a Steam refund?

Fear not, fellow Steamers, as Valve undertakes to refund you when the buying rush is over, and you realize you need another week’s food more than the latest game. As long as you’ve played less than two hours and bought it less than 14 days ago, you’re eligible for a refund.

Of course, there are other valid reasons for requesting a refund that’s also acceptable, such as not enjoying the game, an accidental purchase, or technical issues. You can supply your reasons when following the refund process online on your Steam account.

How to request a refund on Steam?

  • Go to help.steampowered.com and use your Steam account to log in.
  • Select the option for ‘A Purchase.’
  • From the list of recent purchases, you can click on the relevant one you want to return. This list only displays all purchases that fall within the 14 days and are valid for a refund.
  • From the drop-down options, choose the reason why you want to return the game.
  • Click on the tab that reads ‘I’d like to request a refund’ and complete and submit the form provided.
  • Next, you must select the original method of payment you used for the purchase.
  • You’ll receive a confirmation email that your request is submitted.

How long will I wait for my Steam refund?

It typically takes up to 7 days for the refund to be completed, whether you log in via Windows, Mac, or Android. International refunds can take longer. If you’re in the United States and have been waiting more than seven days, you should make sure that you haven’t already used the credit to make more purchases. If that’s not the case, you can repeat the process to request a refund as described above.

Other marketplace platforms like Steam

Variety is the spice of life, and for gamers, that means hunting down the best prices for your games and accessories. You can also take a look at what GOG Galaxy and the Epic Game Store has to offer.

How Much Is My Steam Account Worth?

In the ’80s and ’90s, we collected CDs, DVDs, and Playstation game disks. Whoever had the tallest shelf full of these collectibles was hailed as the king of the tech revolution. You alphabetically sorted many of these collections, and a monetary value would always be a part of your bragging rights. 

As with all things, advanced technology quickly eradicated the need to pile up plastic on our shelves. With the launch of Steam in 2003, our libraries went online. Although Steam has been around for almost 20 years, it wasn’t until 2018 that you could put an accurate price on your collection. If you haven’t joined the digital gaming era yet, remember you can download Steam free for Android, Mac, and Windows.

Calculate the value of my Steam account

If you’ve been collecting game titles for many years, it’s always good to know the value of your investment. Yes, we call it an investment as it has contributed to your emotional wellbeing over the years by providing hours of fun and joy.

Although you’re not legally allowed to sell your Steam account (after hours of reading the fine print, it’s sad to say: it is what it is), it’s still valuable to know how much you’ve spent and how much it’s worth in current times.

SteamDB offers a popular tool to use for calculating your Steam account’s value. It adds up all the games in your Steam community profile and calculates its ‘account worth’ by using each game’s current price. It’ll give you an estimated value in your local currency.

Step 1. Enter in your Steam account

  • Set your Steam profile to ‘Public.’
  • Open a new window and visit SteamDB.info by selecting ‘Sign in via Steam.’
  • Select the blue ‘Sign in through Stream’ again.
  • Select the green ‘Sign in’ button.

Step 2. Check the value of your account

  • View the block in the top R corner to find your actual Steam value (in green) and your current Steam value (in red.)

Another excellent tool is available to help you sort your Steam collection and keep a well-recorded inventory. If you want to look at alternatives for Steam, you can consider GOG Galaxy.

IObit Does It Again: Advanced SystemCare Ultimate 14 Wraps Your PC in a Super-Strong Shield

As more of us work, shop, communicate, and consume content online, it’s become more important than ever to protect our PCs with adequate safeguards against a dizzying array of threats. Our machines are vulnerable to viruses, spyware and ransomware; our personal data is at risk from phishing schemes and endless online tracking; and even the embedded software that we use can hide dangerous code that hackers can use as backdoors to enter our digital lives. 

Unfortunately, getting adequate protection on our PCs as well as shields to guard our data online can be almost as complicated as understanding the different kinds of threats we face. That’s why we’re big fans of Advanced SystemCare Ultimate 14 from IObit, a major force in providing safe and secure PC system utilities

Updates Specifically for 2021

Coming just about one year after the last SystemCare Ultimate update, IObit has packed this release with up-to-the-minute protections that shield you from threats anywhere they might leak in – and we mean anywhere. 

Software screenshot“Cyber attacks have increased dramatically along with the worldwide spread of the COVID-19 and people are facing more varied types of cybersecurity risks,” said Bing Wang, IObit Product Director. “IObit attaches great importance to developing easy-to-use tools to strengthen PC’s defense against cyber threats, especially those that have recently emerged. Now at the very beginning of 2021, we are proud to present Advanced SystemCare Ultimate 14, a system tool that not only makes your PC clean and fast, but, more importantly, safe.” 

For starters, IObit’s continued partnership with Bitdefender – a leading producer of antivirus software – has led to a supercharged database of malware threats. Now, not only will SystemCare Ultimate 14 protect you against the usual threats from Trojans, spyware and ransomware, but it will also guard against the unique viruses that are emerging faster than ever as we enter 2021. IObit’s algorithm and defense engine works tirelessly in the background of all your activity to spot these threats and eliminate them in real time.

Software screenshotBeefed-Up Browser

Browser-level security has also been significantly improved with this release. SystemCare Ultimate 14 now offers surfing protection that is more comprehensive than ever, thanks to a newly updated database that blocks dangerous websites – some of which have merged to make them even more difficult to find. On top of that, you’ll get enhanced email protection, ad removal, and anti-tracking functionality to keep you safe from annoyances like targeted ads, as well as more serious threats like phishing scams. 

Software Screenshot

As if the significant online protections offered by SystemCare Ultimate 14 weren’t enough, this Swiss-army-like software also offers system enhancements that will keep your PC running safely and smoothly. It has greatly expanded and diversified its software database, which lets users access the latest updates to the programs on their machines with one click.

Software Screenshot

This not only keeps computers running better, but it also takes advantage of the latest security patches from software makers that prevent hackers finding their way onto your machine through vulnerabilities. Additionally, SystemCare Ultimate 14 also provides a registry cleaner to eliminate bloatware or unnecessary files, as well as the ability to manage your startup items to improve boot times.

Rarely do so many powerful functions converge in one software, but IObit continues to impress with its offerings. And the best part? You can download a copy completely free! Just follow the link below and a cleaner, safer, glitch-free PC is just a few clicks away.