If you’ve ever worked on a large project in Adobe Premiere Pro, you know how easy it is to get lost among files and clips. Fortunately, the latest version of the program is packed with features designed specifically to make things easier for us: from ways to organize sequences to options for applying color markers. Thanks to this, you’ll be able to know what you’re looking at at any moment and where everything is located.
In the following lines, we will explain how to take advantage of all these features so you can keep control of your projects and dedicate your time to what really matters: telling stories.
Organize your sequences with colors and markers
Assigning colors to your sequences can be a very simple gesture but it will help you maintain control and know where everything is quickly. It is an easy and very quick process, as you will see below.
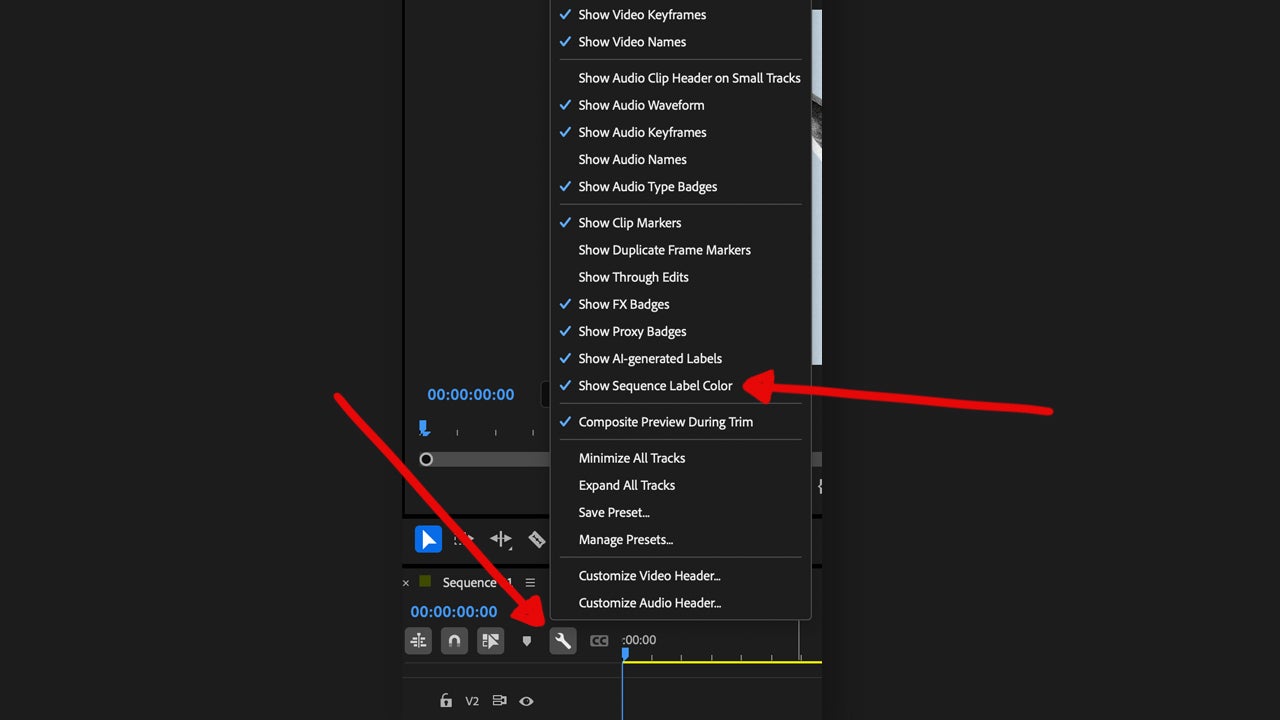
- Select the wrench tool. You will find it in the Timeline panel.
- Activate the Show Sequence Label Color option, as it is disabled by default.
- A color will appear to the left of the sequence name.
With colors you can distinguish between sequences and easily know what each sequence is about. However, this is not the only organization option within Premiere Pro; we also have markers.
Markers can help you highlight the most important points of each clip. With them, you can identify when a specific action occurs and have it as a reference. The types of markers that exist within Premiere Pro are:
- Comment Marker: with them we can add comments.
- Chapter Marker: in a finished video we can jump to different points through them.
- Segmentation Marker: define ranges to automate workflows.
- Web Link: allow adding links to specific websites.
- Flash Cue Point: allows embedding metadata in the video. You can access them via ActionScript in Adobe Animate projects.
Adding your own markers is a simple task and you can do it from the source monitor, the timeline, or the effects control panel. We will explain it to you in order:
- Open the source monitor from the Project panel and place the playhead at the point where you want to add a marker.
- Finally, select Markers > Add Marker. Markers added from the source monitor are always retained, whether the clip is in the timeline or not.
If you want to add them from the timeline, you will see that the process is not very different:
- If you want to add it from the timeline, drag the clip there and place the playhead where you want to position the marker.
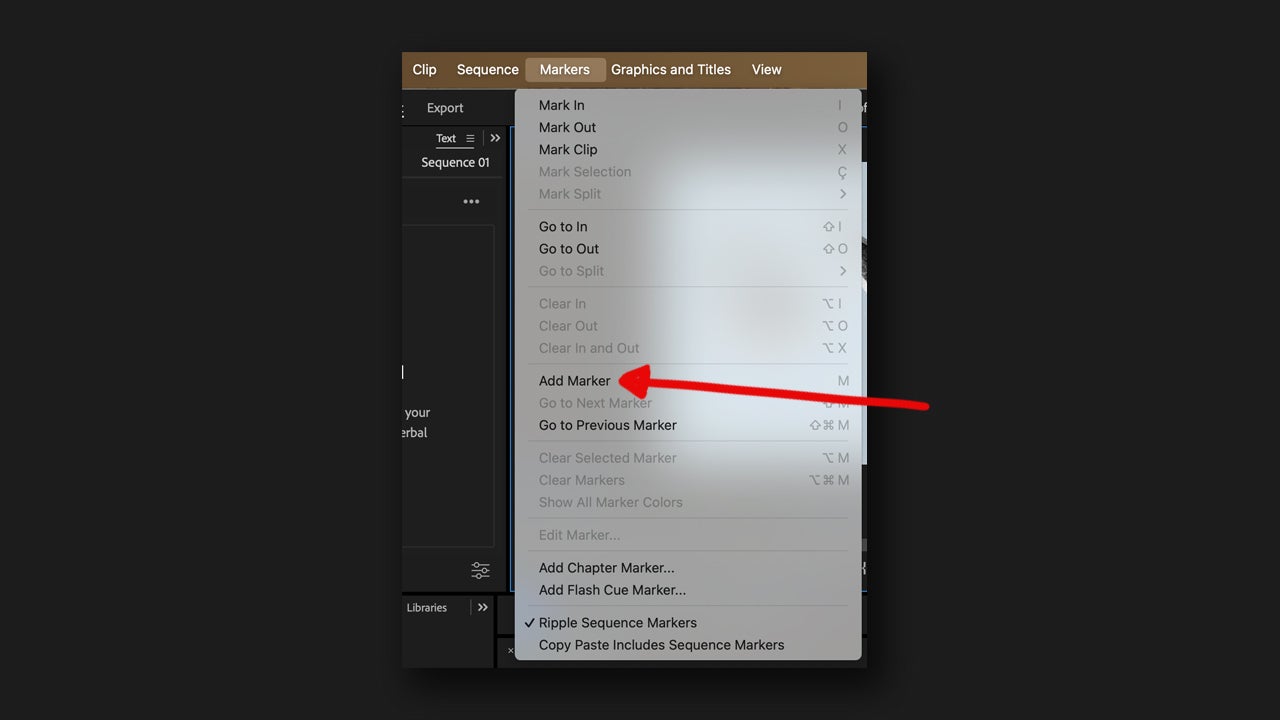
- Select Markers > Add Marker or press M directly from your keyboard.
Finally, you can also do it from the effects control panel:
- Move the player to the point where you want to add the marker.
- Right-click (Windows) or press Control and click at the same time (macOS) on the timeline ruler.
- Select the Add Marker option.
To see all the markers of a project, go to Window > Markers. If you want to know more about a specific one, just double click on it to get all the details: colors, entry points, exit points, comments, etc.
If what you want is to quickly navigate between your bookmarks, you can select it from the timeline and go to the next ones from Marker > Go to Next Marker/Go to Previous Marker. You can also move the site bookmarks by dragging them on the timeline from the source monitor.
Change the color of your markers in Premiere Pro
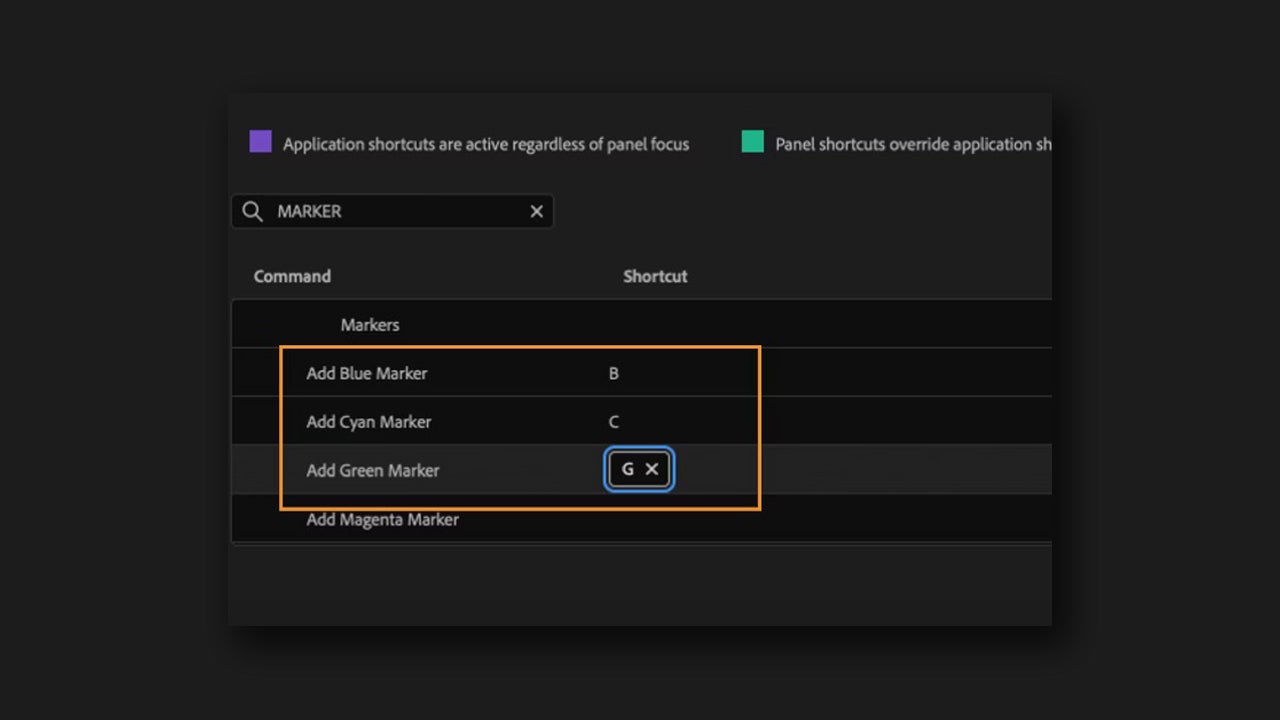
When adding markers, you will see that the green color is the one assigned by default. You can easily change this preference from the Premiere Pro options.
To do this, simply go to Edit > Keyboard Shortcuts. On macOS, the path changes slightly to Premiere Pro > Keyboard Shortcuts. In the Command section, add the keyboard shortcuts you want for each color. To see the list of colors, type Marker in the search field and scroll to the end of the Markers section.