As of today, we can find a plethora of organization programs and applications. Adobe has wanted to contribute its bit to the productivity sector with PDF Spaces, a shared workspace focused on PDFs and other types of files.
In fact, it is the ideal solution for all those users who have ever searched for collaboration tools focused on PDFs. It is more than just a shared space, like any cloud service: with PDF Spaces, multiple people (or yourself) can edit, comment, review instructions from different files, and have AI-generated summaries, all from one place. And here we will explain what it is and how it works.
What is PDF Spaces?
PDF Spaces is one of the most interesting new features of Adobe Acrobat that focuses entirely on productivity. Within PDF Spaces, you can gather several PDF files, documents, links, and notes in one place to read, analyze, comment on, summarize, and even share if you want.
However, it is much more than just a simple place to share files. PDF Spaces can analyze your PDFs and create text or audio summaries with generative artificial intelligence so you can quickly grasp the ideas of more complex texts. Additionally, you also have an AI Assistant at your disposal to ask your questions about the document and get instant answers.
How PDF Spaces Works
The easiest and most direct way for you to access PDF Spaces is by logging in to Adobe Acrobat from your trusted browser. Once you do that, you will see that section at the top of the page, right next to Home.

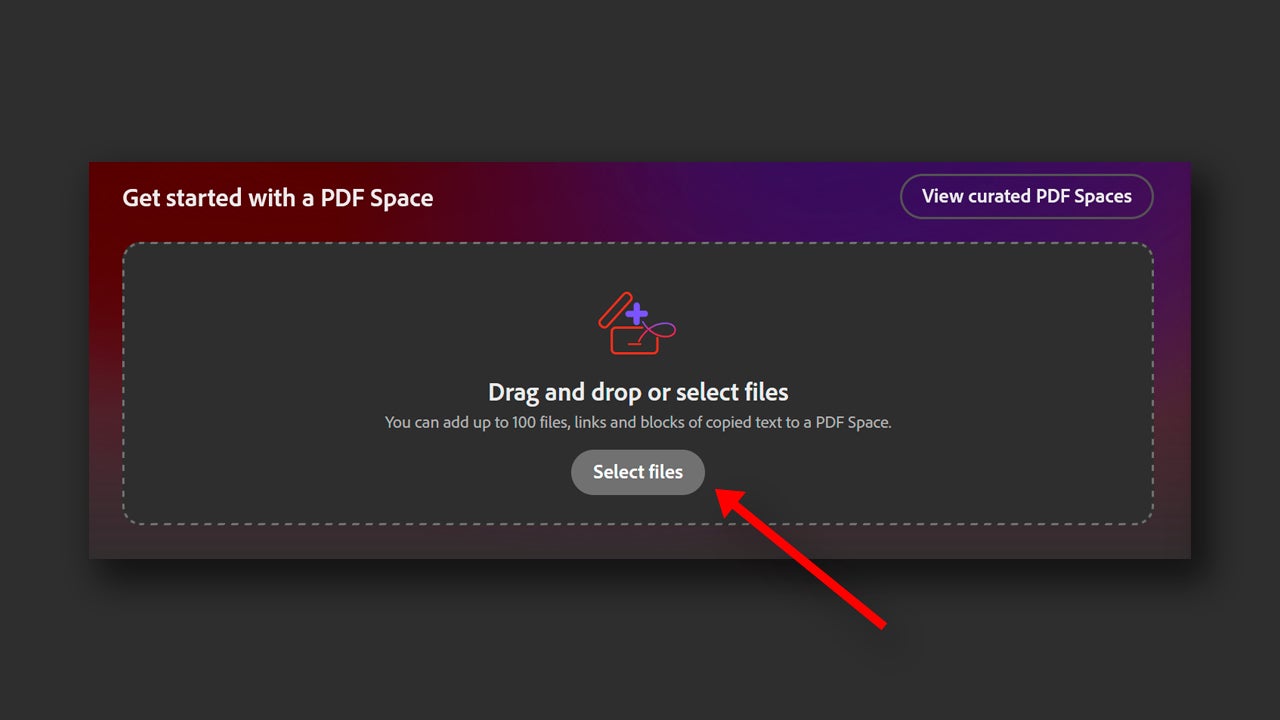
By clicking there, you will directly access the PDF Spaces panel. If you want to create your own space, start dragging files from your computer that you want to be part of it. On the other hand, you can also click on Select files and upload files from your PC. You have a third optional way, which is selecting PDF Spaces > Create a PDF Space.
Wait for the documents to load and you will see how they appear listed in the left panel. Further to the left, you will see a series of options for your space. The first, Overview, will help you quickly see what files you have uploaded and two summaries, one generated by written and the other by audio. On the right, you will always find your AI Assistant, to “whom” you can ask more specific questions.
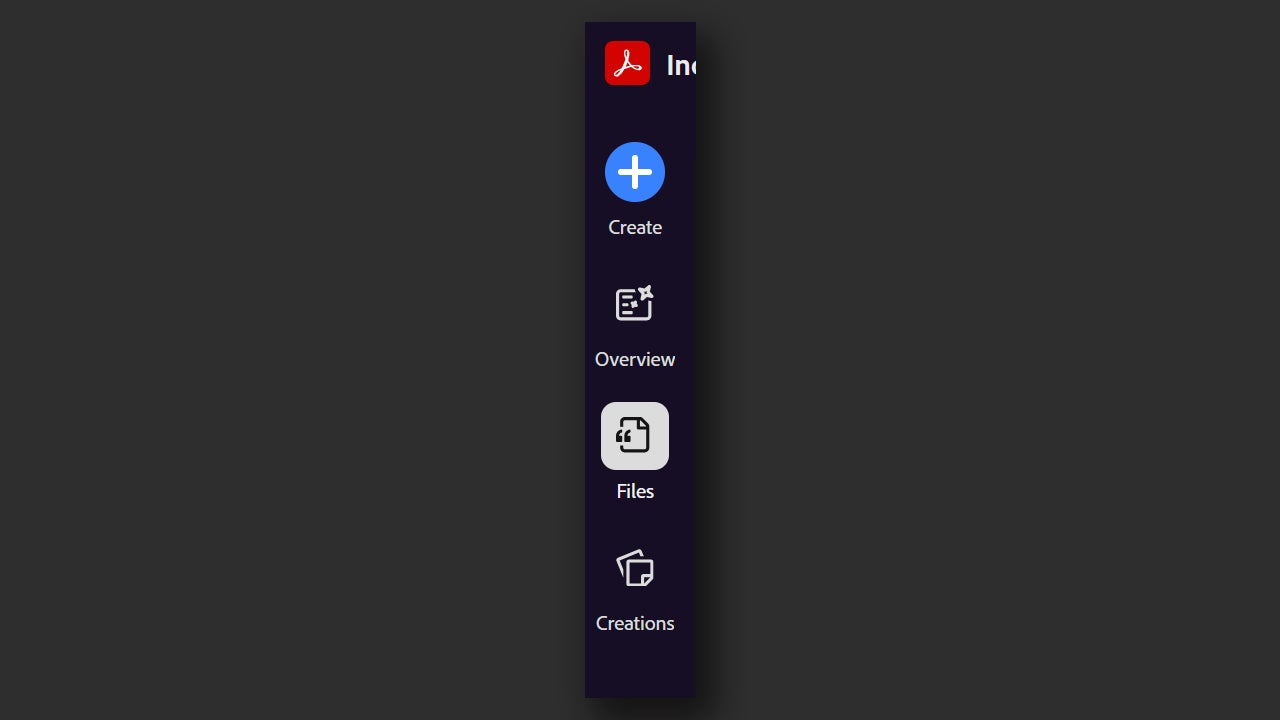
Then you have Files, which is for viewing the files directly, and finally, Creations. From Creations, you can access a podcast generated by Adobe that explains what you have in your Space and what the uploaded documents are about. They are very useful tools, especially if you work with files that are very dense or difficult to understand (legal documents, medical reports, etc.)
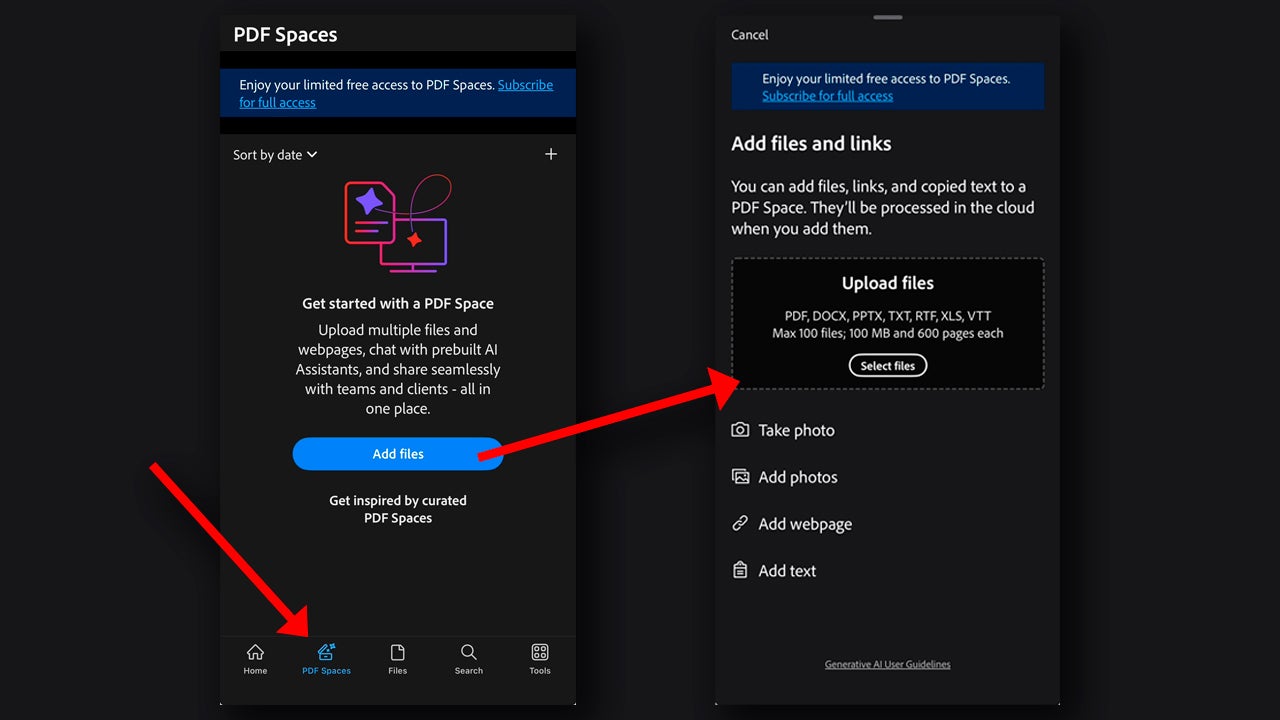
If you want to use PDF Spaces from your mobile, simply download the Adobe Acrobat app for iOS or Android and log in with your Adobe username and password. Then, tap on PDF Spaces, the button you will see below next to Home. Start by adding files from Add files, from here you can take photos, add web links, or upload your documents from your iPhone or the cloud.
AI Assistant, your virtual companion
At this point, we have our space created. Now, you can ask AI Assistant things like: “summarize the key points,” “compare these two documents,” “detect contradictions,” and more. Adobe explains that PDF Spaces allows you to know what the key points are, make more concrete summaries, and compare documents if necessary.
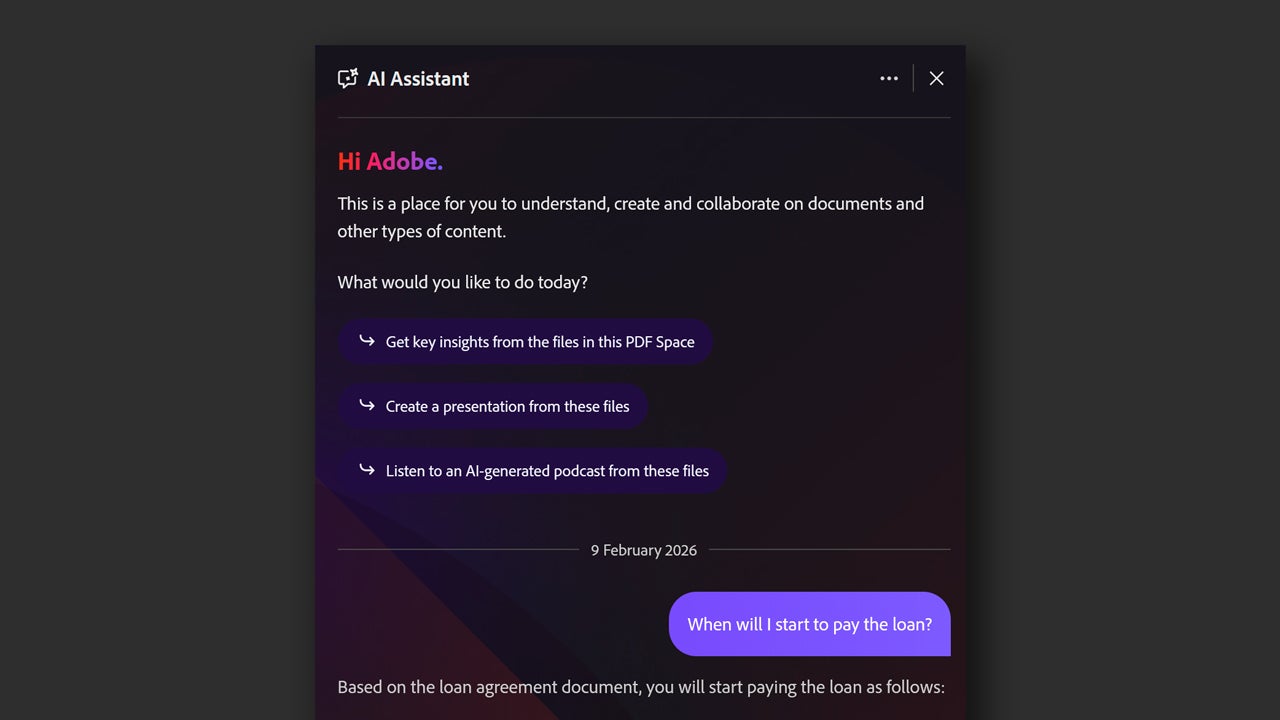
In this case, to make the most of AI Assistant, you should speak to it in a specific and concise manner. It will always be better to ask for a specific action, such as “make a table with agreements, responsible parties, and deadlines” than to ask it to tell you “what the important things are.” If you don’t do that, you are likely to get less optimal results and give the AI the opportunity to “hallucinate.”
When we talk about an AI hallucinating, we mean that it generates a fabricated response with data that is not found in the document. That is why it is important to formulate your questions well and sensibly.
Share your Space with others
You can share your space with other users from the Share button, located at the top right. Here you have several options: the first, is to write the emails of the users you want to share the space with. When you do this, you can assign them the permissions of Viewer to view files and notes, Reviewer to comment, and Contributor to add comments, files, or notes.

You can also control access by using an invitation or by creating a link for people in your company or the public. We don’t need to tell you that, for sensitive documents, it is wise to avoid public links by all means. To set who can view the link or not, configure it from Change.
How can I access PDF Spaces?
PDF Spaces is part of Adobe Acrobat and you can access it from the web or from your mobile (iOS and Android). To create your own spaces, you need to log in with an Adobe account; if you don’t have one yet, you can create it for free in just a few minutes.
Unfortunately, PDF Spaces is not free. The feature is available for users who are subscribed to Acrobat Studio or who have the AI Assistant add-on. However, you can try for free for 7 days the Acrobat plans, such as Acrobat Studio. Through the official Adobe website, you can access trials of their applications to help you decide if it’s worth it or not.