Free Wi-Fi can be found everywhere these days – at airports, hotels, your favorite restaurants, or the even at your local Starbucks. But while public Wi-Fi connections are a great convenience, they aren’t necessarily safe. In fact, you might think of public Wi-Fi as an open invitation to hackers to snoop around and view your online activities. Of course, that doesn’t mean you shouldn’t use free Wi-Fi when it’s available. It’s free, after all! This is where VPN comes to the rescue.
In this guide, we’ll explain what a VPN is, why you need one, and how you can connect to a VPN from your Android phone.

How to connect to a VPN from an Android phone
What is a VPN?
A Virtual Private Network, or VPN, is a private online service that reroutes your Internet connection via remote sites, servers, or computers in order to protect your identity on the web. A VPN works by creating an encrypted tunnel for your data to pass through, effectively forming a barrier between you and the external traffic on the internet. It cloaks your online activities from any and all prying eyes – whether they’re nosy snoops and spies, professional hackers, or even the government.
A VPN benefits you in a number of different ways, including:
- Protecting your privacy by encrypting all your data.
- Enabling you to shield your location from your Internet service provider.
- Providing access to remote resources, such as websites blocked in your region.
- Allowing you to access and handle sensitive and confidential data from a secured network without compromising its security – for example, official work documents from a shared server, or your bank account.
So, if you’re a student accessing official school resources, an employee working remotely for your company, a traveler, or just someone concerned about securing their online identity for privacy purposes – a VPN is an absolute must-have.
Luckily, VPNs are readily available and easy-to-use for cell phones, personal and public computers, laptops, and more.
How to Connect to a VPN from an Android phone
There are two ways to create a VPN connection from an Android phone. You can either connect to a VPN service provider via the built-in Android VPN system, or download any of the standalone VPN apps that provide remote access through a VPN server.
DISCLAIMER: There are endless types of Android devices in the market and not all of them have the same settings. It’s possible that your phone’s settings menu may look somewhat different than the screenshots shared below.
Android’s built-in VPN settings
A majority of the Android phones, especially those with Android version 4.0 and above, have built-in support systems for different kinds of VPNs. These settings may include support for L2TP Virtual Private Networks or PPTP VPNs.
Here is a step-by-step guide to setting up a VPN connection via the built-in VPN support settings in your Android phone.
Step 1. Open the Settings application in your phone which should look somewhat like this:
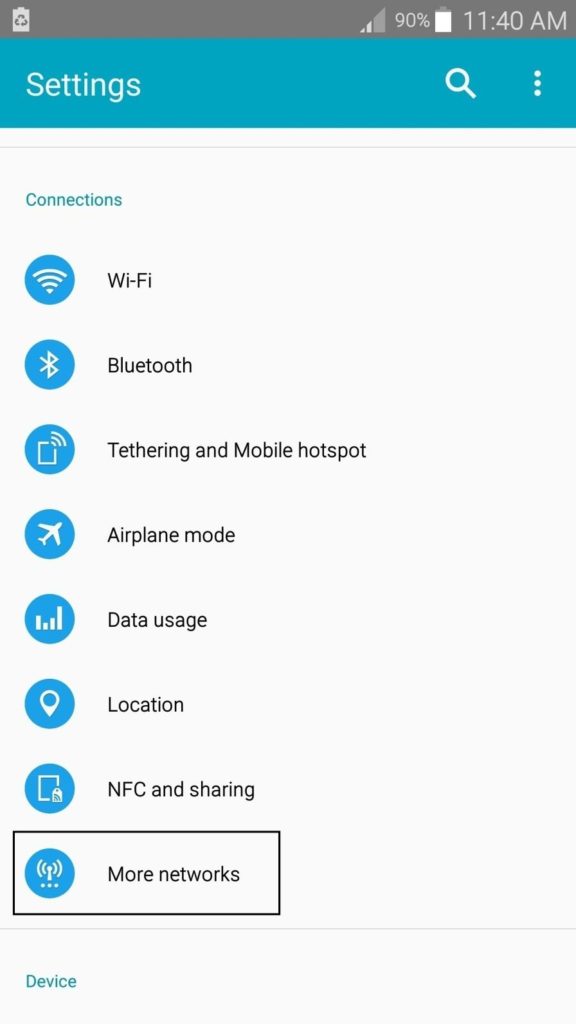
Select the More networks option at the very end of the list.
Step 2. From the three (or more) options available, select the VPN option in the More networks tab.
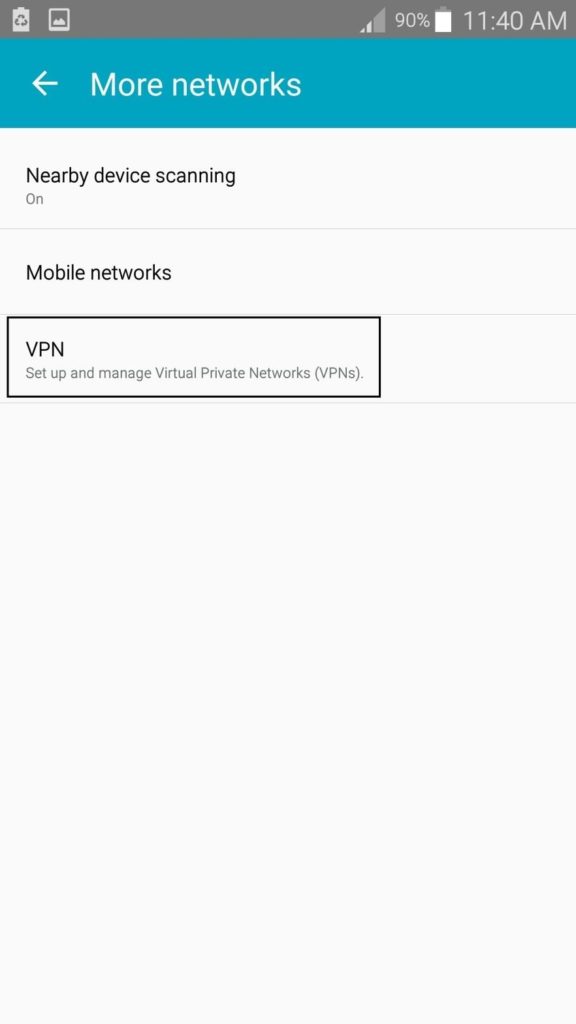
Step 3. If you do not have a standalone VPN application installed already (more on that in a bit), proceed to select the + on the upper-right corner of the screen to manually set up a new VPN profile.
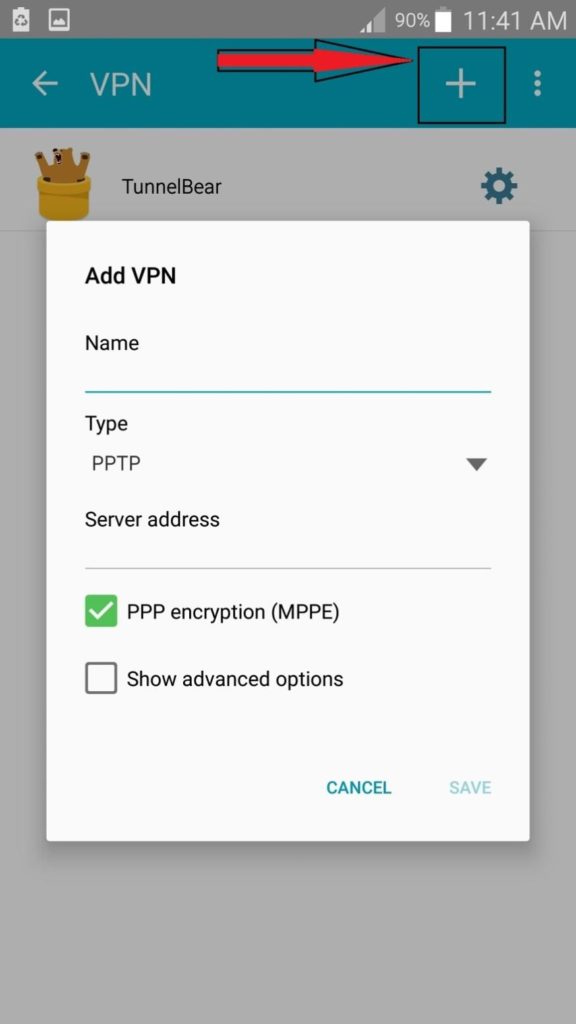
In the Name field, enter a name that will help you identify which VPN is used for which purpose. For example, for a VPN that connects you to your company’s shared server, you might want to name it Work. Once you’ve done that, select the type of VPN profile you wish to create from the list of available options in your phone.
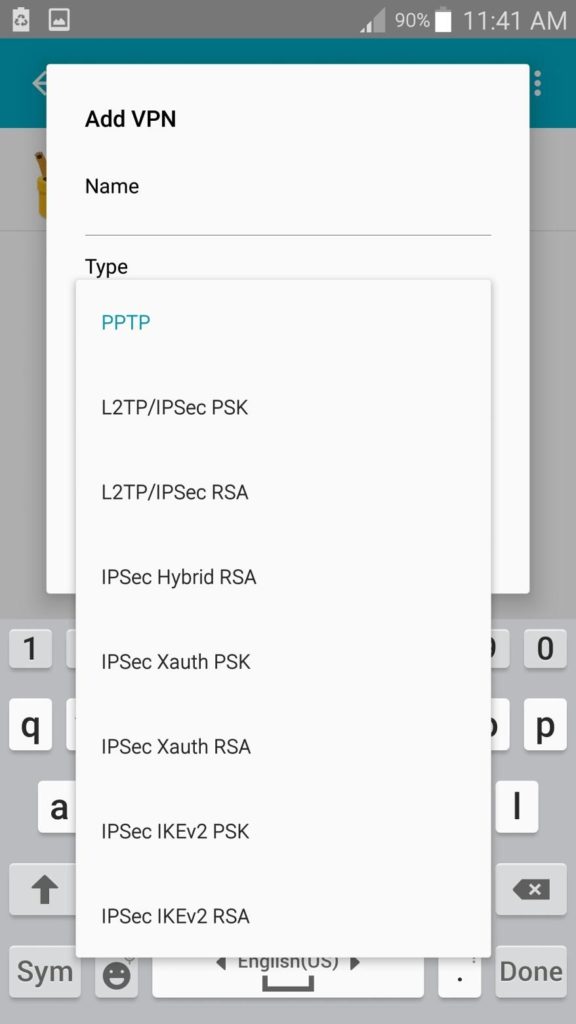
Once you’ve selected the type, provide the VPN server details to finish setting up the connection. The server address could either be a website address (for example, vpn.example.com), or a numerical IP address provided by your VPN service provider.
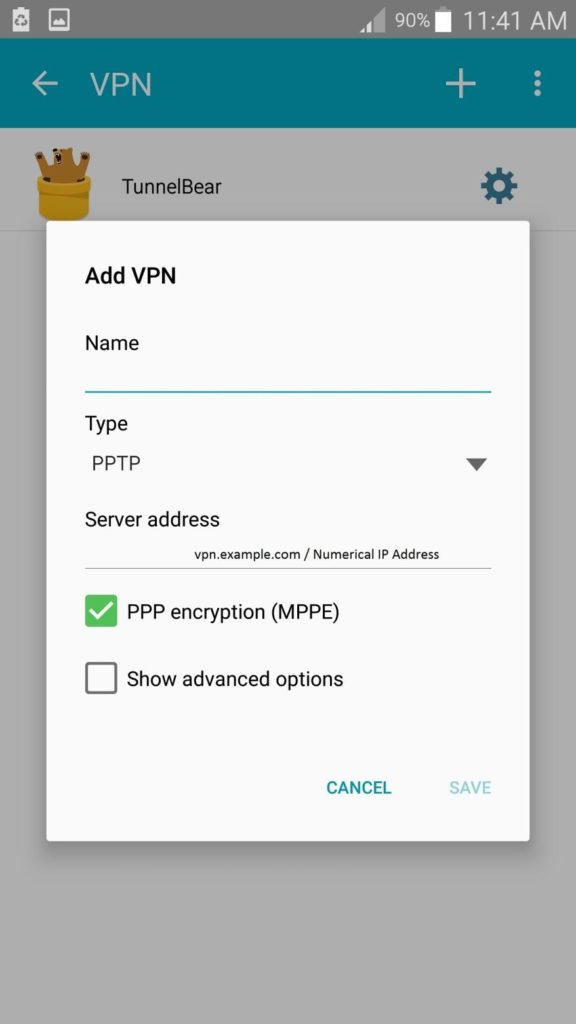
Step 4. Once you’ve entered the server address details, depending on your device, you might either be asked to input the credentials of an account with the VPN provider (one with both a personal username and password), or the domain details for the VPN server.
After you provide the necessary details, you can simply select the connect option and instantly have your Internet identity encrypted. Oftentimes, a small key-shaped icon appears in the notification bar on the top of the screen. This notifies that you are on a secure connection.
Most Android phones allow you to configure multiple VPN servers on one device. You can easily switch among them from the settings, though you can only use one VPN at any given time.
Standalone VPN applications
Apart from the built-in VPN options, a variety of software providers offer standalone VPN apps for mobile devices. These apps usually have individual versions to ensure compatibility with Android devices, Windows phones, iPhones, and tablets. Android users can just download the app from the Google Play Store or download it directly from the website.
VPN apps are popular because they automate and smooth out the connection process for secure web surfing. While a majority of VPNs are free to download, some of them do have monthly and yearly subscriptions to use premium features. (You should always pay for a VPN, and here’s why.)
We’ve rounded the top three standalone VPN apps to download for hassle-free, secure internet connection.
TunnelBear
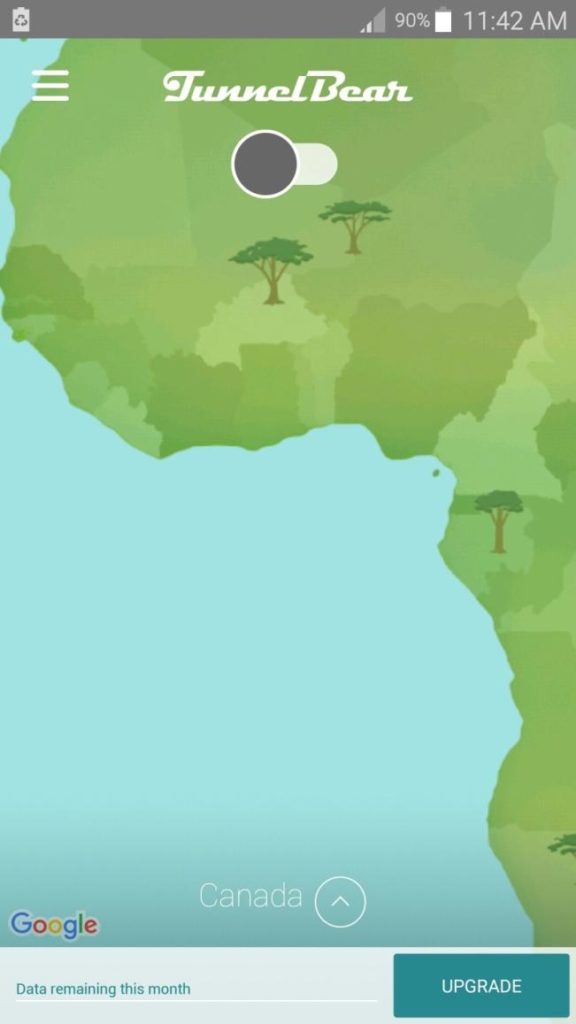
TunnelBear is a VPN server app that operates on a plug-and-play model. It has servers in 13 countries, including U.S., UK, Canada, Germany, Australia, Japan, Spain, Switzerland, and more.
Several payment package plans are available for TunnelBear users, starting as low as $4.99 per month. One of its package plans allows free use with a 500 MB limit that you can use over the course of a year. There’s a yearly payment option as well, which gives you unlimited Internet bandwidth and safe access for $49.99. You can even take advantage of its long-standing free Twitter offer, providing free Internet bandwidth in exchange for a promotional tweet.

NordVPN
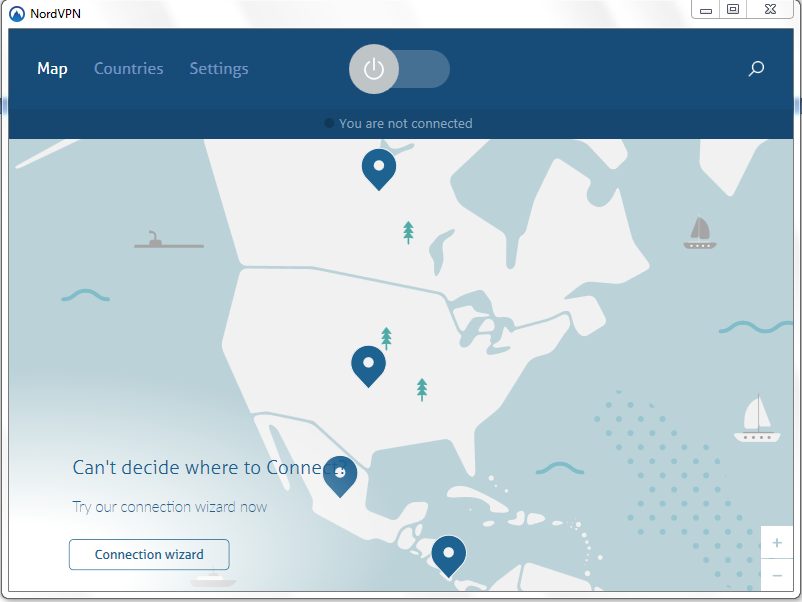
Strict adherence to industry-standard protocols, economically attractive price points and packages, extensive compatibility for several devices, and a variety of payment methods make NordVPN one of the best VPN service providers in the market.
There are three different subscription packages, including the 1-month, 1-year, and 2-year subscription packages, starting from $11.95. It also comes with a 3-day free trial option, allowing you to test drive the VPN server thoroughly before you commit to a payment plan.
Currently, NordVPN has 918 servers spread all over the globe, covering over 57 countries. It allows top-tier encryption and streaming for every single server. NordVPN specifically caters to users who are extra careful about their online identity and privacy by offering an enhanced double encryption feature.
For the Android phone app, just download and install NordVPN from the Google Play Store. Log in using your specific username and password and then select the particular server you wish to connect to. Switch on the power button and you’ve got your VPN encryption in place.

ExpressVPN
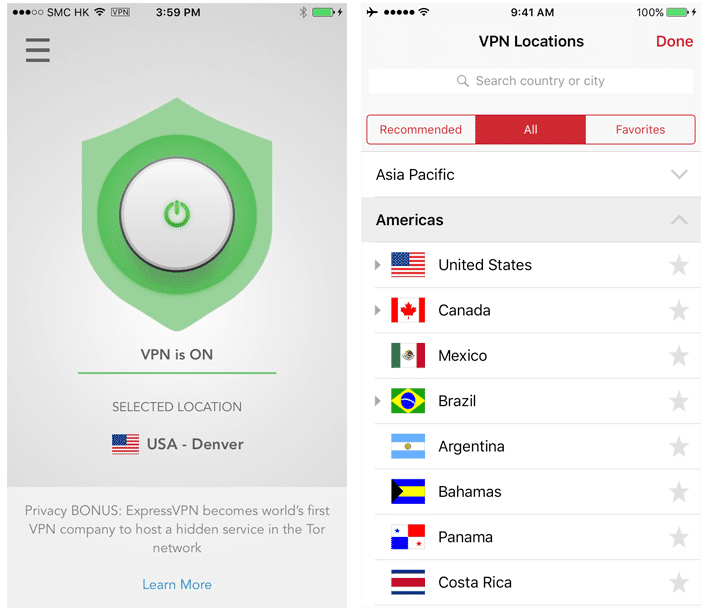
If you’re looking for a clear winner in the VPN industry, ExpressVPN just might be it. It’s one of the fastest VPN service providers in business today. ExpressVPN has over 1,700 servers in 94 countries supporting a strong end encryption capable of securing all your Internet activities.
There are two basic package plans: The monthly plan is priced at $12.95, while the yearly plan costs around $99.95. It offers a 7-day free trial to users, as well as a 100 percent money-back guarantee within the first 30 days of purchase.
The Android app is quite simple to navigate and set up. Headquartered in the British Virgin Islands, ExpressVPN has a strict No Data Retention policy – this means there are no activity or connection logs, anywhere. Features such as split tunneling further enhance your security while surfing online.
With ExpressVPN, you can rest easy knowing that any information you share via your Android device is completely safe and secure.