 One of the best innovations in iMovie ’09 has been the improved ability to upload directly to YouTube. Before, you had to export your clips to QuickTime format and then compress the video for web streaming but now all of this is done for you in one go. The only downside is that iMovie ’09 doesn’t allow you to upload in HD format which is one feature Apple will hopefully add to the next release. For every other format, editing and sharing your video clips via iMovie has never been easier and you don’t even have to visit the YouTube site. Here’s a step by step guide about how to do so:
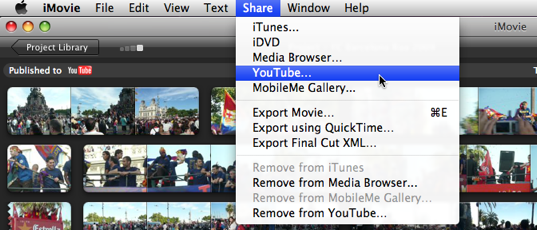
1. Once you’ve completed your project, go to the “Share” option in the main menu bar and select “YouTube…”
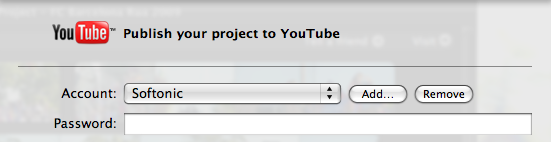
2. Enter your account name and password. Below this you can add title, keywords and a description for your video.
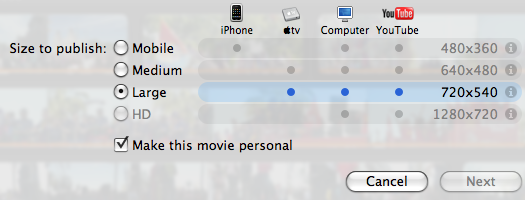
3. Select the size to publish your video i.e. Mobile, Medium, Large or HD although as mentioned earlier, you can’t select HD.
4. Click “Next” and you’ll be given a warning to ensure that you’re not uploading copyrighted material. Click “Publish” and iMovie automatically starts uploading your project to YouTube.
 Remember that YouTube clips can only be a maximum of 10 minutes. If you select the largest size to publish, expect to wait around 10 to 15 minutes while the whole process is completed for a 10 minute movie clip. When it’s done, iMovie issues you with the YouTube link where you’ll find the video although it may take another 5 minutes or so to appear. In addition, even when it does appear, you may receive a warning when watching it that it’s still not fully completed uploading and therefore the quality may be degraded until it is.
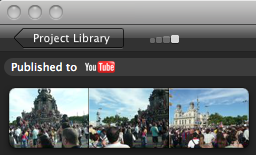
From start to finish then, you need between 20-30 minutes for a large size 10 minute clip to be fully uploaded in all its glory. Note that you’ll also notice a handy “Published to YouTube” message in the top left of your project window to let you know that you’ve definitely uploaded it. You can also remove the video from YouTube at any time by going back to the “Share” menu and selecting “Remove from YouTube…”.
 I recently transfered all of my family’s home movies onto one DVD using
  Check DVD Player compatibility – For some strange reason, many DVD players can’t even play DVD Double Layer disks and this includes new players too. If you’re burning your project as a gift like I was, make sure you find out whether the recipients DVD player can play DL discs.
 Clear some hard drive space – To export a project such as mine to iDVD required around 15GB of free hard drive space to work. In addition, iDVD required another 15GB to burn the movie. When you do finally come to the point where you burn your movie, iDVD will warn you how much disk space it needs to burn.
 Burn at a slow speed – After about 7 hours of rendering the project for burning, iDVD informed me that there had been a “Multiplexer Error” during formatting and the project was unable to burn. A Google search revealed that many other users had experienced the same problem but explanations varied from lack of hard disk space to dodgy DVDs.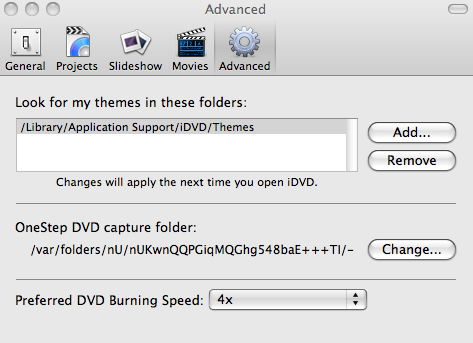
 Lower the encoding quality in iDVD – There are three rather confusing encoding settings in iDVD’s “Project Info” settings – Best Performance, High Quality and Professional Quality. It seems that Best Performance takes up the most disk space, while High Quality and Professional Quality take up a few gigabytes less. By changing to High Quality or Professional, you may be able to fit a large movie onto a Single Layer disk.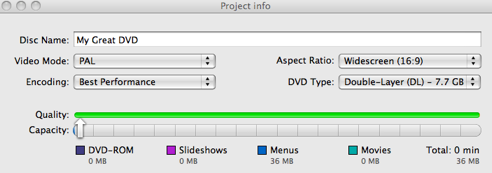
 Go make a big cup of tea – Or make that several cups because your project is going to take a lot of time to render and burn. Mine took around 9 hours and that was just under 8GB. This consumes a huge amount of processing power too so it’s best not use your Mac during this time if you can help it.
 iMovie
 MPEG Streamclip