LogMeIn Hamachi: file sharing

Welcome to part 2 of our beginner’s guide to Hamachi (you can catch part 1 here). Today we’re going to take a look at file sharing, one of the reasons you might want to use the program. If you’ve already taken a look around the options, you’d be forgiven for thinking that it is not a feature, but it is – Hamachi facilitates file sharing, but it doesn’t actually provide it. Let me explain…

File sharing is a feature that you’ll have to enable on your computer. Hamachi then provides the network via which your friend will access your files. Since Hamachi is already set up, you have to turn your attention to Windows’ file sharing. A word of warning –  file sharing is a fairly routine procedure, but there is a degree of risk involved. If you are not totally comfortable with the process, you should probably become better acquainted with it before jumping in to the deep end.
share01.png

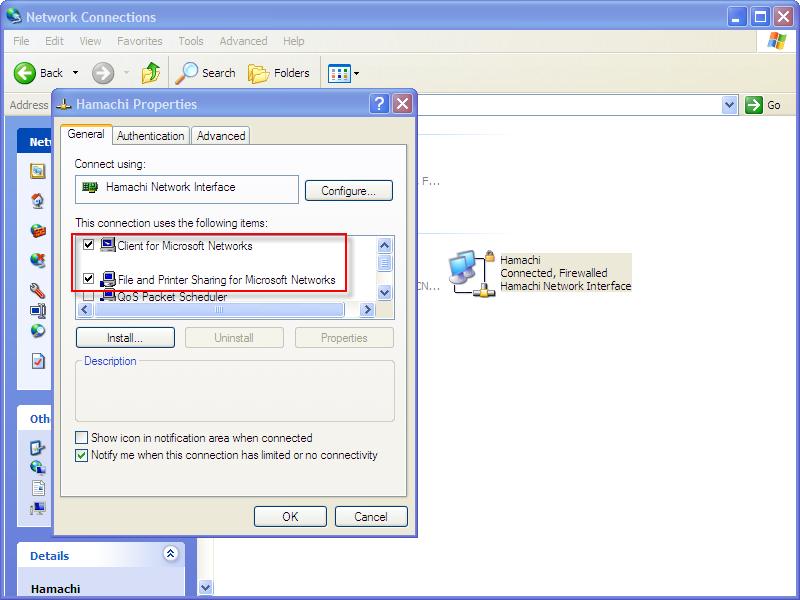
First of all, go to Control Panel > Network Connections (this tutorial is based on XP). Right-click on the Hamachi connection and choose Properties. In the options that appear, make sure ‘Client for Microsoft Networks‘ and ‘File and Printer Sharing‘ are ticked. Continue reading “LogMeIn Hamachi: file sharing”
LogMeIn Hamachi: set-up and chat

Lots of you out there, especially fans of games such as Borderlands and Modern Warfare, will have heard of Hamachi (now LogMeIn Hamachi). Like dedicated techies, you’ll have checked it out, downloaded it and click, click, clicked your way to installation. Great! But what happens now?

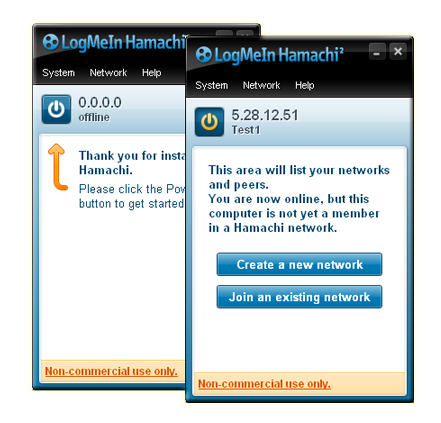
The program’s interface gives away no clue. There’s no wizard, tutorial or even any advice about how to use it, so it’s up to you to figure it out. Well, you’re not completely alone: today we’re going to take a look at the basics of Hamachi – setting up a network and chatting. You’ll either need to ‘Create a new network‘ or ‘Join an existing network‘. In the case of the latter, it’s your friend who’ll have to create the network, but we’ll assume that you’re doing the creating in this tutorial.

combo2.png

When you choose ‘Create a new network’, you’ll be asked for a Network ID (just a name for the network – this can be whatever you want) and a password. Then hit create – it’s as simple as that. Remember! Your friend has to download Hamachi too and they’ll need your details to search for and connect to your network. Once they have found you, you’ll have to approve their request. When they appear in your list, you’re ready to chat!

combo3.png

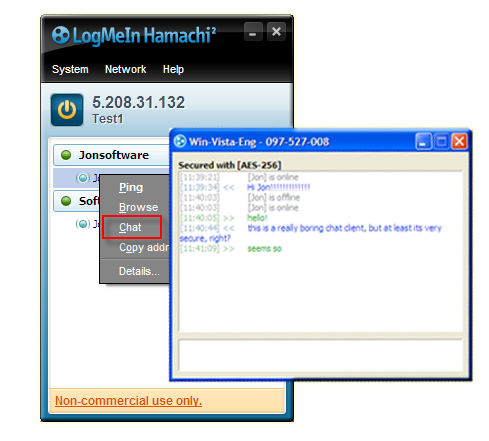
This couldn’t be easier – you simply right-click on your friend’s name and select ‘Chat’. A (very basic) chat window will appear, and you use it like you would any other. Now that you’ve mastered the basics, it’s time to move on to more complicated tasks, like file-sharing and gaming, something we’ll tackle in the next Hamachi post. Stay tuned!