Seems like everyone has a podcast these days. The topics are endless: business, science fiction, even an entire show dedicated to Denzel Washington.
The question is, why don’t YOU have a podcast? (Or maybe you do, but you don’t have much traction yet.) If you’re ready to take the planet’s ears by storm, there’s a plan you need to follow. And Softonic is here to make it as easy as possible.
Ten Simple Steps To Creating Your First Podcast
1. Decide what your podcast is actually about
This first step is the most important step, and also the hardest step. Before you download any software, buy any tools, or do anything at all, you need to figure out what your podcast is going to be about. Without doing this, you and your audience will be confused. Take time to refine your focus.
Let’s just say we’re going to start a podcast on movies. We like movies, and we like talking about movies. But saying we’re going to make a podcast “about movies” is very vague. So we need to think about it a bit more. What kinds of movies? Any particular genres? Is there anything specific that I want to talk about when I talk about movies?
Ask yourself those questions. Then determine the general nature of your podcast. Some podcasts – such as Marc Maron’s “WTF” and The Joe Rogan Experience – follow an interview format with a host and a guest. Other podcasts follow a format where the host is the only person on the podcast. Both formats work. Decide on your format and stick with it.
2. Gather your tools – a microphone, a computer, and maybe a mixer
There are two tools that you MUST have: a microphone and a computer. Any microphone will work, but having a quality mic can put you ahead of the amateurs. Two really good, inexpensive microphones are the Shure SM58, a professional microphone you can find everywhere, and the Blue Yeti, which is a solid quality USB mic.
For the computer part, any desktop or laptop computer will work as long as it has an audio input or a USB port. That’s all you need. If you don’t have a computer, you can use your smartphone or tablet, as long as it has an audio port.
Finally, if you’re running a podcast that has multiple hosts in the same place or involves interviews, you’ll need a mixer. One of the finest mixers on the market (and one of the most inexpensive) is the Behringer Xenyx Q802USB, which works with USB and audio jacks.
3. Download Audacity
Audacity is a free program that allows you to record and edit audio. You can get it directly from Softonic.
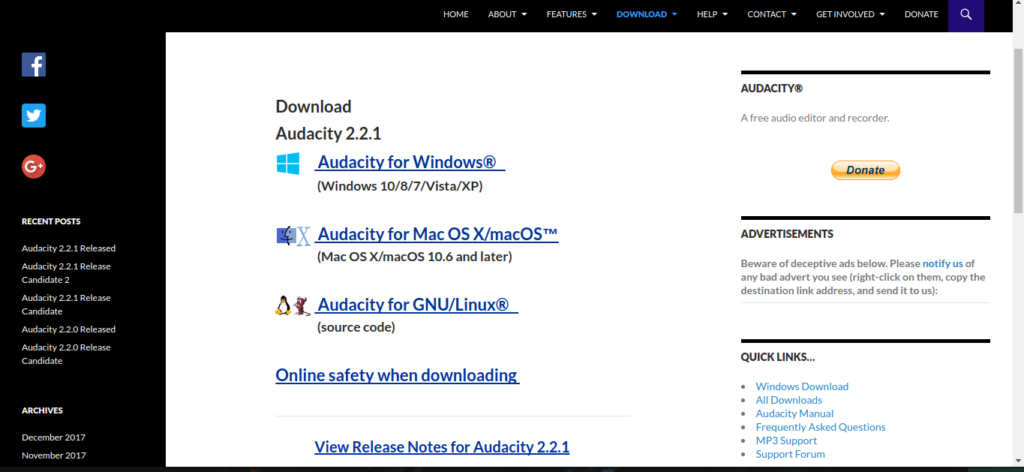
Just plug in your mic, and press record.
4. Record the podcast
Before recording, always check to see if the mic is actually on and recording. Record for a few seconds while you talk into the mic and then play it back. If you hear yourself and it sounds good, then that means you are good to go!
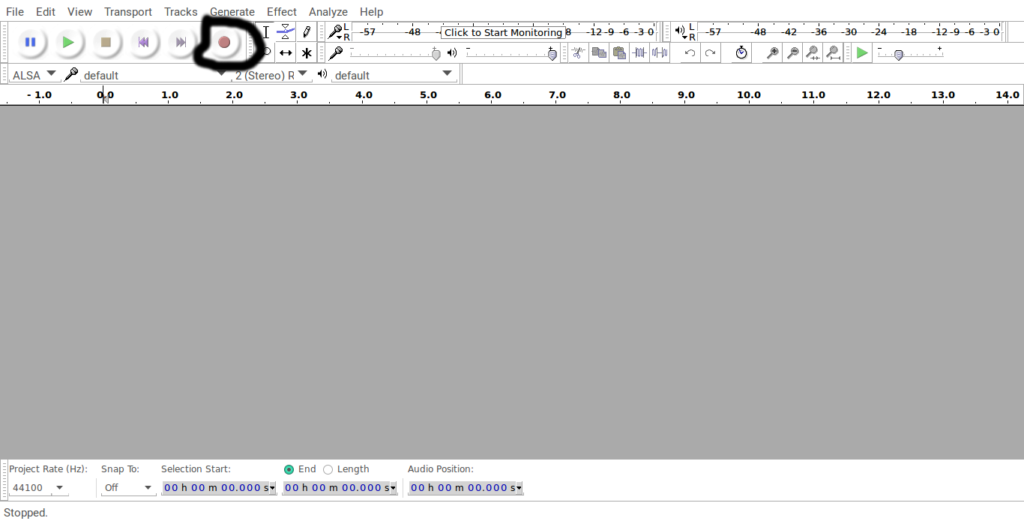
If not, check if everything is connected and turned on. Then, start recording your podcast.
5. Save the file and make a copy of it
You’ve set everything up, and you’ve just recorded your first podcast. Now, it’s time to edit. Before you do that, ALWAYS make a copy of that raw audio file. Put one on your hard drive, and then put one on Google Drive or Dropbox. Here’s why…
When you’re using Audacity to edit, you may make changes you wish you hadn’t. Since you have a backup, you can just delete the edited file you made and put the original back into Audacity. Another reason is that you’ll always have that file as a good reminder of your first foray into podcasting. Finally, if something happens to that original file, you won’t have to do the whole thing over again. Or, in the case of Google Drive and Dropbox, if something happens to your hard drive, you’ll still have access to your work.
6. Edit the audio file – add a good title/tags and a thumbnail
Open the file in Audacity, and start editing it. The editing process is very simple and, depending on your podcast, there may not be a whole lot to do.
If you want to cut something, just find the beginning of the section you want to cut, and the ending. Select it and press the “Backspace” button.
You can also manipulate the audio with filters and all kinds of other options. Most podcasts don’t fool with that much, but you may enjoy a little more bass in your voice or whatever.
Once you’ve made the edits, click on the word “File” then “Export Audio.” In the “Save As” section, click MP3. The “Edit Metadata” window will pop up, and you’ll see a number of categories.
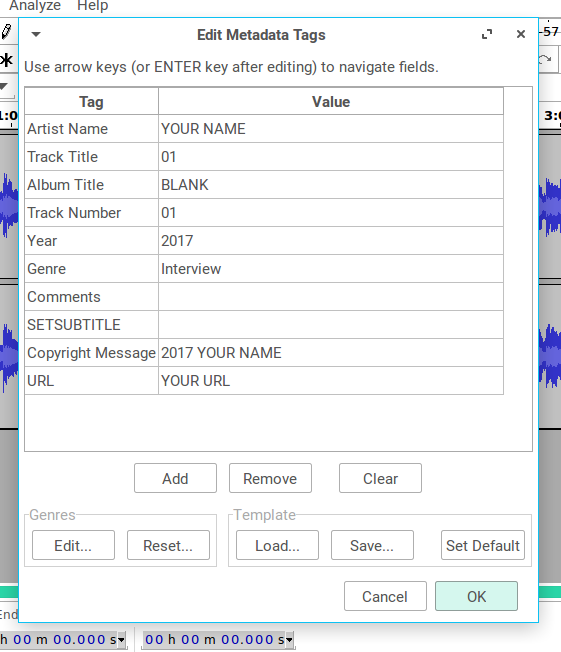
For “Artist,” put your name. Right by “Track Title,” put the name of your podcast and “Episode 01.” Keep “Album Title” blank. For “Track Number,” put “Episode 01.” Add the year that you’ve made the episode. Next to “Genre,” put the word “Podcast.” With “Comments,” add anything that you think would be relevant or important. You can keep “SETSUBTITLE” blank. Finally, with “Copyright Message,” just put the year and your name, and with the “URL” section, we’re going to get to that in just a moment…
7. Make a website and a SoundCloud account
You have this great podcast, you just need a place to put it. There are a number of hosts that allow you to create a website for free, but one of the best is WordPress. It’s completely free and very intuitive.
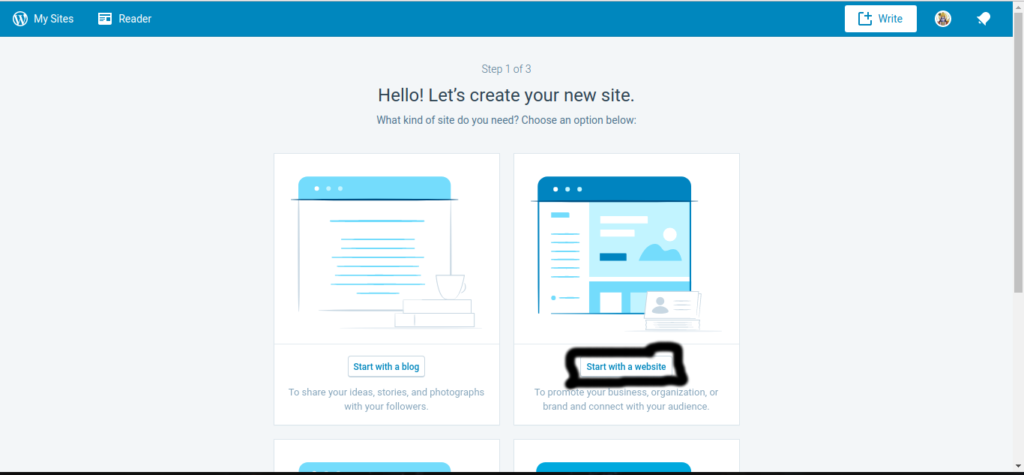
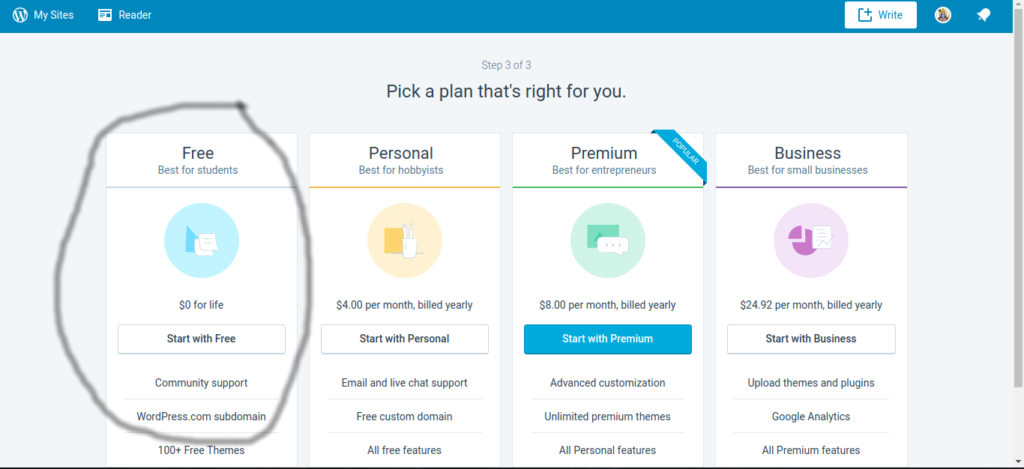
Click on the link and choose “Blog.” Then come up with a name for it. Choose the “Free” plan. You’ll be taken to a page with a number of things on it, you can choose to edit it however you want, but the page just needs to have a single space where you can publish each and every episode of your podcast.
8. Make a SoundCloud profile and upload your podcast
We have to admit, SoundCloud is not the best platform, but it is the best platform for a beginner. Hosting is free. Anyone can download your podcast. The RSS feed is easily created and shared.
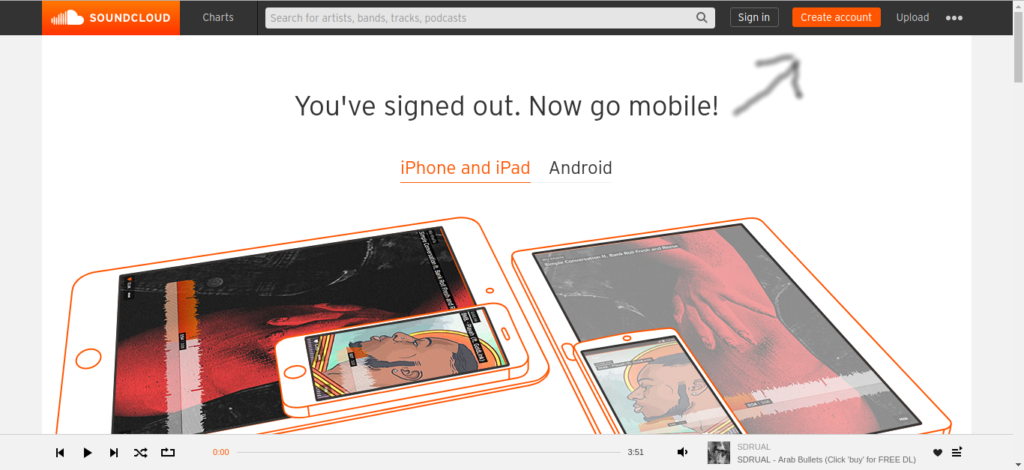
Go on SoundCloud, and click “Create Account.” Enter the email address that you currently use. When you make your profile name, write the name of your podcast.
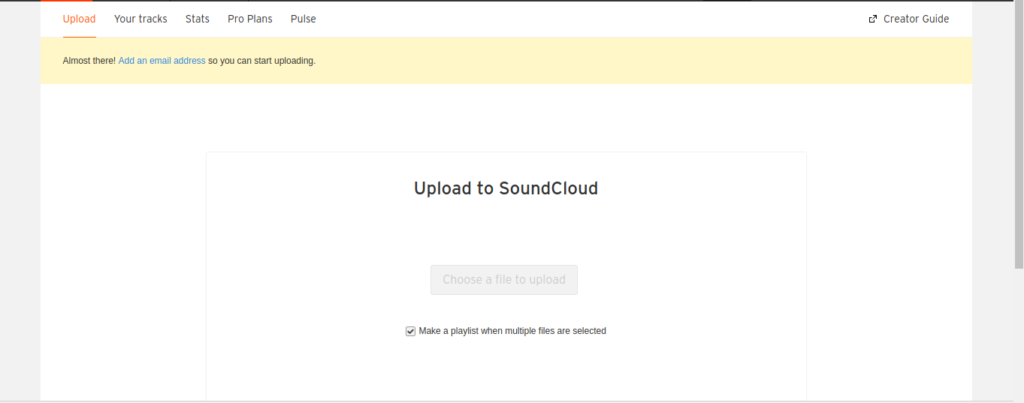
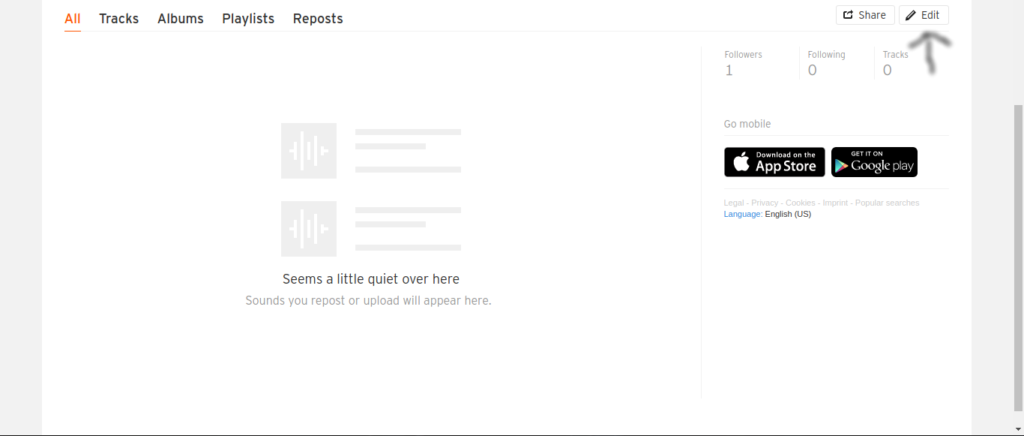
Go to your profile, and click “Edit.” Upload an image that fits with the theme of your podcast. Write a description of your podcast in the bio of your profile. Go to the “Your Links” section and grab the URL from your WordPress website and paste it there.
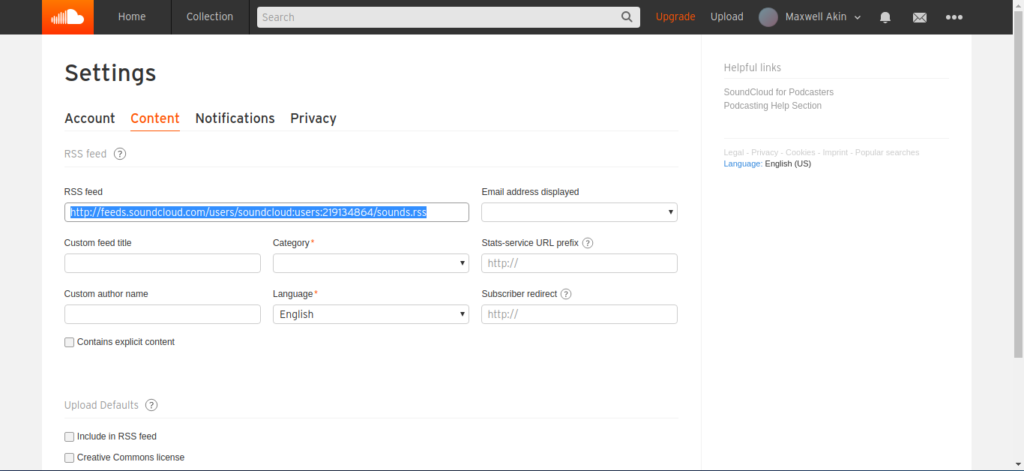
Go to the “Settings” page, click the “Content” tab. Select the category and language of your podcast. There are other settings, but they aren’t that important.
Finally, click on the “Upload” button that is near the top-right of the page. There, you will be taken to a page where you can take the MP3 file that you’ve made and upload it.
Once you do that, fill in any important info and then publish!
9. Grab the RSS feed URL
Go back to the “Settings” page and click on the “Content” tab. There will be a bar that contains the URL address of your “RSS Feed.” Select it, and then copy the URL.
10. Upload the RSS feed to iTunes
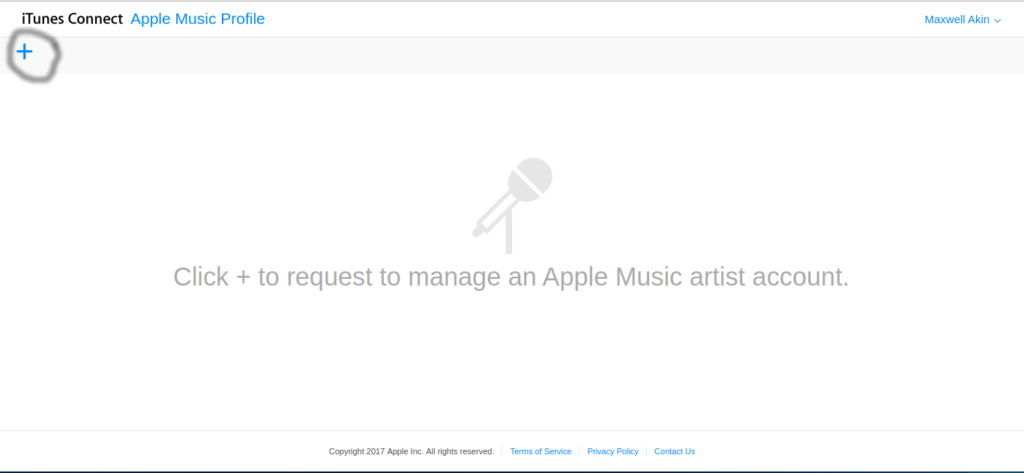
Go to iTunes Connect. Log in with your Apple ID – if you have an iPhone or iTunes, you already have one – and you will see a dashboard. At the top left there will be a “plus” sign, click on that and you will be taken to a page where you paste your RSS feed URL and validate it. Then, sit back and wait.
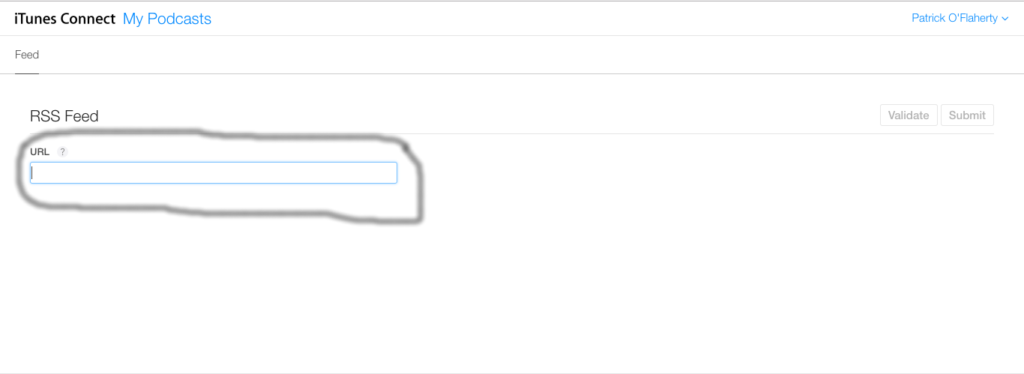
If the feed comes up invalid, that means that you should go back to SoundCloud to make sure that each one of Apple’s specifications is met. You could get rejected if the podcast thumbnail isn’t at least 1400 x 1400 pixels, for example
Once it is validated, your podcast will be available to over 800 million people. But that’s just the beginning. The challenge of marketing and publicizing your podcast can be monumental, but if you’ve got a good idea and solid production values, the sky’s the limit.
Do you have a podcast you’d like to share with the world? Share it in the comments below!
Related articles: