
Being creative and not dying in the attempt has become increasingly difficult. The marketing industry has always faced the same problem, high production costs. The most expensive decisions are made when there is the least time to correct them. Once a campaign is underway, changing something costs much more time, money, and patience.
With the establishment of generative AI, we have a system to validate ideas before executing them. Beyond the technical aspects, with tools like Adobe Firefly, we can preview what we want and be more efficient. If you want to know how to make the most of it, keep reading below.

The Creative Gap, one of our worst enemies
When we talk about Creative Gap, we refer to that gap between what we imagine and what is ultimately produced in reality. In the long run, it can represent a significant black hole of money if we do not manage our expectations well.
It can happen at any time, like in the studio photograph, for example. In some cases, the actual result may not be what you expected, which means repeating sessions, investing more effort, and ultimately causing delays.
Here Adobe Firefly can help you solve this. In addition to Adobe’s proprietary generative model, Firefly Image 5, you can use Gemini 3.1 (Nano Banana 2), GPT Image 1, or FLUX. This way, you can imagine how certain types of photos, poses, or lighting styles would look before bringing the concept to reality.

How to use Adobe Firefly to bring our ideas to life
Since its launch, Adobe Firefly has become more powerful and capable. Currently, we have two ways to access it: the browser on our computer or the mobile app, available for iOS and Android. While you can generate content from both locations, through the browser you will have access to more options, such as Boards.
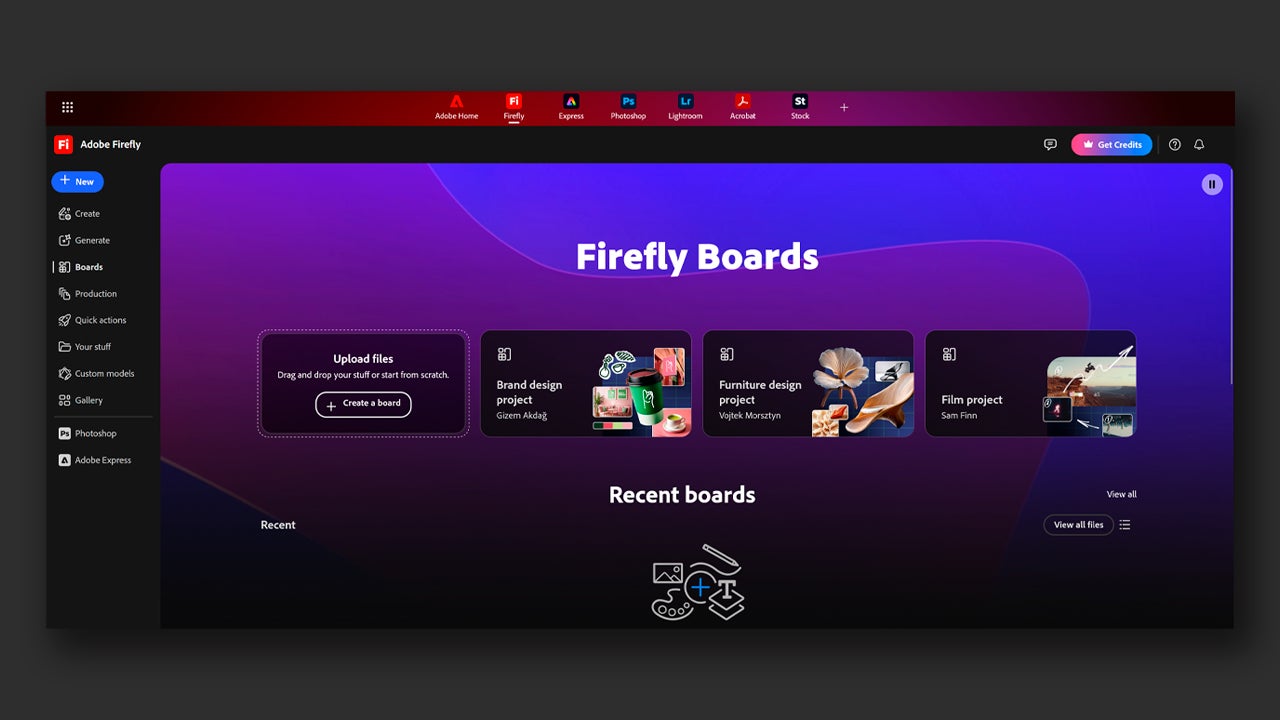
If you want to see how your ideas can be materialized in an image, use the Create function, the most important one in Firefly. It’s very easy to use; as soon as you enter the page, you will see a box where you can write your prompt, that is, describe what you want to generate as an image.
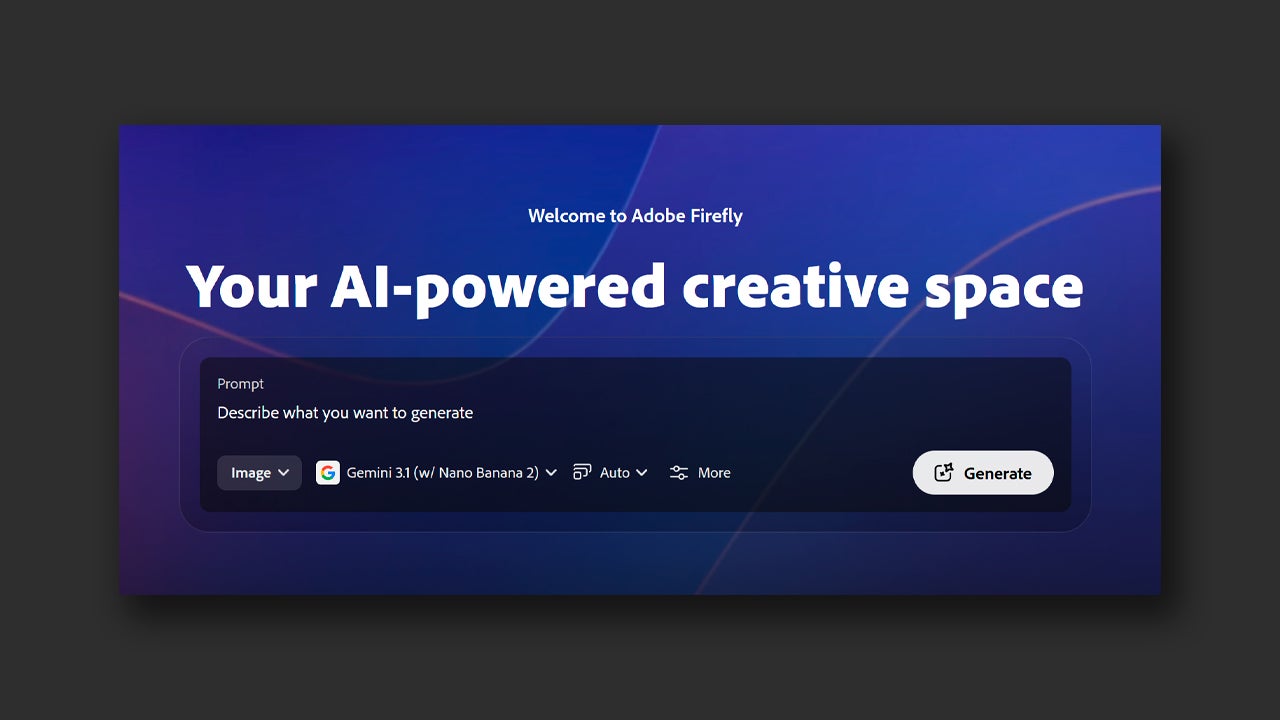
From here you can also choose what type of content to generate (images or videos) from the Image tab, which will be set as the default option. If you choose Image, on the right you will see another tab to switch to a generative model. As we mentioned before, you can choose from different Firefly models and other partner models (Gemini, GPT, FLUX…)
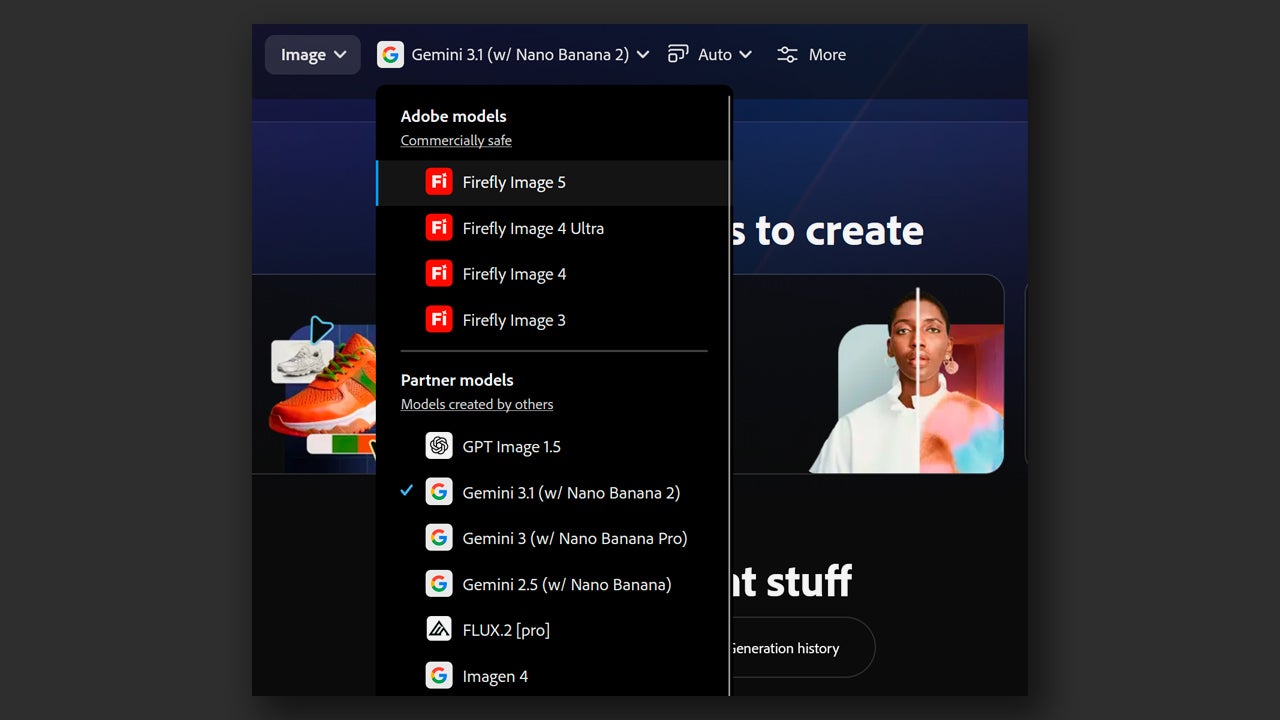
Each of them works better in different contexts. To create realistic photos, for example, the Gemini models can be a good option. Additionally, each model has a different cost of generative credits, as we will see later. Firefly Image 5, for example, uses 10 credits while Gemini 3.1 uses 40 credits.
After writing what you want to generate, select Generate to see the result. This is the fastest way we have to create content, but we can also further customize the result and obtain more refined things by clicking on More.
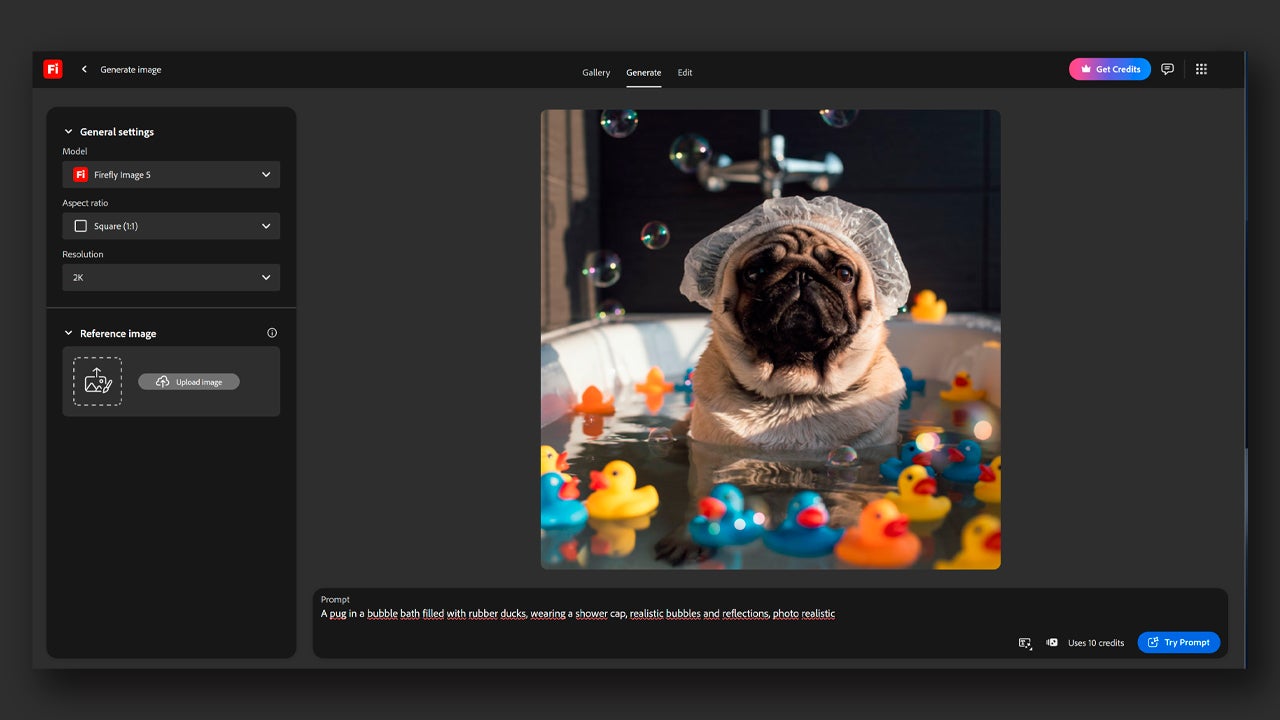
By doing so, you will enter a new screen where you will see on the right the settings that you can modify in order to generate images. In General settings, you can also choose the model, the image size from Aspect ratio, and the resolution. You can also complement your creations by allowing Google Search to be used by activating the tab.
Further down you can add up to six reference images. This will help to “guide” the model better when bringing your ideas to life. Here you can add references for colors, artistic styles… anything you think might be useful for your images.
Once you have generated the image or images, Firefly also allows you to edit them. At the top, you will see three different sections: Gallery, Generate, and Edit. If you select the image, you will automatically switch to Edit. You can switch between sections at any time.
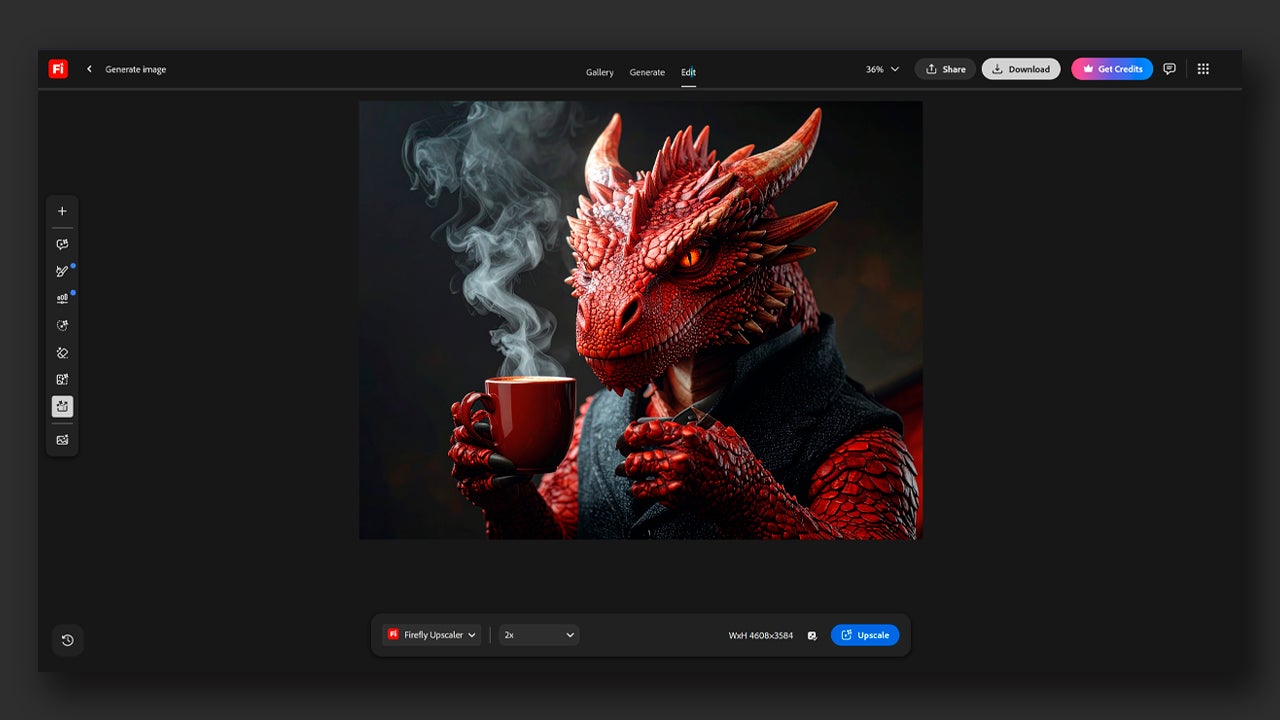
In Edit, we will see our image in the center and in the text box located below, we can write what we want to change and how. Just like when generating, the changes cost generative credits and vary depending on the model you want to use.
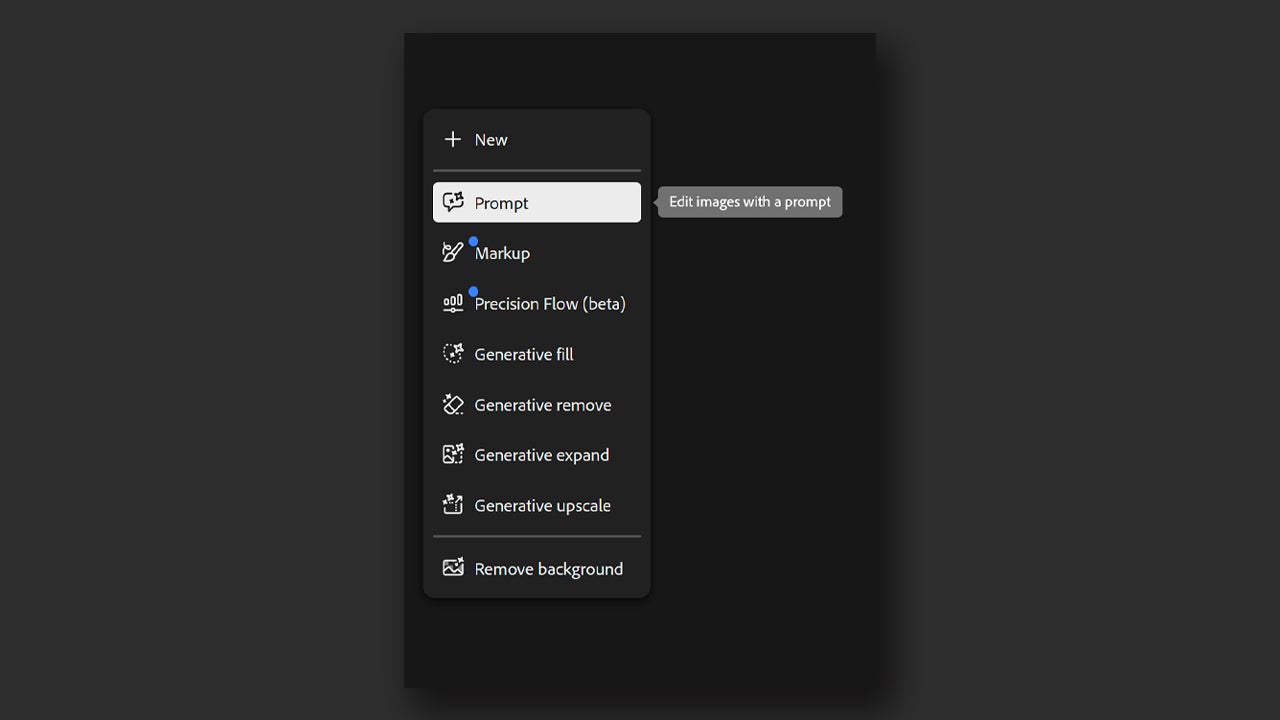
On the left, we will see several tools that will also help us edit the image more precisely. Prompt, the first one, allows us to edit images with written descriptions. With Markup we can leave notes on the image (Text) to make very specific changes and even draw (Brush and Region) on it to be more visual when editing.
We also have Precision Flow, which will allow us to regulate the described changes. With Generative Fill, we can add new elements to the area we want in the image. Generative Remove will help us do the opposite, removing any object from a specific place, previously marked by us. Generative Expand is used to increase the boundaries of the image with generated content. Finally, we have Generative Upscale, which is used to increase the resolution of the image if needed.
At the very bottom, you will see the option to Remove Background, which is used to do exactly that, remove the background from the image almost instantly. Use all the options we have explained here to experiment with your ideas and see if they can be carried out in other media.
