For years, the creation of professional digital images has followed very routine and established processes. Now, where time is most wasted is not in conceiving the idea, but in bringing it to reality, whether due to the use of constantly changing programs or by sticking with an outdated system.
For creatives, Adobe can work very well due to the fact that it offers new tools updated to what these times demand. Here we will show you some of the most interesting features of Adobe Illustrator so you can apply them to your work.
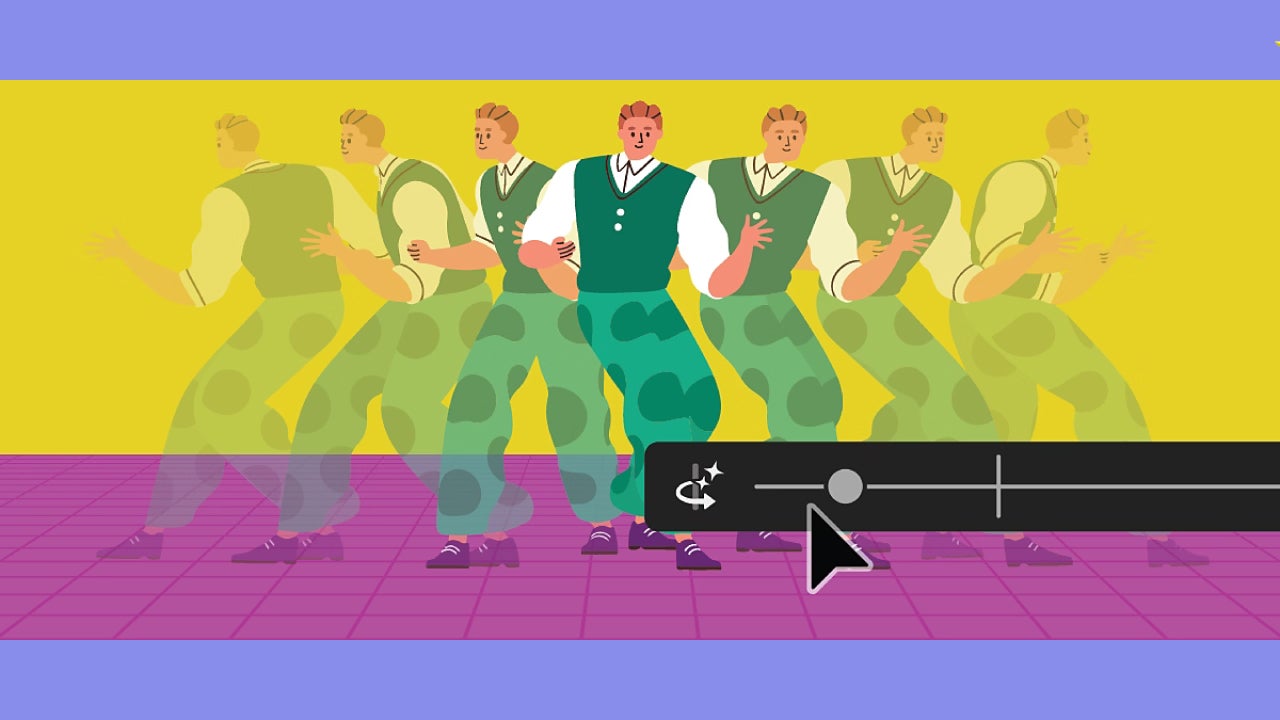
View objects from different angles
One of the most striking new features of Adobe Illustrator is the Turntable function. Powered by Adobe Firefly, it will allow us to take any flat object and “rotate” it in space as if it were a 3D model.
To start using it, open your project in Illustrator, or create a new one. In the project, use the Selection tool and select the item you want to flip. Then, select Object > Generative > Turntable.
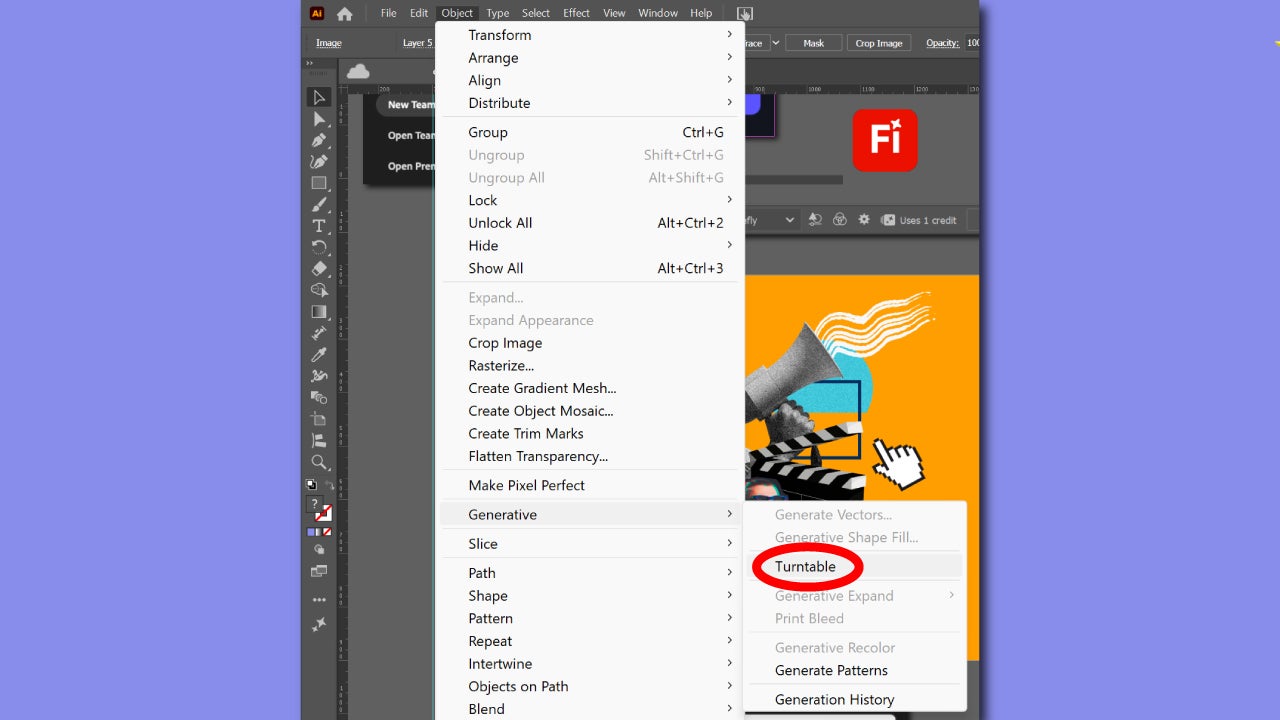
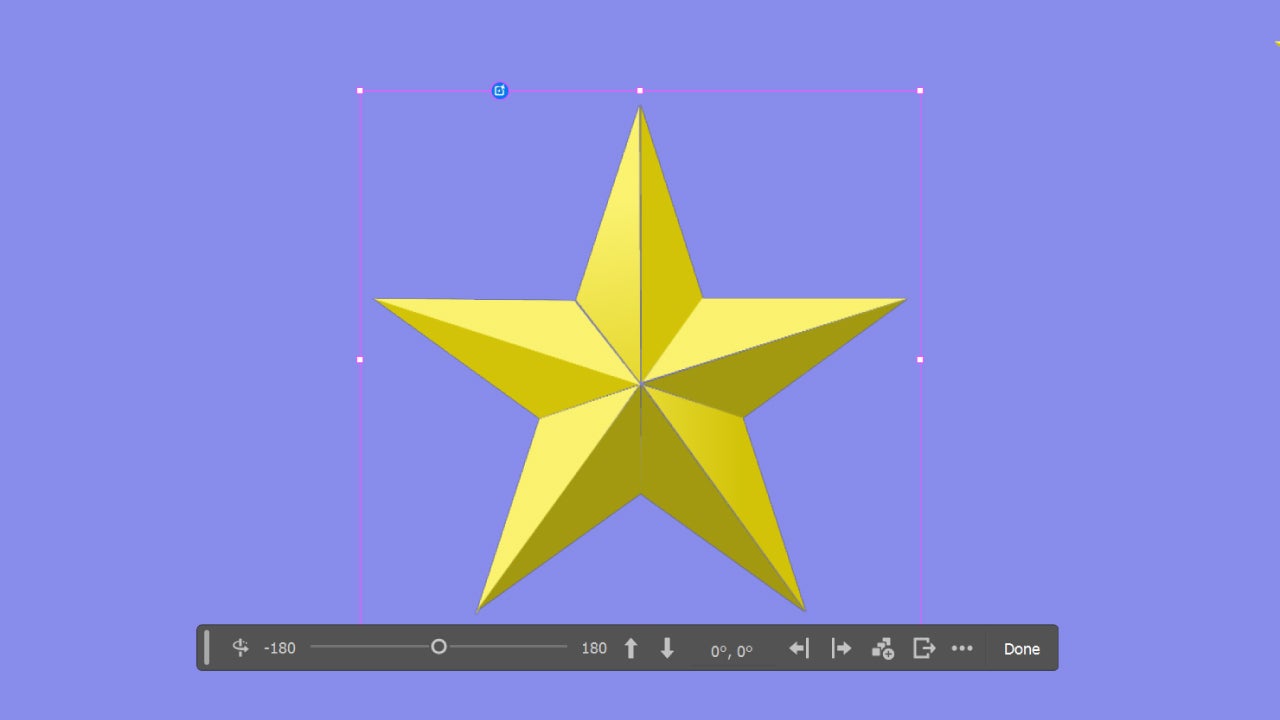
In a matter of seconds, Turntable will generate new angles and views for you. You will see a new generative object (it will be marked with a symbol), which will be the point from where you can rotate it. The original image will be right below.
Right below you will see how a new contextual bar appears, from where you can rotate the object to your liking. If you don’t see it, click with the selection tool on the generated object and select Turntable in the contextual bar. In this menu, you can rotate the object, change the tilt, place all views on the canvas, or export as GIF, among other options.
If you want to edit any of the views, you have to do it this way if you don’t want to lose the changes immediately. First, you need to select the generated object, move the slider to place it in the view you are interested in, and make right click > Ungroup. This causes it to lose all its previous properties and become a normal object. That’s when you can edit without any issues.
Every time you use this function it will cost 20 generative credits, so keep that in mind for future occasions. You can also give feedback on the result by clicking on the three dots in the contextual bar (More options) and selecting from the options of Good result, Poor result, or even Report variation if the result is offensive.
Generate images with Text to Vector Graphic
With Text to Vector Graphic you can do exactly that, generate vector graphics in a way similar to the Generative Fill function in Photoshop. Here’s how it works within Illustrator.
Select the Rectangle tool, which is located in the toolbar, and create a rectangle on your project canvas. Then, select it again with Selection.
You will see a small horizontal context menu appear. There, click on Generate Vectors. There is another way to do the same, which is from Object > Generative.

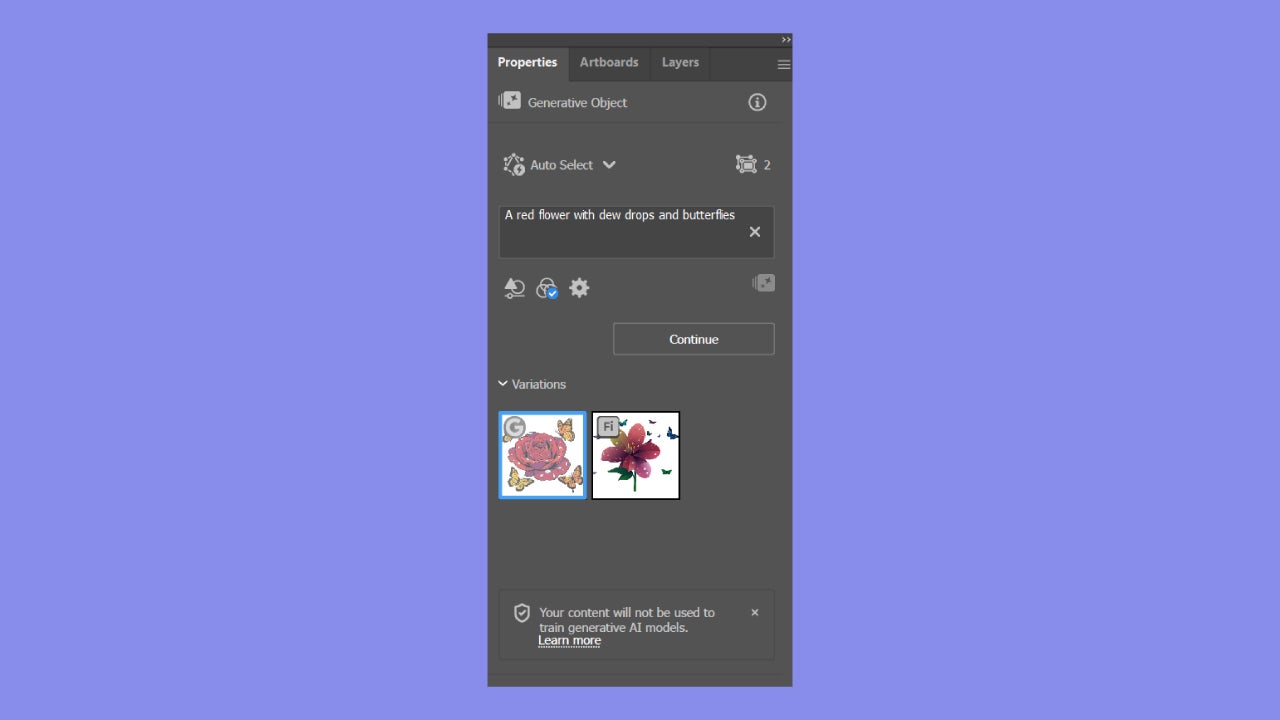
Within the text box, describe what you want to appear (prompt). Illustrator itself will offer you suggestions in case you are not quite sure what to generate. If you don’t like the option, you can always disable it from View all settings by turning off Suggestions. Once you have your prompt ready, click on Continue to generate the image.
Just like in Photoshop, you can choose the generative model that Illustrator will use. If you don’t mind much, you can click on Auto Select to have one selected automatically. If not, you can always choose from Adobe’s models and others from third parties.

Next, you will be able to modify many details of the generation from the Properties panel. There you will find the Variations section, where you will see other results of graphics based on your same prompt. You can choose one of them or keep trying with new generations until you get what you need.
Right below the box where the prompt is located, you can access the options for Content type and detail. Within Content Type, you can specify between Scene, Subject, or Icon, depending on what graphic you want to generate. Then, with the Detail slider, you can adjust the level of detail of the generated result.
If you want to create a chart that follows a particular aesthetic, within Style Reference you can configure it. Leave it on Auto if you want the future chart to simulate the style of the vector objects from the rest of the canvas. If you want it to imitate the style of a specific object, select Choose asset and then click on that object.
Finally, we have the section on Color and Tone. Within Color and Tone, we have Color Presets, Nº of colors, and Specify Colors. The last one, Specify Colors, is very interesting because it will allow us to choose which colors the generated chart should have, with a maximum of 12. You can add and remove colors as you wish and at any time.