Open almost any social network these days and the screen fills up with one thing: video. Short, long, vertical, horizontal. That tidal wave is the reason video editors have stopped being a niche tool and become an everyday essential for content creators.
Among the thousands of things you can do with Adobe Premiere Pro, there’s one that’s pretty much non-negotiable: adding music and sound to your videos. Below, you’ll see how easy it is, and how quickly you can pull it off on your own, even if you’ve never touched Premiere Pro in your life.
Set up the project
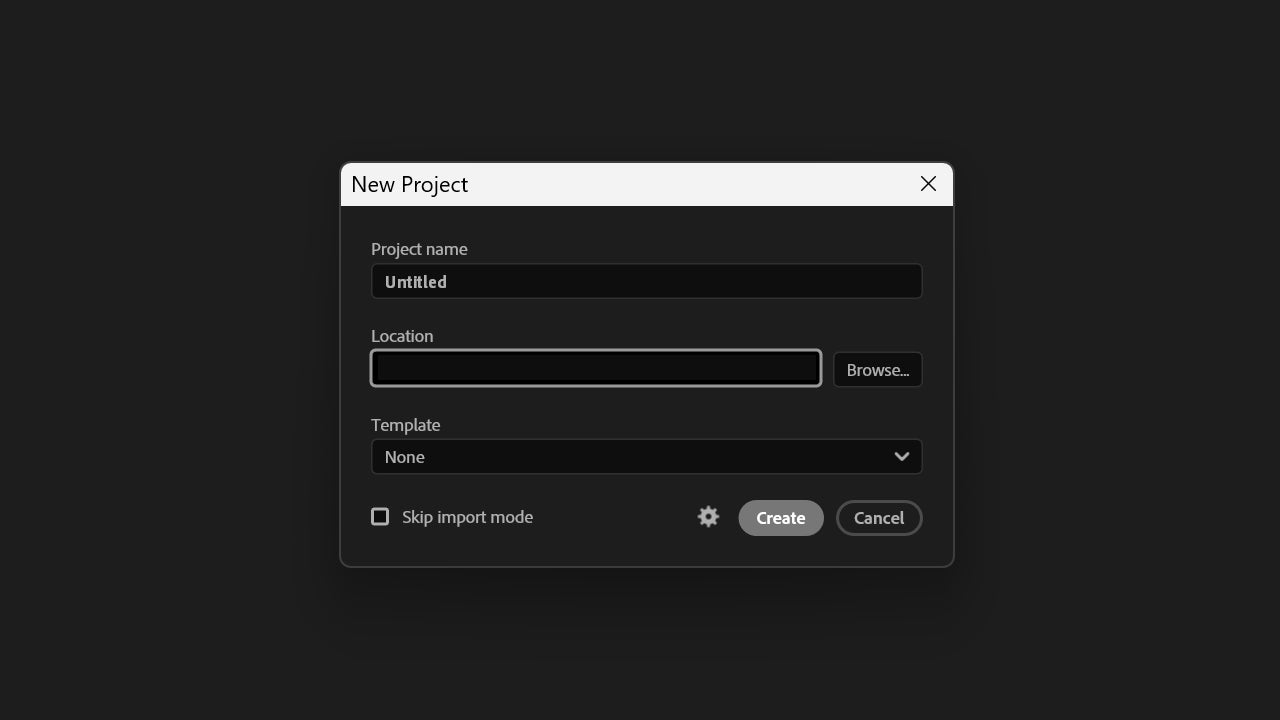
With your videos ready, open Adobe Premiere Pro and create a new project by clicking on New Project. Type the name in Project name and pick where to save it on your PC under Location. You can grab a preset template from Templates, but it isn’t essential.
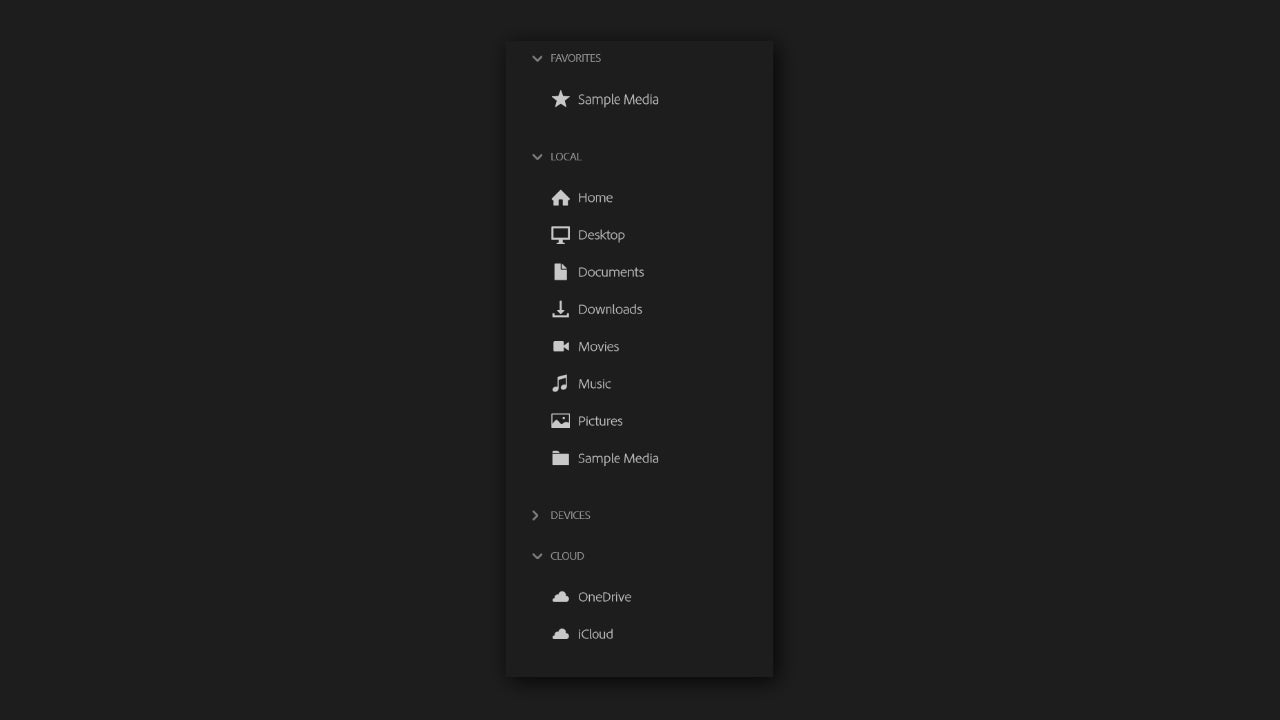
Now, select the video or videos you’ll lay the music over. From the left panel you’ll see the different locations on your PC, so you can jump straight to the folder where the clips live.
When you’re done selecting, click Import (if you don’t spot it on the first try, the button sits in the bottom right corner). Then drag the music file or sound effect directly onto the timeline. The other route is to go to File > Import. Don’t lose track of your assets: everything lives in the Project panel.
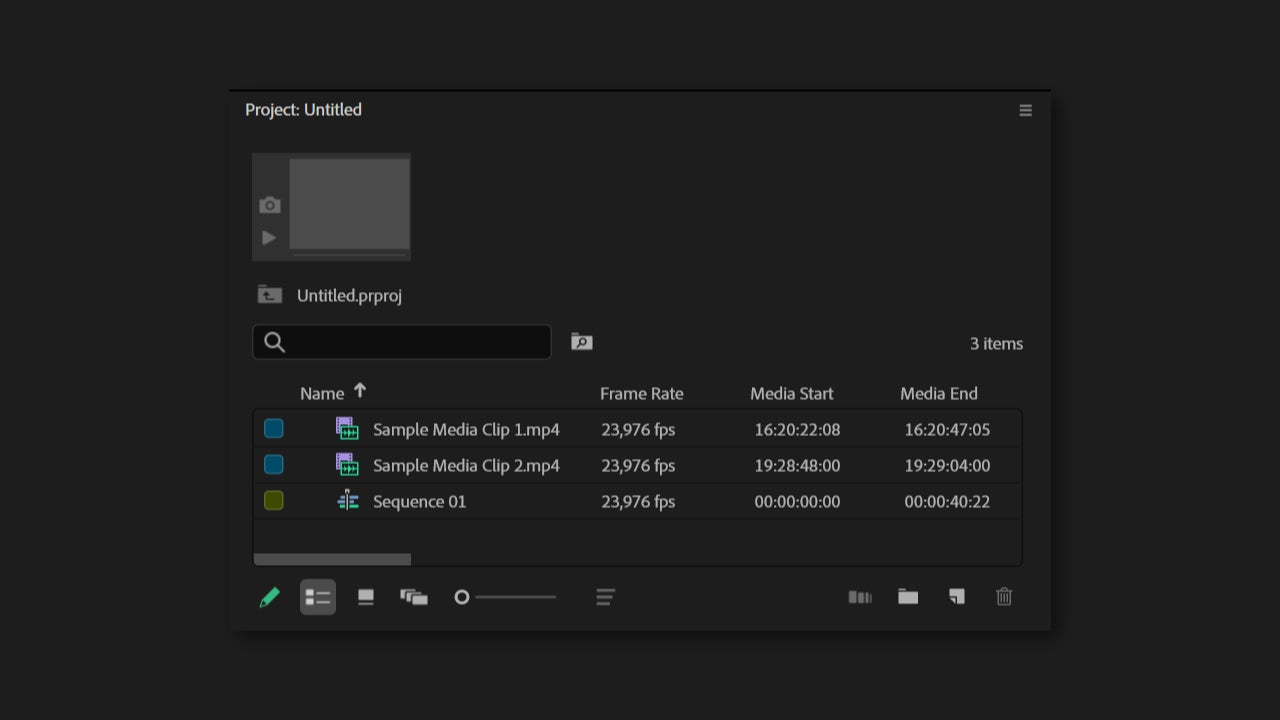
Once imported, drag the audio onto the timeline. All audio tracks sit below the video clips, both the ones you add yourself and the ones that came baked into the video. Premiere Pro displays them as a sound wave, which helps you see where the silences or volume peaks are.
Adjust it on the timeline
Once the music is on the timeline, you can move it, cut it with the Razor Tool (C), or stretch it, the same way you would with a video clip.
You can also add fade-in and fade-out effects so the music doesn’t start or end abruptly. It feels more natural and pleasant in general, though it all depends on the effect you’re going for.
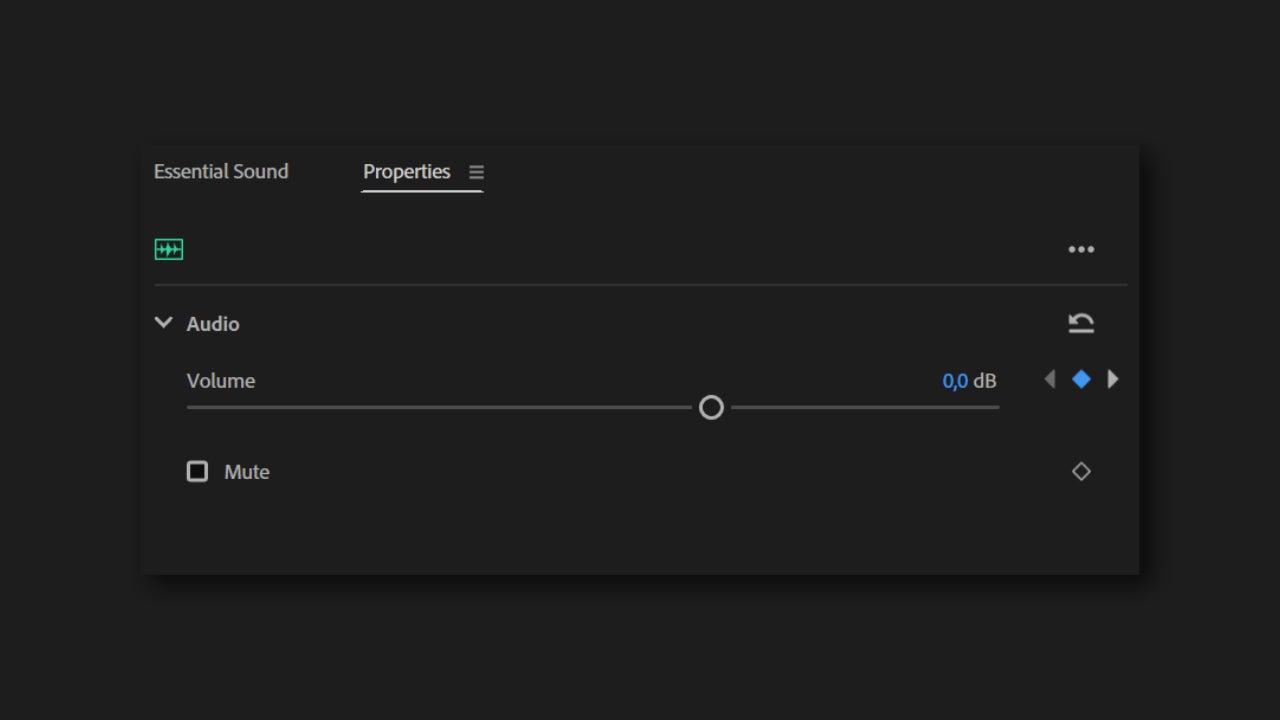
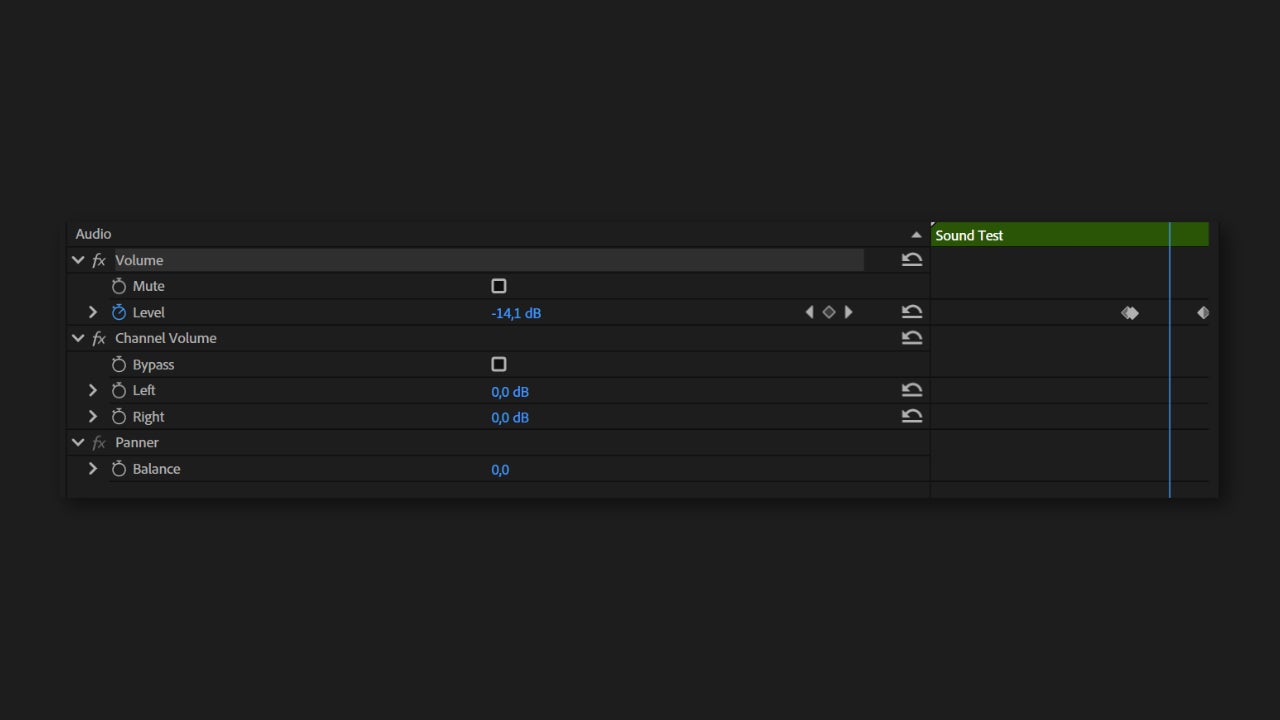
If you want the music to gradually drop in volume at the end until it goes silent, select the audio clip and head to Properties. With that in view, go back to the timeline and, with the audio selected, position the playhead at the point in the video where you want the volume to start dropping. That should be a little before the actual end of the video. Then go back to Properties and click on the small diamond symbol (Keyframe). Return to the timeline, move the playhead to the end of the video, and on the Volume slider, drop it to the minimum.
A good trick is to make the music move with the visual rhythm of the video. If there’s a big shift in the imagery, a title card or a transition, try to line it up with a standout moment in the music.
And if you need something extra… you can always use Adobe Stock
One mistake we all make when adding music to a video is using songs without checking the rights first. If the videos are just for you, nothing happens. If you upload them to social media, that’s a different story: get ready for platform takedowns, copyright claims and similar headaches.
To avoid all of that, you can use Adobe Stock Audio, Adobe’s own library of royalty-free music and sound. From there you can search tracks by style, duration, mood or tempo, preview them, and pick the one that fits your video best.
You’ll find it especially useful for commercial pieces, branded content, ads or social media. Instead of wasting time hunting for music on third-party sites, you can find any track without leaving Premiere Pro. To use it, go to File > Search Adobe Stock….

You’ll see that, alongside sounds, there are templates, videos and images. From the official Adobe Stock page you can check the different pricing tiers, all depending on the material you end up using.
Set the volume and export your project
Making sure your video has the right volume balance is critical. Select the audio clip and adjust its volume from the Effect Controls or directly on the timeline. A practical rule: if there’s voice, drop the music until the narration is easy to follow without strain.
Listen to the video on headphones and through speakers, because what sounds great on one device might not on another. Keep in mind: when the sound is bad, you notice straight away; when it’s good, nobody complains.
Adobe Premiere Pro is available through Adobe’s Creative Cloud, with a free trial that lets you test the full editor before you commit. You can grab it on its own as a single-app plan or as part of the All Apps bundle if you also work with Photoshop, After Effects or Adobe Stock. Check Adobe’s official pricing for current rates.