
Capturing all the nuances of a scene with your camera can be challenging. Thanks to techniques like HDR (High Dynamic Range), we can make our photography show details in both shadows and highlights. And if your camera gets a bit stuck, we can use Adobe Photoshop and Lightroom to achieve that perfect balance.
What is HDR?
HDR stands for High Dynamic Range, or Alto Rango Dinámico in Spanish. It is a photographic technique that aims to capture a wider range of lights and shadows than what a camera can normally record in a single shot. This is achieved through the “merging” of different photos with different exposures of the same scene.
Thanks to HDR technique, we will have correctly exposed photographs in both light and darkness. For example, imagine a place with a very bright sky and a foreground in shadow. If you expose for the sky, the ground will be very dark, but if you expose for the ground, the sky will be blown out. HDR solves this by combining different exposures to create a more balanced photograph.

Prepare your HDR photos in Adobe Lightroom
Before getting into stronger adjustments, Lightroom is the ideal starting point to organize and edit your HDR photos. To do this, we first need to open Lightroom and add our captures from the camera:
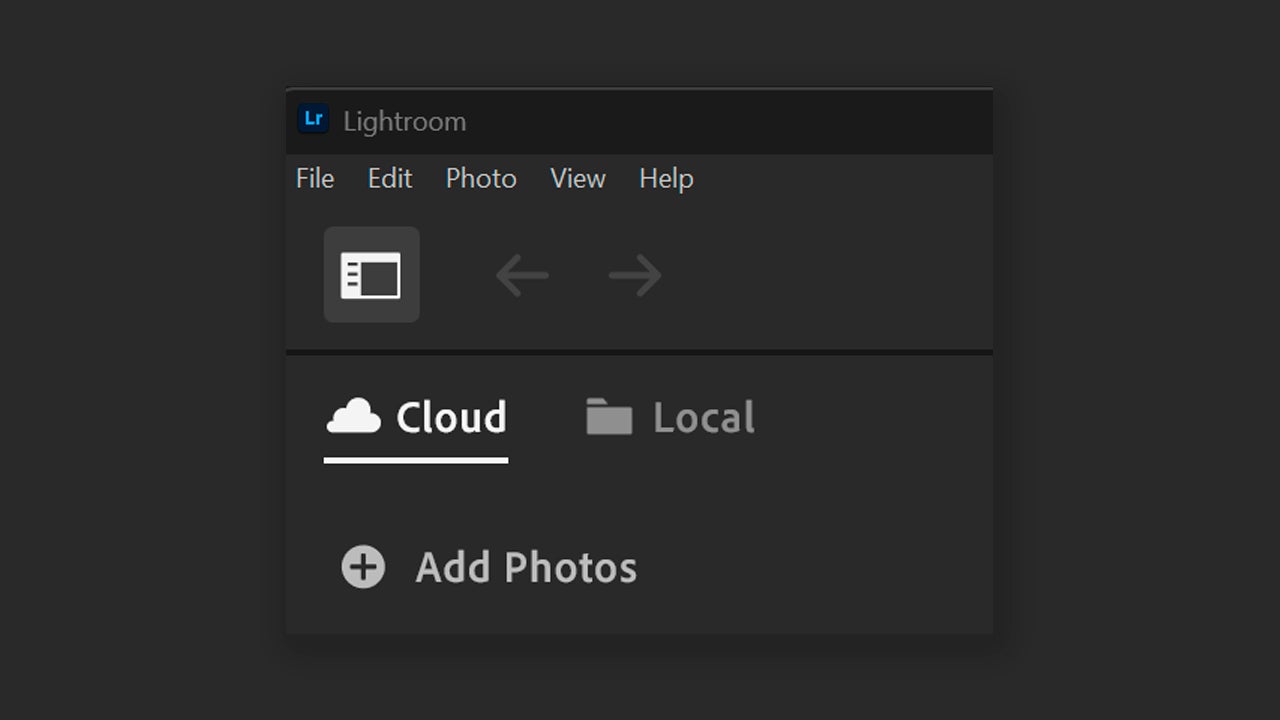
- Connect your camera or your card to the computer. Then, select the Add Photos option that you will find in the upper left corner next to the “+” symbol. You can also click on File > Add Photos… If you want to open photos that you already have on your PC, the procedure you will need to follow is the same.
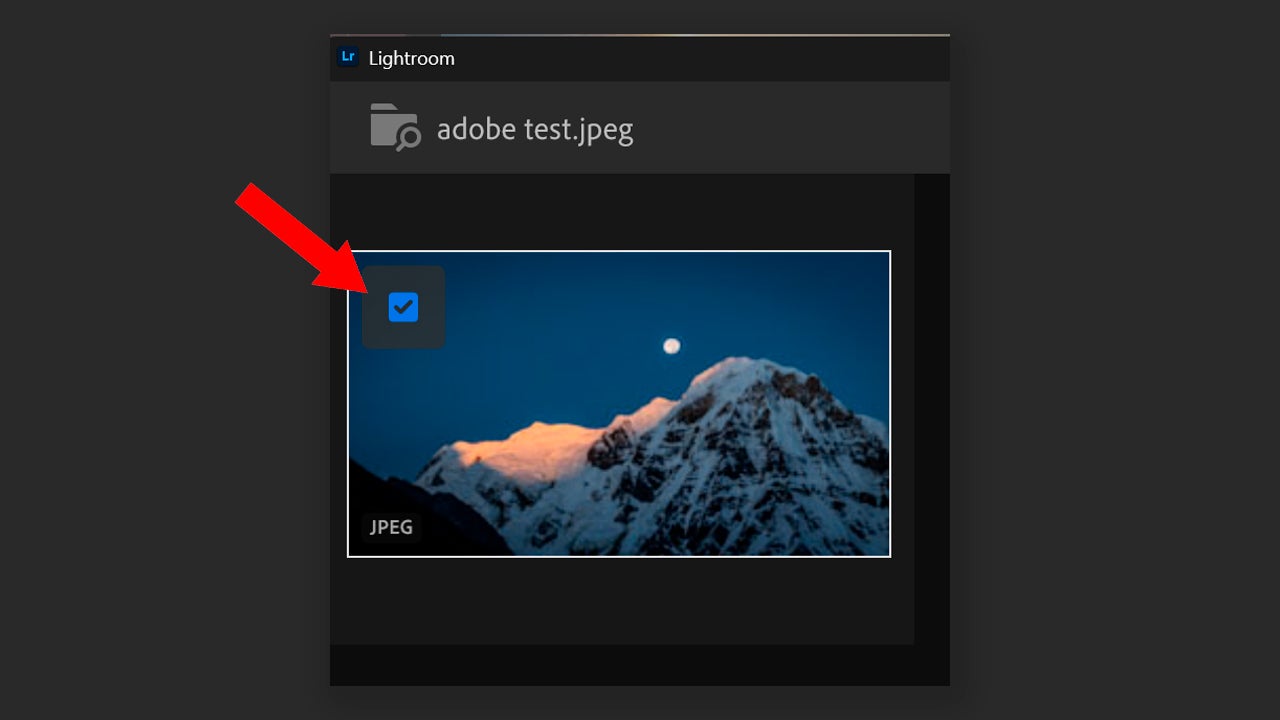
- Once you have selected them, click on Review for Import. Doing so will show you a preview of the chosen photographs. To import them to Lightroom make sure they are selected and that the blue checkmark symbol appears in the upper left corner. Finally, click on Add (…) Photos.
When adding photos, Lightroom is capable of detecting duplicates if there are any. On the Import screen, you will see a warning with the text Previously Added over the thumbnails of the images you have already added. Remember to import your images in RAW format for easier editing.
The photos are already added, now it’s time to get to work. To achieve the HDR effect correctly, you need to have at least three photographs with the same framing and different exposures. Lightroom has the Merge to HDR option, which combines several photos to create one in HDR and also allows us to edit them:
- First, we will activate HDR Output. We will need to select Develop > Basics > HDR. If you want it to be active by default, click on Edit > Preferences > Presets.
Perfect your HDR photographs in Photoshop
After merging our photos to create the HDR image, it’s time to continue refining details in Photoshop.
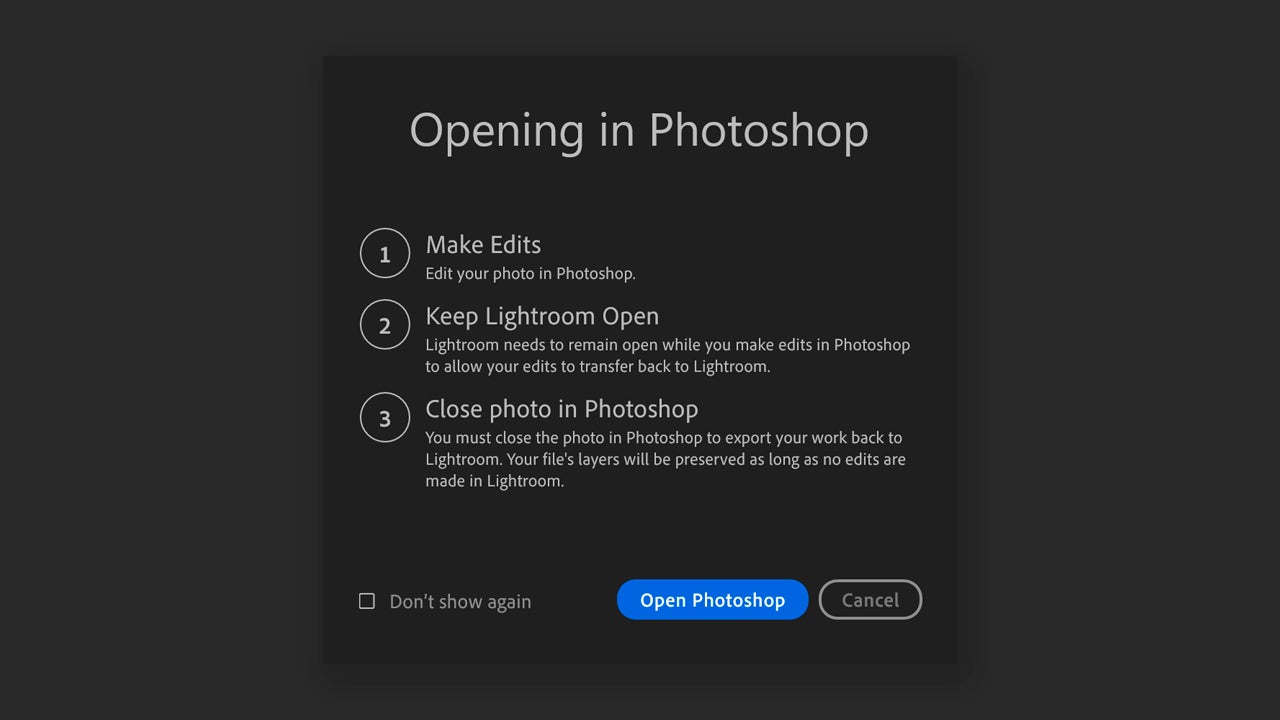
- From Lightroom, select your finished HDR image and right-click to choose Edit in Photoshop. Next, you will see a box where Lightroom will inform you that you should keep the program open while editing in Photoshop. Finally, you will need to close the photo in Photoshop for the changes to update in Lightroom.
One of the great advantages of Photoshop is that it allows you to work in layers. This means you can alter the image without needing to change the original. You can, for example, add adjustment layers to modify exposure, curves, hue, or saturation.
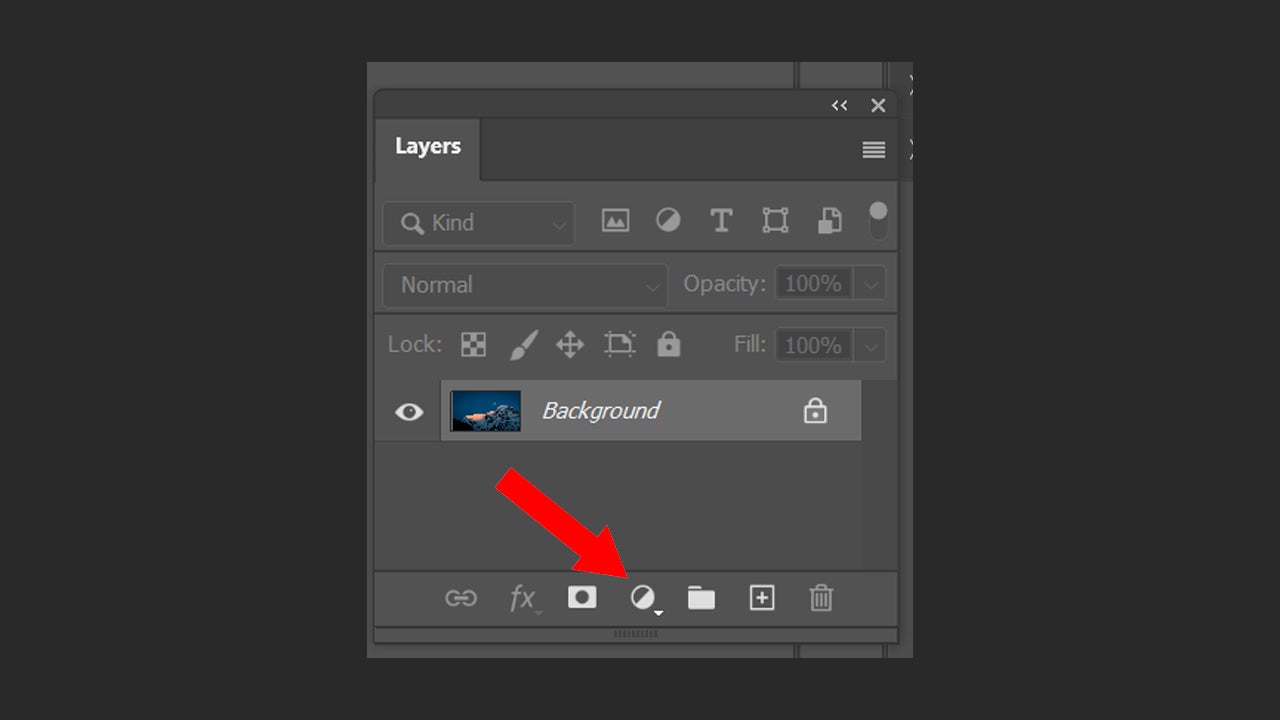
- To add an adjustment layer in Photoshop, go to the Layers panel and click on the symbol that resembles a crescent moon, as shown in the image.
By doing so, you will see a large list of adjustments. In case we wanted to change the colors, for example, we would click on Color Balance. For brightness and contrast, it would be Brightness/Contrast. Get creative and experiment.
When you finish doing it, click on File > Save. Go back to Lightroom; here you will see your photograph with the changes made in Photoshop if you select All Photos and click on the most recent one.
Here we have only shown you the basic process, but the combination of Photoshop and Lightroom can lead to spectacular photography. Try switching between the two to give a different touch to your captures.