Get ready for WhatsApp’s “darkest” change yet!

It’ll soon be time for another round of updates on the world’s most popular messenger service, and thanks to the constant discovery of new beta data, we’ve learned of a new feature that should be coming our way shortly.

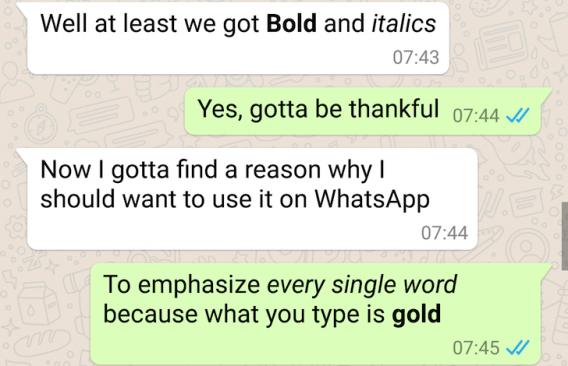
According to the website Android Police, WhatsApp will soon be offering text formatting (such as the ability to change your text using italics and bold).  We can only presume that WhatsApp’s reasons for implementing this, is to not fall behind their rivals, such as Slack, who already offer this function.

In order to use this new feature, you will only have to put the text you wish to appear in bold between *two asterisks*, or _two underscores_ for italics. Of course, we’ll have to wait a little while longer to see this feature arrive to all handsets, but as WhatsApp seem to working flat out on new updates, we hopefully won’t have to wait that long.

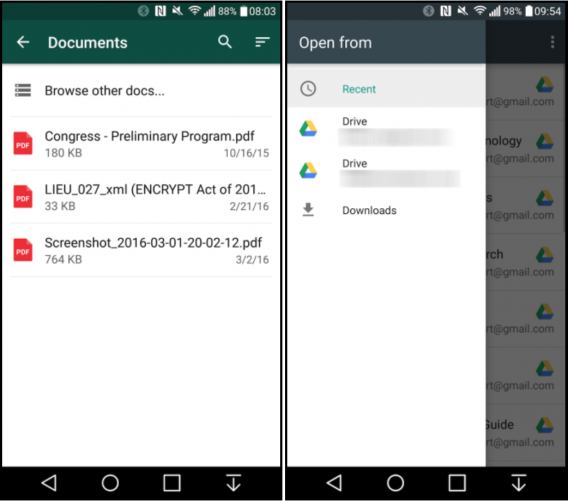
There are also other improvements we can expect to see with regards to the latest document sharing feature on the platform. When attaching a document, we can now see a “Browse other docs” option which allows you to browse your Google Drive and Microsoft One drive accounts. It is however still worth remembering that you can currently only share PDF versions of the documents.

Stay tuned for more WhatsApp updates!

Facebook plans to say goodbye to numerous devices

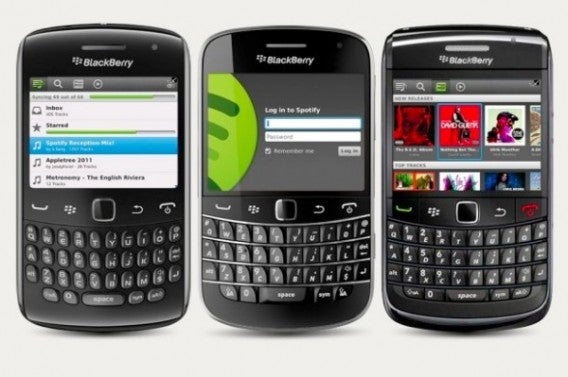
It seems that WhatsApp isn’t the only popular application that has decided to abandon the BlackBerry ecosystem – Facebook has decided to call it a day too.

Facebook and Messenger will both cease to exist on BlackBerry operating systems, including the BB10 by the end of 2016. This is a bit of a blow for BlackBerry users around the world, who have already taken to Twitter in a global campaign to beg Facebook to reconsider.

Initially, WhatsApp’s decision to leave BlackBerry was because 99.5% of its registered users were chatting on Android, iOS and Windows operating systems, therefore it seemed appropriate and natural to focus its efforts on the more popular platforms (and it doesn’t take a genius to work out that BlackBerry didn’t quite make the team).

Seeing as though WhatsApp is owned by Facebook, this decision may come as no surprise. However, you can’t help but ask the question: Has this decision just robbed BlackBerry of a bright future?

It seems Android has two new threats from Apple to deal with

It looks like Android could have a seriously big problem with the newly-announced iPhone and iPad Pro.

For starters, Android lacks a mobile equivalent to the iPhone SE. There isn’t a single high-end Android device with a 4-inch-screen – last year, not a single mobile was launched last year from Android with a screen like this.

And we must not forget that the new iPhone comes with that unbeatable promise of “The iPhone for $399”, that’s bound to catch many an eye. The iPhone SE has brought us a mobile with a better quality/price than the iPhone 6, with very few differences between the capabilities of the two.  It’s an affordable new iPhone, not an old iPhone for a good price – who can argue with that?

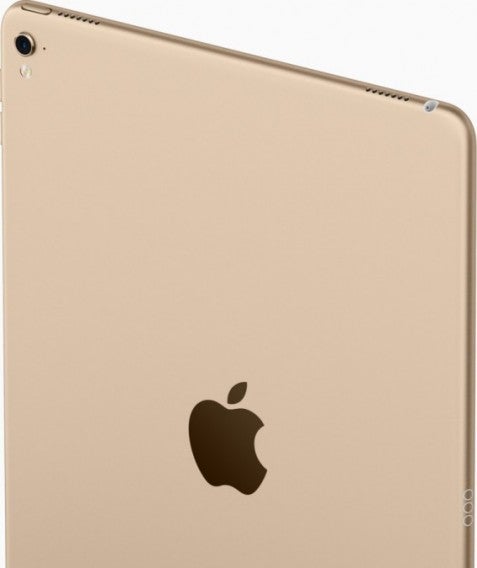
Something similar has happened with the iPad Pro. The issue is that over the last year, Android have failed to bring us a single good tablet (with perhaps the exception of the Google Pixel C). The article has noticed that the market for tablets was in the decline, yet here ‘s Apple, introducing their new tablet, with a fancy “Pro” surname, with an even more expensive price than the others.

So, could this mean the end for Android?

Of course not. But, the situation isn’t ideal for Google’s Android. Android has lost the advantage of entering the 4-inch smartphone market, and they certainly won’t be breathing life into the tablet market any time soon (thanks to Apple). The solution is just as obvious as it is difficult: Android must find something else to focus on and master – but they need to act quick.

What is an ISO?

An ISO image is a complete, replicated picture, called a snapshot, of all of the data on a CD or DVD, including the layout. You can visualize it like a box that holds everything you need to create an identical copy of the data, including the formatting of a disc. It is saved in a format called ISO-9660 and is a popular way of saving the content on CDs to transfer to other CDs or to a computer drive. It is used with Windows, Linux, DOS, and other operating systems and while Windows uses the Joliet ISO file extension for ISO images, Linux uses the RockRidge ISO file extension.

Uses for ISO Technology

The most common use for ISO image files is to create an identical copy of a CD or DVD onto a blank CD-R or DVD-R. These copies include all of the content, just as it exists on the original. Many software titles that allow you to write onto a CD-R or DVD-R offer a feature to help you create a CD from an ISO image file. However, a third-party utility is usually required to “burn to disc”. Examples of these utility programs include Nero, Active ISO Burner, Roxio CD Creator, and ISO Recorder Power Toy, and most of these utilities are available for download for free.

Identifying ISO Files

All of the files you see with the file extension .ISO are ISO image files. These files are handy for transferring large programs via the Internet since all of the program’s related files can be packaged into a single, compact file. You can even get entire operating systems, like Windows, in ISO format, ready to be installed on a computer or to a virtual machine. In fact, Windows 10 and Windows 7 are available as ISO files.

ISO image files can also be transferred to USB drives or external drives so that you can store these for later or transfer the information onto another computer or device.

ISO for Transferring and Backing Up Data and Files

Some other programs can extract the contents of an ISO file if you do not wish to burn the file to a disc or transfer it to a USB device. For example, both 7-Zip and PeaZip can extract the contents of an ISO file into a folder and save it to a hard drive or other storage device. There are some practical uses for this, such as moving your copy of Microsoft Office to a new computer.

ISO image files are also extraordinarily helpful when you need to back up important information. You can put the information in ISO format and have it ready to restore in case the primary copy gets corrupted, lost, or stolen. ISO files can also be used to extract, store, and transfer music CDs, movies, games, software, home videos, pictures and images, and much more.

Want more functionality with virtual drives and ISOs? Check out Virtual CloneDrive!

Virtual? Yes! Creating and Mounting an ISO File

An ISO image is used to create a complete and perfect copy of all of the data on an optical storage disk, such as a CD, DVD, or Blu-Ray, including the formatting of the disc. Though it does take special software, you can make ISO images using most any optical disc and use the files on your computer or another device when the physical disc is not available. You can also use special utility software to create another disc (CD, DVD, or Blu-ray) that is an exact replica of the original. ISO files can be identified by their file extension, which is .iso.

ISO for Backups and File Transfers

ISO files are incredibly useful in creating backup copies as well as for transferring large programs and files across the Internet. ISOs can also be used to share the content of your optical discs with others or to transfer these to your other devices.

One of the software utilities that you can use to create, burn, and mount ISO image files is Daemon Tools Lite. This utility is completely free.

How to Create an ISO Image Using Daemon Tools Lite

To create an ISO image using Daemon Tools Lite, launch the program and click on the option “Disc Imaging”, which is located in the main window of the utility. Next, select the drive where you placed the optical disc that you wish to use to create the ISO file. Find the “Destination Image File” option, and select the path and name for the image. Make sure you are using the file extension .iso. Now, click on “Start”, and the utility will begin making your ISO image file.

How to Mount an ISO Image Using Daemon Tools Lite

Usually, Windows recognizes a disk that is inserted to the optical drive on the PC, but when you want Windows to mount an ISO image that is stored on your computer, you will need to make a virtual drive and mount the ISO image there. Daemon Tools Lite does this for you.

Open the Daemon Tools Lite utility. From the main window, right-click on a virtual drive (which are located in the bottom panel). Choose the option “Mount”, which is in the Context Menu. Then select the ISO image you wish to have mounted. The ISO image you choose will appear in the window as a virtual disc that is loaded into a virtual drive. You can work with the ISO file here, just as you would if the content were stored on a CD or DVD.

What to Know When Using ISO Creation and Mounting Utilities

When you are using software utilities like Daemon Tools Lite, be aware that some of these try to save ISO files in different formats,; in other words, formats that do not end with the file extension .iso and may not be compatible with Daemon Tools Lite.

Stay safe when downloading ISO files with Avast!

Drive in Daemon Tools

Daemon Tools can be used to create virtual drives, as well as ISO image files from optical storage devices, such as Blu-ray, DVD, or a CD. Virtual disk drives, also referred to as just virtual drives or RAM drives, are essentially files that are exact and complete replicas of a physical disk drive or the content of a disc, including related formatting. These virtual files can be configured on the host system or on a remote file system. The user can do things such as install a brand new operating system into the virtual drive without creating a new partition in the system or rebooting the it. The computer’s operating system looks at a virtual disk just like it does a physical disk drive or optical drive.

Recognizing and Using Daemon Tools Virtual Drives

The default file format used by Daemon Tools Lite is Media Data eXtended (usually shortened to MDX). You can recognize these types of files by their file name extension, .mdx. These files include all of the metadata that the original copy contained, including the physical parameters like layer breaks, tracks, and sessions. Daemon Tools Lite also supports data compression, making it incredibly useful for compressing large files like software programs and other multimedia files for transfer over the Internet or to create another copy of a disc. Similarly, it can be used to create a virtual disk drive, right on your computer.

The Steps for Creating Virtual Drives Using Daemon Tools

Daemon Tools will allow you to create up to four separate virtual drives on your machine. To do this, simply open the program. Right click on the Daemon Tools icon. Find the option “Virtual Drives”. From there, select “Add SCSI Virtual Drive”. That’s all there is to it!

Other Versions of Daemon Tools

Daemon Tools and Daemon Tools Lite are just two of your options. You can also consider downloading related products, like:

• Daemon Tools Pro version 7 – professional-grade imaging software

• Daemon Tools Net version 5 – enterprise-grade client server solution

• Daemon Sync version 2 – private and secure storage solution for Mac and PC (including Linux OS)

• Daemon Tools iSCSI Target version 2 – iSCSI storage solution for Mac and PC

• Daemon Tools for Mac version 4 – imaging software exclusively designed for Mac

When downloading ISO files, Malwarebytes Anti-Malware can keep you safe!

3 Smartphone Lighting Tips for Windows Movie Maker

Not only are smartphones everywhere these days, but the cameras included in these devices have become more and more powerful and sophisticated. In fact, many people are able to take pictures and video using smartphones that rival professional equipment that typically costs nearly 10 times as much as the phone itself. However, lighting may be the most important element as it allows camera enthusiasts to achieve all kinds of professional looks.

When it comes to photography or videography, lighting is often considered a background element by hobbyists. The truth of the matter is that proper lighting often can make or break a photo or video. Below are some tips to get the best lighting when using a smartphone for photo or video shoots:

1. The Flash Isn’t Always Your Friend

When it comes to professional-grade cameras, flashes are typically constructed in such a way where they add, not detract, from the final image. With smartphones, however, manufacturers include simple flashes in order to allow you to take pictures and video in dark areas while still maintaining clarity. Instead of relying on a flash, consider letting natural light into the area to warm things up. Natural light is not only brighter, but it is less focused in most cases, meaning the subject will be illuminated from all angles equally rather than just from the point of a flash.

2. Keep Your Lens Clean

When lighting is used in photography, even the smallest amount of dust, dirt, or grime can be magnified on a smartphone’s camera lens. As a result, you’re going to want to make sure your camera’s lens is clean before each use. You can use a microfiber cloth to wipe down the lens, and you should avoid using things like paper towels as they can leave behind bits of paper and may even scratch the plastic or glass in front of the lens.

3. Try to Use Indirect Light

Even though today’s smartphone cameras are more sophisticated than ever, many are still not able to handle direct light. When a picture is taken with direct light, or light that is shining directly on a subject, the camera may have a hard time accurately displaying the image. This occurs because there is too much light on the subject. To remedy this problem, consider using indirect light. You can do this by shining a light on the subject, but then place an opaque, white umbrella backwards in front of the lighting source. This will diffuse the light while allowing it to illuminate the subject in a softer manner.

Check out this video to learn how to make a holiday video in Windows Movie Maker!

4 Tips and Tricks for iTunes

While iTunes is already great for organizing and listening to your media collection, you might not know about all of its features. Check out these tips and tricks to get the most out of iTunes:

1. Use Apple Scripts

AppleScripts can be used to extend the functionality of iTunes. A perfect example of this is Quick Convert.

The Quick Convert feature lets you easily rip a CD to various file formats, but it can also create a playlist for your new files. This is not only beneficial for getting the right format, but it also saves time by encoding all of the media information for you in the list. When using Quick Convert, don’t forget to check the box that deletes original files if you don’t want duplicates hanging around taking up space.

2. Choose the Look of iTunes

If you’re not a fan of the latest iTunes, you can revert back to a previous version by going to View and then selecting Show Sidebar. From there, select View and then Show Status Bar. All you have to do from there is sort your media by artist.

itunes-43-535x535

3. Redeem Gift Cards Using Your Camera

One feature that can save you time in iTunes is its ability to scan codes. If you don’t want to type in your gift card’s number, you can write it down on a piece of paper. Next, go to the iTunes Store and click on Redeem. Now all you have to do is select Camera and hold your code up in front of your web cam. iTunes will automatically scan the code, verify it, and allow you to use it just as if you had entered it manually.

4. Use the Up Next Feature for On-the-Fly Playlists

When you’re listening to a song and you think of something else you’d like to hear next, you can use the Up Next feature to create an on-the-fly playlist. To do this without stopping the song that is currently playing, just click on the song or album you want to play next and select Add to Up Next. You also have the option to Play Next which adds the song or album to the top of the list to literally play next. To see your current list, click the List button in the middle of iTunes and then click on the clock icon.

Don’t forget to check out the Genius Tool in iTunes! and How to add music to iTunes and the iPhone using iTunes

Improve Your Sound Quality in iTunes

Did you know that you can easily improve the sound quality in iTunes? Check out these tips to learn just how easy it is to make your media sound better than ever:

Use the Sound Enhancer

One of the easiest ways to improve sound in iTunes is to use the Sound Enhancer. This can be found in the Preferences Menu under Playback. Sound Enhancer is a simple scroll bar that can be adjusted from low to high, and it essentially adds more depth by adjusting bass and treble levels automatically as well as stereo mixing. You can also tick the Sound Check box to ensure that all songs play at an even volume.

The Equalizer Offers Greater Control

While Sound Enhancer is simple, some iTunes users may want greater control over levels. For these users, iTunes offers an Equalizer that contains various sliders for different frequencies. Using the Equalizer, you can manually adjust specific frequencies to your liking. Want more bass but less treble? You can make it happen in the Equalizer.

Get Better Sound at the Source

When you rip a CD in iTunes, you have options regarding the file format output and the quality of the file. By choosing a lower bit rate at which to rip, you’ll save on space, but the sound quality of the file will be diminished. Likewise, if you choose a higher bit rate or a lossless format, you’ll have much better sound quality at the expensive of a larger file size. Which option you choose is up to you, but if you want the best sound possible from iTunes, choose a lossless file format.

Your Speakers Matter

Although not specific to iTunes, the speakers or headphones you use can make a big difference in sound quality. While you may be fine with an inexpensive pair of headphones from a discount store, you won’t get the full effect of your music without quality gear. In addition, you might consider purchasing a 5.1 surround sound system in order to really feel the bass.

Run Your Audio Through External Processing Equipment

If you’re really into audio technology, you might even consider running your audio through processing equipment, like compressors and pre-amps. This may take a big of extra time and can be expensive, but by running your audio output through processing equipment, you’re bound to get better sound that you can have tighter control over.

Don’t forget this video to know how to add music to iTunes and the iPhone using iTunes.

Syncing Feeling: Sync Your iPad, iPhone, iTunes, and More

When you sync your media in iTunes, you can stay organized and ensure that your media is up to date. If you don’t know how to sync your songs in iTunes, check out the following tips:

How to Sync Your Media in iTunes

To get started, connect your device via USB to your PC. This device can be an iPod Touch, an iPad, or an iPhone. Next, look for your device to show up in the top left-hand corner of iTunes’ main window. When you click on the icon that represents your device, a list should appear detailing what types of media are present.

When you click on a corresponding list item, like music or movies, you’ll be presented with the option to sync that particular type of media. You can also choose whether to sync entire albums or just selected playlists. Once you’re ready, click on the Sync button at the bottom right of the window. This will begin the syncing process and you’ll be notified once it has completed.

Syncing Over Wi-Fi

You can also sync your Apple devices using wi-fi. To do this, you will first need to connect the device to your computer using the correct USB cable. Once again, you’ll look for the device’s icon to appear in the top left of the iTunes window. When you click on it, you’ll have the option for Summary, which provides you with various options. You’re going to select Sync With This [device] Over Wi-Fi. Next, click Apply and you can disconnect the device and choose what media you would like to sync wirelessly.

The Benefits of Staying Synced

Syncing your media collection with your computer basically means that you’ll never have to go without your favorite content. Essentially, if you download a new song on your phone, you can have it on your computer. Likewise, if you’re planning a long trip, you can add movies on your computer to your iPad so you can watch while you’re away. It’s important to remember, however, that you’ll need to sync your media on a regular basis to keep it current. iTunes will compare what it has versus what’s on your device in order to know which files need to be added and which files already exist. All you have to do is enjoy!

Find out how to get the most out of Chromecast by reading Explore 5 Apps to Get the Most Out of Chromecast!