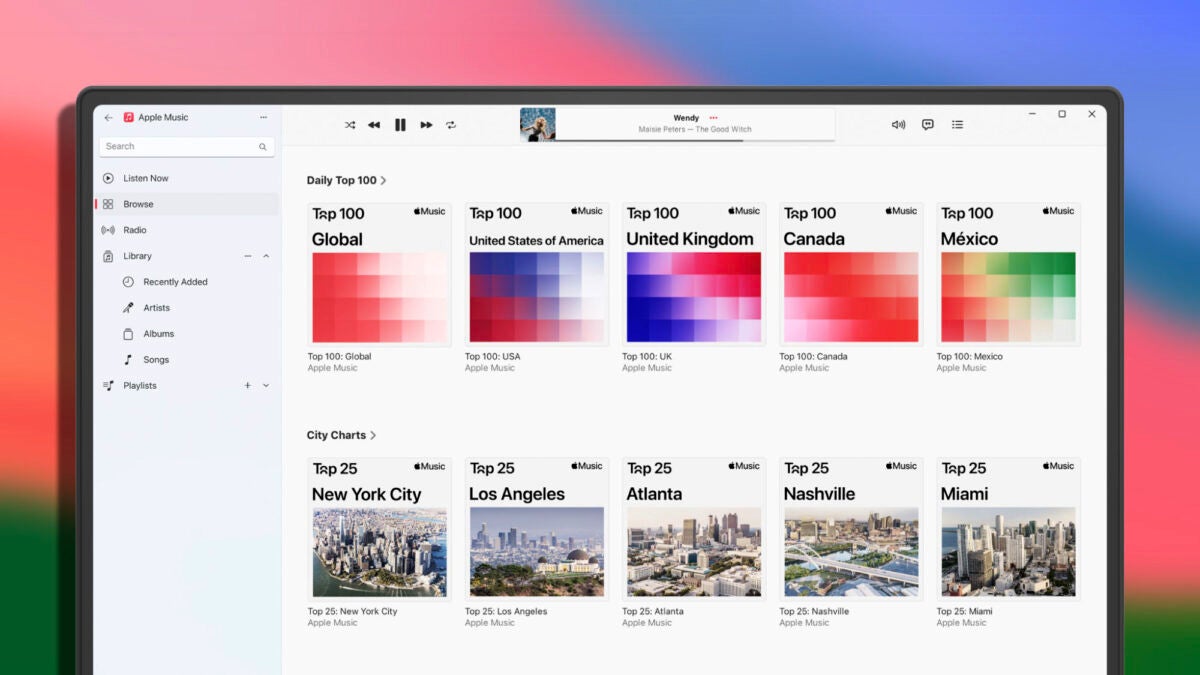
Users of Windows 10 and later versions can now enjoy device management and access Apple Music and Apple TV content through three dedicated applications.
Apple has officially released the Apple Music, Apple TV, and Apple Devices apps for Windows computers, marking the end of an era for iTunes. This change is part of Apple’s efforts to distribute the responsibilities of iTunes across different apps, reflecting how these apps work on Macs. Windows 10 and later users can now enjoy device management and access Apple Music and Apple TV content through three dedicated apps.
The transition has been in progress since October 2022, when Microsoft first announced plans for the Apple Music and Apple TV apps in the Microsoft Store. Subsequently, the Apple Music, Apple Devices, and Apple TV apps were launched as beta in January 2023, and since then, Apple has been carrying out regular updates. Today, the “Preview” label has been removed from the three Windows applications.
The Apple Music app allows us to listen to and manage music from our iTunes library, streaming music service, and purchases from the iTunes Store. On the other hand, the Apple TV app allows us to watch and manage movies and TV shows from iTunes, as well as access the Apple Music and Apple TV+ streaming services. Lastly, Apple Devices is designed to update, backup, restore, and manage our iPhone or iPad, and sync content with our PC.
The use of these applications requires Windows 10 or later, and it is necessary to install all three applications to complete the transition from iTunes. After adding the applications to the computer, iTunes will only be used to access podcasts and audiobooks. The iTunes library, please note, should not be deleted as it is used by the Apple Music and Apple TV applications.
Clearly good news for both Apple and Windows users who, while iTunes Movie Trailers officially says goodbye, we will now have a more cohesive and coherent experience. With dedicated apps for different Apple services, using them will be even easier and more convenient.
Weird, duplicate iTunes playlists? Here’s how to get rid of them.
It’s about time someone had a clear answer for this problem!
iTunes users probably know the feeling: you have a playlist (yep). You get a few new songs (uh-huh). You plug your phone into your laptop to update the music library (so true). Then, you unplug your phone and find an annoying duplicate of the playlist! It looks something like this:
Well, we’re here to fix the problem. We’re here to discuss…
Why extra iTunes playlists appear, and how to fix them
The tried and tested explanation
We rooted around on the internet for answers. It took many minutes of sorting through theories before we arrived at an Apple discussion thread with a solid answers to the question:
User Jon Milan suggested the duplication happens when iTunes is open and playing a playlist during the syncing routine.
We began testing the idea by changing a “Halloween” playlist and syncing our phone without iTunes running. Nothing happened. We altered the music and synced again, while the playlist was running. To our surprise: “Halloween 1” appeared. So far, theory confirmed!
And it makes sense; having iTunes playing during an update could cause difficulties; instead, the program renames your active playlist and inserts the updated version under the original title. Apple made an understandable decision, we just wish they notified us better when it happens. These duplicates have bothered us for quite some time.
The Fix: shut iTunes off during the sync process. Simple!
Of course, if you already created a playlist by accident, carefully delete all numbered versions (ex: “Dance Party 1”) in the main iTunes playlist. Then, without unplugging your phone, re-sync again, without iTunes running.
There are many different settings and versions for iTunes, and all of these can add their own problems or solutions into the mix. If you’re still experiencing issues with playlist doppelgängers, try this on for size:
Switching Phone Playlists
Does your phone still have unwanted playlists that load into your mac whenever you re-sync? We believe removing the playlists and syncing again without unplugging your phone can solve the problem, but if that still doesn’t work…
User Kenichi Watanabe suggested another plan: remove iTunes from your phone entirely, remove the unwanted playlists from your music library on the computer, and then re-sync. Since the extra playlists are gone from your laptop and fully deleted from your phone, it’s highly unlikely they’ll still be around afterward.
And if that still doesn’t do the trick…
Online Playlists
Final Effort!
In another forum, users amergin and swedish_chris suggested the issue may be related to an iTunes update in conjunction with the cloud. Much akin to the first issue discussed, the explanation goes something like this: your Mac has one version of the playlist and your iCloud account has another. When you sync, the extra version appears with a number.
To solve this, go into your iTunes account by visiting “Store” and scrolling down to “Account” at the bottom right:
From here, you can change your settings for iCloud and Family Sharing. Once you turn this off, you should be able to remove the duplicates (just so long as you remember to turn iTunes off during the sync).
Conclusion
We hope you resolved the issue with one of these solutions! While we’re pretty sure the “tried and tested explanation” will help most modern users, there’s no telling if someone running an older installment will have unique problems or if a future update will bring back former problems. If you’re still having trouble or found a new solution, please let us know in the comment section. Thanks for reading!
After being the go-to Music app for years, iTunes has been divided into a new app trinity: Apple Music, Apple Podcast, and Apple TV.
If you used iTunes to sync your music to your iPhone, do not worry. You can still sync your music to your iPhone through Apple Music.
In case you want to find a podcast but you don’t remember the name of it, Apple Podcast has a feature that allows you to find podcasts based its content.
Apple TV has 4K HDR playback support, and also features your channel subscriptions similar to Prime Video.
Apple Music is expected to have a feature that allows users to buy digital songs. However, Apple is rumored to stop having users download mp3s altogether in favor of a music subscription product.
Wrapping up
iTunes was a landmark product for Apple for years. It helped drive the sales for nearly half a billion iPods. The departure of iTunes signifies the end of an era, and that Apple is ready to jump into the next generation of music.
Despite all the competition, Apple Podcasts is still the place that the majority of listeners go to when searching for new podcasts. They’ve been in the game since the very beginning, and it would be completely irresponsible to not have your podcast on their site. Thankfully, they also have one of the easiest application processes for submitting your podcast, so you don’t have to go through an extreme process to get onto their platform. Here is an easy step by step guide on how to put your podcast on iTunes.
How to add your podcast to iTunes
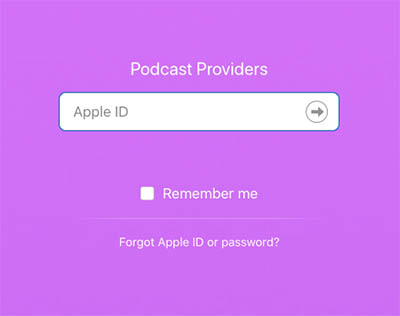
Step 1: Go to the iTunes Connect site and login with your Apple ID. If you don’t have one, you’ll have to create one.
Step 2: Enter your RSS Feed URL and press “Validate.” Note: You may have to press a “+” symbol in the top left corner if you already have a podcast associated with your Apple ID. This will bring you to the page where you can enter your RSS Feed URL.
If you’re hosting your podcast on SoundCloud, then you can find the RSS feed under “Settings” and “Content”. If you’re hosting it on another site and you do not know where to find your podcast’s RSS Feed URL, rss.com made an easy guide to help you find it.
Additionally, there are some requirements to what has to be in your RSS feed to qualify. The RSS feed must contain a title, description, and registered language. You’ll also have to place the podcast into a maximum of three different categories that Apple has listed, as well as marking whether the content is explicit.
You may also want to check out the other requirements Apple listed if you are worried about the content of your podcast possibly going against the values of Apple. Most of these are guidelines for the titles and artwork, but some include the type of content that is restricted by Apple.
Step 3: After pressing “Validate,” your podcast’s information should appear. Make sure to double check it for accuracy. Once you’ve done this, you can go ahead and press “Submit.”
Step 4: Wait for your confirmation email from Apple. This can take up to 10 days. Once you’ve received it, your podcast will be available to download right away.
Possible submission errors and how to correct them
Because Apple Podcast is such a popular choice, Apple has pretty high standards for what they allow on their site. While the content of your podcast doesn’t really matter to them, the appearance and quality do.
RSS feed problems – If you are using SoundCloud, Buzzsprout, Libsyn, or other reputable podcast hosting sites, then you shouldn’t have to worry about this being an issue (and each of those sites has their own troubleshooting methods if it is one). However, if you have your own site to host your podcast, you may run into an issue if your feed isn’t programmed correctly. There are a few feed validators on the internet that can help you find and fix your RSS feed issues.
Bad Artwork – Apple cares about appearance more than anything else, and if your podcast doesn’t look like it’s going to be high quality, then they don’t want it. Artwork seems to be a bigger issue than the audio quality (!), so you will need a quality image to go along with your podcast if you want to get it on Apple Podcast.
If you’ve successfully completed these steps, congratulations! You’ve finally put your podcast on the most important site in the industry. Don’t forget to check out other popular locations like Spotify and Stitcher, so your podcast is able to reach as many listeners as possible.
We love iTunes and enjoy creating new playlists but it took years to realize the full potential of iTunes’s options! Rather than going through a long journey of technological discovery, enjoy this short guide to Apple music mastery. Prepare yourself for the…
To create a playlist (a grouping of songs) there are two simple paths:
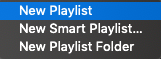
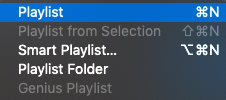
1. Easy Mode: right click the left bar, hit “New Playlist”. You’ll be given the option to name your new playlist!
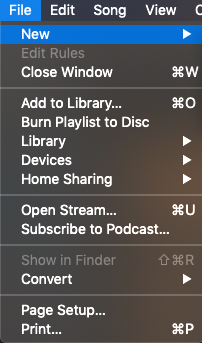
2. Thorough Mode (for Mac users): open iTunes, and visit “File” in the top bar:
Within the “New” section, you’ll see the same three choices available.
Creating a Smart Playlist
Smart Playlists bundles music, videos, and more based on preset conditions: date added, title, year composed, etc. If you know how to shape the playlist, it can become whatever you like!
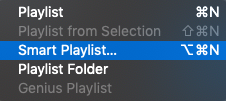
Starting a Smart Playlist begins much the same as a normal playlist. Double click the left bar or hit “File” and “New” in the top bar to arrive at the playlist menus:
You can go with this…
Or you can go with that!
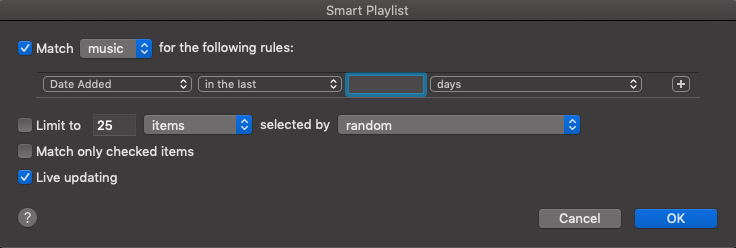
For smart playlists, you have another step! The “Smart Playlist” window:
The magic happens here. In general, smart playlists gather songs with a similar characteristic. Right now, the targeted characteristic is “Date Added”, but there are a number of other parameters available:
Recently, iTunes randomly deleted our “Recently Added” section, so we made our own smart playlist that compiles all songs added within the last month. Play around and see what you could make!
(NOTE: in the smart playlist window, make sure to select “Live Update”. This keeps the folder updated without requiring extra effort.)
Developing Your Playlist
Guess what? Now that you have a playlist, it’s time for customization!
ADDING SONGS
Want to add a song? Select one and drag it over your playlist name, in the left column. Easy as that!
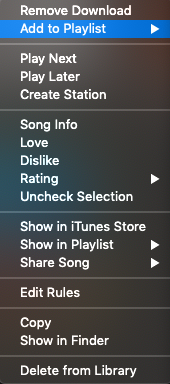
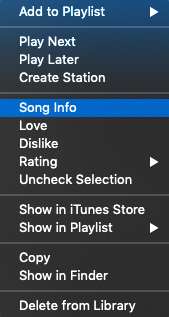
On the other hand, if you aren’t using MacOS, right click the song in question. Select “Add to Playlist” in the dropdown menu. Then, choose your playlist from the options given:
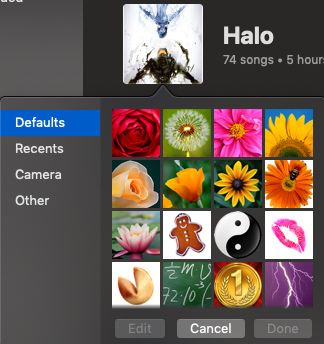
To change the playlist artwork, simply click the current artwork directly, at the top left. A new window will appear, from which you can search for another graphic file:
ALTERING PLAYLIST DETAILS
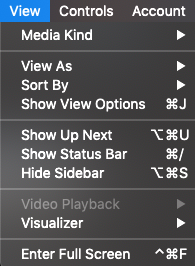
Select the “View” tab, at the top of your screen:
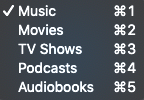
The three most important options are: Media Kind, View As, and Sort By. The first, Media Kind, simply tells iTunes whether its dealing with music, movies, or something else:
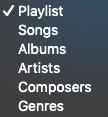
“View As” determines how you will see your song. Currently, the default goes to Playlist, which shows each individual song with artwork. Songs creates a list of songs; compact, better for ordering, but less visually appealing. The last four sections – Albums, Artists, Composers, and Genres – lump songs back into those categories.
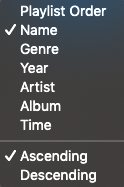
Sort By arranges music by either user arrangement, alphabetical order, genre, year, artist, album title, and song length. Within those categories, you can choose ascending or descending order.
Keep all these options in mind when making your playlist. There’s no right answer except what works for you!
Songs make playlists. Therefore, a thorough playlist guide deserves guidelines on how to work with songs and albums, right?
Of course!
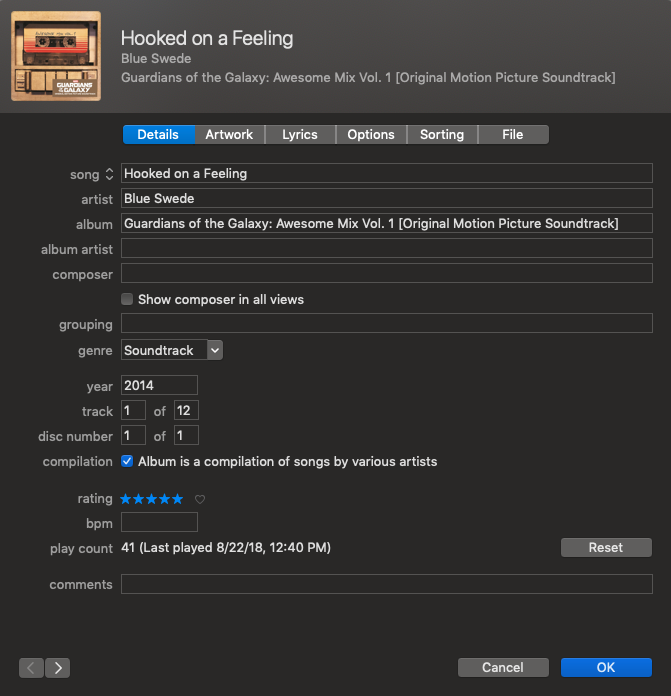
Right-click your song or album. The dropdown menus look slightly different, but both have an all-important “Info” button:
As an example, here’s the window for the song “Hooked on a Feeling” by Blue Swede, from the “Guardians of the Galaxy: Awesome Mix Vol. 1” album:
(Song and album windows look the same)
Let’s talk about the three most important tabs: Details, Artwork, and Lyrics. In the Details tab above, you may notice every piece of information from the title to ratings to BPM (Beats Per Minute). Many of these items can be adjusted right here! If you really want, “Hooked on a Feeling” can appear in your playlist as “Wizzle Wozzle,” composed in 1872 by John Williams.
It’s your playlist, we won’t judge.
Next up is Artwork! Why change the image for a song or album? Two reasons come to mind: CD’s often don’t load with the graphics, and more exciting artwork can be found elsewhere.
Whatever the case, click “Add Artwork” at the bottom left to choose a new image. Consider deleting old artwork if you’re using a new one instead!
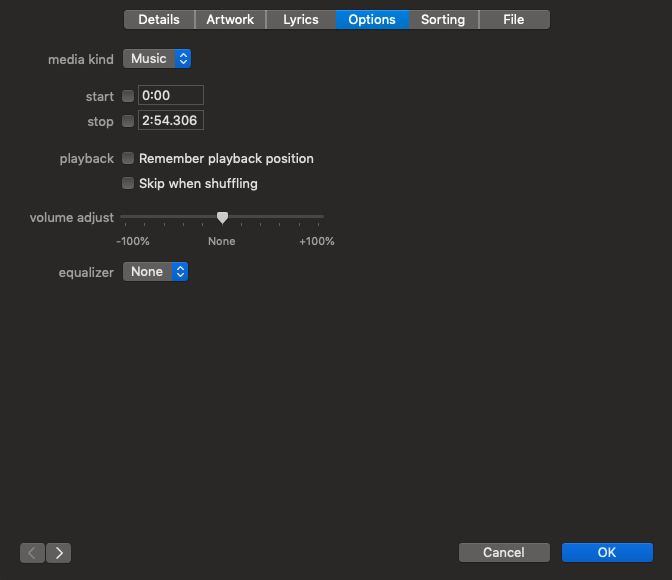
Next section: options.
Want a song to start or stop at a certain time? You can control that here! Want the song to be skipped while you’re shuffling? Done! Is the song or album at a strange volume compared to others in the playlist? Adjust the level!
Conclusion
John Wooden said, “Small things make big things happen”. With a few easy clicks, you can set new and inspiring artwork for an album or fix offset volume levels within individual songs.
Thanks for reading, enjoy the tunes, and stay fresh!
iTunes is certainly the go-to method for adding music to your iOS device, but for the users who are looking for an alternative, CopyTrans is the easiest solution.
Completely free,CopyTrans can be quickly and safely installed, and immediately allows the transfer of any .mp3 file from your PC or Mac directly to your iPhone music app. Magic? More or less.
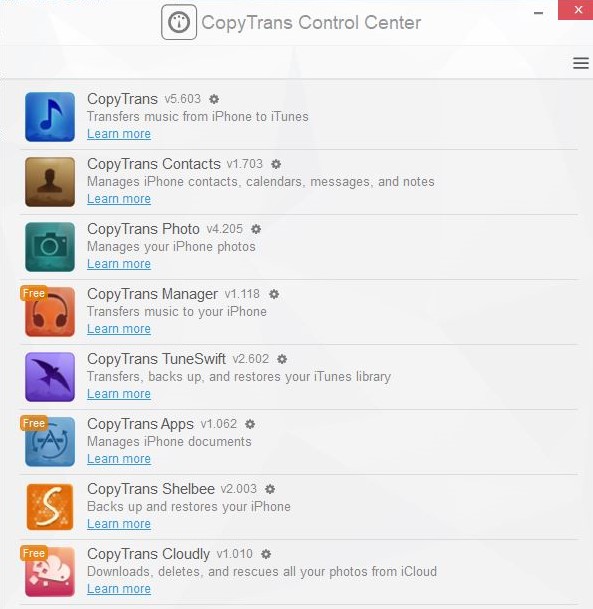
Clicking the button above will eventually take you to the software’s download page. Once here, don’t click the first green button you see. Scroll down a little to where it shows ‘CopyTrans Manager.’ This is the free option.
Next:
Once it’s downloaded, run the program and it should show the CopyTrans control list (above). CopyTrans Manager should be up top since that’s the one you’ve installed. Hover your mouse over it and click ‘start.’ This will open the transfer software you’ll be using.
CopyTrans will now ask you to connect you iOS device if you haven’t already. Go ahead and do so, and you should be ready to start adding tracks. If you receive an error message, here’s a simple and free workaround:
Go back to the CopyTrans website and scroll to the very bottom. There’s another free app called ‘CopyTrans Drivers Installer’ (pictured above). Run the automatic install and this should target and remove any dastardly fragments of iTunes on your iOS device that are preventing your PC from accessing your phone. Once this automatic driver editing process is complete, we can pick up where we left off.
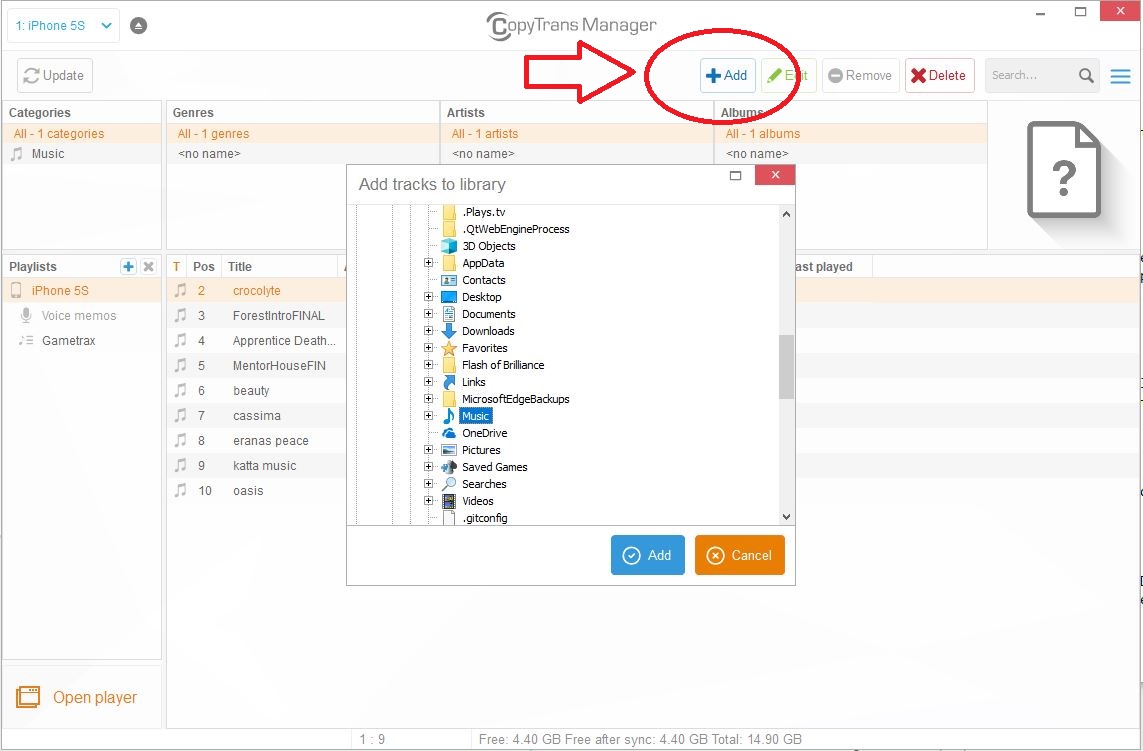
Adding tracks is as simple as clicking the ‘Add’ button on the top of Manager window. From here, simply navigate to where your music is stored (we recommend putting any tracks you want to add in an one easy-to-find folder so you can just navigate to it and select all your files at once) and click ‘Add.’ You should see the track(s) show up in the main window.
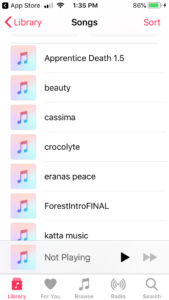
Once you have all the tracks you want to add in that window, click ‘Update’ in the top left corner. Let CopyTrans work its magic and bam! Next time you open your iPhone music app all the new tracks should be right there.
While iTunes is already great for organizing and listening to your media collection, you might not know about all of its features. Check out these tips and tricks to get the most out of iTunes:
1. Use Apple Scripts
AppleScripts can be used to extend the functionality of iTunes. A perfect example of this is Quick Convert.
The Quick Convert feature lets you easily rip a CD to various file formats, but it can also create a playlist for your new files. This is not only beneficial for getting the right format, but it also saves time by encoding all of the media information for you in the list. When using Quick Convert, don’t forget to check the box that deletes original files if you don’t want duplicates hanging around taking up space.
2. Choose the Look of iTunes
If you’re not a fan of the latest iTunes, you can revert back to a previous version by going to View and then selecting Show Sidebar. From there, select View and then Show Status Bar. All you have to do from there is sort your media by artist.
3. Redeem Gift Cards Using Your Camera
One feature that can save you time in iTunes is its ability to scan codes. If you don’t want to type in your gift card’s number, you can write it down on a piece of paper. Next, go to the iTunes Store and click on Redeem. Now all you have to do is select Camera and hold your code up in front of your web cam. iTunes will automatically scan the code, verify it, and allow you to use it just as if you had entered it manually.
4. Use the Up Next Feature for On-the-Fly Playlists
When you’re listening to a song and you think of something else you’d like to hear next, you can use the Up Next feature to create an on-the-fly playlist. To do this without stopping the song that is currently playing, just click on the song or album you want to play next and select Add to Up Next. You also have the option to Play Next which adds the song or album to the top of the list to literally play next. To see your current list, click the List button in the middle of iTunes and then click on the clock icon.
Did you know that you can easily improve the sound quality in iTunes? Check out these tips to learn just how easy it is to make your media sound better than ever:
Use the Sound Enhancer
One of the easiest ways to improve sound in iTunes is to use the Sound Enhancer. This can be found in the Preferences Menu under Playback. Sound Enhancer is a simple scroll bar that can be adjusted from low to high, and it essentially adds more depth by adjusting bass and treble levels automatically as well as stereo mixing. You can also tick the Sound Check box to ensure that all songs play at an even volume.
The Equalizer Offers Greater Control
While Sound Enhancer is simple, some iTunes users may want greater control over levels. For these users, iTunes offers an Equalizer that contains various sliders for different frequencies. Using the Equalizer, you can manually adjust specific frequencies to your liking. Want more bass but less treble? You can make it happen in the Equalizer.
Get Better Sound at the Source
When you rip a CD in iTunes, you have options regarding the file format output and the quality of the file. By choosing a lower bit rate at which to rip, you’ll save on space, but the sound quality of the file will be diminished. Likewise, if you choose a higher bit rate or a lossless format, you’ll have much better sound quality at the expensive of a larger file size. Which option you choose is up to you, but if you want the best sound possible from iTunes, choose a lossless file format.
Your Speakers Matter
Although not specific to iTunes, the speakers or headphones you use can make a big difference in sound quality. While you may be fine with an inexpensive pair of headphones from a discount store, you won’t get the full effect of your music without quality gear. In addition, you might consider purchasing a 5.1 surround sound system in order to really feel the bass.
Run Your Audio Through External Processing Equipment
If you’re really into audio technology, you might even consider running your audio through processing equipment, like compressors and pre-amps. This may take a big of extra time and can be expensive, but by running your audio output through processing equipment, you’re bound to get better sound that you can have tighter control over.
When you sync your media in iTunes, you can stay organized and ensure that your media is up to date. If you don’t know how to sync your songs in iTunes, check out the following tips:
How to Sync Your Media in iTunes
To get started, connect your device via USB to your PC. This device can be an iPod Touch, an iPad, or an iPhone. Next, look for your device to show up in the top left-hand corner of iTunes’ main window. When you click on the icon that represents your device, a list should appear detailing what types of media are present.
When you click on a corresponding list item, like music or movies, you’ll be presented with the option to sync that particular type of media. You can also choose whether to sync entire albums or just selected playlists. Once you’re ready, click on the Sync button at the bottom right of the window. This will begin the syncing process and you’ll be notified once it has completed.
Syncing Over Wi-Fi
You can also sync your Apple devices using wi-fi. To do this, you will first need to connect the device to your computer using the correct USB cable. Once again, you’ll look for the device’s icon to appear in the top left of the iTunes window. When you click on it, you’ll have the option for Summary, which provides you with various options. You’re going to select Sync With This [device] Over Wi-Fi. Next, click Apply and you can disconnect the device and choose what media you would like to sync wirelessly.
The Benefits of Staying Synced
Syncing your media collection with your computer basically means that you’ll never have to go without your favorite content. Essentially, if you download a new song on your phone, you can have it on your computer. Likewise, if you’re planning a long trip, you can add movies on your computer to your iPad so you can watch while you’re away. It’s important to remember, however, that you’ll need to sync your media on a regular basis to keep it current. iTunes will compare what it has versus what’s on your device in order to know which files need to be added and which files already exist. All you have to do is enjoy!
iTunes isn’t just a music player, it’s also an excellent music collection storage library. You can download music from most anywhere — as well as from your own CD collection — and store and play albums and songs right in iTunes. It can even play a few video formats, if movies are your kind of thing. So the answer is, yes! iTunes can play your free music. Here are the file formats it is capable of playing, as well as some great places to nab free music that are completely legal.
Types of Music Files iTunes Can Play
iTunes can play all of the common music formats, plus a few that are less well known. iTunes is compatible with:
• MP3
• AIFF
• WAV
• MPEG-4
• AAC
• m4a
• Any file format that QuickTime is capable of playing
• A few common video formats
Where to Get Free Music for Your iTunes Library
So, where can you get all that free music to build an iTunes Library? iTunes will allow you to play most any music you get, from most any source, so long as it is one of the file formats above. This is a great option to streaming music from online radio stations or apps that play three commercials for every song they let you listen to, or renting music instead of downloading and owning your tunes.
Android App Store offers free music downloads that can be played using iTunes. Most of the free songs they offer are by up and coming artists, but there is a decent selection in terms of genres.
Google Play offers a section of free music called Antenna Sampler. The music is mostly by up and coming artists, but almost every genre of music is represented, so whatever you’re into, you can likely find it here.
Amazon offers a free music section, as well. Amazon has several genres to choose from, including country, folk, rock, pop, hip hop, gospel, rap, soundtracks, and miscellaneous. However, most of the free stuff is lazily categorized in Miscellaneous. The trick is, you have to go through the actual checkout process to download free music from Amazon, but it doesn’t charge you anything to do so.
Free Music Archive is a music source that features free music through the Creative Commons licenses. Most of this music is by independent artists that aren’t widely known, but sometimes you can find songs by the bigger names. The best part about Free Music Archive is that it allows you to browse in several different ways to find music you like — including by genre, by music curator (which is basically radio stations), and by the type of Creative Commons licensing the song has.
Once you download the music, all of the songs should play from iTunes without a problem.


 From here, you can change your settings for iCloud and Family Sharing. Once you turn this off, you should be able to remove the duplicates (just so long as you remember to turn iTunes off during the sync).


 As an example, here’s the window for the song “Hooked on a Feeling” by Blue Swede, from the “Guardians of the Galaxy: Awesome Mix Vol. 1” album: