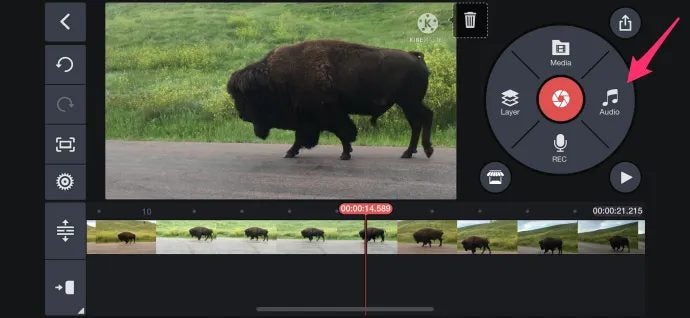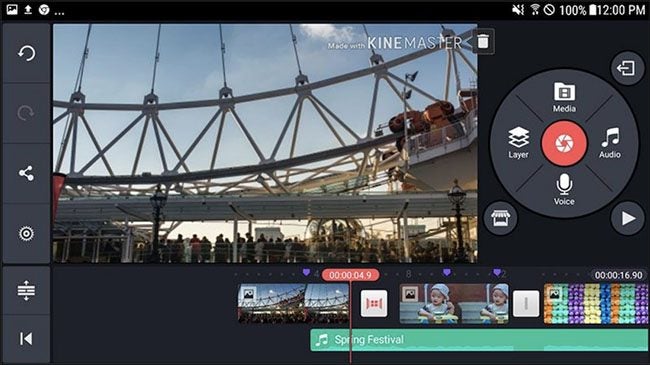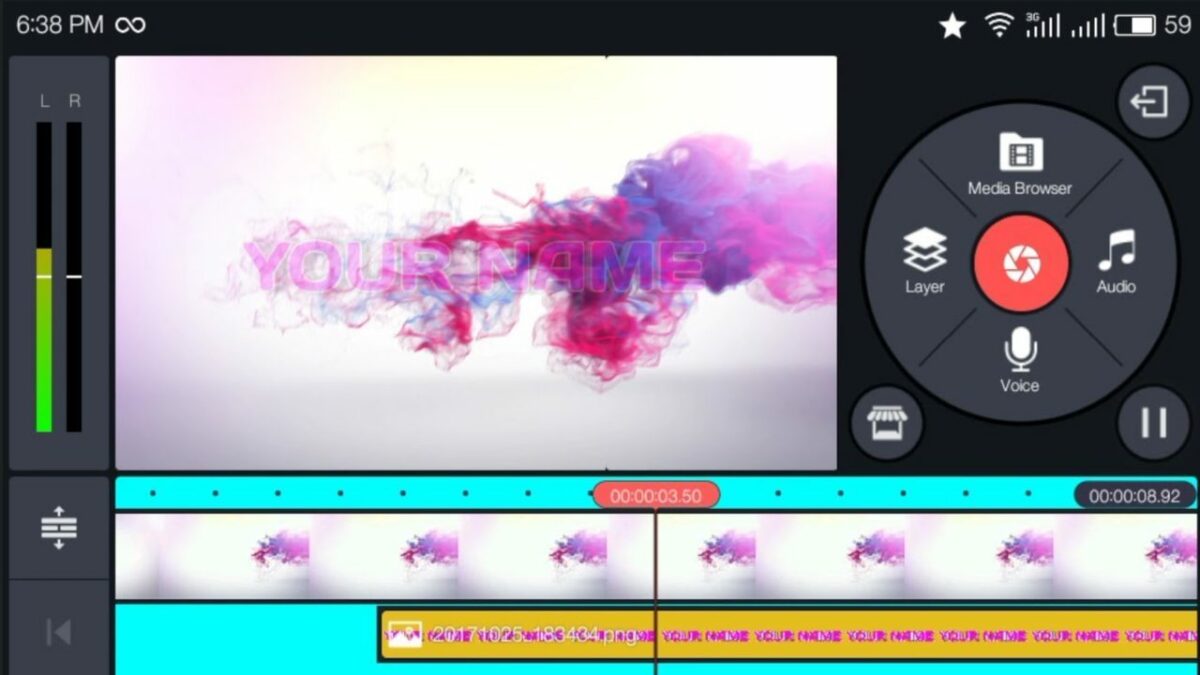
How to export MP4 videos with KineMaster in just 3 steps

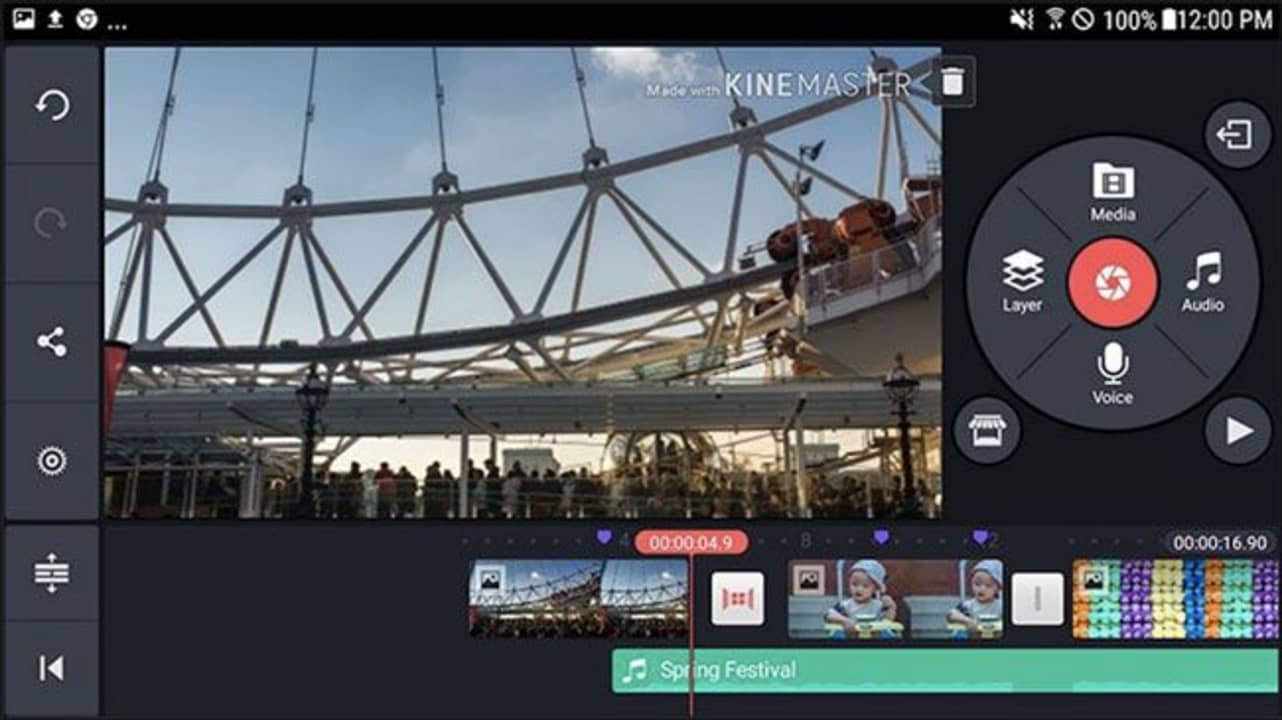
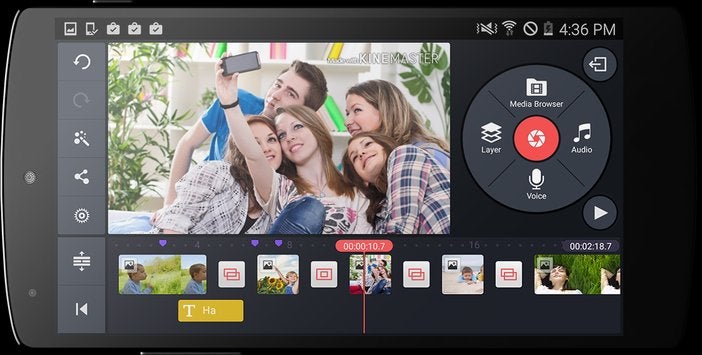
KineMaster is a versatile tool for creating and editing videos with your PC or mobile device. Both Android and iOS users can enjoy the easy-to-use interface that relies on simple phone controls and foolproof templates to get video content off the ground. As for PC users, Windows provides the best experience on desktop. Of course, the reason you edit video footage in the first place is to eventually share your creation with as many people as possible. Luckily, KineMaster allows you to easily export your .mp4 videos to other popular platforms and services.

KineMaster DOWNLOAD

Before you can export videos from KineMaster, you must have the app and at least one .mp4 file to transfer. You can create a .mp4 video with KineMaster if you do not have one already. Otherwise, you can open existing .mp4 files from your device with KineMaster to make any necessary changes to the video before exporting.

  1. Use the share feature

    Use the share button in KineMaster to export videos to other platforms.

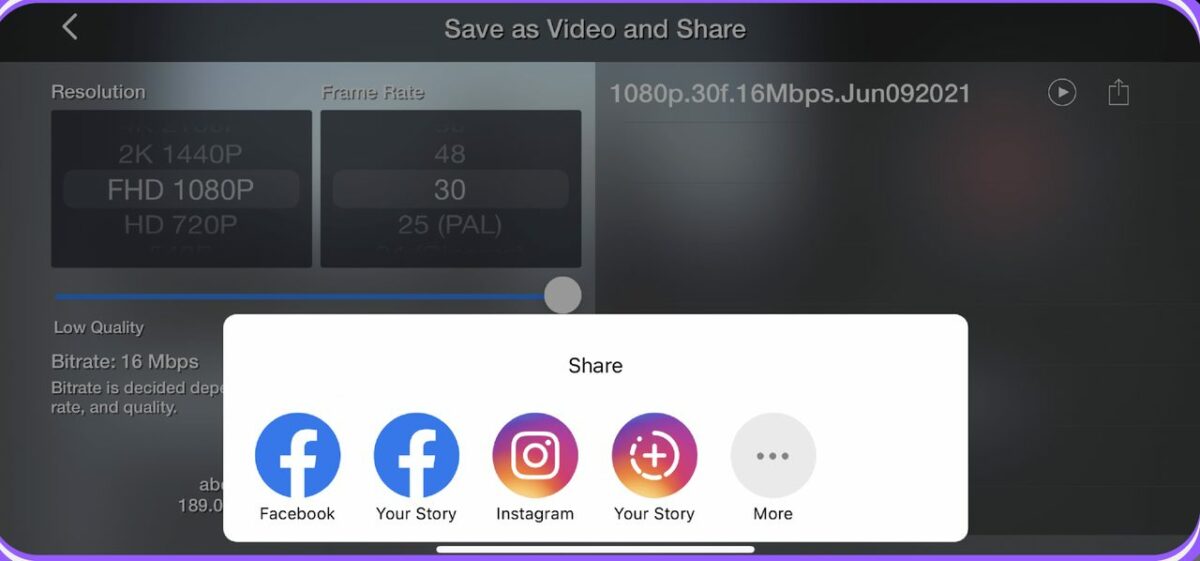
    Like most modern apps, KineMaster allows you to share your work with just the press of a button. With a file selected, click the share button in the settings panel. The share button icon has the appearance of three dots linked with two lines. After clicking the share button, you are greeted with several options on where you want your files to go.

    The most popular services like Facebook and Instagram are front and center. However, you can click the more button with the three dots to be taken to the full menu of exportable platforms. Hover the mouse cursor over your desired export location, and click on it to finish the first step.

  2. Make final edits and adjustments

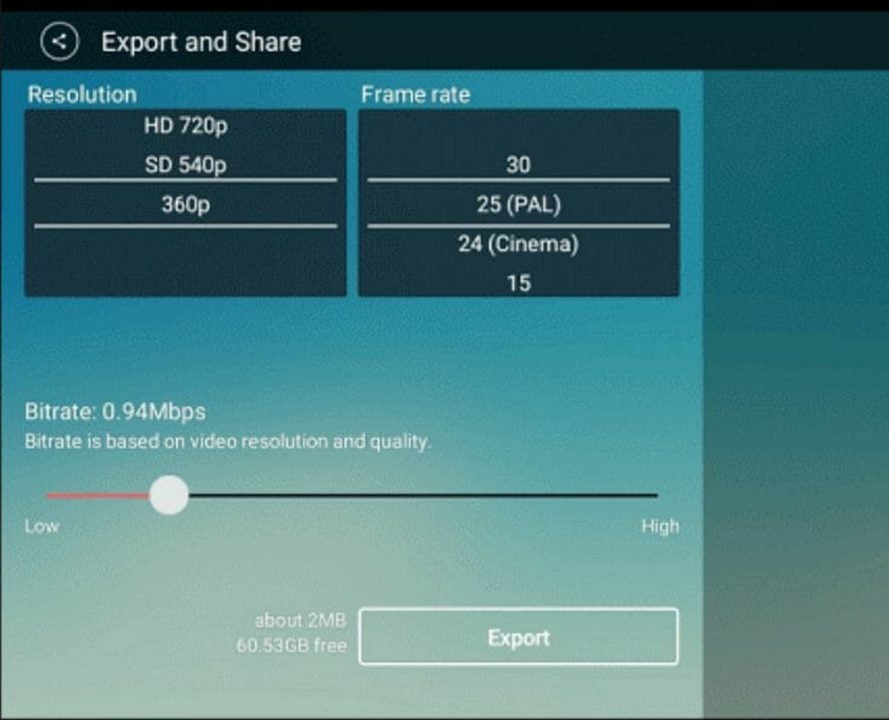
    Use this KineMaster screen to make final adjustments before the export process.

    A selection of settings for your video file appears after hitting share. KineMaster allows you to adjust video resolution, bit rate, and playback frame rate to name a few. You can enhance the resolution up to 4K and play the file at 60 fps if your device is powerful enough to facilitate high-end configurations. Keep in mind that the further you enhance the specs from the video’s original settings, the more likely you are to encounter issues when exporting the file. This means you should shoot any video footage in the highest resolution possible to reduce the number of post-processing glitches that affect your project.

  3. Export to the program of your choice

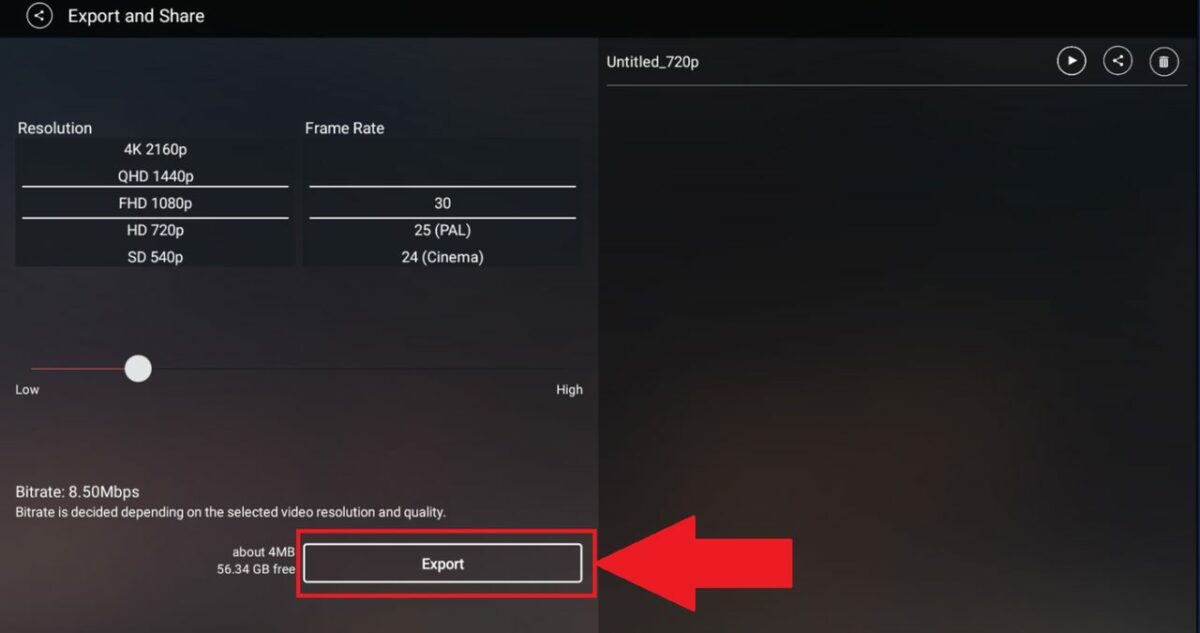
    he export button is the last thing you need to click in KineMaster.

    With your final settings established, you are ready to export your file. It is recommended to use the .mp4 file format, as these videos are compatible with the greatest number of platforms and services. Click on the export button that appears at the bottom of the editing menu. You can select which file format you will use on this export screen. Clicking export one more time will start the file transfer process.

    Depending on the length of the video and which settings you applied for the export, you will have to wait for the file transfer to complete. Higher resolutions, frame rates, and bit rates will inevitably make the file size larger. This lengthens the time needed to complete the export process. Make sure your device has adequate power, and then, feel free to walk away for several minutes. After a few small tasks around the house, your video file should be fully exported.

Improving KineMaster video quality

Now that you know how to transfer your video files, you may notice that some KineMaster projects do not look as sharp as they would in other video editors. This is likely due to the default settings that came with the program. If you would like to learn about which settings improve video quality, check out our guide on how to fix poor quality in KineMaster.
How to Use Green Screen in KineMaster in 2 Steps

If you’ve been on YouTube… Who are we kidding? Of course, you’ve been to YouTube and seen content shot in front of a chroma-key (the fancy word for the green screen), which is then digitally removed and replaced with a background .png.

The process might look complicated at first, but removing it is a matter of one click in most video editors. Our today’s article shows you how to do it in KineMaster.
  1. Add the media

    How to Use Green Screen in KineMaster

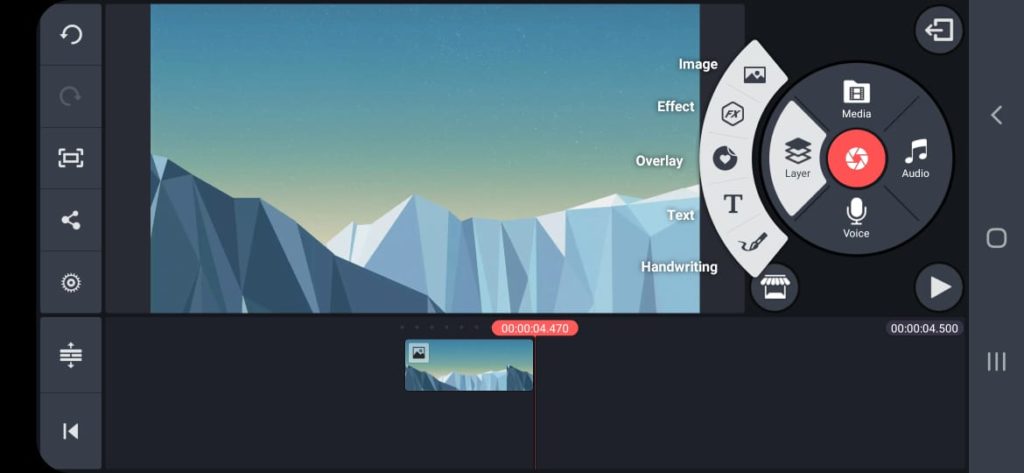
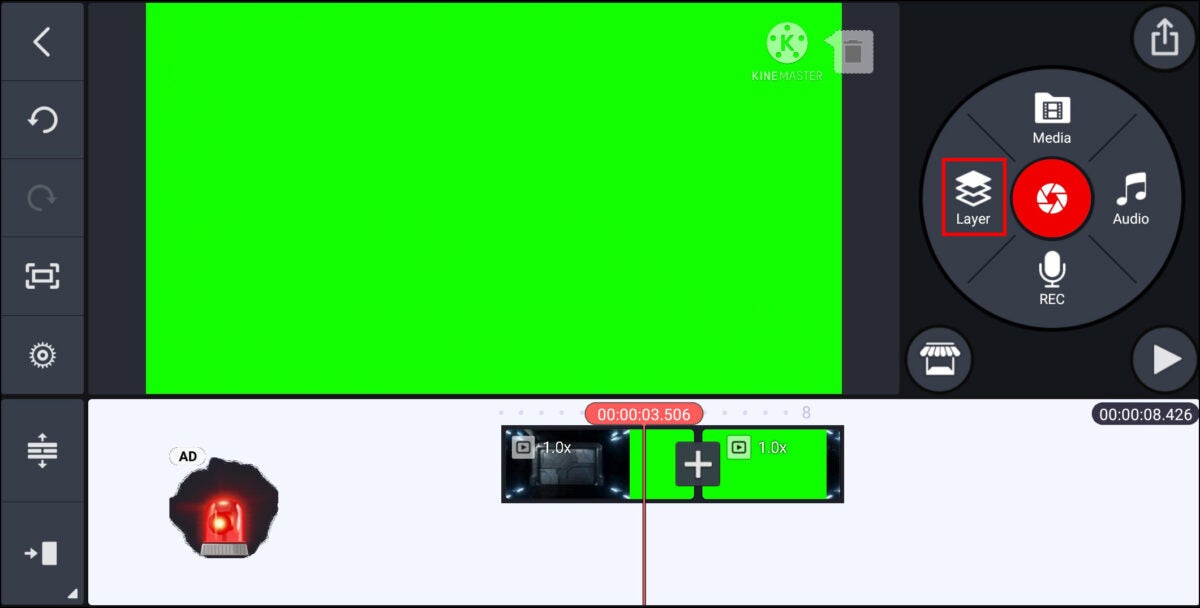
    Open the application and select the aspect ratio. Afterward, navigate to the right side of the screen and select “Media.” Choose the video clips with the chroma-key and click to import them to the timeline.

  2. Enable chroma-key

    How to Use Green Screen in KineMaster

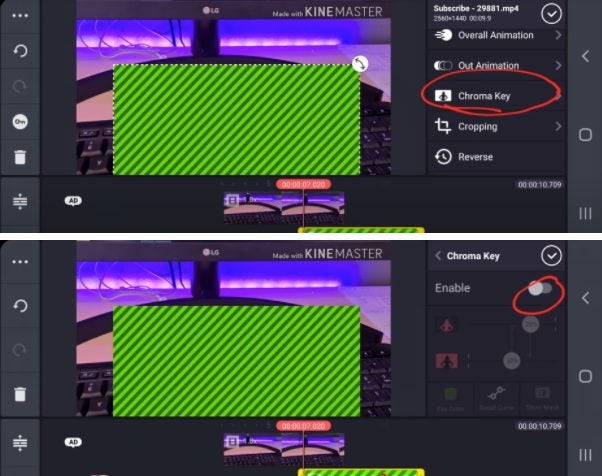
    In this step, select all the clips with the green screen and navigate the menu on the right-hand side. Scroll down until you see the “Chroma Key” and tap on it. Enabling the key will remove the color from the clip. If your green screen wasn’t homogenous during shooting, you might need to adjust the color and other settings to get a clear picture.

Edit and adjust your video

If you’re into video editing, using KineMaster can get your creative juices flowing. You can use the app’s features to trim and put together the video as your imagination fancies. Use the blending modes to get fantastic effects, the reverse feature to make in-camera transitions, and add presets to your creation.

You can also have fun combining video layers, adding music, and recording audio; enjoy playing with animations, graphic overlays, and other assets.

How to Get GIFs on Kinemaster in 5 Steps

KineMaster is a great video editing app for Android devices. KineMaster has a lot of features available, from different effects such as the fire effect all the way to trimming videos and even adding GIFs to your videos. However, if you’ve been using KineMaster, you might have encountered a problem when you try to add GIFs to your video.

When you add a GIF to a project in KineMaster, the GIF shows as a static image and doesn’t play like a video clip. So, how can you add GIFs to videos and have them play as they should? Let’s take a look at what you need to do to fix this issue.

  1. Open Browser and Go to ezGIF

    How to Get Gifs on Kinemaster

    First, you need to have the GIF you want to use in your video downloaded to your phone.

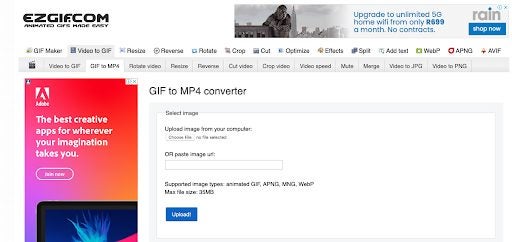
    Open your chosen browser on your phone and head to ezGIF, which is a browser-based GIF converter.

  2. Convert GIF to MP4

    How to Get Gifs on Kinemaster

    Use ezGIF to convert your chosen GIF file to an MP4 file. The GIF doesn’t play when added to KineMaster because it is not in MP4 or video format. That is why we need to use a converter to convert it to MP4 file format.

  3. Launch Kinemaster and Upload GIF/Video to Your Project

    How to Get Gifs on Kinemaster

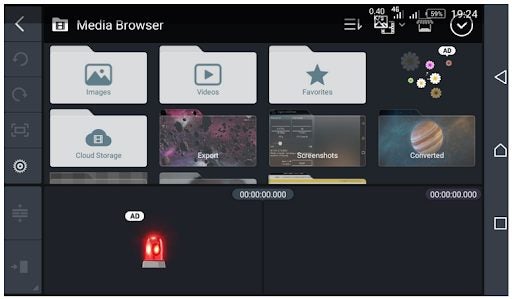
    Make sure that you save the converted GIF to your mobile device. Now you can launch Kinemaster and upload the newly converted GIF from the media browser by tapping on ‘Videos’ on your screen.

Add GIFs to Enhance Your Video Content Further

Using GIFs effectively in your videos can make a big difference to the quality of content you can create. By converting GIFs to the proper file format, you will easily be able to add them to your videos in KineMaster and edit them to your liking before you send them to others.

How to Get Videos from Cellphone Files on Kinemaster Pro Android App in 3 Steps

When it comes to video editing apps, KineMaster is a leader in the field of mobile editing. It is a powerful video editing app for Android devices that lets you create and edit videos. With many features, even in the free version, KineMaster is not only for creating videos from scratch, but you can also edit videos that already exist on your mobile device.

How do you import videos from your phone to KineMaster Pro? Let’s take a look at how you can add videos from your phone’s storage to KineMaster Pro.

  1. Open Kinemaster and Create a New Project

    How to Get Videos from Cellphone Files on Kinemaster Pro Android App

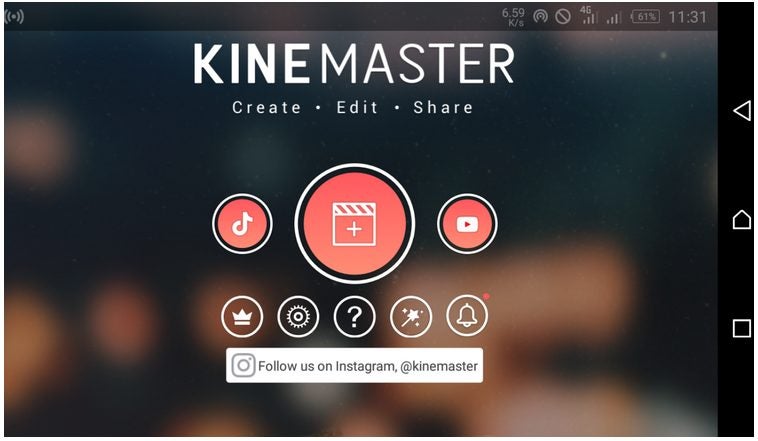
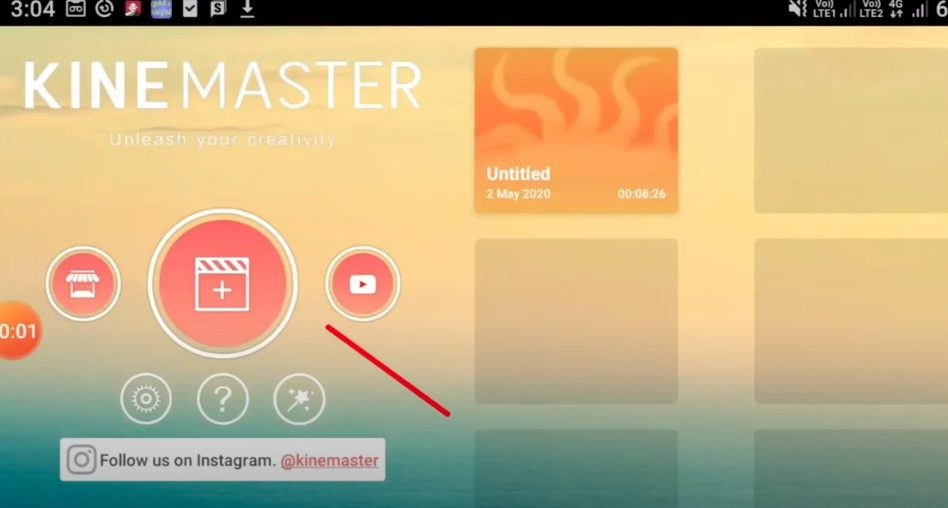
    Launch the app from your android device and tap on ‘New Project’ represented by the film-reel icon.

  2. Choose Your Aspect Ratio

    How to Get Videos from Cellphone Files on Kinemaster Pro Android App

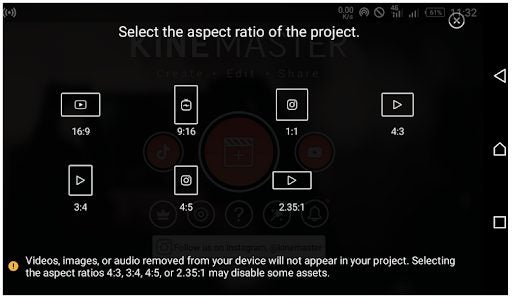
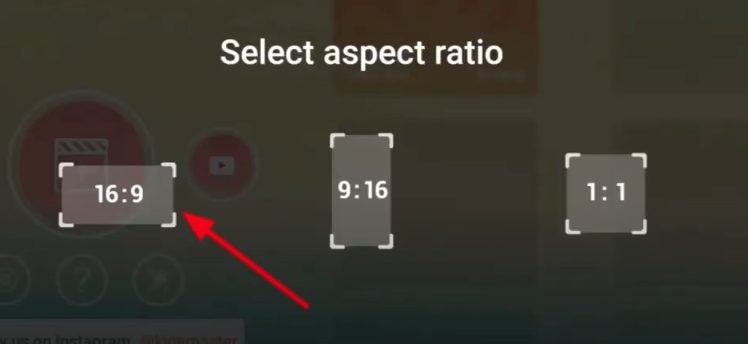
    Choose the aspect ratio that you want to create your video in. KineMaster Pro has many different ratios available, and the type you choose is dependent on what you want to use the video for. You will see icon images within the aspect ratios to help guide you. For example, 16:9 has a YouTube icon, meaning this aspect ratio is ideal for platforms like YouTube.

  3. Add Media

    How to Get Videos from Cellphone Files on Kinemaster Pro Android App

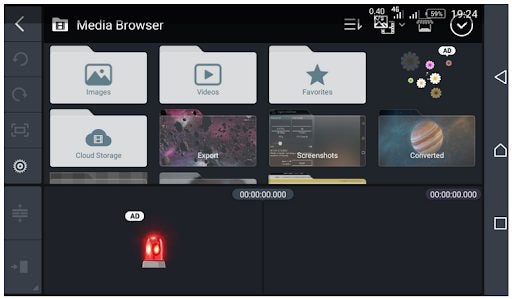
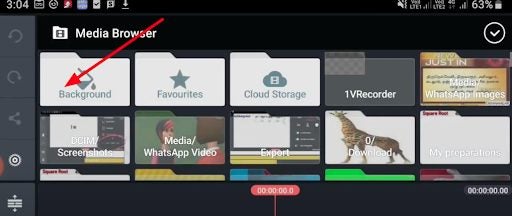
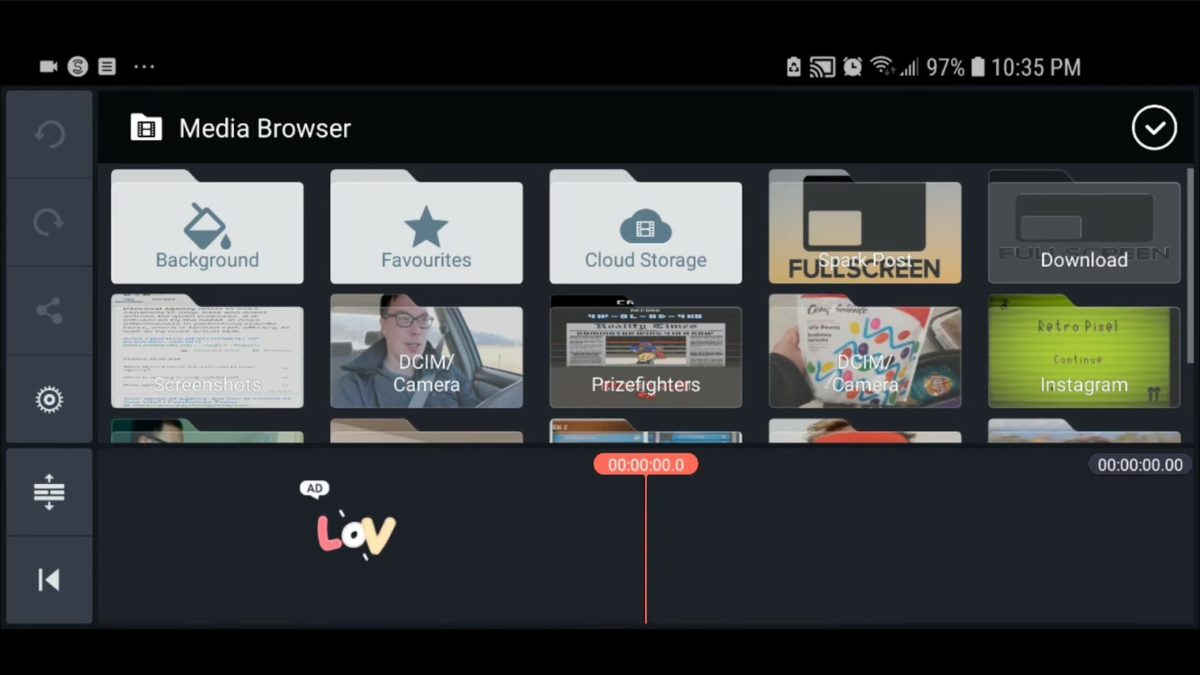
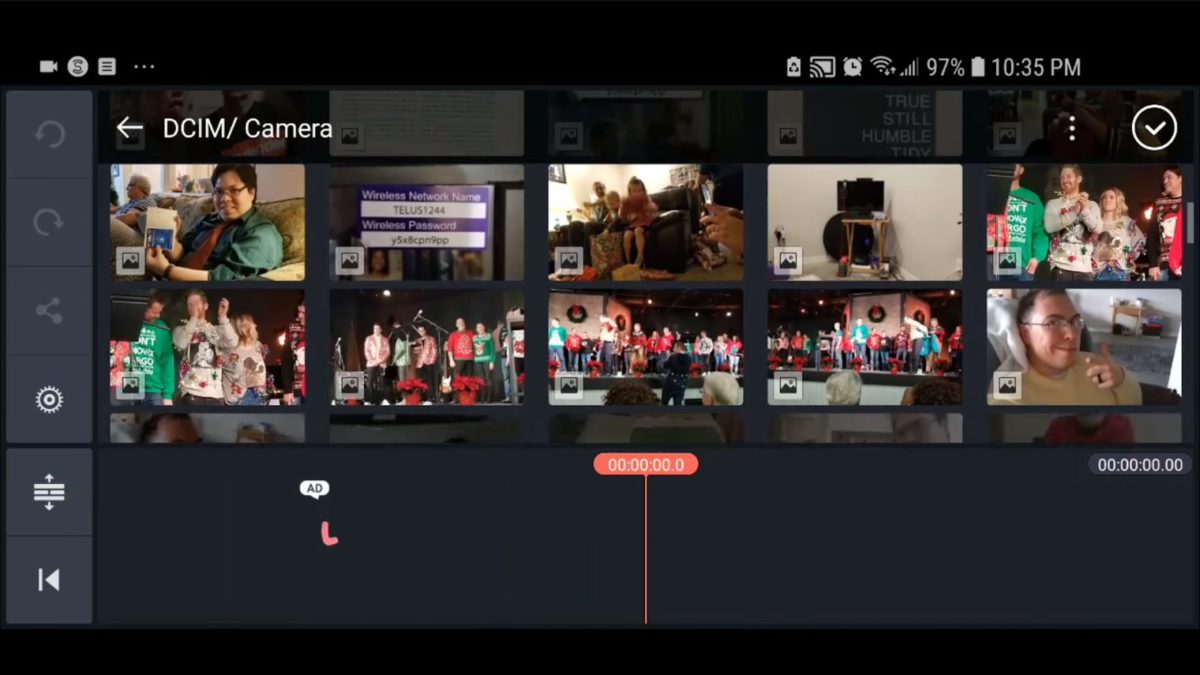
    – Tap on the ‘Media’ icon to be taken to the media browser. 

    – Select the video clip from your phone files that you want to work on.

    – Tap on the checkmark at the top-right of your screen to import this video to KineMaster.

    • Now that the video file from your phone has been added to KineMaster, you can edit videos and add different effects and transitions to enhance and create quality video content.

Start Editing Any Videos Anywhere

Adding videos from your mobile device to KineMaster Pro is a simple process that takes only a few seconds. Now you can edit videos and enhance them to create exceptional video content easily from your mobile device with KineMaster Pro.

How to Get Rid of KineMaster Watermark in 3 Different Ways

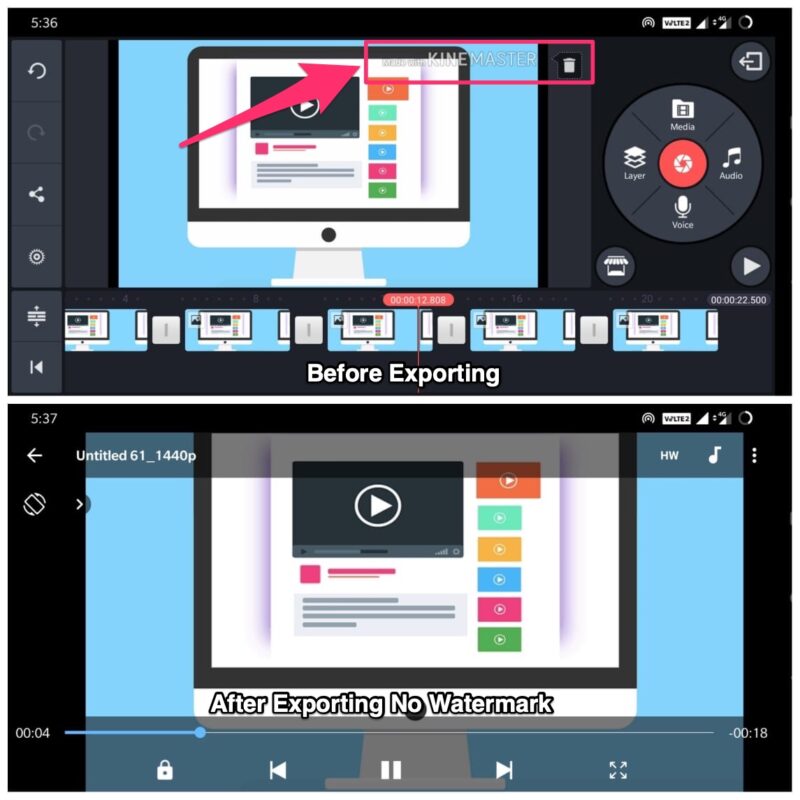
KineMaster is a powerful video editing app for Android devices. With many useful features to help you create quality video content, KineMaster is definitely at the forefront with what it offers users. KineMaster has a free-to-use version, but then it will display its watermark on all the videos that you create with the app.

This can be less than ideal for some content creators who prefer not to have the watermark featured on their videos. Let’s take a look at how you can remove the watermark from your videos created in KineMaster.
  1. Pay for Kinemaster Pro

    How to Get Rid of KineMaster Watermark

    Download the Kinemaster app for your Android device.

    – Launch the app on your phone.

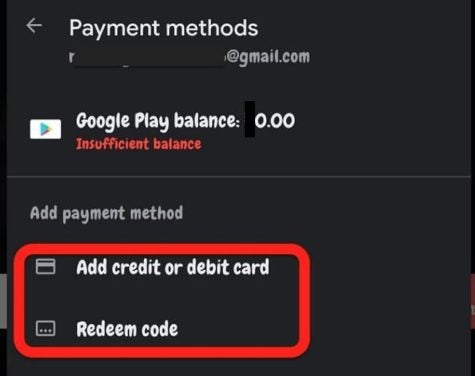
    – Tap on the ‘Subscribe’ button.

    – Choose the paid option you prefer.

    Follow the on-screen instructions to complete the transaction and get KineMaster Pro without watermarks and ads.

  2. Use Lucky Patcher

    How to Get Rid of KineMaster Watermark

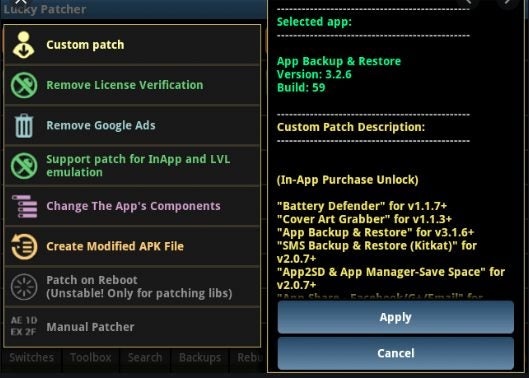
    – Download and install Lucky Patcher.

    – Launch Lucky Patcher and tap on KineMaster.
    – Choose the ‘Open Menu’ of the app, check the top two options, and tap on apply. 

    – Close Lucky Patcher.

    – Launch KineMaster.
    – Tap on ‘Account Settings.’

    – Tap on ‘In-App Purchases’ and then on ‘Buy.’

    • A pop-up window will appear asking if you want to buy the app for free. Tap on ‘Yes.’
  3. Use a Logo or Watermark Remover App

    How to Get Rid of KineMaster Watermark

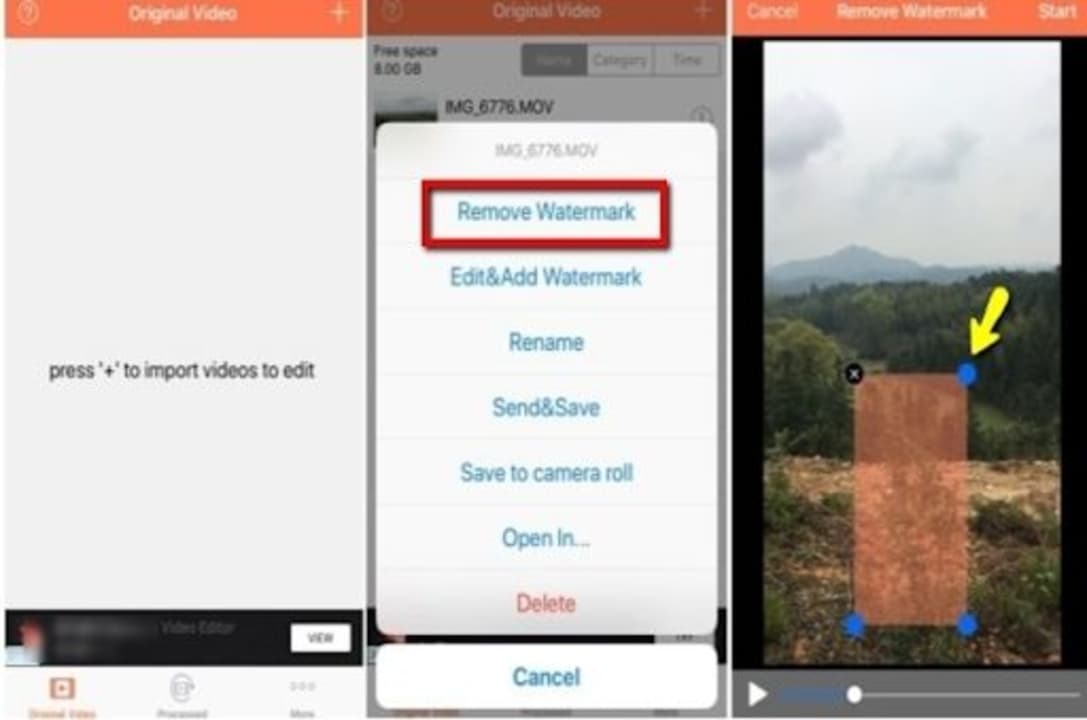
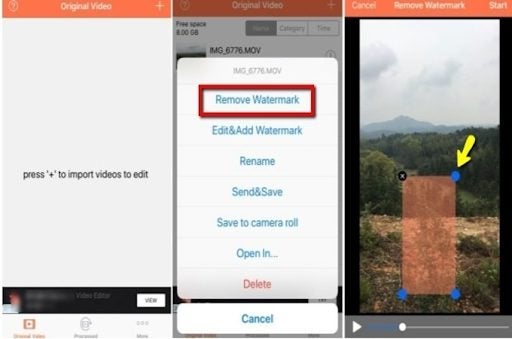
    – Download a logo or watermark remover app.

    – Finish your video in KineMaster and save it to your phone.

    – Launch your chosen watermark or logo remover.

    • Use the watermark remover to erase the watermark from your video

Create Flawless Videos Without Watermarks

KineMaster is a feature-rich video editing app that allows you to make amazing and creative videos right from your phone. The above three methods can be used to remove the KineMaster watermark from your video so that a watermark doesn’t obscure your video content.

GTA V Online Has Eight New Stunt Races Available

Rev Your Engines And Get Ready for new GTA V Online Stunts

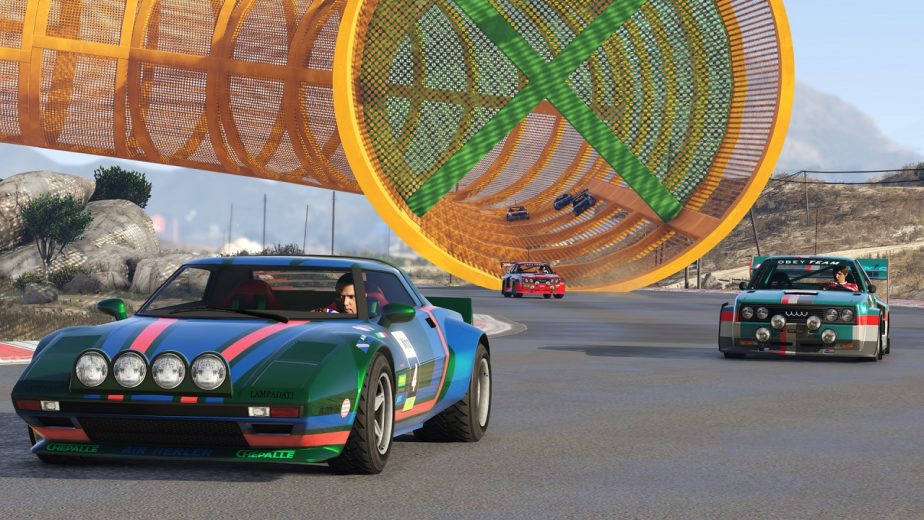
Racing in GTA V has long been an enjoyable pastime for those who need a break from killing and bank heists. There are many types you can participate in, but one of the most thrilling is the stunt race. Now you can turn on your engines and spin your wheels to eight new tracks with the latest update.

This feature is part of an online event where you can win GTA$100,000 for merely finishing any of the stunt courses. Each one focuses on different vehicles and track types, varying between the streets and off-road challenges. You’ll be able to race with bikes, sports cars, muscle vehicles, and so much more.

Rev Your Engines And Get Ready for new GTA V Online Stunts Racing in GTA V has long been an enjoyable pastime for those who need a break from killing and bank heists. There are many types you can participate in, but one of the most thrilling is the stunt race. Now you can turn on your engines and spin your wheels to eight new tracks with the latest update.  This feature is part of an online event where you can win GTA$100,000 for merely finishing any of the stunt courses. Each one focuses on different vehicles and track types, varying between the streets and off-road challenges. You’ll be able to race with bikes, sports cars, muscle vehicles, and so much more.   Rockstar has plenty of other rewards lined up that aren’t related to the stunt races. For instance, you’ll earn double the rewards in Premium Deluxe Repo Work and Simeon Missions. If you have any rank above 100, you’ll receive the Hunter Camo for the Mammoth Avenger.  Of course, you’ll need to best rides to win in the races. There’s a 40% discount on selected vehicles, such as Brute RCV, Mammoth Thruster, and Pegassi Infernus Classic, to name a few. Some facilities are also down by 40%, and you’ll also receive a sale on the modifications. Can you see why it’s a good idea to hit up GTA V Online this week?

Rockstar has plenty of other rewards lined up that aren’t related to the stunt races. For instance, you’ll earn double the rewards in Premium Deluxe Repo Work and Simeon Missions. If you have any rank above 100, you’ll receive the Hunter Camo for the Mammoth Avenger.

Of course, you’ll need to best rides to win in the races. There’s a 40% discount on selected vehicles, such as Brute RCV, Mammoth Thruster, and Pegassi Infernus Classic, to name a few. Some facilities are also down by 40%, and you’ll also receive a sale on the modifications. Can you see why it’s a good idea to hit up GTA V Online this week?

How to Make Pictures Move In Kinemaster in 6 Steps

Kinemaster is a handy video editing tool for Android devices. This useful application boasts tons of features that allow you to create, edit and share great videos. With the Kinemaster app, you can combine multiple images or animations in a video, make images move, trim frames, and add transitions and these are just a few of the features that make this app so useful for Android users.

Do you want to edit a video and make the pictures move in Kinemaster? In this tutorial we will look at how to do just that.

  1. Start a New Project

    How to Make Pictures Move In Kinemaster

    Launch the app on your Android device. Start a new project by tapping on the icon that looks like a film reel.

  2. Select the Aspect Ratio

    How to Make Pictures Move In Kinemaster

    Before you can start with your video, you need to select the aspect ratio. We suggest 16:9, especially if you plan on posting the video on Youtube.

  3. Add the Background

    How to Make Pictures Move In Kinemaster

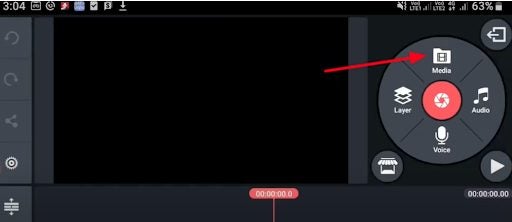
    You can start by tapping the ‘Add Media’ wheel and choosing to add a background from your media files.

  4. Tap on ‘Layer’ and Add a Picture

    How to Make Pictures Move In Kinemaster

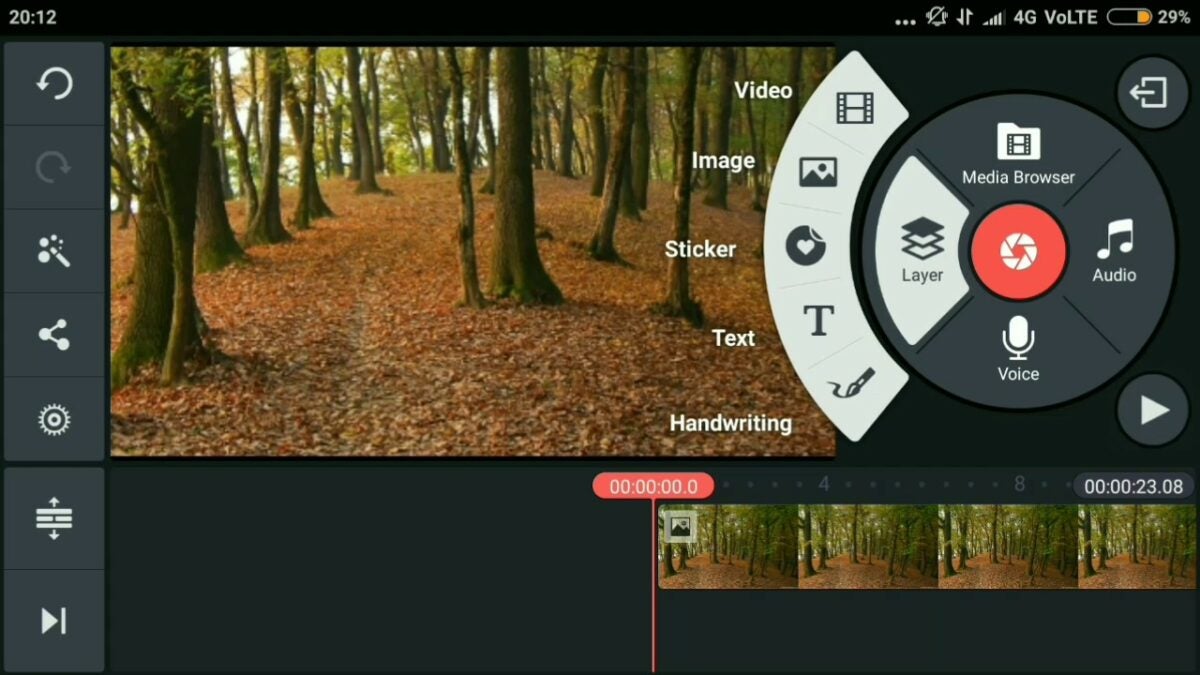
    Next, tap on ‘Layer’ to add another image to the foreground of the video. This is where you can now choose to insert a moving picture and adjust your image and place it where you want it to show on the screen.

  5. Lock Image and Move

    How to Make Pictures Move In Kinemaster

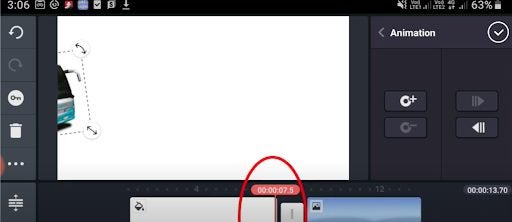
    Now tap on the key icon in the toolbar on the right side of your screen to lock the image. Adjust the red bar at the bottom of your video to start with the image at that point.

    Now move your image to where you want it to end and align that with the red bar that shows at what time in the video you are as well.

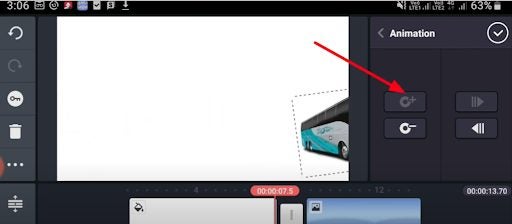
  6. Add the Movement to Your Image

    How to Make Pictures Move In Kinemaster

    On the right side of your screen, in the animation key, choose to add the image to the end of the animation.

Make Your Images Move Across Your Video With Kinemaster

Using Kinemaster is easy and intuitive, even when doing more complex things like moving a stationary picture across the screen in your video.

How to Add Music to KineMaster in 3 Steps

If you like fiddling with songs and clips, KineMaster can become your go-to app on Android. Making masterful videos and your artistic vision into reality is as easy as pie with this video editor.

Here’s a quick look at how you can add music to the experience.

  1. Add the clip to your KineMaster timeline

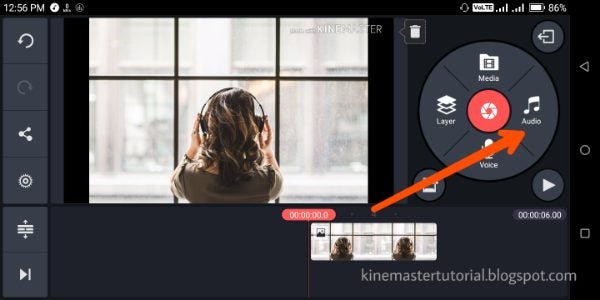
    How to Add Music to KineMaster

    Although you can add music to the timeline first, it’s easier to choose the atmosphere if you have the material edited and ready for the audio. Click “Media” and select it to add to the project. Make rough cuts to understand the length of the final video and make other creative decisions. Once it’s ready, move to the next step.

  2. Tap the “Audio” icon and click “Add (+)”

    How to Add Music to KineMaster

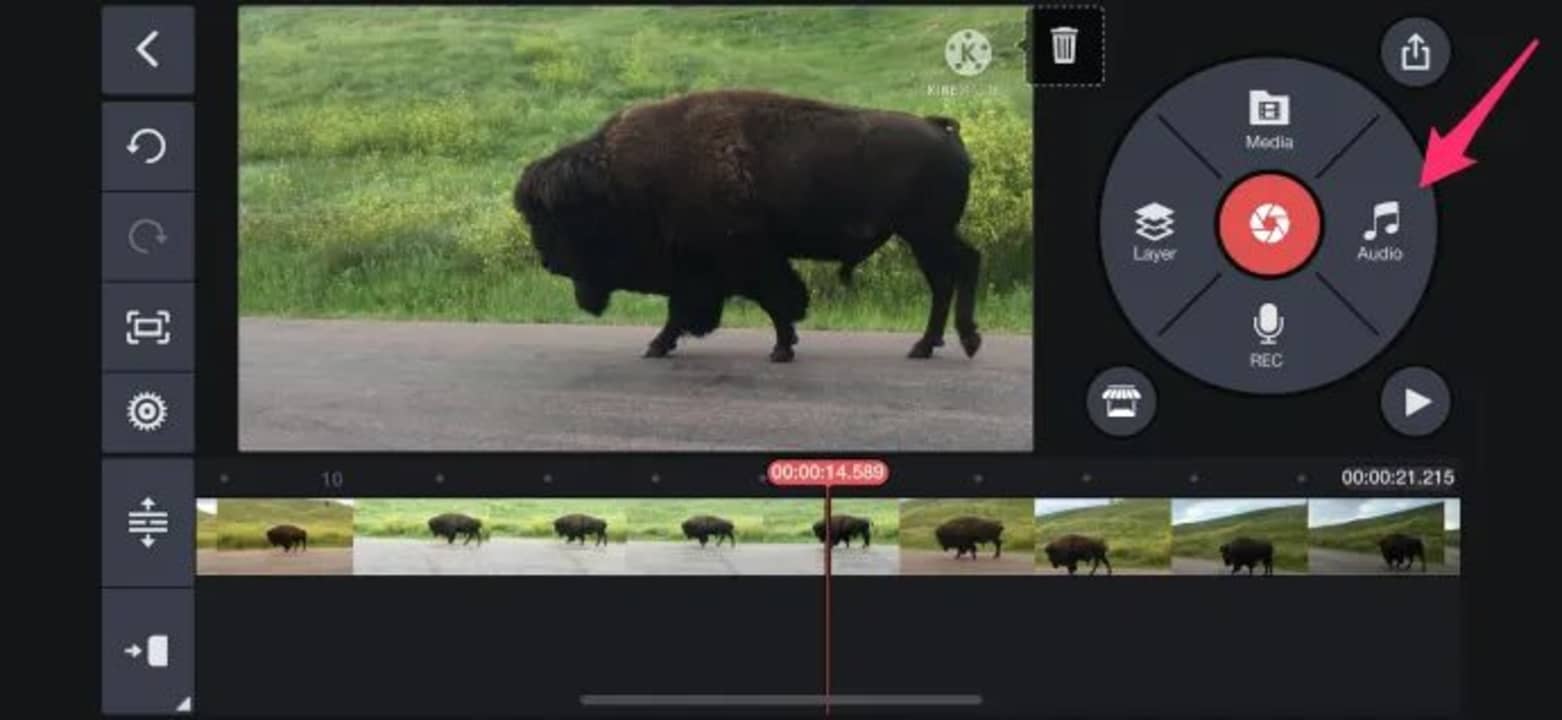
    Importing music is as easy as getting the visuals. The “Audio” icon is on the right-hand side of the settings wheel. Click it, navigate to the “plus icon,” find the folder of choice, select the music file, and tap it to add.

  3. Edit, save, and export

    How to Add Music to KineMaster

    Once you have it on the timeline, you can manipulate the music as you want. Trim, use filters, compress, and whatnot. Once you’ve played with the music and picture enough, save the final product on your device or share it with friends on social media.

Record audio!

Voiceover is fun! Not only can you make a unique video with available music overlay, but you can also add a spoken word or a song recorded by you right in the app. KineMaster is a creative hub that doesn’t cease to amaze!