OTV Relaunches Minecraft Server Modpack with New Features

Offline TV Brings Back Its Minecraft Server Modpack!

Offline TV is well known for its Minecraft Server Modpack that provided most of the same content, with a few new creative additions. It consists of a group of developers coming together to provide new mobs, blocks, and other features that you won’t find in the original game. Well, the good news is that it’s back in action with several new features.

Known as the Better Minecraft Offline TV Edition, you can launch it on your Minecraft client after you install the modpack. There are over a hundred new biomes and five dimensions. It also features an Antique Atlas Book that guides you to all the new locations so you don’t get lost.

OTV Relaunches Minecraft Server Modpack with New Features

Of course, it’ll integrate with the new upcoming Caves and Cliffs updates so you don’t miss out on the fun. There are over 40 creators hard at work producing the content and ensuring that the system remains up and running. Many of the new mods focus on Quality of Life, adding improvements over the original game.

OTV’s plan is to bring more developers onto the table every week, which means you’ll see content arrive more over the next few months. It will be interesting to see how many gamers move to the new modpack over the original version in the next few months. 

Twitter Blue To Roll Out As a Subscription Service

New Exclusive Features Arriving with Twitter Blue

The Twitter community has been crying for new features for a long time. For instance, they’ve been waiting for reader mode and bookmark folders, while some have asked how they can undo Tweets. Well, most of that is about to change with the new Twitter Blue.

Unfortunately, none of these new features are free. The original Twitter remains, while you’ll need to subscribe if you want what you’ve asked for. It’s the social media platform’s first paying business model that will see revenue from something other than advertising. 

Twitter Blue To Roll Out As a Subscription Service

One of the features allows you to undo a Tweet. However, the name is slightly misleading. What it does is let you preview the post before it appears on your timeline, letting you make any last changes. You’ll also have 30 seconds to undo posting it, after which it will permanently be live.

You’ll also be able to save any content you bookmark in different folders. This feature lets you come back to any important posts you want to review or discuss, preventing you from searching for them later again.

Twitter Blue will roll out in Canada and Australia first before anywhere else. It’s strange to pay for features that you would automatically get free with other social media apps, but there’s enough demand to justify it. We’ll see how long the subscription model lasts before it goes free.

How to Add Fonts to Microsoft PowerPoint

Microsoft PowerPoint is a space for personal expression and fantastic presentations. Design is one of the crucial aspects of a successful one, so you might need to add a dazzling touch to your .PPT document through type.

You can play around with many settings, one of which is the fonts. We’ll show you how to add new ones that aren’t available by default in PowerPoint.

  1. Find the font on the web

    How to Add Fonts to Microsoft PowerPoint

    For starters, you need to browse the web for the font you want in your presentation. There are thousands of free ones on websites like 1001freefonts.com, dafont.com, and fontspace.com. Once you browse and find your favorite, download the file.

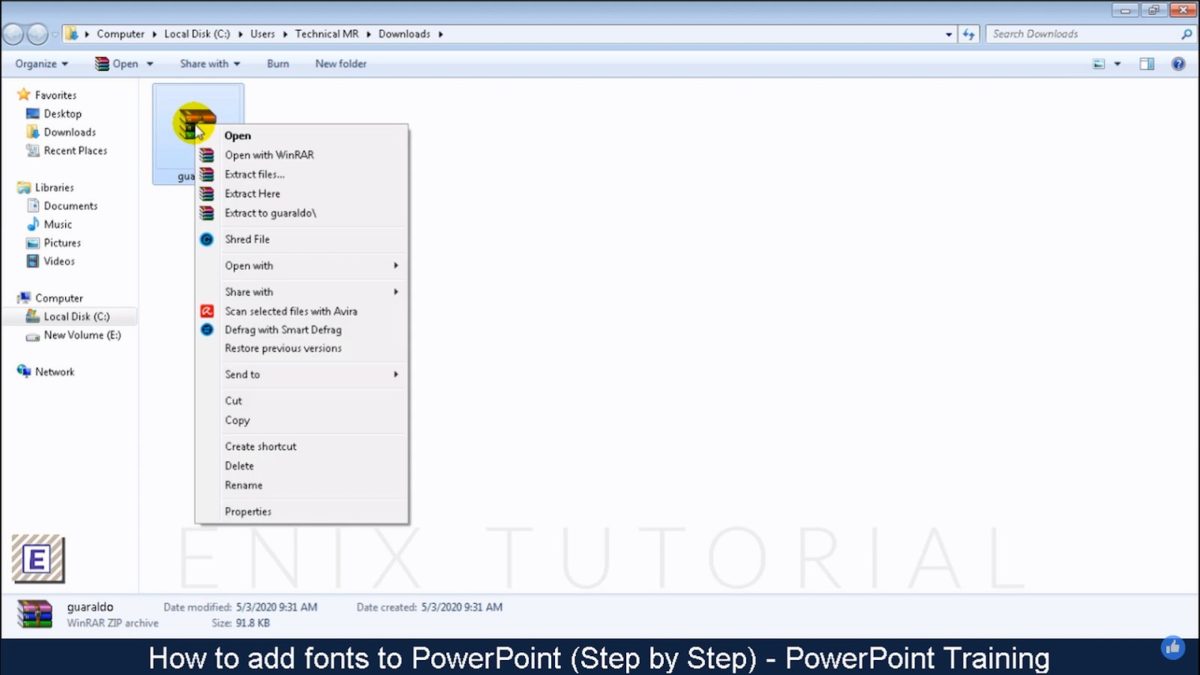
    Back on your computer’s “Downloads” folder, find the .zip file, and extract the directory.

  2. Install the file

    How to Add Fonts to Microsoft PowerPoint

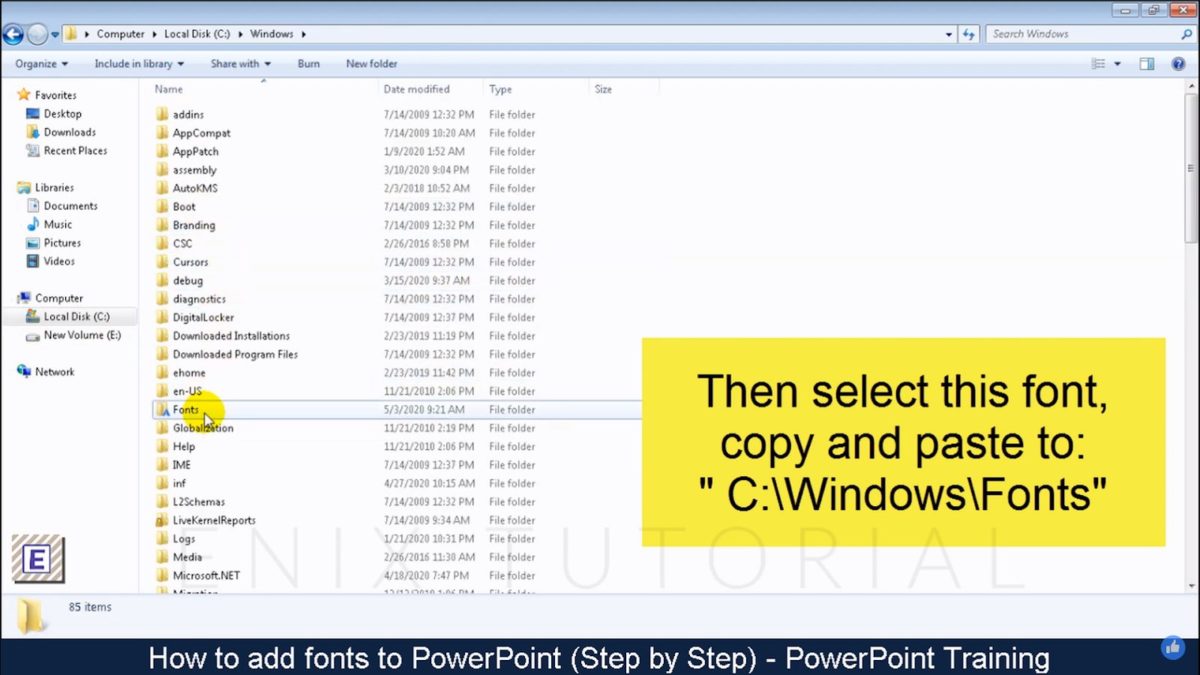
    Open the folder, find the font file, and copy it to the fonts folder (C:\Windows\Fonts folder) on your computer. The last action will install it automatically.

    Another way to introduce a font to your machine is to find the file in the folder, right-click it, and hit “Install.”

  3. Access it from PowerPoint

    How to Add Fonts to Microsoft PowerPoint

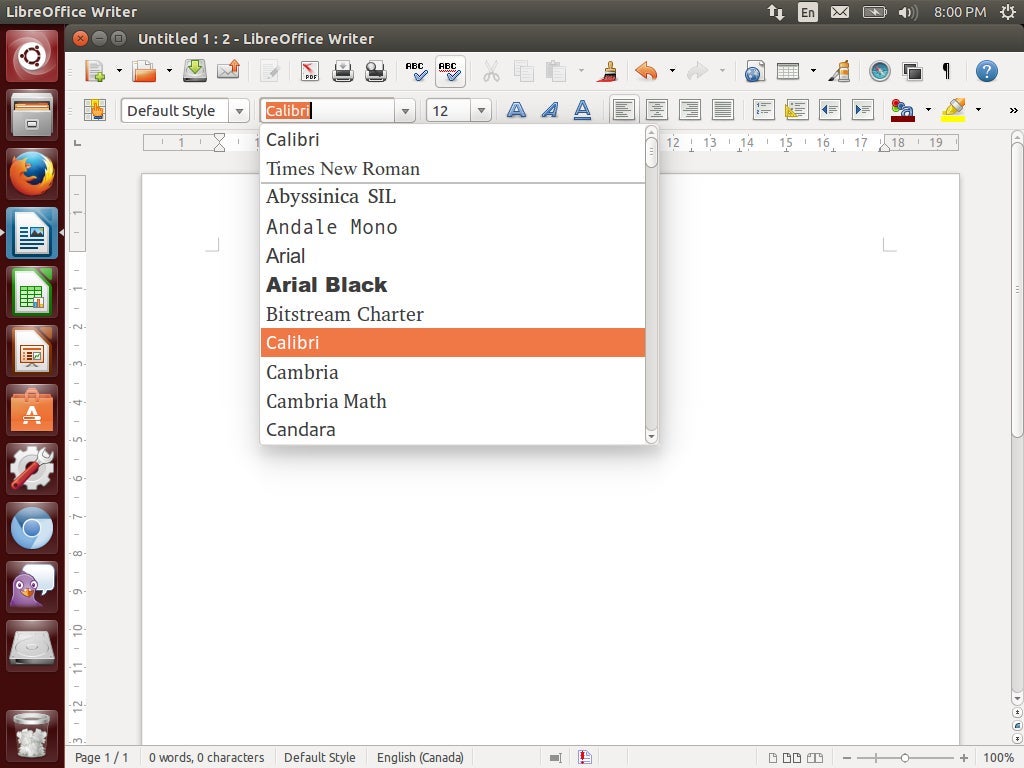
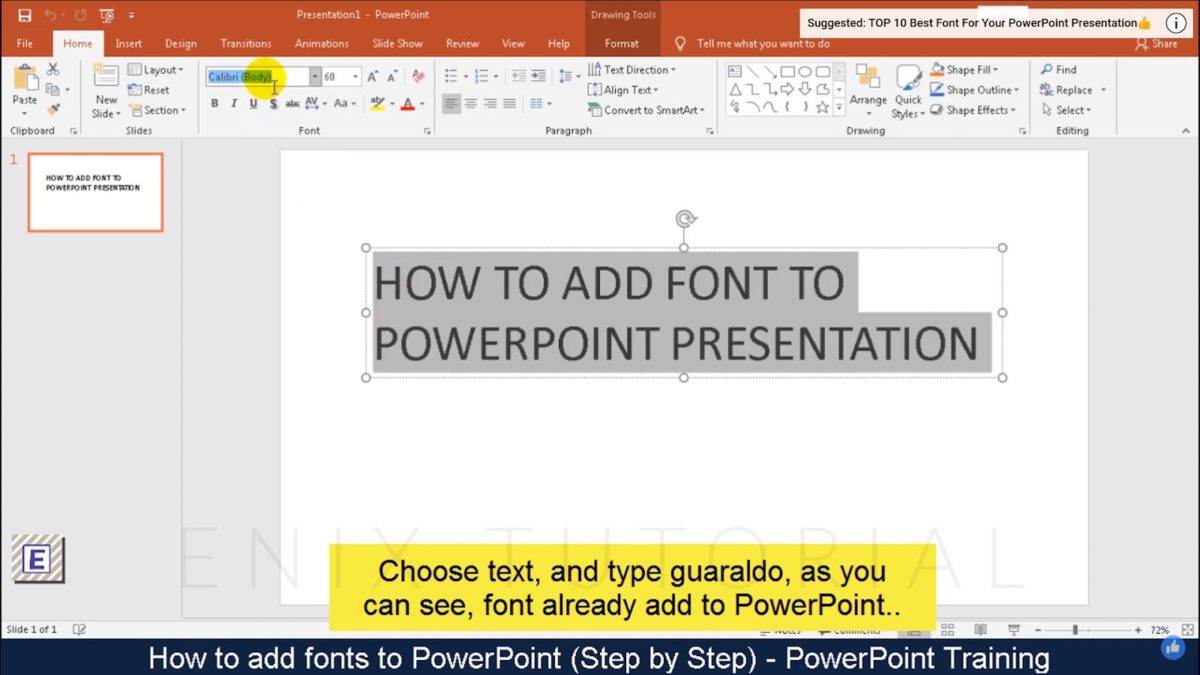
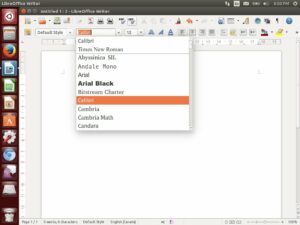
    Now, it’s time to move to the presentation program itself. If you search the font at once, it might not appear. Restart PowerPoint, choose the text, go to the “Font” panel on the “Home” tab, and search for the downloaded type. This will apply the style to the selected text.
Be bold!

Although installing a new font is technically easy, you might get lost in their abundance. If you know what you’re going to style (a heading or a body text, a quote, or a phrase to emphasize), it would be easier to settle for a look. Try to make the presentation eye-catching but not too distracting. Follow design rules but trust your gut too.

How to Add Music to Microsoft PowerPoint in 2 Easy Methods

Music in a presentation creates ambience and lets the audience dive into your vision. Inserting and controlling the audio file in Microsoft PowerPoint is as straightforward as it can get.

You can add downloaded files and record narration as you work through the presentation. Only a few clicks, and boom!

  1. Audio on My PC

    How to Add Music to Microsoft PowerPoint

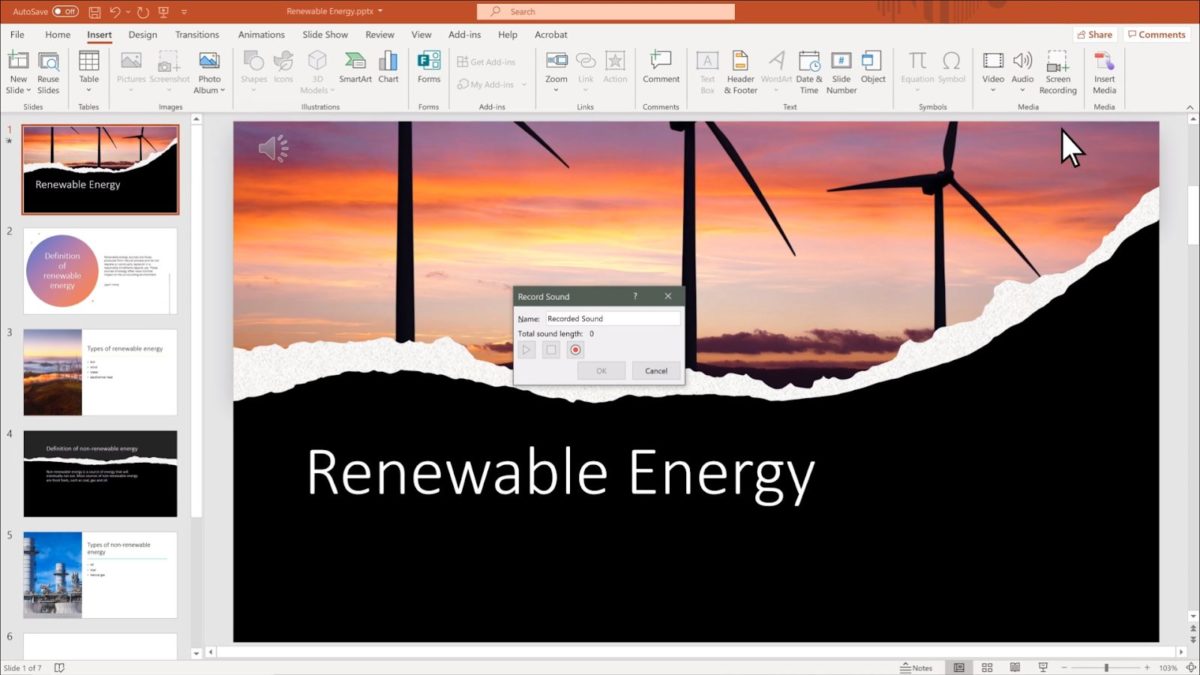
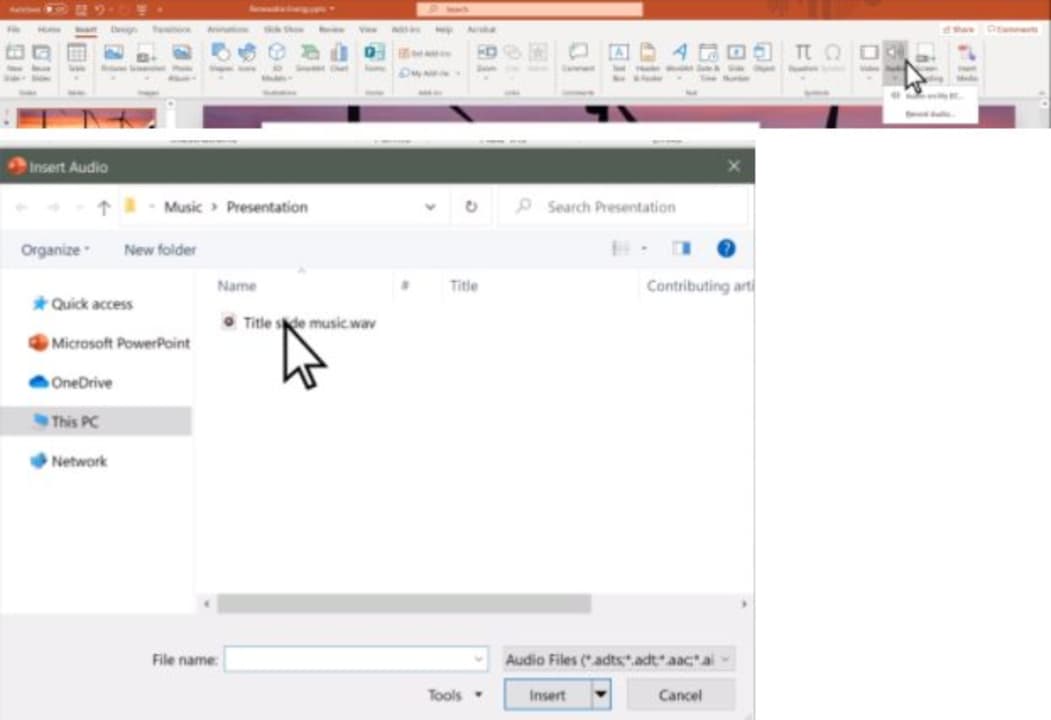
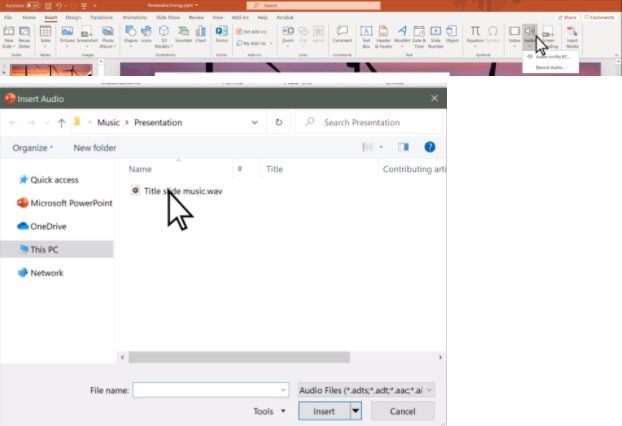
    One of the easiest methods is to add the file from your computer’s local storage. Once you know where and what to choose, go to the slide and click “Insert.” Find the “Audio” tab, and click the “Audio on My PC” option.

    This action will open a dialog box, where you can select the audio file (it might contain anything from narration to music). Click the “Insert” button. Once it’s on the slide, adjusting its settings is straightforward.

  2. Record a tune or a narration

    How to Add Music to Microsoft PowerPoint

    In the same Insert > Audio section, the other choice is to “Record Audio.” For this option to work, you need to ensure the input microphone is working. If it does, click the red “Record” button and start speaking (or singing!).

    As you finish, name the recording, listen to it and modify it as you would any other audio file.

Full control!

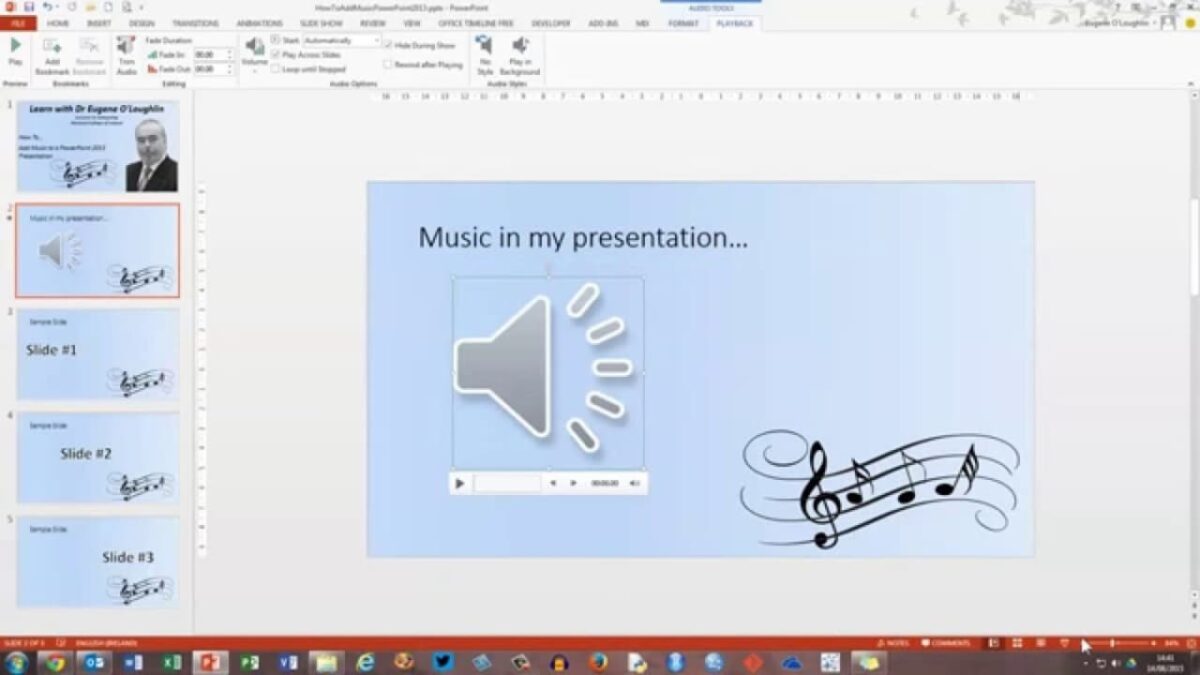
PowerPoint lets you control the audio length, fade in and out, set and change the volume, and play the music in the background. You can also manage its start and end, put it on a loop, and establish the automatic playback time. These instruments will let your presentation go as smoothly as possible.

How to Convert Google Slides to Microsoft Powerpoint in 3 Steps

There may be cases where you will need to convert your presentation file between Google Slides and Microsoft Powerpoint formats. This could be especially true if others need to collaborate on the files or need to add specific information.

Luckily for us, Google has made converting a Google Slide to Microsoft Powerpoint a relatively straightforward process. Let’s take a look at the steps you need to follow to convert  Slides to Microsoft Powerpoint presentations.

  1. Locate Your Google Slides

    How to Convert Google Slides to Microsoft Powerpoint

    Open your Google Drive in your chosen web browser. Or launch the Drive app from your mobile device by tapping on the Drive icon in your app menu. Search for the Google Slide that you need to convert among your other files in Drive. If you have many files in Drive, you can also use the search function to find the Slides file quickly.

  2. Open the Presentation

    How to Convert Google Slides to Microsoft Powerpoint

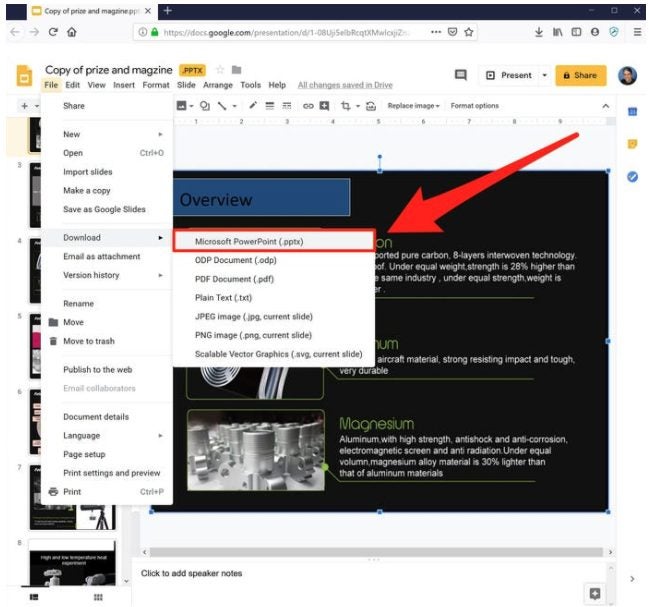
    Open the presentation by double-clicking on it from your Drive. Alternatively, you can also right-click on the files and select ‘Open With’ and the ‘Google Slides’. Once the presentation opens, click on ‘File’ in your top menu to open up a drop-down list.

  3. Download as Powerpoint Presentation

    How to Convert Google Slides to Microsoft Powerpoint

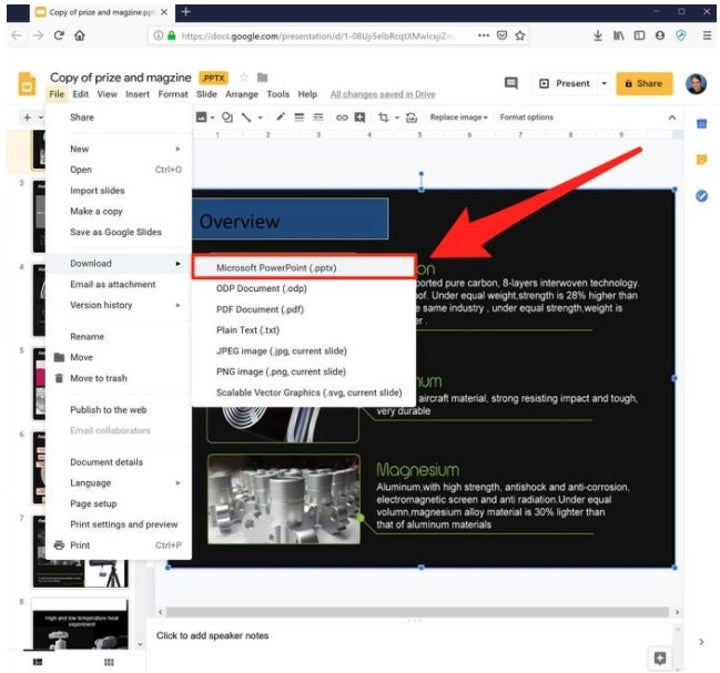
    In the drop-down list, click on ‘Download’ and then choose Microsoft Powerpoint. Your presentation will now be downloaded to your computer in the correct format so that you can open it with Powerpoint and make any changes or adjustments.

Switch Between Google Slides and Microsoft Powerpoint Easily

As you can see from the above steps, it is very easy to convert your Google Slides to Microsoft Powerpoint presentations and vice versa. This makes it very easy to share and collaborate on different projects. How don’t you try changing from Slides to Powerpoint format now?

How to Get Microsoft Powerpoint for Free 3 Different Ways

Microsoft Powerpoint is an incredibly full-featured program that enables users to create powerful presentations.

There are free spreadsheet programs available, but they usually don’t have all the features and ease of use that Powerpoint offers. So how can you get Powerpoint for free so that you can use all the features without the hefty price tag?

  1. Web Version

    How to Get Microsoft Powerpoint

    Microsoft Powerpoint is available in the online version for free. You will need to set up an Office account, but this process is simple and doesn’t cost anything.

    You will need an internet connection to use these programs. Let’s take a look at what you need to do to use the web version of Powerpoint.

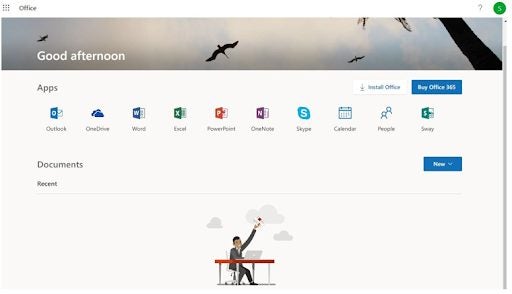
    – Head to Office.com and log in to your account using your Office account details. 

    – If you don’t have an account yet, you can create one from here by clicking on ‘Sign In’ and then choosing ‘Create Account’.

    • Once you sign in to your account, you will be redirected to the apps screen to see the available programs. Click on Powerpoint to start creating a presentation.
  2. Use the Mobile Version

    How to Get Microsoft Powerpoint

    Similar to the web version, Microsoft has released mobile versions of all the popular Office programs such as Powerpoint for free. The apps are available on iPhone and Android devices. Not all the features are included in the apps, as Microsoft needs to keep some elements for their paying customers. However, there are still more than enough to create compelling presentations from your mobile device.

  3. Use the Trial Version

    How to Get Microsoft Powerpoint

    All Office programs come with a one-month free trial. If you only need Powerpoint for a few short presentations and don’t need the program long term, this might be a good option for you to access the full version of Powerpoint for free.

Create Free Presentations Using These Options

With the above options, you can start creating presentations using Powerpoint for free on your computer or mobile device. Why not try these options now?

How to Update Microsoft Powerpoint in 5 Steps

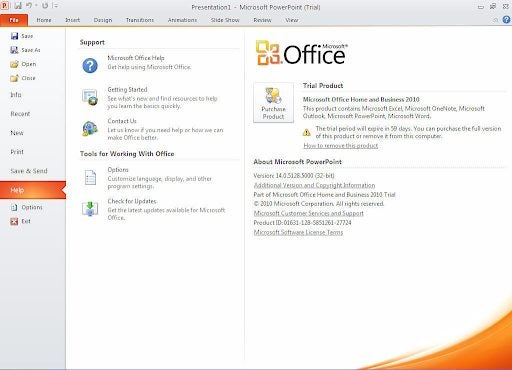
Microsoft Powerpoint forms part of the Office suite of software. The program has to be updated periodically to ensure that they continue working and fix any bugs or issues that users may be experiencing. 

You can turn on automatic updates so that your Office products update whenever Windows updates from the ‘Systems and Security’ panel. However, if you prefer to update your programs manually, here’s how to do it.

  1. Launch Powerpoint

    How to Update Microsoft Powerpoint

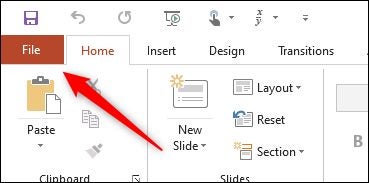
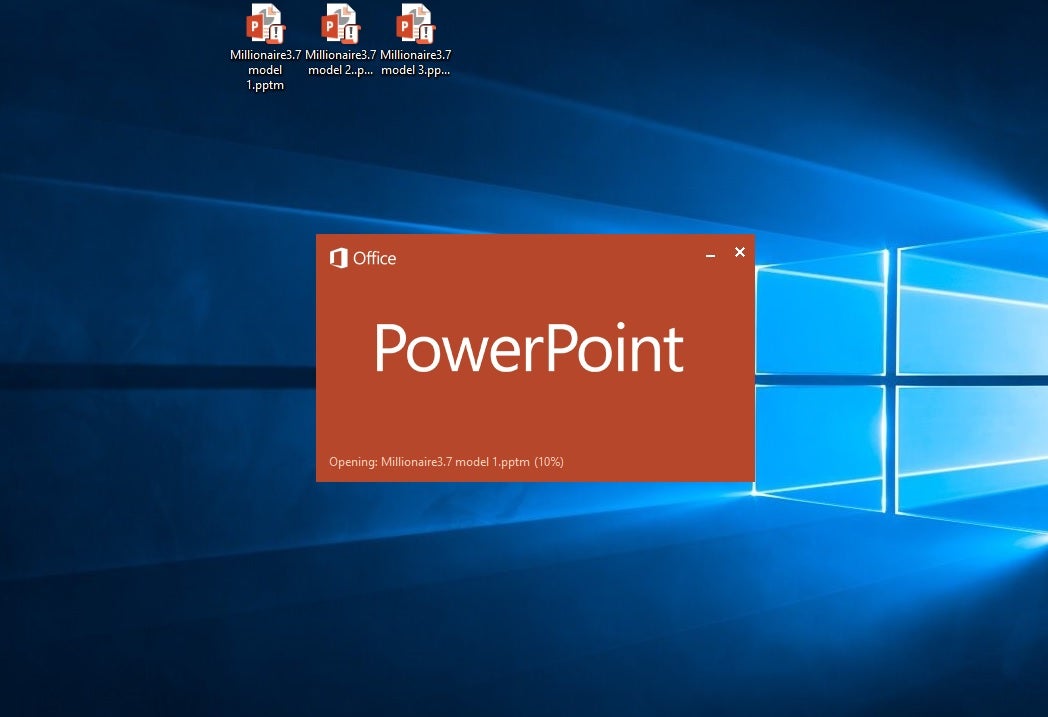
    Launch Microsoft Powerpoint on your computer by double-clicking on the Powerpoint icon on the desktop or from the Start menu. Click the ‘File’ tab in the menu at the top of your screen.

  2. Click on ‘Updates’

    How to Update Microsoft Powerpoint

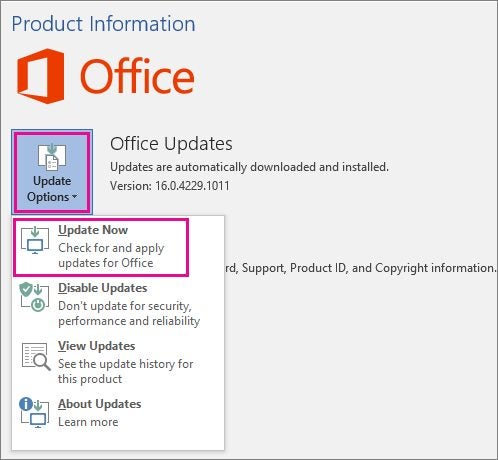
    Click ‘Update Options’ and then choose to disable all updates. You need to first disable the updates so that we can force an update in the next step. This is important to complete the manual update of Powerpoint.

  3. Enable Updates

    How to Update Microsoft Powerpoint

    Click ‘Update Options’ again, and this time choose ‘Enable Updates’ to force Powerpoint to update if there is one available. You may need to restart Powerpoint and any other Office programs once the update has been completed.

Update Powerpoint to Get More Features

By updating Powerpoint, you ensure that your program will continue to work correctly and also install new features and improved security settings. Why not try updating your Powerpoint now?

How to Use Microsoft Powerpoint in 5 Steps

Microsoft Powerpoint contains many valuable features that make creating striking presentations a breeze on your Windows, Mac, iPhone, or Android device. These features include useful templates, themes, transitions, and effects.

You can also add presenter notes which don’t show on the presentation but show on the presenter’s device to help you stay on track during your presentation. Let’s take a look at how to use Microsoft Powerpoint.

  1. Choose a Template or Blank Project and Add a Theme

    How to Use Microsoft Powerpoint

    Open Powerpoint and start a new project.

    – Choose one of the already designed templates, or you can choose a blank design.

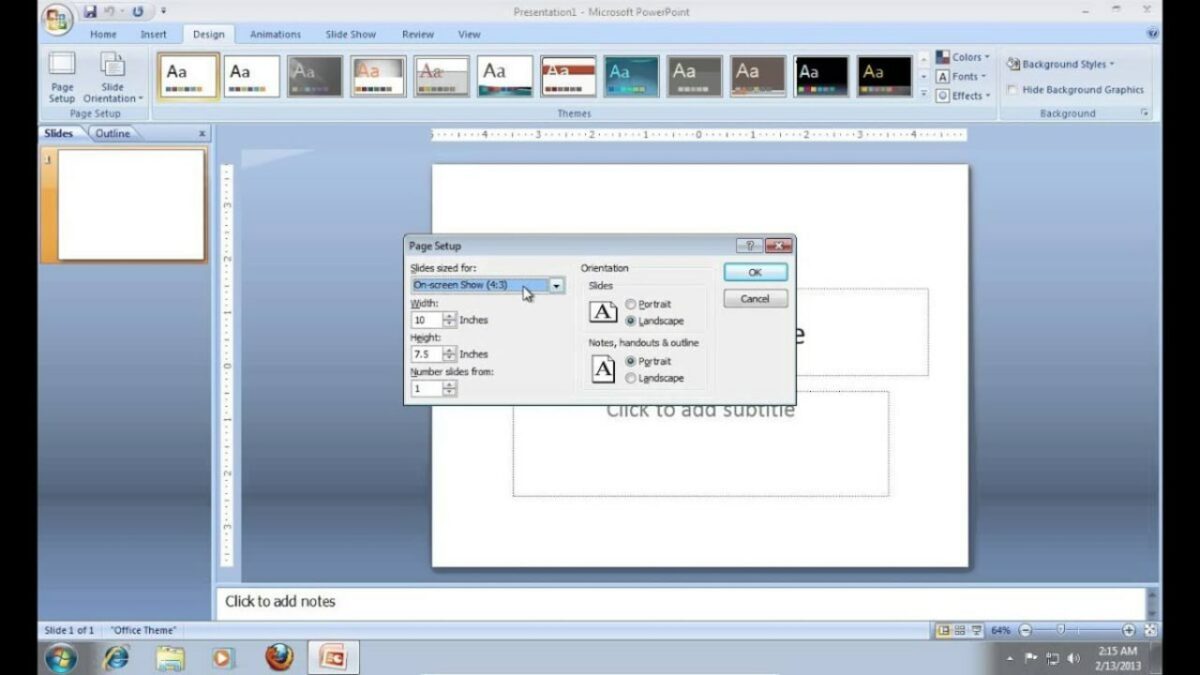
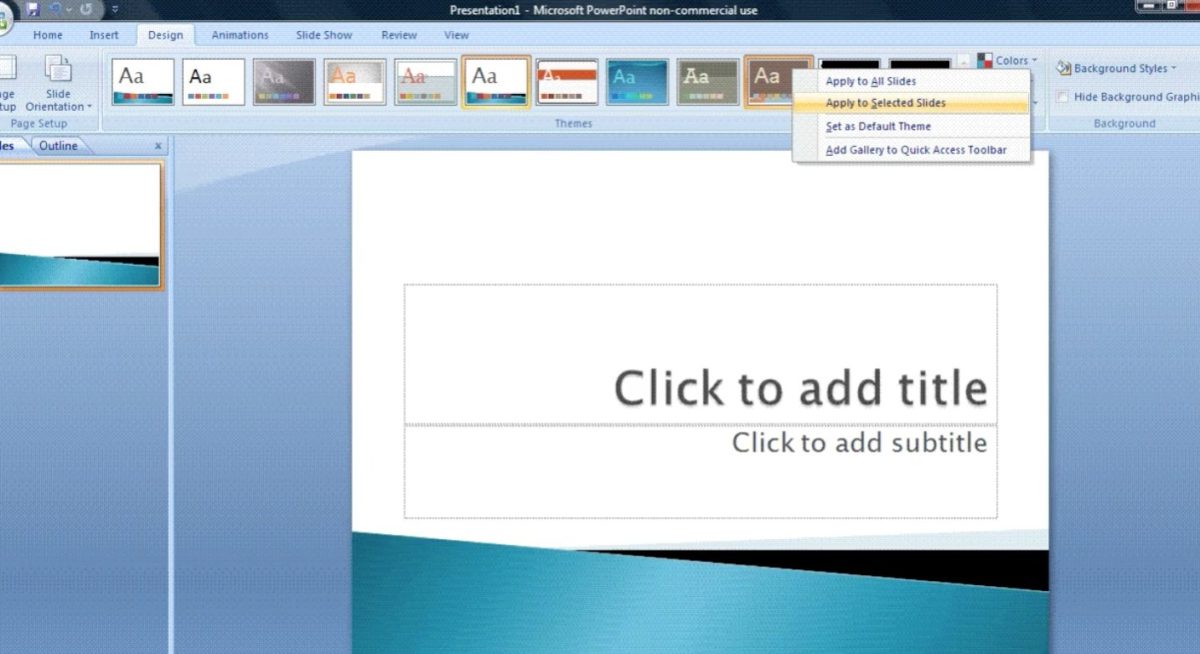
    • If you select a blank project, click on ‘Design’ in the top ribbon of Microsoft Powerpoint and scroll through the options and choose one.
  2. Make the Title Page

    How to Use Microsoft Powerpoint

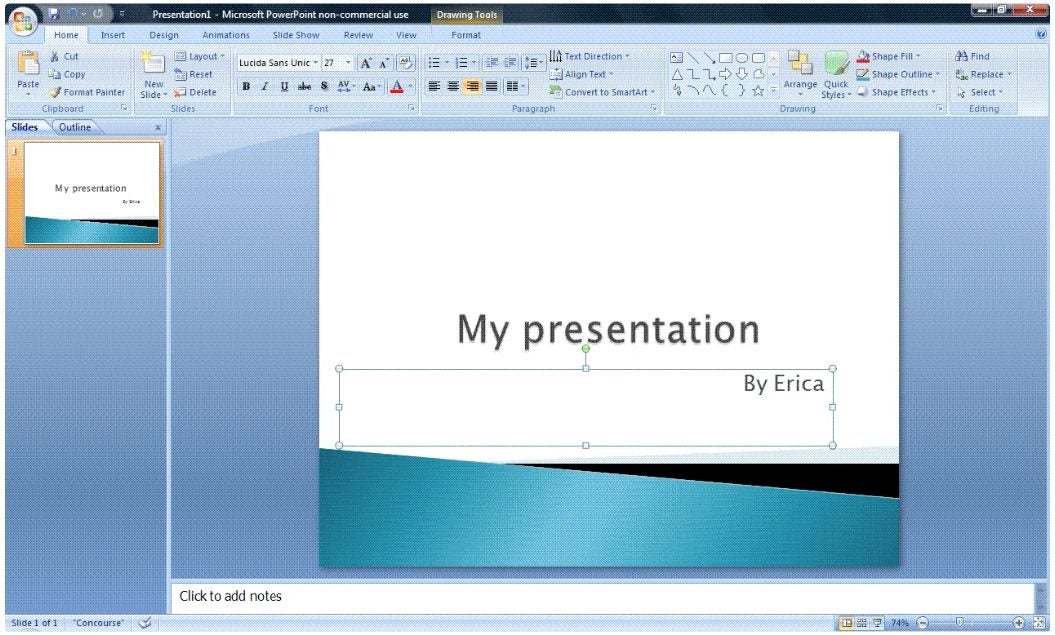
    The first slide that you see will already be set up as a potential title page. 

    – Click on the textbox’ Click to Add Title’ and type the title of your presentation.

    – Click on the textbox’ Click to Add Subtitle’ and type the subtitle of your presentation and your name if relevant.

    • Now you can change the font, size, and color of the text by changing the options in the top ribbon. You can also move the text boxes or resize them.
  3. Add More Slides

    How to Use Microsoft Powerpoint

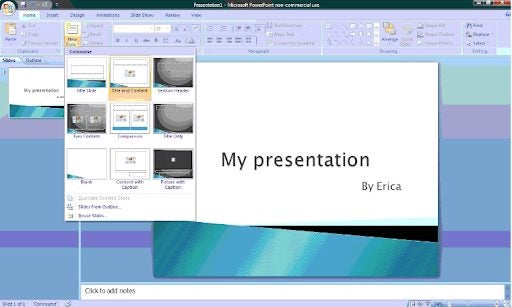
    You will need to add more slides to your presentation

    – One way to add a new slide is to click the area to the left of your screen underneath the title slide and choose ‘Add New Slide.’

    – Another way to add a slide is by clicking ‘Add New Slide’ in the top ribbon of the program.

    • The theme and design you chose in step two will automatically carry over to any new slides.
  4. Insert Media

    How to Use Microsoft Powerpoint

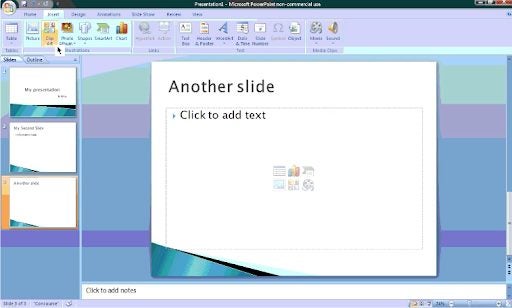
    Click on ‘Insert’ from the top ribbon and insert media such as images, graphs, charts, and even videos to your presentation.

  5. Add Transitions

    How to Use Microsoft Powerpoint

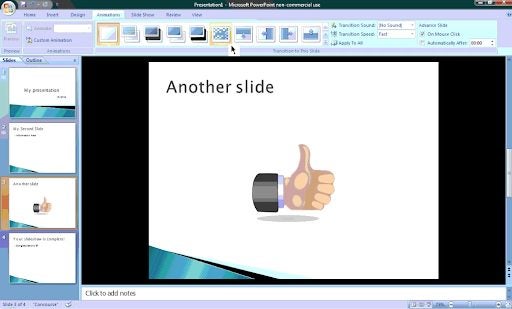
    By clicking on the ‘Animations’ tab from the ribbon, you can insert different transitions between your slides.

Create Impressive Presentations Easily

By using Microsoft Powerpoint, you can create memorable presentations in just a few simple steps.

How to Fix Poor Quality on Kinemaster in 3 Steps

KineMaster on Android is pretty powerful. This app can do most things a fully-fledged computer program can, from removing the green screen to making animated intros.

We’re here to show you how you can increase the quality of your video in KineMaster.

  1. Open KineMaster and access “Settings”

    How to Fix Poor Quality on Kinemaster

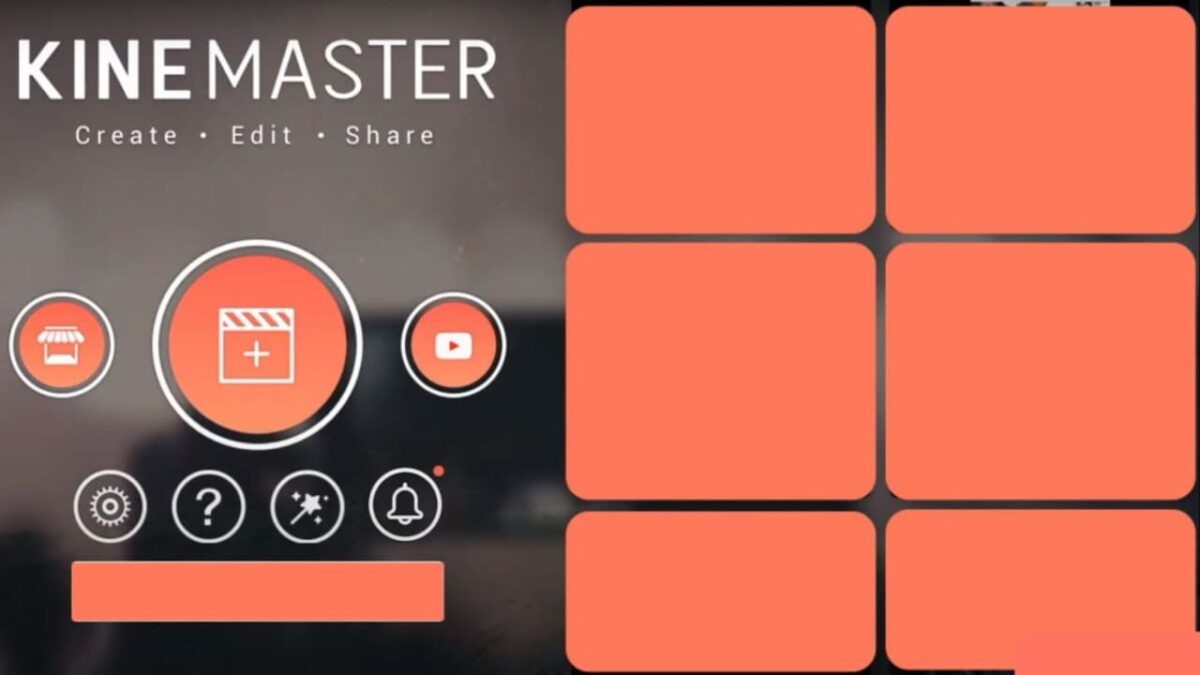
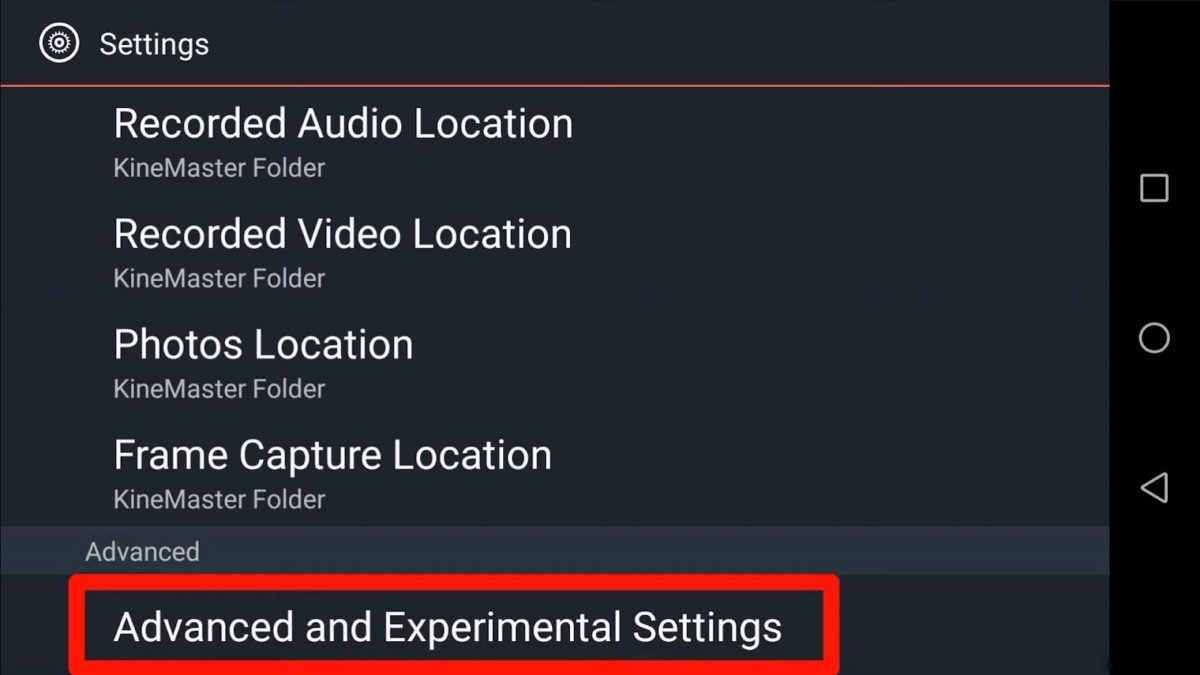
    Access the program from your home screen or folder. Right on the first page, below the new project and “Store” icon, you’ll see the “Settings” button. Click it, scroll all the way down, and select the “Advanced and Experimental Settings” line.

  2. Adjust the “Advanced and Experimental Settings”

    How to Fix Poor Quality on Kinemaster

    Once you access this page, the phone will prompt you to agree that you need to:

    – Ask for support to guide you

    Or

    – If you encounter problems, the video editor might become glitchy.

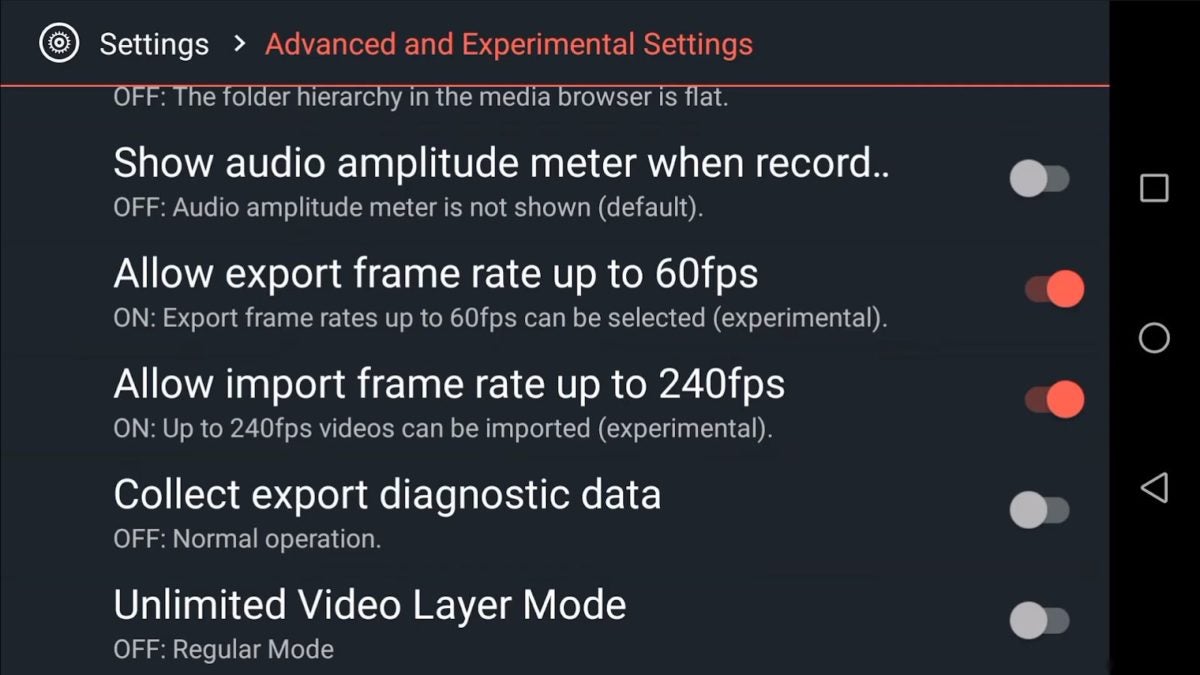
    Agree to the warning and proceed. On the “Settings” screen, allow the following settings:

    – Export frame rate up to 60fps

    – Import frame rate up to 240 fps

    Once you do, the program will change the settings to increase the video quality automatically.

  3. Create a project and start editing

    How to Fix Poor Quality on Kinemaster

    From here, you can go back to the project creation page, make a new one, import the media, and start editing. Once you finish, export the video, and it will be of much higher quality.

“We’ll fix it in post”

This has been an ongoing Hollywood meme when CGI came along. You’d technically be able to correct “anything” in post-production using computer technologies. Still, getting quality material isn’t something to compromise on. If you happen to have poor-quality material for some reason, some editing techniques can save you too.

How to Make an Intro With KineMaster in 3 Steps

Do you need an eye-catching intro for your videos like those of the best YouTube creators? KineMaster is an Android app for making such an asset in a few clicks.

Let’s dive into today’s article and see what potential the video editor has.

  1. Create the base

    How to Make an Intro With KineMaster

    Well, to start the process, you obviously need a new file with a relevant background. You can get it from anywhere, including your camera roll, or download a royalty-free picture from the internet. Using a video background is also possible, as long as the final product is punchy.

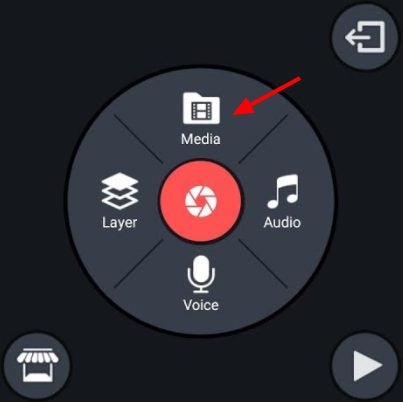
    Once you have it, click “Media” and import the file to the software. You can extend photos for as many frames as you want, while the videos can be trimmed and edited.

  2. Add visuals

    How to Make an Intro With KineMaster

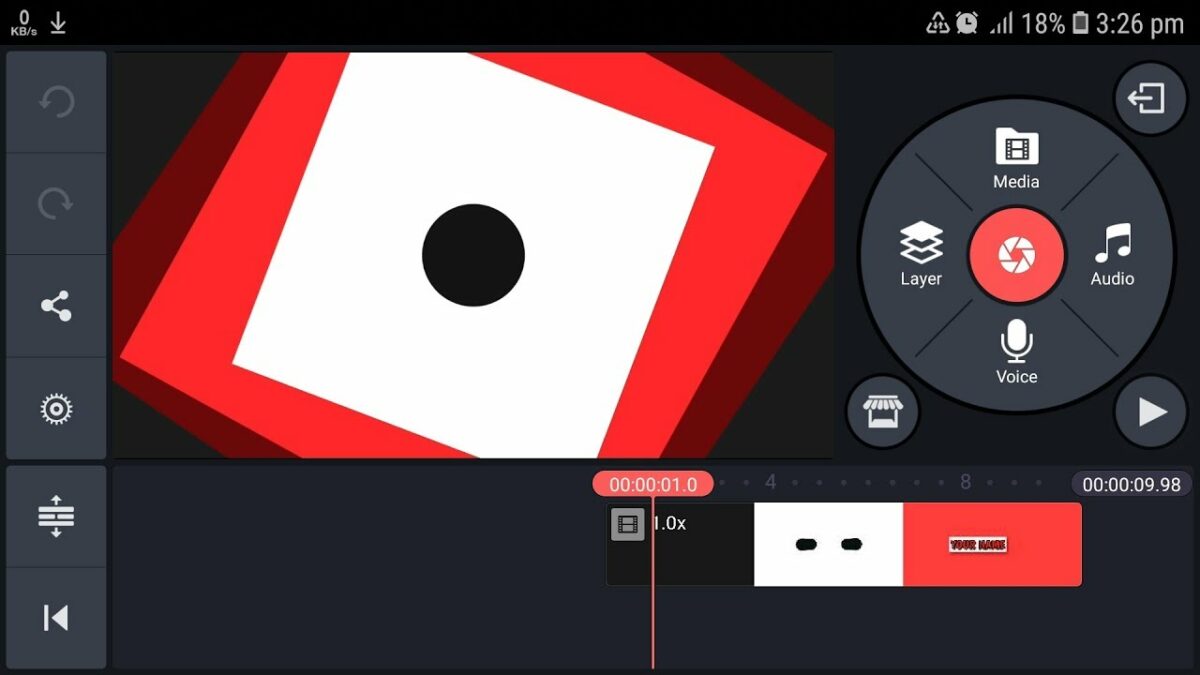
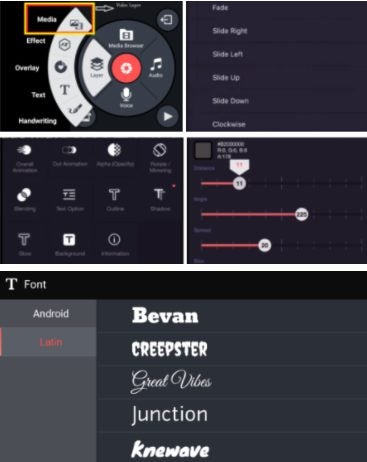
    The “Layers” tab is the central hub you need to master to add and refine elements in your intro. It contains all you need, including media, effects, text, handwriting, and overlay. Once you add the text, you’ll be able to set the font, change the color, add artistic elements, make it move due to the animation effects, and so much more!

    This step isn’t something we can walk you through, as it’s an entirely creative process that helps you achieve your vision. Experiment and give freedom to your beautiful mind!

  3. Add audio

    How to Make an Intro With KineMaster

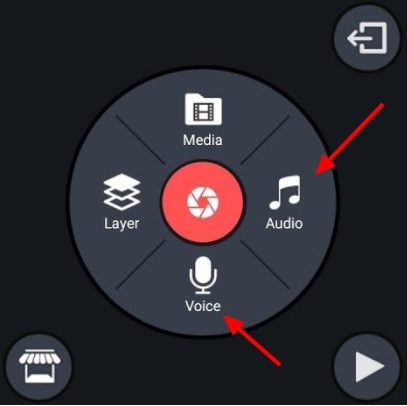
    In addition to the abundant elements, fonts, and crazy animations in the application, and the assets available in the built-in KineMaster store, your audience needs a cool jingle to go with the visuals. Use the library to find the best royalty-free audio tracks and add them to the intro.

    You can manipulate the audio, trimming it, or putting it on a loop. Another fantastic option to keep your intro fresh and unique is to record a voiceover right in the app!

Use it anywhere you want!

Whether you decide to use the intro on one or all of your videos or change it up from time to time, using KineMaster can assist in all cases. You can save the animation as a template, add or remove elements, change the music, or duplicate it to assemble a new project. The same steps work for creating outros to wrap up the video successfully.