
Editing a large number of portraits can be a problem for you as an editor for two very simple reasons: the amount of time invested and the possible inconsistencies. And it can be even worse if each photo requires some specific retouching. This is where Adobe Lightroom can help you.
The AI-powered tools in Lightroom allow you to detect people and isolate specific areas of the face to work with precision without sacrificing your time. Next, we will see how to use Lightroom to make any type of skin look great in an easy and accessible way.
Why skin correction remains a bottleneck
When photographing a person, the skin is one of the most important points. Even the most inexperienced eye can easily tell whether it has been edited correctly or not. Excessive smoothing and an inappropriate color can make anyone look like a doll, for example.
When working in batches, the problem becomes more pronounced, as not all adjustments work the same on all photos. The advantage of Lightroom when it comes to editing photos is that it allows us to work on RAW files with non-destructive editing and apply local corrections precisely.
How to correct the skin and other areas of the face without overdoing it
The most common trap we tend to fall into when editing with AI is over-editing. To avoid this, it is advisable to follow a simple rule: correct to improve, not to transform the person into someone completely different. Lightroom‘s selective tools allow for working on specific areas, which already reduces the risk of applying aggressive adjustments.
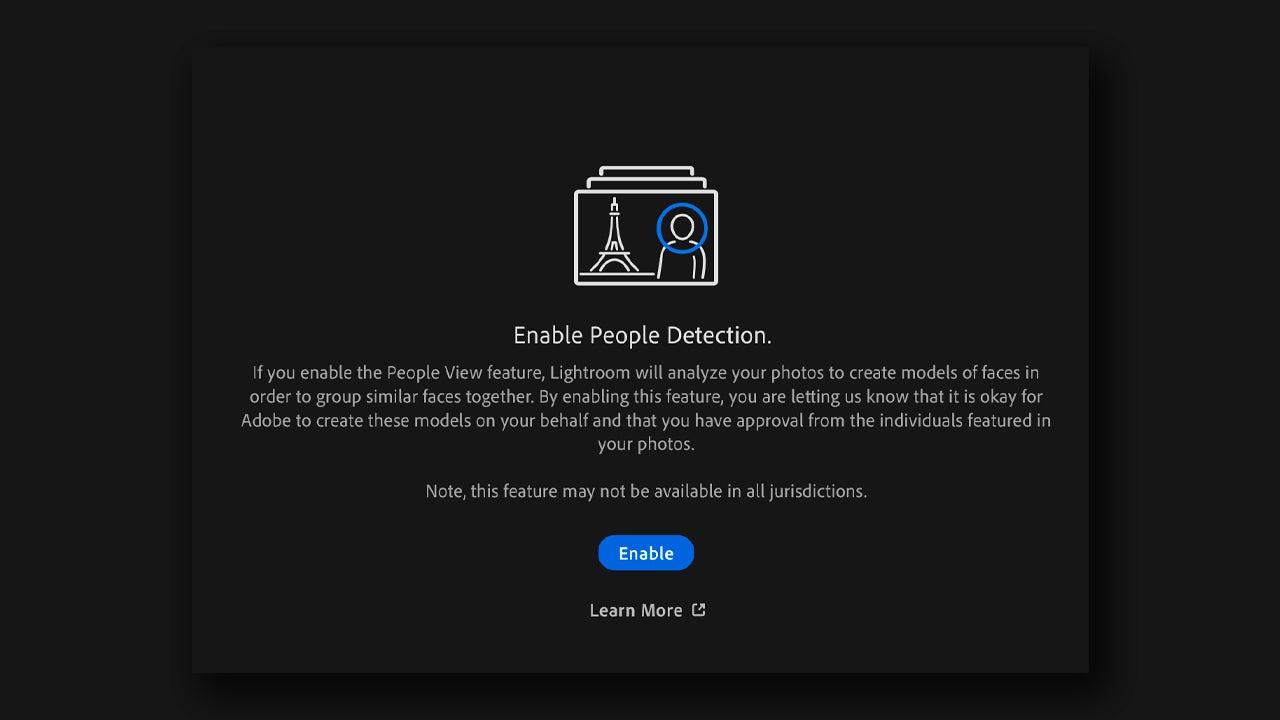
However, before we start, we will need to organize our library. Within Lightroom, we can sort the photos thanks to its facial recognition technology. To do this, you will need to enable People Detection and give Lightroom permission to analyze your photographs. Within All Photos, select People and click on Enable. You can also go to Edit > Preferences > General and within Privacy, click on Enable People View.
If you are on mobile, go to the album view and tap the Settings icon (it’s in the upper right corner of the screen). In the Settings panel, select People View to activate the feature.
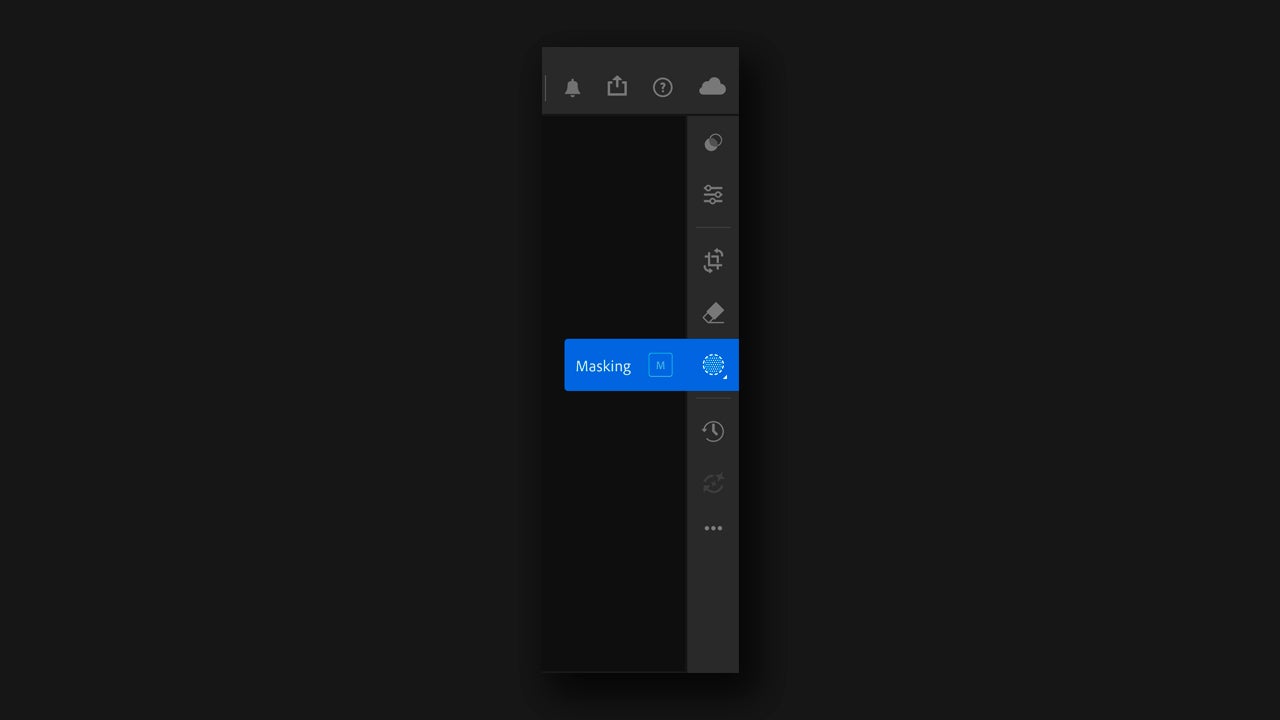
With our images organized, we can now get to work. The Lightroom masking panel offers us several ways to create a mask to adjust specific parts of an image. Double-click on the portrait you want to modify to open the editing menu. Then, select the Masking icon that you will find in the toolbar, located on the right.
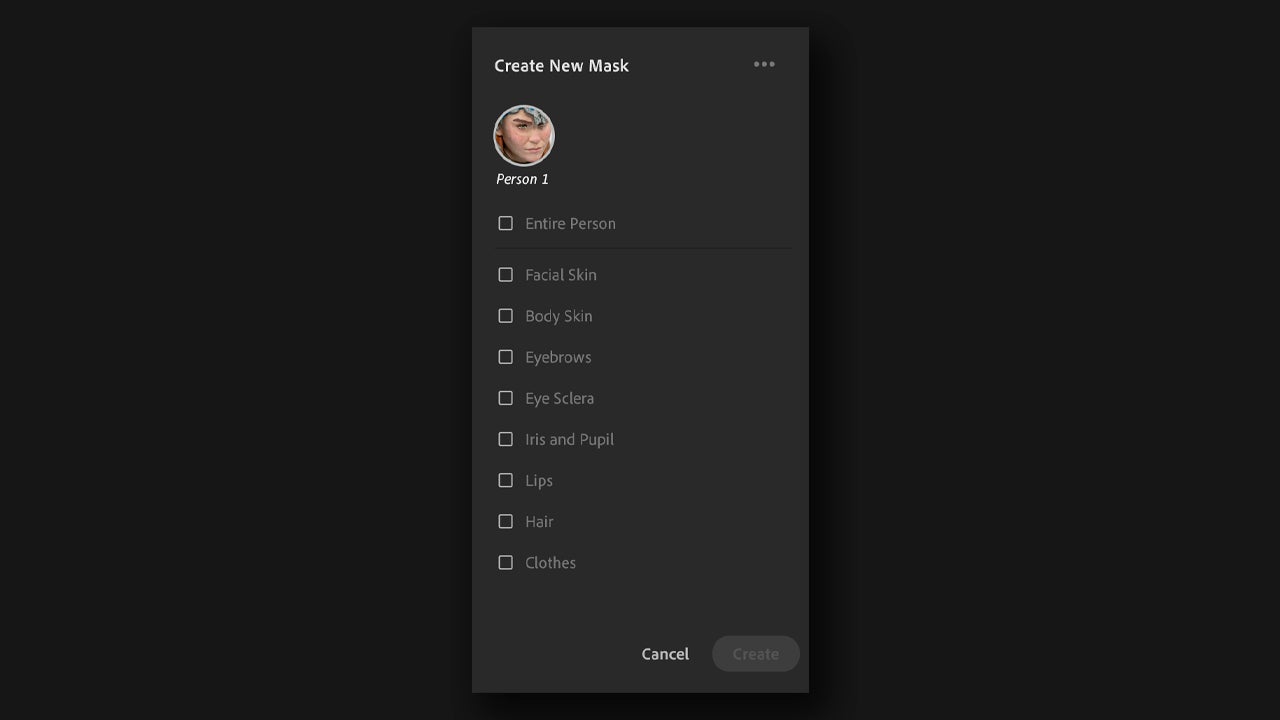
Select the People section and you will see how it analyzes the photo to detect the face. Click on the detected face and you will see a series of options detected by the AI: skin, face, eyes, etc. Select the sections that you are most interested in editing. Keep the Create separate masks option selected below so that the adjustments are not applied equally.
Let’s start with the skin. Select the mask corresponding to the skin and go to the Effects panel, located on the right. Edit to your liking: add texture, smooth, add grain… Do it however you want.
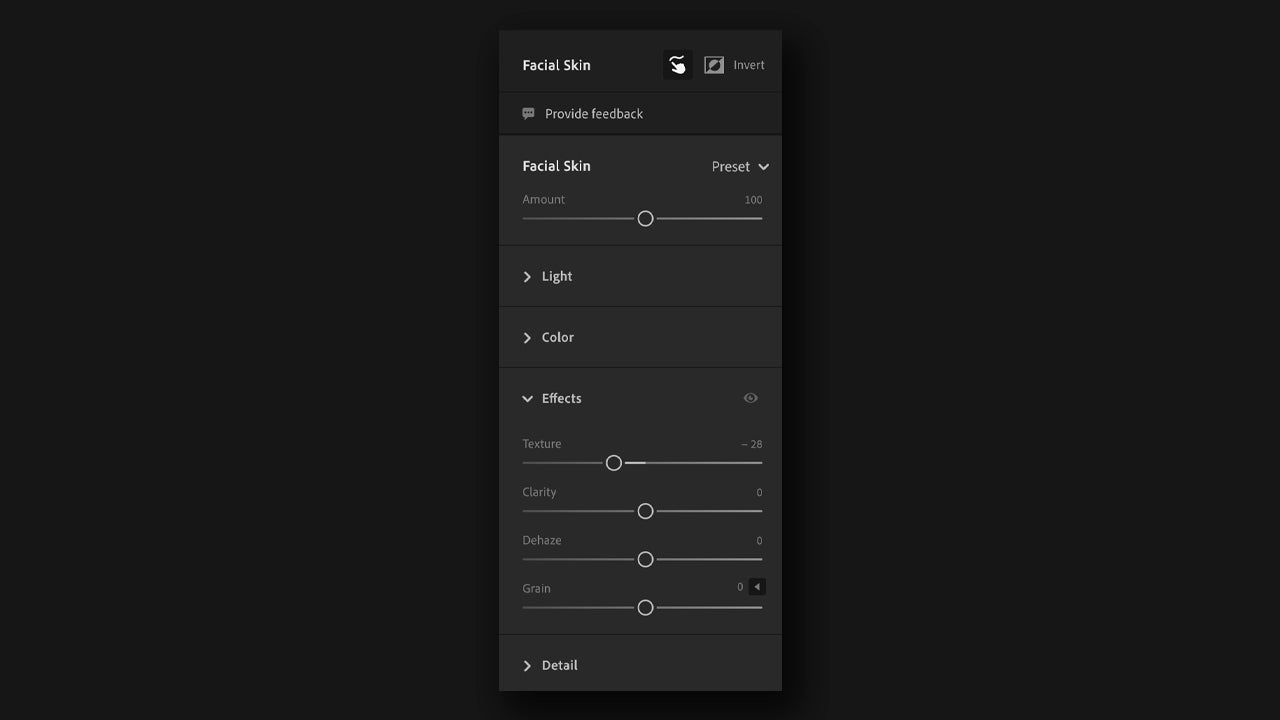
If you don’t want to overthink it, you can try your luck with the Presets. Right next to Facial Skin you will find the Presets section. There you will see a default list of effects that you can try to see how they look on your image. The Presets are available in all the masks you have previously created.
In addition to this, you can also make color adjustments within Lightroom. You can change the color grading from the Edit button by accessing the Color section. Right there, you will find a section called Color Grading.
Within the Color Grading section, you will see several attributes that you can change, such as Midtones, Shadows, and Highlights. These attributes refer to the luminance values of the image.