
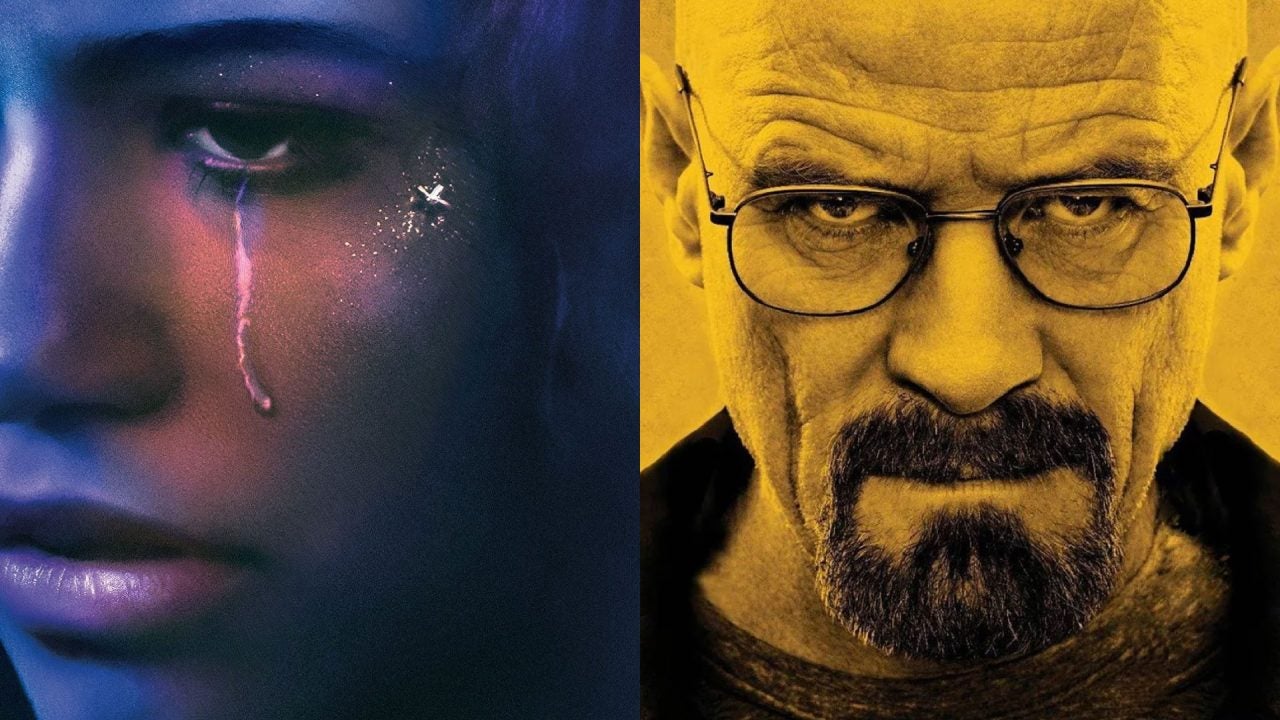
Color changes everything in an audiovisual production. If you don’t believe me, think of series like Breaking Bad or Euphoria. While the yellow tones of the former can convey tension, the neon colors of the HBO series transport us to a more dreamlike world.
Thanks to Adobe Premiere Pro, it will be even easier for you to find the perfect palette. Its wide variety of tools combined with the power of artificial intelligence will allow us to achieve any style of finish, whether more cinematic or casual.

The importance of color
It doesn’t matter if it’s a TikTok, a YouTube video, or a short: beyond aesthetics, colors influence how we perceive what we are watching. A warm tone can convey closeness or joy, while cool colors generate calm, tension, or even sadness.
Just like with Breaking Bad or Euphoria, it’s enough to remember how other series and movies use colors to create unique atmospheres that remain etched in the viewer’s memory. In addition to conveying emotions, you can also make your videos stand out even more. In the end, color speaks as much as images or sound.
Lumetri Color: what it is and how it works
When we need to work with color in Adobe Premiere Pro, we will mainly do it from the Lumetri Color panel. It’s used for both basic color correction (contrast, temperature, saturation, etc.) and for creating more creative styles.
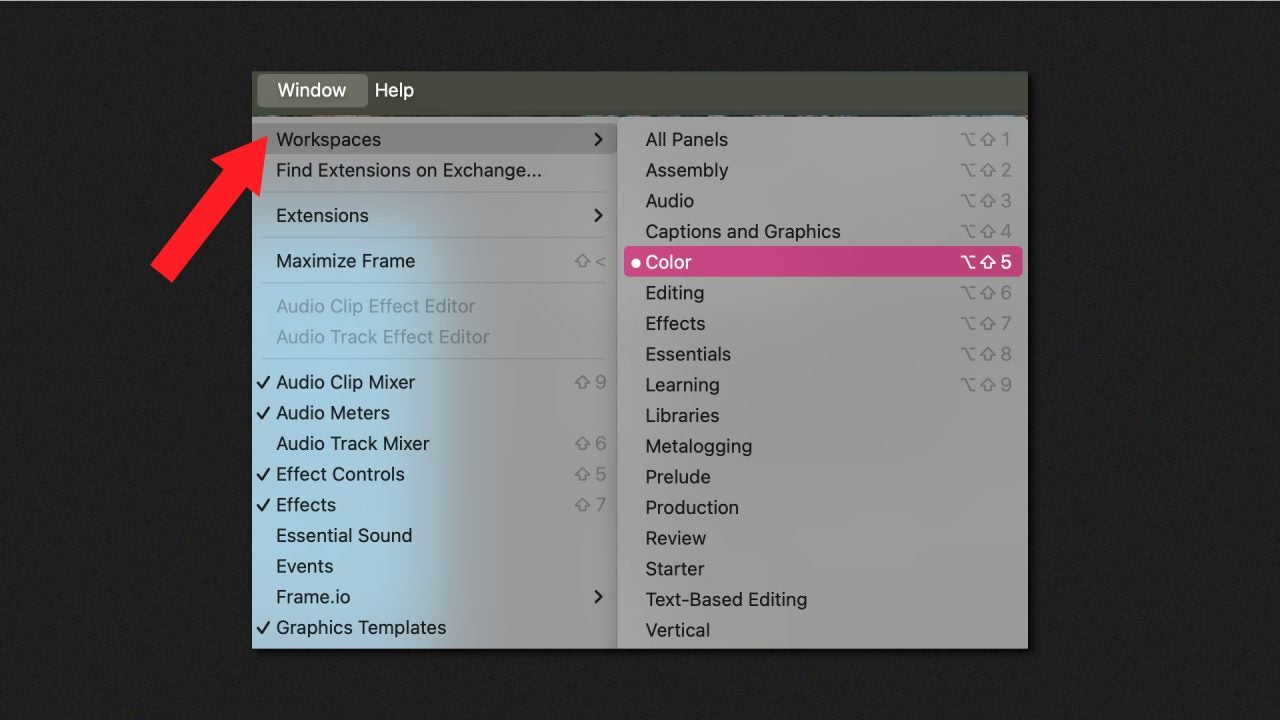
Before we start adjusting the colors of our project, we will set up the program layout to streamline the work. Click on Window > Workspaces > Color so that Premiere changes the panel arrangement. This will allow us to see the Lumetri Color panel on the right and the Lumetri Scopes panel on the left.
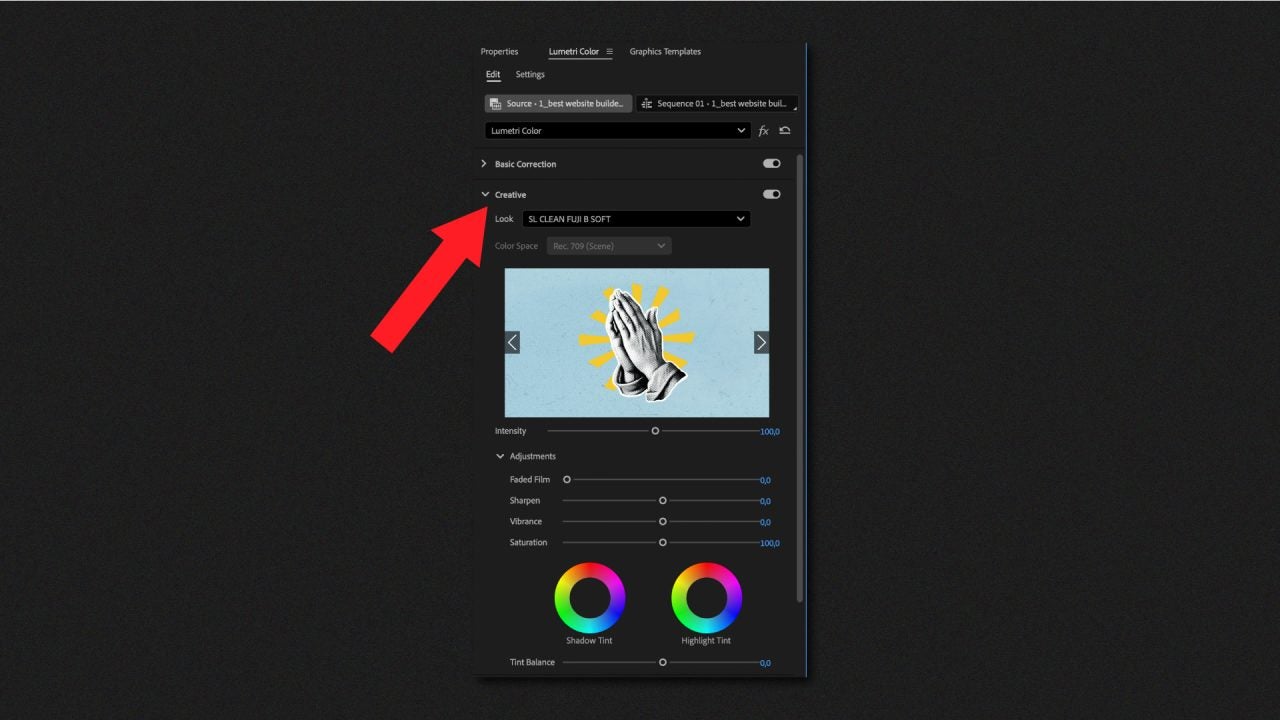
From the Lumetri Color panel, we will see the basic adjustments we talked about earlier: Basic Correction, Curves, Creative, and others. On the other hand, Lumetri Scopes will show us analysis of luminance and chromaticity in the form of waves.
The Lumetri Color panel also has a section that you’ll find very interesting called Creative. By clicking there, you will find several presets to try out. Additionally, you will be able to preview how the different effects would look on your clips and adjust the saturation and intensity of each preset.
From here, If you have multiple sequences, you can also make the color match between them. To do this, follow these steps:
- Click on the Comparison View button. You will find it in the Lumetri Color panel and below the viewing monitor itself. This will allow you to select different frames and compare the colors.
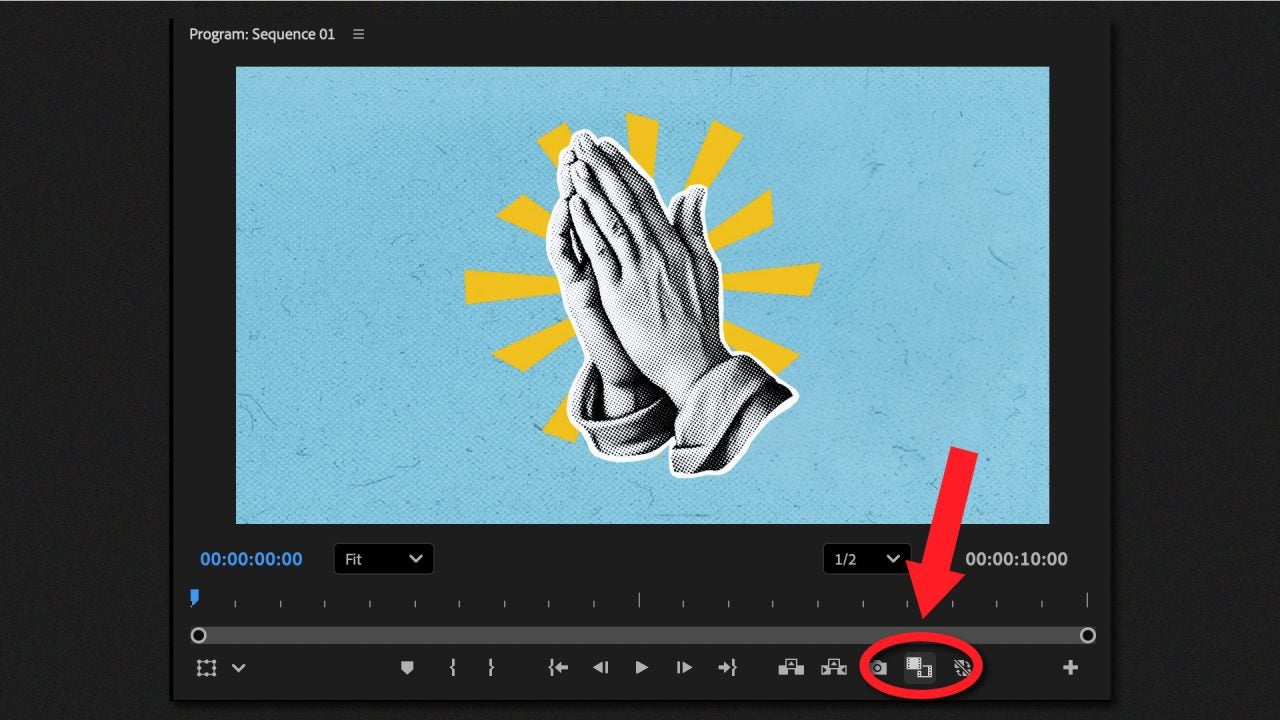
- Now we’ll choose the frames of the clips that we want to match with the color. To do this, go to the timeline that you’ll see just below Reference and place it where you need. This will be displayed on the left. In the overall timeline is where you will need to move the playback head to change the frame on the right.
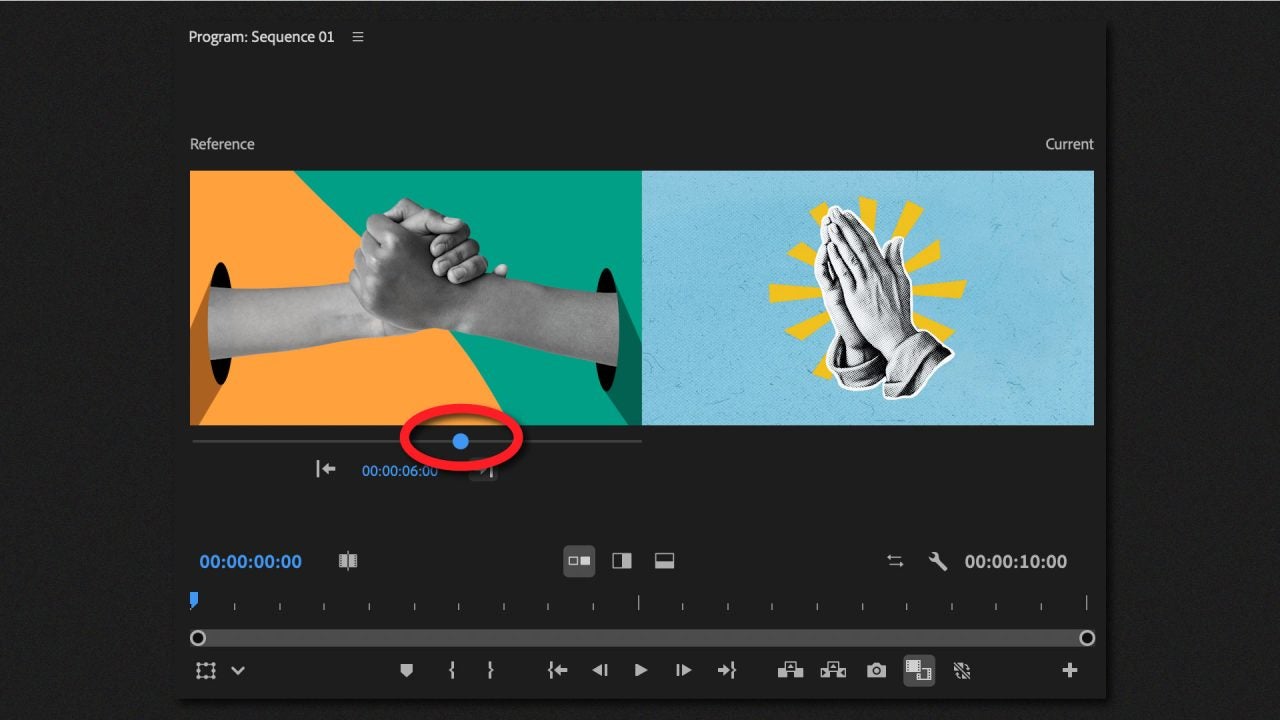
- Within Lumetri Color, go to Color Wheels & Match and click on Apply Match. If you want, you can try other frames to experiment with different tones.
This is how Auto Color works in Premiere Pro
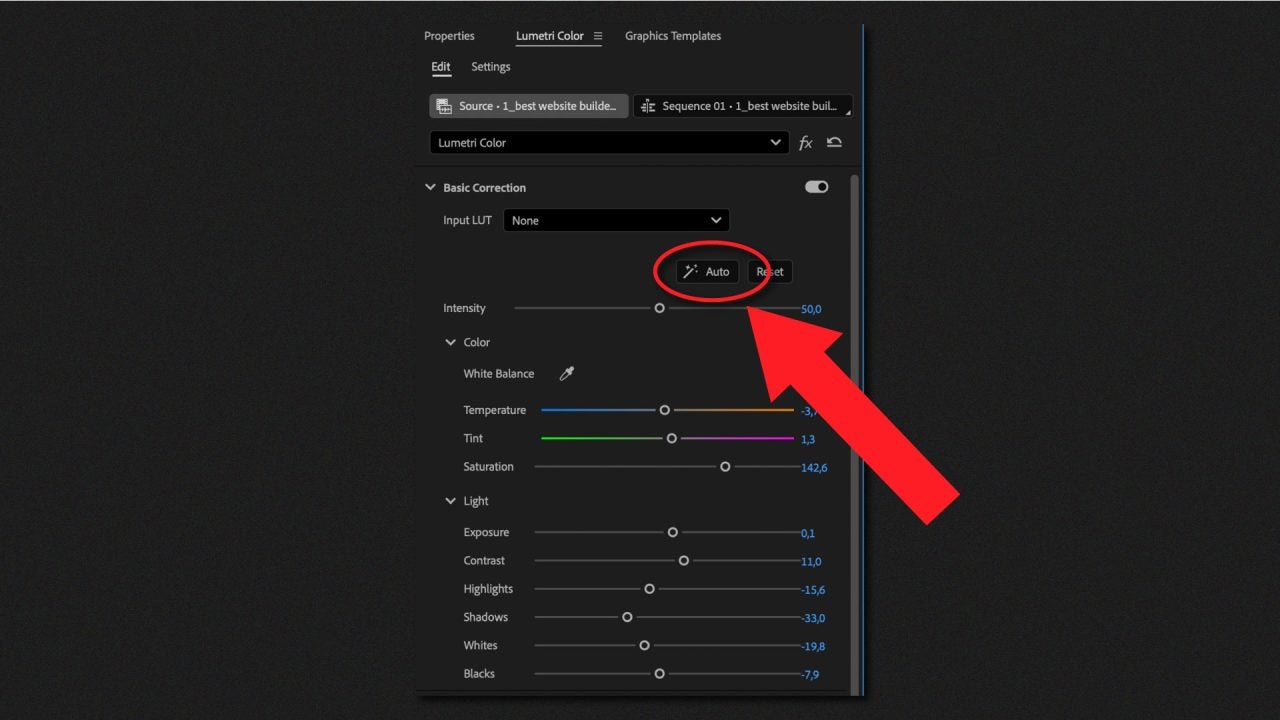
Just like in many other Adobe programs, we will see features powered by artificial intelligence within Premiere Pro. One of them is Auto Color, which uses Adobe Sensei technology to automatically apply color corrections. To use it, follow these steps:
- Place the playback line at the point of the clip you want to alter.
- Go to the Lumetri Color panel. If you changed the workspace as we explained earlier, you will probably find it on your right. If you don’t see it, click on Window and look for Lumetri Color.
- Open the Basic Correction section and click on the Auto button. You will see the light and color sliders update immediately.
- You can modify the intensity of the changes using the Intensity slider that you will see just below.
Color as a Creative Tool
Without a doubt, color is one of the most powerful tools when it comes to storytelling, and with Adobe Premiere Pro you no longer need to be an expert to take advantage of it. Whether for a personal project or to give a professional finish to your work, Adobe Premiere Pro gives you the freedom to experiment and transform your videos into pieces that convey exactly what you want.
