Have you ever started editing a video and realized that the colors don’t look the way you wanted? Although many may not believe it, making a video look good goes beyond the recording quality itself: colors are important and help us convey ideas or feelings.
In Adobe Premiere Pro, the color management tools have become even more efficient and accessible for everyone. Thanks to this, you won’t need to be an expert in color calibration to achieve professional results. Below, we show you how you can easily tackle color management in your projects.
.png)
Why should I enable color management?
Many know that color management is one of the most common headaches among those who do it professionally. Over time, Adobe has been refining its interface and improving its tools to make this task easier for editors, regardless of their level.
Before we start playing our clips, we need to set up color management. To access the preferences, we will first go to Window > Lumetri Color. Within the Lumetri Color panel, check the Display Color Management option to display accurate color values on any screen you are using.
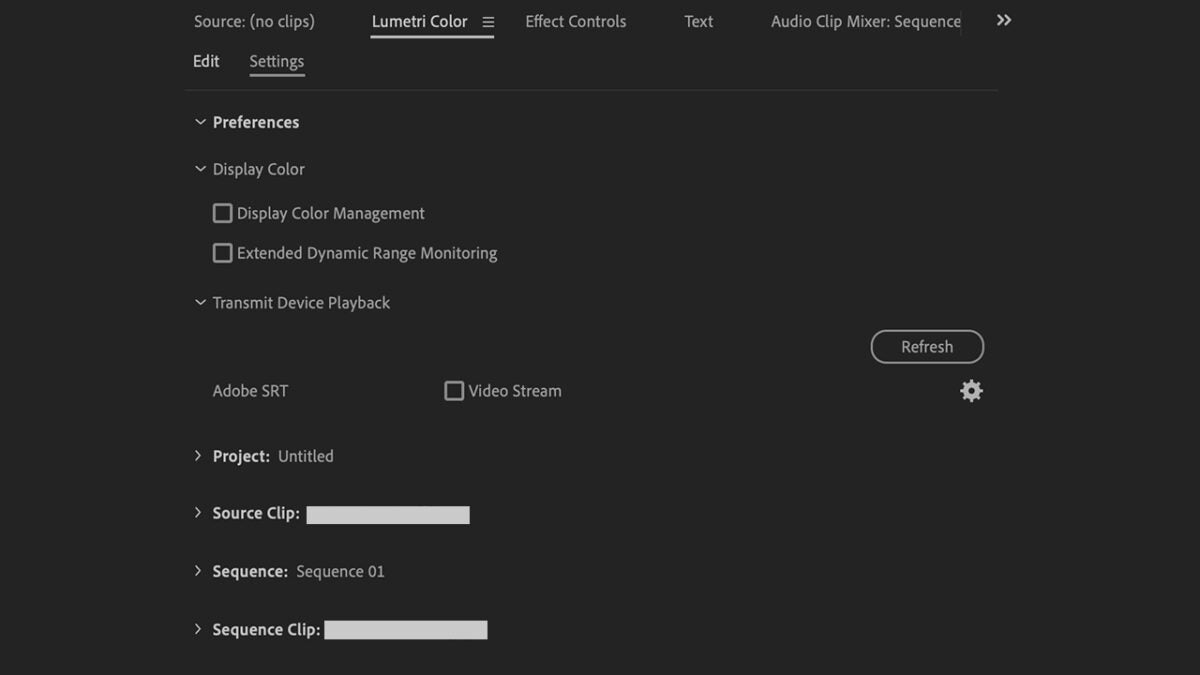
It is important to emphasize that the vast majority of monitors we have at home are calibrated with the sRGB color profile. However, televisions, for example, are based on Rec. 709, a standard for high-definition television.
Although sRGB is the most used color profile on the Internet, it can cause problems because many videos are in Rec. 709. By enabling color management, videos in Rec. 709 can be better displayed on an sRGB monitor.
Organize Your Workspace and Focus on Color
Just like with Photoshop or Illustrator, Premiere Pro allows you to change the layout of the panels to suit your needs. To optimize our work with color, we will go to Window > Workspace > Color. By doing so, the Lumetri Color panel will open on the right and the Lumetri Scopes panel on the left.
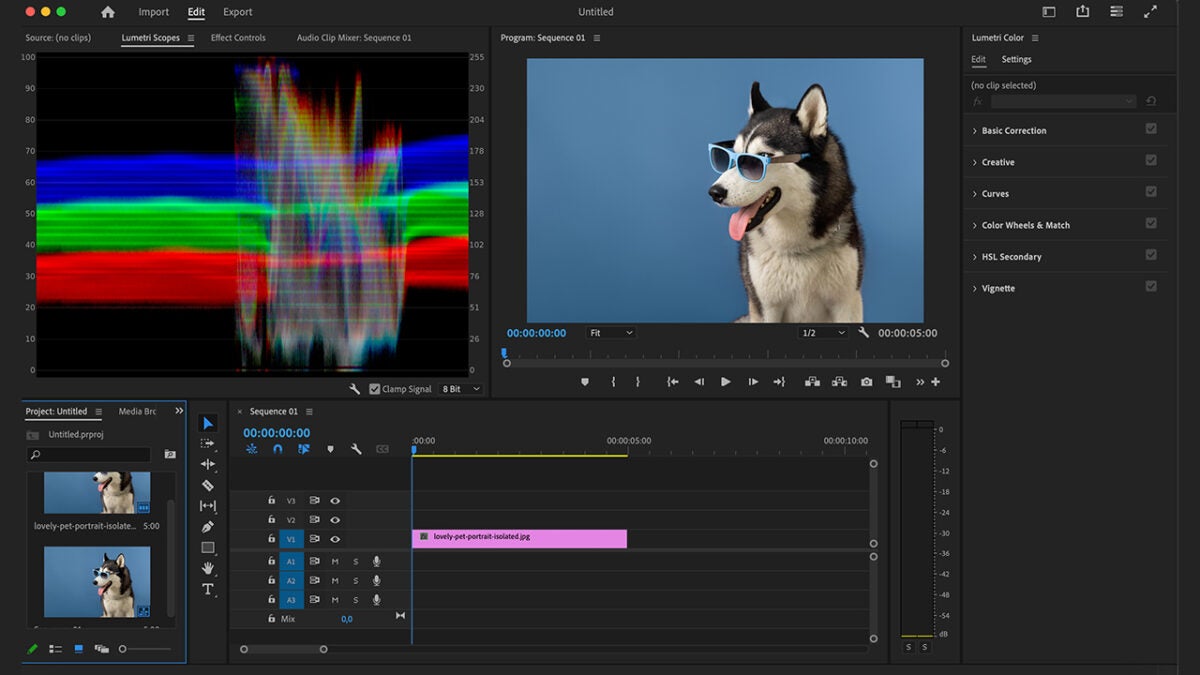
Lumetri Color: This is how basic color correction works
Knowing how to handle the Lumetri Color panel will be essential for you to change the tones of your project with great precision. As we mentioned before, you will see it located on the right after changing the workspace.
The first thing we will see in the Lumetri Color panel is the Basic Correction section. From here you can make changes to the brightness or color in a general way, something that in most cases will help you quickly correct your clips. Simply slide the controls until you get the result you want.
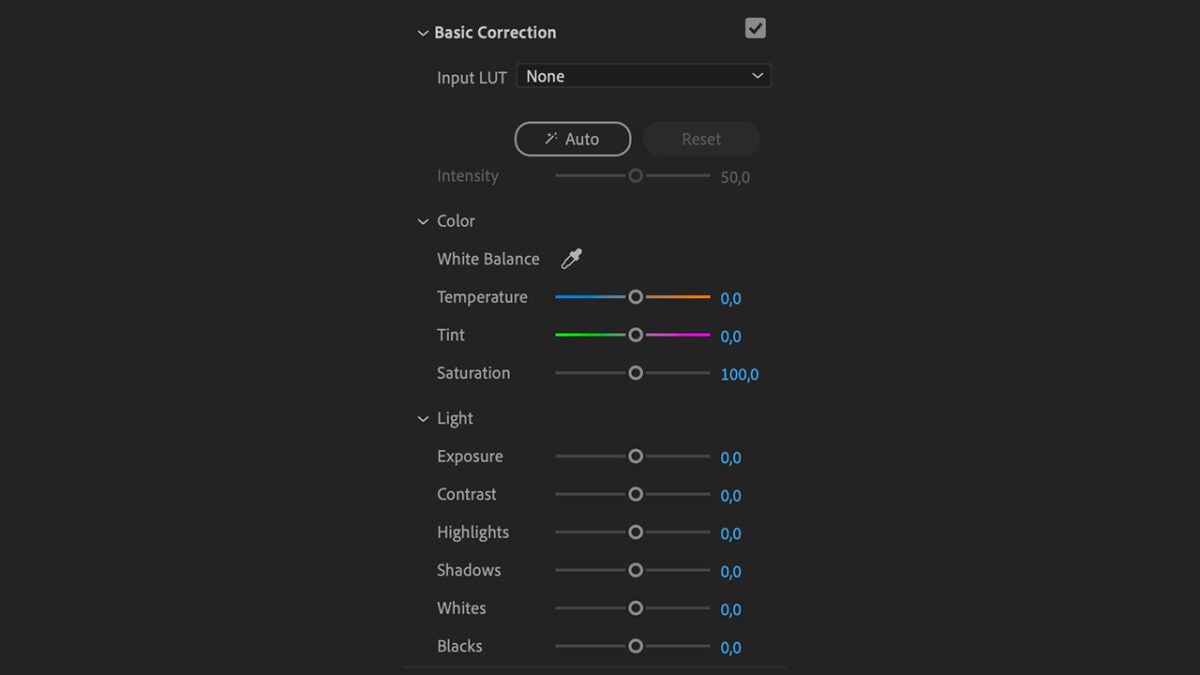
Here, you will also see the Input LUT. The word LUT is the acronym for Look Up Table and is an algorithm that transforms the color parameters of the clip to different ones. In the case of Input LUT, these changes are applied to the source material. Further down, you will see other panels like Creative or Curves, which will allow you to fine-tune the color of your project.
Color Correction Effects
Adobe provides us with a wide selection of effects and color controls to modify our clips in real-time.
Just like with video effects, color effects are applied in the same way. You will find them under the video effects> color correction section. Besides Lumetri Color, you will find this series of adjustments:
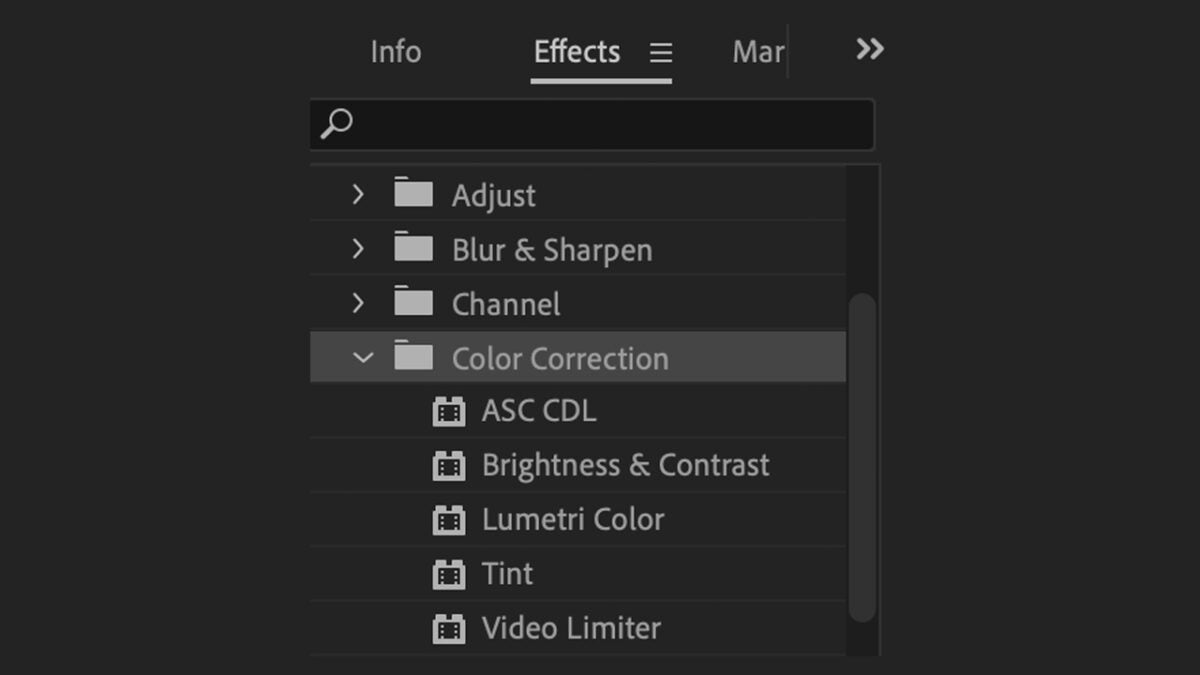
ASC CDL
The ASC CDL (American Society of Cinematographers Color Decision List) is a standard used in post-production to consistently adjust color across different programs and equipment. It is very useful for teams or individuals editing together, as the color changes you make to a clip will appear the same for everyone. This way, the group will work under the same basic guide of brightness and contrast.
Brightness & Contrast
As you can infer from the name, the Brightness & Contrast adjustment is used to adjust the brightness and contrast. Drag it to any clip located on the timeline to change these parameters.
Tint
The Tint effect replaces the original colors of a video with the two colors of your choice. However, doing so will not change the brightness and contrast. With this effect, you could, for example, alter the shadows of a clip and replace them with a different color.
Video Limiter
Applying the Video Limiter effect will ensure that the brightness and color values remain within acceptable limits for playback on different platforms. Your final video will meet technical standards and will not cause color errors on other screens.
