Jeremy is an avid gamer, writer, musician, and instructor. He has been teaching for over 15 years, with his primary focus on music, and has written all manner of gaming articles, reviews, FAQs, walkthroughs, strategy guides, and even the odd screenplay or two.
He has run the gamut of tech reviews, game guides, lifestyle content, and more. His focus as a writer is to give fair feedback of products, highlighting their strengths and weaknesses in a clear, concise, and entertaining manner.
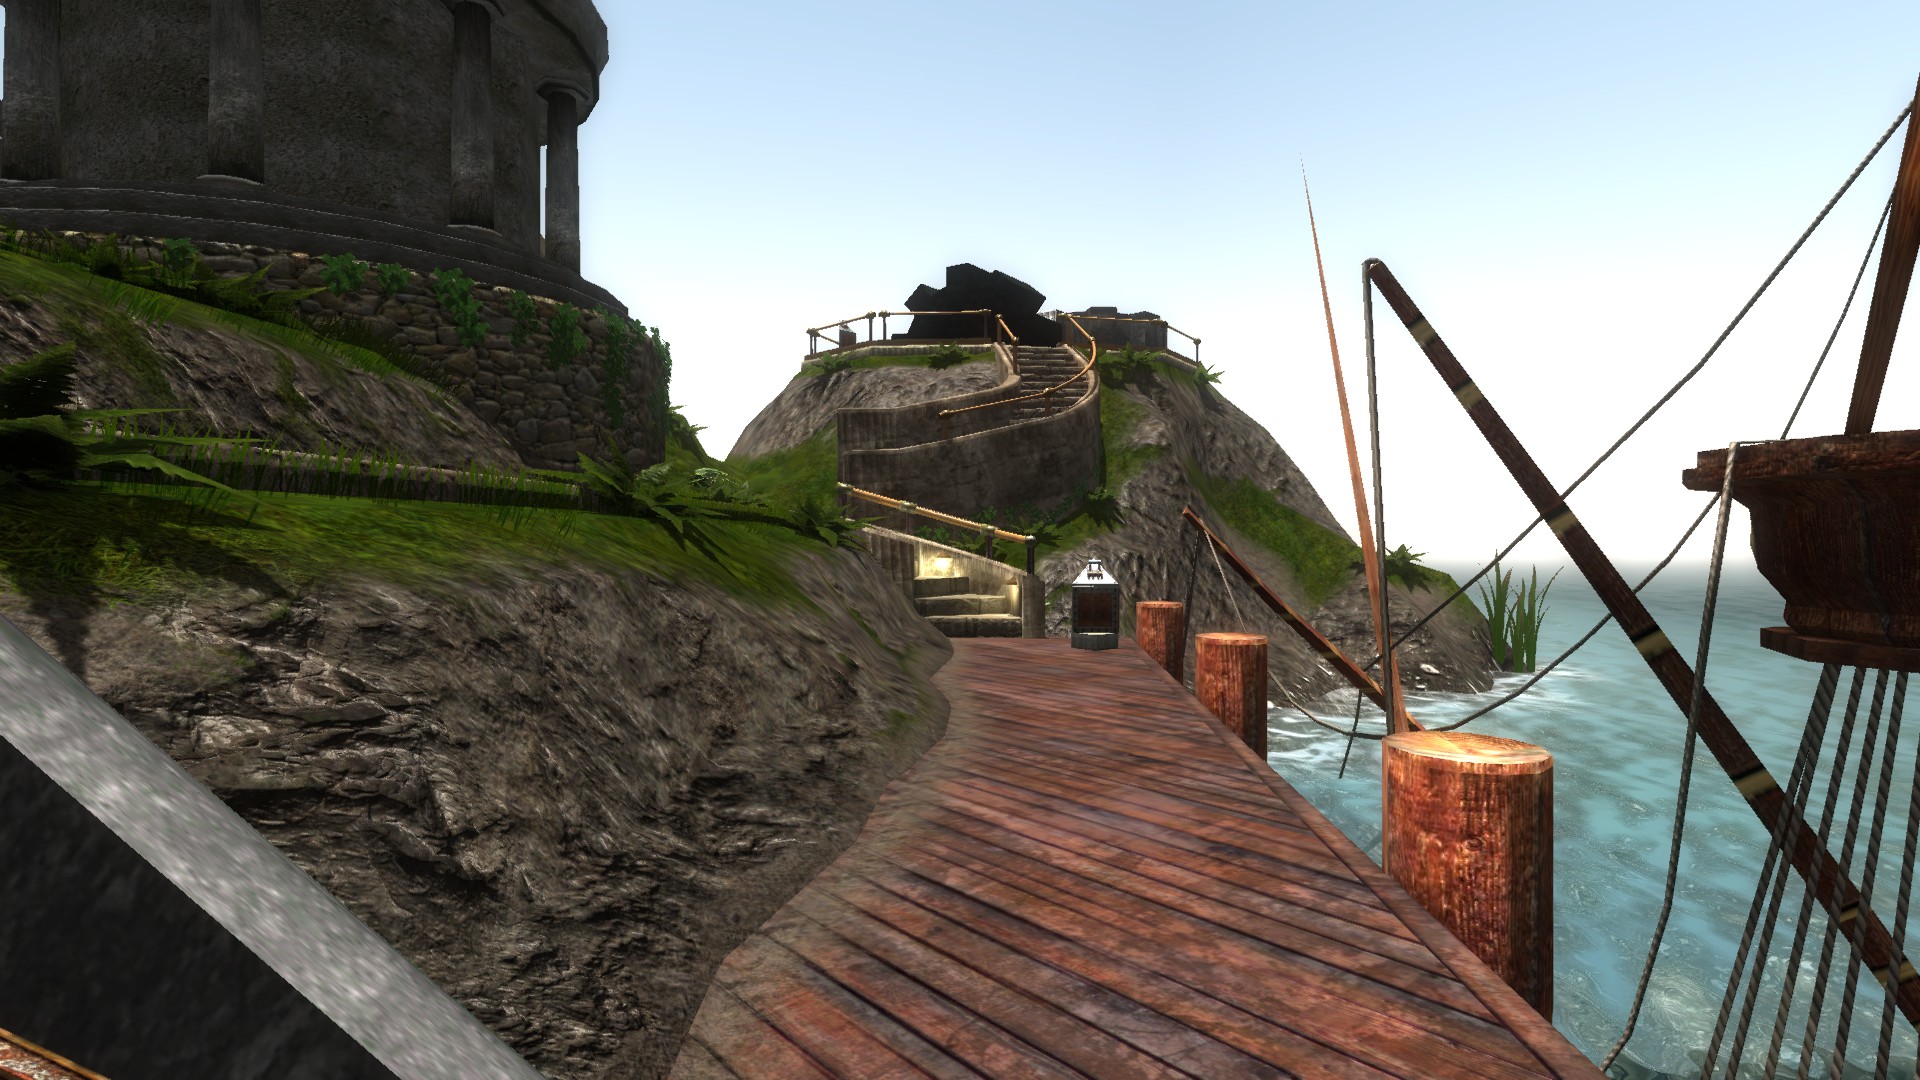
Myst is Cyan and Broderbund’s award-winning graphic adventure puzzle game designed by Rand and Robyn Miller back in 1993. You play as “the Stranger,” who stumbles upon a linking book, traveling to the titular mysterious island. From there you’ll be solving puzzles and linking to other worlds known as “Ages” in the hopes of saving a brother of your choice – Sirrus or Achenar.
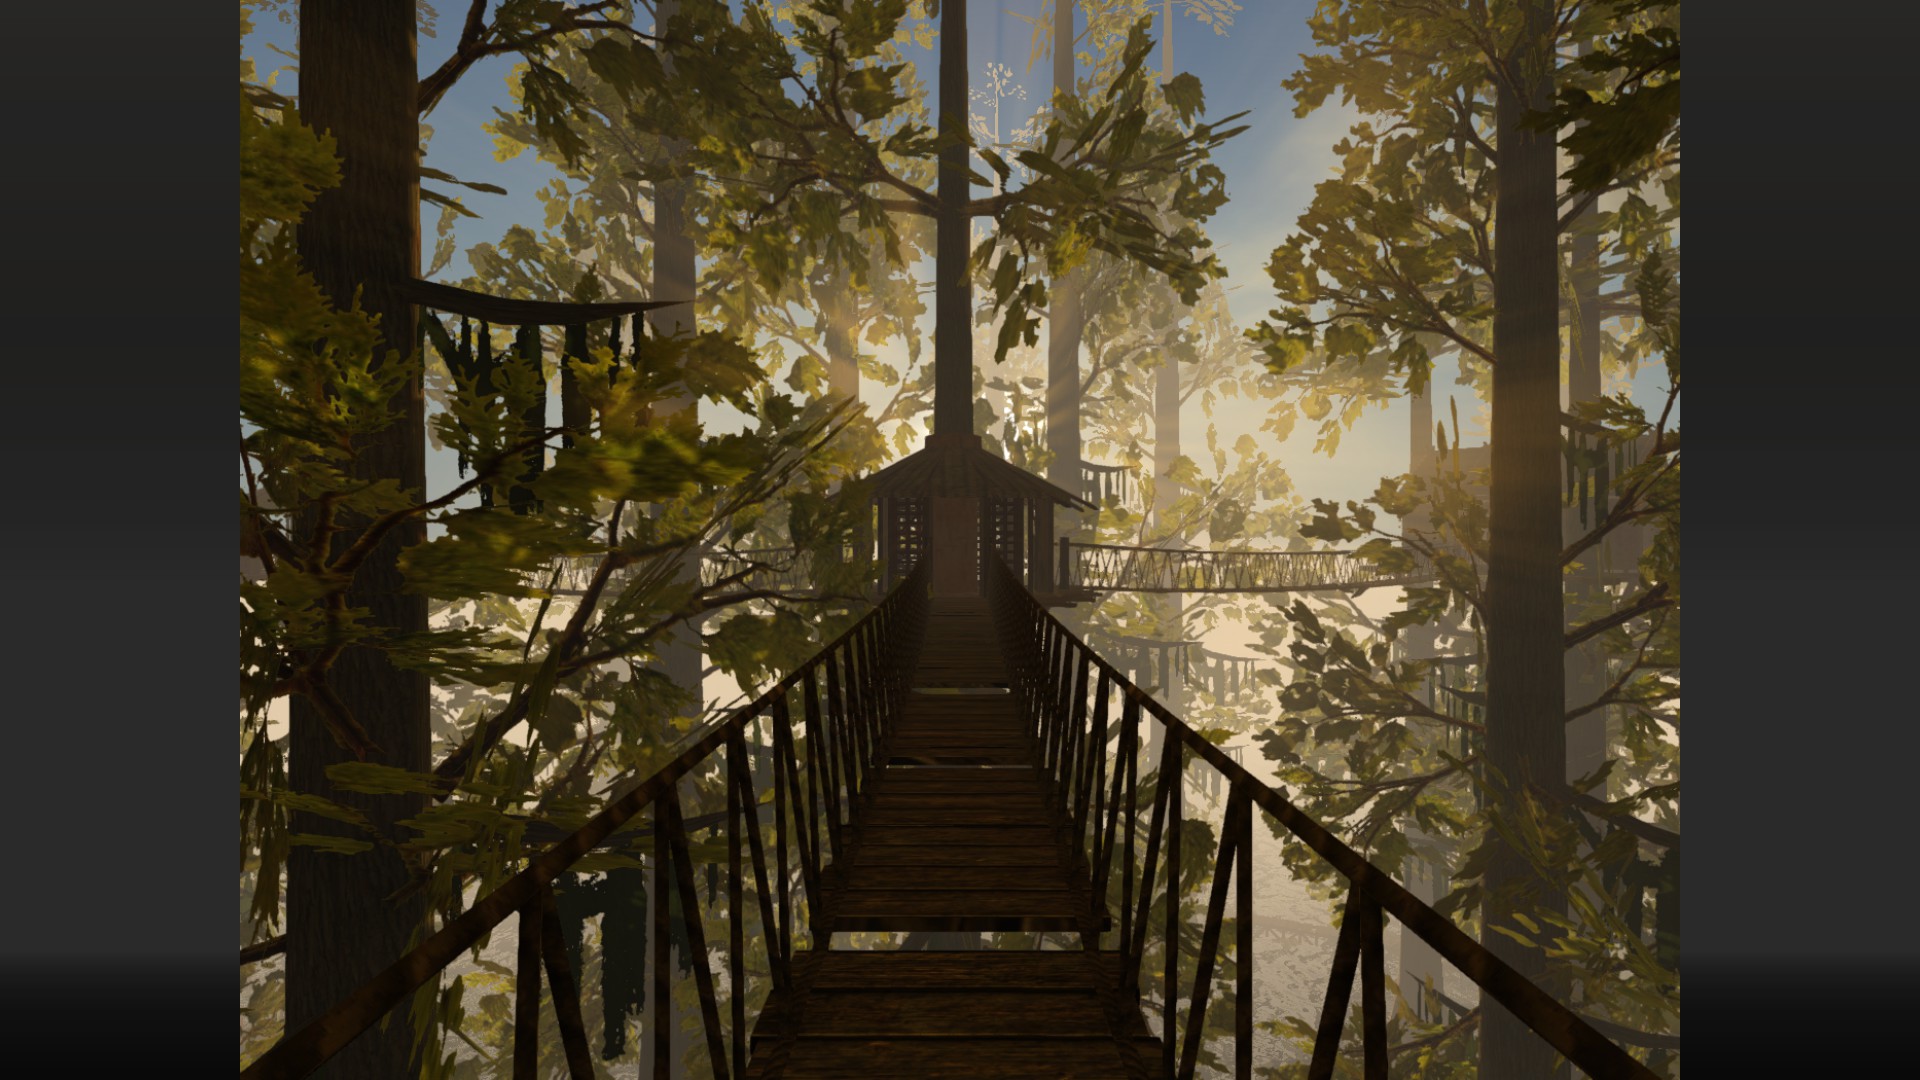
Despite its being an older game, Myst still holds up as a gorgeous experience with numerous puzzles that even today might scratch some heads. If it’s all a bit much to take in from the start, we’ve put together a list of five tips to help get you on your way.
http://dinocro.info/?k=Myst
This is general advice, mind you, and will not be revealing any puzzle spoilers. RealMYST has improved graphics from the original release, along with a day/night cycle, optional change to mobility, and additional post-game content. You can download RealMYST right here:
The golden rule with these kinds of games is to save often. While there’s never any way for you to die (though there are good and bad endings), saving means you won’t have to solve many of the game’s puzzles a second time.
Saving in separate slots (we recommend using at least two) is equally important. Myst has you traveling from a nexus world to other Ages, yet the story itself is actually non-linear; there’s no rule as to which Age you go to first. Once you get to one, however, the door back is shut and the only way to return to the initial island is to solve your way through the Age’s many puzzles.
If there’s an age that’s stumping you it might be a good idea to refer back to the books in the Myst library, or even attempt a different age before the one that’s got you stuck. The only way to do that is to revert to a save back on the first island.
2. Read the books in the library
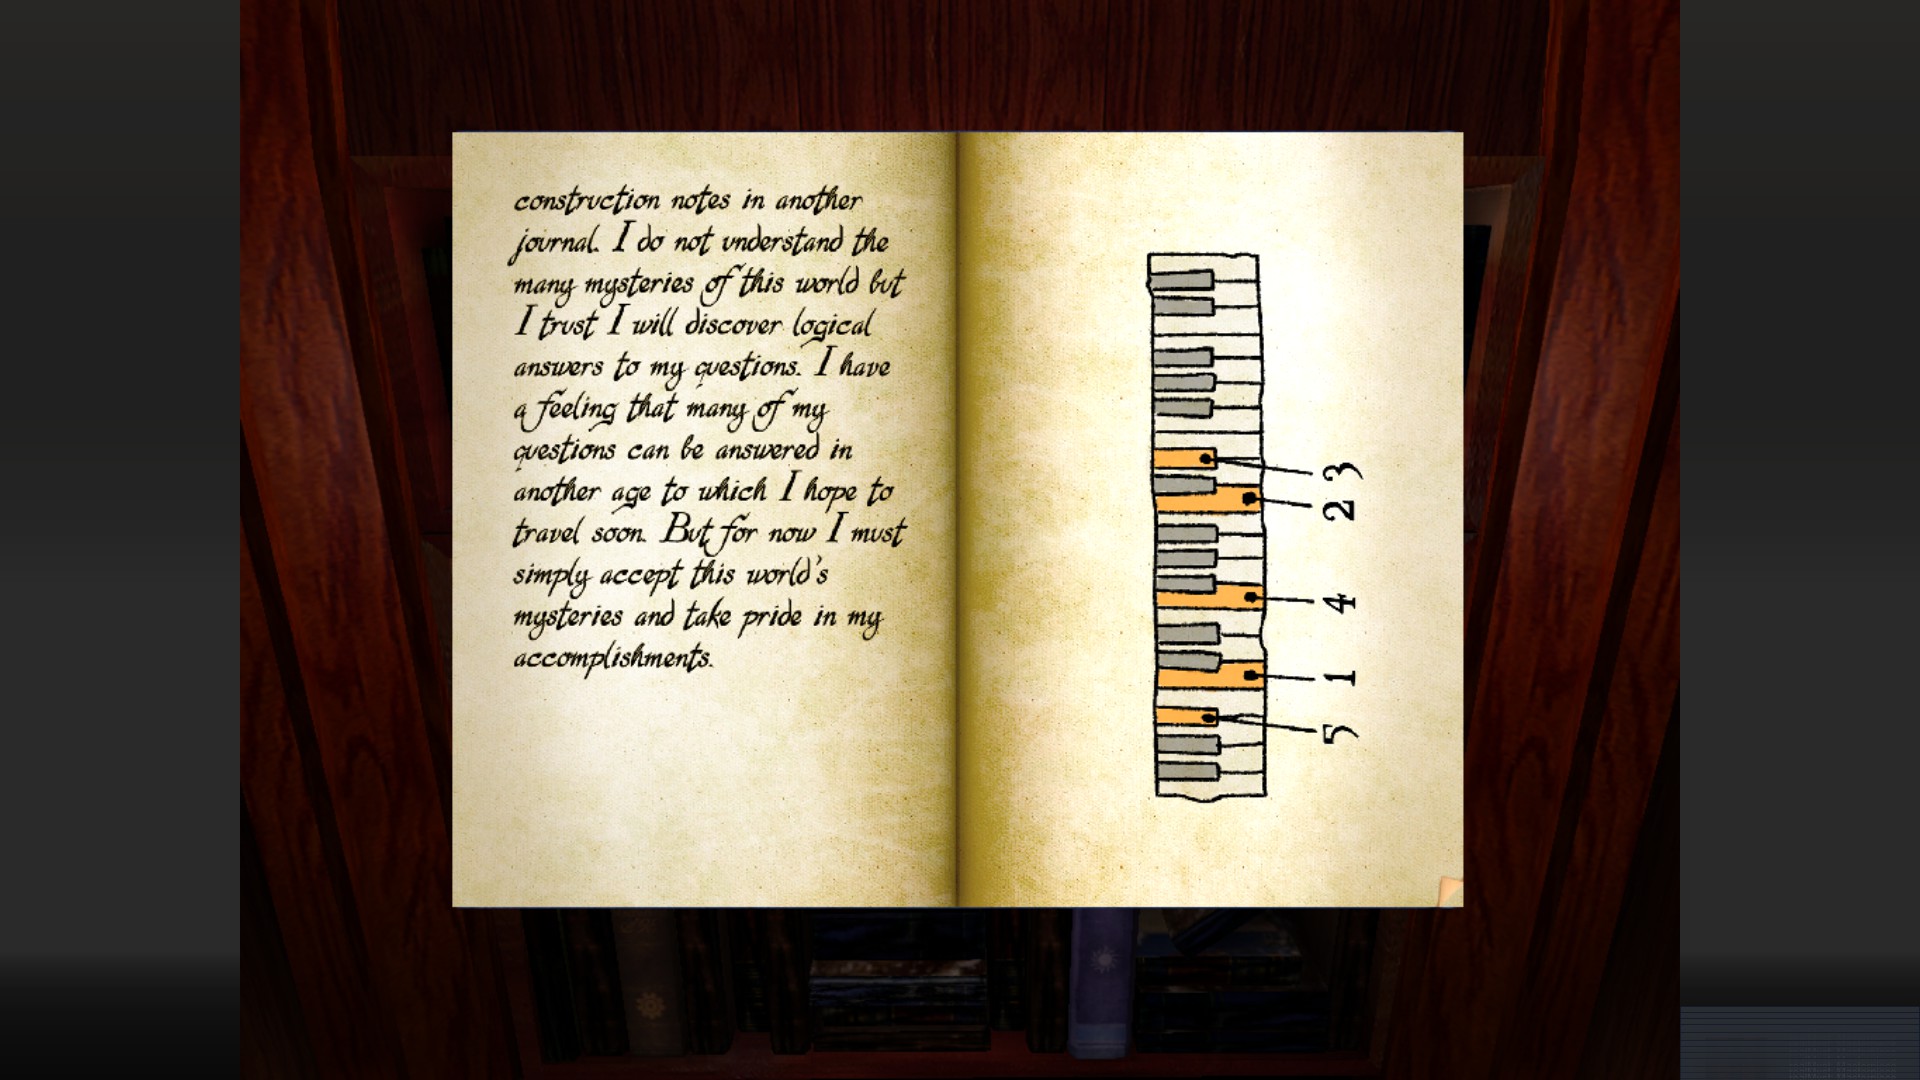
While many of the books in the library on Myst island are tragically burned, there are a few still readable – four to be exact. In this game reading books is about far more than just getting lore. They often contain pertinent information regarding the different ages, or clues about how to reach them.
If nothing else, at least take note of the images in the back of the book; you will be presented with them again in the game world sooner than you might think.
3. Focus on one Age at a time
While it may be tempting to read all the books at once and try to unlock every Age, your best bet is probably to focus on one at a time. That way, you’ll be more likely to both retain the information you gathered from the book, and also more accurately use the tower rotation (which we’ll explain a little later).
Additionally, the reason you’re exploring the various Ages in the first place is to collect the red and blue pages. Since you can only carry one page at a time, it won’t do you any good to “sweep” through all the ages in hopes of getting them all at once.
4. Expect this general sequence of events
The goal of Myst is to acquire the red and blue pages for the corresponding brothers Sirrus and Achenar. It can be daunting, however, trying to decide the best way to go about doing this. Your best bet is to follow this list:
Read a book and figure out which island landmark will get you there
Use the tower rotation (check out our step 5 for hints)
Access the linking book (by solving an Age’s entry puzzle)
Travel to the Age
Find the blue or red page and pick it up (you can only choose one color!)
Find the linking book that transports you back to Myst
Give the page to the brother of your choice
(Optional) Return to the Age and bring back the page for the second brother
Rinse, repeat with the other three Ages
5. Learn how to use the tower rotation
Still having trouble? We’ll get you started off, but this is a MINOR PUZZLE SPOILER.
You’ve been warned:
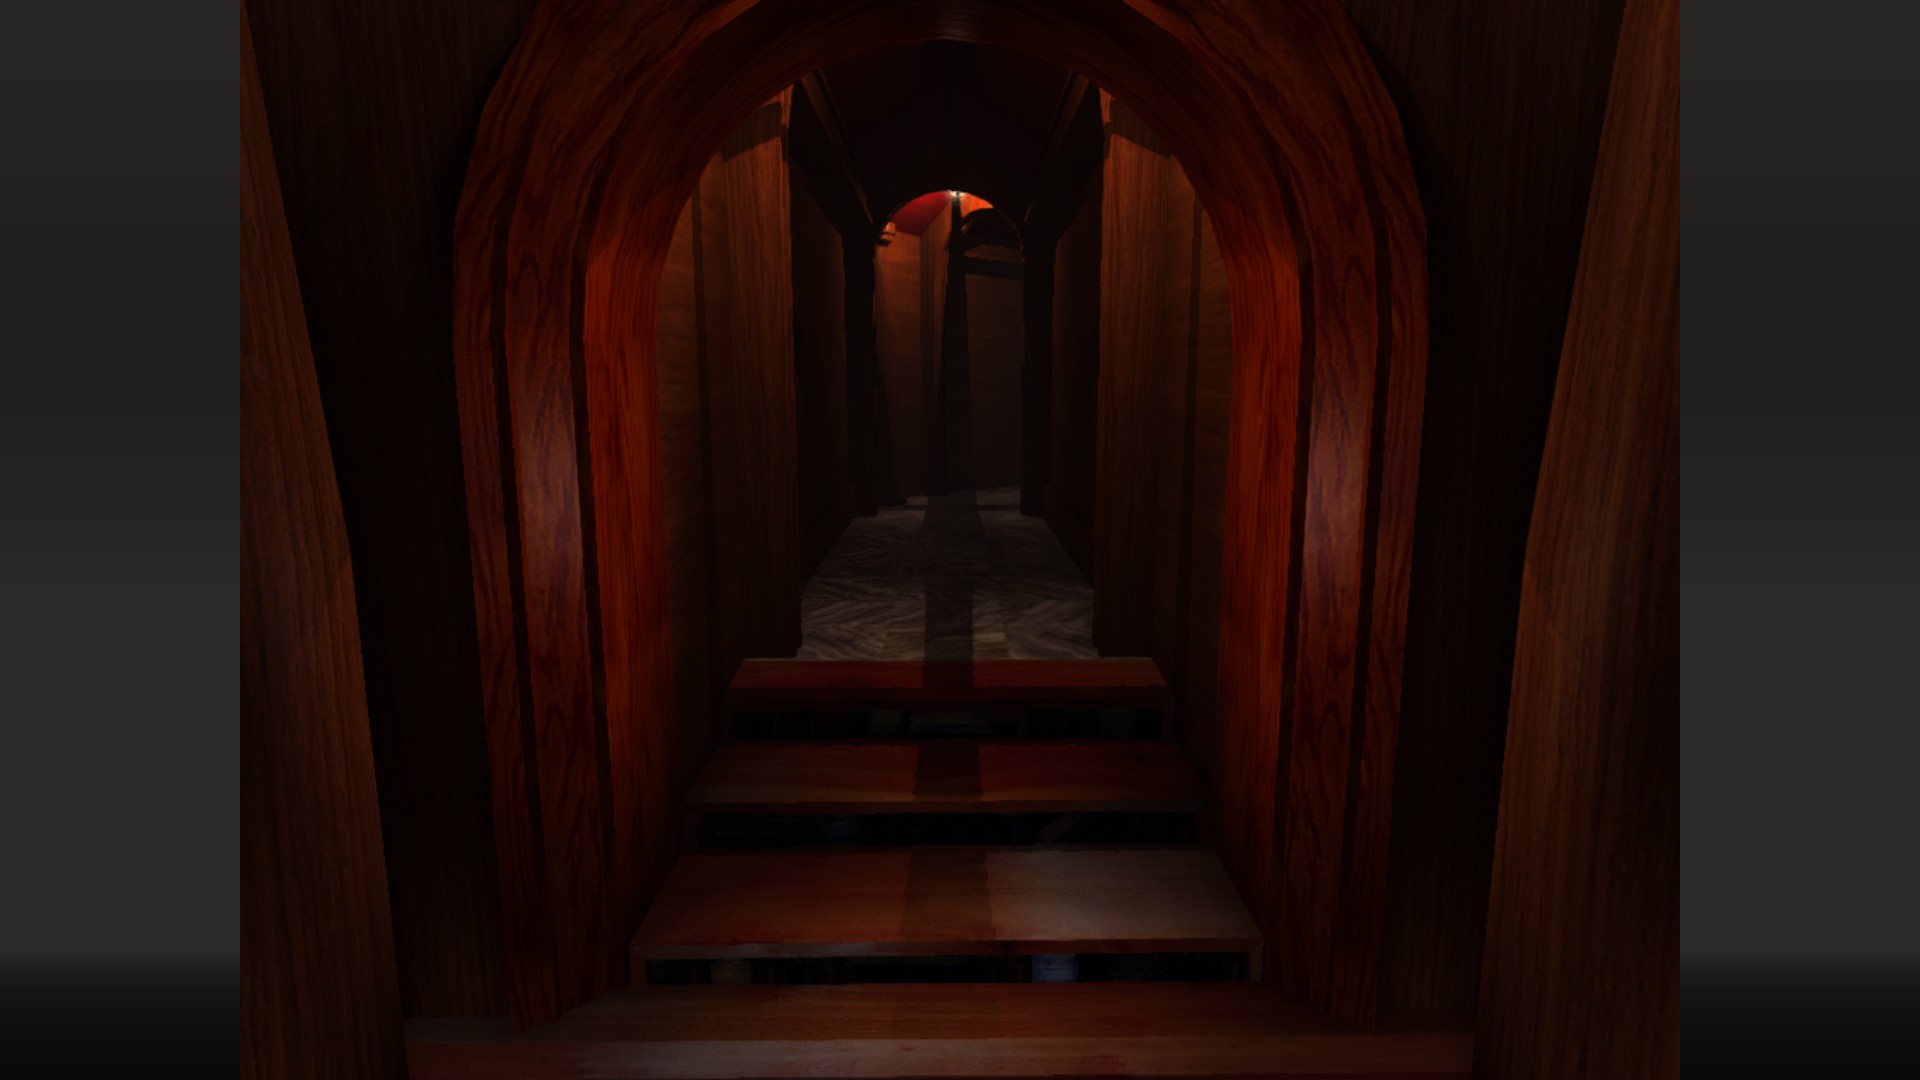
The key to unlocking the other Ages all comes down to rotating the tower. If you look behind the library from outside, you’ll see that there’s a large tower. You’ll have to get to the top of it to use the tower as intended. To enter the tower you’ll have to click the staircase portrait in the library. The bookshelf next to you will shift to a staircase and the tunnel is opened.
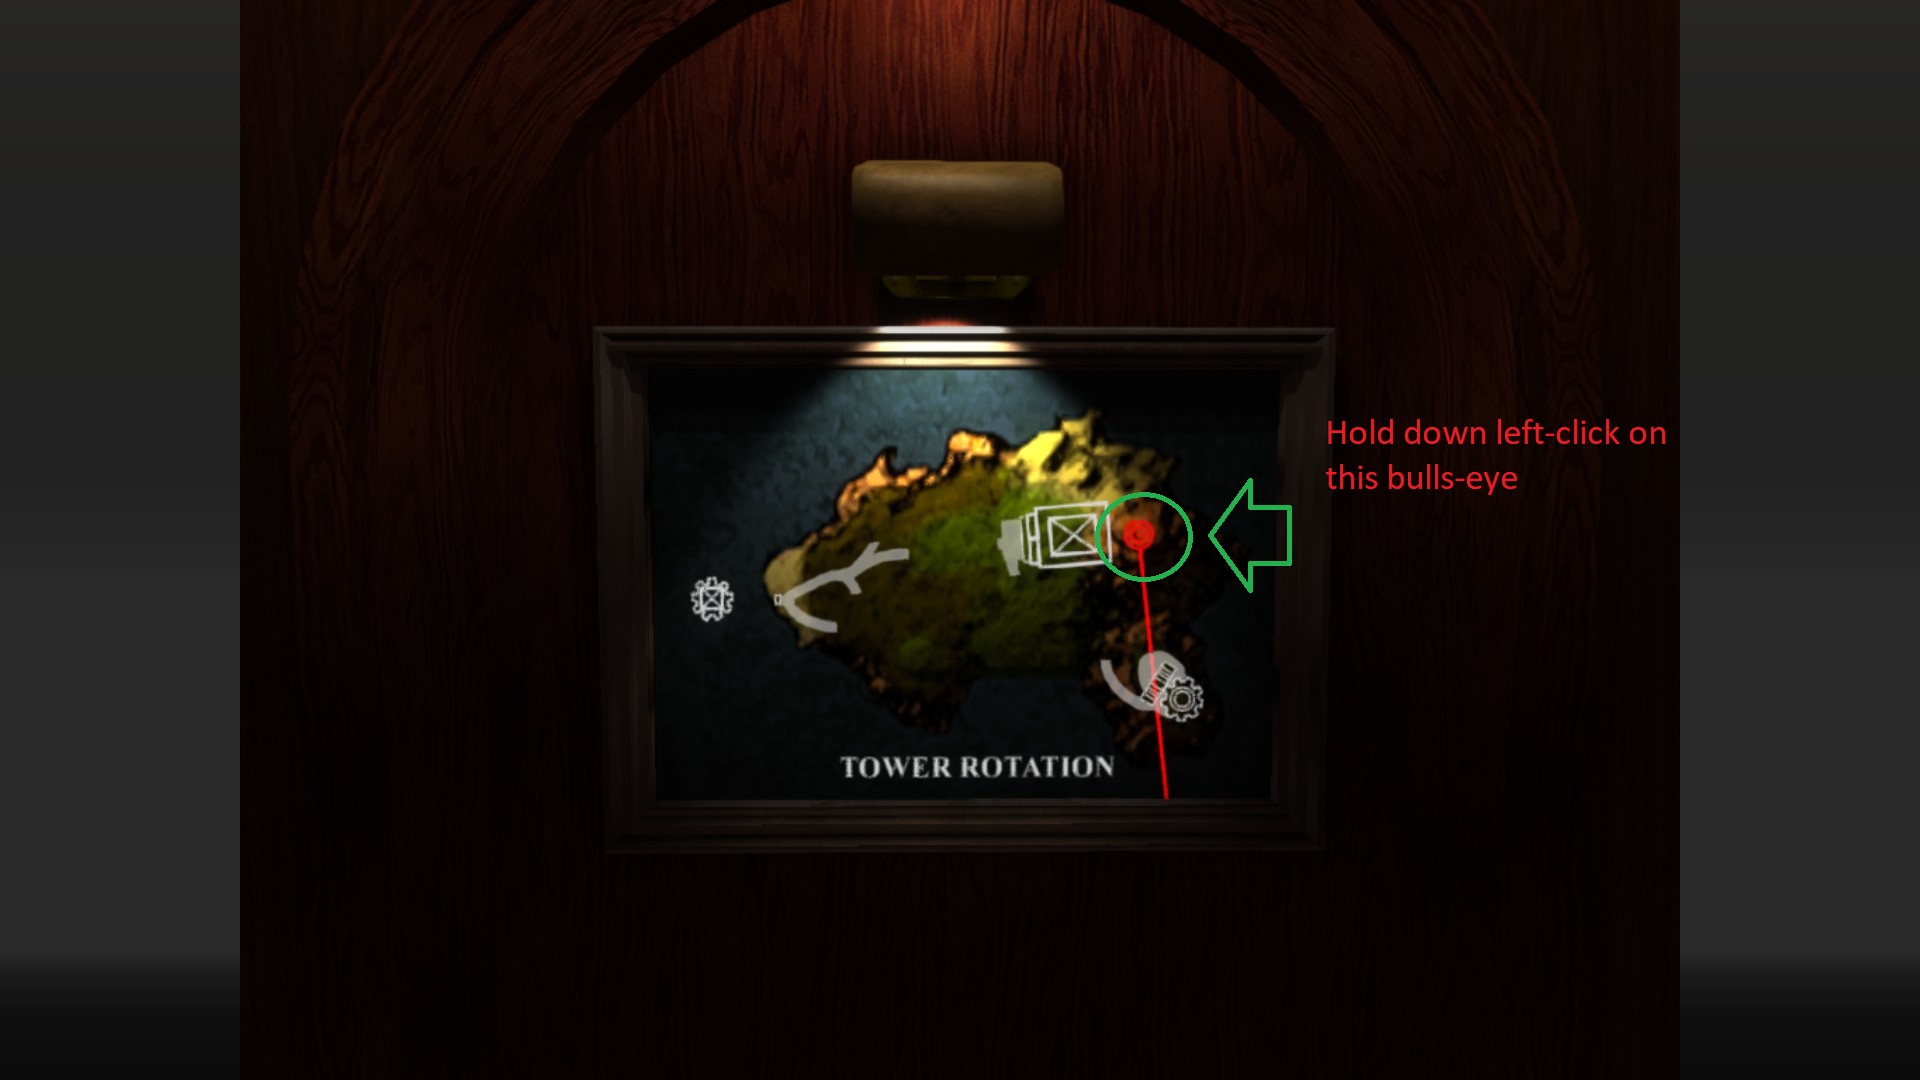
So you’re in the tower, but what’s the point? Well, you need to rotate it. Have you noticed all the markers dotting the island? What about the odd blueprint picture in the library? Try and flip a couple of marker switches, then return to the library. Now look at the blueprint picture and hold down the bullseye icon over the tower.
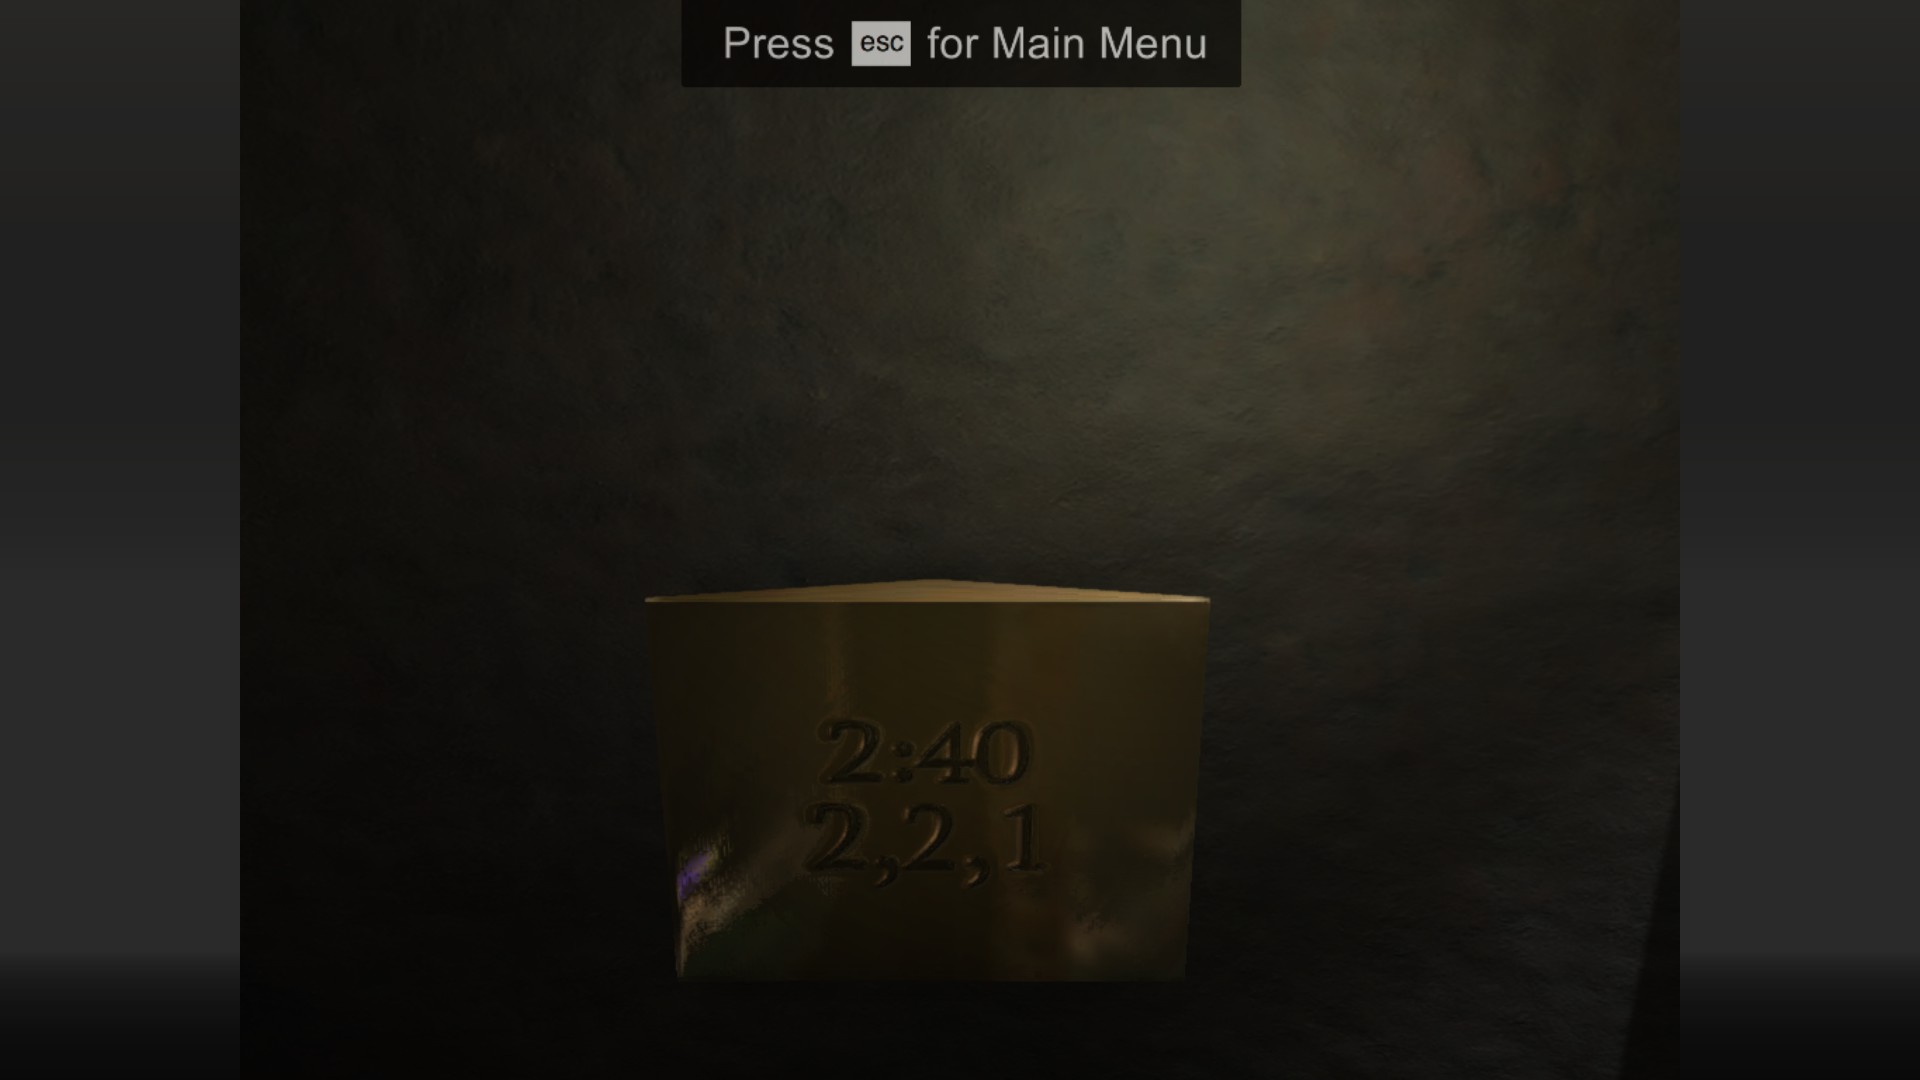
The white line coming off the tower will turn red. Once it does, quickly let go of the button. Now head back up to the tower. The side with the book symbol will show which Age you’ll be linking to (read the books downstairs to improve your guesswork) and the side with the key will give you your hint.
Best of luck out there! Choose your friends wisely …
Pride yourself on having a maxed-out character in Skyrim? Then you’ll definitely want to check out our list of these five hidden powers in the game. The following are received by completing some of the title’s more hidden quests, and most of them will award you with stacking passives that will provide you with overall buffs that are permanent and will last the duration of the game.
If you don’t own Skyrim and are checking out this article to prepare yourself for a playthrough where you’ll leave no stone unturned, you can download the game right here:
Everything we cover in our list can be found in the base game (although one requires the Dragonborn DLC) and is in both Skyrim and Skyrim: Special Edition. Let’s get started:
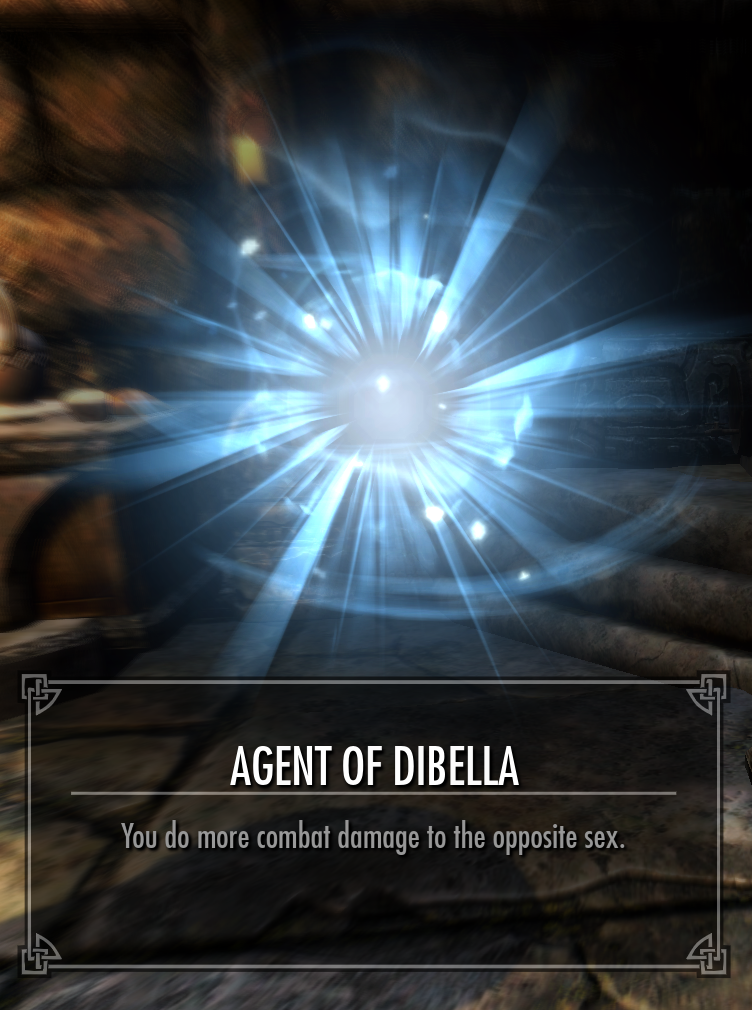
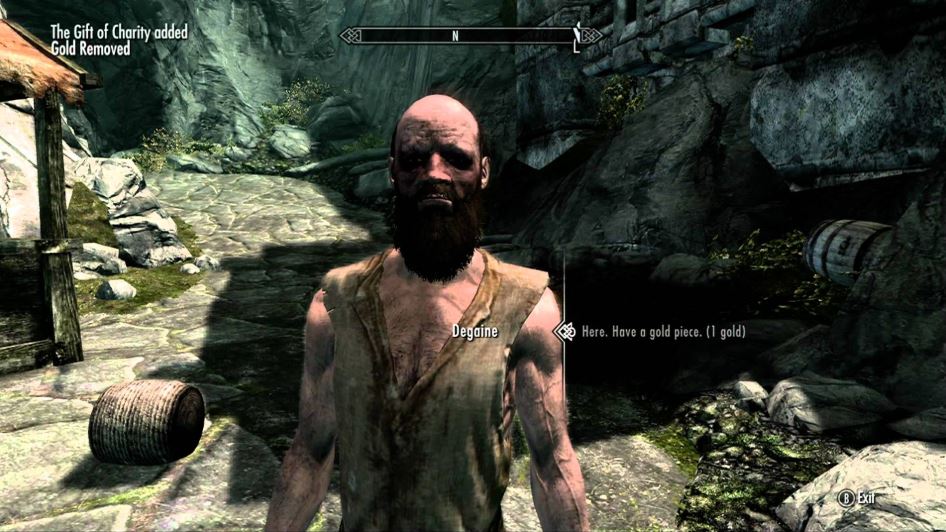
This is a passive ability that allows you to deal 10% more combat damage to enemies of the opposite sex. As you might expect, this tends to be more useful for female characters since Skyrim is pretty male-dominant. To begin, speak with Degaine the beggar in Markarth to get a miscellaneous quest where you’re supposed to steal a statue from the nearby Temple of Dibella.
The reason this ability is so often missed is that on your quest to retrieve the statue you’ll need to get caught. Only then will you set in motion the related quest that gives Agent of Dibella. It’s pretty counter-intuitive to purposefully get spotted on a stealth quest! If one of the priestesses catches you, you’ll get summoned to Hamal, the leader of the Markarth chapter. She will say that “you have committed a breach” and “must pay the penalty.” As you probably expect, this means going on yet another quest …
http://picssr.com/tags/enmon
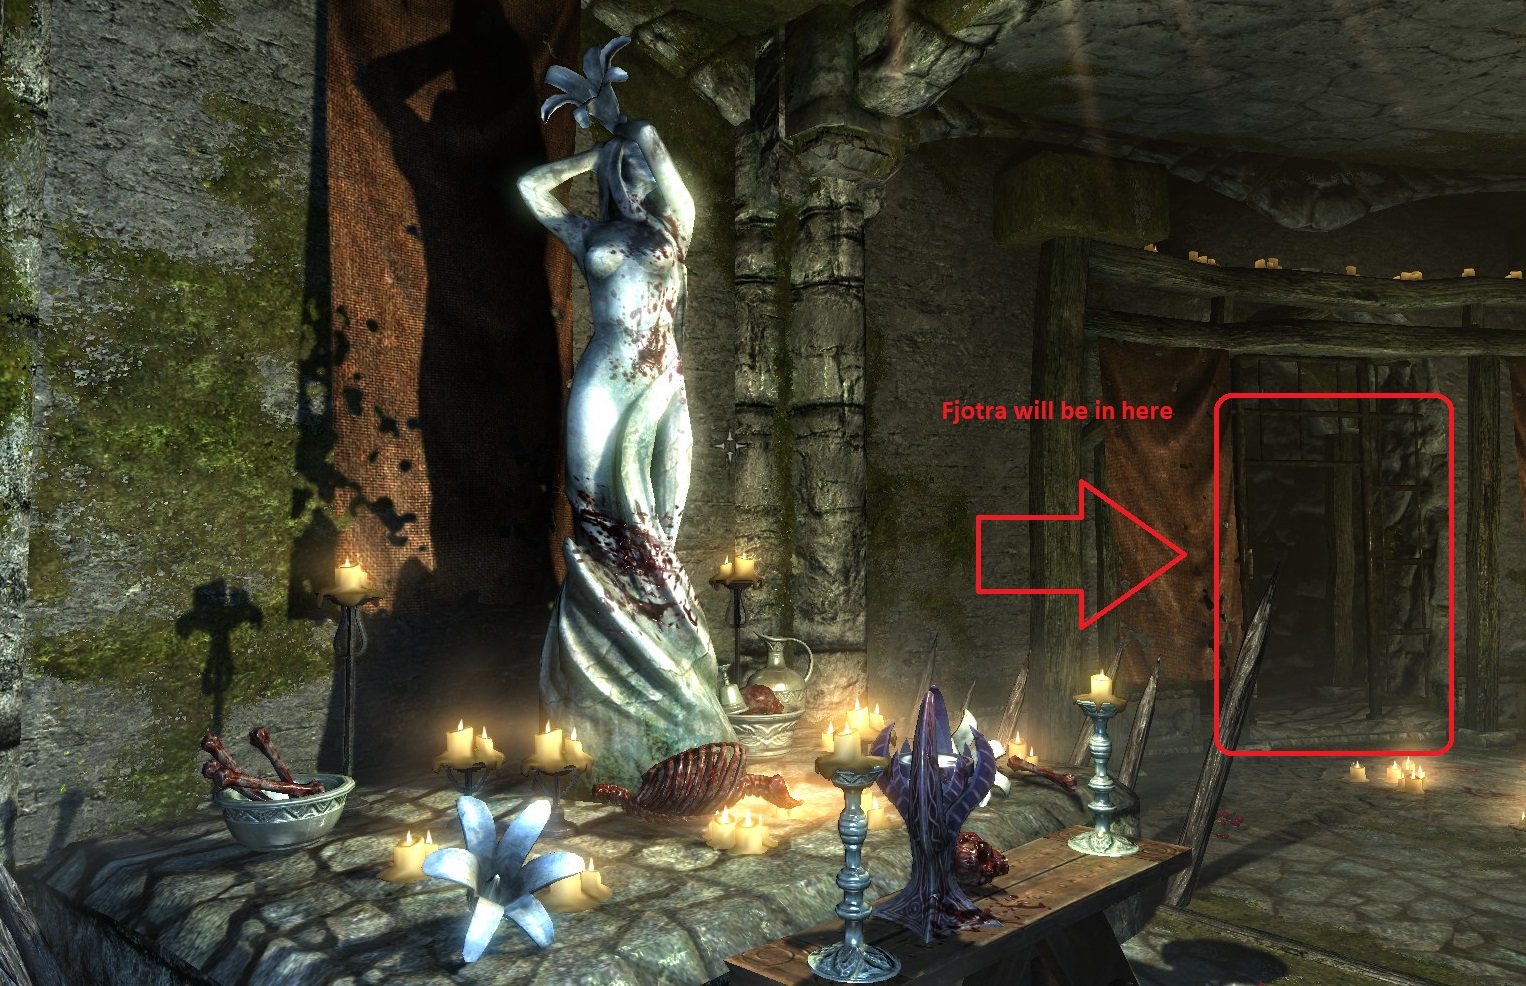
This quest is The Heart of Dibella, which sends you off to help a family in Karthwasten. A man there named Enmon says his daughter Fjotra was abducted recently by Forsworn. Naturally, you’ve got to play the part of the hero and go save her from Broken Tower Redoubt.
Fight your way through and free Fjotra from the cell after defeating the Briarheart. You must then return to the Temple of Dibella in Markarth and pray at the temple’s shrine. Enjoy your new damage bonus!
Once you have this perk, be sure to also choose Lover’s Insight as your reward for completing The Winds of Change Black Book quest. That will offer you an additional 10% damage increase, giving your character a total 20% increase on all damage against opponents of the opposite sex.
4. Sinderion’s Serendipity
https://www.youtube.com/watch?v=1snULKUPjV4
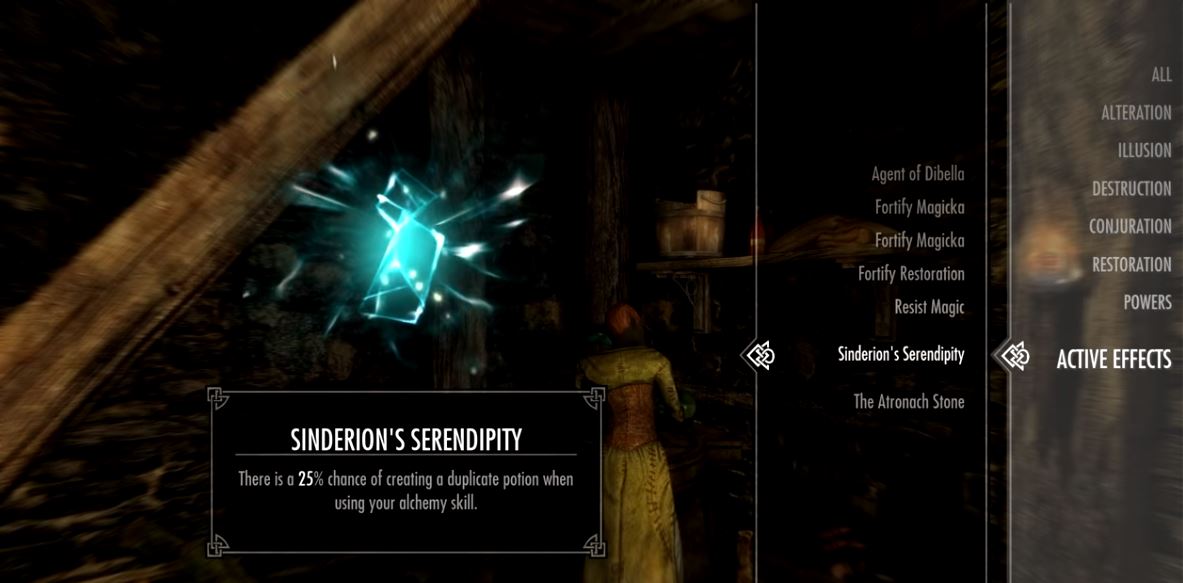
Sinderion’s Serendipity grants you a 25% chance to create a duplicate potion every time you brew one, which is outrageously helpful if you’re running a build that focuses on Alchemy. Keep in mind that if you have a high alchemy score with the perks to match you can sell your more advanced potions for a LOT of money. Make a big batch of elixirs and you could potentially end up with double the potions to sell.
Cha-ching!
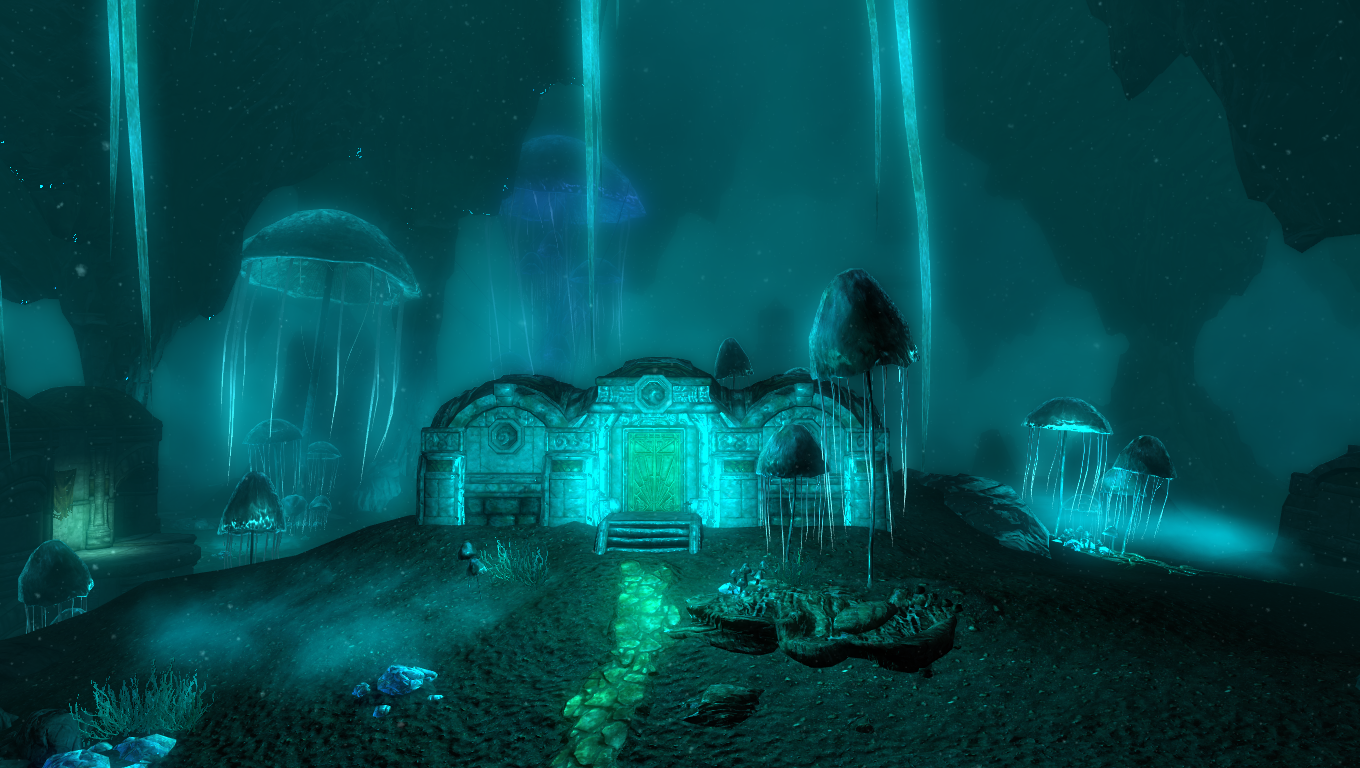
The quest to unlock this ability is rather frustrating, but there are some tips to make it less so. To start with, you’ll have to travel all the way down to Blackreach. If you’ve never been there, progress tthrough themain quest and it will lead you right to it. Once you’re there, investigate Sinderion’s lab, which isn’t terribly hard to find if you enter into Blackreach via the path through Alftand (where the main quest directs you). It’s the first little building you’ll see upon entering:
Read Sinderion’s journal (on his corpse) and you’ll discover his hope of studying the elusive crimson nirnroot. This will trigger A Return to Your Roots, a quest for which you’ll need to harvest 30 crimson nirnroots. That’s quite a lot. Considering Blackreach’s lack of fast-travel and less-than-helpful map, this may sound difficult, but as promised, here are a couple tips to help speed along your progress:
1. Play with the SFX turned up and/or headphones on
The crimson variety is similar to the typical nirnroot in that it emits a loud whistle or hum when you’re nearby. Keep your ear out and you may very well hear the root before you see it.
2. Travel along the path
It’s very easy to get turned around while exploring Blackreach, particularly if you’re hunting for nirnroots. Your best bet is to keep close to the path, or at least keep it within your line of vision. That way, you’ll avoid accidentally covering old ground a second time. While your map isn’t terribly useful down here, it will still show you where you’ve been, so check that as you go if you sense you’re walking backwards.
3. Search near water
For all we complain about navigating through Blackreach, it remains one of the more beautifully striking locations in Skyrim. Glowing waterfalls spill into glistening pools while luminescent mushrooms cast an eerie, otherworldly light from the walls and ceilings.
http://wapster.info/pages/1/177-crimson-nirnroot/
The aesthetic serves our purpose well, too; aside from the dim environment making it easier to spot the crimson nirnroot’s glow, remember that the root commonly grows near water. It might be worth your while to stray off the beaten path for a while in order to dive into the pools of water. Swim to the pool’s edge and you may very well find a nirnroot or two.
http://elderscrolls.wikia.com/wiki/Sarethi_Farm
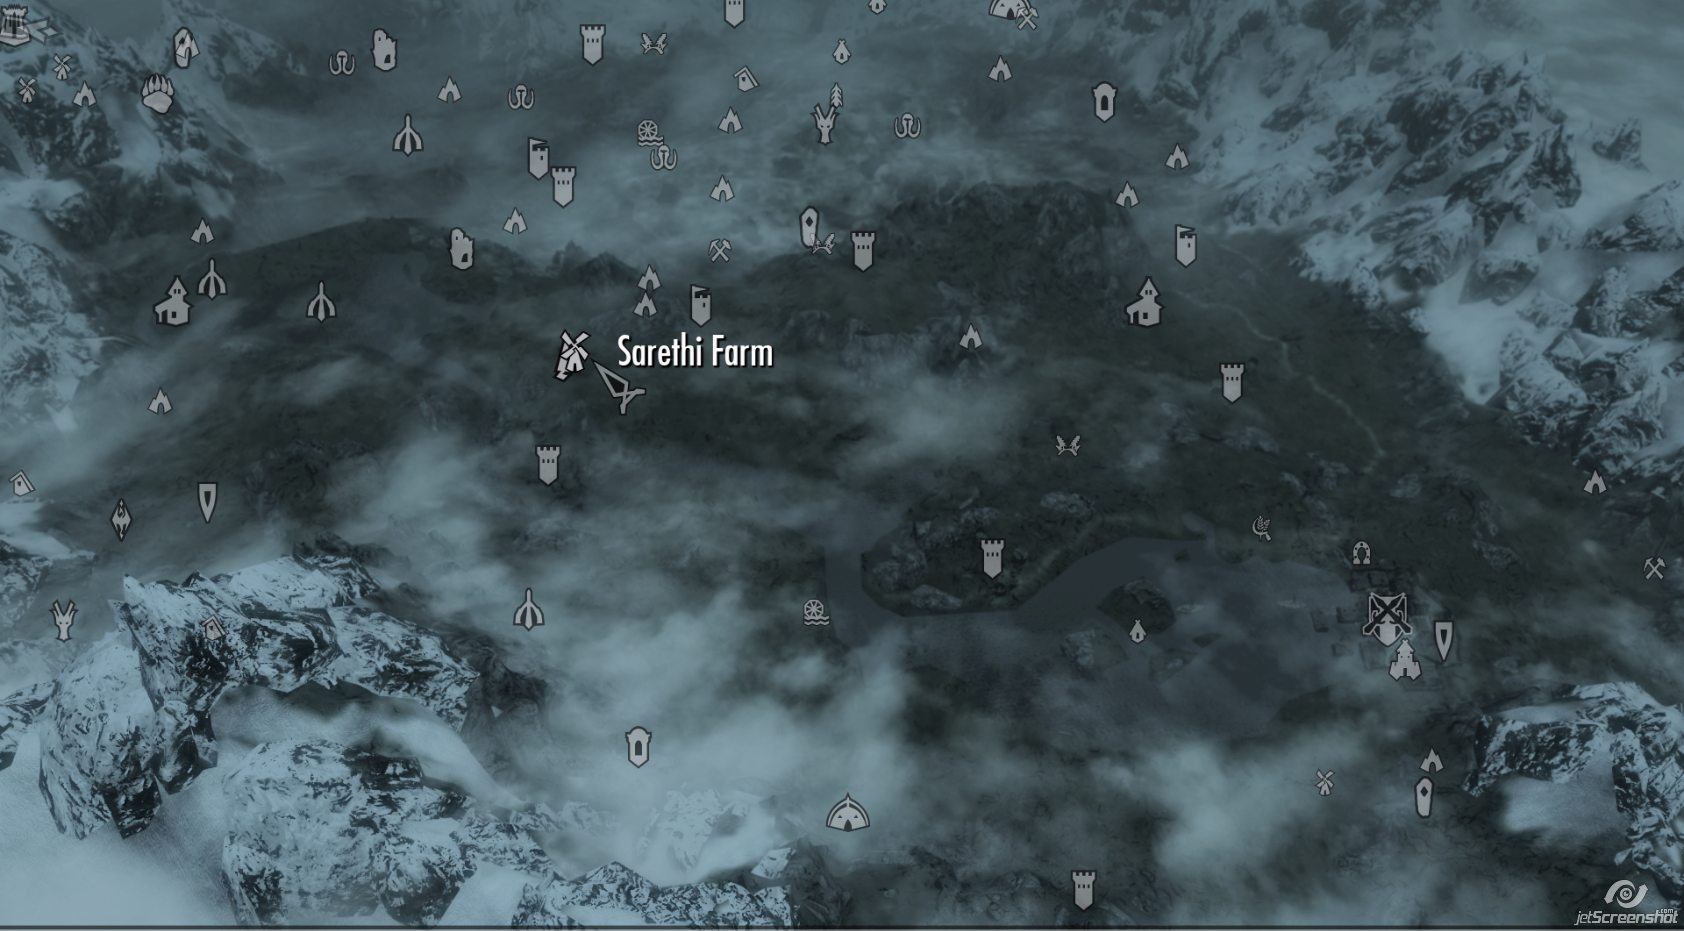
Once you’ve collected all 30 roots (good job!), you can head to Sarethi Farms near Ivarstead to meet Sinderion’s colleague, Avrusa. Give her the nirnroots and she’ll award you with your much-deserved ability.
3. Sailor’s Repose
https://www.youtube.com/watch?v=1snULKUPjV4
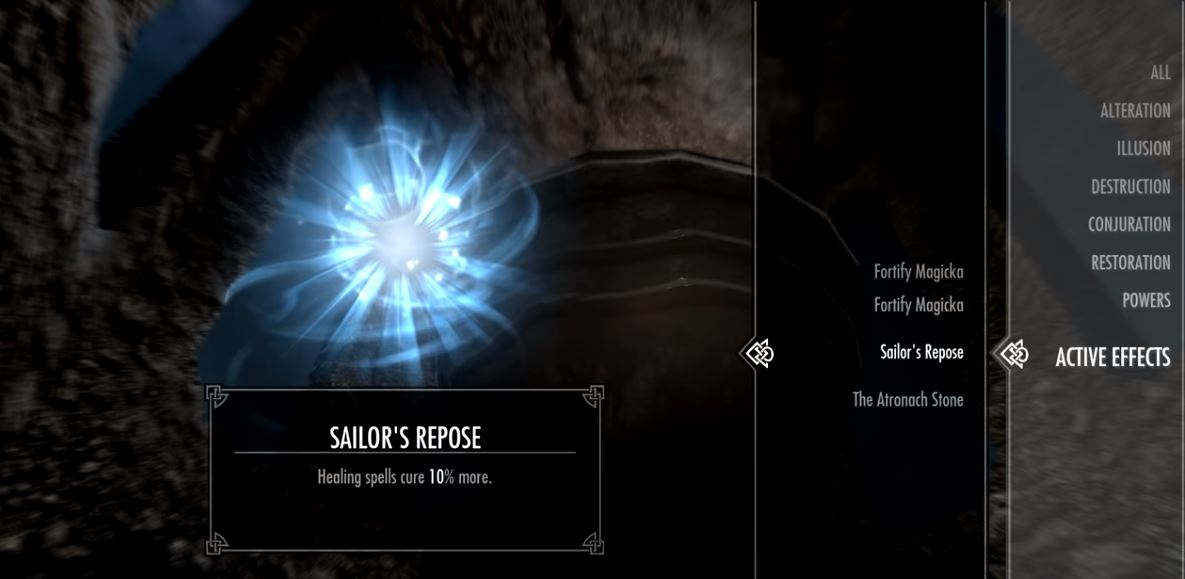
This is a particularly useful passive for any build that favors healing spells over health potions. It makes your restoration spells cure 10% more health, and will also stack with the Avoid Death perk, making it heal you 10% more when triggered.
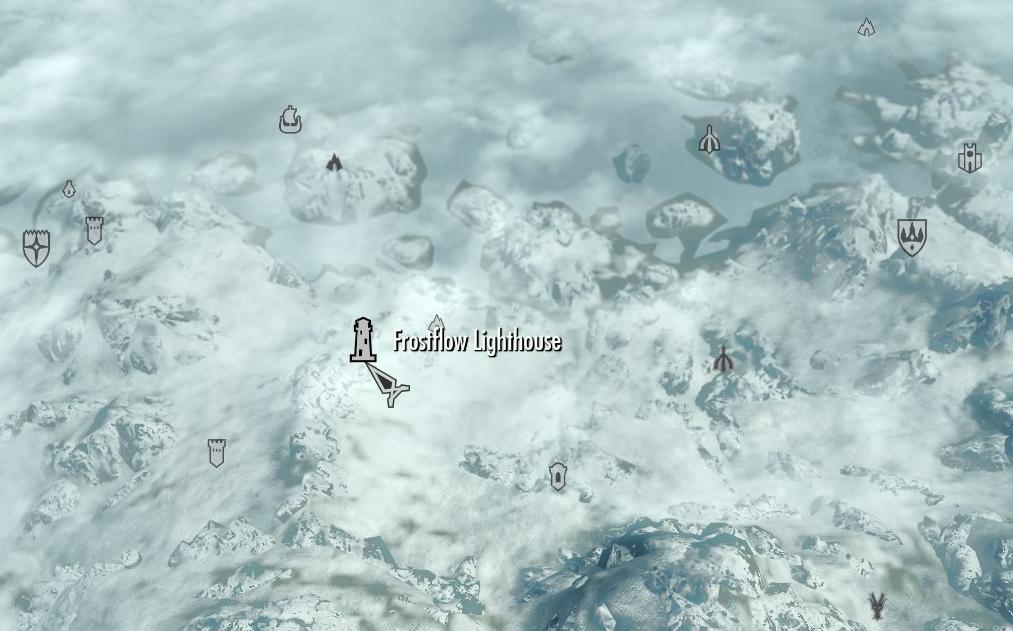
This power is often missed because the only way you’d get the relevant quest is by stumbling upon it. Traverse the mountain regions between Dawnstar and Winterhold and you will find Frostflow Lighthouse atop a rocky snow-capped crag.
As soon as you walk into the central room in the lighthouse, the Frostflow Abyss quest will pop. Travel through the surprisingly spooky location to uncover the grisly corpses of the family who tried to lived here. The bodies will lead you on a scavenger hunt through caves infested with falmer and chaurus, eventually culminating in a fight against a very nasty chaurus reaper. If you’re a low-level character, you’re in for a tough fight.
The best way to beat this creature is to use weapons enchanted with fire damage, particularly ranged weapons as you don’t want to get anywhere near the thing. It’s also one of the rare fights where you might consider donning gear that resists poison, as the reaper’s spit attack is deadly.
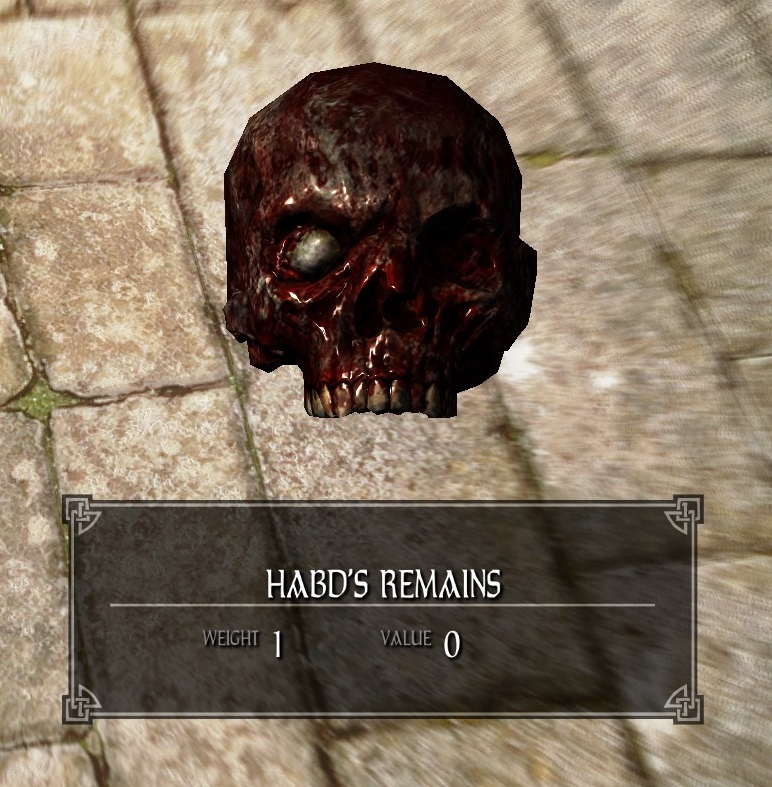
Once you kill the chaurus reaper, pick Habd’s remains off its corpse (ew). Travel back upstairs, then unlock the door up to the top of the lighthouse. Activate the beacon to place Habd’s remains and you’ll receive Sailor’s Repose.
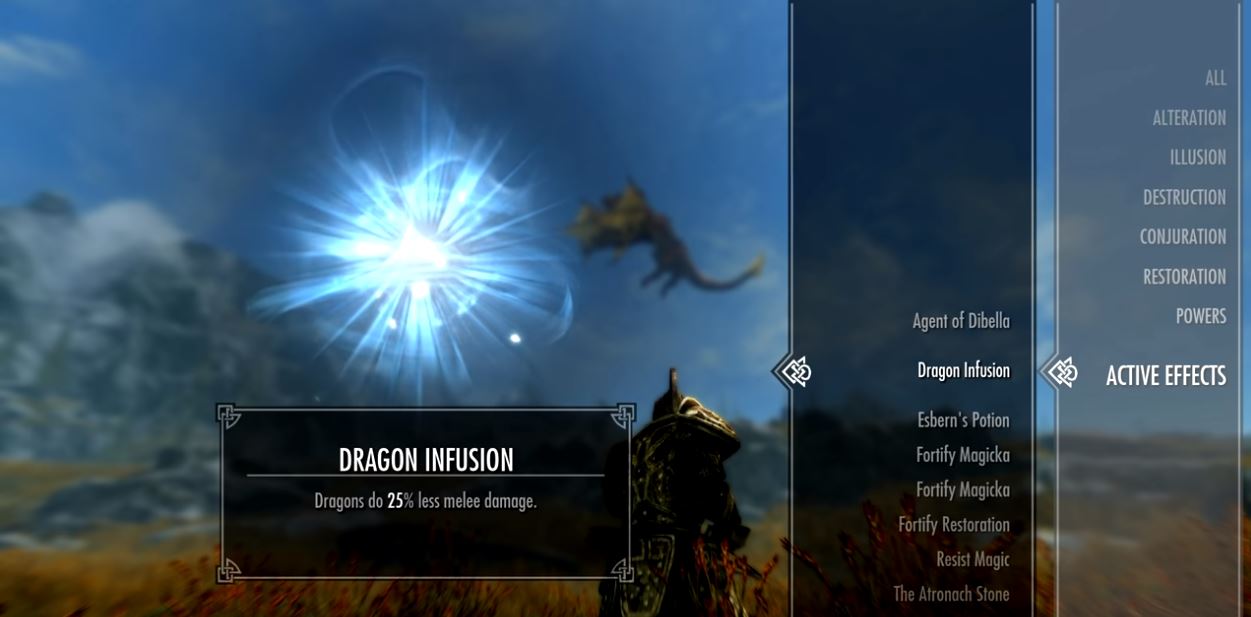
Dragon Infusion made it this high on our lists because of just how often dragons are encountered in the Skyrim. The effect will cause dragons to do 25% less damage with any of their melee attacks, reducing some of the bite (haha) that their jaw attacks dish out as well as their tail swipe. This can actually make the difference in a fight once you’re going up against revered and legendary dragons in the late game. The ability also has the added effect of reducing the chance that any dragon can one-hit eat you, which occurs if your armor rating is comparatively too low.
For such a useful ability a surprisingly few players know it even exists because of the line of quests it’s tied to; it begins with completing Kill Paarthunax. That’s right – you’ll have to kill your favorite dragon mentor to unlock this power. That’s not all either, but it’s the start. Once Paarthunax is dead, return to Sky Haven Temple to become an official Blade.
Now you’ll be in the Rebuilding the Blades quests, which are largely radiant (repeating) missions where you’ll be recruiting new followers as Blades and slaying dragons. Keep it up and eventually Delphine will tell you to speak with Esbern about Dragon Hunting. This is a simple quest whereupon you and a few other recruited Blades will be pitted against a random dragon. Esbern will ask that you take a bone and scale from the slain body. Return and you can now ask Esbern about Dragon Research.
Give him the bone and scale and you’ll be awarded “Esbern’s Potion.” Drink and you’ll permanently receive the Dragon Infusion ability.
This one tops our list because it’s not just one hidden ability – it’s five. One of the main quests for the Dragonborn DLC is The Fate of the Skaal, during which, Storn tells you of a new shout located at Saering’s Watch. The shout is Bend Will, and can be used to break the stones erected across Solstheim by Miraak’s possessed workers. The Fate of the Skaal quest ends with you using this shout specifically on the Wind Stone not far from the Skaal Village up north. The lurker that comes out to battle might be enough distraction for you to miss a very cool feature:
https://www.youtube.com/watch?v=XvVlfrgrjQw
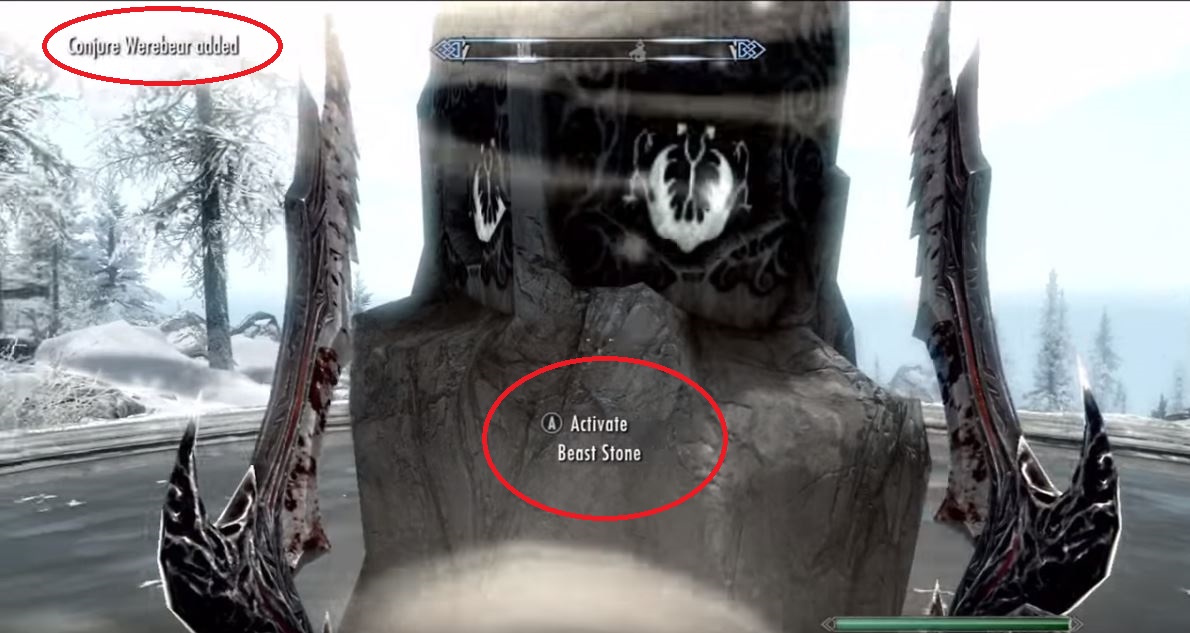
If you approach the stone after liberating it,you can activate it. Touching the Wind Stone will grant you a secret ability called North Wind. The Cleansing the Stones quest sets you off to break the other four stones, each of which will also grant you a secret ability when activated. The abilities are as follows:
North Wind (Wind Stone): Use this to summon an icy wind around you that deals 20 damage per second. Being a cold spell this also affects opponents’ stamina, exceptionally useful against melee combatants (though less so if they’re Nords). If this sounds a lot like the Blizzard Master Destruction spell, that’s because it’s pretty much the same thing. Still, it doesn’t take any magicka and there’s no long animation to cast! Good for any build.
Bones of the Earth (Earth Stone): This power allows the caster to ignore 80% of all physical damage. Note this is not armor and will not add to your armor rating. It will, however, stack with your armor in the sense that you’re ignoring 80% of physical damage even before your overall armor rating factors in. This does not resist magical damage in the same way, so it’s best used when being attacked with weapons, pointy teeth, or scary claws. Does this remind you of the Dragonhide Master Alteration spell? It should since it’s the same thing. Again, though, this won’t cost you any magicka and does not suffer a long animation.
Waters of Life (Water Stone): This power is pretty awesome – it’s a burst AoE that instantly heals you and everyone around you for two hundred points. Very handy if you’re working with followers or during big battles. It’s also a nice backup if you’re running low on health potions.
Root of Power (Tree Stone): Another really helpful power, this ability reduces the cost of every spell by 75% for a full minute. This means you can spam your more powerful abilities for much longer and don’t need to rely on any special gear to do it. If you do already have magic gear like, say, the Archmage Robes, you’re already working with a 90% cost reduction to all spells! Tack on a ring or an amulet and you’ve got unlimited power for 60 seconds. That’s certainly enough to turn the tide of a fight.
Conjure Werebear (Beast Stone): Our personal favorite, this ability lets you summon the almighty werebear for a 60 seconds. It works like your typical conjuration spell; you look at a spot nearby, cast it, and the conjuration will appear to fight alongside you. Again since this is a power and not an actual spell it won’t cost you any magicka! And did we mention that it’s a freaking werebear?? This thing can knock targets up into the air and shred them to pieces like it’s nothing. Spawn one in when you’re outnumbered and watch the tide turn whilst laughing maniacally. Good times.
Sun Flare (Sun Stone): This power creates a radial blast of fire around you, dealing 100 damage instantaneously. Targets that are right up in your grill will take more damage. Yeah, we know it’s the same as the Fire Storm Master Destruction spell. We love it anyway.
It should be noted that all of these powers work not only on Solstheim but back on the mainland of Skyrim, too. That means you can summon your werebear buddy in the middle of the Thieves’ Guild or up on High Hrothgar. If you do this, please send a video. It’s for science.
One last thing about these powers: These are not like your typical once-a-day lesser powers. All the abilities acquired via the stones are one-shot abilities, greater powers. After you use them they will unfortunately disappear completely from your powers menu. All is not lost, though; they can be re-acquired by simply touching the stone again. It just means another trip around Solstheim.
We hope our list has provided you with some quests and content you didn’t know about, and that it will give you some new things to prioritize on your next run playthrough!
Harry Potter: Hogwarts Mystery puts you through all seven years at JK Rowling’s incredible school. The game takes place shortly after the death of Harry’s parents at the hands of Voldemort, and puts you in the shoes of a new student attending Hogwarts in the period before Harry’s arrival 11 years later.
Amidst your first year of brewing potions, taking flying lessons, and learning new charms, the player may also attempt to win the House Cup for his or her respective Hogwarts House – Ravenclaw, Slytherin, Hufflepuff, or Gryffindor.
Think you have what it takes? You can download the game here:
While the story will progress regardless of whether your House wins, the rewarded gems are a nice incentive; the winning House will receive one hundred gems, which is the equivalent of about $5.00 of in-game purchases. Plus, who wouldn’t want to win the House Cup?
Check your House progress
To win the Cup at the end of the year you’ll need to be at (or at least very near) the top of the Ranking screen. Dumbledore introduces these colored hourglasses after the start-of-term feast, and they can be checked under your profile menu at any time.
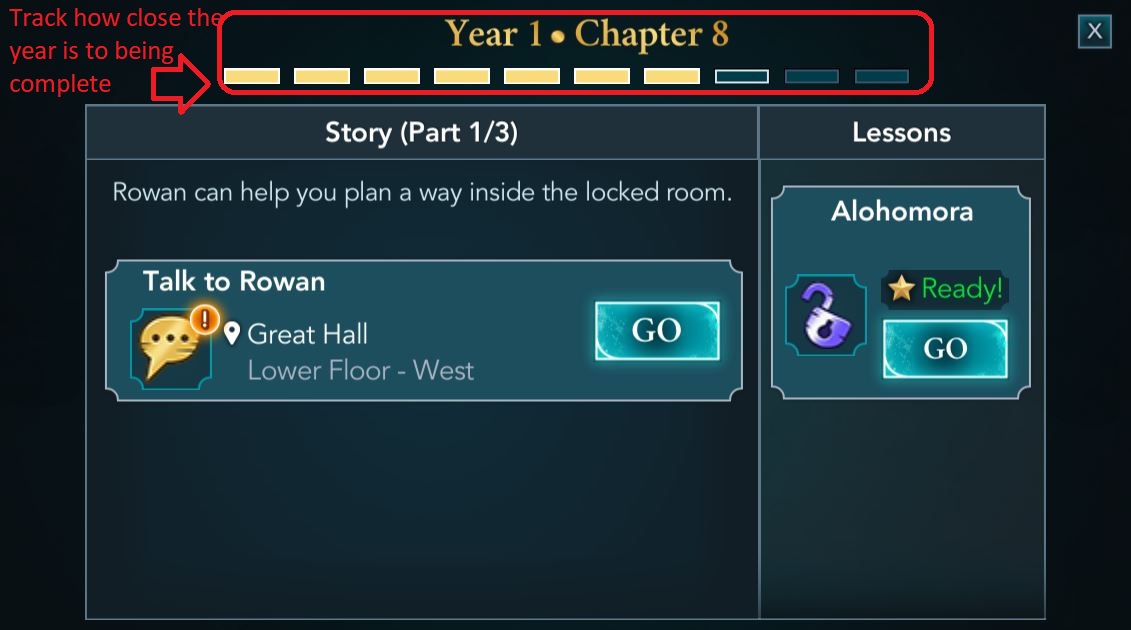
If you click the scroll icon on the left of the screen, it will display how close you are to completing your current year at Hogwarts:
Once you complete the final chapter for the year, Dumbledore will announce the winner during the feast. If your House wins, you’ll receive the gems and a slightly different cut-scene. It will look something like this:
How to earn House Points
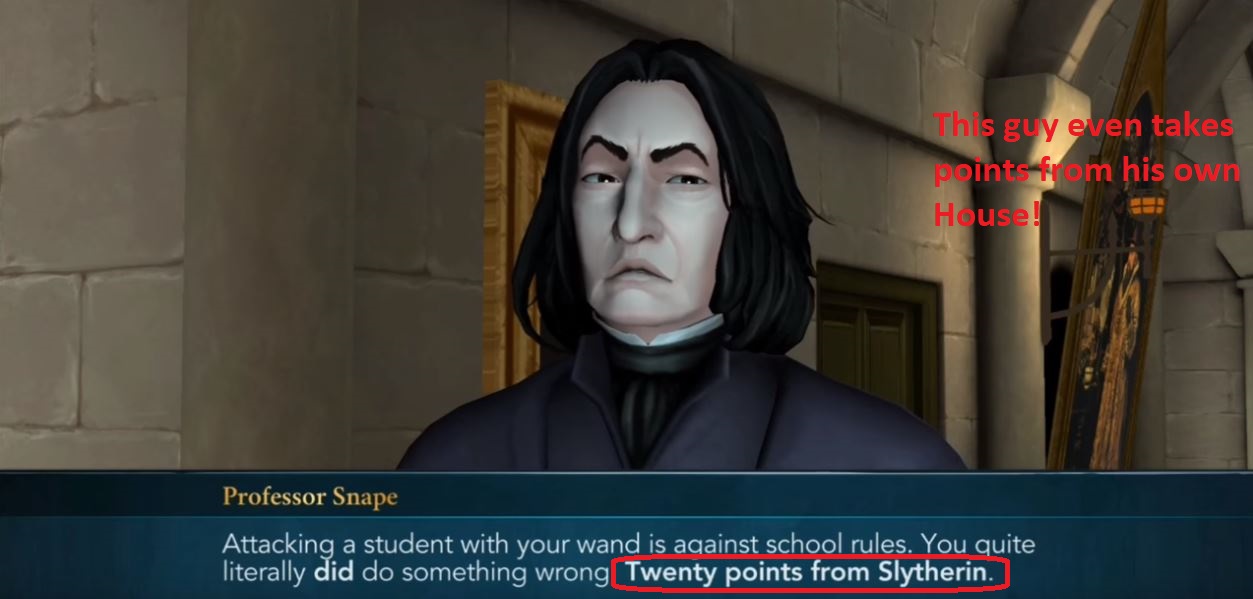
To win this prestigious honor, you must earn House Points. That’s certainly easier said than done, as there are unavoidable points during the main story where points are arbitrarily awarded or removed (we’re looking at you, Snape). Since this is largely beyond the player’s control, this is not a good way to plan on getting House Points. There are two other ways players can earn House Points, and they’re much more reliable methods:
1. Take extra classes
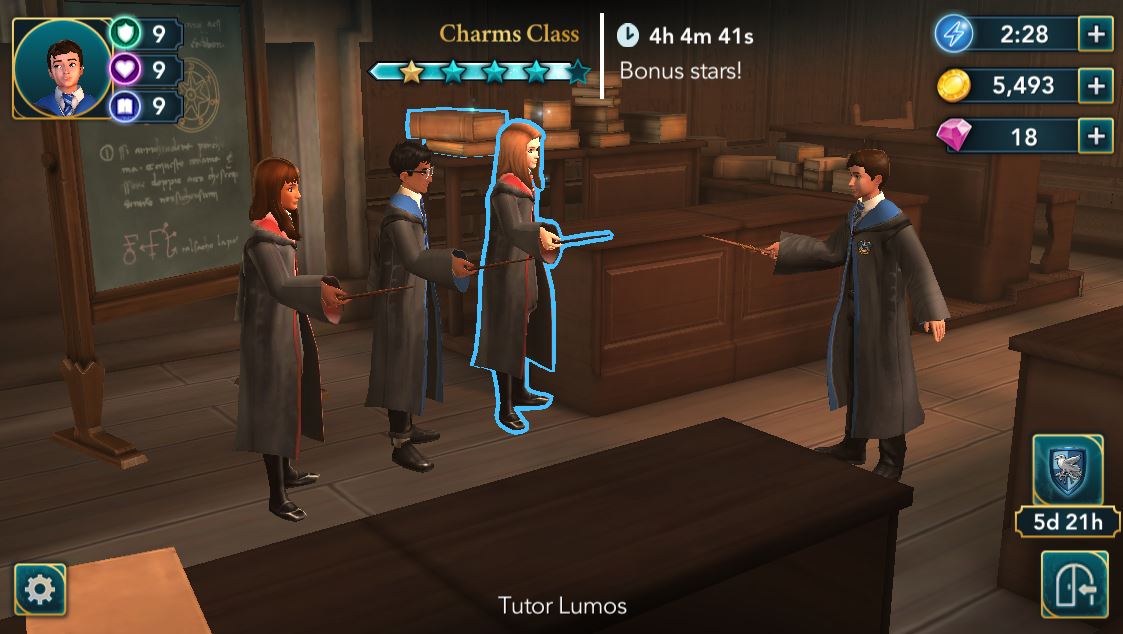
By and large, the best way to earn points for your Hogwarts House is to be a good, diligent student. Pretend you’re role-playing as Hermione Granger: Attend extra classes, make those classes take longer, and get every star possible. Here’s where it’s important to point out the distinction between classes and lessons in Hogwarts Mystery: Lessons are scripted events that you must complete in order to progress in the story. These teach you the necessary charms or potions that are integral to completing the game’s story. Lessons are usually three hours in length.
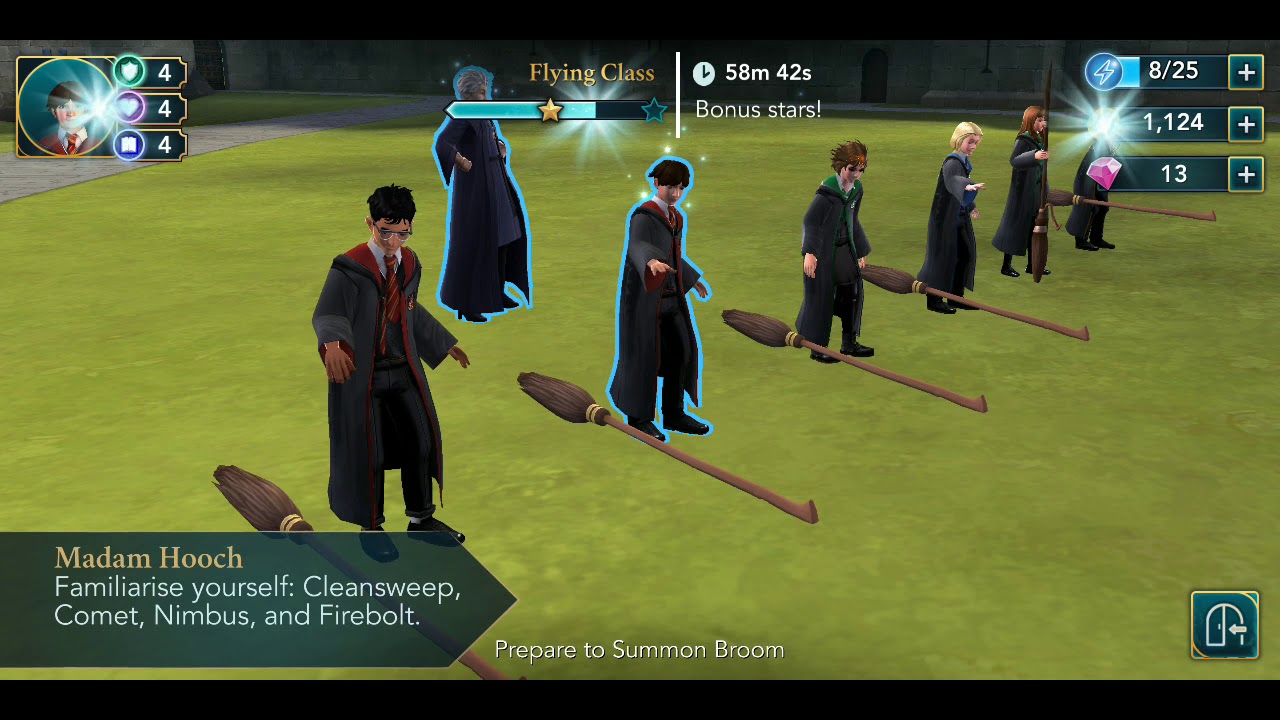
Classes, on the other hand, are not required but are instead offered at any given time. Players can elect to take extra classes in Flying, Potions, or Charms whenever they choose, and doing so is not only a great way to gain exp, earn money and gems, and raise your stats, but also to gain those much-needed House Points.
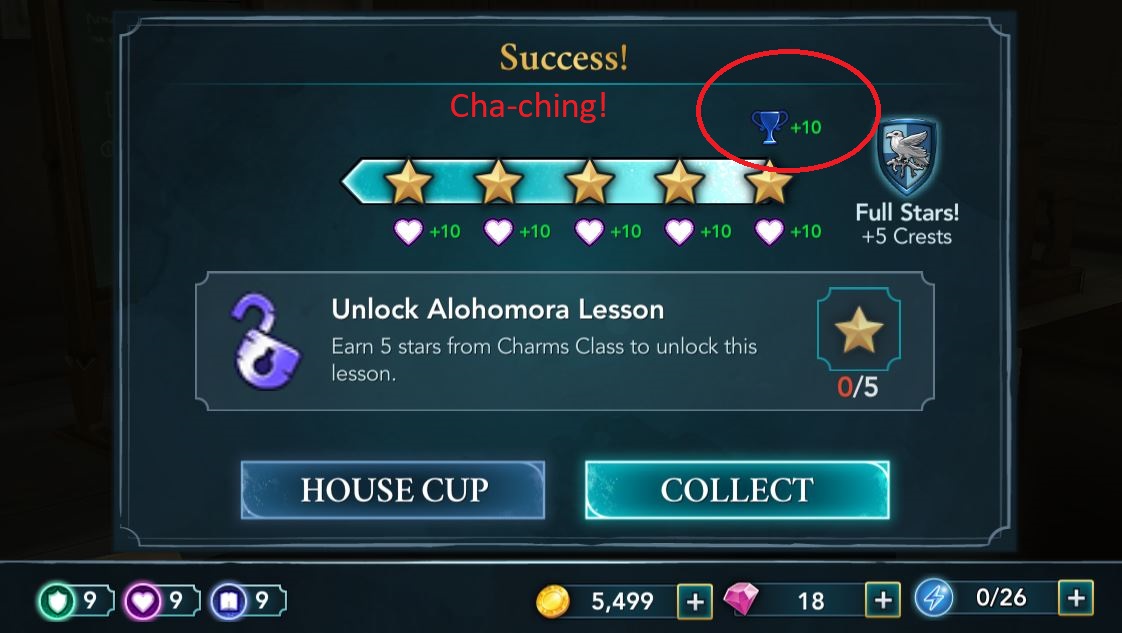
Completing extra classes will guarantee you House Points, and the longer the class the more you’ll receive: A one-hour class grants you two House Points, a three-hour grants four, and an eight-hour class will reward a whopping 10 points towards your House (provided you acquire all the possible stars), enough to make a big difference in your ranking.
2. Choose dialogue suited to your House
Your other best method for attaining points is to pick your dialogue choices with your House in mind. While the best decision won’t always be apparent, there are times where it most certainly is. Pick a knowledgeable response as a Ravenclaw and you’ll get points for role-playing. Likewise for picking courageous choices for Gryffindor or kind, respectful choices as Hufflepuff. If you’re unsure which option corresponds to which house, check the color outlining the dialogue choice.
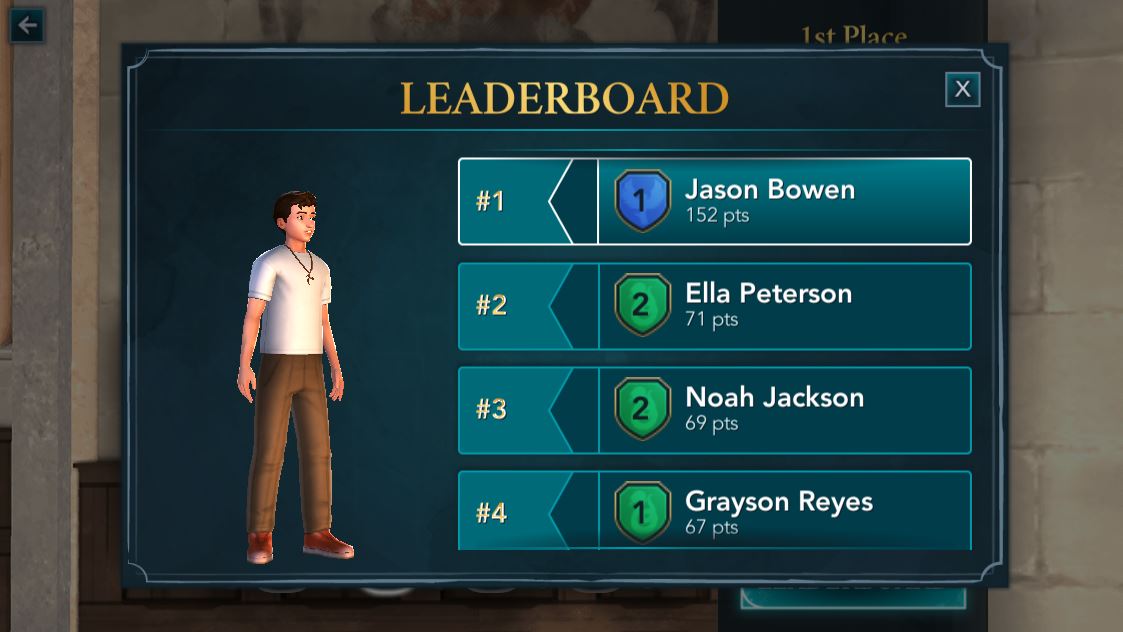
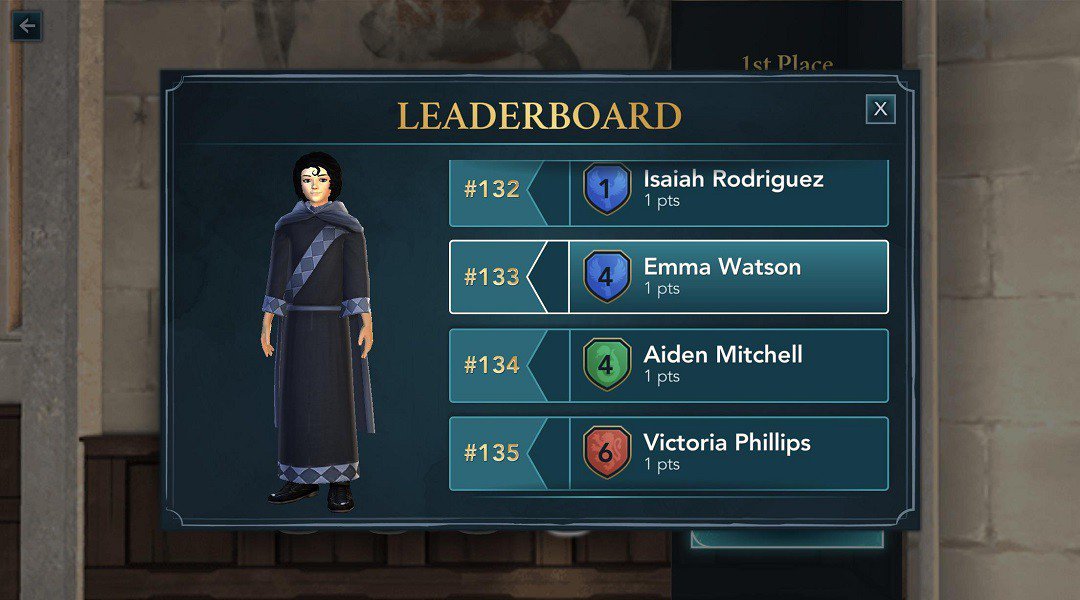
One neat feature is the leaderboard, accessed via the Ranking screen. Here you’ll see your character among the other students at Hogwarts and you’ll get to see where you stand in terms of who’s earned the most House Points.
The amount procured by other students is randomized, and your character is almost guaranteed to be near the top. If you keep scrolling down you might be amused to see some celebrity cameo students, though, like Maggie Smith or Emma Watson.
If you’re a few points short of the House Cup by the end of year one, don’t fret; Dumbledore will award you an extra 100 points just for completing your first year at Hogwarts. That should be enough to give you a pretty big edge.
Other than that, just be careful not to lose points along your journey. This can happen through incorrect dialogue choices, but is more often the result of failing classes or not finishing with the minimum requirement of stars. To ensure this does not happen, be sure to have enough energy points to get you through the class. For strategies on how to best obtain and distribute your energy, you can check out our guide here.
Fallout 76 is Bethesda’s upcoming online multiplayer action RPG set in the Fallout universe. It’s the first title in the series – and the first game by Bethesda Game Studios – to be a fully multiplayer experience.
At QuakeCon Todd Howard announced that servers will be both public and private, allowing players to invite friends should they choose to do so. Additionally, every human you see in the game world will be another player. From the sound of it, this one’s going to be pretty groundbreaking.
If you thought death was a frequent enough occurrence in previous Fallout games, remember that all you had to worry about then was AI enemies. Fallout 76 will introduce enemy players into the mix along with the addition of a full-on PvP mode. The elephant in the room becomes our main question here: What happens when you die in Fallout 76?
Since the game is no longer a single-player experience, saving and loading will not work the way they have in the past. “For a long time we tried testing where there was no punishment at all,” says Development Director Chris Meyer. “That took all the sting out of death. People used it to their advantage … it didn’t feel right. But we didn’t want to make it to punitive.”
When a player dies in Fallout 76 the only thing that will drop is their junk: Odds and ends like leather, bone, rubber, or silver. That means players will not be losing anything of real value or worth like guns or armor. “Junk is nothing that you can’t just re-get if you keep playing,” Todd Howard explained. “But collecting that junk you lost was still sunk time. Do you want to go back and get it? Before this, you could just run into a dangerous area and there’s no penalty of death. You can just fast-travel back. Now there’s a moment where you pause. ‘Do I want to take a moment and collect my stuff? Maybe store the junk before I head into danger?'”
The only instance where a player will lose more than simply junk is when facing off with another player. Die in PvP and you’ll lose caps, too, which are the game’s main form of currency.
The junk you drop can be reacquired at the spot where you died, but other players can pick it up just as easily. That means going back to retrieve it might not be logical – will it still be there? How valuable was the junk? Items like screws or silver are very valuable, so players are encouraged to consider lock it away before leaping into a dangerous scenario. That junk is safe from other players and can be kept in stashes seeded throughout the game world.
As far as respawning, players can re-enter the game from anywhere they’ve unlocked, just like in Fallout 4. Fast-travel will work the same way too. Spawning at Vault 76 will always be free, so will be the spot closest to the wherever you died. If you want to spawn somewhere further away, that’s going to require spending caps. The cap cost will depend on how far away it is.
So you play, you die, you lose junk, you respawn for free at either the vault or close by, and you decide whether you want to retrieve your lost gear.
Death has a sting, but it’s nothing too severe.
To see BGS describe the death system firsthand, check out this video of their full panel at QuakeCon:
For editing audio on a budget, it’s hard to ask for a better tool than Audacity. A free and open-source digital audio editor, Audacity is available for Windows, macOS/OS X, and Unix operating systems. The program has been around since 1999 and has been downloaded over 100 million times, and yet most users don’t really scratch the surface of what Audacity can do.
While it boasts many useful features (cross-platform operation, vocal reduction and isolation, multi-track mixing, MIDI playback, and plugin support), it does suffer a few shortcomings. Its chief drawback is its inability to import WMA, AAC, AC3, or proprietary file formats. But considering the software is completely free, we’re more than happy to cut our losses and start editing.
If you’re new Audacity or if you’re unable to find the right tool, your answers are here. We’ve put together a list of 14 beginner tips that show you how to quickly locate and effectively use the basic sound editing tools that Audacity puts at your disposal:
1. Set your audio device
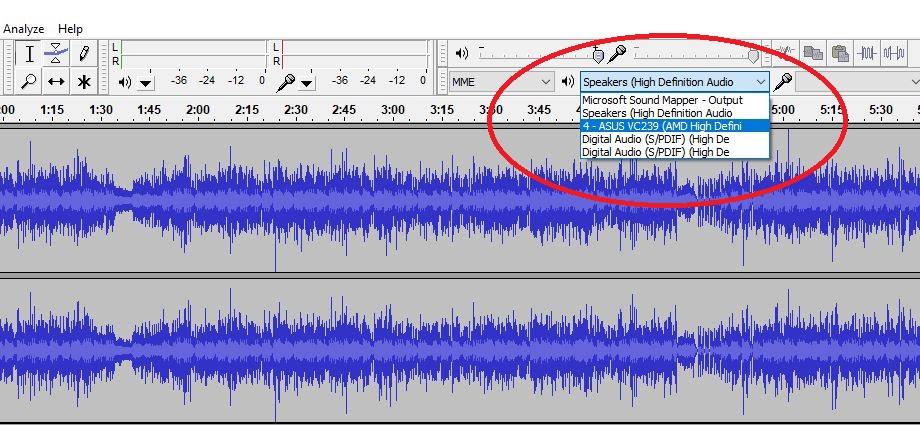
If you’re not getting any sound at the start of booting up Audacity, it’s most likely because the program defaulted to the wrong output device. To change where the sound comes out, you just need to select the correct device. On the top toolbar there are pictures of a speaker and a microphone, both with sliders next to them.
Directly below the microphone slider is a drop-down where you can select your device. We recommend headphones, particularly if you’re working with a stereo track.
NOTE: The drop-down right next to this is for selecting your microphone device, so if you want to record, make sure the right device is selected here.
2. How to delete part of a clip
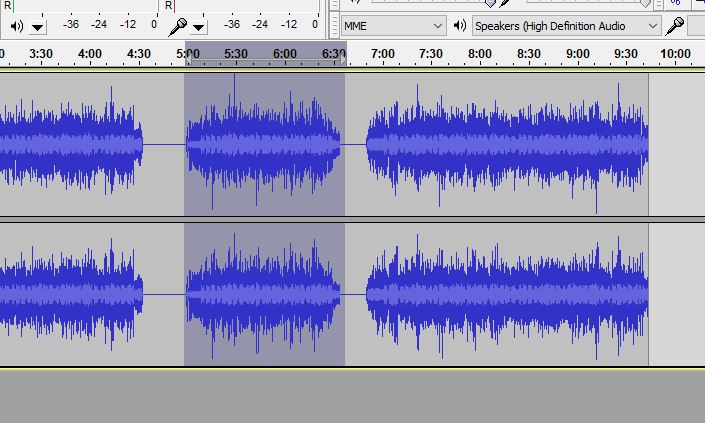
Audacity actually makes this super intuitive. All you need to do to delete part of an audio track is to highlight what you don’t want (be sure to select both left and right if you have your track in stereo). Then press delete. Couldn’t be simpler.
Note, though, that everything before and after your highlighted selection will just smash together which will inevitably sound bad. Check out our tips on fading and silencing further down.
3. Zoom in and out
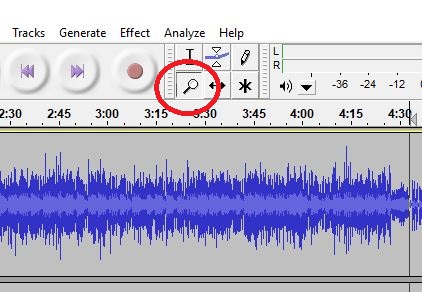
You’ll almost certainly need your zoom tool for fine tuning and making precision cuts. To zoom, click the magnifying glass on the top toolbar and click where on the track you’d like to zoom. Right-click to zoom back out. You can also use ctrl+1 and ctrl+3 to do the same thing. Ctrl+2 resets to default.
4. Open a new empty track
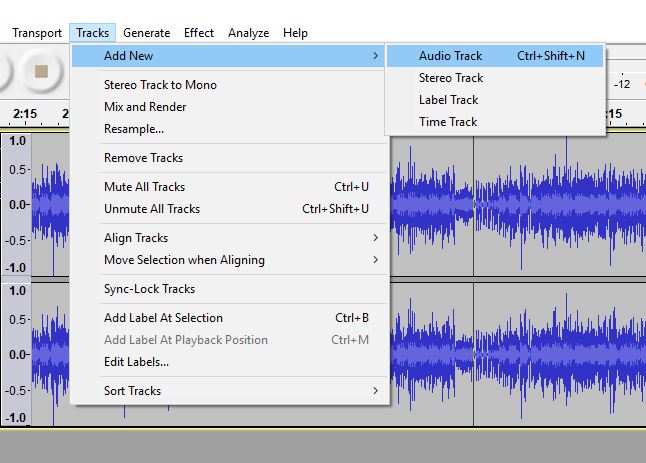
To insert a new track into Audacity, click the tracks tab up top, then add new. Pick whether you’d like this track to be mono or stereo. You can also simply type ctrl+shift+N.
5. Insert another completed track
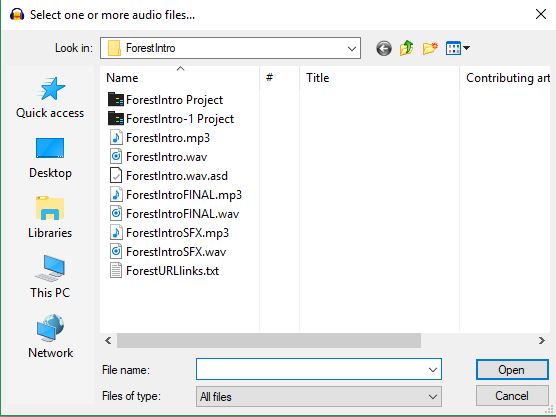
Contrary to our above point, this is how you add a track that already has audio. To do this, click on import via your File menu. Then choose audio. Or you can simply ctrl+shift+I to open the file explorer for importing.
Once the window is open, navigate to the track you want and add it. Be sure it’s either a .wav or .mp3 file. If you need to change the format, your best bet is to use this free site.
6. Align your tracks
The most accurate method for lining up your tracks is under the tracks menu. From there, choose align tracks. Select start to cursor and the next place you click will be where your selected track begins.
7. Lower track volume
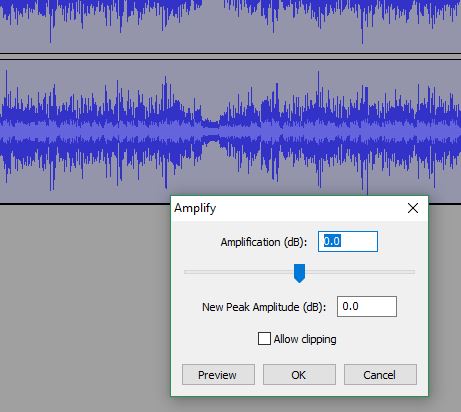
Select the part of the track you’d like to quiet down. Under the effect tab choose amplify. It will open a window with an adjustable slider. Lower it by however many decibels you think the volume should lower. Don’t forget you can hit ‘preview’ to check whether it sounds right before you commit.
8. Raise track volume
To raise the volume of a track you’re going to be opening the same window as in our last tip (effect > amplify). Be sure to highlight your selected audio beforehand.
Once you’re in the new window you’ll raise the slider by however many decibels you like.
NOTE: Audacity will not allow clipping by default, meaning it won’t go above a certain margin of volume without breaking that threshold. If you want to ignore this default, click ‘allow clipping’ before committing to the change. Check whether you’re alright with the audio quality after doing this, though.
9. Where is it clipping?
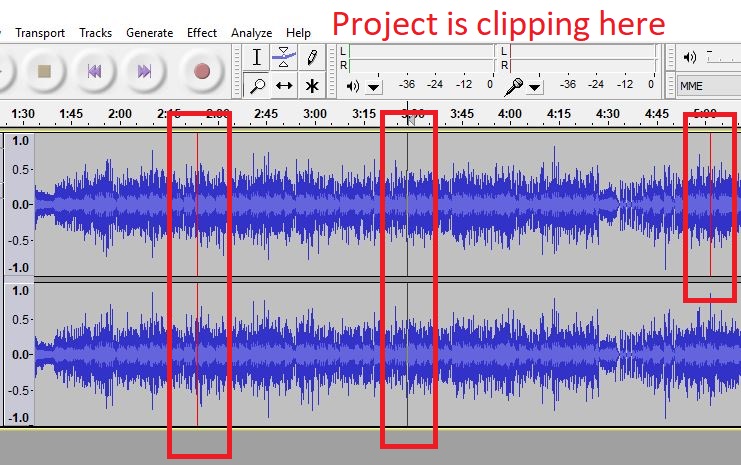
To see any place where your track volume is clipping above the safe threshold, open the view tab and click show clipping. This will show you any place where your volume spikes. Either adjust those areas manually, or alternatively use effect > equalization to set your own volume parameters.
10. Fade in/Fade out
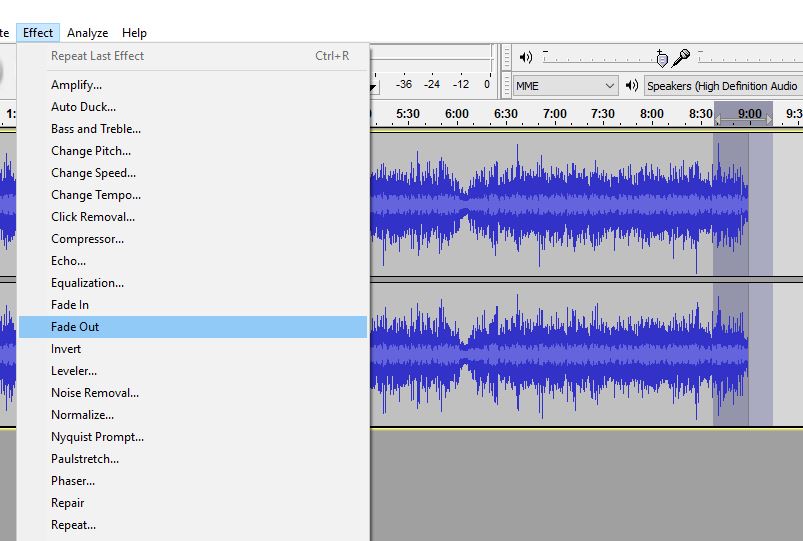
This one’s pretty easy. Highlight the selection you want to fade and under the effect menu you can choose either fade in or fade out.
You might consider doing a double fade depending on what sound you’re going for.
11. Double fade
You might find that the fade is not blunt enough, or that it doesn’t taper as obviously as you’d like. To rectify this, let’s take a fade out, for example: Highlight the selection where you want your fade, then go ahead and add it (as described above). Now select the latter half of that same selection and fade out again. Give it a listen; this might be closer to the effect you were expecting.
12. Delete part of a clip without changing the clip’s length or speed
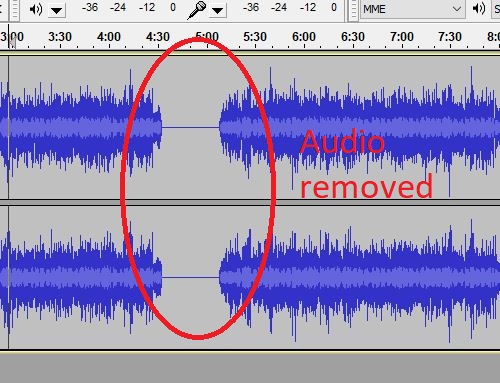
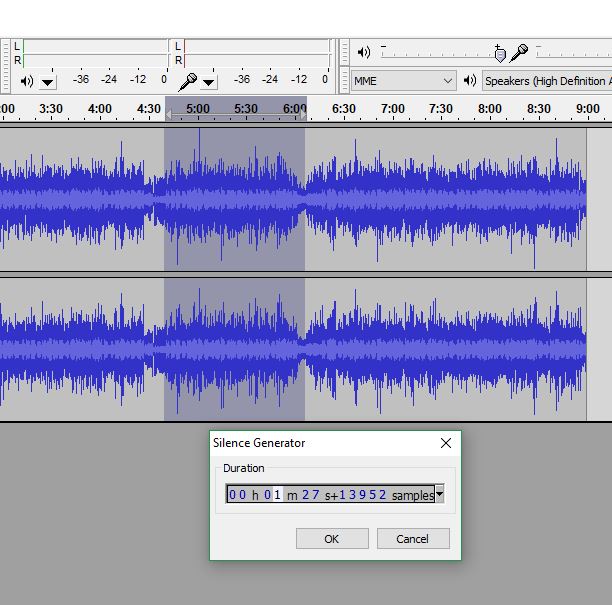
Normally when you delete a selection of a clip it’ll smash the other segments together, making for some jarring audio and affecting the timing for everything past that point. To avoid this, a neat trick is to instead select the portion you want removed and instead of deleting it, go under your generate tab and select silence.
You’ll create emptiness for the duration of your selection.
13. Modify pitch
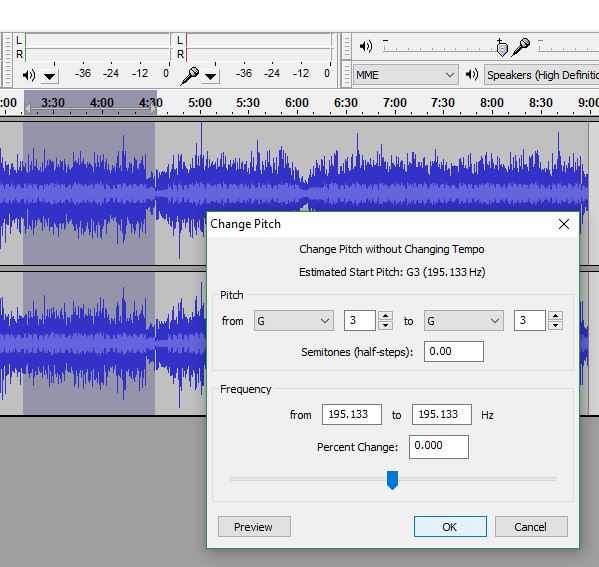
This is a fun feature that’s useful if you want to make someone’s voice sound lower or higher. Highlight your selection and look through your effect menu. Choose change pitch. It’ll open up a new window.
Adjust the slider and preview until it sounds the way you want. We advise you to mark down the number you choose, though; that way you can replicate the pitch again later.
14. Export your tracks
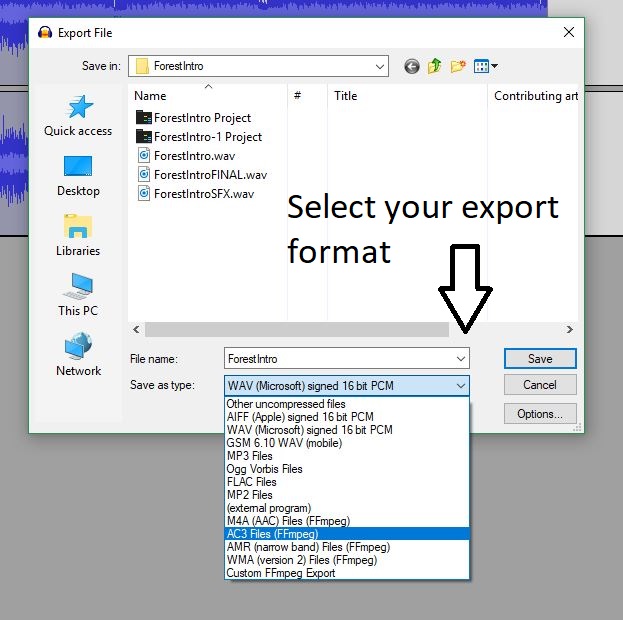
When you’re done working, you can export your project by clicking export under the file menu. Be sure to set your format before saving, and remember that you can change it later at this site.
Hopefully, this guide will help you more efficiently navigate through Audacity, and use some features you may have overlooked. Editing audio can be a time-consuming task, but it’s well worth the effort in the end!
If you’re a musician, if you’ve ever wanted to be a musician, or heck – even if you’ve ever been inspired by a musician you might have heard of “perfect pitch:” It’s the quasi-magical sixth sense that some people seem to be gifted with, allowing them to distinguish everyday sounds and noises as musical pitches. It’s incredibly helpful for transcribing, arranging, or composing music, and generally offers a leg-up over the competition in a variety of not-so-small ways.
If you want to see what perfect pitch looks like in action, check out Dylan’s frighteningly accurate display:
The truth, however, is that there are really three different variants of perfect pitch: Perfect pitch, relative pitch, and absolute pitch. While all three pertain to the same skill, they are not the same thing. For example, someone with perfect pitch may not necessarily have absolute pitch:
Perfect pitch: This is a person’s ability to recognize the pitch of any given note, or spell out chords they hear – like we saw Dylan demonstrate. It can be obtained or developed at a very young age, and is pretty freakin’ cool.
Relative pitch: Relative pitch is a little more common, and can be developed by anyone. You don’t need to be born with it, and it’ll mean you have very accurate pitch memory. Pitch memory is being able to say things like “I don’t know what B flat sounds like, but I can sing you the second note of Chuck Mangione’s ‘Feels So Good,’ and it’s the same thing!” With enough practice you’ll be able to hold your own against people with perfect pitch. Training isn’t easy, though, but we’ll get to that in a second!
https://www.youtube.com/watch?v=1aW1gCkZGrg
Absolute pitch: This one’s kind of freaky. Though it’s widely generalized to mean the same thing as perfect pitch, they are not the same. While someone with perfect pitch can sing or match any note without a reference, absolute pitch takes things a step further.
Folks who have absolute pitch are able to narrow down a sound to the Hertz – the very measure of the sound wave. ‘A 440,’ for example, is the standard tuning pitch for string instruments. Someone with absolute pitch could, on the spot, not only sing you an A, but they can tell you if you’re a little sharp or flat. It’s scary.
If you’re interested in reading more on the topic of perfect pitch, you can check out this article on the subject.
Of the three above options, relative pitch is the one you’ll be most easily able to pick up and learn. We’ll be showing you a great tool for developing it as early as right now: That tool is teoria.com.
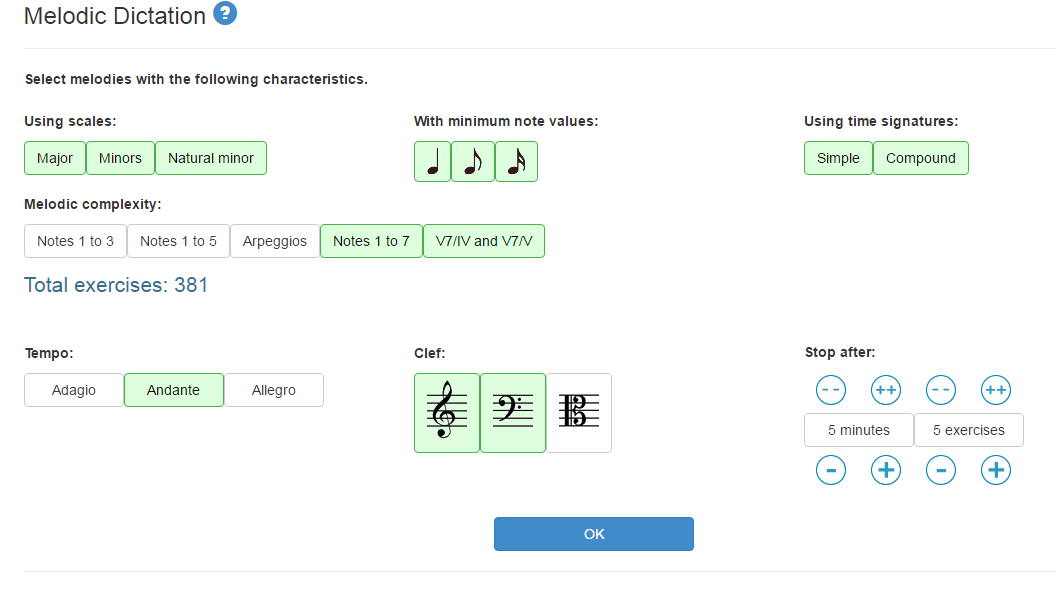
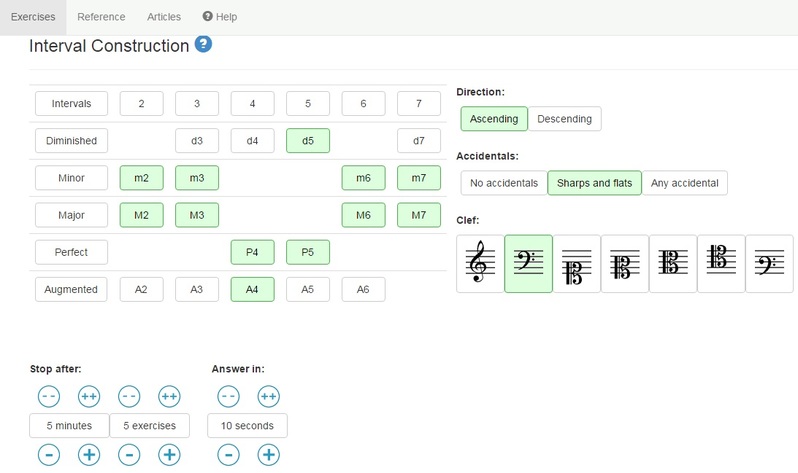
Teoria is a free website that offers tutorials, theory training, and ear exercises to help develop a highly accurate relative pitch. Choose the kind of ear training you’d like to start with – scales, intervals, chords, or even progressions and melodic dictations – and Teoria will randomly generate a quiz for you. Give it your best guess and it’ll immediately tell if you if you got it right. You can also choose however long you’d like each quiz to be.
https://www.chargerchoir.com/theory.html
You’re even able to customize each quiz so that, should you guess incorrectly, Teoria either tells you the correct answer or allows you to guess again until you choose correctly. Complete your quiz and Teoria will give you a score. It’s very rewarding to see your scores climb higher and higher as you get more practice.
Check out Teoria right here and you’ll soon be rattling off pitches and intervals with the best of ’em!
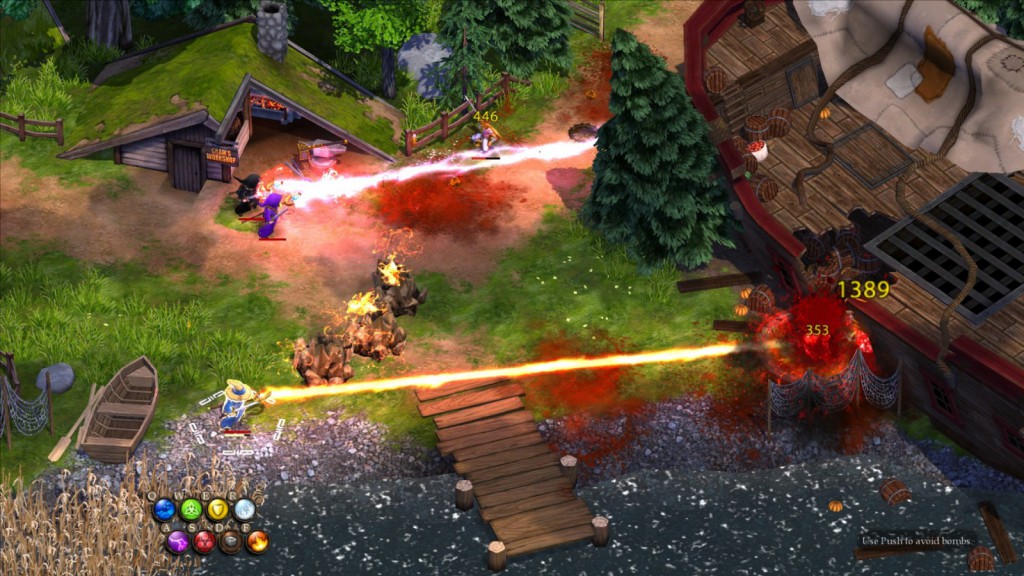
Magicka is a fast-paced action-adventure romp created by Arrowhead Game Studios and Paradox Interactive. It takes the player through a tongue-in-cheek fantasy world full of pop culture references and NPCs speaking in garbled Swedish. Addicting and fun from screen one to the end, but the game’s tricky for sure.
http://arrowheadgamestudios.com/games/magicka/
Magicka is clearly meant to be played with friends (there’s a reason the first magick you get is a revive spell), but that’s not to say it’s unbeatable if you’re playing in solo mode. It just might take a little more … finesse?
The great thing about Magicka is that upon finishing the tutorial you’ll immediately have access to every spell in the game – you just need to mess around with different combinations of the eight elements to achieve varying effects.
This can be extremely daunting right out of the gate, however, so we’ve put together a list of our top five spells that’ll get you from the beginning to the end with minimal frustration. Don’t be a Magicka school dropout and get left out in the rain!
https://wall.alphacoders.com/big.php?i=201177
Before we start, it’s important to note that the “spells” we’ll be going over are different from the game’s “magicks:” Spells can be accessed from the beginning of the game, while magicks are unique effects that must be found and unlocked as you progress through the story.
As such, this particular guide will not be covering magicks since we’re sharing spells that can get you through the entire game. That said, definitely try and memorize the game’s different magicks as you come across them; some are very useful, and all are unique.
Also if you don’t own Magicka yet you can grab it right here:
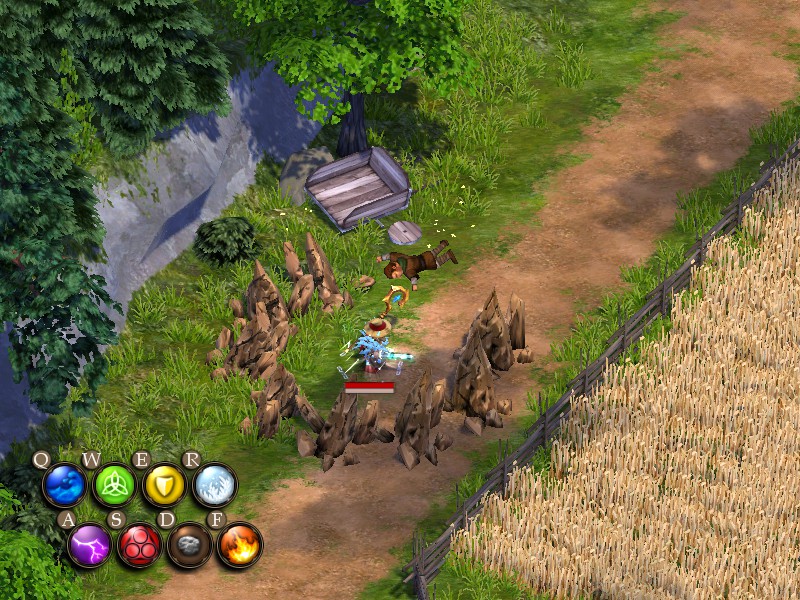
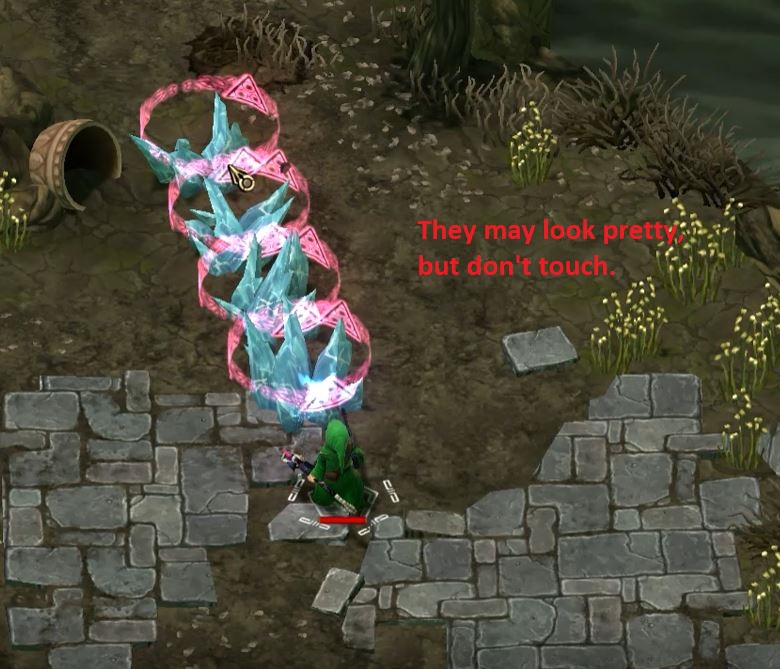
A simple spell, this go-to defense option has saved our hides more times than we can count. Casting earth, earth, shield directly in front of you (right click) will conjure up a wall of stalagmites that enemies must either break through or circle around in order to reach you. It’s great for when you need a couple seconds to formulate a plan, or if you’re getting swarmed by melee opponents and they’re closing in a little too fast. The same wall can be accomplished with one earth and one shield, but we think using two earth is just as fast and gives the wall that little bit of extra toughness.
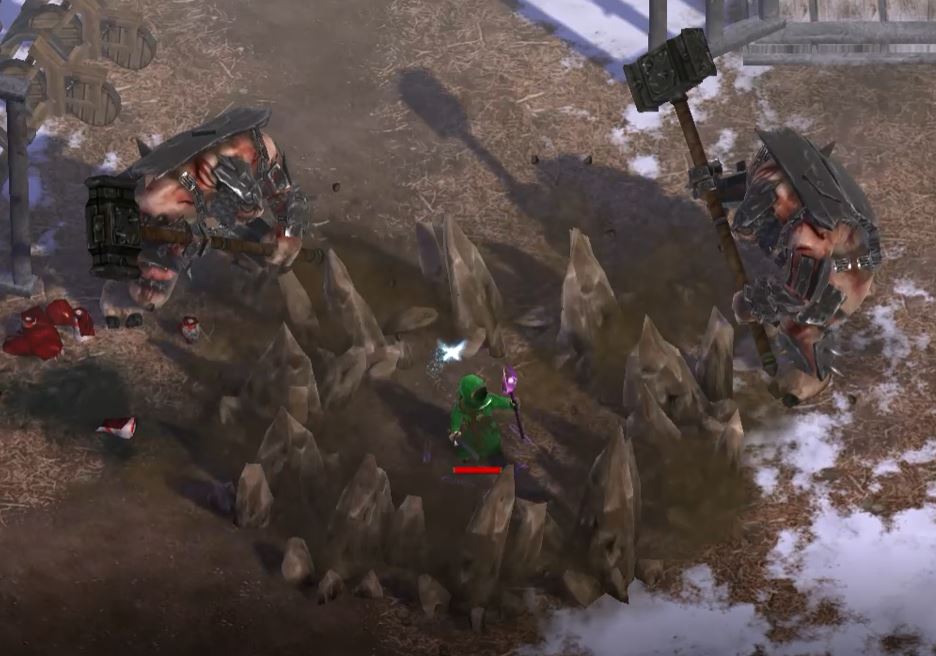
Boosting the spell (holding shift+right click) will surround the caster with rocks, which can be the better option if you’re simply looking for breathing room or are surrounded. This means that you’re stuck inside the wall too, though, so use it with caution.
Additionally, using FOUR earth before the shield will make those stalagmites metal, rendering them much harder to break. Queuing up more complex spells takes longer, though, and will slow you down before you cast, so only buff the wall when you can afford the extra few seconds.
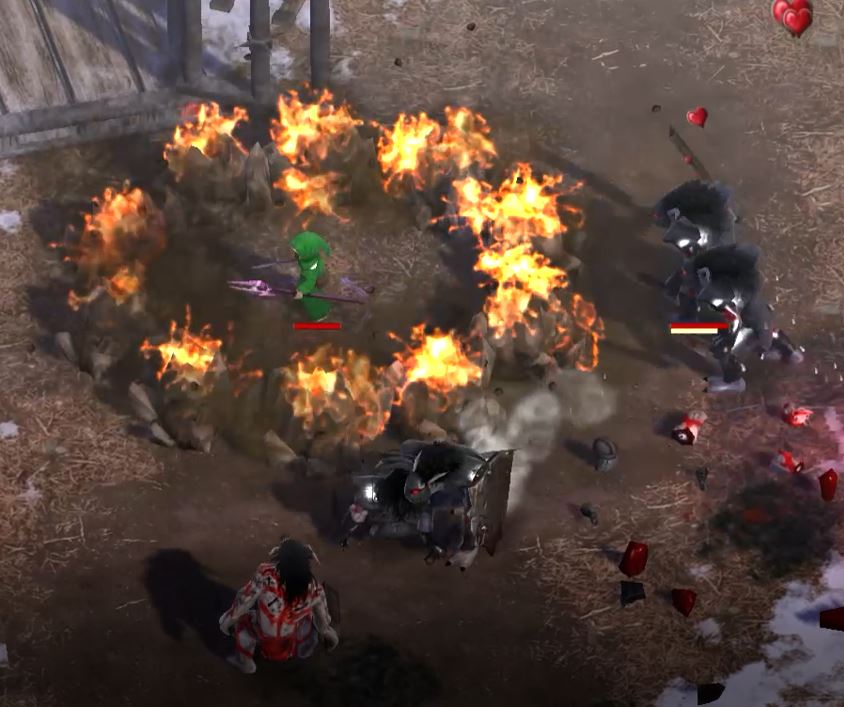
Lastly, you can tack other elements onto the rock wall as well if you want to give it an added effect. We recommend fire (fire, fire, earth, earth, shield)
4. Healing Mines – heal, heal, shield (W,W,E)
Another very basic spell, this is by and large the best way to heal in Magicka. Casting this will immediately drop four healing mines directly in front of the caster – a much quicker and reliable way to restore health than just casting heal on yourself again and again.
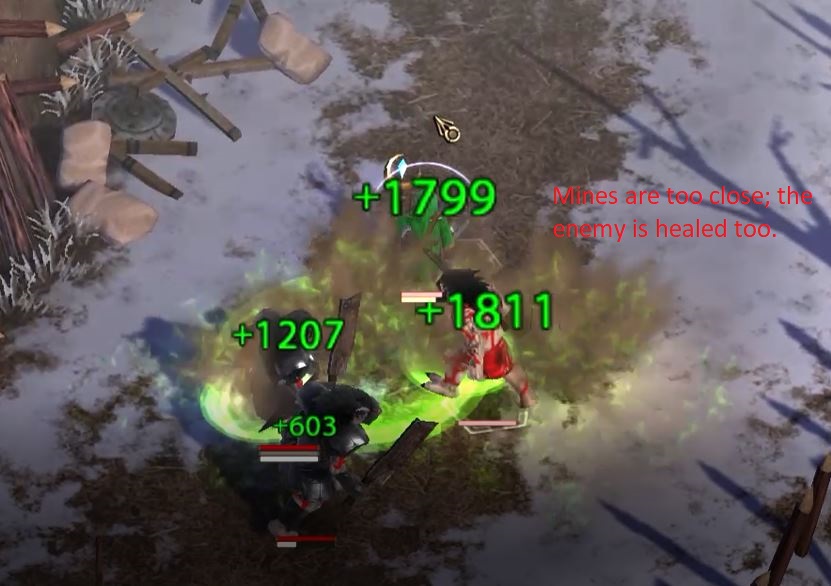
Supercharging the spell (heal, heal, shift+right click) will drop the healing mines around you in a circle, dramatically increasing the amount of health you’ll receive, but also upping the risk that you’ll accidentally heal the surrounding enemies. We found this spell most useful when running from a fight or when used within a supercharged shield (heal, shift+right click).
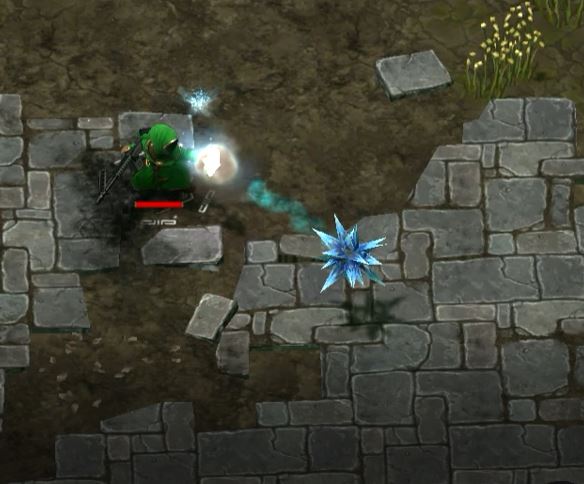
3. Ice Rock Missile – ice, ice, ice, ice, rock (Q,R,Q,R,Q,R,Q,R,D)
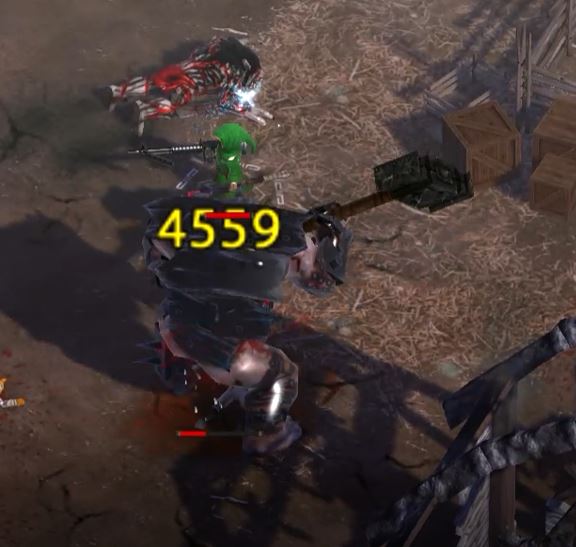
One of the strongest spells in the game, this missile is extra nasty because it freezes and shatters the frozen target at the same time. Seriously, we’ve seen this do upwards of over 6,000 damage in a single hit when it’s fully charged. It can even two-shot an armored troll.
The caveat, of course, is that this spell takes a while to fully charge and can be a little tricky to aim, particularly if the target you’re fighting is fast. If you’re playing with teammates have them distract, and this spell can be a little more reliable. In solo play, though, you should only fire this up if the target is distracted, stationary, or supremely slow. Still, you’ll be hard pressed to find a spell that does more raw damage.
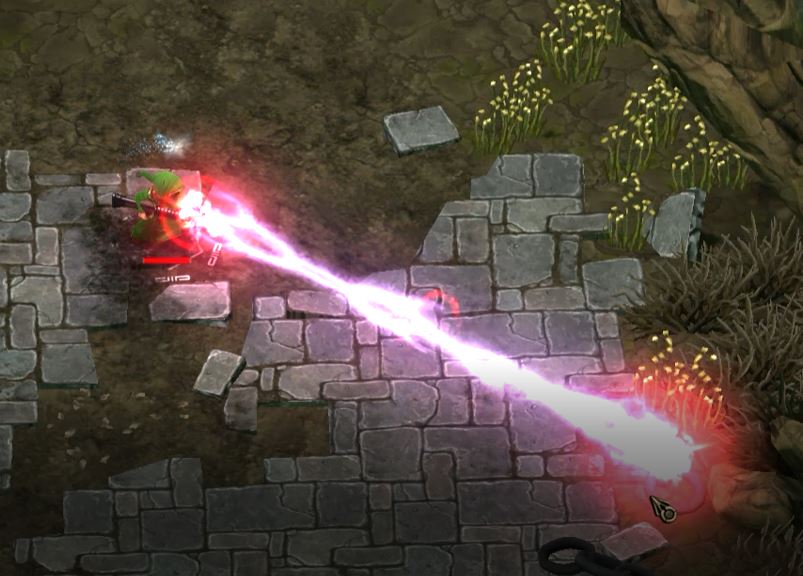
If you’re looking for the most powerful beam attack in the game, look no further; this beam is enough to make Iron Man jealous. What makes it so powerful is that the steam in the spell causes the ‘wet’ debuff on your enemies, and it’s got lightning added in – lightning and water don’t mix.
This spell is best used on bosses or on targets that are especially far away and out of reach of your spray attacks and AoE. Careful when using this against enemy spellcasters, however; if they reflect it back at you, you’re probably dead.
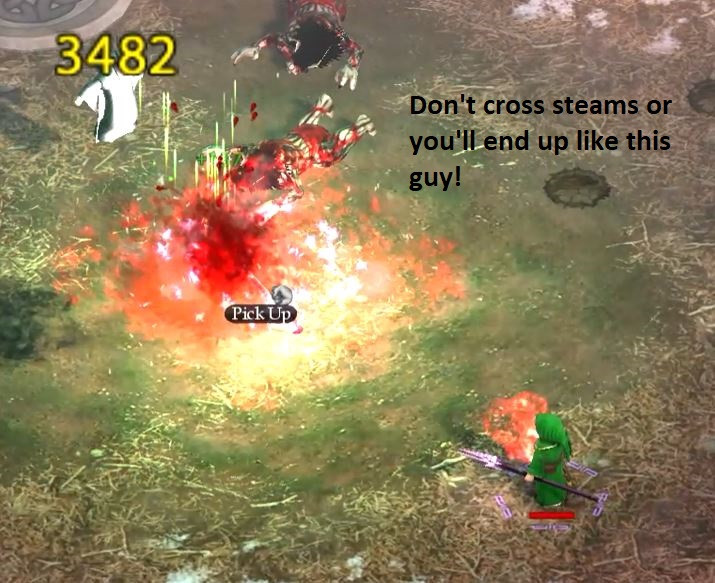
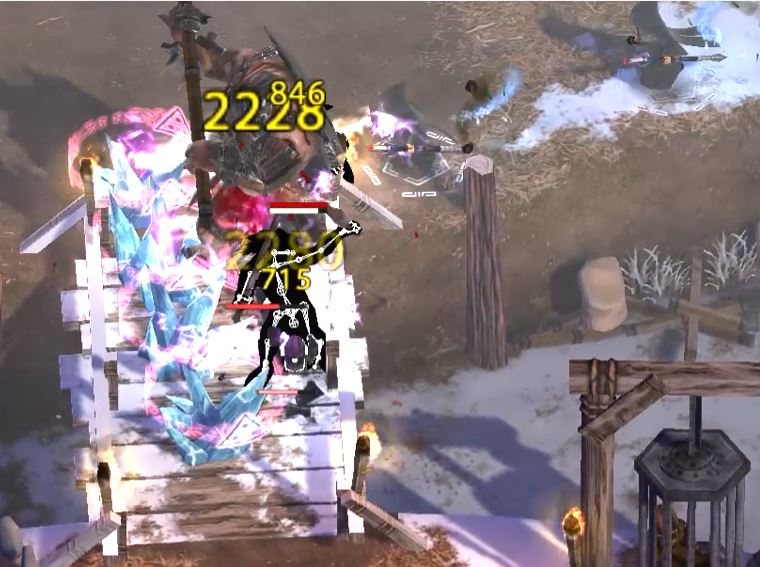
This one is so ridiculously damaging that you can practically beat the game armed with this alone. This will conjure a rock wall much like the one from earlier, except that this one is infused with ice and lightning, slowing and chaining damage between all the targets that come close to it. If they GET close enough, that goes for bosses too; it’ll probably kill them in just a few hits.
This spell is so powerful that you’ll die in seconds if it accidentally touches you, too, so a different approach is needed to use this effectively. Instead of casting this in front or around you, you’re going to cast it on your weapon. To do this, use shift+left click after the spell is armed. Attacking with your weapon will summon the stalagmites out in a line in front of you, and will be lethal to any opponents unlucky enough to attack you in single file. Useful any time that you’re not backed into a corner, this spell is your best solution against armored orcs, dwarves, and dwarf mages.
Try and learn these five spells before completing Chapter One and you should be more than prepared to handle anything else the game throws your way. That being said, it’s very much worth your while to mix and match the elements yourself to see what you can come up with! And remember that mixing in even just one different element can totally change the effect of your spell.
When you think you’re ready for more advanced strategies and spell combinations, you should check out this video guide:
Careful casting; Midgard isn’t safe at night! At least there aren’t any vampires to worry about.
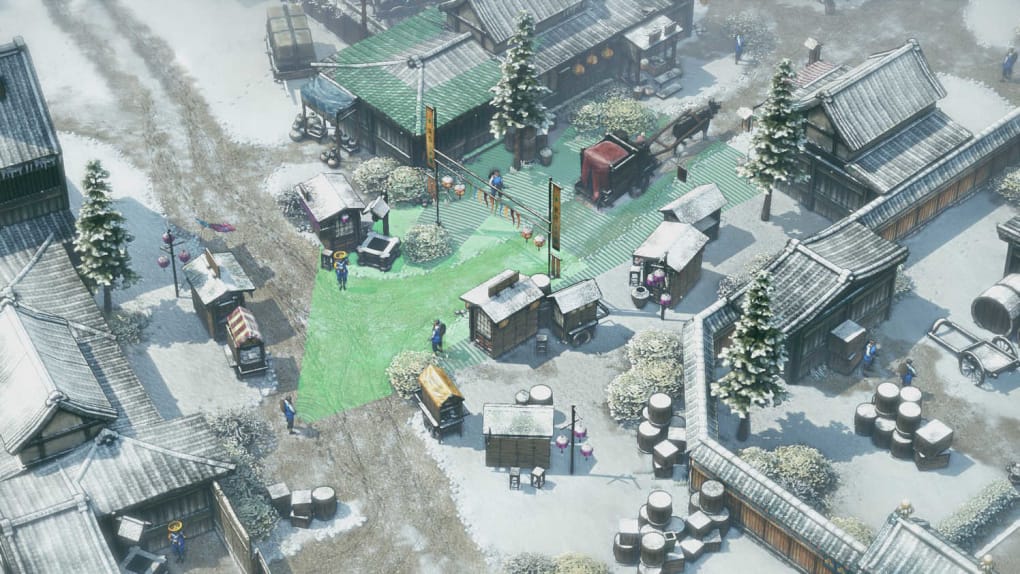
Shadow Tactics: Blades of the Shogun is a bold real-time tactics game by Daedalic Entertainment and Mimimi Production that is heavily focused on stealth and a strategic understanding of the game’s various characters. Constantly compared to Commandos (1998) and Desperados (2001), we think this 2016 release is an excellent step for the genre to take into more modern gaming.
The story features five characters in their role during a plot to depose their Shogun:
The mercenary ninja Hayato
The honorable samurai Mugen
The wily rogue Yuki
The unassuming disguise artist Aiko
The wise sharpshooter Takuma
This is a title that puts a tremendous focus on how the characters use their unique skills in tandem to inch their way closer to their goal. “This is a puzzle!” Yuki will exclaim. Right you are, Yuki.
Every character has a specialization, and since every mission has a different combination of playable characters it can be daunting having to learn the ins and outs of each one. We’ve put together a character guide to help analyze and explain the unique angle that each character can provide for those troubling viewcones and circuitous patrols.
Hayato is Shadow Tactics’ introductory character for a reason – he’s both the most versatile and the easiest to pick up. “Move like water,” he will say, and it’s what he does: Fast and agile, Hayato can get around the battlefield quickly, and can get virtually anywhere through jumping, climbing, and rappelling.
Hayato can also use his blade to eliminate targets very quickly, and can carry bodies rather than dragging them, making him a good pick for body disposal. If you’re unsure which character is best suited for a particular enemy setup, try starting your strategy with Hayato.
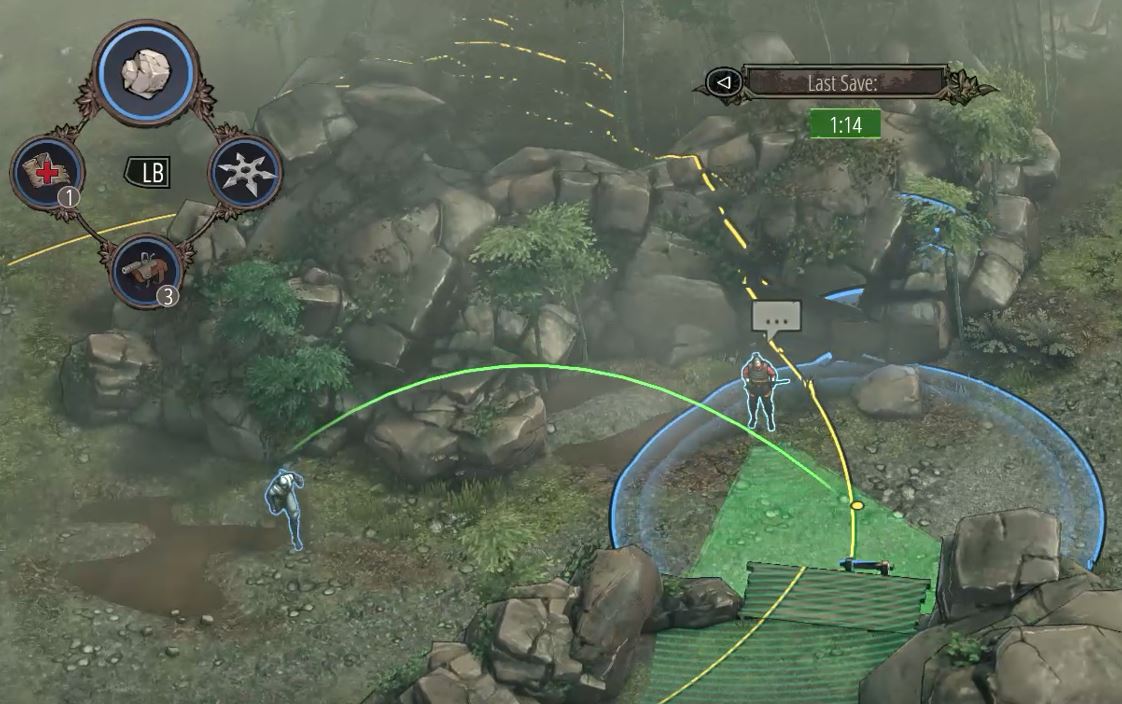
Rock: Straightforward, but not to be underestimated, the rock can be an incredibly useful distraction tool. When Hayato throws a rock, it forces any NPC to look at its point of impact. Guards with straw hats and Samurai will not be as effected, but even they will at least glance in the direction where the rock landed.
If you’re fast enough – and Hayato is – an instant will be all that you need to re-position or score a quick kill. Note that guards distracted by the rock will not move from their location. Rather, they will simply turn, re-orienting their viewcones until the distraction period ends. This can be to your benefit if you just want people to look the other way and don’t necessarily want them to move from their spot.
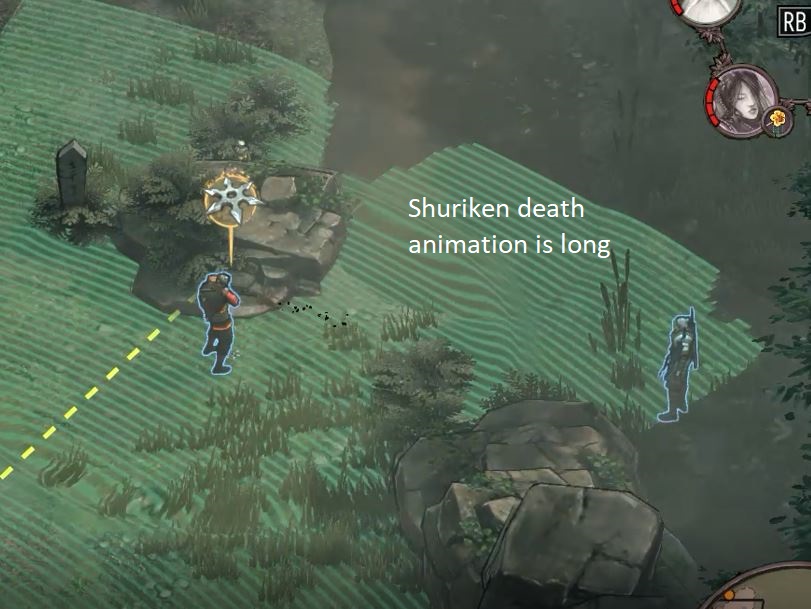
Shuriken: The mark of the true ninja, Hayato carries one shuriken that can be picked back up for reuse, meaning that as long as you do pick it up you can use the weapon an unlimited number of times. Naturally, be sure not to throw it towards the few places where Hayato cannot get it back. Throwing a shuriken at an NPC will instantly kill them provided they are not Samurai.
Note, however, that while the shuriken instantly kills the target, their death animation is quite long and anyone who spots the dying guard will expose you, putting the place on high alert. A good way to prevent this is to walk over and pick up the target before they fall, which will cut the animation short.
One great tactic with Hayato’s shuriken is to use it to quickly dispatch patrols of two. Throw the shuriken at one of the guards, and before the other can react, run up and swiftly dispatch him with the sword.
Mugen is your team’s Samurai – an absolute tank in terms of health, power … and also speed. Boasting three times the health bar of any other playable character, if there’s someone that needs to get hurt, always pick Mugen.
Slow but powerful, Mugen is able to kill enemies just as quickly as Hayato, heave huge boulders onto enemies, and can carry two bodies at once – even while running. Mugen also will not care if that body is a regular guard or a heavy armored Samurai – he’s able to carry them all the same, which is nuts. Mugen’s Samurai armor does prevent him from swimming or climbing anything short of ladders, though.
Furthermore, Mugen is the only character in the game capable of killing Samurai in melee combat, making him your prime choice for dispatching them should the need arise. And it will. Often.
Sake bottle: Mugen’s lure is different from Hayato’s in that it is triggered visually and causes the target to approach the bottle. If you throw the sake into an enemy viewcone, that enemy will leave their post or their patrol and walk towards the bottle.
This only works on regular guards and civilians, however, and will not affect Samurai or straw hat guards. If the guard picks up the bottle, you will have to kill or KO him in order to retrieve it for reuse. The sake bottle is a great way to lure targets into an ambush or out of another NPC’s viewcone where you can kill them undetected.
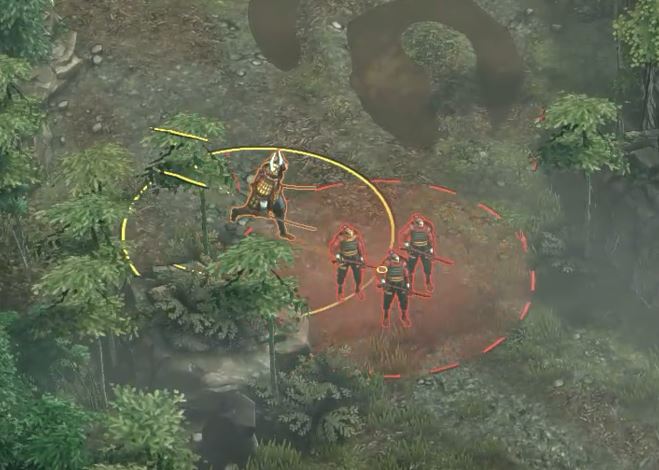
Sword Whirlwind: Mugen’s “most deadly technique” for sure, the sword whirlwind will kill any opponents within the radius of attack. That radius is pretty big, too, and we’ve seen as many as four guards eliminated at once. Naturally, this attack will not work on Samurai.
While the cooldown for this ability is lengthy, it’s not as long as you might think considering how powerful this is. Don’t hesitate to use it as needed. This is especially useful in tandem with lure abilities that bring enemies to a set location, as Mugen can emerge from a bush or from behind a wall and eliminate all targets at once.
The thief, Yuki’s specialty is the bait and lure. Able to keep pace with Hayato, Yuki can also reach any point on the map, making her ideal for scouting and positioning. Yuki’s not quite as strong as Hayato, and not nearly as strong as Mugen, so her ability to carry bodies is limited to dragging them – much slower.
Instead of a sword, Yuki also uses a dagger, the “stick and stab” of which has a longer animation than Mugen or Hayato’s default kills. Use this with caution if there’s a chance that you’ll be spotted.
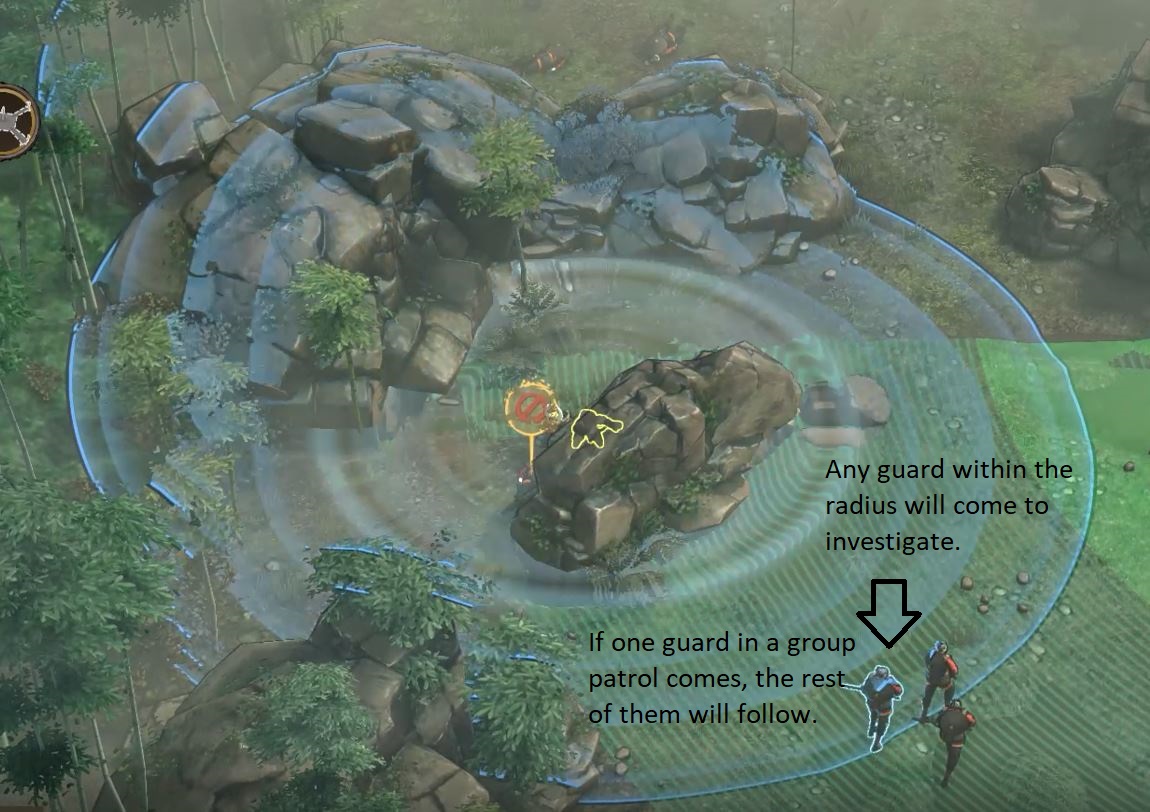
Whistle: Yuki’s “bird noise” will attract any guards within its wide radius. Straw hat guards and Samurai will briefly look at the sound’s point of origin, but regular infantry will come over to investigate unless they’re too far away. Even so, we were surprised by how often lookouts would go out of their way to investigate.
Yuki’s lure has the advantage of being able to attract any number of opponents within earshot, so it pairs very well with Mugen’s sword wind or Takuma’s bombs. Don’t underestimate the usefulness of this tool even late in the game. A couple seconds of a Samurai looking in a different direction can open a window for you.
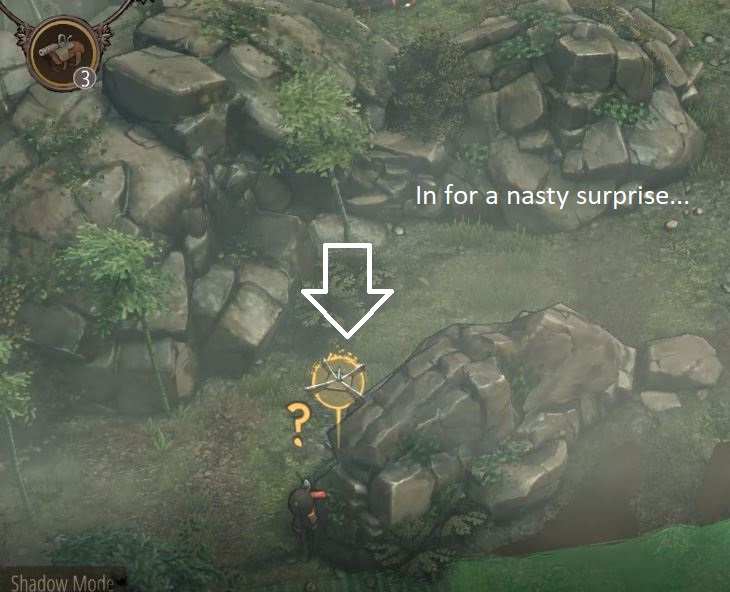
Trap: Yuki’s little trap is capable of killing any (non-Samurai) target unfortunate enough to step in it. Like Hayato’s shuriken, the death animation is quite long, so be sure no one witnesses it happen. The best way to use this is in tandem with Yuki’s lure: A guard will hear the bird noise, come over to investigate, and get caught in the trap before he makes it to the whistle’s point of origin.
In this regard, Yuki, too, is capable of killing two targets at once – one with her knife and another with the trap. The trap can also be used without the help of a lure; it just has to be placed on a guard’s patrol path, so keep track of who’s moving and when no one will witness them die.
Aiko
Aiko is the resident disguise expert and a kunoichi to boot, meaning she can match the speed and agility of Hayato and Yuki. As such, she too can rappel, climb, and swim as the need arises. Aiko is at her most useful, though, when she has access to a disguise.
Uniquely, Aiko can roam the ranks of any guards as long as they are not Samurai. Samurai will be able to see through her disguise, removing it and setting the place on alert. Like Yuki, Aiko is not strong enough to carry bodies, and will instead have to drag them. Her hairpin is her blade of choice, and grants “a quick and elegant death.”
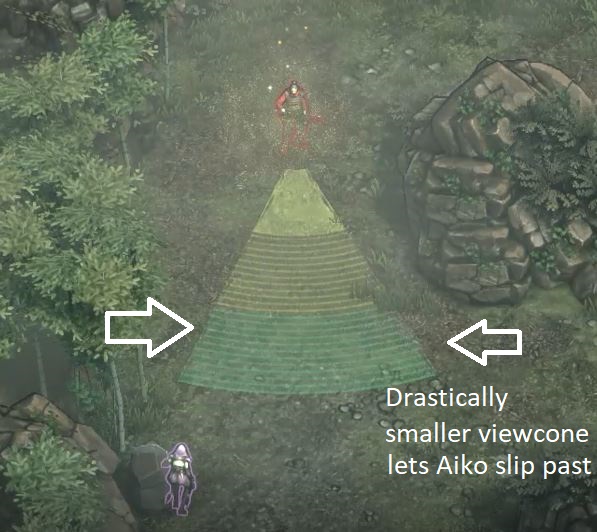
Sneezing powder: Aiko’s “most elegant tool” takes a little more of a learning curve than some of the others, but it does something no other character can match: Any targets within the radius of the powder will sneeze, causing their viewcone to immediately shrink, returning to full capacity a few seconds later. This will affect Samurai!
The best times to use this tool are when a guard’s viewcone passes over a spot where you need to be, or if you need to quickly eliminate someone just on the edge of a guard’s viewcone. By the time their vision returns, you’ll have been in and out and the enemy in question dealt with and dragged away.
Disguise: Once Aiko gets a hold of a disguise (most maps with Aiko will have one or two to choose from) and equips it, she can hide in plain sight. This means her actions (unless they are decidedly unladylike such as crouching, climbing, or killing) will not arouse suspicion. This is an extremely useful edge in almost any scenario. When disguised, Aiko can do things like put out torches, activate items, bang gongs, or poison tea as the mission allows.
Aiko can also approach a guard and talk with them, forcing them to look at her for the duration of the conversation (which can go on indefinitely; she’s good at her job). When engaging in conversation with a guard, be sure you position Aiko in beforehand in such a way that the guard will be turning AWAY from where you don’t want them looking when they face Aiko.
Takuma is arguably the trickiest character to use in Shadow Tactics as he’s the only one with a “capped” number of kills he can get per mission. He’s also limited in terms of mobility due to his leg injury which renders him unable to rappel, climb, swim, or even to carry bodies. Plus, any time Takuma walks he makes a loud noise with his peg leg, meaning you’ll only be walking with him after an area’s been completely cleared and there’s no chance of the noise accidentally alerting someone.
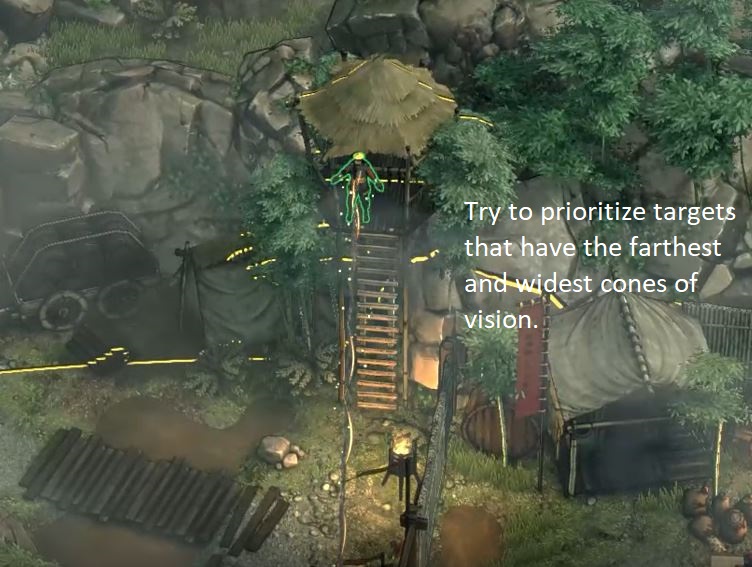
At first glance, Takuma seems the weakest character of the bunch, but trust us – this is a very balanced game. For every disadvantage Takuma suffers, he’s in every regard a specialist when it comes to what he does best and has the most tools at his disposal. The best way to use Takuma is as an ace in the hole. Have him target and eliminate whoever has the broadest, most irksome viewcone, then have your ninjas take care of the rest. You just need to pick that initial target carefully.
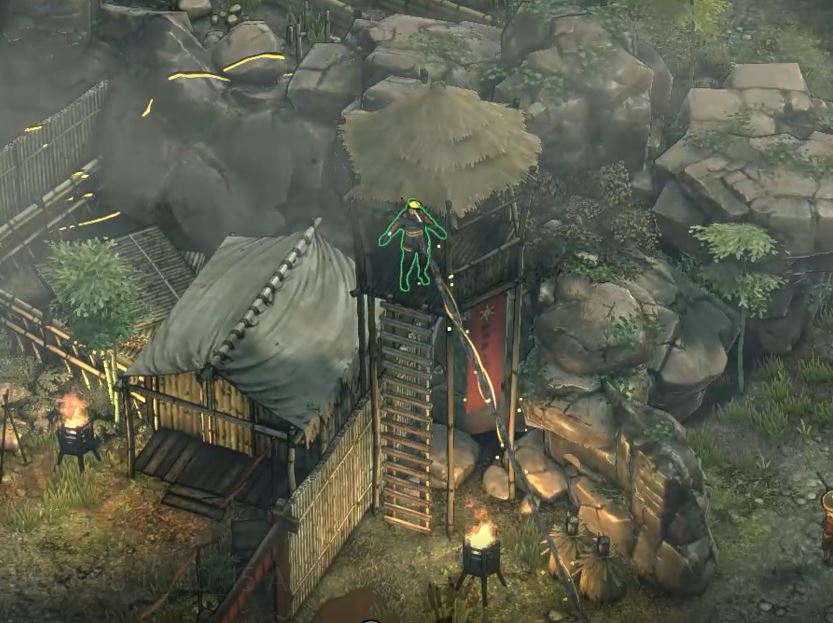
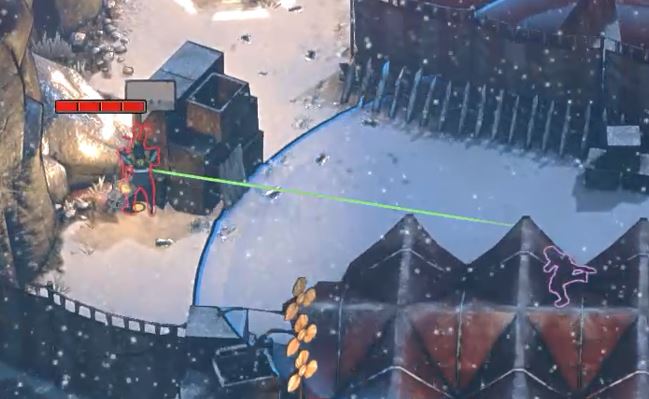
Rifle: Takuma’s biggest role in the party is as a sharpshooter. His rifle is able to reach targets from incredibly far away, and is best used from atop lookout towers or tall buildings. The moment you see the radius of Takuma’s field of vision and realize just how many targets he has within that radius is when you start formulating all kinds of possibilities. The rifle itself is extremely powerful, capable of killing ANY opponent in the game with a single shot. That includes Samurai, so be sure to use portion your bullets with that in mind.
While your number of bullets is limited, there are several factors to keep in mind:
1. You might find more ammo
First off, most maps with Takuma have one or two ammo boxes at certain locations, typically in or near lookout towers. Getting to these points is a good way to plan your strategy, and will give Takuma the most options for targets.
2. He carries a spare bullet
Takuma will also ALWAYS save a bullet for mission objectives, so if your mission involves shooting, say, an explosive crate, you need not worry about hoarding your ammo in order to complete it.
3. He can shoot highlighted targets like ropes
Finally, Takuma’s accuracy is so uncanny that he can even snap a rope from one hundred yards away with his rifle. If that rope is holding something heavy, whoever gets sadly crushed beneath it will die – and it will be deemeed a “terrible workplace accident.”
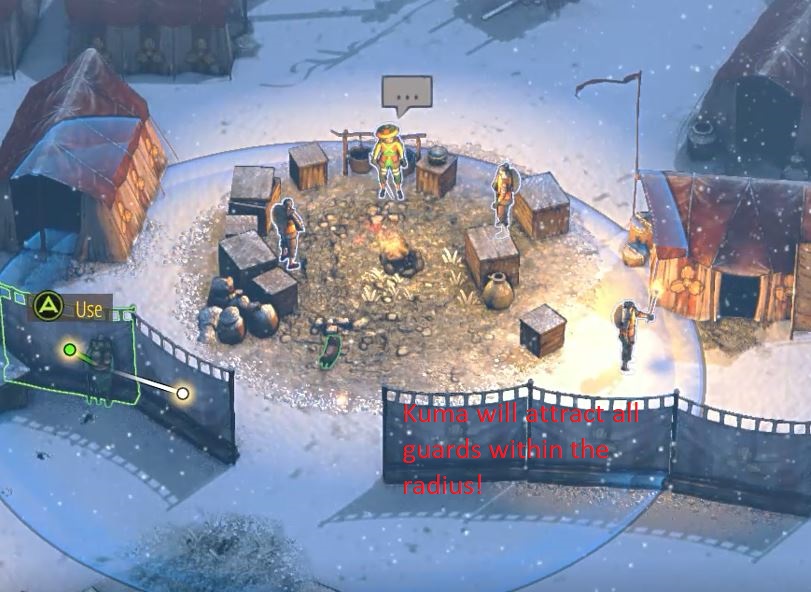
Kuma: Takuma’s pet tanuki, Kuma plays the unofficial sixth member of the team. Kuma serves as the best “lure” ability in the game. Takuma will send him out to a particular spot (from which he can be repositioned as long as Takuma is nearby) where he will wait. Activate him again and he will perform a loud, distracting, and adorable routine that will hold any guards within its wide radius spellbound for a very long duration. This won’t work on Samurai or straw hat guards, though they will look at Kuma briefly.
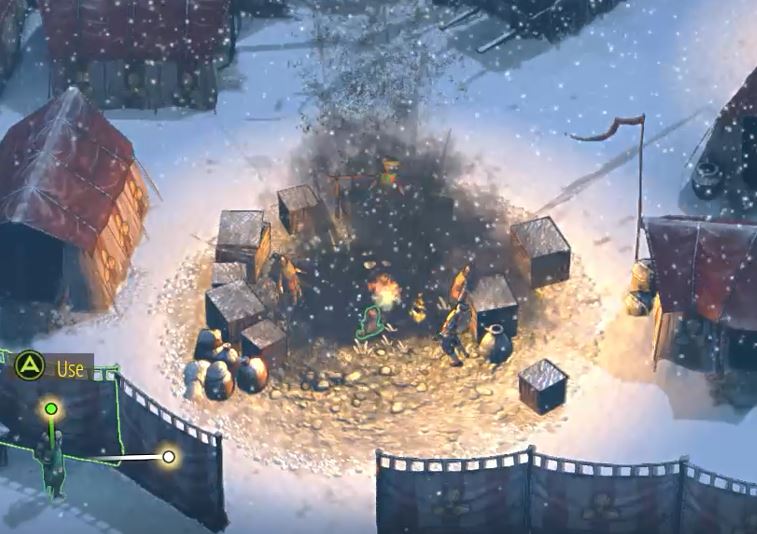
Apart from using this to keep guards distracted, it’s also a very effective way to clump several NPCs together. They can then be dispatched by either Takuma’s bombs or Mugen’s sword wind. Don’t worry – Kuma will not be harmed by either.
Bombs: The most powerful items in the game, Takuma’s bombs can be used either as explosives or as knockout gas. Anyone within the radius of the explosive variant will be instantly (albeit very loudly) killed – another great ability to use in tandem with a lure like Yuki’s whistle or Kuma. Alternatively, Takuma can use the knockout gas to eliminate enemies noiselessly. They WILL wake up from this eventually, however, so be sure to drag and carry them off to be eliminated once they’re out of view.
In our experience, if you even consider spending a bomb, it’s usually worth using. Even if you only take out a few enemies with it, it will make your life much easier. If it’s a choice between using Takuma’s bomb or Mugen’s sword wind, however, do go with the sword wind; you can use that indefinitely. These bombs will also work on Samurai!
Shared items
Pistol: Every character in Shadow Tactics will eventually get a pistol. This is a short-mid range weapon that can kill any guard instantly and loudly. This is generally not advisable as the pistol can also be used to wound a Samurai. Shooting him with it will make him vulnerable to a follow-up kill move. Note that if you do this, the Samurai WILL look in the direction where the shot came from, so we advise you shoot then have someone run up from behind the Samurai to kill him.
On missions where Mugen or Takuma are not present this is your best bet for killing Samurai. Try to shoot and kill with the same person and you’ll likely suffer return fire. Mugen’s pistol is stronger than the others’ and can kill a Samurai in a single shot.
Healing Kit: Every character also comes with a single healing kit. The kit will revive three pips of health, which is enough to fully heal once. The only instance this would not fully heal is if used on Mugen after he’s lost more than three health. If the mission is taking a long time, don’t forget you have these! If you just came out of a difficult encounter wounded but are unsure whether you could pull it off again, don’t bother reloading to test it. Go ahead and use the healing kit; it’s there for a reason.
Spider-Man has been one of the most beloved Marvel characters for many decades now, ever since we saw him spin his first web in comic books. It was a delight when we saw him appear in movies, but the real joy was roleplaying as him in video games.
With the latest movie fresh on the big screen, we feel it’s only appropriate to list our top 10 Spider-man games on PC, Android, and iPhone.
Spider-Man Ultimate Power (Android)
Side-scrolling action platform games are still incredibly popular on smartphones, so you’ll enjoy activating your web-slinging abilities in Spider-Man Ultimate Power. The story mode is linear, with you running through various levels to stop the villains. The controls are easy to master, and you’ll unlock some power-ups along the way.
There are also different suits to claim as rewards, which you can view in the gallery. The visuals may not be superb, but it’s reminiscent of the comic books from which Spider-Man hails. To unlock more features, you’ll need to earn coins and gems in each stage.
Spider-man (Windows)
Here’s a Windows title that goes back as far as the year 2000. The classic Spider-man game for PC fits in the action-adventure genre and was one of the first in the hero’s list of games to enter the 3D realm. While the graphics are blocky compared to most of today’s titles, it was still one of the best web-slinging games to play.
You’ll see familiar villains from the comics and movies, and your mission remains to stop them from achieving their evil goals. Each level presents some tactics you need to use to overcome them, especially the boss battles. The main actions are jump, web-swing, and fight, but you can use some of Spidey’s abilities that you unlock.
The Amazing Spider-Man 2 (Windows)
Launched in 2014, The Amazing Spider-Man 2 brought awe and wonder to gamers with its impressive gameplay and graphics. It followed hot on the heels of the movie with the same name, presenting a familiar storyline with the same villains. However, the open-world nature of the game allowed players to take on some side missions and explore locations freely.
By completing missions, you received tokens or credits for unlocking powers and special moves. If you arrived at boss battles too soon, there was always the chance that Spidey wasn’t strong enough to take them on, which meant grinding side missions until you were ready. Still, it’s a wonderful Spider-Man game for PC that we’ll gladly play again.
Spider-Man 3
Yet another game based on the movie, Spider-Man 3 is from the Tobey Maguire universe. It also features an open-world action theme, and you’ll enjoy putting on the Venom suit for more power. The same primary villains are the bosses, namely Venom on Eddie Brock and Sandman.
However, there’s a creative take with some of the other villains in the Spider-Man game that we don’t see in the movie. For instance, you’ll hunt down the Lizard while meeting Kraven the Hunter. All of these additions help you become stronger and unlock new abilities in preparation for the final battle.
Spider-Man: Friend or Foe (Windows)
With a different spin on the game mechanics, Spider-Man: Friend or Foe is a side-scrolling fighting arcade game where you beat up as many enemies as you can per level. You’ll cross streets, rooftops, and other terrains in your mission, but your goal is simply to go from one side of the stage to the other while eliminating your foes.
One element that’s similar to many Lego superhero and villain games is that you unlock the main villain you defeat. For instance, Venom or Doc Oc can become allies as soon as you defeat them. A second player can join you at any time if they want to partake in the head-bashing hilarity.
The Amazing Spider-Man (Android)
Returning to the Andrew Garfield universe, The Amazing Spider-Man is a delightful game based on his first Spidey movie, this time for Android devices. It presented outstanding graphics for mobile phones during that time, while the action gameplay was incredible. As we’ve become used to by this time, you swing around in an open world taking care of baddies while working up to the main boss.
However, you’ll be surprised to learn that the story actually happens after the movie’s plot. With Gwen Stacy at your side, you’ll face the sinister Alistair Smythe, who was a popular villain in the comics. You’ll love when your spider-sense warns you of danger, and there are some skills to unlock along the way. It’s certainly still one of the top Spider-Man games for Android still around.
Spider Web of Shadows Fight (Android)
Despite a challenging name to say out loud without sounding ridiculous, Spider Web of Shadows Fight was an addictive Android game with action platform features. It’s based on the same title from the console version, but only as far as the plot and some choices are concerned. You’ll meet some of the mainstay villains again, such as Venom.
Once you unlock the symbiote suit, you can switch between red and blue or black. You’ll also meet Agent Fury, who provides you with the details of the alien attack on New York. While fighting and jumping are among the main actions, you can also crawl along walls and web-swing, of course.
Spider-Man: Total Mayhem (iPhone)
While being a mobile game, Spider-Man: Total Mayhem actually pulls off the action in a 3D environment quite well. The graphics are slightly outdated now with blocky characters, but it delivers just as much fun as when it launched in 2010. You’ll once again face off against goons in the street as a test of your prowess, with simple controls on the screen.
The villains in this Spider-Man game for iPhone are a mix from various movies, with more of a focus on the comics. Most of the Sinister Six are around, such as Goblin, Doc Oc, Electro, and Sandman. The music is superb, getting your adrenaline rushing as you take on the bad guys.
Spider-Man Unlimited (iPhone)
Here’s a Spider-Man game with a different take on gameplay. Spider-Man Unlimited features linear running mechanics where you’ll need to jump and perform actions according to the items you come across. Objects will fall in your way or attempt to stop you while you work out which is the best course of action.
You’ll love the cartoon graphics that are similar to the comics. You’ll earn in-game currency tokens to use when you die or unlock items. As you progress through the Spidey game, you’ll discover other versions of our hero with new abilities you can use against the bosses.
Spider-Man: Far From Home (iPhone)
If you’re a die-hard Spidey fan, you’ll love the Spider-Man: Far From Home app. While there aren’t many game elements, it definitely goes on our list for you to try out. There are augmented reality features where you may come across Mysterio or Spider-Man from the movie with the same name.
One of the functions lets you take a selfie with Spidey or Peter Parker, depending on your preference. You can also hack his phone and see his text messages, photos, and voicemails with real voice-acting.
A web-swinging adventure for Spidey fans
Spider-Man has come a long way from when Stan Lee first created him in comic books. He’s still regarded as one of the most powerful and popular superheroes of all time, and the villains, characters, and stories will live with us for all time. Is there a Spider-Man game you love that you feel should be on this list? Let us know.
Over the past six months, EA and DICE have put a lot of work into editing and updating Star Wars Battlefront II. The Solo Season added new skins (Lando, Chewie, Han) and maps (Kessel), as well as a neat little touch where lightsaber-wielding hero characters are now able to turn their lightsabers on and off (hold Y/Triangle on console or gamepad).
In addition, EA has also put in a variety of new game modes, some of which are permanent new additions, and others that are in rotation. All of them can be found under Multiplayer from the Play menu. Here’s a rundown of what you’ll find in these new modes:
Extraction (Operations)
http://battlefront.wikia.com/wiki/Extraction
Featured in EA’s previous Star Wars Battlefront, Extraction returned to BFII with the Han Solo Season Update. Extraction is a push scenario where the Rebels try to escort a slow-moving cargo tram through either the Coaxium Mine or Jabba’s Palace. Empire players will be attempting to gun down the Rebels so that none remain present to move the tram forward. This escort goes through three checkpoints, each of which will reset the five-minute timer. Should this timer run out before the Rebels reach the next checkpoint, the Empire wins.
An Extraction match can hold up to sixteen players and does not allow for heroes. Players can, however, unlock enforcer and aerial class units with their earned Battle Points.
Jetpack Cargo (Operations)
http://battlefront.wikia.com/wiki/Jetpack_Cargo
Removed on March 5, 2018 but re-instated in EA’s 2.0 patch, Jetpack Cargo is on rotation with the infamous Ewok Hunt (see below) as of the Hero Starfighters Update on July 3rd. Jetpack Cargo features up to 20 players on either Yavin, Tatooine, or Bespin and plays out like a 1-flag Capture the Flag match, with the “cargo” appearing in the center of the map. To win, a side must deliver the cargo to the enemy’s side three times.
Possibly BFII’s most hectic mode, each player spawns as an aerial unit equipped with a blaster and a rocket launcher. Boost cards do not affect gameplay here.
On rotation with Jetpack Cargo, Ewok Hunt is a frightening struggle for survival. Matches begin with 20 players, only two of whom are ewoks. The rest are stormtroopers, but they don’t have it as easy as one might think. Empire players are confined to a first-person view in a completely dark forest with their only light source being a flashlight mounted to their rifle. The light is on a timer, too, meaning that you WILL be in complete darkness at some given time. Brightness settings are also disabled for this mode (nice try) and the minimap is disengaged as well, making for a very alienating experience.
Ewoks, on the other hand, have night vision, a rallying horn, and wisties: A throwable pouch that bursts into a swarm of fireflies, dealing damage over time. Whenever an Empire player dies, they will respawn seconds later as an ewok, slowly increasing their numbers and turning the tide in their favor. Hilariously, this is likely the most realistic depiction of what the Battle of Endor felt must have felt like from the Empire’s perspective.
Empire players may also chance upon weapon caches sparsely littered around the map. After about seven minutes, a shuttle will come down to extract any surviving stormtroopers. A mad dash for the shuttle ensues, reminiscent of a finale out of Left 4 Dead.
The only new mode to take place off the ground, Hero Starfighter Assault is an eight-player dogfight on either Fondor, Ryloth, Endor, Kamino, D’Qar, or the Unknown Regions. As is typical of the Hero vs. Villains mode, chronology is ignored here and players have access to any hero ship in BFII’s hero lineup.
The first team to defeat all the enemy hero ships wins, and any defeated players will respawn in any normal ship of their choice, also having access to fighters, bombers, and interceptors from all eras.
Hero Showdown (Heroes and Villains)
http://battlefront.wikia.com/wiki/Hero_Showdown
Hero Showdown is your typical Heroes vs. Villains ground match, but with two distinct differences – instead of eight-player four v. four, it’s knocked down to a four-player two v. two, making for an experienced much more focused on teamwork, strategy, and good communication.
Hero Showdown matches last for five rounds, the winner being the first team to win three. The catch, however, is that the winning team is not able to play as the heroes they just won with. So while you might be able to win easily with your upgraded epic characters, you won’t be able to play as them again!
Choose wisely.
We found it was best to pick two characters with similar abilities and weapons (i.e. two Jedi or two ranged characters) and to stick close by your partner. Matches may take place on Endor, Naboo, Tatooine (Jabba’s Palace), Hoth, Naboo, or Starkiller Base.
Hope our rundown was helpful! For more updates and Battlefront II news and patches, check out their EA’s forums right here.