Audio Editor Audacity 3.2 launches with real-time effects support

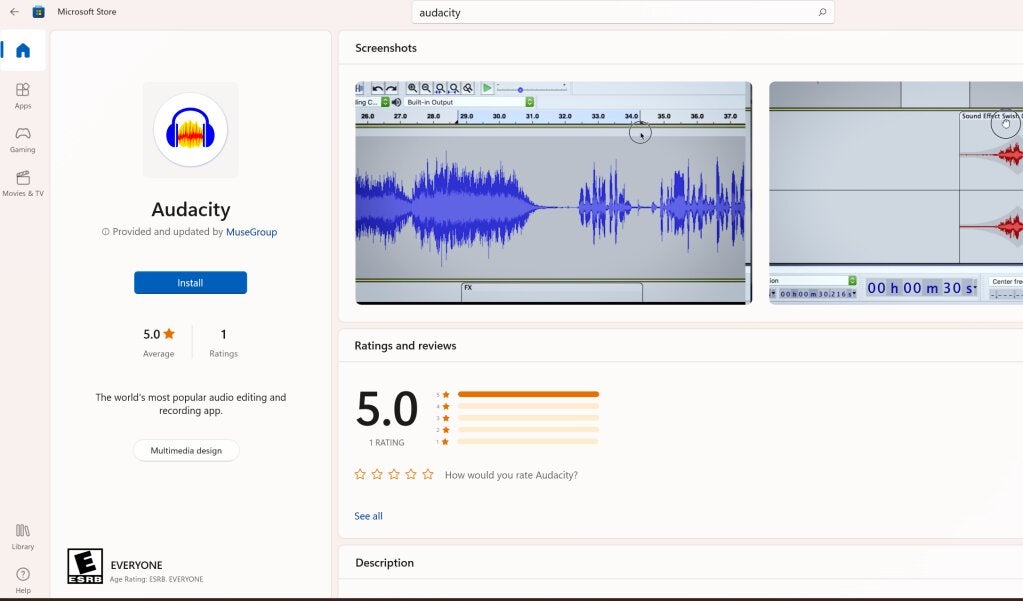
Muse released a new stable version of the open source audio editor Audacity on September 27th, 2022. The new Audacity 3.2 release introduces support for real-time effects and interface improvements.

Audacity DOWNLOAD

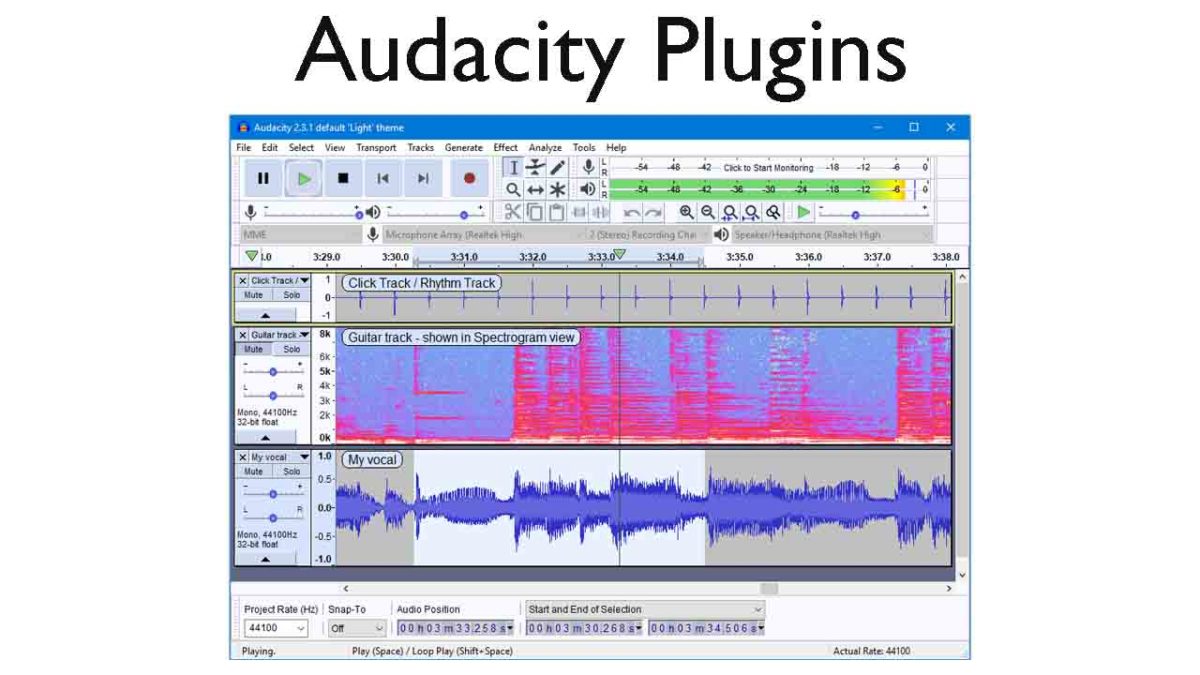
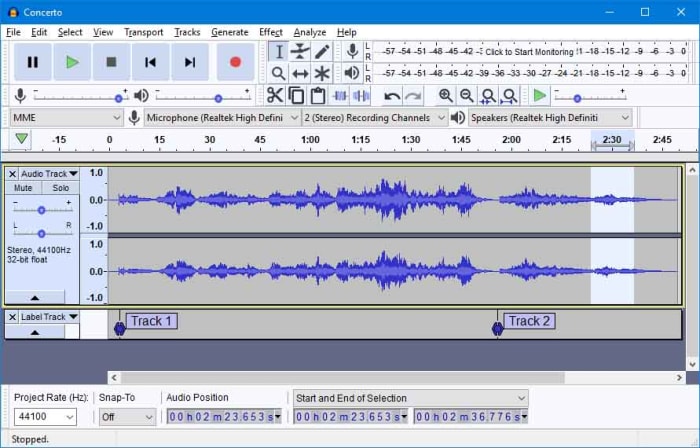
In case you never heard of Audacity before, you may check out our guide on using Audacity. In short: Audacity is an audio editor that you may use to edit any type of audio file and to create audio recordings.

Audacity supports real-time audio recording of any sound of supported operating systems, conversion of one audio format into another, and the cutting or mixing of sounds. Add support for effects and plugins to that, and you get a free feature-rich audio editor that leaves little to be desired.

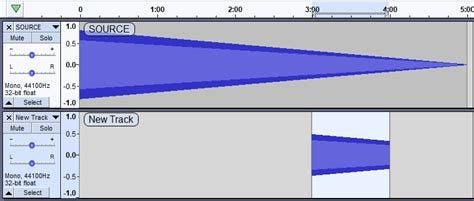
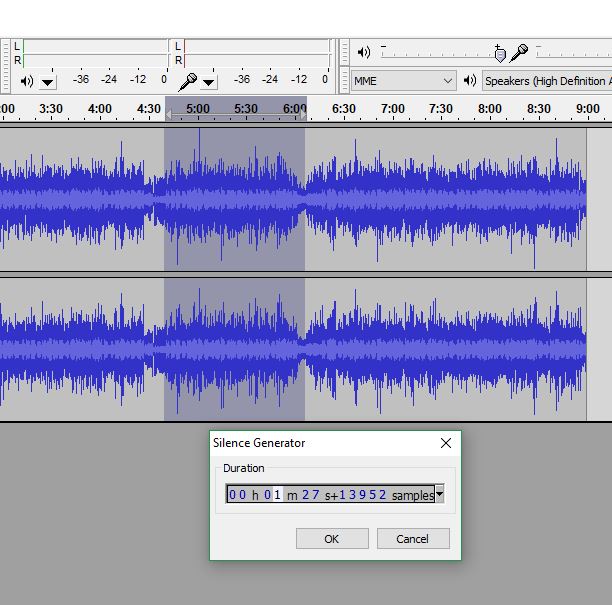
One of our favorite features of Audacity is the ability to create white noise sound files with just a few clicks.

Audacity 3.2

Audacity is a cross-platform application that is available for Windows, Mac and Linux systems. The latest version supports Windows 8.1 and newer versions of the Windows operating system only. Legacy downloads are available for older versions of Windows.

Installation of Audacity 3.2 is straightforward on Windows. All it takes is to download the latest version and run the installer. A portable version is provided as well, which does not need to be installed; this makes it ideal for testing.

One of the main development goals for this and future releases is the transformation of the application into a digital audio workstation. One key aspect of the transformation is support for real-time effects.

Audacity 3.2: real-time effects

The three main feature improvements in Audacity 3.2 are real-time editing capabilities, VST3 plugin support and sharing options.

Most of these new features improve the audio editor for professionals, but anyone interested in audio editing may use the new capabilities of the audio editor.

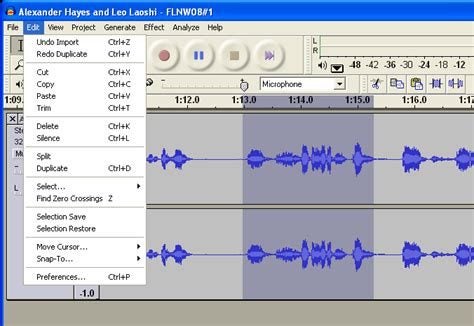
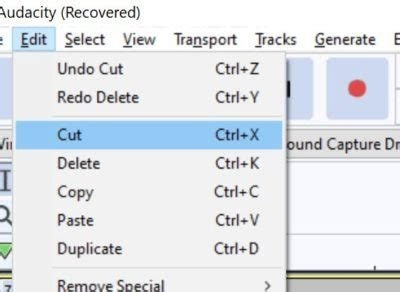
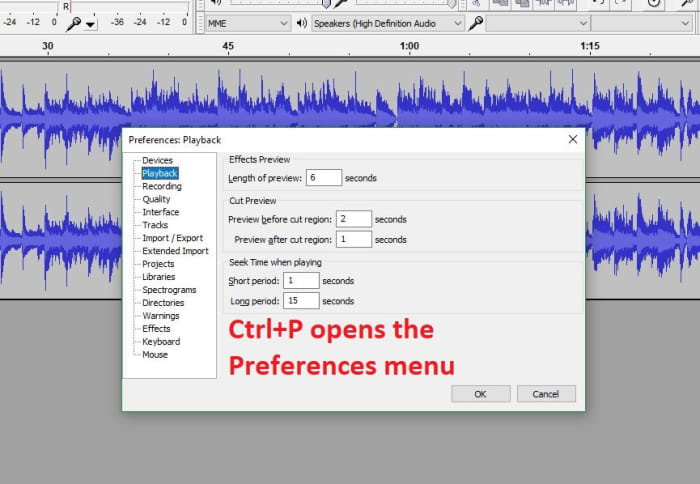
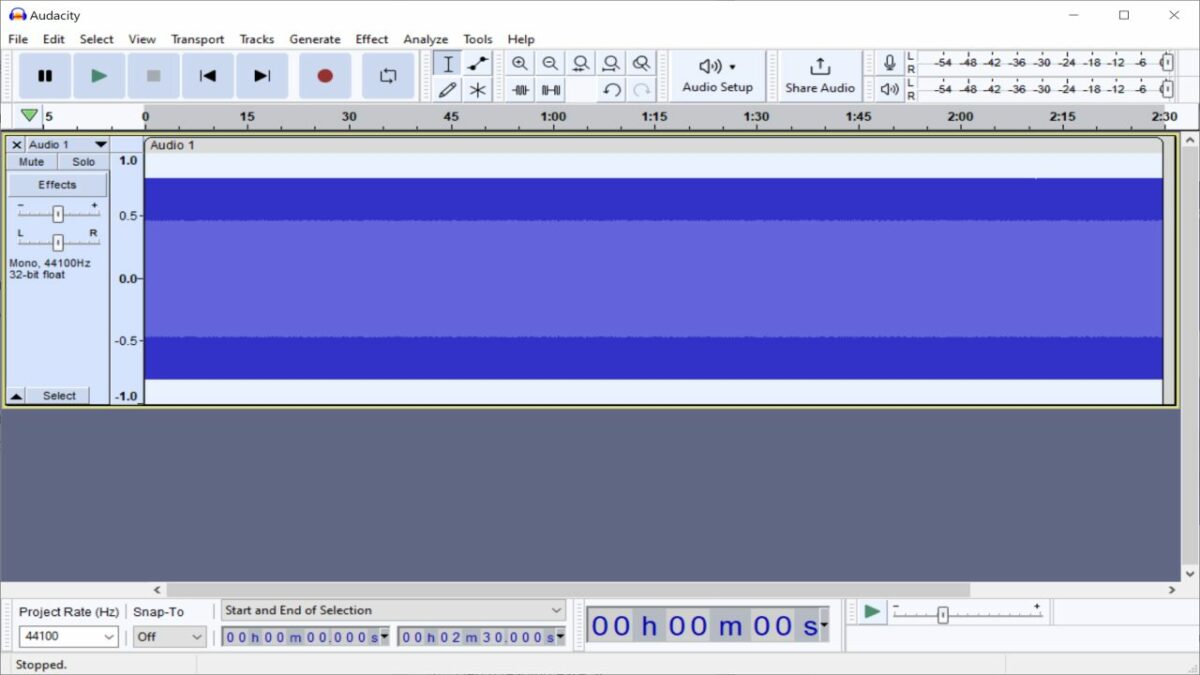
Veteran users of the audio editing software may notice that the interface is simpler and easier to use. The developers removed duplicate and unnecessary features from the user interface to achieve that goal.

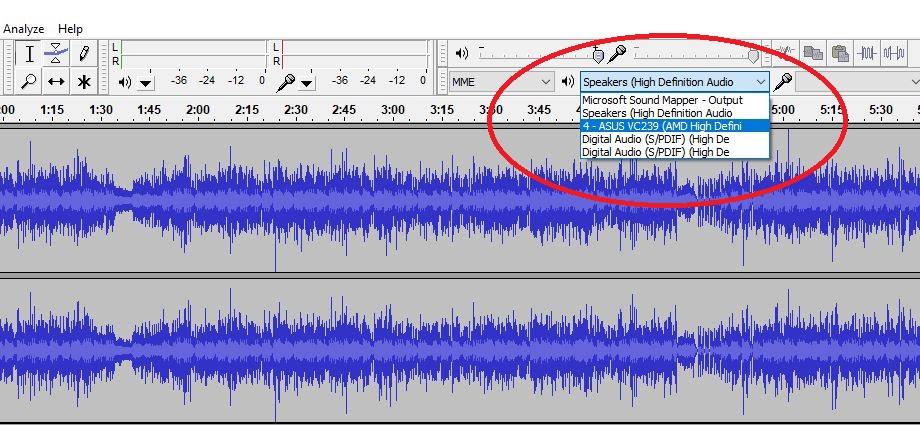
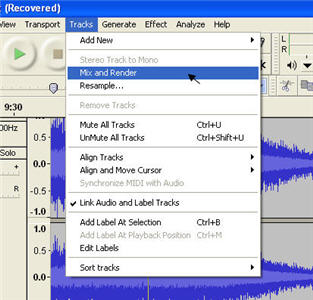
For example: the dropdown audio settings menus are now available under a single audio settings button, which improves access significantly.

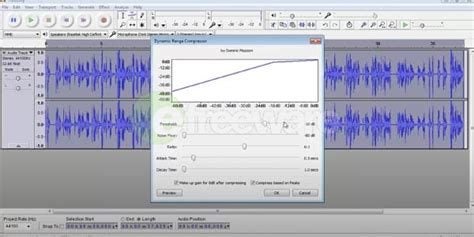
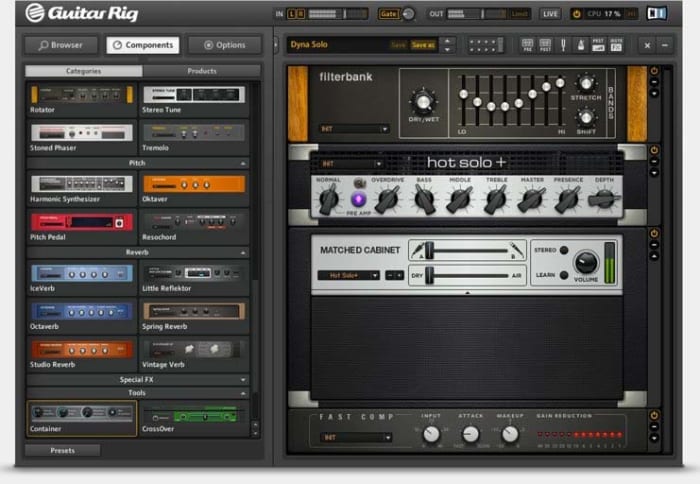
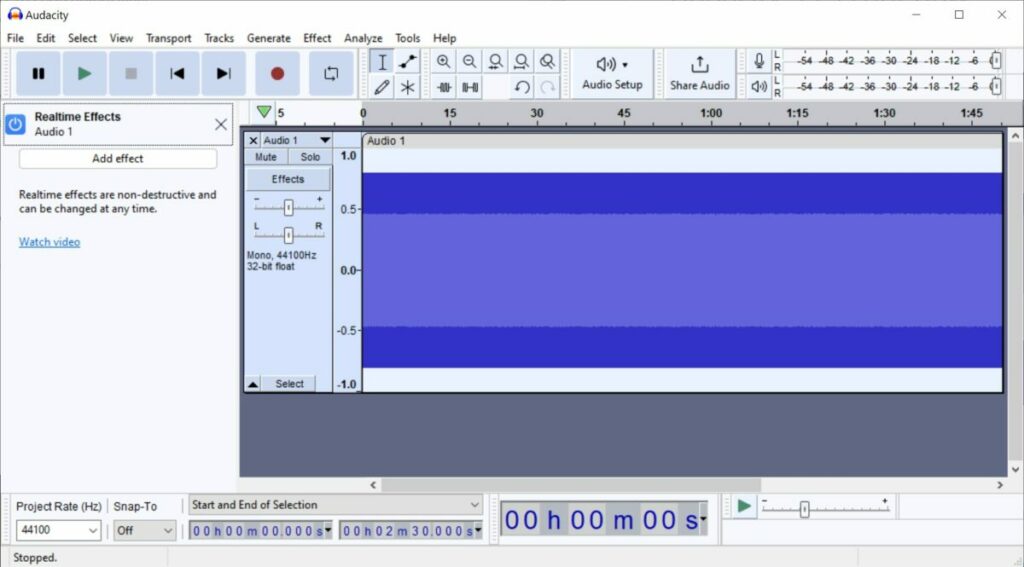
Real-time effects allow users to apply and edit effects at any point in time. Muse notes that it “is now possible to reduce the amount of echo on a vocal track, or increase the amount of distortion on a guitar track, without having to modify the underlying audio data”.

Instead of having to use the undo button to remove an applied effect, it is now possible to adjust the effect until it is perfect. Consequently, audio editors save a lot of time when using effects in Audacity.

Audacity supports stackable real-time effects, which may be reordered on the fly.

Other improvements in Audacity 3.2

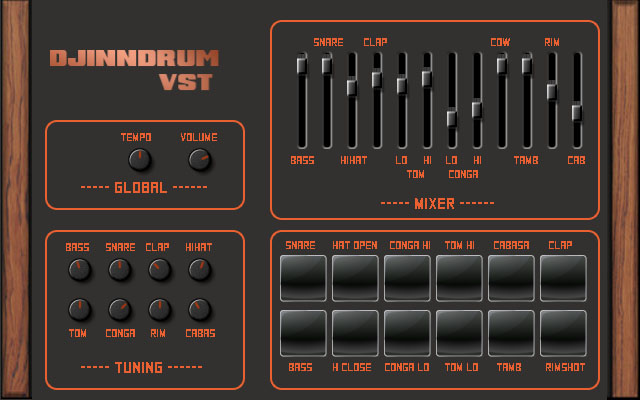
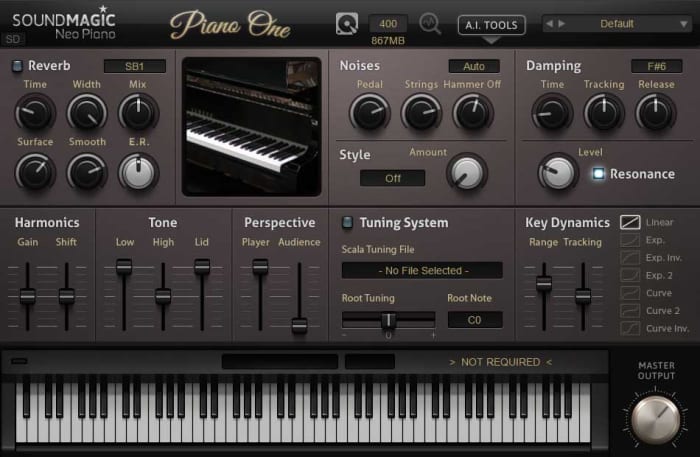
Audacity 3.2 introduces support for VST3. VST3, the VST stands for Virtual Studio Technology, is an audio plug-in interface. Its main purpose is to integrate software synthesizers and effects into digital audio workstations.

Support for VST3 gives users of Audacity options to load these plug-ins into the audio editor.

Muse integrated its audio sharing platform audio.com into Audacity 3.2. Audacity users may link their account in the software to upload audio content to the platform from Audacity.

Verdict

Audacity remains an open source free audio editor. The extra capabilities are all optional, but improve the audio editor significantly for some users.

Generally speaking, it is still the same audio editor as before for most users. It remains to be seen how the new sharing platform develops in the coming months and years. In the long run, it is likely that paid plans will be introduced that offer more features and options.

You can now get Audacity on the Microsoft Store for free

If you head to the Microsoft Store and search for Audacity, you’ll notice how many knock-offs there are of this popular audio-recording program. Some of them even charge you a price, which then heads to the pockets of the false sellers. Microsoft has finally put an end to this, offering the official software for free.

Martin Keary is the original creator of Audacity. While he provides the program for free on the official website, it bothered him that so many Windows users were heading to the store and paying for knock-offs. Keary decided to take the name back and give Microsoft users the proper version without charging a single cent.

To find the proper version, look for one developed by Muse Group & the Audacity Open-Source Community. If you check the official site, you’ll notice it’s the same team that created and published Audacity. Now you can edit your songs and podcasts with the authentic app on your Windows device.

For those of you who don’t know, Audacity has helped many musicians and audio editors in compiling music or tracks for various reasons. It can be used for games, short videos, and even podcasts. However, you don’t need to pay for it at all, no matter what the scam artists tell you.

One of the benefits is that you can merge uninterrupted audio tracks on Audacity. It entails a few easy steps where you combine two recordings into one with a simple drag-and-drop mechanism. It’s also simple to edit after that, especially if you want to clear some background noise.

It’s a pity the free version of Audacity wasn’t available before. It would have saved so many people money that unfortunately paid for it to be part of the Windows experience. Who knows? Maybe when Windows 11 finally receives the promised upcoming features, we will have an alternative option as a default app.

How to merge an interrupted recording with Audacity

Audacity is an award-winning, free, open-source digital audio editor and recorder. It can run on Windows, GNU/Linux, macOS, and other operating systems. Even if you’re a complete beginner, you can do lots of things with Audacity. You can record live audio using a microphone or mixer and import, combine and edit sound files. You can digitize recordings from other media and export recordings in different formats. If you’re not happy with something you’ve recorded, you can undo and redo as many steps as you need to. 

You can remove extra noises from your recording or filler words in a voice-over. And there should be no problem understanding anything in Audacity because it offers the interface in more than 30 languages!  

Plug-ins and sound quality

Audacity supports many plug-ins to enhance your recordings, including LADSPA, LV2, VST and Audio Unit. Nyquist effects can be modified using a text editor. 

 When it comes to sound quality, Audacity supports 32-bit, 24-bit and 16-bit equipment. You can convert rates and formats using quality dithering and resampling. 

File formats supported

Audacity supports many different file formats, including FLAC, OGG, MP3, AIFF, WAV, MP2, and more. Some plug-ins will also allow you to use MP4, M4A, as well as AC3. Audacity can also convert some file types.

How to merge tracks in Audacity

Merging different audio tracks into one is among Audacity’s best features. It’s not at all difficult. This is how you combine tracks.

  1. Open Audacity

    Open Audacity or download it if you don’t already have it installed on your computer.

  2. Drag and drop audio files

    How to merge an interrupted recording with Audacity

    Drag the audio files you want to merge into Audacity’s window. Each of them will show as a track.

  3. Cut one track

    How to merge an interrupted recording with Audacity

    Select the track you want at the end of another one and choose Cut from the Edit menu. Or cut that track by using Ctrl+X.

  4. Paste track

    How to merge an interrupted recording with Audacity

    Click at the end of the track you want to run first when they’re combined, and click Paste. Or press Ctrl+V to insert the audio you’ve cut at the end of the other one.

    Play the combined track and see if you’re happy with it. If you are, export or save it as you wish.

Creative uses of Audacity

Audacity can enhance any creative projects you might undertake. Here are some ideas:

Record music

Audacity’s multi-track music recording ability is legendary, and some professional musicians use it for all their recordings, including whole albums! It’s ideal for recording backing tracks for singers.

Record your ideas

You can record story ideas if you’re a writer or song lyrics if you’re a musician. You can even record a shopping list so you don’t forget what you must buy when you get to the store.

Make a karaoke backing track

If you’re into karaoke and want to practice at home, record some backing tracks and sing to them, so that if you decide to do it in public, you’ll know exactly how you’ll sound.

Practice a speech in Audacity

You can record yourself making a speech, giving a toast or making a presentation. Practice makes perfect, and by listening to a recording of yourself, you can ensure you sound perfect.

Record audiobooks

If you have a good voice, you can record audiobooks. You can do this for your family, friends, or children or offer them to groups that provide audiobooks for visually impaired people. 

Learn a foreign language

If you want to learn a foreign language, Audacity can help. You can record yourself speaking or reading to practice and play it back to check your accent and pronunciation.

Create a podcast

Because of its multi-track capabilities, you can import audio, fade in tracks or add sound effects and music to enhance the dialogue in your podcast to make it really interesting.

Versatile Audacity makes sound easy

It’s hard to think of another software program that allows you to do as much as Audacity when it comes to recording and playing back just about anything. That’s why it’s so popular, not only with people playing around and enjoying audio but with professional musicians and writers. There’s so much you can do, so give it a try!

How to do bird audio cleaning via Audacity?

Have you ever recorded a podcast or talking session and discovered there are birds singing in the background? Perhaps you played guitar or piano, but the birds ended up on the sound file between rests. Fortunately, there are some editing tools you can use on Audacity to eliminate the issue.

Performing bird audio cleaning on Audacity is easy and only takes a few steps. Once you know how to do it, you can use it to clean other types of noises. Of course, it depends on your approach and what you’re aiming to achieve.

What is bird audio cleaning?

Bird audio cleaning can refer to two different types of goals. The first one, which we’ll focus on in this article, is removing bird noises from your sound file. It usually occurs when there’s a gap in the speaking or music and you can hear the bird calls in the background.

The second type is more complicated. It refers to the practice of recording bird sounds so you can use them in sound files or music. When you perform bird audio cleaning in this situation, you’re eliminating any background noises you don’t want to accompany the bird sounds.

How to perform bird audio cleaning on Audacity

No matter which approach you take, you can use the steps below for both forms of bird audio cleaning. We’ll focus on removing the bird sounds on Audacity, but you can also do so for any other background noises. The same rules apply.

  1. Search for the bird sounds on the recording

    How to do bird audio cleaning via Audacity

    To begin, start the sound file on Audacity and watch the wave patterns. You’ll need to find a spot where there’s as much silence as possible surrounding the bird sounds. That’s why most content creators wait about six seconds at the start and end of recordings to give them a reference point.

  2. Select the bird noise reference

    How to do bird audio cleaning via Audacity

    Once you have a section where you only hear the bird sound you want to remove, you’ll need to select it. Make sure you only highlight the part where the birds are chirping away. Now, go to Effect and then Noise Removal. When the window appears, click on Get Noise Profile.

  3. Clear the bird audio sounds

    How to do bird audio cleaning via Audacity

    Audacity now knows which noise you want to clear. All it needs now is for you to say where you want it cleared from, especially if you don’t want to apply it to the entire sound file. When the window vanishes, select the entire recording or only the portion where you want to do bird audio cleaning. 

    Head back to Effect and Noise Removal, and now click on OK. You’ll notice that the sound waves change slightly. All the background bird noise effects are now gone. You can start the steps over again if there are other sounds you want to eliminate.

How to minimize bird audio recording

While clearing bird audio in your sound file via Audacity really works well, prevention is better than cure. There are some steps you can take to save time in post-production with editing and eliminating background noise. We recommend the following tips:

Microphone quality

High-quality microphones have mouthpieces or mesh filters to help block out ambient and bird sounds. Always research the devices before you buy one to see whether they’ll assist so you won’t have to do too much editing.

Recording space

It’s best if you record in a space that isn’t close to the bird sounds. We know it’s not always possible to do so, as you may be performing an interview or podcast recording outside. The more you can block bird sounds from the area, the better.

Reduce ambient noise

The one element that may interfere with bird audio cleaning is ambient noise. If there’s too much interference from other sounds, you may not be able to identify and eliminate bird calls properly on the file. You may need to first deal with the ambient noise and then the bird sounds.

Increase microphone gain

Some microphones let you increase the microphone gain, which means it stands a better chance of recording your voice-over background noise. It may be a dial on the mic or a setting in the software. Check the manual for how to apply it.

Move closer to the mic

Another trick is to move closer to the mic so your voice drowns out the bird sounds. Of course, you don’t want to get too close, as the recording will distort and sound terrible

Do a few test recordings first

Run a few tests before you start the first official recording. Check the tips above for how you can improve the sound files, and then see if it improves when you apply any of them. If all else fails, do bird audio cleaning with Audacity.

How to do bird audio cleaning via Audacity

Silence of the birds

While the sound of birds is spectacular in the morning when you wake up to the sunrise, it can become a nuisance when you’re recording a new album or podcast. Of course, it’s a different matter if you’re deliberately capturing bird sounds and other background noises are causing issues. Either way, these tips for Audacity will help you come right.

Best Audacity plugins

Check out our list of the best Audacity plugins.

The best audacity plugins

Audacity on Windows, Linux, and Mac OS X operating systems is an excellent open-source audio editor for anybody who needs to do pretty much any task relating to the audio. Audacity puts the power of a music producer recording studio right there in your bedroom and it is fair to say that many of the biggest tracks have been produced in bedrooms by aspiring producers and DJs just like you.

Audacity is a very well-made piece of music software that has been developed by and continues to be maintained by the audacity team, which is a group of volunteer developers all over the world. The nature of the Audacity software is why we’re here today. Its core functions mean it can help you create podcasts or produce tracks that can hit the top of the charts, it is that good. On its own, however, it can be and feel a little limited. This is OK though, as because it does the basics so well, other developers can build their own plugins that augment the music production process. This is what we’re going to look at today, an Audacity-files plug-in directory. These are the best Audacity plugins.

7

Best free plugins for Audacity

Audacity VST Enabler

VST effect plugins. This is where all Audacity plugin guides should start. The Audacity VST Enabler plugin manager allows users to take advantage of high-quality Visual Studio Technology (VST). Using VST plugins will give you the ability add all sorts of different recording studio like features to your setup. Think pianos, synthesizers, oscillators, and even guitar rigs or classical instrument inputs and samples and you’ll start to see just how much is possible with VST plugins for Audacity.

There is good news and bad news, however, when it comes to the Audacity VST Enabler. The bad news is that it has been removed from the official Audacity website. The good news is that it has been built-into Audacity itself. If you’ve recently installed Audacity, you already have it and can begin downloading VST plugins. If you installed Audacity a while ago or have an older version like v. 1.3, update Audacity and you’ll be ready to install VST plugins.

Djindrumm LM-1

Djinndrum

Now that we’ve cleared all that up, let’s get into some of the best VST plugins you can add to Audacity. Let’s go through VSTs that’ll help you create and enhance all the sounds you’d get from a band then add some creative powers to your setup too.

First off then, is the Djindrumm VST. The Djindrumm is a digital re-creation of the classic Linn LM-1 drum machine. The Linn has been a stalwart of rock and pop gods for years. Michael Jackson used one and so did Prince. Enough said. You can get the tools they used to make their hits with this free VST plugin for Audacity, which you also got for free. It really is a mad and crazy world we live in.

Piano One

Piano One

Many people think that Piano One is the best free acoustic piano VST plugin you can get your hands on. One of the main reasons for this is because the samples came from a Yamaha C7 Grand Piano, which would set you back about $75,000, if you bought one today. Yep, that’s right, you can get a free acoustic piano that sounds like a $75,000 piano. The free version of this VST isn’t feature rich, but it sounds incredible.

Acon Digital Multiply Chorus

Acon Chorus Multiplier

The Acon Digital Multiply Chorus plugin is great if you want to thicken out your sound and add a bit of depth to your tracks. It offers control over frequency and amplitude modulation and can add minute delays to your vocals. This effects VST is excellent if you’ve already laid down your track and you’re looking to add a little atmosphere and emotion to the sound. It is only a small console, but it can bring so much to your music.

Melda MAutoPitch Auto-Tune

Melada AutoTune

Auto-Tune processes sound and then shifts the pitch to the nearest true semitone. This makes it an invaluable tool for any vocal mixer. If you’re laying down vocals on your track, you need to an Auto-Tune plugin, and the Melda MAutoPitch is one of the best you can get for free. It will fix the pitch in your tracks, correct all the notes that aren’t quite right, and also give you the ability to distort the vocal tracks you’re putting into your songs.

VK-1 Viking Synthesizer

Viking VK-1

If you’re looking to bring some retro electronica into your music, you’re going to want a synthesizer. The VK-1 is a VST plugin emulation of an analog mono synthesizer that’ll bring some real power to your Audacity setup. It comes with oscillators, dual modulation channels and an all-round accurate recreation of a very retro sound. What’s even better about the VK-1 Viking is that it is paid as you like. If you’re just getting started and don’t have much money to invest in your setup you can get this for free or very little.

CamelCrusher

CamelCrusher

CamelCrusher adds distortion control, reverb, compression, and filtering to your Audacity toolkit, giving you powerful control over the sounds and beats you add to your tracks. As well as giving you the control, CamelCrusher also gives you a number of presets to add some instant oomph to your output while also giving you an idea of what the plugin is capable of. The CamelCrusher plugin is so good that Apple decided to acquire the developers that built it. Don’t worry though, you can still download CamelCrusher for free.

Guitar Rig 5

Guitar Rig

Guitar Rig from Native Instruments brings the power of the most epic of rock god recording studios right into your bedroom. With 17 different amps to choose from, 27 cabinets, and 54 effects this VST plugin gives you the power to really take control of the guitar tracks in your audio files. It can even manage effects like tone shaping, different mics, and even the positioning of your setup. This really is some next-level gear.

34 handy keyboard shortcuts for Audacity

Edit audio like a pro for free with these Audacity shortcuts!

Audacity

If you’ve ever done any kind of audio editing you’ve probably at least heard of Audacity – that free program that covers the basics but probably isn’t as good as a more pricey DAW like Pro Tools, Logic, or Ableton. While a heavyweight DAW like Ableton can get the job done like a champ, don’t overlook Audacity just because it’s free. Spend some time with the program and you can work absolute magic with it. People will hear your final mix and be absolutely shocked that you made it with freeware.

7

One easy way to take your Audacity skills to the next level is to familiarize yourself with its many keyboard shortcut commands. This will allow you to work faster, gain a more discerning edge over your audio product, and fine-tune your tracks more accurately and meticulously. Here’s a list of 34 different shortcuts you can use as you work:

Universal commands

Starting with the absolute basics, these are general Windows commands that seamlessly translate over to Audacity for ease of use. You’ve probably used many of these before in a program like Microsoft Word or Photoshop, and Audacity conveniently keeps the paradigm.

Audacity preferences menu shortcut

CTRL+N New project

CTRL+O Open project

CTRL+W Close project

CTRL+S Save project

CTRL+Z Undo

CTRL+Y Redo

CTRL+X Cut

CTRL+C Copy

CTRL+V Paste

CTRL+A Select all

CTRL+D Duplicate

CTRL+P Preferences

Playback commands

Audacity shares similar audio playback functionality as other digital audio workstations (like Pro Tools, Reaper or even Finale). If you start using Audacity more consistently you’ll be using these functions a lot. These shortcut commands will save you a ton of time:

Audacity play shortcut B

Space Play/Stop

Shift+SPACE or L Loop

P Pause

R Record

1 Preview for one second

B Play from cursor to selection

Navigation commands

Editing audio is a lot of zooming in and out, selecting parts of the file, syncing tracks, and picking just the right nanosecond where you want to start that Fade Out effect or modify the volume a touch. Navigating your project is a cornerstone of using the interface, and getting a grasp of the relevant keyboard commands will grant you more finesse, maneuverability, and precision.

Audacity zoom feature
Set your zoom level faster with CTRL+#

CTRL+1 Zoom in

CTRL+2 Zoom normal

CTRL+3 Zoom out

CTRL+E Zoom to selection

F4 Zoom tool

F1 Selection tool

Edit commands

At its heart Audacity is free editing software, and that’s what the program’s all about. The following edit commands are what you’ll probably be using the most, to avoid having to keep clicking on obscure toolbar buttons or hunting through menus. Get used to these and you’ll be able to add effects, switch tools, and remove unwanted noise on the fly.

Audacity Amplify tool window
Switch to the right tool for the job.

F3 Editing tool

CTRL+R Repeat previous effect

Delete or CTRL+K Delete

CTRL+L Silence

F2 Envelope tool

F5 Timeshift tool

F6 Multi tool

D cycle tool forward

A cycle tool backward

For editing audio on a budget, you can’t do much better than Audacity. While it does suffer a few shortcomings (such as an inability to import WMA, AAC, AC3, or proprietary file formats), you’re getting a program that can keep up with other digital audio workstations, and that does it all for free. Other Audacity functions include multi-track mixing, vocal reduction and isolation, MIDI playback, and even full cross-platform operation.

We hope these helpful shortcut commands save you time! Stick with Softonic for more Audacity tips and tricks.

How to use Audacity: 14 beginner tips

For editing audio on a budget, it’s hard to ask for a better tool than Audacity. A free and open-source digital audio editor, Audacity is available for Windows, macOS/OS X, and Unix operating systems. The program has been around since 1999 and has been downloaded over 100 million times, and yet most users don’t really scratch the surface of what Audacity can do.

Audacity Free Download
7

While it boasts many useful features (cross-platform operation, vocal reduction and isolation, multi-track mixing, MIDI playback, and plugin support), it does suffer a few shortcomings. Its chief drawback is its inability to import WMA, AAC, AC3, or proprietary file formats. But considering the software is completely free, we’re more than happy to cut our losses and start editing.

http://ruportable.ru/audio/542-audacity-203-final-portable-rus.html

If you’re new Audacity or if you’re unable to find the right tool, your answers are here. We’ve put together a list of 14 beginner tips that show you how to quickly locate and effectively use the basic sound editing tools that Audacity puts at your disposal:

1. Set your audio device

If you’re not getting any sound at the start of booting up Audacity, it’s most likely because the program defaulted to the wrong output device. To change where the sound comes out, you just need to select the correct device. On the top toolbar there are pictures of a speaker and a microphone, both with sliders next to them.

Directly below the microphone slider is a drop-down where you can select your device. We recommend headphones, particularly if you’re working with a stereo track.

NOTE: The drop-down right next to this is for selecting your microphone device, so if you want to record, make sure the right device is selected here.

2. How to delete part of a clip

Audacity actually makes this super intuitive. All you need to do to delete part of an audio track is to highlight what you don’t want (be sure to select both left and right if you have your track in stereo). Then press delete. Couldn’t be simpler.

Note, though, that everything before and after your highlighted selection will just smash together which will inevitably sound bad. Check out our tips on fading and silencing further down.

3. Zoom in and out

You’ll almost certainly need your zoom tool for fine tuning and making precision cuts. To zoom, click the magnifying glass on the top toolbar and click where on the track you’d like to zoom. Right-click to zoom back out. You can also use ctrl+1 and ctrl+3 to do the same thing. Ctrl+2 resets to default.

4. Open a new empty track

To insert a new track into Audacity, click the tracks tab up top, then add new. Pick whether you’d like this track to be mono or stereo. You can also simply type ctrl+shift+N.

5. Insert another completed track

Contrary to our above point, this is how you add a track that already has audio. To do this, click on import via your File menu. Then choose audio. Or you can simply ctrl+shift+I to open the file explorer for importing.

Once the window is open, navigate to the track you want and add it. Be sure it’s either a .wav or .mp3 file. If you need to change the format, your best bet is to use this free site.

6. Align your tracks

The most accurate method for lining up your tracks is under the tracks menu. From there, choose align tracks. Select start to cursor and the next place you click will be where your selected track begins.

7. Lower track volume

Select the part of the track you’d like to quiet down. Under the effect tab choose amplify. It will open a window with an adjustable slider. Lower it by however many decibels you think the volume should lower. Don’t forget you can hit ‘preview’ to check whether it sounds right before you commit.

8. Raise track volume

To raise the volume of a track you’re going to be opening the same window as in our last tip (effect > amplify). Be sure to highlight your selected audio beforehand.

Once you’re in the new window you’ll raise the slider by however many decibels you like.

NOTE: Audacity will not allow clipping by default, meaning it won’t go above a certain margin of volume without breaking that threshold. If you want to ignore this default, click ‘allow clipping’ before committing to the change. Check whether you’re alright with the audio quality after doing this, though.

9. Where is it clipping?

To see any place where your track volume is clipping above the safe threshold, open the view tab and click show clipping. This will show you any place where your volume spikes. Either adjust those areas manually, or alternatively use effect > equalization to set your own volume parameters.

10. Fade in/Fade out

This one’s pretty easy. Highlight the selection you want to fade and under the effect menu you can choose either fade in or fade out.

You might consider doing a double fade depending on what sound you’re going for.

11. Double fade

You might find that the fade is not blunt enough, or that it doesn’t taper as obviously as you’d like. To rectify this, let’s take a fade out, for example: Highlight the selection where you want your fade, then go ahead and add it (as described above). Now select the latter half of that same selection and fade out again. Give it a listen; this might be closer to the effect you were expecting.

12. Delete part of a clip without changing the clip’s length or speed

Normally when you delete a selection of a clip it’ll smash the other segments together, making for some jarring audio and affecting the timing for everything past that point. To avoid this, a neat trick is to instead select the portion you want removed and instead of deleting it, go under your generate tab and select silence.

You’ll create emptiness for the duration of your selection.

13. Modify pitch

This is a fun feature that’s useful if you want to make someone’s voice sound lower or higher. Highlight your selection and look through your effect menu. Choose change pitch. It’ll open up a new window.

Adjust the slider and preview until it sounds the way you want. We advise you to mark down the number you choose, though; that way you can replicate the pitch again later.

14. Export your tracks

When you’re done working, you can export your project by clicking export under the file menu. Be sure to set your format before saving, and remember that you can change it later at this site.

Hopefully, this guide will help you more efficiently navigate through Audacity, and use some features you may have overlooked. Editing audio can be a time-consuming task, but it’s well worth the effort in the end!

Create a seamless mixtape with Audacity

/* Style Definitions */ table.MsoNormalTable {mso-style-name:”Tabla normal”; mso-tstyle-rowband-size:0; mso-tstyle-colband-size:0; mso-style-noshow:yes; mso-style-parent:””; mso-padding-alt:0cm 5.4pt 0cm 5.4pt; mso-para-margin:0cm; mso-para-margin-bottom:.0001pt; mso-pagination:widow-orphan; font-size:10.0pt; font-family:”Times New Roman”; mso-ansi-language:#0400; mso-fareast-language:#0400; mso-bidi-language:#0400;} I used to love making tapes for friends, but the onset of mp3s has made it a lost art form. Playlists just aren’t the same to me. I’m going to show you how to make an mp3 “mixtape” using a freeware audio editing program called Audacity. I used Audacity 1.3.6, which is a beta release, although using the older 1.2 version is the same as far as I can tell.

First, choose the mp3s you want on your mix. I recommend copying them all into a special folder, just to make sure you don’t mess up your originals! The next thing is choosing the order of play. You could do this in Audacity, but I find it easier to play about with the order in an iTunes playlist. Once you think your playlist looks good, it’s time to stick it together.


Open Audacity, close the welcome message, then from your special folder, drag and drop your first two tracks into Audacity. Choose the time shift tool, and drag the second track to around the end of the first. It should look something like this.


With my tracks, usefully, the first track faded out, and the next faded in, so I experimented with it until it sounded good. Usually you can get a nice effect just by choosing the right point to start the following track, but if it doesn’t work, you can create fade ins and outs by highlighting part of the track then going to ‘Effects’, ‘Utilities’ then choosing your fade.

Once you’re happy with the join between tracks, highlight both with the selection tool, go to ‘Tracks’, then click ‘Mix and Render’, which will blend the two tracks as you decided.


Now you have your first mix, you can continue to add more tracks repeating the above method. For my mix, the next track I chose was a much quieter recording than the first two, so it needed amplifying. To do this, simply highlight the whole track, go to ‘Effect’ again, then choose amplify. This tool isn’t great, as you can’t preview your results, but from experience, you’re unlikely to want to amplify more than 3.0db. Check the ‘allow clipping’ box, if you can’t then click the ‘OK’ button. You might need to experiment a bit to get the loudness of your tracks the same.


Eventually, you’ll be left with one long track (see left picture). Now you can export the mix as an MP3, which requires a tiny add-on to be downloaded, but Audacity will prompt you and take you through it. Unfortunately you can’t burn to CD with Audacity, though you can easily do that in iTunes and most media players, assuming your mix isn’t over 80 minutes long.


Using this cut and past method to stitch tracks together is surprisingly easy once you’re used to it, and there are some interesting effects you can add, and you could also add snippets of spoke word from films and TV easily, or even your own voice, as Audacity will record any external sound source you plug into your computer (like a microphone), and once recorded you can treat the snippet like any other file.


Audacity: audio mixing made easy

audacity-logo.jpgI must admit I’m not very fond of audio editing tools. Mixing music has never been my cup of tea, so when it comes to testing an audio editor, chances are I end up more confused than satisfied. However, this isn’t the case with Audacity. To begin with, this editor is free source and supports MP3, two features which usually don’t meet in this kind of application. Secondly, it’s easy to master, even for newcomers. And finally, there’s a wide range of filters and special effects you can apply to your music so that you easily achieve the desired effect.

Audacity doesn’t stand out for its interface. At first sight one wonders if this program is really going to be that easy to use. In fact, the interface sometimes makes it really hard to work with your tracks, especially when you zoom in on them for a more comfortable editing session. Besides this, I found myself constantly right-clicking on the working area and the tracks too, waiting for some handy context menu to appear but nothing came out.

Continue reading “Audacity: audio mixing made easy”