I hail from the awe-inspiring beauty of South Africa. Born and raised in Pretoria, I've always had a deep interest in local history, particularly conflicts, architecture, and our country's rich past of being a plaything for European aristocracy. 'Tis an attempt at humor. My interest in history has since translated into hours at a time researching everything from the many reasons the Titanic sank (really, it's a wonder she ever left Belfast) to why Minecraft is such a feat of human technological accomplishment. I am an avid video gamer (Sims 4 definitely counts as video gaming, I checked) and particularly enjoy playing the part of a relatively benign overlord in Minecraft. I enjoy the diverse experiences gaming offers the player. Within the space of a few hours, a player can go from having a career as an interior decorator in Sims, to training as an archer under Niruin in Skyrim. I believe video games have so much more to teach humanity about community, kindness, and loyalty, and I enjoy the opportunity to bring concepts of the like into literary pieces.
Tired of finding a cool app only to discover it’s not on the Play Store? With our help, you can still get it.
If you own an Android device, then you’ve probably heard about or come across APK files before? Perhaps you’ve downloaded APK files without even knowing what they are? APK files are critical if you want to use leaked apps or personalize your Android experience beyond what the Play Store allows.
In this article, we will be looking at what an APK file is, how they work, how to open APK files, and how to install one on your Android device.
What Is an APK File?
An APK file stands for Android Package Kit. This is a package file format used by Android operating systems to distribute and install apps on mobile devices. Essentially it works the same way that a .exe file works on a Windows computer. When you download an app from the Play Store, it is essentially an APK file, but you aren’t always aware of the file extension since it installs automatically.
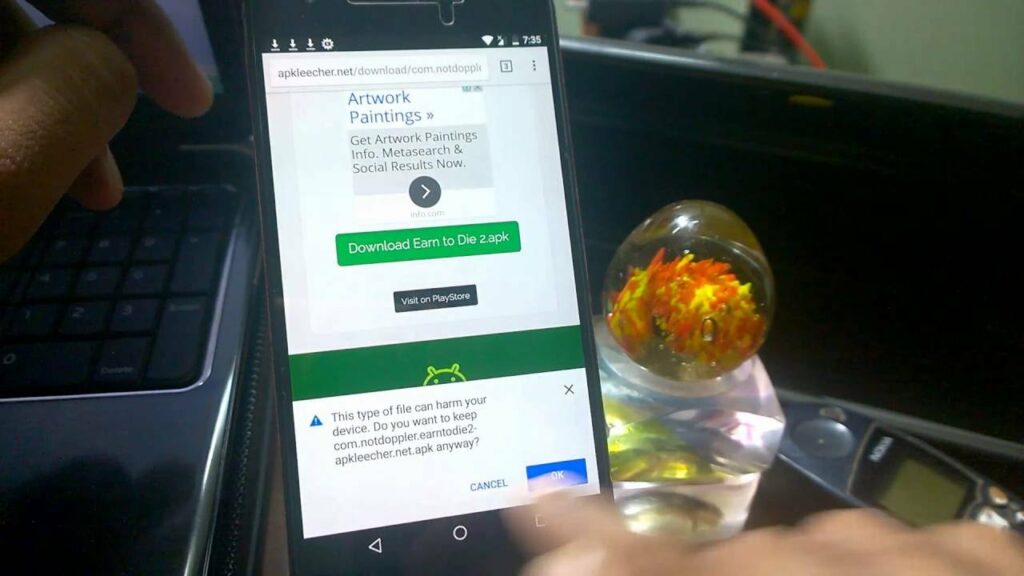
If you want to download apps for your Android device from other sources, you will download and install an APK file. There are a few reasons why you might want to download and install APK files from other sources than the Google Play Store. For one, the play store might not have the specific
Android app that you are looking for. Perhaps an app is not available in your country, it would not be listed in the Play Store, and you would need to download the APK files from a reputable third party. This also allows users to gain access to leaked apps before they are released on the Play Store.
Word of warning
Downloading applications outside the Play Store is practical but it can also be dangerous for your phone depending on where you download the APK file. Many hackers use these applications to introduce malware into your phone and even steal data.
For this reason, we recommend downloading a good antivirus app.
All Android devices have a default option that prevents you from installing any application from unknown sources. As a result, you can only download and add applications that have been reviewed by the Play Store.
In order to install a third-party application, you will first need to follow these steps:
Step 1: Access the Configuration menu
The first step is very simple; you just have to click on the “Settings” menu of your phone or Android device.
Step 2: Allow the installation of unknown sources
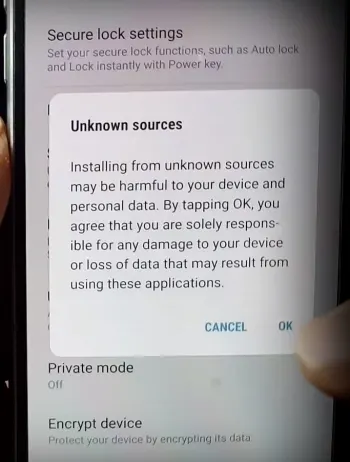
In the configuration menu, you will need to activate the option that will allow the installation of APK files. To do so, click on “Lock Screen and Security” and then look for the option “Unknown Sources.” This is usually at the bottom of the list.
Click on the option to allow the installation of applications from sources other than the Play Store. Your phone will warn you that it is dangerous to install third-party sources. Throw caution to the wind, and confirm the change.
If you use a Samsung Galaxy phone: The steps to activate this option on a Samsung Galaxy phone are very similar. The only difference is that you must go through “Sources” to activate the installation of unknown sources.
If you use an LG phone: If your phone is LG you will have to navigate first through “Settings” followed by “General.” In this menu, click on “Fingerprints and Security.” From here, click “Allow.”
How to install an APK file
After downloading the APK file to your Android device, you can install it. Search for the file in question within the downloads of our phone and click on it.
If you have trouble locating your phone’s download folder, we recommend that you install a free file browser for your phone such as Windows File Explorer.
Now, you’re free to download apps not featured in the Play Store. Again, please exercise caution when choosing which sites to get your apps, and what you download. You have the potential to download awesome apps for your phone, but you also have the potential to kill it.
Don’t let the word Android in the file extension fool you. The app can also be downloaded to other devices, such as your Windows 10 desktop. Although Windows 10 cannot recognize APK files, there are many programs that will allow you to install these files on your computer. You can either use an Android emulator, like Bluestacks, or you can use a Chrome browser extension, like ARC Welder.
To start, you’ll want to either download and install Bluestacks or Arc Welder. Next, you can download the app you want. If you’re using the Arc Welder Chrome extension, you can open that now and click on the ‘+’ to add the APK file. Bluestacks will work almost exactly as your Android device would. Search for the APK file you downloaded and click on ‘Install’ to start the process.
How to Open APK Files on iOS and iPhone
There is no easy way for an iPhone to open APK files as the programming language is difficult. While it would be possible to install APK files via an Android emulator, there are no such emulators available on the App Store. This would mean downloading one from a third party and may require jailbreaking your device.
This is not an ideal situation. As such, we would recommend first looking on the App Store for an iPhone version of the app you are looking for. The APK file version for iOS is known as .IPA files, so you could look for these files instead.
How to Open APK Files on Chromebook
On Chromebook, you can use the Chrome extension ARC Welder to open APK files directly in your browser. Alternatively, Chromebook has another way to open APK files. You can put your Chromebook in ‘Developer’ mode and enable installation from unknown sources. Once you’ve done this, you can open and install APK files.
It’s important to note that changing to developer mode will wipe your storage, and you’ll get messages notifying you that you’re in developer mode. Most of your storage might be backed up in the cloud anyways, and if it isn’t, we recommend doing so before switching to developer mode.
The world of APKs and Android
Now that you know what an APK file is and how to install it, you can have a look at which apps are available on the web. While the safest route is using an app store, you can also find gems on others sites where you can download them directly. Remember to protect your device from malicious files.
Mobile games have evolved a lot since the first sighting of that well-known digital snake. With some games even coming close to PC and console-style quality, there’s a whole new world of options on mobile platforms.
Clash of Clans is one such option; in some spheres of mobile gamers, it’s more than an option; it’s a staple. But with so much mention of it in popular culture, you might be left wondering what is Clash of Clans and how do you play it?
What is Clash of Clans?
Clash of Clans is a hybrid online multiplayer game set in a fantasy realm. You play as a village chief, and you are responsible for expanding the village, cultivating mutually beneficial relationships with other chiefs to form clans, and engaging in battle with rival clans.
What Type of Game is Clash of Clans?
Developed and published by Finnish game developer Supercell, Clash of Clans is a free-to-play mobile strategy video game. Players in Clash of Clans construct their own villages by using the materials they gain by attacking other players’ villages, earning rewards, buying them with medals, or producing them at their own villages.
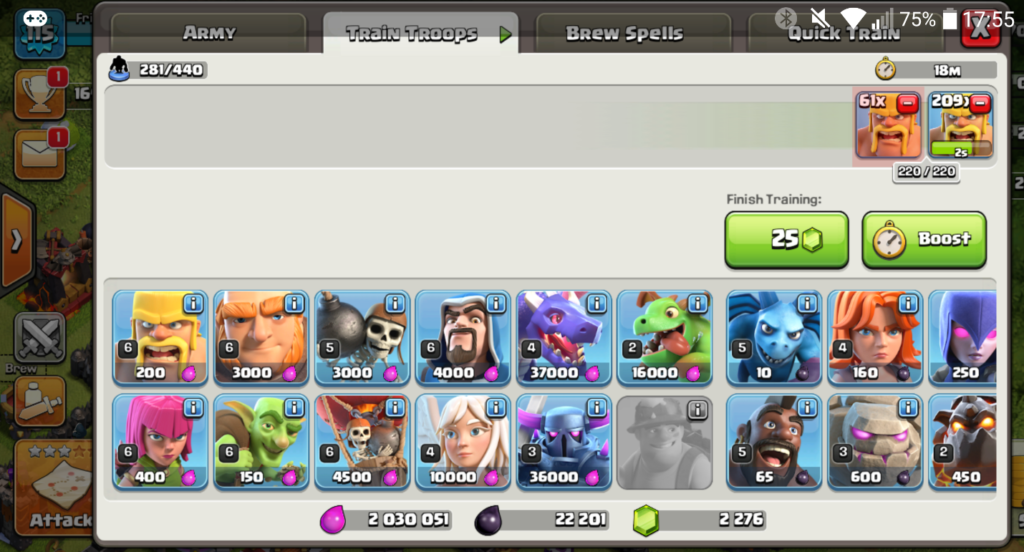
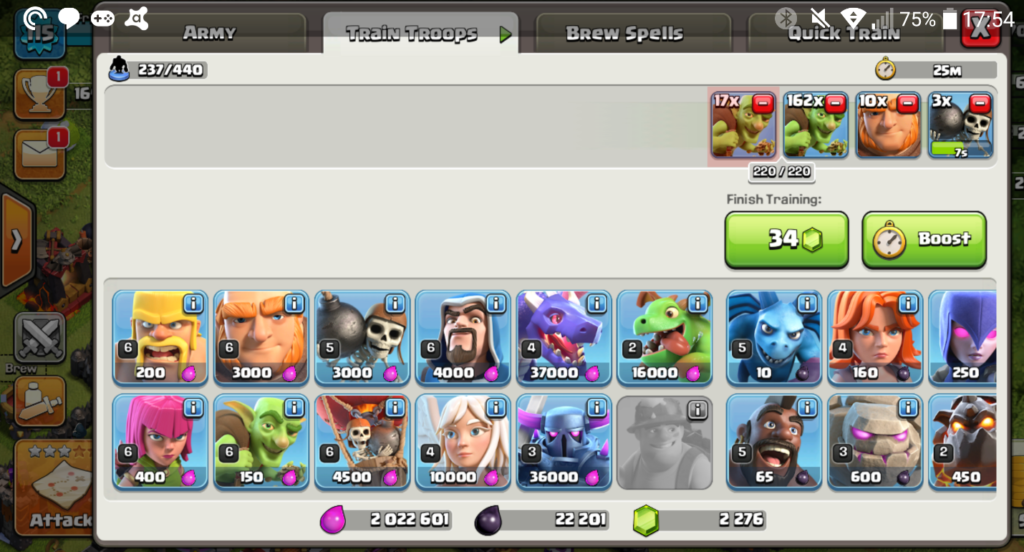
Different types of troops can be trained using resources for the attack. Gold, elixir, and dark elixir are the main resources. The game allows players to form clans of up to fifty members, who can participate together in Clan Wars, donate and receive troops, and chat with each other.
How to play Clash of Clans
While it’s helpful knowing what Clash of Clans is, it still doesn’t explain how to play it. Get ready, as we’re about to give you an extensive guide on getting started.
What you need to know
Clash of Clans can be a complex game, but the built-in tutorial is easy to follow. The key to the game is to build a base surrounded by great defenses while raiding other players’ bases for loot and trophies. The loot allows you to upgrade your base or create stronger troops. As you level up, you may choose to join a “clan” of other players to battle rival clans around the world.
When you first start playing, your base is defended by a shield. The shield gives you a 72-hour window of safety when enemies can’t attack your base and steal your loot. If your shield is down, attackers could swoop in, but the shield will return to defend you after a catastrophic loss.
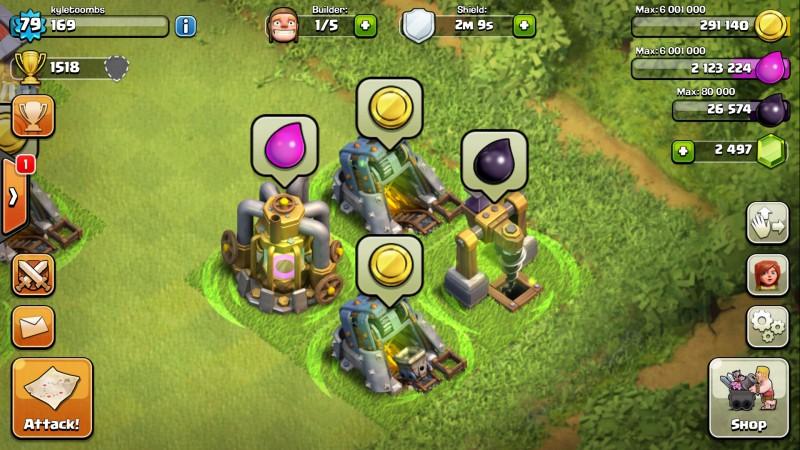
How do you upgrade your squad? Clash has one currency and three resources within the game. Gems are the “money” in the game. You’ll earn them by removing obstacles around your base. If you’re less patient, you can purchase them in-game with real money. Think of gems as a shortcut to repair your heroes and speed up construction.
Clash has three resources: gold, elixir, and dark elixir. All three can be “mined” with structures in your base or looted from other players. Gold is used to create buildings. You’ll spend elixir to create your troops and helpful spells. Dark elixir appears later in the game, unlocking even more powerful elements. Bottom line: Grab all of this stuff as often as possible and you’ll get more powerful.
The initial setup
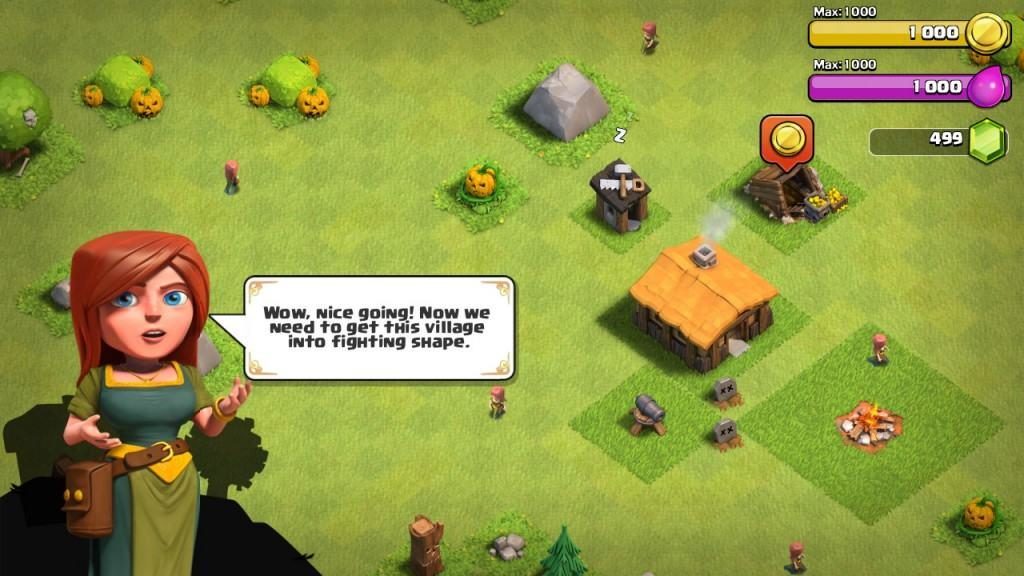
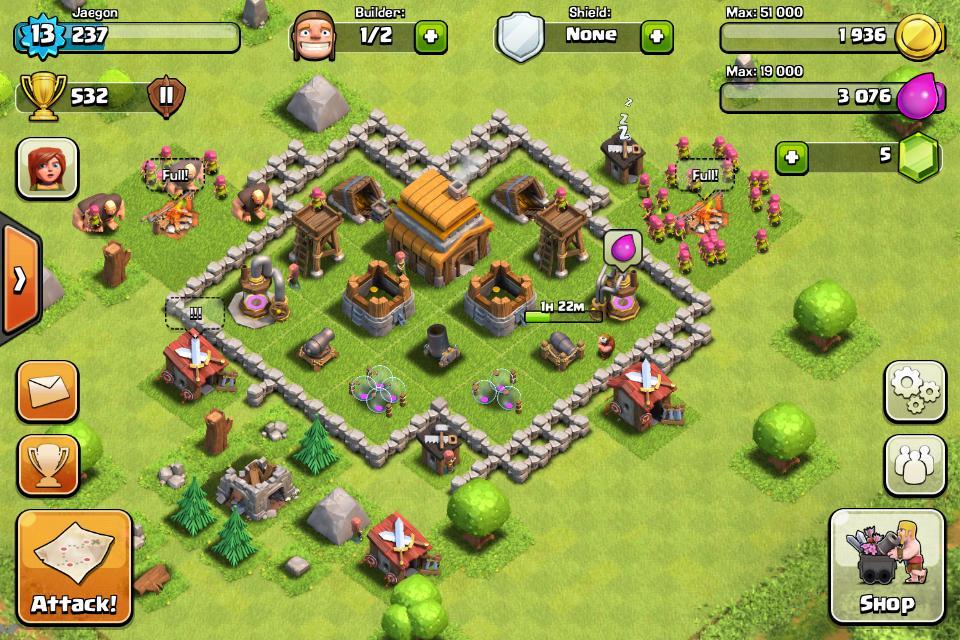
As you begin gameplay, a helpful tutorial makes it impossible to mess up. The heart of your base is the town hall, and you want to protect that at all costs. Try placing your town hall at the center of the map and surround it with buildings. This way, enemy raiders will need to go through multiple levels of buildings before getting to the town hall.
Walls will slow down the enemy, so put those around your precious town hall, along with your gold and elixir storage units. If you’re short on walls, you can place your defensive buildings (cannons, archer towers, etc.) outside the barriers. Hopefully, your defenses will shred the enemy before they can get to your goodies.
At the beginning of the game, try to save all your gems so you can buy builder huts. These structures are critical to building up your base, so don’t waste gems on minor time-savers. (Yes, the tutorial will tell you to spend gems recklessly. Ignore it. Save those gems for the builder huts.)
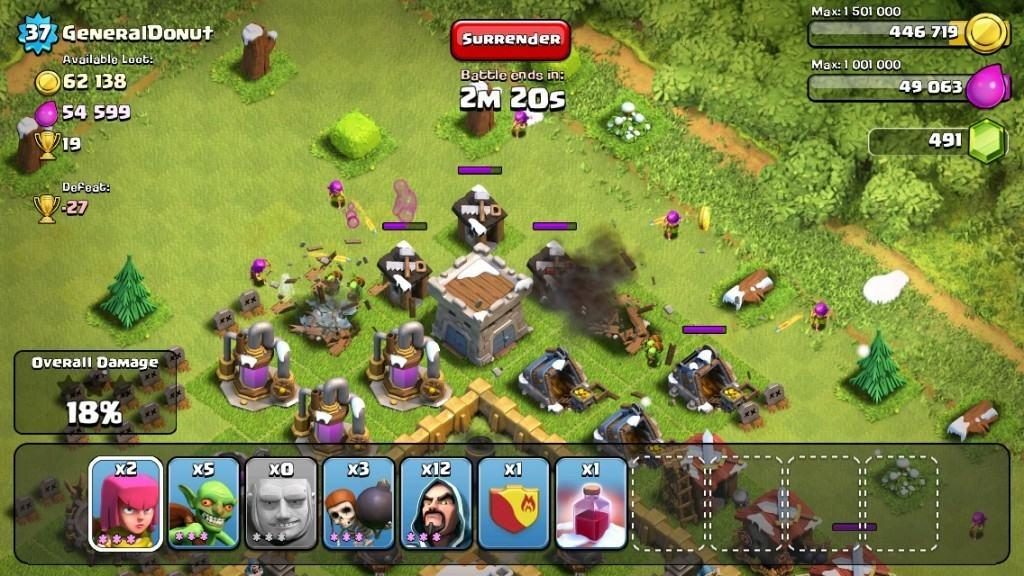
During the tutorial, you are given five wizards to destroy an enemy base, but you only need two. Just don’t deploy the other three! They’ll simply wait in your army camp. Since wizards don’t unlock for a few town hall updates, having three extra wizards will give you extra firepower in the future.
Another key tip: Don’t bother building extra gold or elixir storage at the beginning. It will be a while before you can fill them, so they’re mostly a waste of your resources.
Protecting your base
The key to a strong defense is to upgrade defensive weapons quickly. Improve your cannons, archer towers, and mortars and they’ll rip through opposing armies. As you level up your town hall, more defensive weapons will be unlocked. But you should resist the urge to upgrade the town hall until all your other buildings have been maxed out. Yes, you should even upgrade all your walls before making the leap to a new town hall.
It’s also important to keep your base compact. If you’re too spread out, your defenses won’t be able to tag-team incoming armies. One exception to the rule? Put your builder huts in the very corners of your map. The extra travel time for opposing armies could prevent a perfect 3-star attack.
In addition to defensive buildings, you can also set traps to thwart your enemies. While defensive buildings keep firing until they’re destroyed, traps only go off once. For a great defensive base, place your slower and longer-range defenses (like mortars or air defense) closer to the center. Cannons and archer towers should be placed to protect the slower defenses while still defending the town hall and your gold and elixir storage. When your base is protected, your trophy count stays high.
Attacking others
Now that your base is protected, it’s time to blow up your enemies on their turf. Whether you’re taking on other humans or the computer-led goblin bases, there is a method to the madness.
Before you start the attack, look at the loot that is available. Generally, you will want to target bases that have weak defenses, but lots of available gold and elixir. Win a battle and you’ll gain trophies. Lose and (you guessed it) your trophy count goes down. Each successful attack helps you earn bonuses, adding more gold and elixir to your stash.
For the maximum victory, you’re aiming for a 3-star attack. That means that the base is 100 percent destroyed. You’ll get one star for destroying half an enemy’s base or taking out their town hall. The only way to get all three stars is to blow up every structure on the map. (It’s extremely gratifying.)
The key to a great attack is to find a base’s weakest point. Is there a spot where the walls are weak? Can you snipe some structures with long-range archers before sending in the slow, heavy giants? Or can you wipe out the big guns with your heavy troops before sending in the less expensive, faster-firing fighters? Think strategically and you’ll increase your odds.
Ways to raid resources
Simply looking to grab loot as fast as possible? Here are two great attack methods that have proven to be successful at all levels of Clash. The first is the Goblin Rush.
Goblin Rush
4 Wall Breakers
4 Giants
Fill the rest of your army with goblins
This attack method relies on overwhelming numbers and luck. Release the giants to absorb damage while your wall breakers take out the walls. Once the barriers are gone, send in the goblins. These greedy little guys target elixir and gold storages and collectors, providing maximum return on minimum investment. When deployed properly, a 1-star is guaranteed and you’ll gain tons of loot.
Barbarian Rush
All Barbarians
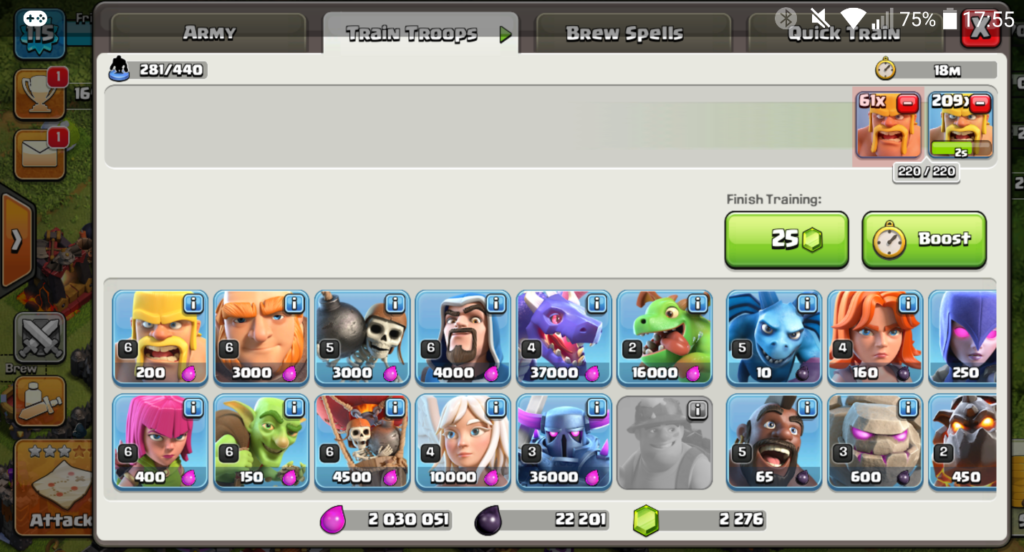
This attack relies on massive troop numbers to overwhelm a base’s defenses. The method works best against weak walls. You will need to deploy your barbarians quickly, but it does risk a zero-star attack if your troops get held up.
In addition to the regular player-vs.-player gameplay, there are also side games that involve your clan fighting other clans and a builder village with different troops and defenses. No matter how you clash, you’re bound to have a lot of fun for years with this top-notch freemium game.
FAQ About Clash of Clans With Tips and Tricks
Now that we’ve piqued your interest, you probably have burning questions about the finer points of Clash of Clans gameplay. We’ve assembled a comprehensive list of the most frequently asked questions to help you improve your Clash of Clans experience.
If you have any other questions, we have other articles on Clash of Clans that will benefit you; check them out below:
There are two ways to obtain gems in Clash of Clans; you can purchase them through the store or earn them as you play.
Purchasing
This method of getting gems is the easiest way to secure a good collection, but it’s counted as an in-app purchase. To access this option, head to the in-game shop and click on the treasure menu. Here is a list of what it will cost for each in-app purchase option for gems:
Pocket of Gems: 80 gems for $0.99
Pile of Gems: 500 gems for $4.99
Bag of Gems: 1,200 gems for $9.99
Sack of Gems: 2,500 gems for 19.99
Box of Gems: 6,500 gems for $49.99
Chest of Gems: 14,000 gems for $99.99
While buying gems is the easier and quicker option, it’s also an option that costs real money. Players who buy gems are called Gemmers, and the process of using gems to upgrade your buildings is called Gemming. Gemming is a fast way to upgrade your setup, but many Gemmers focus only on Gemming their town hall.
The best way to Gem your setup is by focusing your attention on all your crucial buildings. Upgrading your town hall progresses your game further, but without upgrading your other buildings, you’ll get to a point where your resource production buildings can’t keep up with the demand required for raids.
Gems are also useful for speeding up processes. For example, use some of your gems to speed up your troop training so that you can launch attacks in rapid succession and capitalize on faster raids yielding more resources. You can also use gems to speed up longer building processes. As your buildings increase in rank, upgrades take longer. Why not plow a few gems into reaching higher production volumes instead of just Gemming your town hall?
Earn gems
The other way to obtain gems is by simply playing the game. You earn gems by completing achievements. Each achievement awards a specific amount of gems. One of the achievements that awards gems is clearing obstacles. Earning gems from achievements has a cap, however. There are 3,200 trophies to collect from completing achievements, and the total amount of gems you can earn this way is 2,000. If you take into account the earnings from the individual achievements as well, this total is 3,715 gems.
This is a good amount, but it’s remarkable how fast your gem stash can dwindle when you use it indiscriminately. It’s a little like winning the lottery; while you make be vastly wealthy for a time, spending excessively to show your wealth, or without a proper plan for progression, you might not be wealthy for long. The best advice here again is don’t spend all your gems in one place or on one building.
Clearing obstacles is a slow but steady and limitless way to earn gems. As you expand your village, you’ll need to clear obstacles, and you’ll earn a few gems in the process. Not all obstacles award gems, though; sometimes, you’ll just be clearing them for the sake of a cleaner area. Some obstacles award up to 6 gems in addition to experience points, but the big prize is the Gem Box. This obstacle yields 25 gems when you clear it. However, Gem Boxes are rarer than any other obstacle, so trying to grind gems from finding Gem Boxes is going to be difficult.
Events are a good way to generate gems as well. Events typically give you instant XP and gems. The highest amount of gems ever earned from a single event is 250, in addition to 600 XP.
Playing a strategic and successful enough game to land in the top 20 players of the top 3 clans is another way to make bank with gems. This is definitely the rarest way to make gems, but the payoff is incredible. The top clan typically earns 50,000 gems to be shared equally among its top 20 players. The second and third place clans win 30,000 and 15,000 gems, respectively.
Mining gems is always an option. The Gem Mine is in the builder base and produces a maximum of 4.8 gems a day. This is a slow method, but you’ll have gems trickling in slowly and passively while you play.
As you can see, even if you aren’t willing to part with your hard-earned dollars to buy gems, there are plenty of ways to increase your stash, albeit fairly slowly on average. The most efficient way to make the most gems is to dabble in all the different individual methods. This way, you have a fairly constant passive stream, in addition to moderate bonus amounts from events, achievements, and obstacles.
How to get 6th builder CoC?
Unlocking the elusive 6th builder in Clash of Clans is a process to end all in-game processes. First off, you need to get your builder’s hall to level 9. Most players discourage you from rushing one particular building; we even mentioned earlier that a more holistic approach was the better way to play. However, this section is purely the journey to unlocking the 6th builder.
This takes long. If the 6th builder is your main focus, rushing a few key buildings and focusing your attention on your builder’s hall is the right move. This means that every time you upgrade to a new builder’s hall level, build all the buildings required to advance levels further.
The following buildings are important to upgrade to the max with each builders hall level you obtain:
Elixir collectors
Gold mines
Gold storage
Elixir storage
Star laboratory
Clock tower
Getting all of these buildings to their max on each builder’s hall level increases your passive income, storage capacity and boosts your elixir and gold production. These are all the resources and processes you need in place to get the 6th builder as fast as possible.
Once you get to builder’s hall level 9, you’ll be able to build the OTTO hut. The OTTO hut is essentially your gateway to the 6th builder, and you’ll need to upgrade this key structure to level 5. This also takes a little time because each level has requirements for other buildings around your base to level up as well. Even if you don’t rush to builder’s hall level 9 and you upgrade your entire base as you go through the different town hall levels, you’ll still need to make upgrades to be able to upgrade the OTTO hut.
Once all these upgrades are done, you’ll be able to use the OTTO hut to send the master builder to your home base, and he will be the 6th builder. There is no definitive timeline to how long this will take because it depends on how often you play, how you prefer to upgrade your setup, and whether you use in-app purchases to speed things up for yourself.
How to get super troops?
Super troops are a new addition to the Clash of Clans universe. Essentially, these new types of troops will replace your traditional troops once you’ve unlocked and equipped them and are valid for three days. This means if you choose to boost your giants to super giants for the three days of the validity period, all the giants you make will be super giants.
To be able to unlock super troops, you need to have your town level at 11 or higher. You also need to have the troops you want to upgrade to super troops at a high enough level. For most, this is level 9, but it’s easiest to just make sure all your troops are maxed out.
It’s also important to note that you can only have two classes of super troops active at once and that they take up more housing space than their base alternatives.
How many people play Clash of Clans?
Clash of Clans boasts 1.9 million active players each day. This means it is among the most popular mobile multiplayer games in the world.
How to make a second account on Clash of Clans?
Before the launch of Supercell ID, it was nearly impossible to have a second Clash of Clans account. The process involved watching sketchy videos on YouTube and going into the developer options on your phone to basically manipulate game files.
Now, this process is significantly easier. All you need is one device and two email addresses. Supercell doesn’t let you link two accounts to one Supercell ID, but this makes sense. It would be like trying to create two Facebook accounts with one email address; impossible.
So, all you need to do is click on the tab to create a Supercell ID. Once you do this, your game won’t be connected to Google Play or Game Center, but this is not a problem. Supercell ID has its own game-saving functionality. Creating a Supercell ID requires you to register with your email address, which you’ll need to confirm to continue. Follow the prompts you receive via email, and you’ll be directed back to the game.
Now you need to log out of your Supercell ID so that you can create another one. Once you’ve logged out, you’ll see two options, log in with Supercell ID and play without Supercell ID. Click on play without Supercell ID, and you’ll be taken to the game tutorial. When the tutorial is done, enter your username, and click the disconnected button under Supercell ID in the game options.
Create a new Supercell ID with a second email address, and you’re done. Now when you play, you can log in with either of the Supercell IDs and even create more using the same process.
How to upgrade troops?
Upgrading troops in Clash of Clans is really easy. You’ll need to be on town hall level 3; otherwise, you won’t have the upgrade option available yet. Once you have reached level 3, tap the Shop button on the bottom right-hand side of the screen. From there, buy the laboratory and place it in your village. When the laboratory is finished being built, tap on it, and select the Resources option. Select the unity you’d like to level up, and start upgrading your troops.
How to get master builder?
The Master Builder’s hut is unlocked once you’ve unlocked and placed the OTTO hut and completed all the necessary tasks to upgrade the hut to level 5.
What are clan wars?
Usually, Clan Wars are fought between Clans that are roughly equal in strength. For both clans to be matched against each other, they must have the same number of participants selected. A player must have a green Clan War button in his profile to fight in a war, indicating that he is available and must have been chosen by the Clan Leader. Clan leaders may also choose people who opted out of Clan War lineups.
Below we’ll highlight the two stages of Clan Wars.
Preparation Day
War Bases can be adjusted, and troops donated or requested during Preparation Day. Clan Castles at your War Base are separate from Clan Castles in your village, and they require separate donations of troops. A War Base’s troops will be used to defend it against all enemies during the War, so make sure you request those who you feel will be best suited for defending your layout.
War Base troops will not be available in your regular village, and vice versa. Troops donated to your War Base cannot be used for your own attacks; these must be requested from Clanmates in the Troop training screen and the Clan Chat.
Battle Day
By the end of Preparation Day, your Clan should be ready and hungry to win! On Battle Day, participants can attack twice, but not against the same opponent. Following the start of Battle Day, changes to your War Base layout or building levels will no longer take effect.
Are you ready for a clash?
As you can see, Clash of Clans has so many game mechanics involved, it can be easy to become confused. We hope this guide has helped you in some way towards winning more victories.
Financing the latest tech is far from cheap, so it’s no surprise that many of us sell off our old gear to pay for new additions to our tech collection. However, before you part ways with your old laptop or computer, ensure you give your hard drive a proper goodbye – you don’t want it conspiring with its new owner to empty your bank account or steal your identity, do you?
The decent thing to do is erase every trace of you from the poor thing’s memory. The article below will highlight three methods that we’ve compiled to give your desktop or laptop a new lease on life – with someone else. We’ll cover three different levels of data erasure, revealing how to wipe your hard drive before you donate or sell your computer.
How to wipe your hard drive before selling or donating your computer
Three degrees of erasing your data
Method 1: The extreme method – 100% effective
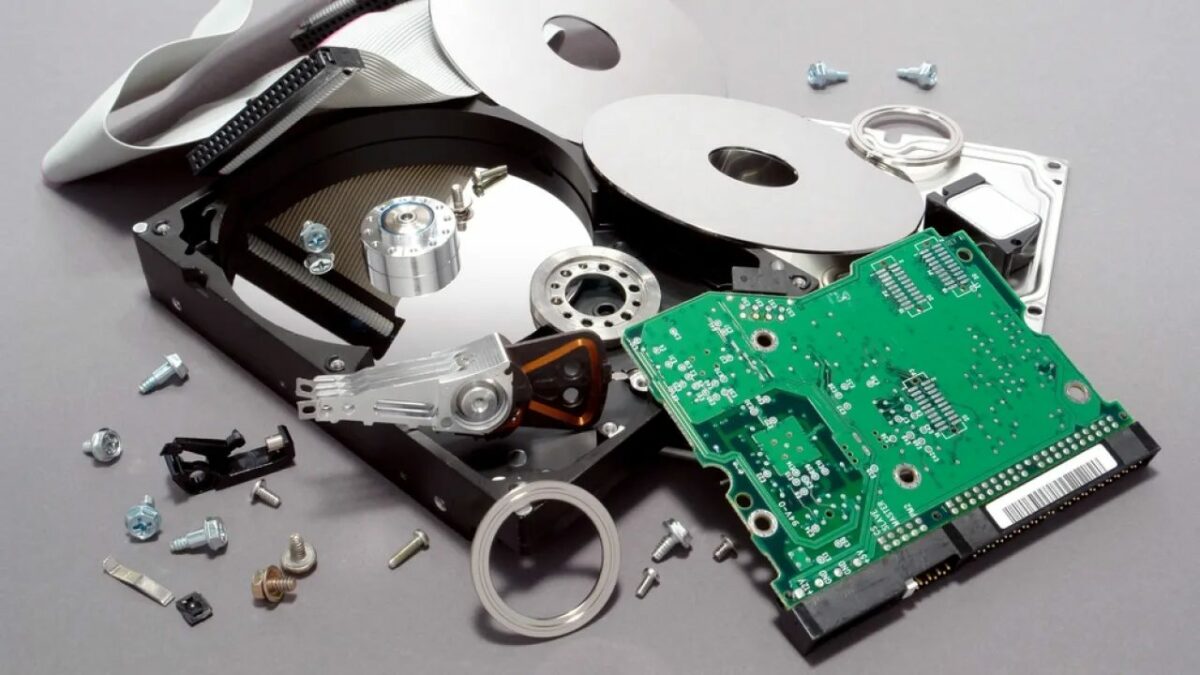
If you want absolutely no chance of anyone gaining access to your hard drive, remove it and take a sledgehammer to it. It’s a messy solution, but an effective one. There’s absolutely no coming back from such a vicious physical assault, no matter how good a hacker you are.
However, I suspect your buyer would prefer the hard drive included when they purchase your old PC. In which case, destroying it will almost certainly affect your asking price. Unless you’re committed to total protection from someone recovering your data, try some of our other solutions instead.
Method 2: The (slightly less) extreme method – 100% effective
So, your buyer is a bit of a stickler and wants a hard drive with his new computer. People can be so demanding, can’t they?
The good news is that there’s a way to wipe your hard drive without bludgeoning it to the hereafter (as fun as that may be); a program that overwrites ALL of your data.
Now this might seem like an easy option, but hold on. First, not all hard drive technology is supported. For example, the free version of DBAN – the best wiper of them all (conforming to Department of Defense standards) – doesn’t support SSDs. And for a guaranteed, certificated erasure you also need to pay for the business version. Whether it’s worth it is another question only you can answer. If you have neither the time nor energy to to determine this for yourself, read our review of DBAN for a comprehensive look at its pros and cons. You’re welcome.
If you decide that DBAN and utilities of the like are not for you though, feel free to keep scrolling for our most in-depth and most widely-performed solution.
Method 3: The manufacturer method – 99.9% effective
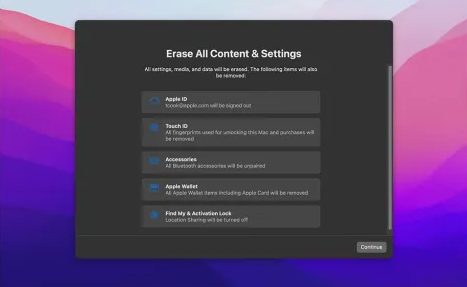
Whenever you delete a file, it doesn’t just disappear. You’re simply telling the computer that it can be overwritten with something else. So even after doing a manufacturer’s factory restore/reset, while the hard drive seems empty, you can recover data that hasn’t already been overwritten.
In 99.9% of situations, this isn’t a problem. Beyond a factory reset, you have to start buying expensive recovery software or pay others to recover surviving data for you, which is a deterrent for all but the most persistent criminals. Another factor to keep in mind is that in 99.9% of circumstances like this, you’re selling to a genuine buyer – perhaps a friend – and they’ll quickly overwrite your “disabled” data with their own.
So unless you suspect your buyer is a cybercriminal, there’s not much to worry about. With that out of the way, let’s head into how to restore/reset a Mac, Windows 10, and Windows 11 PC. We’ve covered all our bases with this guide.
How to restore/reset a Mac
– Back-up all your data, either to an external hard drive or cloud storage
– Ensure your Mac is connected to the internet so it can reinstall macOS
– Deauthorize iTunes on your computer
– Sign out of iCloud and disable it on your computer
– Restart in Recovery mode by holding down cmd + R
– Use disk utility to erase the hard drive
– Reinstall macOS
How to restore/reset a Windows 10 PC
– Back-up all your data, as above
– Save your software serial keys so you can reinstall on your new machine
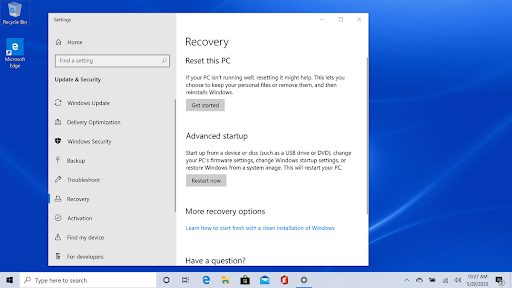
– Go to Settings > Update & Security > Recovery > Reset this PC > Get Started > Remove everything > Remove files and clean the drive
How to restore/reset a Windows 11 PC
– Create a backup of your data, as above.
– Save any software keys you have so that you can install on your new device, as above.
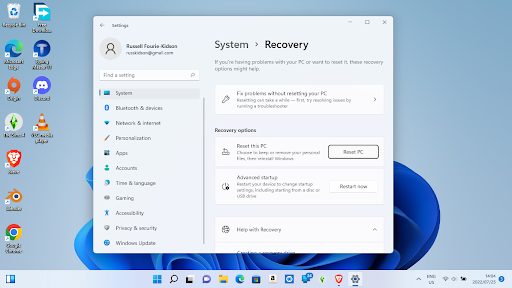
– Head to Settings > System > Recovery > Reset PC and follow the prompted factory reset guide.
The great reset
Learning how to erase yourself from any given system is an integral skill. Especially in the current climate where nothing is permanent and tech changes hands as fast as it progresses – lightning fast. We hope the guide above helps you safeguard your most precious memories with your old PC while simultaneously pulling a Men in Black and wiping your existence from its memory – or at least instructing it to forget that memory until someone else comes along to overwrite it.
For other guides, you may want to see our tips for how to stay safe online.
That’s a bold statement right out of the gates, but trust me, it’s true. All the different iterations of Windows have represented a distinctly new era in computing. Who could forget the global impact that Bliss made when it came standard with WindowsXP? However, as incredible and powerful as Windows 10 has been, there’s always been something missing. That’s where utilities come in!
The article below will explore five of the most essential utilities for any Windows 10 user. Each of these utilities is backed by the rich history they have within the Windows OS ecosystem, and best of all, they’re free!
What is an essential utility?
For a utility to be truly essential, it has to meet any one of the following three basic criteria:
Must offer features that the operating system for which it was created doesn’t have
Should perform a particular task with more efficiency than the built-in alternatives
Needs to optimize the operating system for which it was created
Once you have an app that fulfills even just one of these requirements, you have an essential utility. For instance, Windows 10 has a built-in antivirus in the form of Windows Defender. However, there are numerous external antivirus apps and utilities that claim to provide far more in the way of features than Windows Defender. Sounds perfect, right? Brace yourself for another ‘however’. Unfortunately, the vast majority of the apps that fulfill one of the three criteria highlighted above are also incredibly expensive.
This is due to either the cost of the resources necessary to create such an app or, in some cases, pure developer greed. For this reason, we’ve worked on an additional criterion that each utility has to meet unconditionally to make it onto our list; it has to be free.
With that out of the way, let’s head into our list of the five most essential utilities for Windows 10.
Criterion: Offers features that Windows 10 doesn’t have
CCleaner does exactly what the app’s title suggests; it cleans. As you use your Windows 10 computer, you gather up junk. This is potentially through no fault of your own. It is simply the way the internet, programs, and file storage systems work. Every app you download leaves a little part of itself behind on your system, and eventually, all these little parts of apps since deleted add up.
When your computer starts to struggle under the immense storage demands of all the junk you’ve amassed, it’s good to know that you have a capable, easy-to-use, and, most importantly, free way to trim down the fat.
The most impressive factor that sets this utility apart from many other cleaners is that it lets youdelete bloatware and system apps that ship with Windows 10. This means that you can finally delete OneDrive if you prefer Google Drive and Cortana if you don’t want your computer blabbering at you all day.
Bloatware typically takes up much more space than other apps and can slow your system down considerably. With CCleaner, you’ll have more space for the apps and files you actually need.
Criterion: Performs a task better than the built-in Windows 10 alternative
If I had to choose one utility out of these five to be the most essential of them all, I’d choose Everything. This is purely because of how often I find myself having to look through the endless void that is my file explorer for a particular file. I’m then, without fail, always met with that frustrating green progress bar that never seems to move past the 90 percent mark.
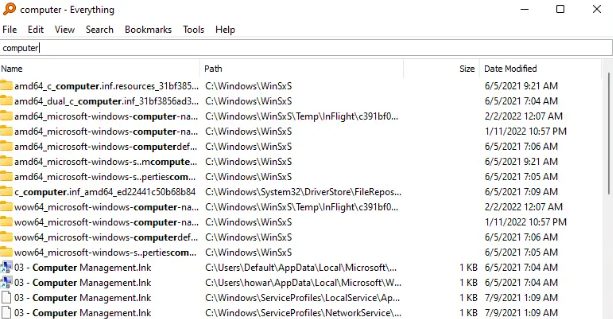
Everything is a utility that lets you instantly search your entire computer and all the files contained within the four corners of your screen and the eight corners of your presumably rectangular-prismesque hard drive. In condensed terms, Everything lets you instantly search everything. More than that, it instantly serves up a labeled list of all the associated files it finds.
The four-cornered window within which Everything displays its impressive findings lets you see the exact path necessary to navigate to each file, the date each file was last modified, and the size of each file. Isn’t that incredible? Oh, before I forget, Everything is free. What could be better?
Criterion: Offers features that Windows 10 doesn’t have
Product Key Finder is similar to Everything, except that it is purpose-built to locate product keys for all the software, apps, and other utilities you may have bought over the years. You’ve no doubt got a few old games or bits of software that you initially installed with a disk, or you’ve got those that you’ve bought and installed digitally. Either way, eventually, you may need to reinstall them. This can happen for any number of reasons. Either your files become corrupted, a disk malfunctions, or you must reinstall your entire Windows OS after battling a malignant virus.
If any of these are the case, run Product Key Finder from your downloads folder, and you’ll be greeted with a list of all your installed products and their respective product keys. No more hunting through your cupboards for those little leaflets that products used to come within the before times. One quick note; because of Product Key Finder’s ability to access your registry, some antivirus software may flag the utility as a trojan. However, if you download the program from a reputable source, you can rest assured that it won’t harm your computer.
Criterion: Offers features that Windows 10 doesn’t have
Have you accidentally deleted files that you weren’t quite ready to part with? Recuva could be the solution you’ve been looking for. While you can recover some files that you’ve accidentally deleted by heading to your recycling bin, that option becomes useless if you habitually empty said bin. In such cases, Recuva will be most helpful.
All you need to do is run the utility and answer a few questions based on the past location of the deleted file, and Recuva will serve up a list of deleted files with little color-coded indicators. These indicators show you how likely it is to recover each file. Green indicates files that Recuva will recover with relative ease. Even if you don’t remember where the file was before it was deleted, Recuva may still be able to help you out.
Criterion: Offers features that Windows 10 doesn’t have
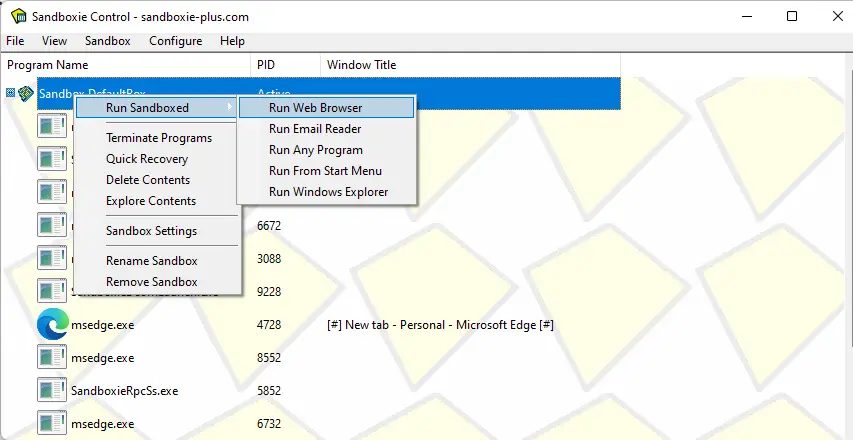
We’ve all downloaded potentially sketchy software at some point in our lives. This is where Sandboxie comes in. If you’re not sure about the providence of an app or piece of software, Sandboxie provides you with a useful little sandbox within to run it.
This sandbox is like a separate enclosed system within your operating system. This way, any potentially malicious software can do no harm to the rest of your Windows 10 ecosystem.
It’s remarkably easy to delete files from your PC accidentally. Even with all the fail-safes and precautionary measures in place, all it takes is a few poorly-placed miss-clicks, and your precious files are relegated to the inky blackness of the void – never to be seen again. Or are they? Enter Recuva with its incredible recovery skills.
While it’s easier than ever before to delete important files, it’s also easier than ever before to recover deleted content. In the article that follows, we’ll use Recuva to snatch those all-important files out of the void’s clutches.
How to recover deleted files with Recuva
Download Recuva
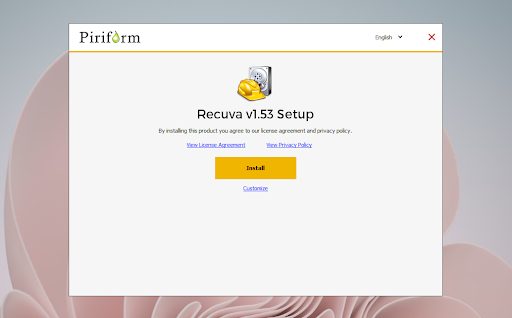
Your first step is naturally to head to the link in the introduction which will take you directly to Recuva’s download page on our website. You can download Recuva’s executable file in a couple of easy clicks.
All you need to do to install Recuva is click on the executable file and let the utility make changes to your system. Once the install wizard has run and the installation has completed, the utility will save a shortcut to your homescreen.
Run Recuva
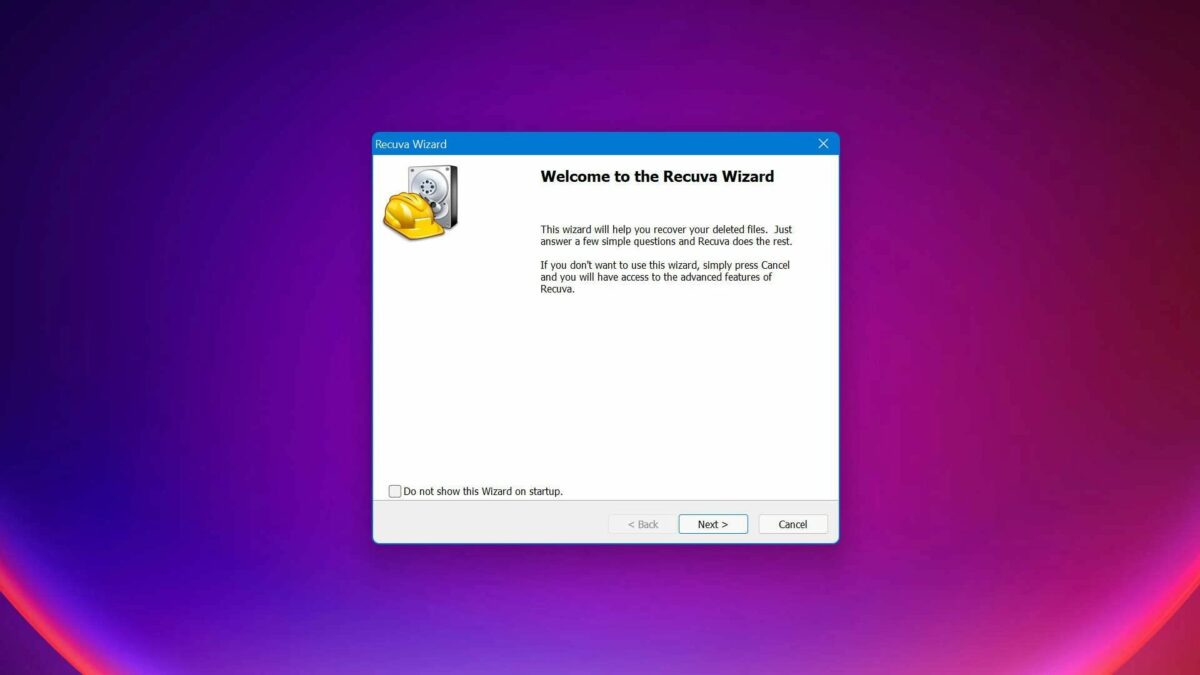
Directly after the installation has completed, you’ll get a pop-up prompting you to run the utility for the first time. If you happen to ignore this, or need the utility again after you’ve used it the first time, you’ll just need to click on the homescreen shortcut, as you would with most other utilities. Once Recuva opens, you’ll notice how simple the interface is. Your use of the utility, from start to finish, is a guided prompt-led experience.
Select files to recover
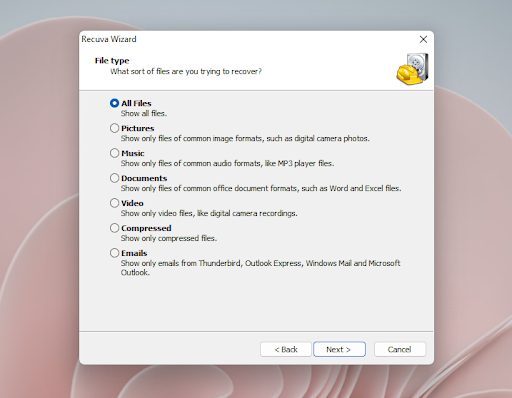
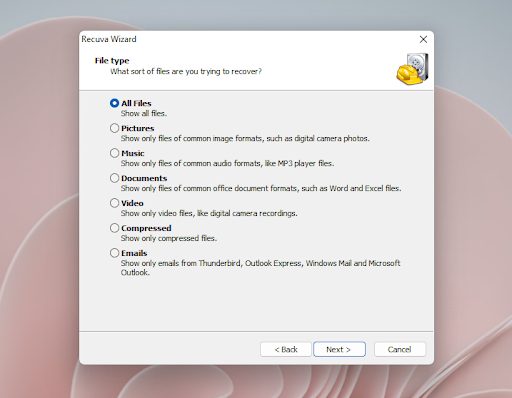
The first interface you see will ask you to select the type of file you’re trying to recover. This is the most basic information you should know. However, if you’re simply looking for anything that may have been deleted from your system, you can leave the selection on ‘All files.’ If you’re looking for a specific file only, indicating this in the dedicated space within this interface will likely save you some time.
Select the last known file location
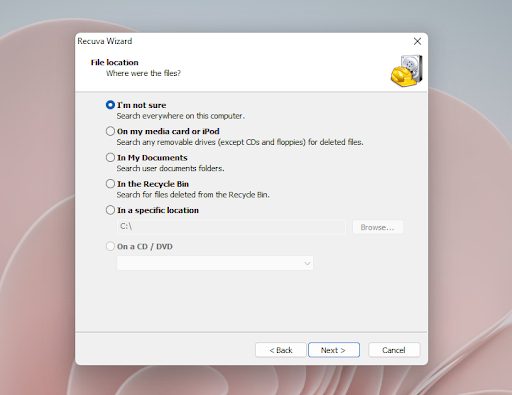
In most accidental deletion cases, you’ll know which type of file you’re looking for, and you might even know the location where this type of file was stored. The next interface is where you specify the particulars of this. Here, you can choose a location so broad as your Documents folder or Recycle Bin, but you can also enter a specific location directory path if you know exactly where your file was. If you don’t know where your file was stored, you can simply select ‘I’m not sure’ and the utility will search your entire computer and all associate drives.
Start Scanning
All you need to do on the next interface is hit Start. You’ll see there’s an option to enable a deep scan here, but this isn’t necessary until you’ve scanned your computer at least once. Deep scans take a lot longer than the already advanced search protocols that Recuva employs and should be your last resort when unable to find a specific file.
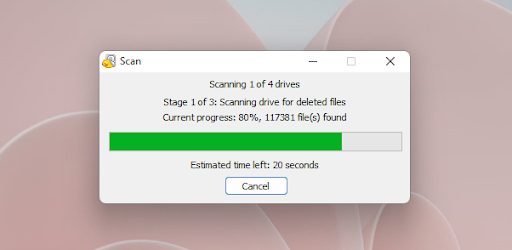
You’ll now see a progress bar in the signature Windows 11 style. You’ll also see other information here that may be pertinent such as how many files Recuva has found so far. These searches don’t take terribly long; a scan of my system was completed in less than five minutes.
For the purpose of this article I’ll pretend that Recuva didn’t find the file I was looking for. In this case, it might be time to pull out the big guns. Exit Revuca and restart the utilty from your homescreen again. Revert to steps 1-5 again, but when you get to step 5 the second time around, check the box that enables a deep scan. Next, simply click Start to begin the deep scan and wait for the results. You may be waiting over an hour.
iTunes is an incredible repository for music, movies, and TV shows across your Apple devices, but no device lasts forever. This is why it’s always good to have a backup plan for when you inevitably get a new device or something happens to your current one. Moving your iTunes library between devices that run on Apple’s software is super easy.
However, if you use iTunes on a Microsoft device, the process won’t be quite as effortless. The article below will show you how to move your iTunes library to an external drive.
Moving your iTunes library on an external drive
There are a few steps involved in this process, so be sure to follow each one attentively. We’re going to show you 4 main steps, namely:
Consolidate your iTunes library
Find your iTunes media folder
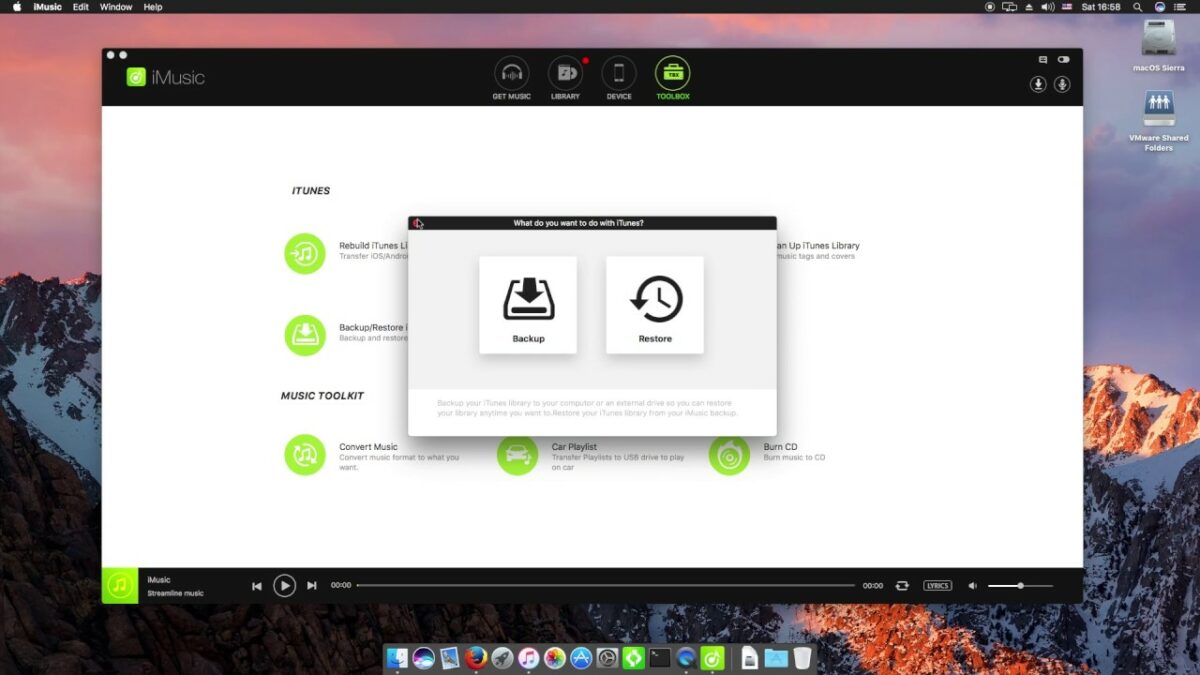
Backup your iTunes library and media folder
Restore your iTunes library from a previous backup
Now that you have a roadmap of your iTunes backup and restoration journey, let’s get started.
How to consolidate your iTunes library
Consolidation, in this context, is just a fancy word for moving all of the files that iTunes uses to one folder. This way, you don’t have to go hunting through your entire C: drive for files associated with iTunes. Here’s how to do it:
Step 1: Open iTunes
A lot of the steps involved with the process of moving your iTunes library happen within the file explorer utility. This first step, however, takes place directly in your iTunes for Windows app. Head to wherever your iTunes icon is on your computer, and click on it.
Step 2: Organize iTunes
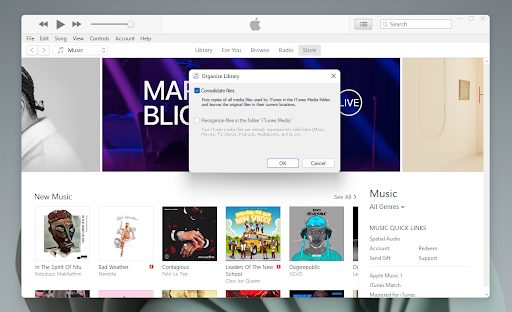
Now, you’ll need to organize your iTunes media folder. Don’t stress though, the app will do the heavy lifting for you. All you need to do is head to the menu bar at the top of the iTunes interface and click on File. Next, you’ll want to hit Library from the drop-down menu, and then click on Organize Library.
Step 3: Consolidate iTunes
You should see a new window open up with the heading Organize Library. Here, you’ll see two available options, depending on the state of your iTunes library. Check the box next to the first option – Consolidate files. This will begin the process of moving every file associated with iTunes into one neat folder.
Step 4: OK
All you need to do now is hit OK and you’re done!
Just to be clear, while the term used in this process is ‘move’, the app actually creates a copy of any file associated with iTunes that isn’t in your iTunes media folder. Therefore, it’s a good idea to go around your PC and delete the original versions of these outsider files once you know that the copies are safe and secure in the new consolidated folder. If you’re not much of a fan of saving space, feel free to chuck this pearl of wisdom back into the ocean.
How to find your iTunes media folder
Not everyone knows their way around a Windows PC – especially the filing system outside of ‘Desktop’ or ‘This PC.’ If you’ve ever messed around with mods or custom content for PC games, you’ll know that while most games save a sub-folder to your Documents folder, the real treasure of the inner workings of the game are nestled in your User folder. iTunes also uses your User folder for storage.
By default, you should find your iTunes folder under User > Music > iTunes > iTunes Media.
If, for any reason, your iTunes media folder is not the above location, we’ve got a way for you to track it down:
Step 1: Open iTunes
Yip, you’ll need to head back to the iTunes app for this one.
Step 2: Preferences
Preferences are all the rage right now. In this step you’ll see what kind of preferences your iTunes app has. Head to the menu bar again, and click on Edit. Now, hit Preferences and then click on the Advanced tab.
Step 3: Location
All you need to do now is look at the big block toward the top of the Preferences interface. You’ll see a heading – iTunes Media folder location. Below that, you’ll see the exact directory path to follow on your computer. On any default iTunes configuration, it should read something like:
C:\Users\YourNameHere\Music\iTunes\iTunes Media
Whatever your directory path says, if you follow it, you should find your iTunes Media folder.
How to backup your iTunes library and media folder
Once you’ve consolidated all of your files associated with iTunes, you can back the folder up to an external drive of your choice – supposing it has enough space for all the music you listen to while living your best life. My music folder on my PC spans years, genres, and so many memories.
Step 1: Exit iTunes
Sorry iTunes app, you’ve outlived your usefulness for this guide. We’re just going to go ahead and close you up really quick. Click the red X icon at the top right-hand side of the iTunes interface to close the app.
Step 2: Locate your iTunes folder
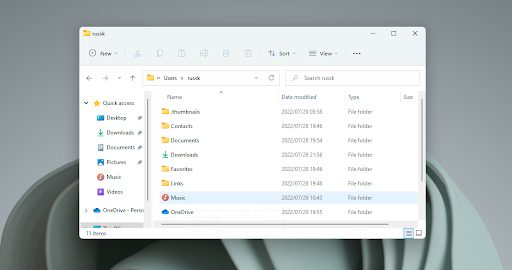
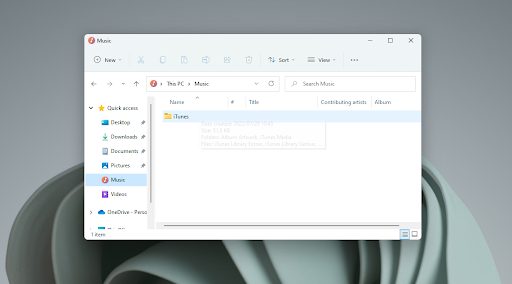
Your iTunes Media folder and iTunes folder are two different folders in two different places. The one you’re looking for now will be in This PC > Music. It’s that simple to find. This folder will contain your entire iTunes discography.
Step 3: Move your iTunes folder
This next step is as easy as hitting right-click and selecting Copy. All that’s left is to head to your external drive of choice and then click Paste.
How to restore your iTunes library from a previous backup
Once you’ve got your iTunes library saved to an external drive, you can move it to any device. Just keep in mind that if you intend to restore your iTunes library on a different computer to that where it was first saved, you’ll need to ensure that the new device has the latest version of iTunes. With that out of the way, let’s head into how to restore your iTunes library.
Head to This PC and locate your external drive.
Next, find the iTunes folder you moved to your external drive in the previous main step and right-click on it. Select Copy.
Now, you’ll need to go to the location on your computer where you’d like to save your iTunes Library, and then right-click and hit Paste.
Your next step is to hold down the Shift key while you open the iTunes app. You’ll see a window pop up prompting you to choose your iTunes library. Click on Choose Library, and then select the Library.itl file associated with your itunes library.
Lastly, click Open, and your iTunes library will be restored.