Capcom has spoiled us so much that a year without Resident Evil feels strange. Almost like a wasted year. It’s not quite that bad, because it’s not as if they haven’t released excellent games this year, like the fabulous remaster of Dead Rising, but it is true that it’s a series with a pull that very few others can imitate. That’s why it’s a joy to know that the year won’t end without us getting another Resident Evil. Even if it’s an older one. Resident Evil 2 Remake will soon be coming to iOS devices. If you’re not familiar with the game, it’s a […]
Capcom has us so spoiled that a year without Resident Evil feels strange. Almost like a wasted year. Not quite to that extent, because it’s not as if they haven’t released excellent games this year, like the fabulous remaster of Dead Rising, but it is true that it’s a saga with a pull that very few others can imitate. That’s why it’s a joy to know that the year won’t end without us having another Resident Evil. Even if it’s an older one.
Resident Evil 2 Remake will soon arrive on iOS devices. If you are not familiar with the game, it is a relatively short experience, lasting about 3 or 4 hours, where we have to investigate what has happened in the mysterious city of Raccoon City to cause a zombie invasion. All while trying to escape the place.
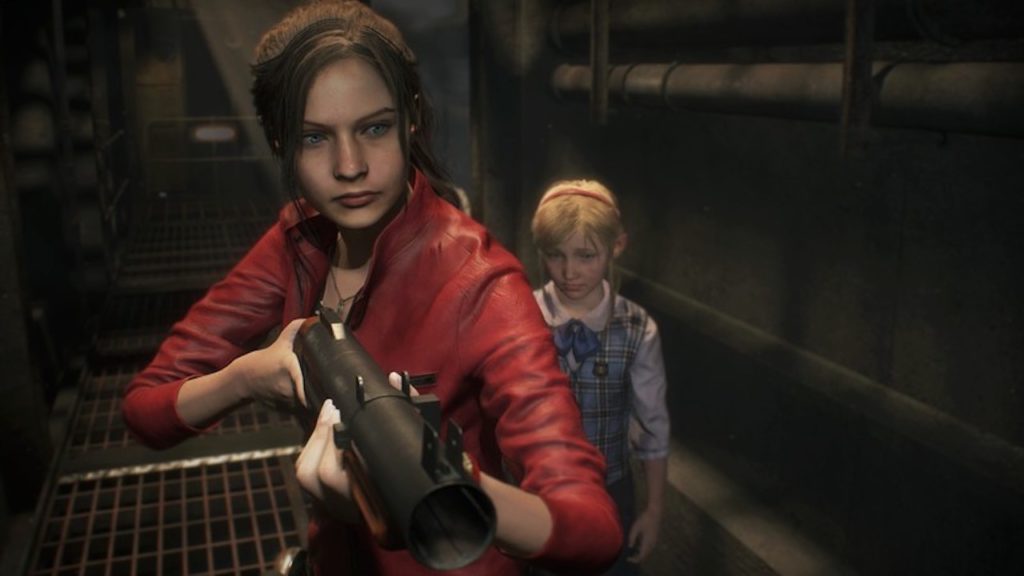
We say relatively brief because part of its charm is its replayability. With two selectable characters, rookie cop Leon S. Kenneby and the young motorcyclist who perhaps wasn’t just passing by? Claire Reidfield, each of them will tell half of the story. Their stories will intersect at various moments, providing details, but to fully understand the events of the game, we will need to complete it twice, once with each character.
This Resident Evil 2 Remake arrives after Resident Evil 8 came to iOS leaving a somewhat bittersweet impression. It’s not that it was a bad game or a poor adaptation, but it felt like they could have done more. And above all, they could have chosen a more suitable game to play on the phone than a game where long gaming sessions are the norm. Perhaps this Resident Evil 2 Remake fits better with the average player’s experience.
Resident Evil 2 Remake is now available for pre-order on the App Store, it will be free and will have in-game purchases. Although it does not have a specific release date, it is expected to be released sometime in the second half of December, so you should stay tuned: this trip to Raccoon City seems to be especially festive.
Originally released in 1998, Resident Evil 2 marked a turning point in the horror and action genre in video games. Now, it returns to the market in a remastered version for the new generation consoles. Undoubtedly, a unique opportunity to enjoy every moment with this iconic game once again.
Puzzled by the puzzles of Resident Evil 2? Follow our guide to solve them in a flash.
Resident Evil 2 players know that surviving Raccoon City depends on more than just your ability to kill zombies. You’ll also have to put your mind to use, as Resident Evil 2 is just as much of a puzzle game as it is a survival horror game. However, it can be tricky trying to track down the solutions to all of the game’s puzzles in the maze of zombies and locked passages. Whether you’re trying to pull off a speed run or just looking for a solution you may have missed, here’s how to solve all of Resident Evil 2’s puzzles.
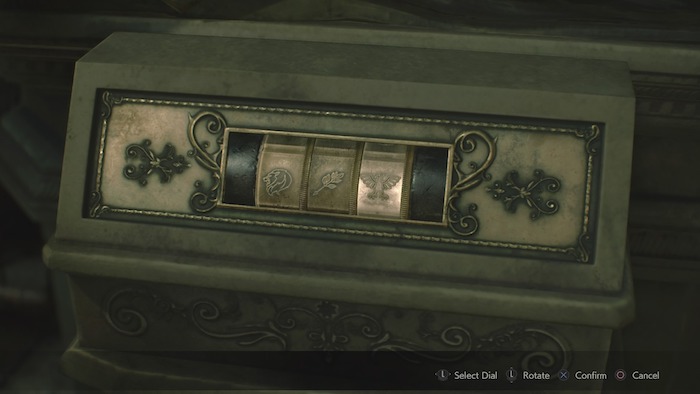
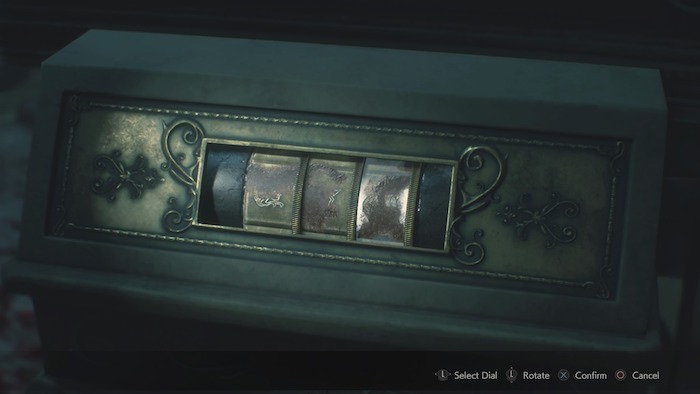
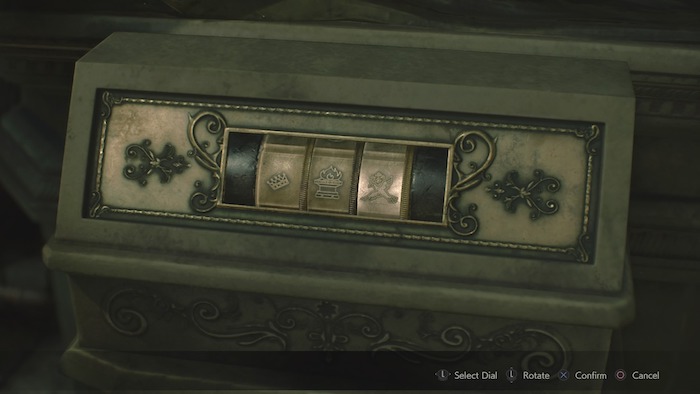
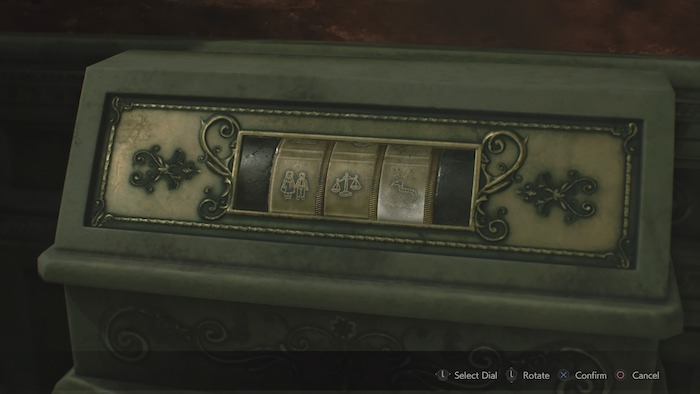
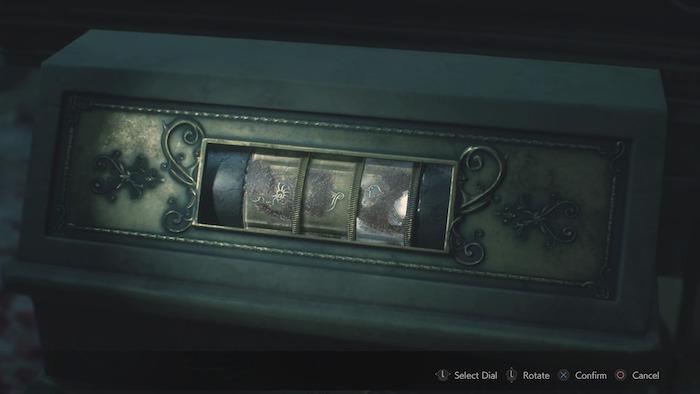
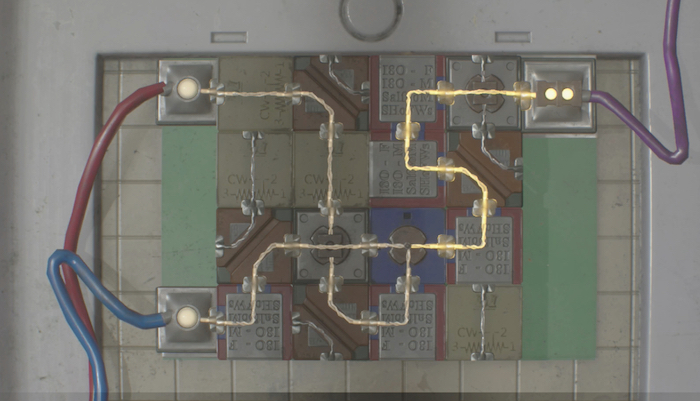
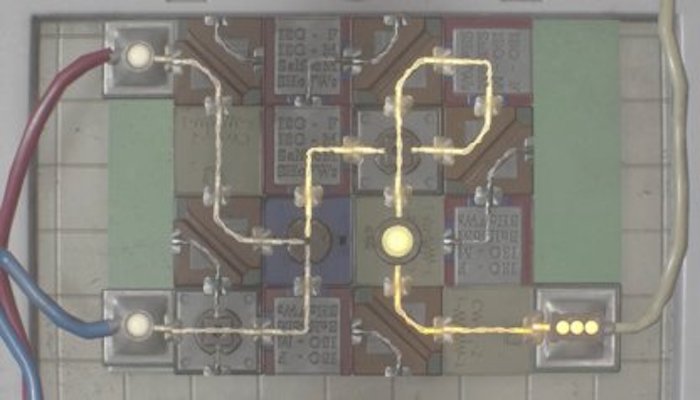
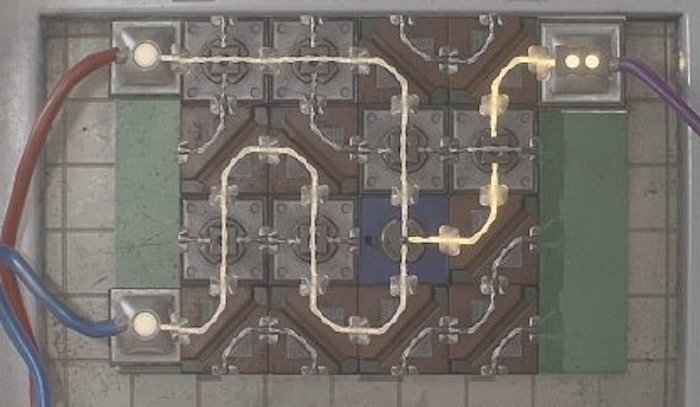
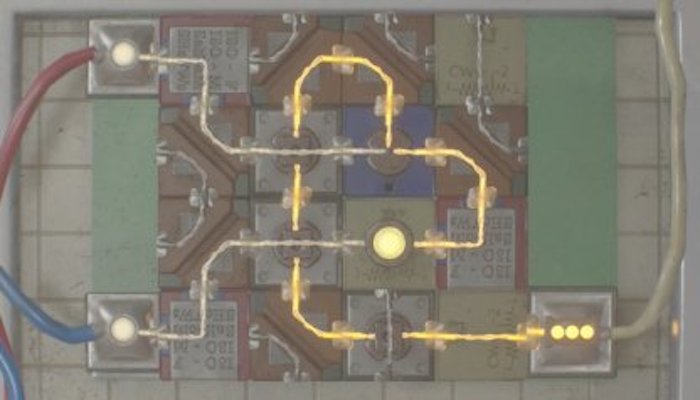
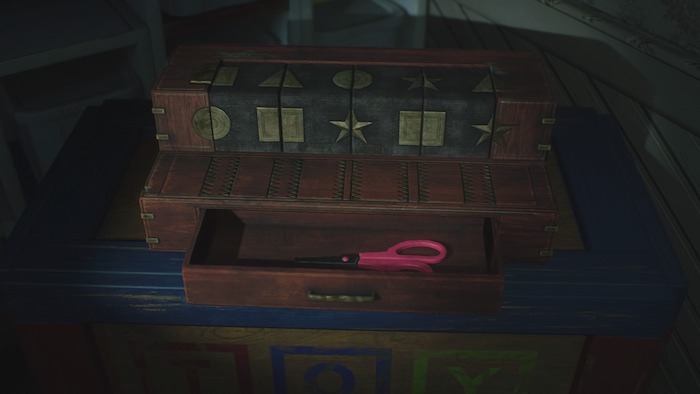
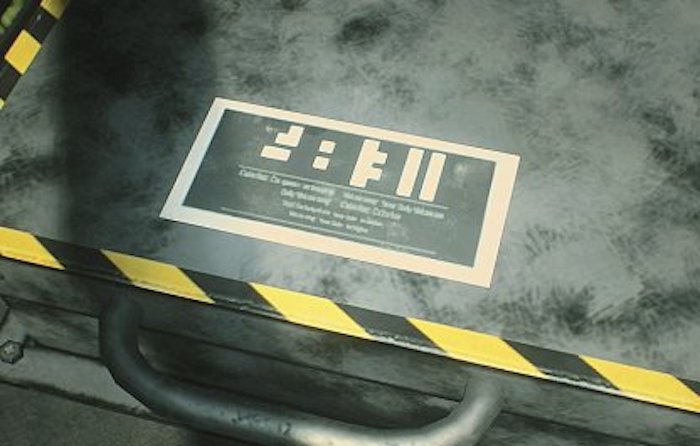
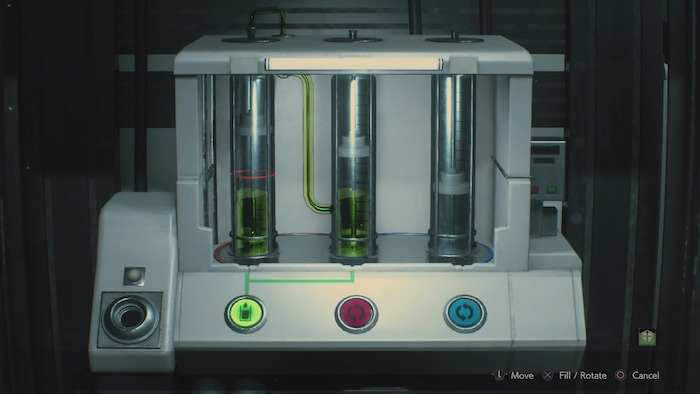
The chess-themed circuits in the Sewer control room form one of the game’s more head-scratching puzzles. Facing the desk with the riddle taped to it, the three circuits on the left are the Left Wall, and those to the right of the desk (the side closest to the item box) are the Right Wall. All pieces are listed from left to right when facing that particular wall.
Get supplies in a hurry with our guide to the Resident Evil 2 lock and safe combos.
Resident Evil 2 is just as much of a puzzle game as it is a survival horror game. As you fight for your survival against the zombie hordes, you’re bound to come up against some locked safes and doors that contain all sorts of useful supplies. The solutions and combos, however, aren’t easy to find. If you’re hurting for supplies and don’t have time to hunt down those elusive codes, check out our guide to find out how to open all the locks and safes in the game.
RE2: All lock and safe combos
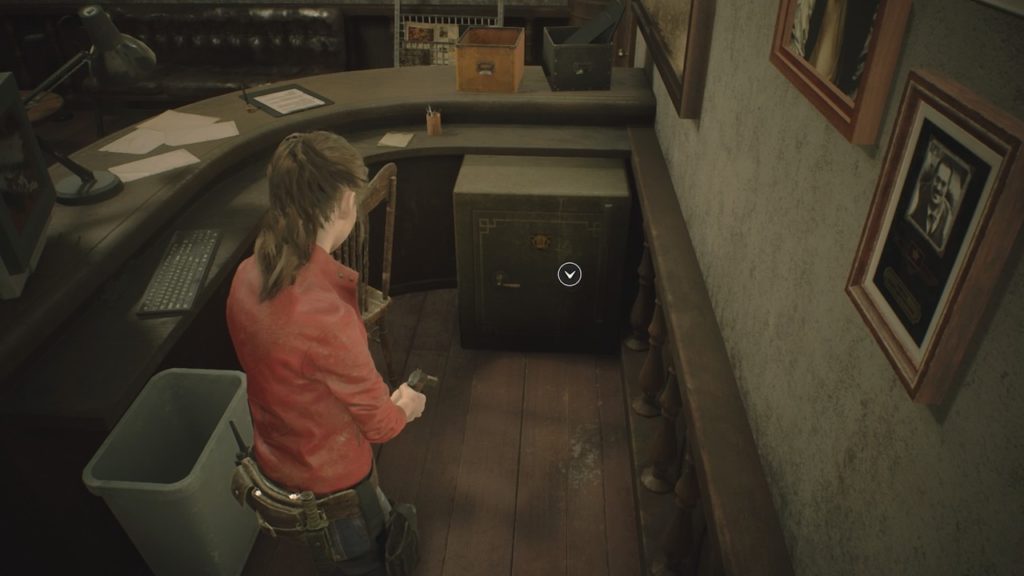
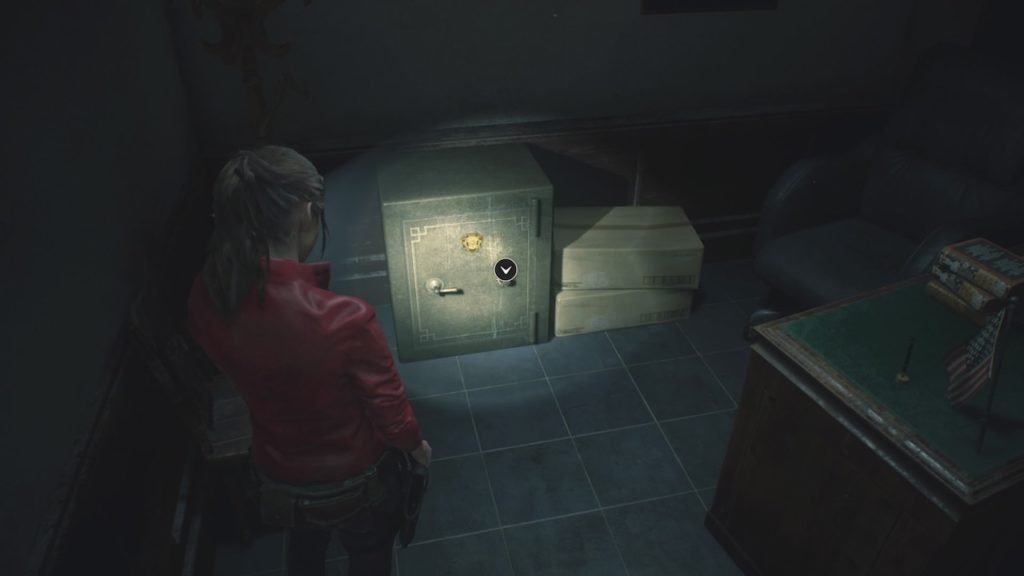
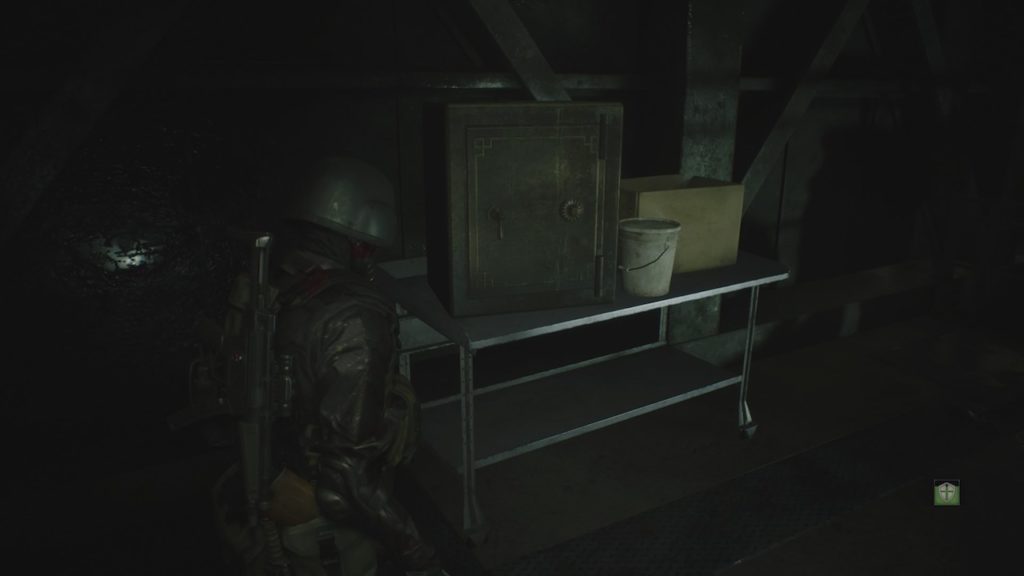
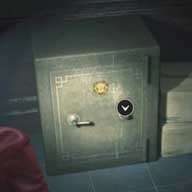
Waiting Room Safe
Image courtesy Capcom
Location: Waiting Room (second floor, east wing)
Combo: Left 6, Right 2, Left 12- this combo can be found in the Confiscation Report document.
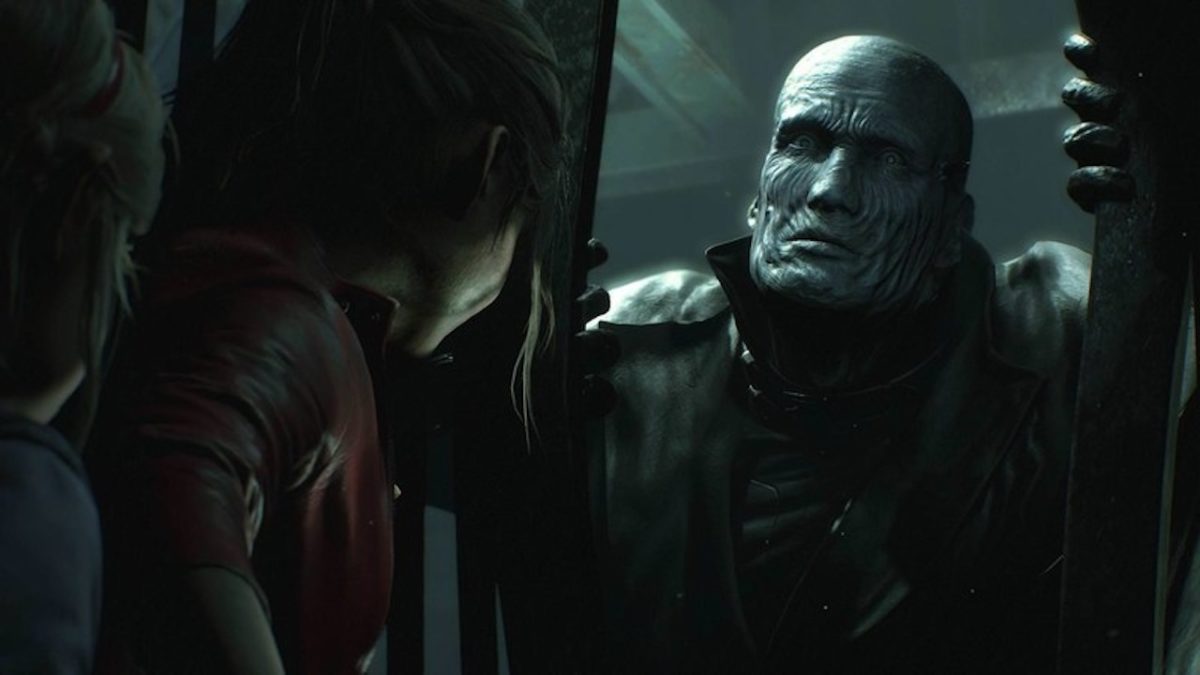
If the Tyrant finds you, you have to act fast to survive. Here’s how.
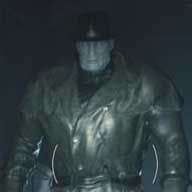
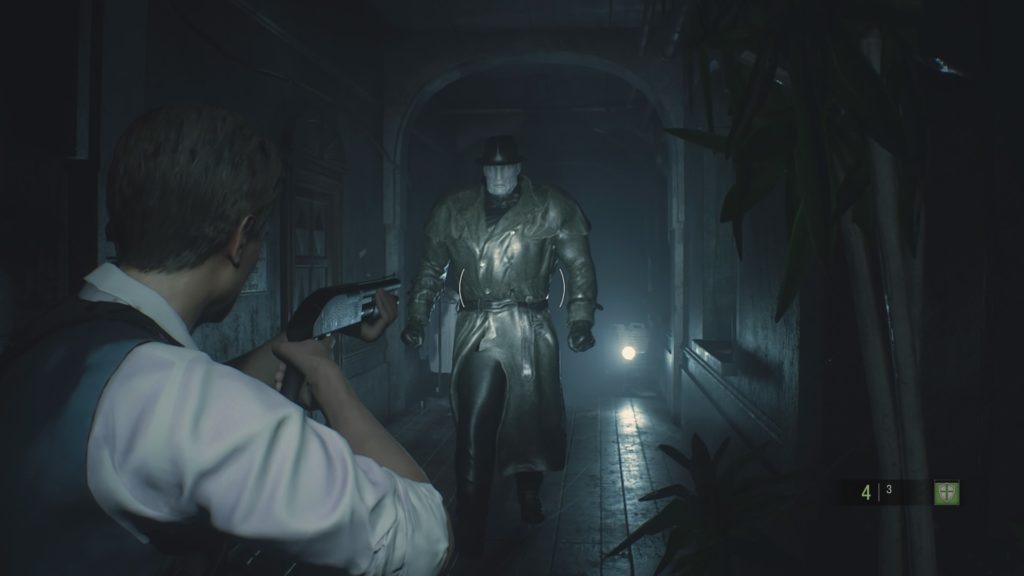
He’s big, he’s mean, and he’s just about invincible. Tyrant is one of Resident Evil 2’s most fearsome enemies, and he’ll relentlessly track you down until you’re dead. Fortunately, there are a few ways to survive if you happen to cross paths with the intimidating Mr. X, but you’ll have to play your cards right if you want to live to fight another day. When confronted by this formidable enemy, you only have three options: run, hide, or fight. Read on to learn how best to employ each strategy and survive a harrowing encounter with the Tyrant.
For such a large foe, the Tyrant can often appear suddenly and without warning. If you’re caught unprepared for a fight or are low on supplies and healing items, running may be your best bet. In addition to his tremendous strength, the Tyrant is also capable of moving extremely quickly, and can easily keep pace with the player character during a chase. He’s also got an uncanny ability for tracking, which does make sense: he’s a bioweapon sent by Umbrella to wipe out any witnesses left standing in Raccoon City.
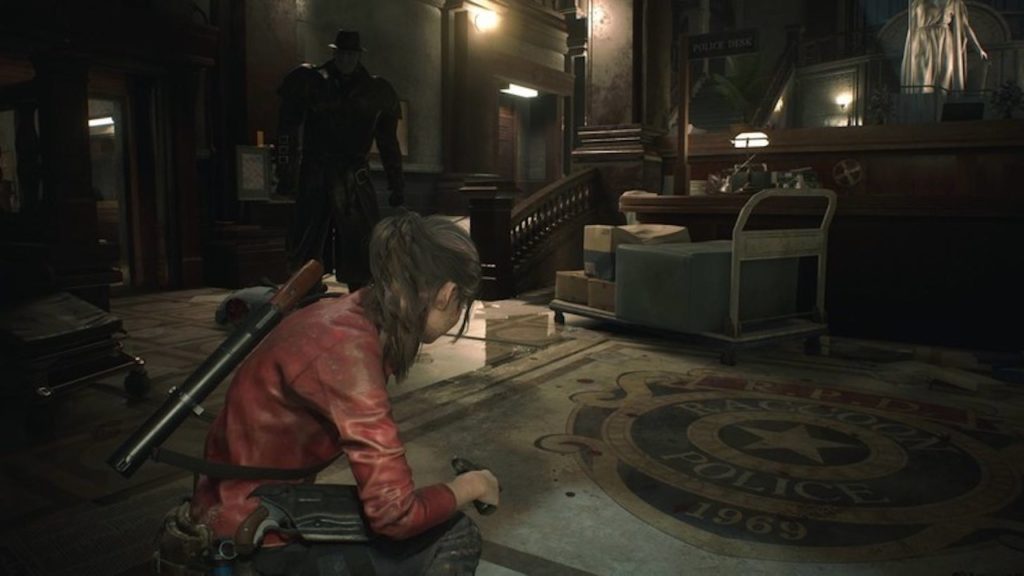
If you decide to run, try to take a route that will take you through multiple rooms or around obstacles. The more maze-like your path, the more difficult it will be for the Tyrant to track you, which means it’ll be easier for you to lose him. You’ll also want to try to break his line of sight on you. As long as Tyrant sees you, he’ll keep coming after you until you’re dead.
Your second option when facing down the Tyrant is to hide. As mentioned above, Tyrant will track you relentlessly until he catches you. However, there are certain places that Tyrant won’t pursue you. If you’re in a foot chase with Tyrant, try to make it to the nearest Save Room. These are rooms scattered around the game that contain Item Boxes and Typewriters, and Tyrant won’t be able to follow you inside. Other rooms, such as the Clock Tower on the third floor of the RPD, are also off limits to Tyrant.
Once you’ve made it to a safe room, you can take a breather, grab some supplies, and recuperate for a moment. Tyrant will usually stick around in the general vicinity for a time, and you’ll be able to hear his distinctive heavy footfalls as he stomps around outside searching for you. Eventually, however, Tyrant will lose interest and leave the area to search elsewhere, which is when you can make your escape.
Sometimes, a fight with Tyrant is unavoidable. If you find yourself going up against Tyrant in combat, you’ll need to end the fight quickly, as it’ll only take a few hits from Tyrant’s massive fists to take you down. It’s important to keep in mind that Tyrant is invincible outside of his boss fights, so the most you can hope to do in attacking Tyrant is stagger him. Do enough damage, and you’ll see Tyrant drop to one knee to recuperate. When this happens, you’ll want to put as much distance between you and Tyrant as possible.
When fighting Tyrant, you’ll want to bust out your heavy hitting weapons, such as Magnums or Shotguns. Don’t be stingy about conserving ammo, as a handgun is essentially useless against Tyrant. Tyrant’s body is heavily armored, and can easily absorb a barrage of bullets without breaking stride. Aim for the head: it’s Tyrant’s most vulnerable area, and scoring a few headshots in a row is usually enough to bring Tyrant down.
It’s easy to panic when you hear the sounds of Tyrant bearing down on you. Next time you run across Mr. X, keep these tips in mind and you’ll live to fight another day.
Get to know the weapons that will save your life in Resident Evil 2.
If you hope to survive the zombie hordes and make it out of Raccoon City alive, you’ll need to be well equipped. Fortunately, Resident Evil 2 includes a vast arsenal of weapons that you can employ against the living dead. The trick, however, is getting your hands on these weapons. Oftentimes, it isn’t as straightforward as simply finding a gun and picking it up. Here’s our complete list of all weapons, their mods, and most importantly how to obtain them.
Location: Available in inventory from the start of the game (Leon).
Mods:
Muzzle Brake– Lowers recoil and allows for more accurate fire. Found in the Waiting Room safe.
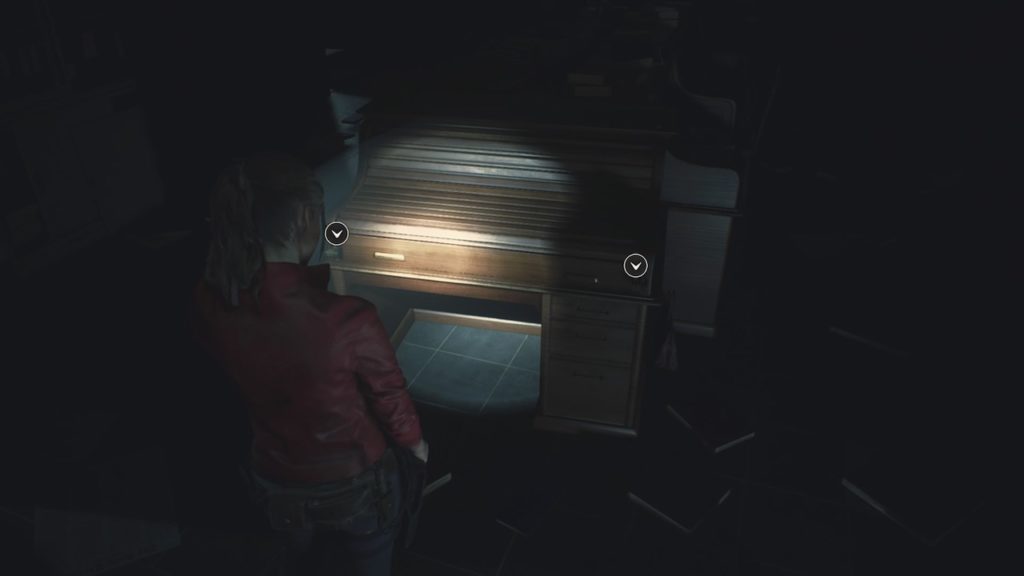
High Capacity Mag– Upgrades capacity to 24 rounds. Found by solving the West Office desk puzzle.
Gun Stock-Further increases accuracy and enables three round bursts. Located in the trunk of a police car in the parking garage. You’ll want to grab the discarded car key located in the Firing Range, then press the button in the garage to open the trunk.
Description: Matilda is Leon’s standard starting handgun. A semi-automatic pistol with a decent magazine capacity to start, obtaining all upgrades will turn it into a slow-firing three-round burst weapon that’s much more accurate than the game’s submachine guns, but tends to chew through ammo fast. As Leon doesn’t have access to any alternate handguns in his standard scenario, you’ll want to hold onto this gun until the bitter end.
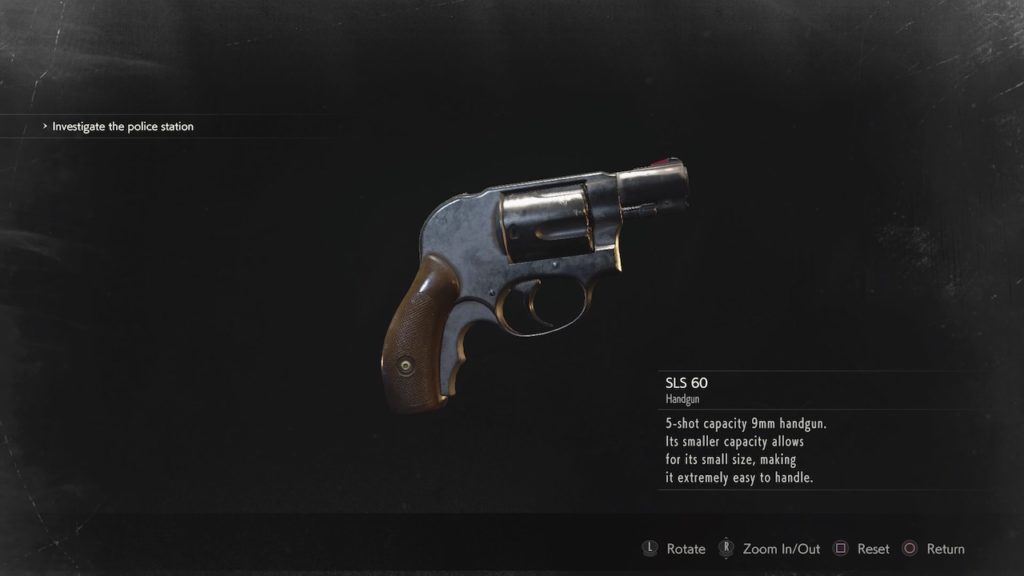
Location: Available in inventory from the start of the game (Claire).
Mods:
Speed Loader– Allows for much faster reloads. Found by solving the West Office desk puzzle
Reinforced Frame– Strengthens the frame and allows the gun to fire powerful Magnum Ammo. Found by unlocking the safe in the Treatment Pool Room in the Sewers
Description: The SLS-60 is a compact revolver that Claire keeps for self-protection. It only carries 5 shots of standard Handgun Ammo, and has a revolver’s standard lengthy reload. At its default state, this gun isn’t all that useful against the hordes. You’ll want to obtain this weapon’s upgrades as soon as possible. The Reinforced Frame, in particular, turns the gun into a Magnum type weapon that will come in handy during some of the late-game boss battles.
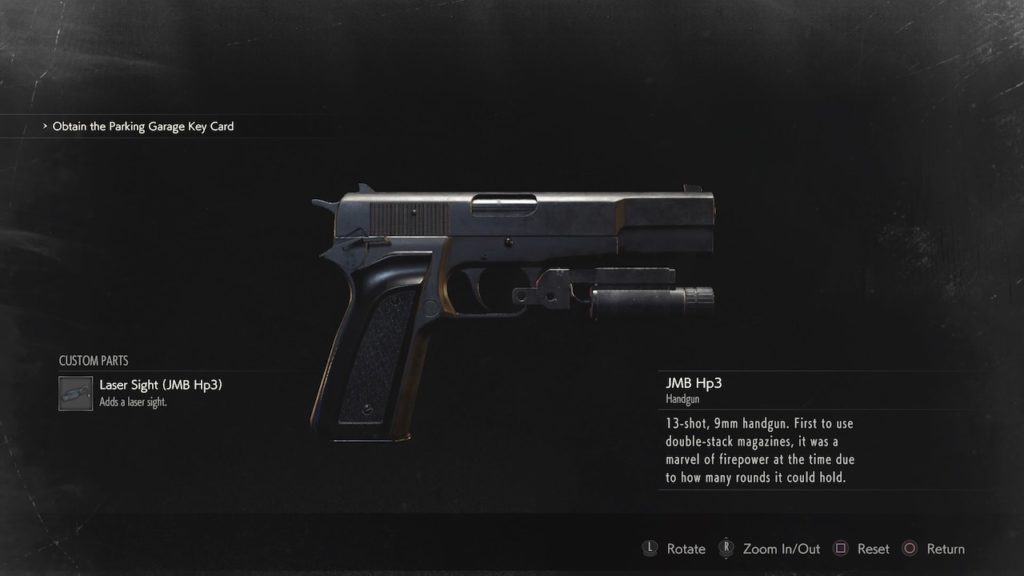
Location: Inside the trunk of a police car in the parking garage. Use the car key found in the Firing Range to unlock (Claire).
Mods:
Laser Sight– Greatly increases the weapon’s accuracy and allows for quick follow-up shots. Equipped by default.
Extended Magazine– Increases magazine capacity to 26 rounds. Found by unlocking the Waiting Room safe.
Description: This semi-auto handgun the standard issue sidearm of the Raccoon Police Department. It’s also a direct upgrade over the SLS-60, with better accuracy, increased capacity, and higher damage. As soon as you find it, you’ll want to start using this as your primary handgun, and use the SLS-60 as more of a backup weapon.
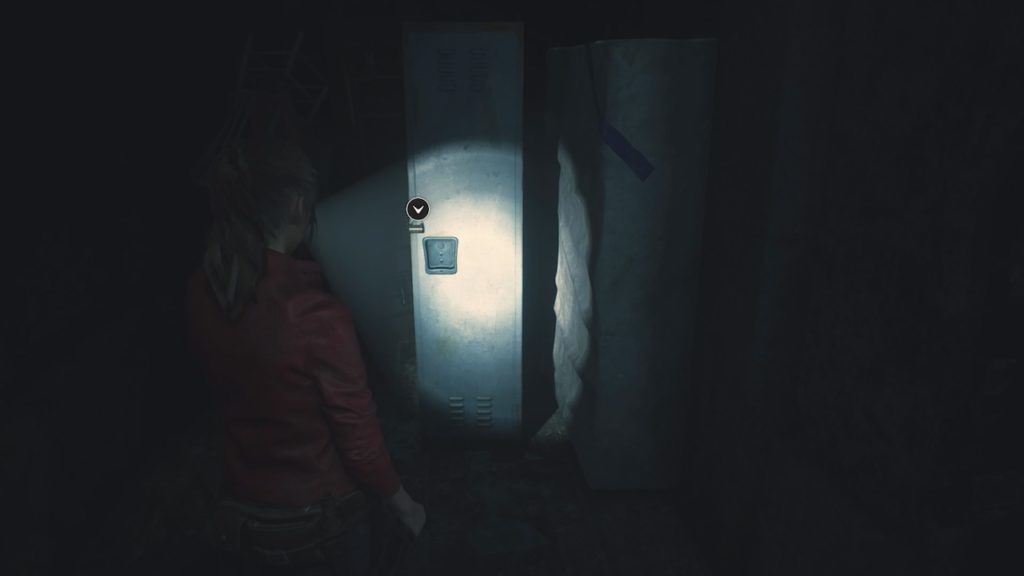
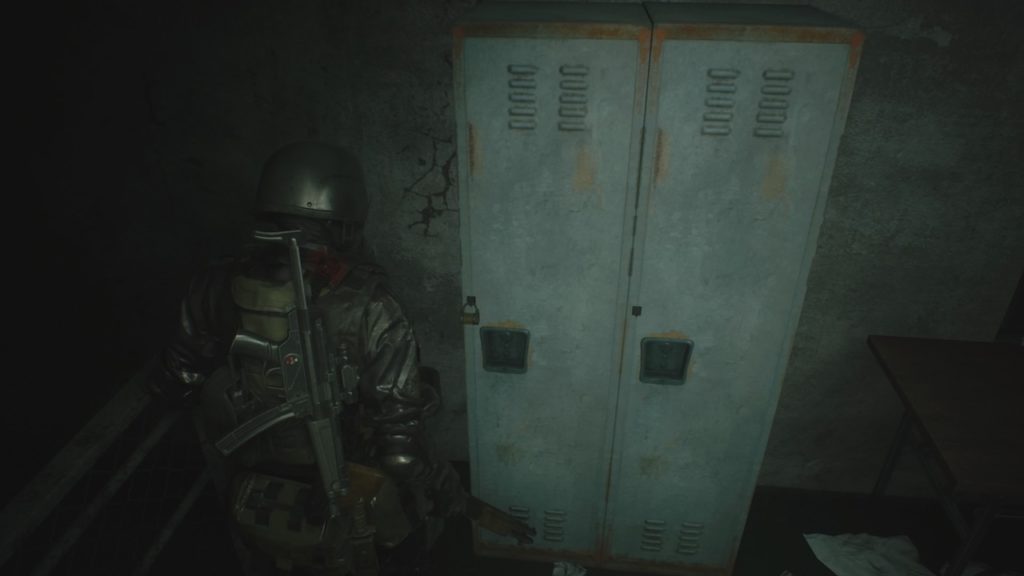
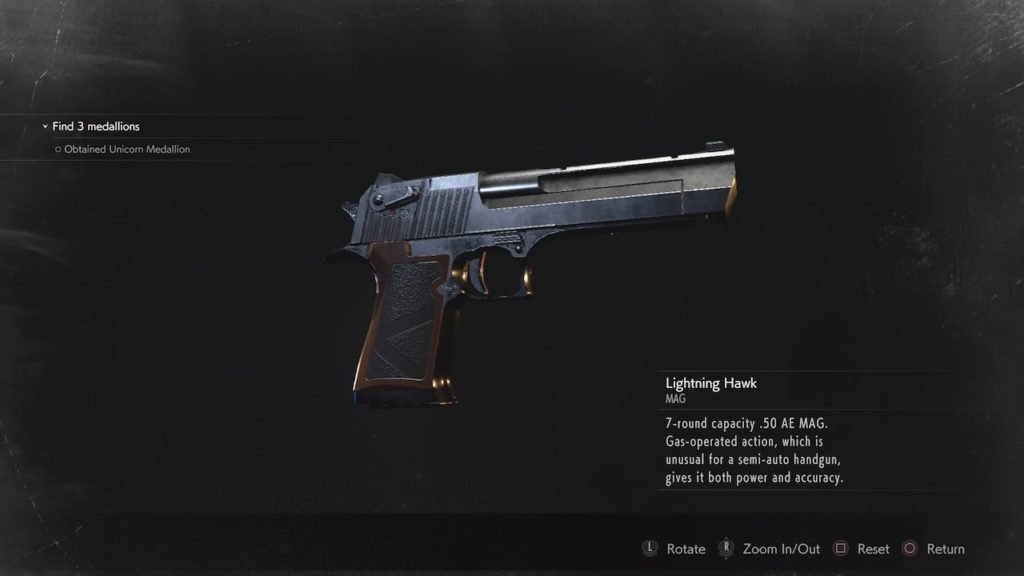
Location: S.T.A.R.S. Office locker. Use S.T.A.R.S. badge to unlock (Leon).
Mods:
Long Barrel-Reduces recoil and increases damage, but increases the Lightning Hawk’s inventory space. Found in the Underground Facility weapons case, unlocked with S.T.A.R.S. badge.
Red Dot Sight– Adds what is essentially a laser sight, further increasing accuracy. Found in the bottom drawer of a desk in the S.T.A.R.S. office, but can only be found after developing the “Hiding Places” film roll found in the Sewers breakroom.
Description: This hand cannon is a staple component of Leon’s arsenal, but can also be easily missed if you haven’t found the S.T.A.R.S. badge. Examining the badge will reveal it to be a USB that can be used to open the weapons locker that it’s contained in, and the badge can also be used on a weapon case to grab the gun’s Long Barrel upgrade. You’ll want to make sure you grab it before heading down into the Sewer areas, as you’ll be able to put this weapon to good use against Tyrant or the mutated Dr. Birkin.
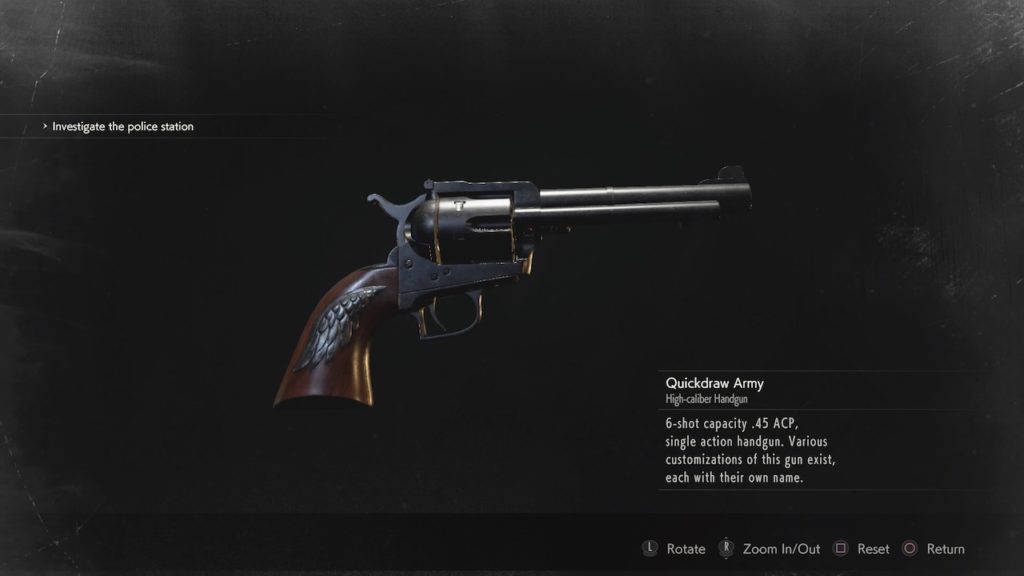
Description: This old army revolver should be a familiar sight for any Red Dead Redemption 2 players. Only available in Claire’s B campaign, the Quickdraw Army fires powerful .45 Ammo. As this ammo is far more common in the B campaign than standard handgun ammo, you’ll likely be using the handgun as your primary sidearm. When holding down the trigger, Claire will fan the hammer and fire it almost like a submachine gun, but you’ll want to be careful as it only holds 6 shots and takes quite a while to reload.
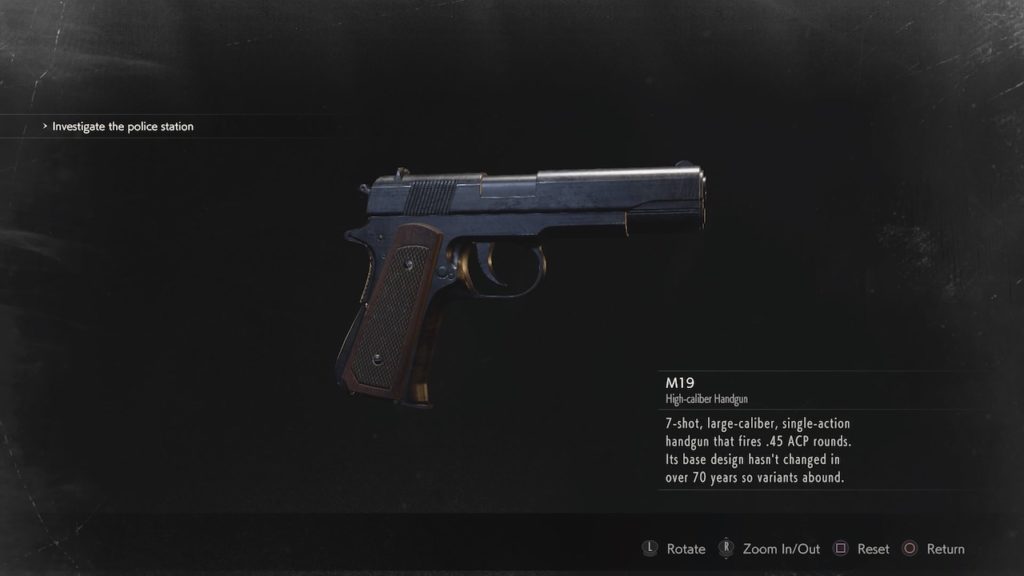
Description: The M19 returns from Resident Evil 7 as Leon’s counterpart to the Quickdraw Army. When using the gun, Leon will hold it sideways, so you may find that you have to adjust your aim according. Also as with the Quickdraw Army, it has a low 7 round magazine, which means you’ll find yourself reloading a lot more often.
Location: Hunk exclusive weapon (The Fourth Survivor).
Mods: None.
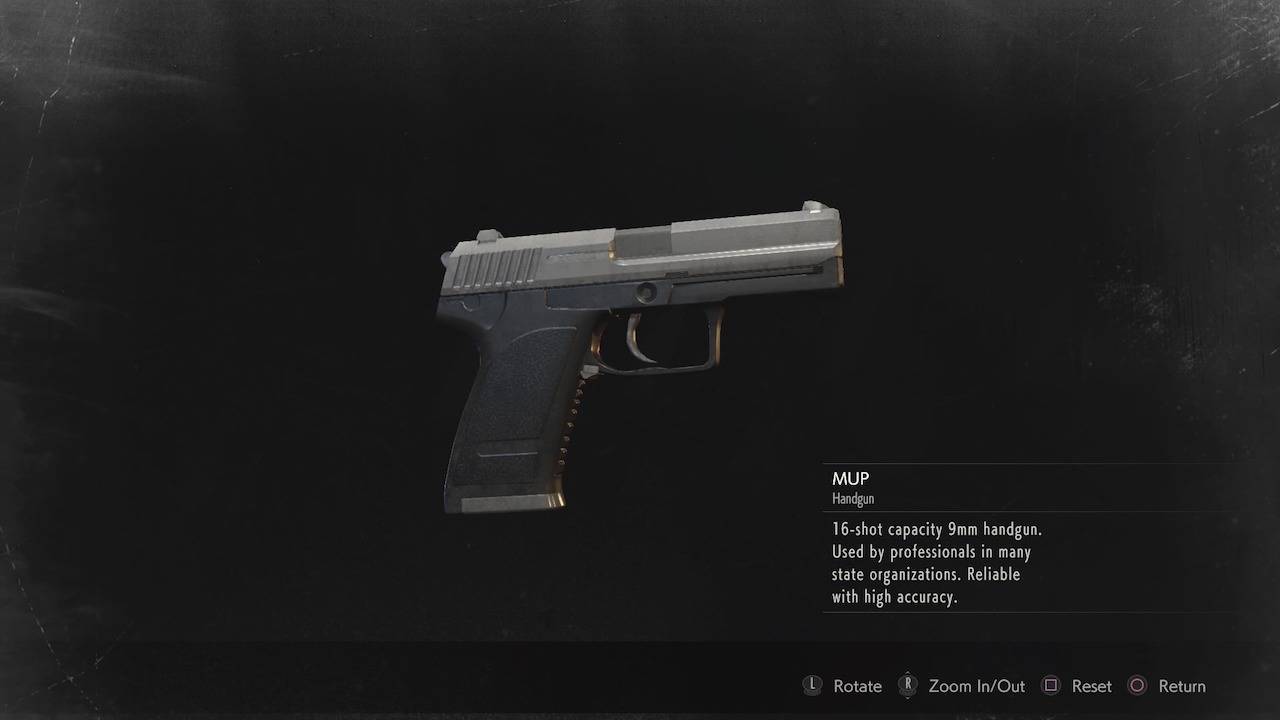
Description: The MUP is a German military handgun with a 16 round magazine. Unfortunately, this gun isn’t available in either of the game’s primary campaigns. You’ll only be able to use it when playing as Hunk during The Fourth Survivor minigame, where you’ll find the MUP in Hunk’s inventory by default.
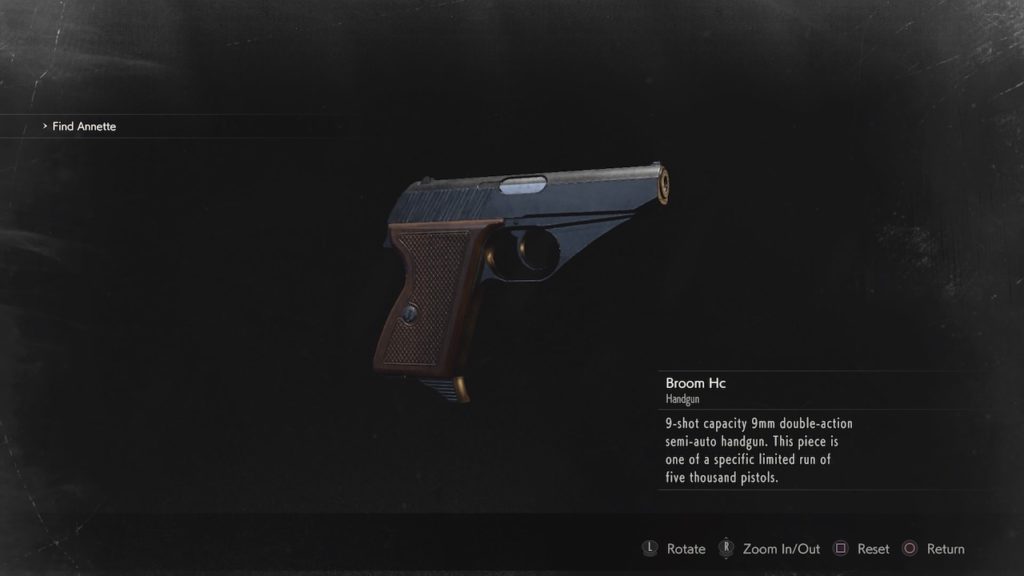
Description: The enigmatic Ada Wong carries the Broom Hc as her personal handgun. As such, you’ll only be able to use it during a brief section in Leon’s campaigns where you get to take control of Ada. As far as the gun itself, it’s rather underpowered with a low capacity, and can’t be modified. It does well in the accuracy department, however, allowing for quick follow-up shots.
Location: Unlocked with an S-rank clear (either campaign).
Mods: None.
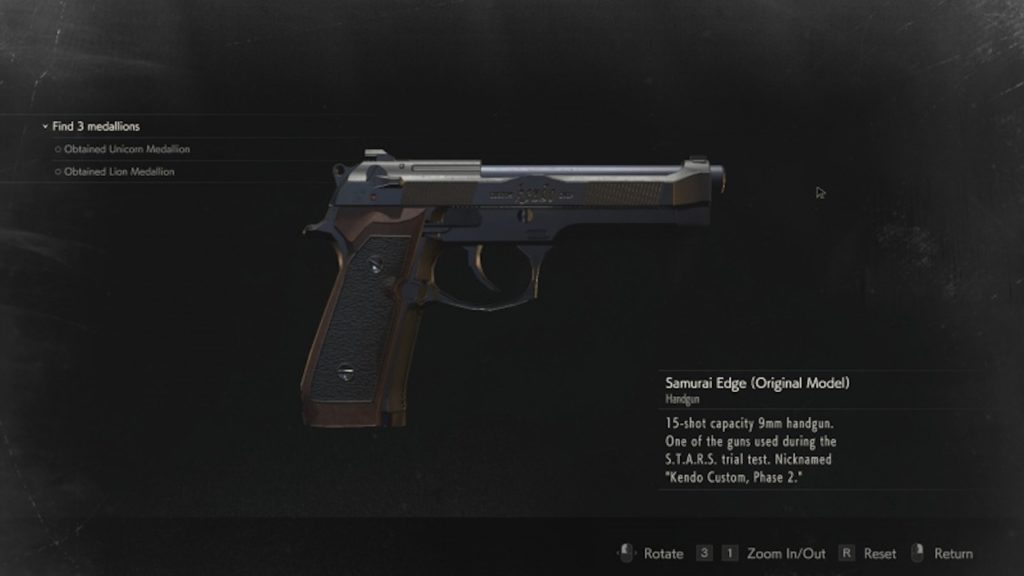
Description: The Samurai Edge is the name given to the custom Beretta pistols carried by the RPDs elite S.T.A.R.S. unit. Each member of the unit could also further modify the pistols to better suit their specific needs. This standard issue Edge can only be unlocked by beating the game with an S rank. Befitting such a rare firearm, the Samurai Edge boasts infinite ammo, so fire away.
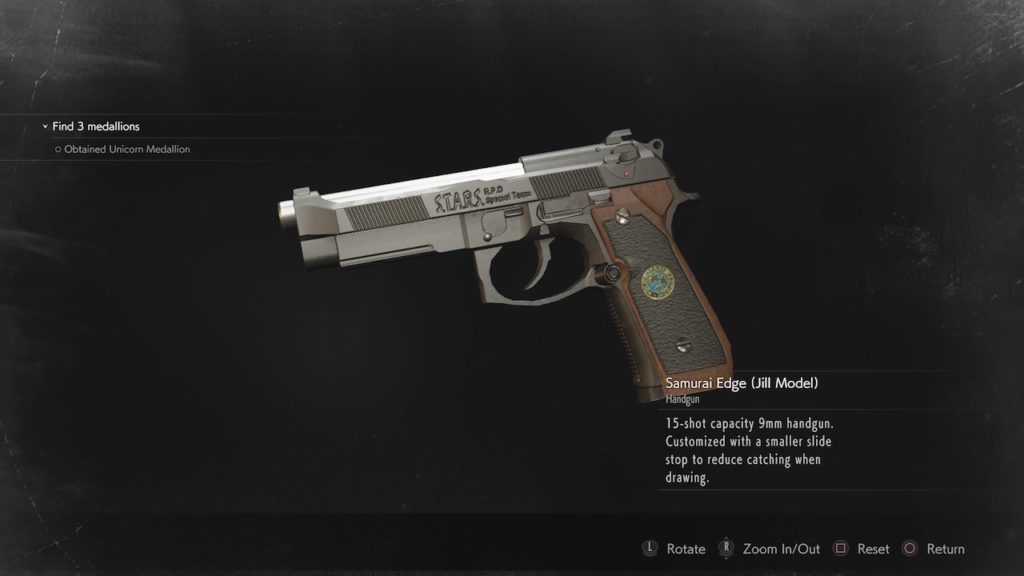
Description: This version of the Samurai Edge has been further modified by Jill Valentine to allow for a faster draw. As a player, this means that you can quickly switch to Jill’s Edge from other weapons, making it effective as a backup gun.
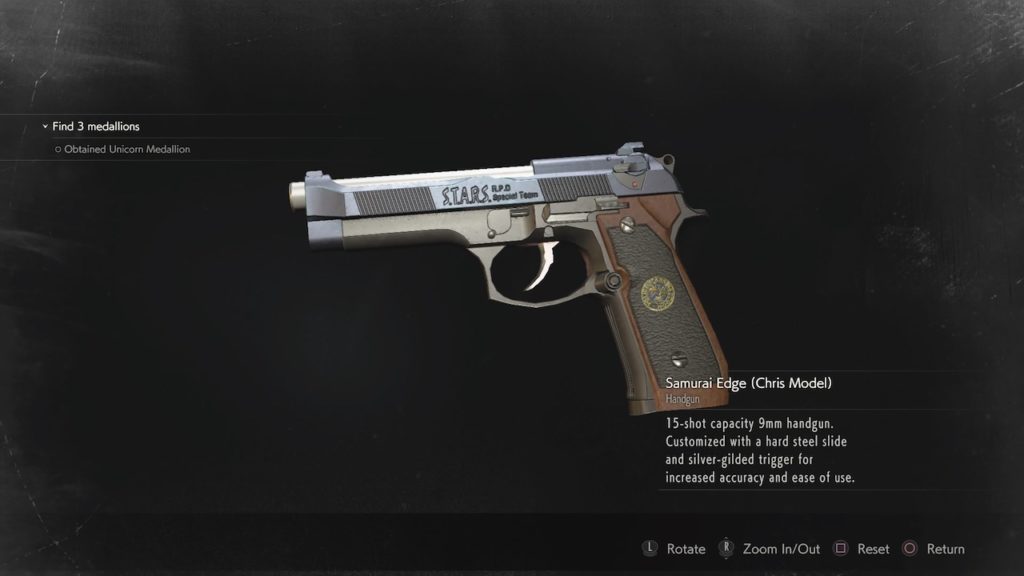
Description: Chris Redfield’s Samurai Edge has been further modified with a blued slide and silver match-grade trigger. This means the gun has increased accuracy, and will allow a quicker refocus on targets.
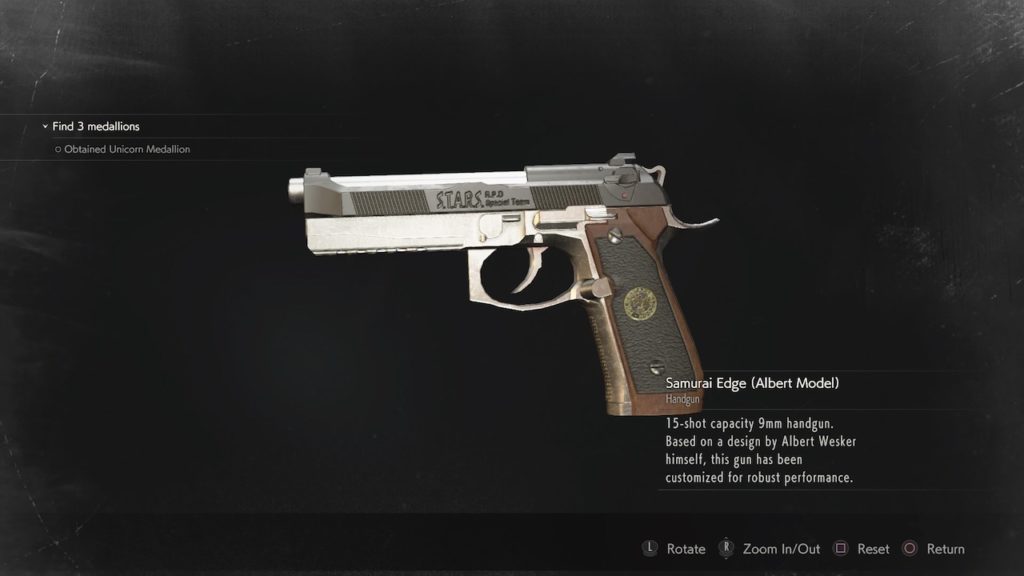
Description: This custom Samurai Edge was used by former S.T.A.R.S. commander and secret Umbrella operative Albert Wesker. It’s been heavily modified with some rather striking upgrades, including increased damage.
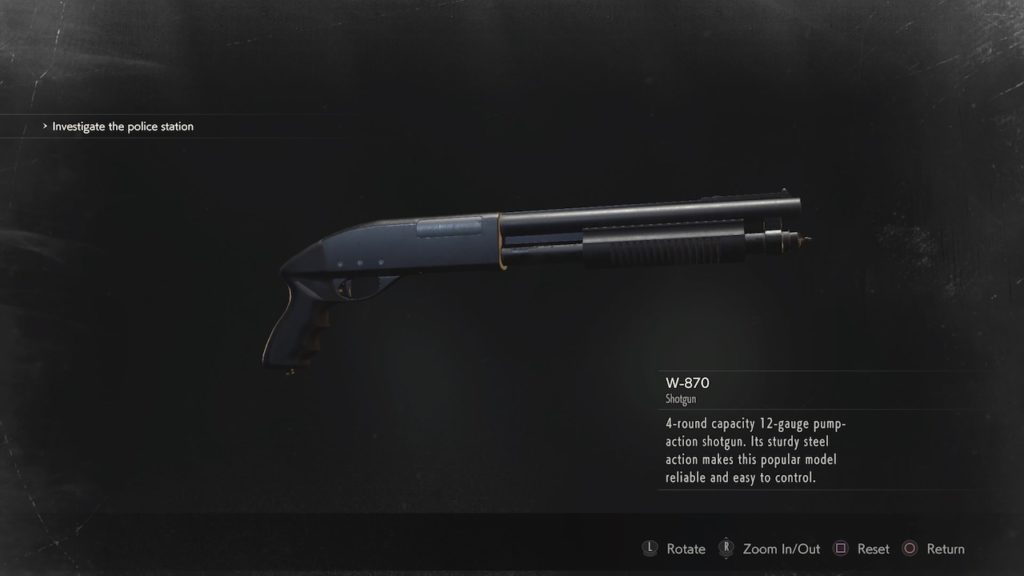
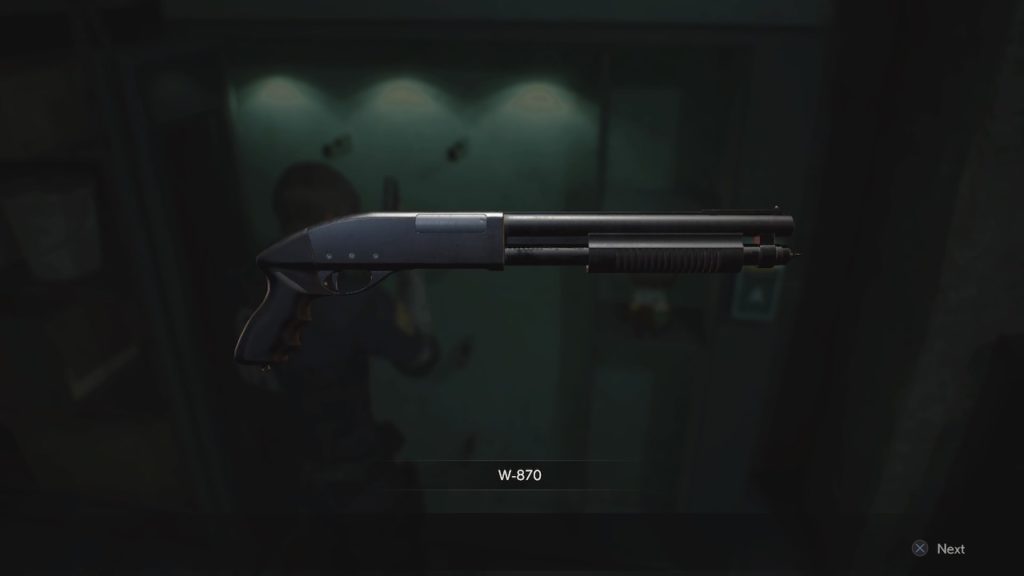
Location: Safety Deposit Room. Use Weapon Locker Key to unlock (Leon).
Mods:
Long Barrel– Increases ammo capacity to 8 shells, but also increases the weapon’s inventory size. Found on a shelf in the Kendo Gun Shop.
Shotgun Stock– Increases the weapon’s rate of fire. Found by unlocking the safe in the Treatment Pool Room in the Sewers.
Description: The shotgun can be found early in the campaign and serves as Leon’s main heavy weapon throughout the campaign. A well-placed headshot is capable of taking down a standard zombie in a single hit. It can be customized with several upgrades that give it a distinct advantage over its initial sawed-off form, at the expense of taking up more inventory space. Ammo can also be somewhat scarce, but can also be easily crafted using found Gunpowder items.
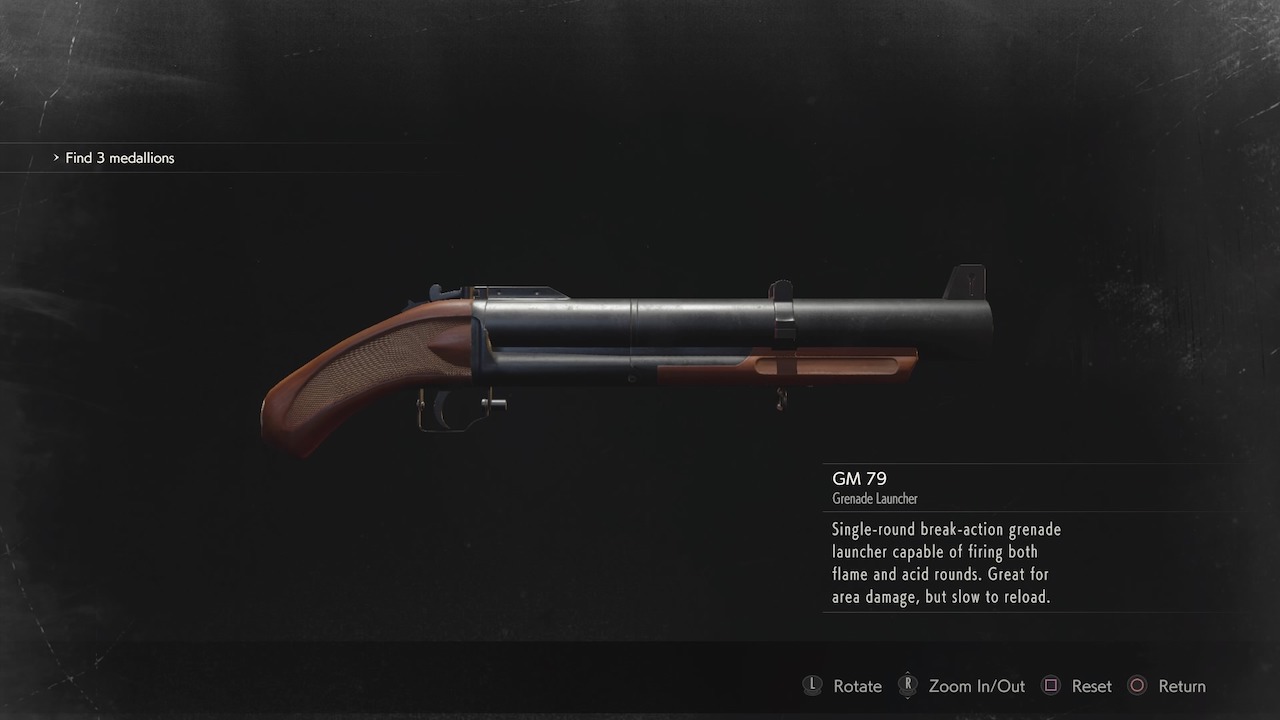
Location: Safety Deposit Room. Use Weapon Locker Key to unlock (Claire).
Mods:
Shoulder Stock- Increases the weapon’s range and accuracy, but also increases the inventory size. Found in the Elevator Control Room located off the Parking Garage, unlocked with the Diamond Key.
Description: Claire’s counterpart to Leon’s shotgun, the Grenade Launcher is a bit more unique. The grenade launcher is capable of firing two ammo types- flame and acid. Flame rounds tend to do a bit more damage while acid rounds do well to stumble and stun standard enemies. As a drawback, the launcher can only hold a single round at a time, but you can switch between ammo types with a quick button press as long as you have some of each type in your inventory.
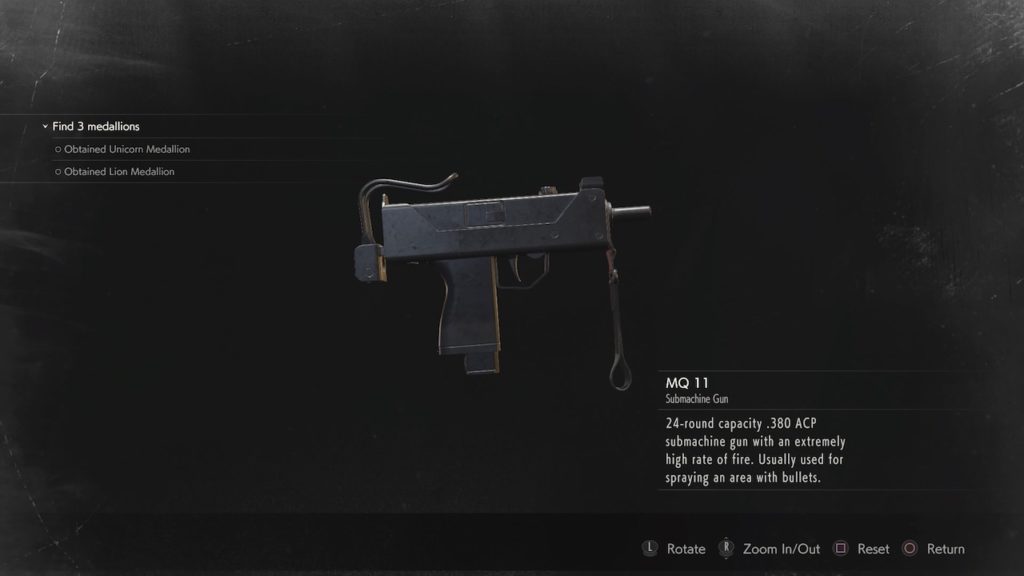
Location: S.T.A.R.S. office locker. Use S.T.A.R.S. badge to unlock (Claire).
Mods:
High-Capacity Magazine- Increases magazine size to 50 rounds. Found in the bottom drawer of a desk in the S.T.A.R.S. office, but can only be found after developing the “Hiding Places” film roll found in the Sewers breakroom.
Suppressor- Reduces recoil and increases accuracy, but increases the weapon’s inventory size. Found in the Underground Facility weapons case, unlocked with S.T.A.R.S. badge.
Description: Though not particularly high damage, the MQ-11 excels with a blistering fire rate. You’ll want to fire in short bursts to preserve accuracy. You can also easily stagger an enemy with a few rapid shots to the legs, leaving an opening for you to slip past while also saving valuable ammo.
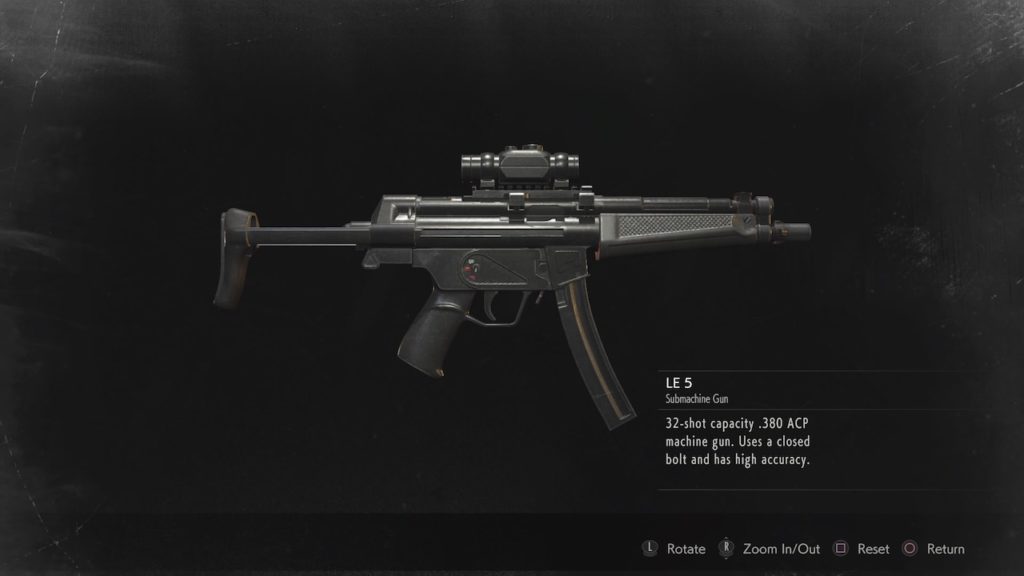
Location: Complete the game with an S-rank on Hardcore difficulty.
Mods: None.
Description: The LE-5 is a standard-issue submachine gun used by Umbrella’s elite paramilitary unit. As such, Hunk is equipped with one during The Fourth Survivor. If you want to unlock the LE-5 for use in the main campaigns, you’ll need to clear either campaign on Hardcore with an S-rank. Like the Samurai Edge, it will come equipped with infinite ammo.
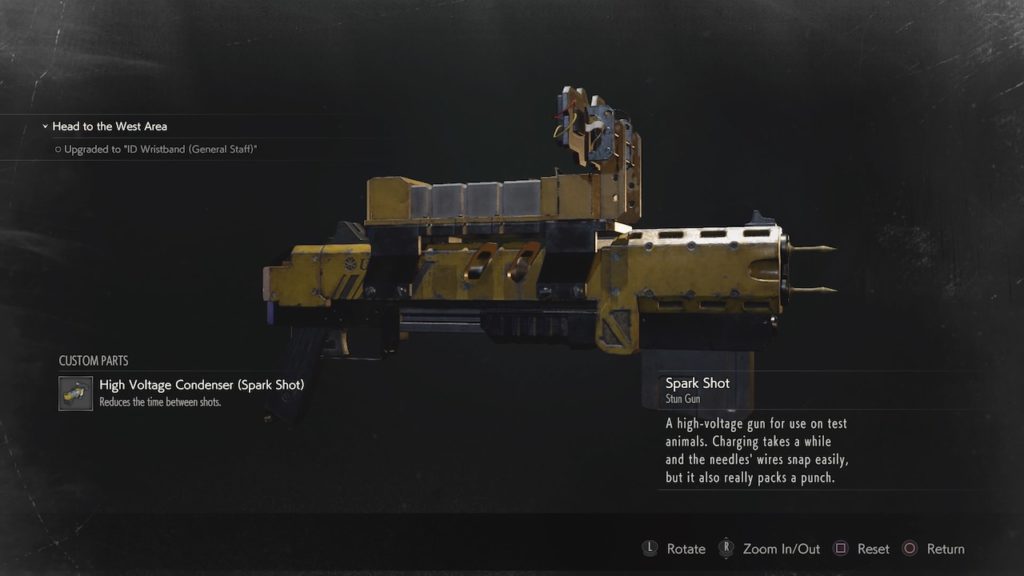
Location: Supplies Storage Room, Sewers. Use King/Queen chess plugs to unlock (Claire).
Mods:
High-Voltage Condenser– Increases overcharge speed. Found in a locker in the Lab’s Nap Room.
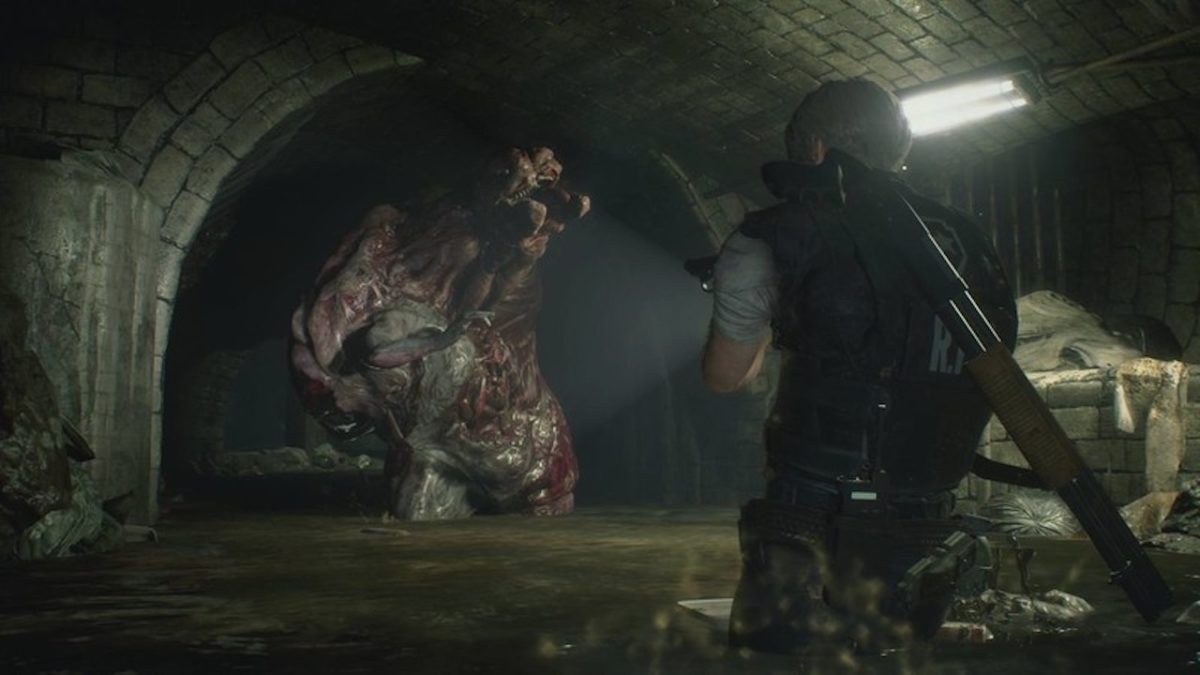
Description: The Spark Shot is an odd but powerful weapon. Essentially a gigantic taser, the Spark Shot launches electrical prongs at an enemy. Once embedded, the prongs will continue to electrocute the enemy as long as you keep the weapon aimed at them before finally exploding and dealing huge amounts of damage. This is especially effective against the G-Virus monsters that populate the Sewers.
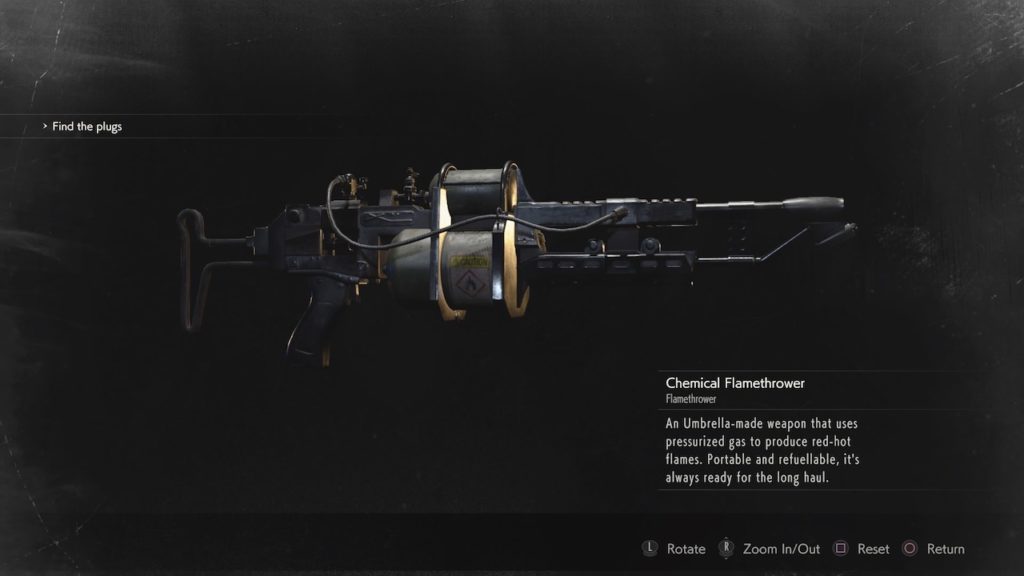
Location: Supplies Storage Room, Sewers. Use King/Queen chess plugs to unlock (Leon).
Mods:
Regulator– Reduces fuel consumption to conserve ammo. Found in a locker in the Lab’s Nap Room.
Description: Nothing quite beats a classic flamethrower. Though powerful, it does have some drawbacks. The flames can take a while to deal damage, so you’ll want to keep enemies at a distance while in use. This gun is especially effective against the plant-based Ivy monsters in the Lab’s Greenhouse area. Charring them to a crisp is the only way to prevent them from reviving.
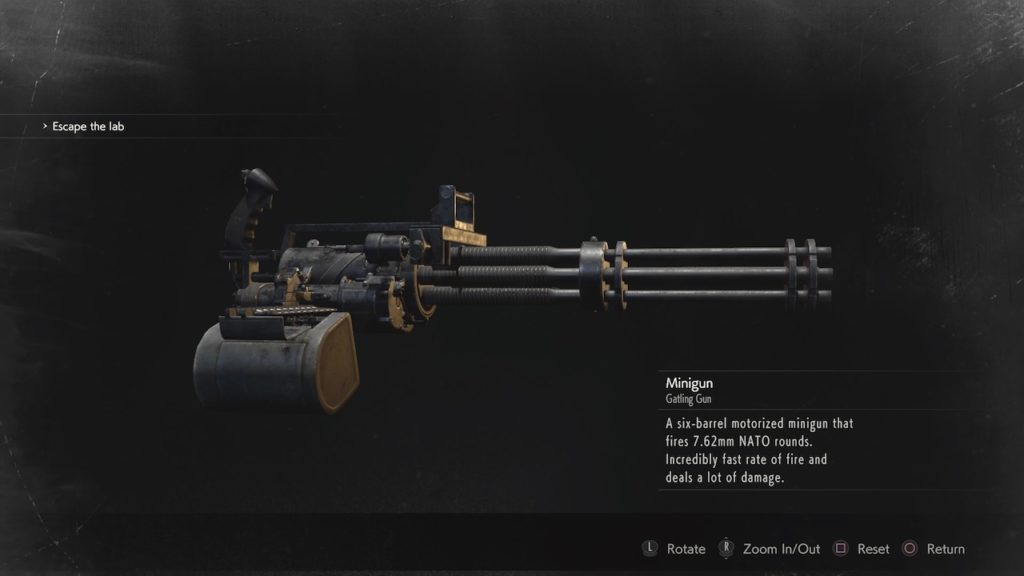
Description: The Minigun is a beast of a weapon that Claire can grab before her final boss fight. It comes with a huge ammo pool, but the fast fire rate means that ammo can disappear fast. In the B-Scenario especially, you’ll want to make sure you have some ammo saved for the “true” final boss in the train sequence.
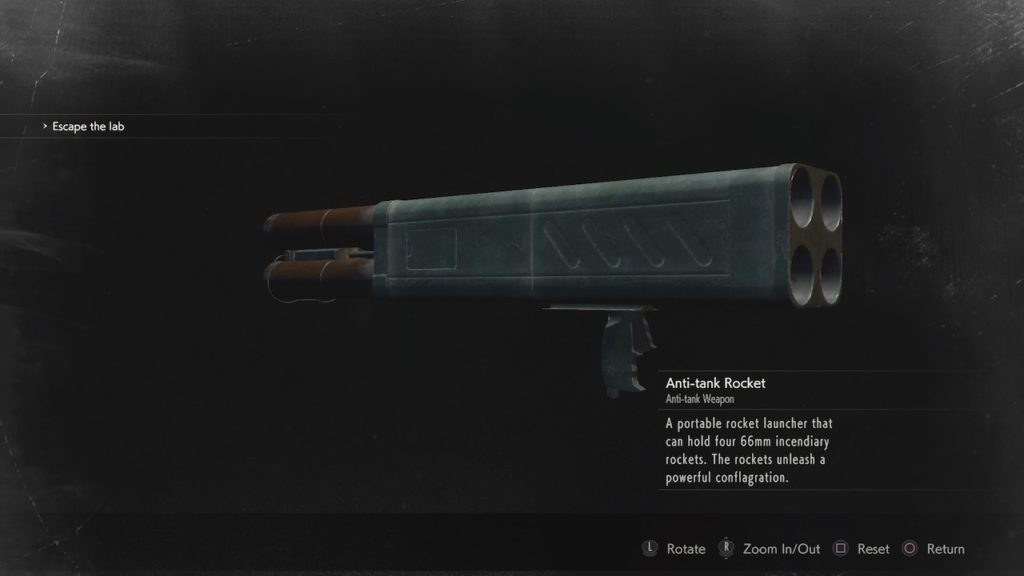
Description: Like Claire’s minigun, the Rocket Launcher is only available in Leon’s last fight against the Super Tyrant. Last long enough, and a mysterious figure will eventually toss the weapon to you. Though it will only take a single shot to kill the Tyrant, it carries four shots. You can save the remaining three to do with as you please, or use against the final train boss in the B scenario.
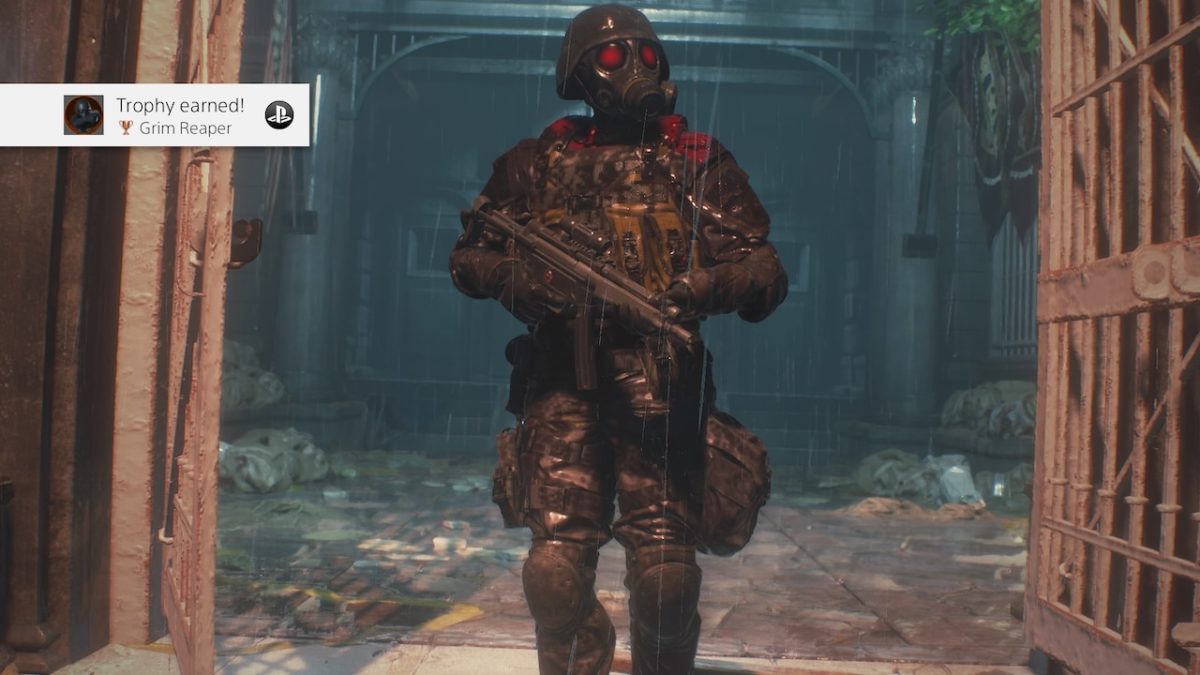
Need help beating the 4th Survivor minigame? Here’s how to pull it off.
Anybody who’s unlocked and played Resident Evil 2’s 4th Survivor minigame knows that it’s unbelievably hard. The mode unlocks after the completion of both campaign scenarios. Players take control of Umbrella Corporation operative Hunk as he attempts to make his escape from the overrun Raccoon City before an incoming missile strike wipes it off the map. You’ve got limited supplies, a gauntlet of enemies to run through, and a long route to run to make it to your extraction point. Here’s our guide to making it through the minigame in one piece.
When you check your inventory upon taking control of Hunk, you’ll notice that you’re fully stocked with weapons, ammo, herbs, and healing items. While this may seem like more than enough in the way of supplies, you’ll soon find there are no additional item pickups in the map. You’ll only have the items in your inventory to make it through to the end- once they’re gone, they’re gone.
It may seem at first like you’re working with a surplus, but the key here is conservation. Don’t fire your weapon unless totally necessary, keep the use of healing items to a bare minimum, and try to make strategic use of your backup weapons like grenades and knives. In the case of backup weapons especially, you may have to make a judgment call to swallow some damage if it means preserving those weapons for use later. Your escape route is long and filled with enemies, and the last thing you want is to be caught with no way to survive.
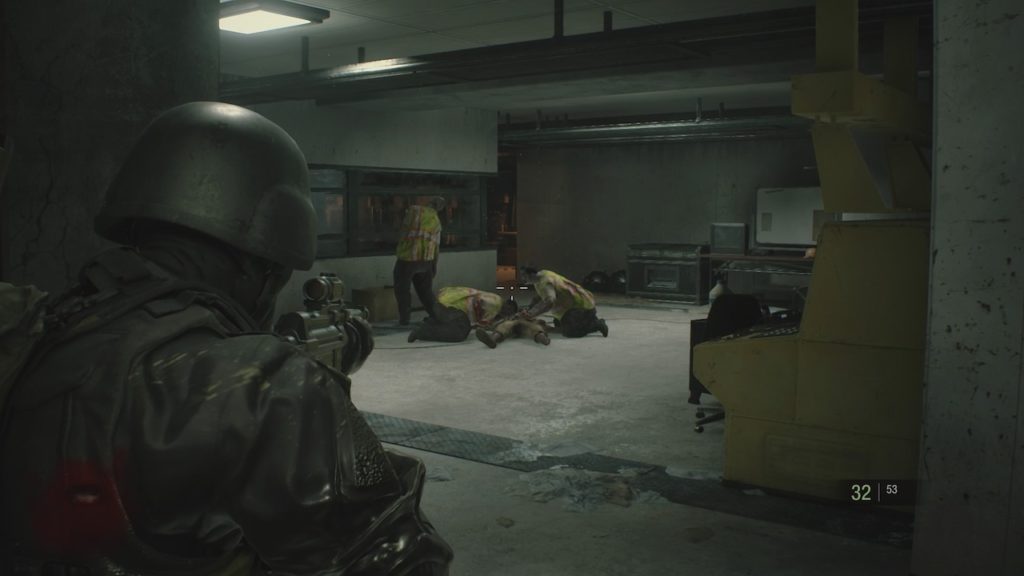
As stated above, supplies are limited, and that includes ammo. You’ll start the game with four weapons: an LE-5 submachine gun, W-870 shotgun, Lightning Hawk magnum, and MUP handgun. You’ll also have a bit of backup ammo for each weapon, and some gunpowder to use as you please. We strongly recommend using that gunpowder to create as many shotgun shells as you can: the shotgun is your most efficient gun, easily taking down a zombie in a single headshot and allowing you to keep moving.
Also to that end, we recommend using your weapons in descending order of power: shotgun first, then submachine gun, then handgun. Once you run dry with one weapon, switch to the next. The magnum, however, we recommend keeping in reserve for special circumstances, such as dealing with powerful enemies like Lickers or other obstacles that need to be quickly dispatched.
As a general rule, you want to be constantly moving forward. Your goal shouldn’t be to kill enemies, but rather to move past them. Thus, go for headshots with the handgun and shotgun to kill or stun enemies in your path, and use the submachine gun to sweep their legs and stagger them. Whenever possible, try to quickly run past enemies rather than engaging them. You should only fire your gun as an absolute last resort.
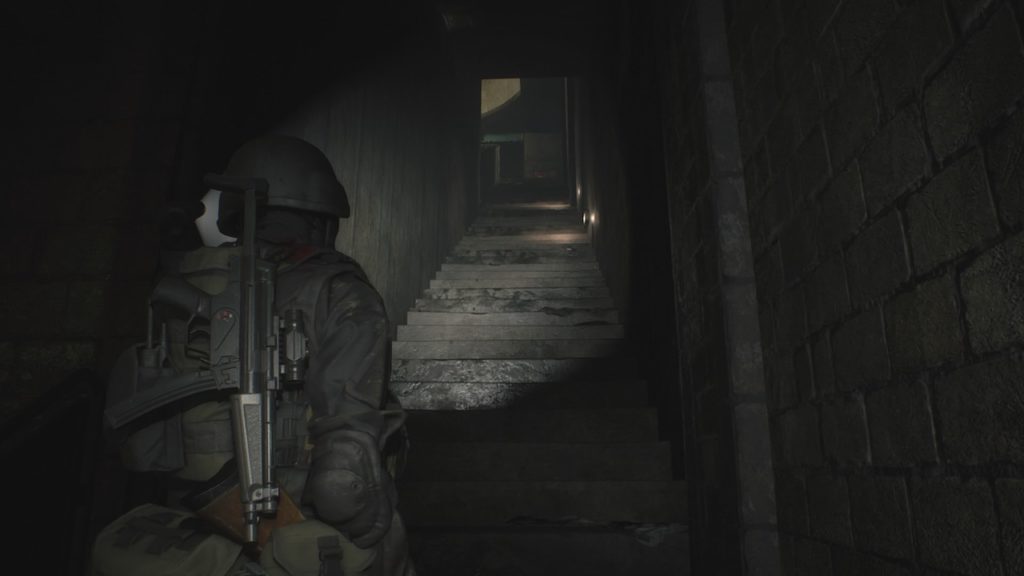
Hunk’s route to his extraction point is long and winding. You’ll start in the lowest part of the Sewers and eventually have to make your way to the front gates of the Raccoon Police Department. It’s not going to be a straightforward route, as you’ll run into many locked doors and there aren’t any key items for you to find. In all likelihood, you’ll die on your first run through. Use this as an opportunity to start to get a sense for the route you’ll be taking through each area, and where enemies are placed.
Ideally, you’ll get a bit further with each run until eventually working out your strategy for that final push to the entrance. Things will get harder and harder the further into the Police Station you get, so be prepared for some heavy resistance as you get towards the final areas.
Making it through The 4th Survivor is tough, but certainly doable. Though the process can be frustrating at times, nothing beats that feeling of triumph when you finally push through to the station gates and see your extraction chopper hovering overhead. Hopefully, these tips will make it that much easier for you to achieve a well-earned victory.
Here’s how to survive all your zombie encounters in Resident Evil 2.
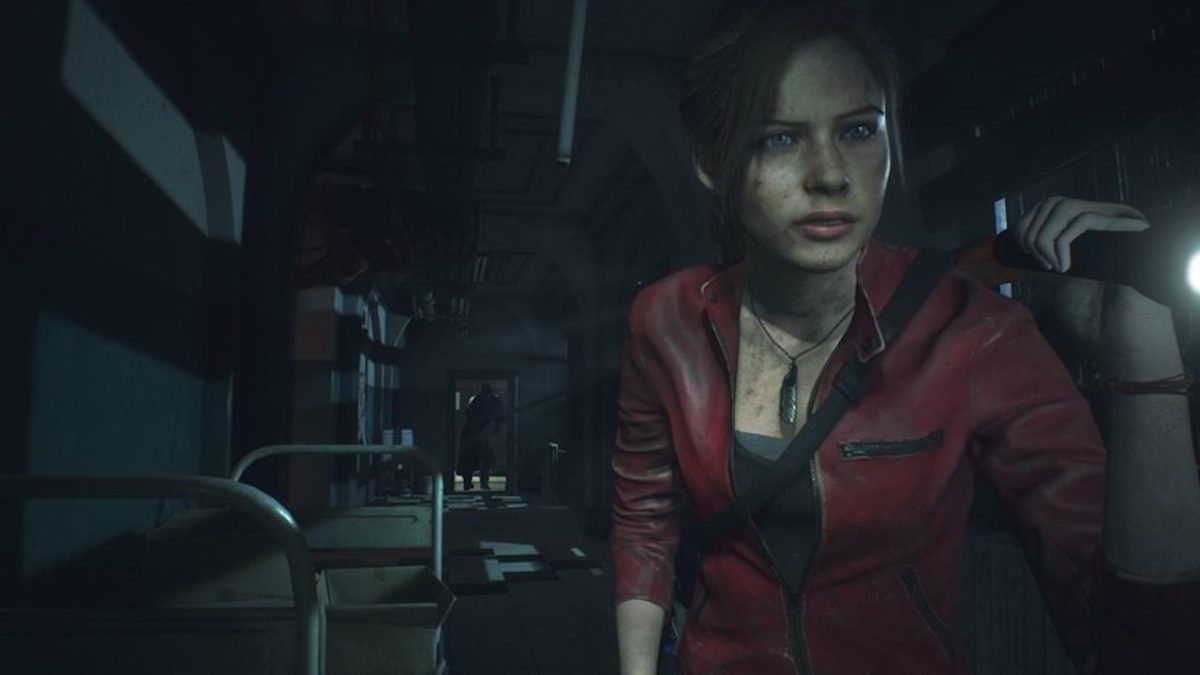
Raccoon City: once a bustling Midwestern metropolis, now a hellish nightmare teeming with zombie hordes and other terrifying creatures created by the sinister Umbrella Corporation. As a player, you’ll take control of rookie cop Leon S. Kennedy or student Claire Redfield as they fight to escape the city. Whether you’re a series veteran or a new player, Resident Evil 2 offers a unique survival horror experience. You’ll need to do more than simply shoot zombies if you hope to make it out alive. In this guide, we’ll teach you the tips and tricks you need to know to keep you from becoming zombie food.
As with other games in the Resident Evil series, Resident Evil 2 uses a limited inventory system. This particular format was introduced with Resident Evil 7. It depicts the inventory as a group of small squares, with most items taking up a single square and larger items eating up two squares. Once your inventory is full, you won’t be able to pick up any more items. You then have two options. Discarding an item can free up inventory space, but that item is permanently lost, and you won’t be able pick it back up. Retaining your supplies is important, as you don’t want to get caught in a boss battle without the ammo and healing items you need. You’ll want to avoid discarding items at all costs.
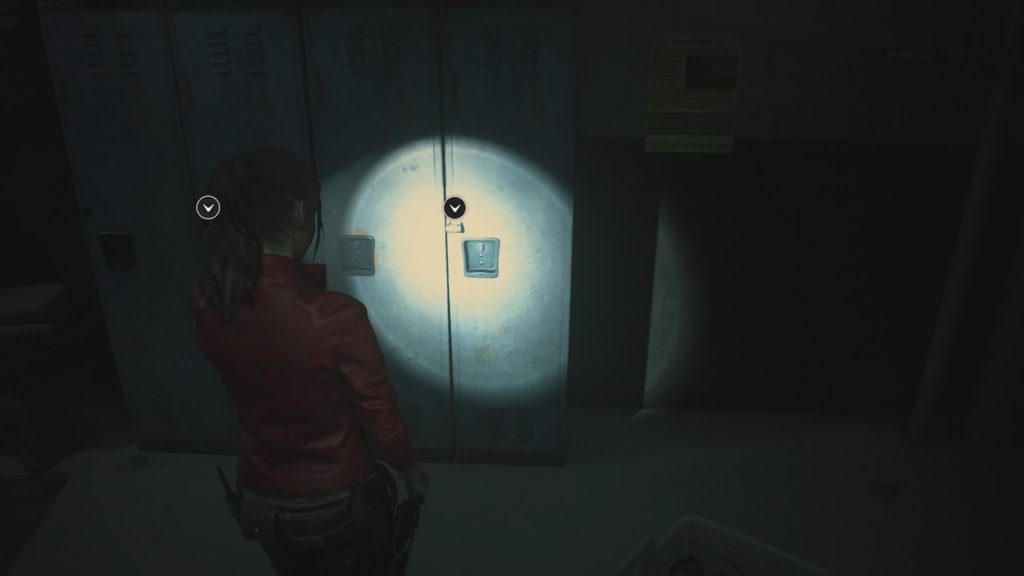
If you want to lose items without discarding them, you’ll have to take a trip to an Item Box. Usually found in safe rooms, Item Boxes such as the ones pictured above allow you to store an infinite amount of items with no penalty. The catch is, you’ll have to make a trip to the Item Box if you need to retrieve an item from it, so it’s advisable to always know the location of the closest Item Box. You’ll need to manage your inventory space carefully to avoid being forced to discard important items or make avoidable trips to a safe room.
Items in Resident Evil 2 fall under several distinct categories: Weapons, Healing Items, and Key Items. You’ll want to make sure you have a good balance of all three types in your inventory at all times.
Weapons
Weaponsare an absolute necessity to survive in Raccoon City. Usually, weapons such as small handguns only take up a single inventory slot, but will start to become bulkier as more modifications are found and added. You’ll need to decide if taking up that inventory space is worth having a more powerful gun. You’ll also need to keep in mind that ammo also eats up inventory space, so it’s advisable to only keep a few weapons on your person at any one time.
Backup Weapons, such as grenades and knives, can also be found. If a zombie grapples you, you can use a backup weapon to fend off the zombie and avoid taking damage.
Healing Items
Healing Items encompass herbs and First Aid Sprays.
First Aid Sprays are rare, but fully heal the player.
Green Herbs are the main healing item, and heal a small amount of health.
Red Herbs buff the player and make it harder to take damage for a short time, and also increase the effectiveness of Green Herbs.
Blue Herbs will cure poisoned players.
Herbs can be mixed in any combination, with a mix of all three herbs being the best healing item in the game.
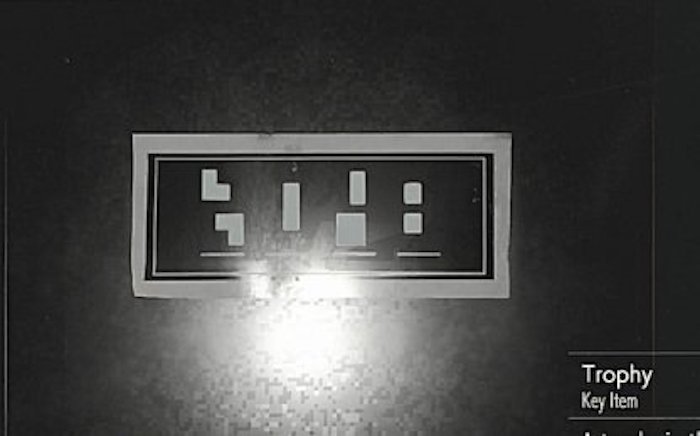
Key Items
Key Items are items necessary to solve the many puzzles located throughout the game. Oftentimes, these puzzles have multiple stages and completing them is necessary to proceed, so you’ll want to make sure you save ample room for key items instead of solely loading up on weapons and herbs.
As a general rule of thumb, a good inventory composition consists of one handgun, one more powerful secondary weapon, ammo for both, a healing item, and one backup weapon. The rest of the space should be devoted to Key Items. Feeling a little cramped? You can also find Hip Pouches hidden throughout the game that can upgrade your max inventory space.
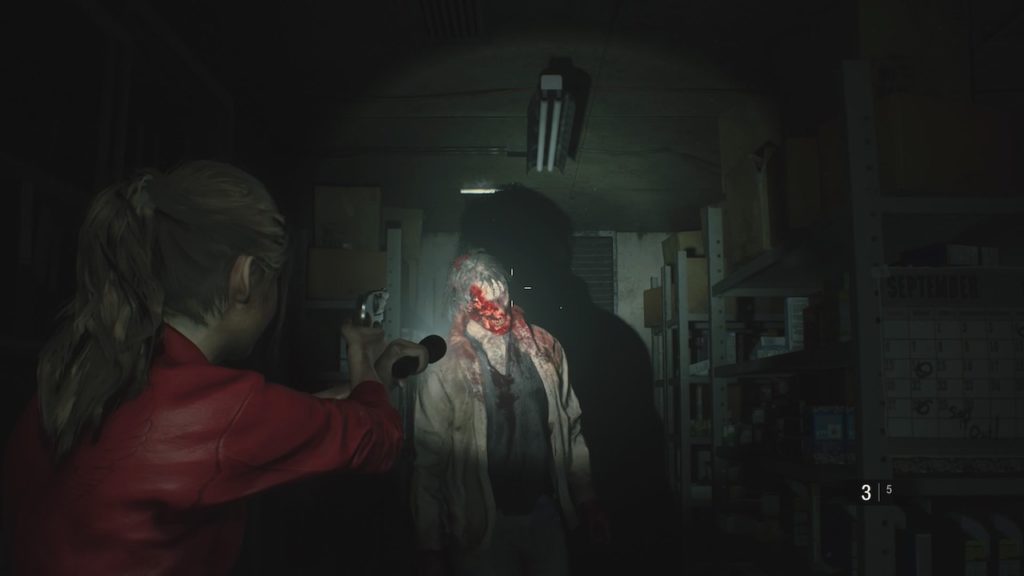
Zombies in Resident Evil 2 are more dangerous than they appear. Though generally slow-moving, they’re capable of absorbing massive amounts of damage before going down for good. Even headshots aren’t always fatal; it usually takes several to kill even an average zombie. As such, you’ll need to make a choice every time you run into a zombie: fight or flight?
There are distinct advantages to both camps. Alone, zombies don’t pose too much of a threat, but when encountered in groups, they can easily overwhelm and take you down. Trying to take down a group of zombies can also chew up a lot of valuable ammo. In this case, you may want to run and avoid an encounter, but you also risk having to deal with those zombies again if you need to retrace your steps through a particular area.
If you do decide to take on a zombie, there are several things to keep in mind. First, headshots will do the most damage and also temporarily stun zombies. If you need to get past a zombie blocking your path, consider snapping off a quick headshot and running past. Headshots also have a small chance of scoring criticals. A critical hit will blow a zombie’s head clean off and kill it instantly. That said, headshots can be hard to land while under pressure, so you’ll need to think carefully about if trying to nail a headshot is worth it.
Alternately, you can also aim for a zombie’s limbs. Legs and arms can be blown off, hindering a zombies ability to attack or grapple you. Like a headshot, a few quick shots to the leg will stagger a zombie and let you slip past. The goal of most encounters in Resident Evil 2 should be to end them quickly and conserve ammo. Whether this means quickly putting an end to a zombie or avoiding it entirely is up to you.
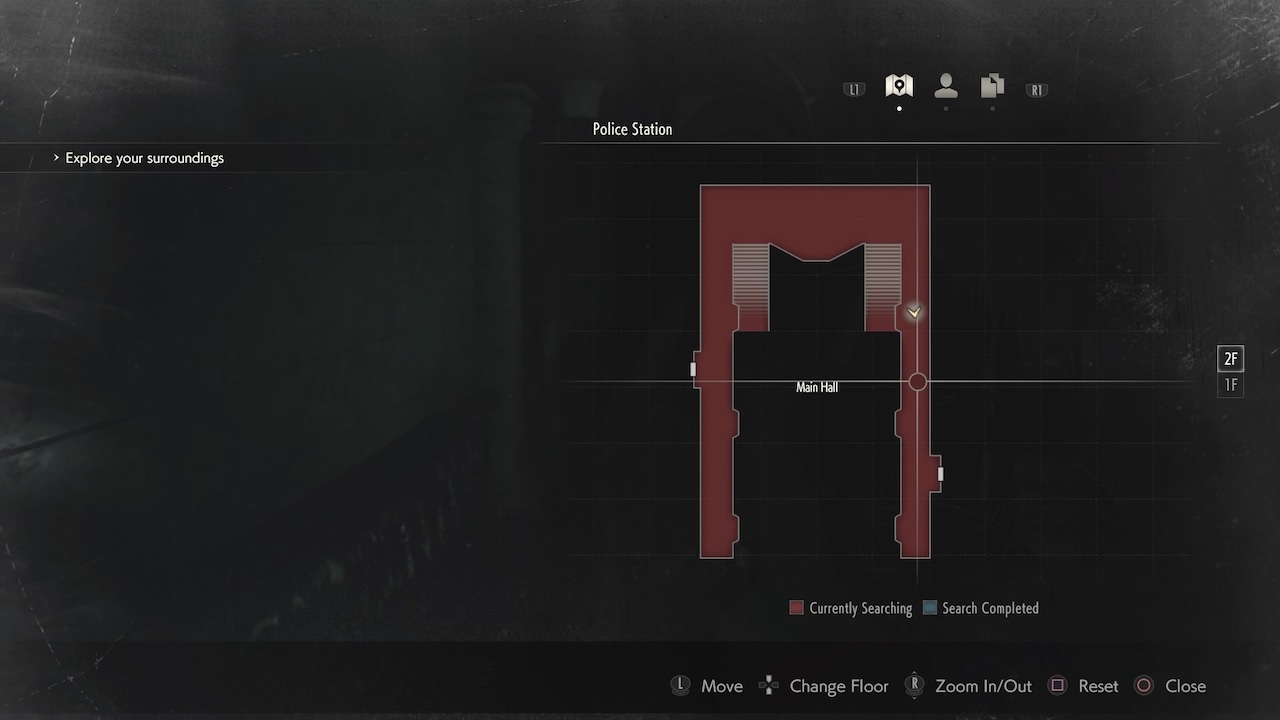
Know your map
The hallways of the Raccoon City Police Department and the tunnels beneath it are essentially a maze. Getting to know your map, and how to use it effectively, will make your life a lot easier.
A typical map readout will look like the image above. Rooms will be highlighted with one of two colors: red or blue. Rooms highlighted in red haven’t been fully searched. If you see a room highlighted in red, that means you still have items left to find in that particular room. It won’t tell you what those items are or where to find them unless you actually have seen the item in question. If you’ve seen an item, its specific location will be marked on the map, which is handy if you need to leave an area and return later for whatever reason. If a room has been completely searched, it will turn blue. This generally means you can shift your focus to other areas.
Locked doors are also indicated on the map in red, and doors that can be unlocked using specific keys or items are denoted by an icon of the item associated with that door. For example, doors that can be unlocked using the Spade Key are noted with a Spade Icon, and so on. Any locked doors or other areas associated with your current objective are marked with an exclamation point icon.
If you find yourself missing a certain item or are stuck and aren’t sure how to progress, it’s always a safe bet to check your map. You’ll see which rooms you might need to search again and see doors you can potentially open. It’s also good practice to start to memorize the general map layout, so you can know where you are in case the Tyrant starts chasing you down or if you need to find your way to an Item Box.
Though seemingly basic, these tips are essential for making it through the horrors of Raccoon City unscathed. Mastering these basics is what makes the difference between a genuine survivor and just another corpse.
Follow our guide for 30 minutes of thrills and chills.
The release of Resident Evil 2 is almost upon us, and Capcom has just released an official demo that has fans salivating like the game’s zombie hordes. The so-called “1-Shot” demo puts players in the shoes of rookie cop Leon Kennedy during the game’s opening moments, just as he arrives at the overrun Raccoon City Police Department. Here’s the catch: this “1-Shot” demo has a strict 30-minute time limit. Once your half-hour is up, the demo will end, regardless of where you are in the game. No do-overs, no replays. We’ve put together our own walkthrough to make sure you get the most out of your “1-Shot” playthrough.
As a general note, the demo timer only runs during cutscenes and gameplay. You can spend as much time as you like looking at maps and menus.
Resident Evil 2 “1-Shot” Demo Guide and Walkthrough
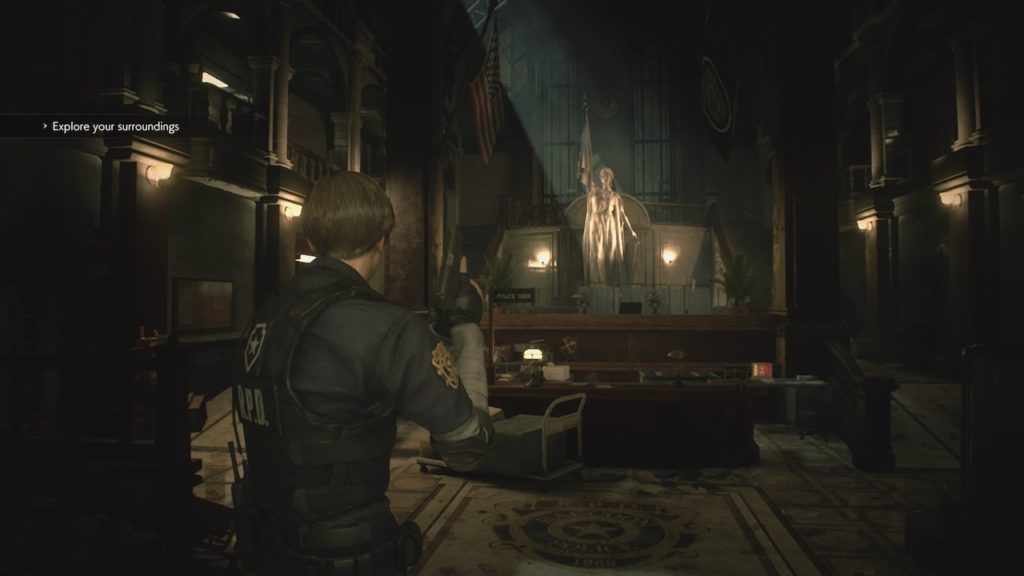
Part 1: Main Hall/East Wing
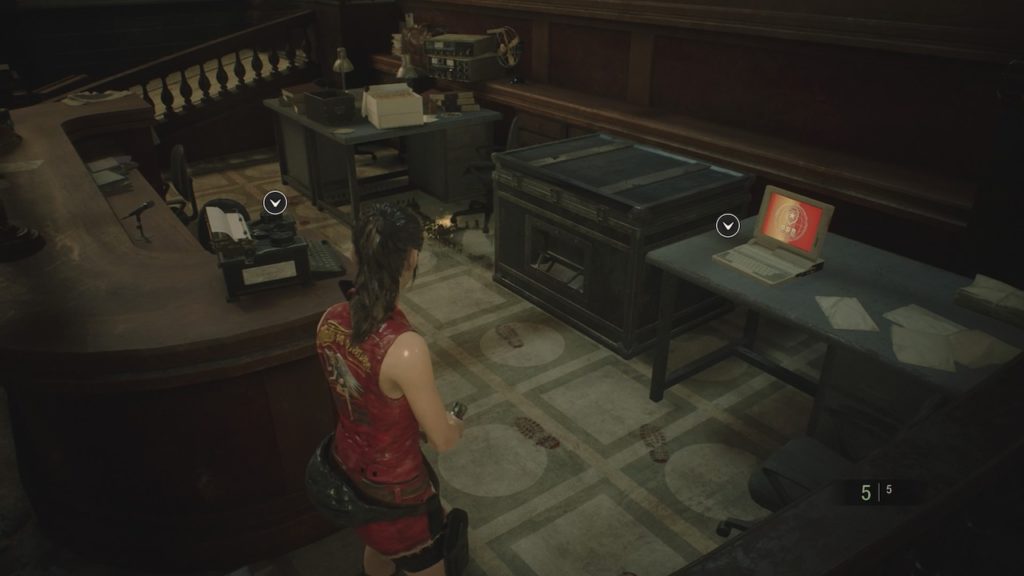
The demo opens with Leon entering the main hall of the Raccoon City Police Department. It’s sure to be a nostalgic moment for veteran Resident Evil gamers, as the room is pretty much a note-perfect rebuild from the original game.
Head forward to the main reception desk, and you’ll find a familiar looking (but unusable) typewriter, and an old desktop computer. Interact with the computer, and you’ll trigger a short cutscene. You’ll see an officer fending off waves of zombies, imploring you to find him in the East Wing so he can pass on some important info.
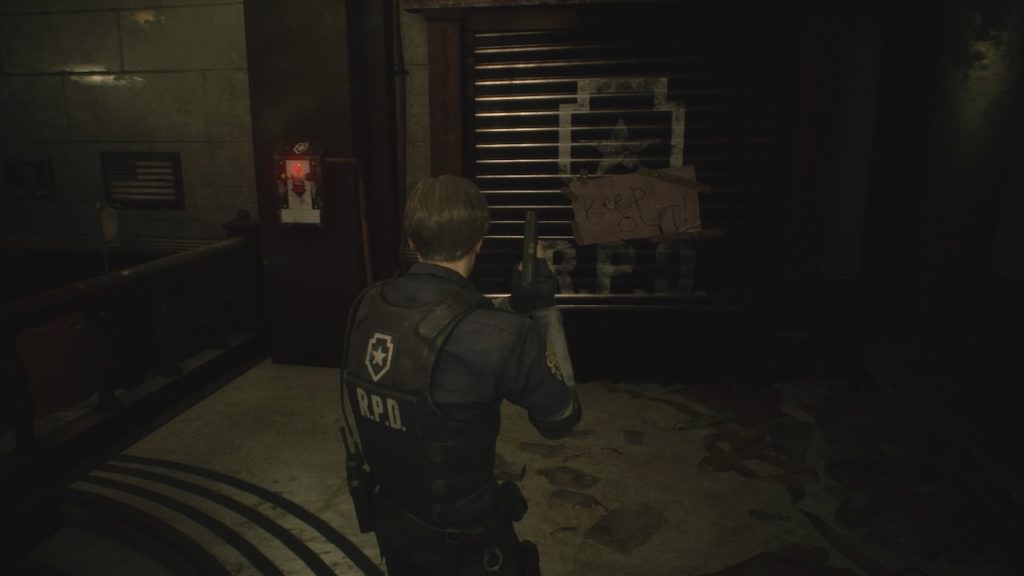
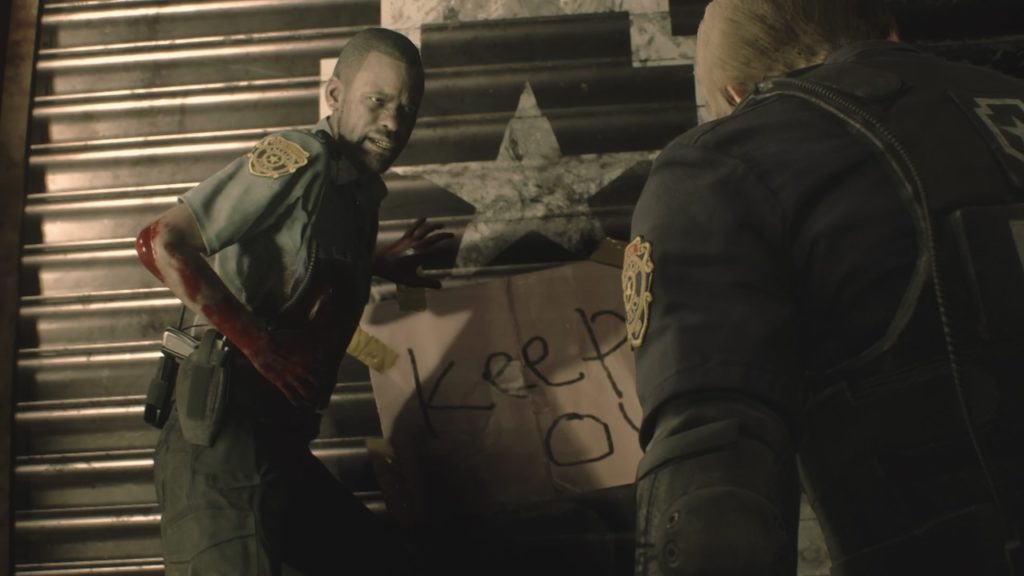
Flip back around the way you came, and you should see a shuttered metal door with a scrawled “Keep Out” sign taped to it. Looks like you’ll have to break the rules.
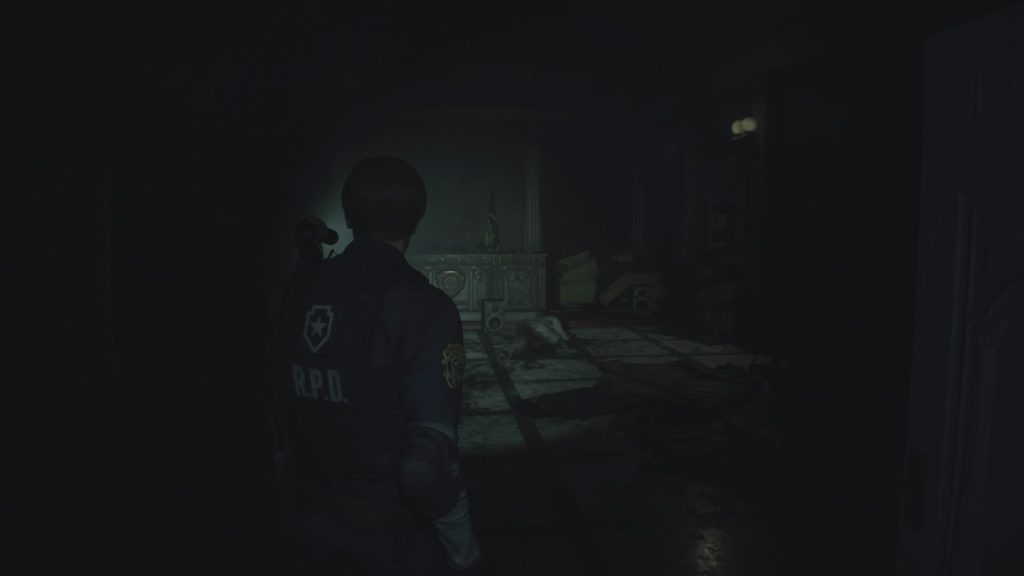
Head over to the door and flip the switch located on the left-hand side. The door will open, but only partially, forcing Leon to crawl through the gap. On the other side of the door is a maze of dark hallways. It’s creepy, to be sure, but if you’re courageous and can spare the time, you can investigate the side rooms here to nab a few items. You can find more Handgun Ammo in the Press Room, and a First Aid Spray in one of the bathrooms.
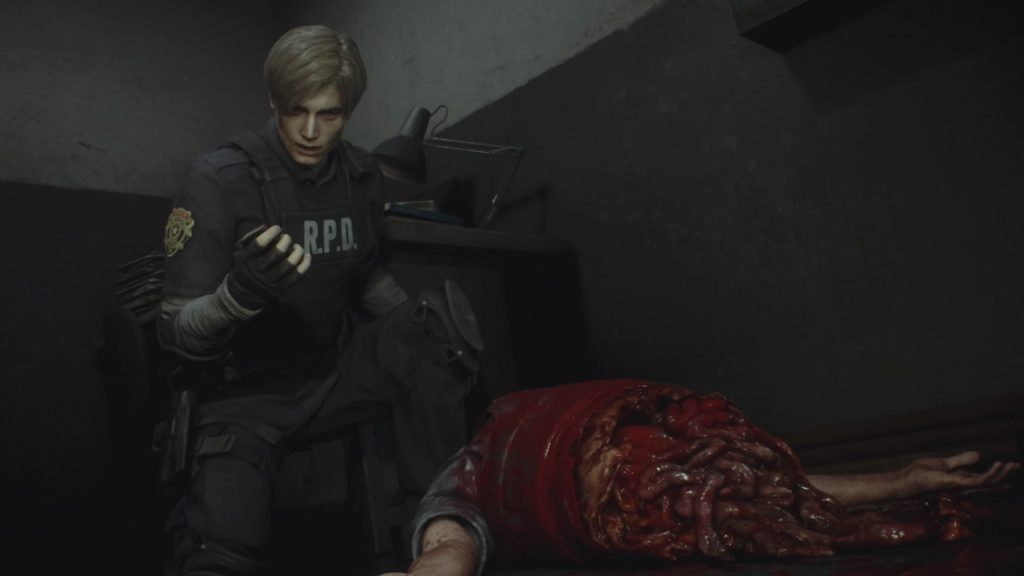
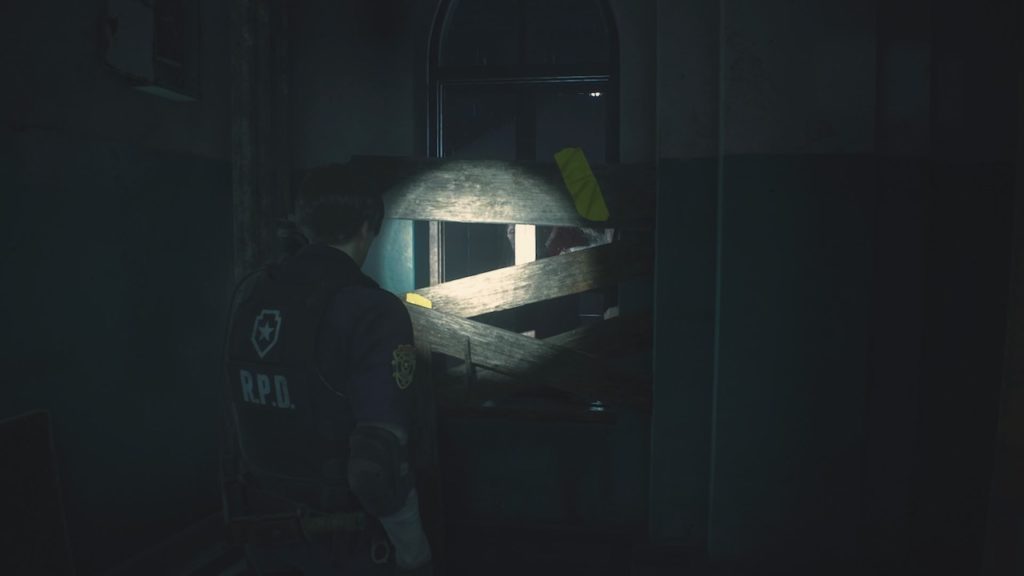
After making your way to the end of this winding series of corridors, you should come across the Night Watchman’s Office. You’ll know you’re close when you start to hear the cop you saw onscreen earlier crying out for help. Head into the Night Watchman’s office and look for the metal shutter in back. Pry it open, and you’ll watch a short cutscene. The cop, unfortunately, doesn’t quite make it.
Before his untimely and rather gruesome demise, the cop will pass you a small notebook. Examining the sketches inside will reveal a map to a hidden tunnel that should allow you to escape the station. Before you can get to the tunnel, though, you’ll need to find a few keys to make your way there. Unfortunately, there’s no time to puzzle out your next moves. Things are about to get hairy.
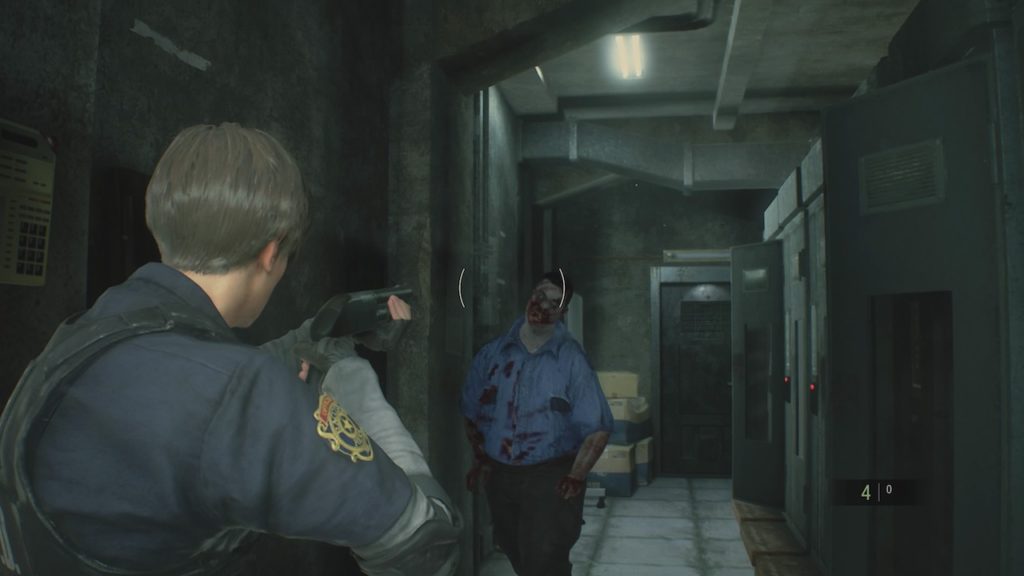
Zombies will burst through the door of the office. You’ll have to use your handgun to blow away the first zombie, as he’ll literally be blocking your way out. Aim for headshots; zombies in this game take a fair bit to go down, but a headshot will stagger them at the very least. Once you have an opening, sprint past the first zombie and out into the hall.
Things aren’t looking great out here either, as zombies start reviving left and right. Though tempting, you don’t have time to take them all out. Sprint past them and back towards the Main Hall. Towards the end of the corridors, a cop zombie will burst out of a previously locked closet. If you can, slip past him and grab the Planks hidden inside. They’ll come in handy later. It’ll be a tense gauntlet, and Leon will slide back under the shutter with not a moment to spare.
Back in the Main Hall, you’ll meet another survivor, who introduces himself as Officer Marvin Branagh. Like you, he was caught up in the outbreak, but was unfortunately seriously injured in the process. He agrees to help you, offering some advice and then giving you his Combat Knife.
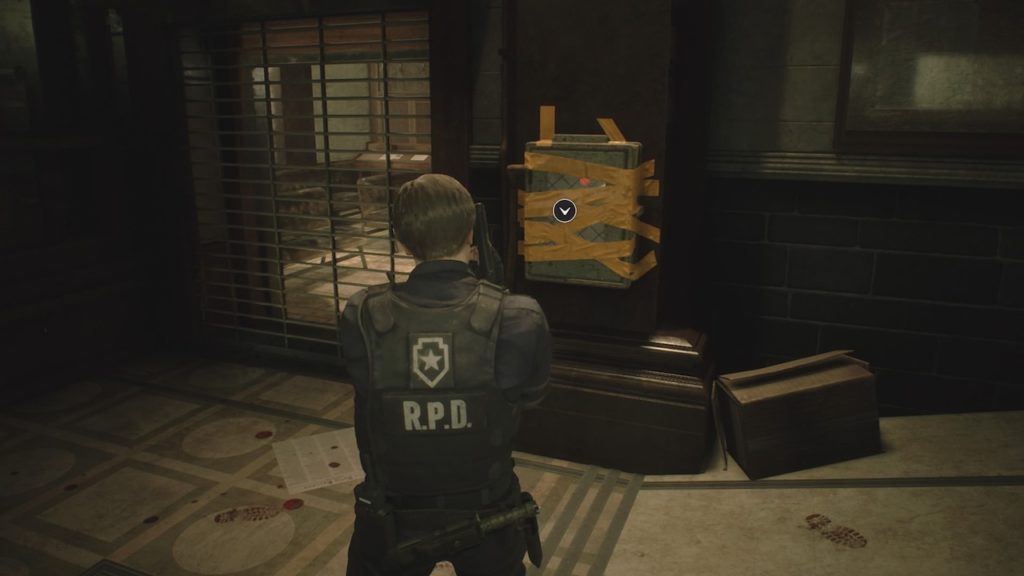
With the knife in hand, head over to the western side of the hall. You should see another security shutter and a control box that’s been wrapped shut with yellow electric tape. You can use your knife to cut through the tape and open the box. Flip the switch and the shutter will open, giving you access to the West Wing.
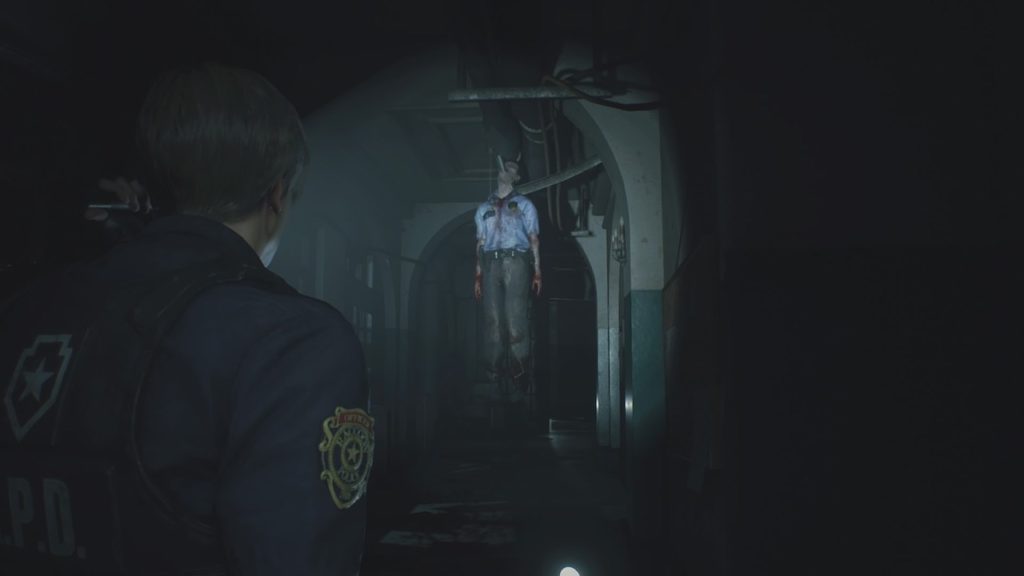
Head through the first waiting room area and you’ll enter a long, dark hallway. At the end you’ll be able to just barely see the corpses of a few officers, and you’ll hear the sound of their crackling radios. As you approach the first officer, you’ll trigger a short cutscene where you answer his radio… and reveal his grisly fate.
Continuing on down the corridor, you’ll eventually hit a window where a zombie is trying to break in. If you grabbed those boards earlier, you can use them now to barricade this window. Otherwise, the zombie will break through and you’ll need to deal with it. After that’s taken care of, hook right and right again and you should see the door to the Operations Room.
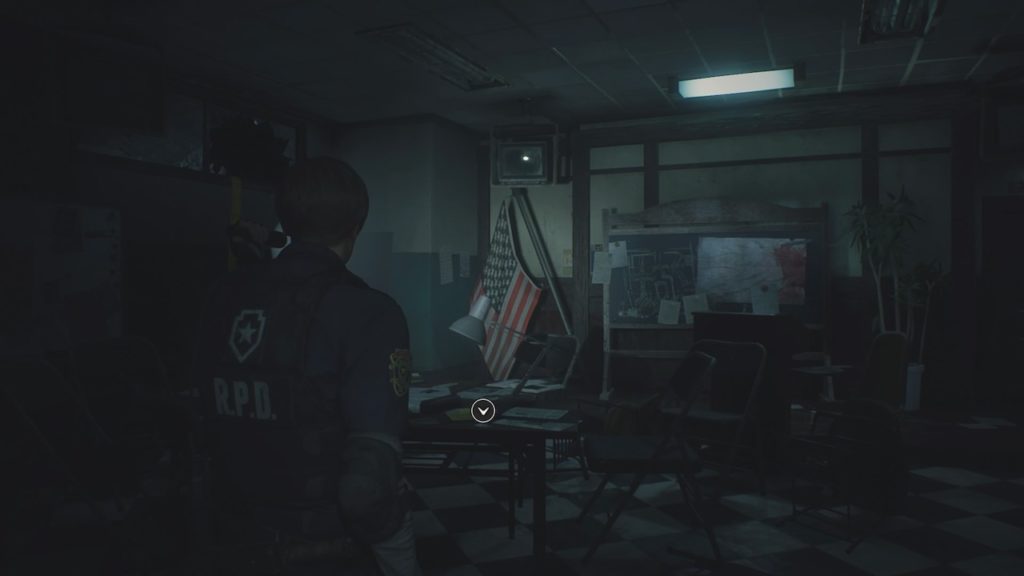
Directly in front of you should be a desk with a Weapons Locker Keycard sitting on it. Grab this, then navigate towards the back of the room near the fallen American flag. There are a few other supply items in the room if you want to take the time to search it. Notably, the 1F Map is taped to the chalkboard here.
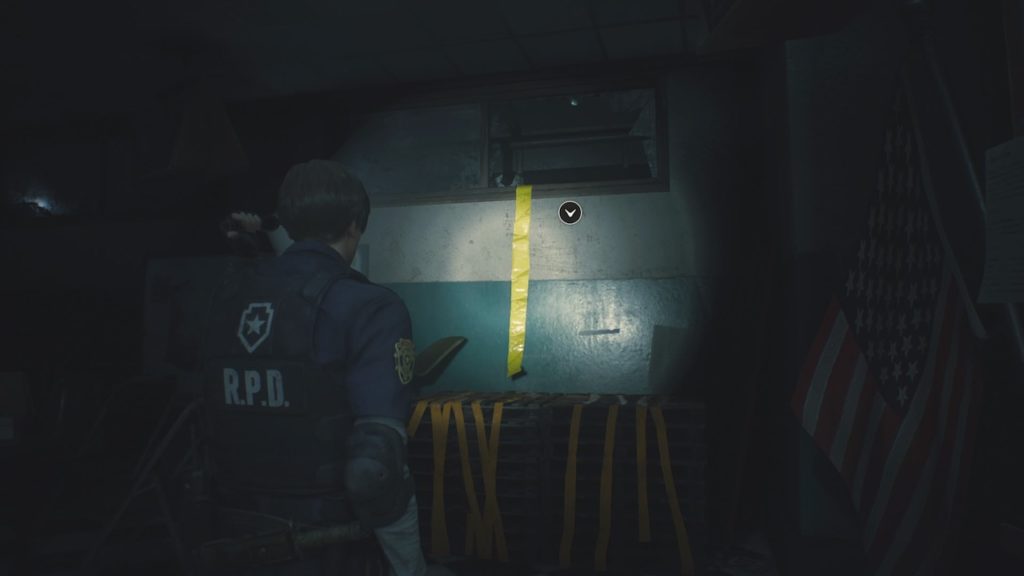
At the rear of the room, you’ll be able to see this broken window, marked by yellow caution tape. You’ll need to climb over the boxes and through the window to move on. As you make your way into the West Wing, you’ll come across a zombie cop banging on a vending machine. It’s your choice whether to take him out or sneak past, but if you hook left you’ll come upon the evidence room.
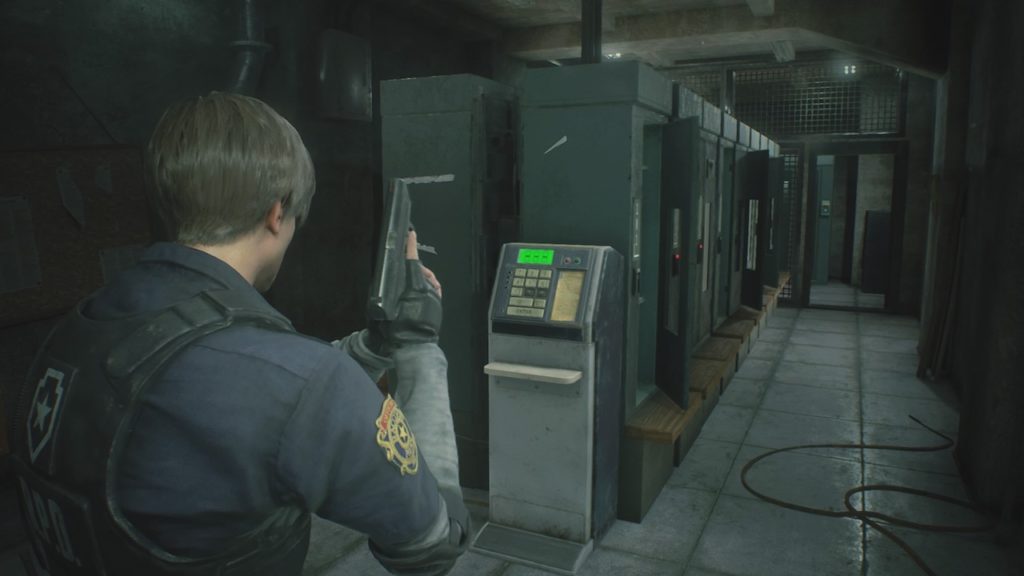
At the front of the room, you’ll see a keyboard. Most of the lockers are empty or unable to be opened due to missing keys, but entering 109 will open a locker containing more Handgun Ammo. Snag it, then head to the rear of the room to find the Weapons Locker. Use your keycard, and then grab your shiny new Shotgun.
Fortunately, you won’t have to wait long to try out your new gun. Zombies will come bursting into the evidence room. Again, aim for headshots, but between your handgun and newly acquired shotgun you should be able to make short work of them.
Head out of the Evidence Room and go left to come upon a staircase leading up into the rest of the station. You’ll run into a few zombies here, so be prepared. In the interest of time, you’ll want to skip the second floor for now as it contains nothing crucial to finishing the demo. Instead, head all the way up to floor 3.
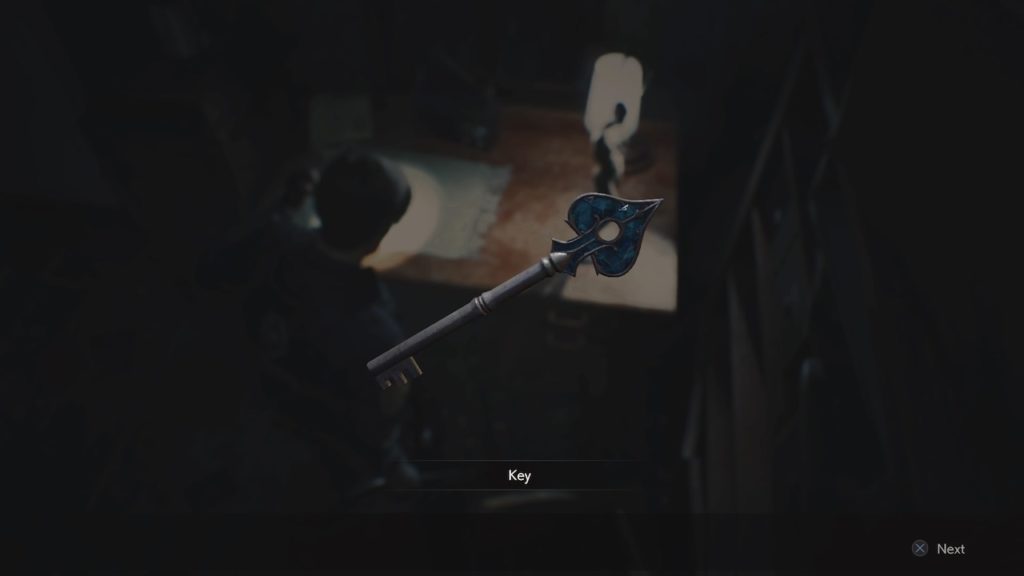
On the top floor you should see a broken wall leading inside an office. Head inside and grab the Blue Spade Key off the desk there. Now you’re ready to head back towards the Main Hall.
Part 3: Library/Main Hall
From the desk where you found the key, head left through the door and into another hallway. You’ll want to head straight through the hall and then left again, and you should see a door on your left next to a small tipped over bookshelf. This will take you into the Exhibit Room, where you’ll be looking for another small door between two of the shelves. Head through the door and into the library.
Entering the library, you’ll get a message from Marvin on your radio, asking you to return to the Main Hall. The quickest way there is to continue the way you’re heading, through the library. Head down the ladder to the bottom floor, where you’ll encounter a group of three zombies. You can opt to run past them or quickly kill them, then use your Spade Key to unlock the exit door and head back into the Main Hall.
Once there, the demo will officially conclude and you’ll be treated to a short cutscene, as well as a demo-exclusive trailer revealing the return of some previously unrevealed fan favorite characters.
That concludes our walkthrough of the Resident Evil 2 “1-Shot” demo. Check back with Softonic for tons more Resident Evil 2 content when the game releases on January 25!
Set to release in late January, Resident Evil 2 is perhaps one of the most anticipated releases of 2019. A ground-up rebuild of the survival horror classic, the game will include the familiar characters, enemies, and locations that Resident Evil fans have come to know and love. However, not everything is staying the same for the remake. One of the major changes will be the addition of microtransactions, proving that even the classic series isn’t immune from this modern gaming trend.
Resident Evil 2 will include microtransactions
The ESRB recently finalized Resident Evil 2’s rating (M for Mature), a rating based on the game’s inclusion of strong language, blood, gore, and intense violence. In other words, it’s everything Resident Evil fans have come to expect from the series. The rating also mentions, however, that Resident Evil 2 will include in-game purchases in the form of microtransactions.
So far, Resident Evil 2 appears to be a single-player only experience, so it seems unlikely that microtransactions will pertain to a multiplayer experience of any kind. That said, Resident Evil is no stranger to multiplayer, such as the fan-favorite Mercenaries mode included in several titles or the less-popular Agent Hunt mode in Resident Evil 6. Perhaps this does hint at there being some type of multiplayer component involved in Resident Evil 2.
It seems more likely, however, that the microtransactions will pertain to campaign-mode goodies. Several unique DLC weapons and skins have already been confirmed for certain pre-order editions of the base game, so cosmetic and vanity items seem like the most likely candidates for these mysterious microtransactions. Capcom has given no official word on the subject, so it’s likely that players won’t know for sure what these transactions entail until the final game is released.
Otherwise, the official rating from the ESRB does tease a typically Resident Evil experience:
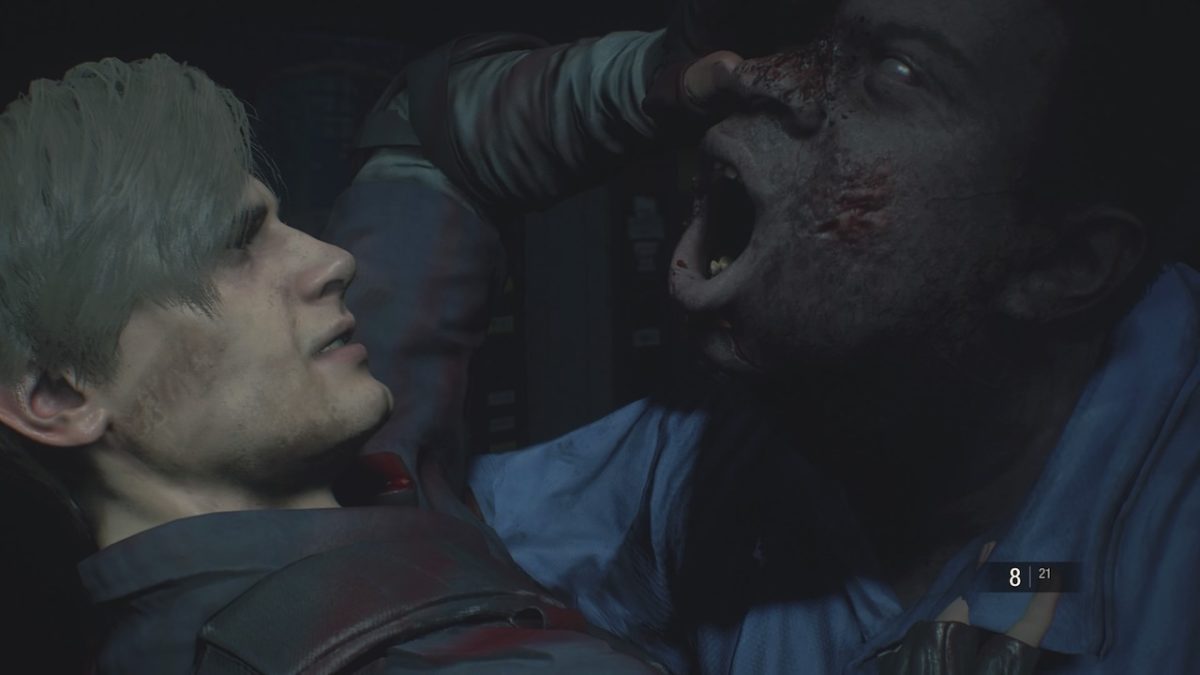
This is a survival-horror game in which players assume the roles of a policeman and/or a college student battling a zombie outbreak in the fictional Raccoon City. From a third-person perspective, players explore environments and use pistols, shotguns, tasers, explosives, and flamethrowers to kill mutant creatures and zombies. Combat is highlighted by realistic gunfire, screams of pain, and large blood-splatter effects. Cutscenes also depict instances of intense violence and gore: a character’s throat ripped out by a mutant’s teeth; a man’s body cut in half, leaving entrails dangling from his torso; a man’s head crushed by a zombie’s hands. Some areas also depict mutilated corpses/zombies with exposed organs and viscera. The words “f**k” and “sh*t” are heard in the dialogue.
Based on this official ESRB statement and the already released trailers, Resident Evil 2 promises to be one of the most intense games in the series.
Resident Evil 2 is slated to release January 25, 2019 for PC, PS4, and Xbox One.