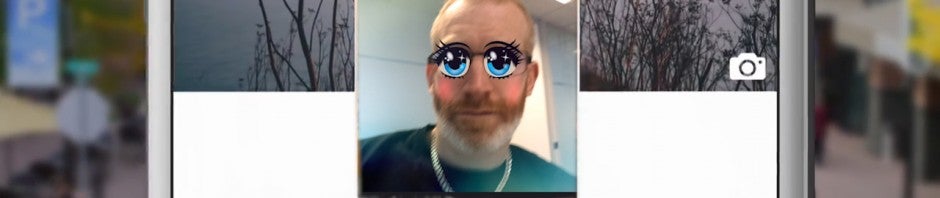
Reenergize your profile and get more likes with this new Facebook feature

Among all of the mind-boggling, impossible to penetrate tech that was revealed at the F8 global developers conference last Tuesday (Source: Adweek), Facebook snuck in one fun little nugget: more news about animated profile pictures.

Get some pretty sweet Facebook likes with this apps!

This was actually announced back in September 2015. Then, Facebook rolled out the new feature allowing you to upload short, seven seconds videos to use for your profile image – that is providing you were using an Android or iOS device to upload the video and lived in the US or the UK.

Well, those limitations still exist, but Facebook has added its Profile Expression Kit to the list of features on iOS. This tool allows third-party developers to add a button into their apps that allows users to upload videos directly to their profile image.

Currently in beta, the confirmed partners are MSQRD (iOS|Android), Boomerang from Instagram (iOS|Android), Lollicam, BeautyPlus, Cinemagraph, Pro from Flixel, and – predictably given the seven second time limit – Vine (iOS|Android).

The one that has us most excited is the chance to use our MSQRD alter egos for our profile images – after all who doesn’t want to be Iron Man on their profile page?

In a post on the Facebook for Developers site, Aigerim Shorman outlined the reasons behind the Profile Expression Kit’s development with some compelling numbers:

With more than 4.5 billion views and nearly 30 million profile picture updates every day, Facebook profiles have become the best place to curate your own identity and learn about others.

By offering more creativity Facebook is sure to increase interaction between its users. Expect your friends and acquaintances rush to click on your latest profile creations – the perfect way to get more likes and start new conversations.

Related Stories

The five best VPNs

Five apps to create your own digital avatar

Three Dark Souls III alternatives

Follow me on Twitter: @DoFuss
Three tricks to speed up your PC’s start up

We’ve found ourselves in the era of “time is money, especially mine,” and we certainly can’t afford to lose any of it.

Here are three tricks (recently provided by Fox News) that will help make your PC start up at lot faster!

1) Disable programs that start up automatically

Why is your computer taking too long to turn on? And why does it take longer each time? Well, when you turn on your computer, it transfers data from your hard drive to your RAM. The more information your computer needs to transfer, the longer it takes. Makes sense doesn’t it?

The first trick helps reduce that initial amount of information that needs to transfer.  You can prevent programs from loading automatically during your computer’s start up. To find out which programs are running when you switch your computer on, go to “All Programs” menu and open the “Startup” folder. Here, you’ll find the list of all the programs that are running automatically. You can easily delete those programs which you don’t wish to initiate when turning your PC on. Please note that this does not remove the program completely from the computer.

Or, alternatively, you might want to leave this kind of process in the hands of an expert. If this is the case, then CCleaner could be perfect for you! You can download it for free here.

Be warned, using a tool like this with the default automatic cleaning process can sometimes oversee certain programs, therefore when using it it’s better to do it step-by-step as if you were doing it manually.

2) Time the startup programs

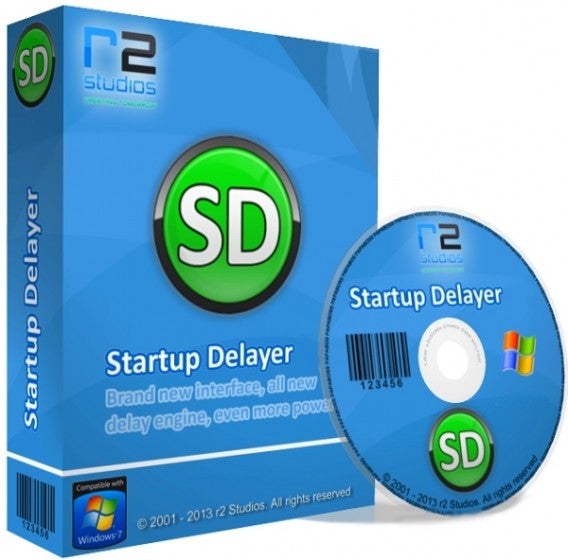
Perhaps there are programs that you wish to run upon start up, but you don’t want them to be initiated all at once. To do this, there are tools such as Startup Delayer, which will allow your programs to start up gradually, therefore the system can avoid being overloaded and crashing.

3) If all else fails, update your computer

A new computer means it contains less information and more agile hardware, therefore it’s no surprise that it starts up in no time at all. Obviously, you’re not going to buy a new computer every couple of months, however buying a much faster hard drive could mean that the information transfer mentioned in Trick 1 is a much faster process. There are many affordable SSDs on the market to choose from, and if you use one, you could start up a new Windows 10 in a matter of seconds instead of the lengthy time it currently takes. If you buy a computer, make sure you check out the SSD options, it’s definitely worth paying that little bit extra.

Bonus Trick: Don’t turn off your computer

Nobody told you to turn off your computer at night right? If you leave your computer on, using the sleep or hibernation modes, you can be up and ready to go in seconds when you switch it on the next day – plus, energy saving modes on newer models means it’ll use less energy than if you turn it off completely!

How to clear history in UC Browser

If you’re a user of UC Browser, you might be wondering how to delete the history of the sites you’ve visited.

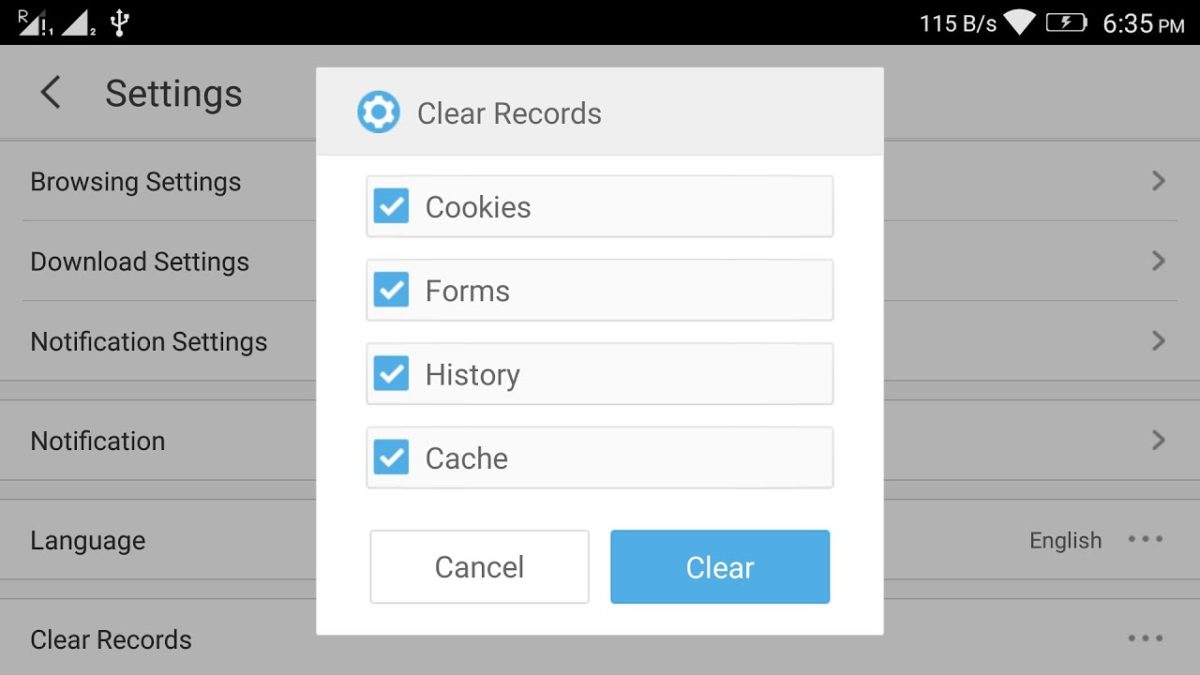
Actually, it’s very easy to remove your history in UC Browser. Besides deleting your browsing history in UC Browser, you can remove cookies, clear form data, and wipe the cache (or a combination of all of these). Here’s how:

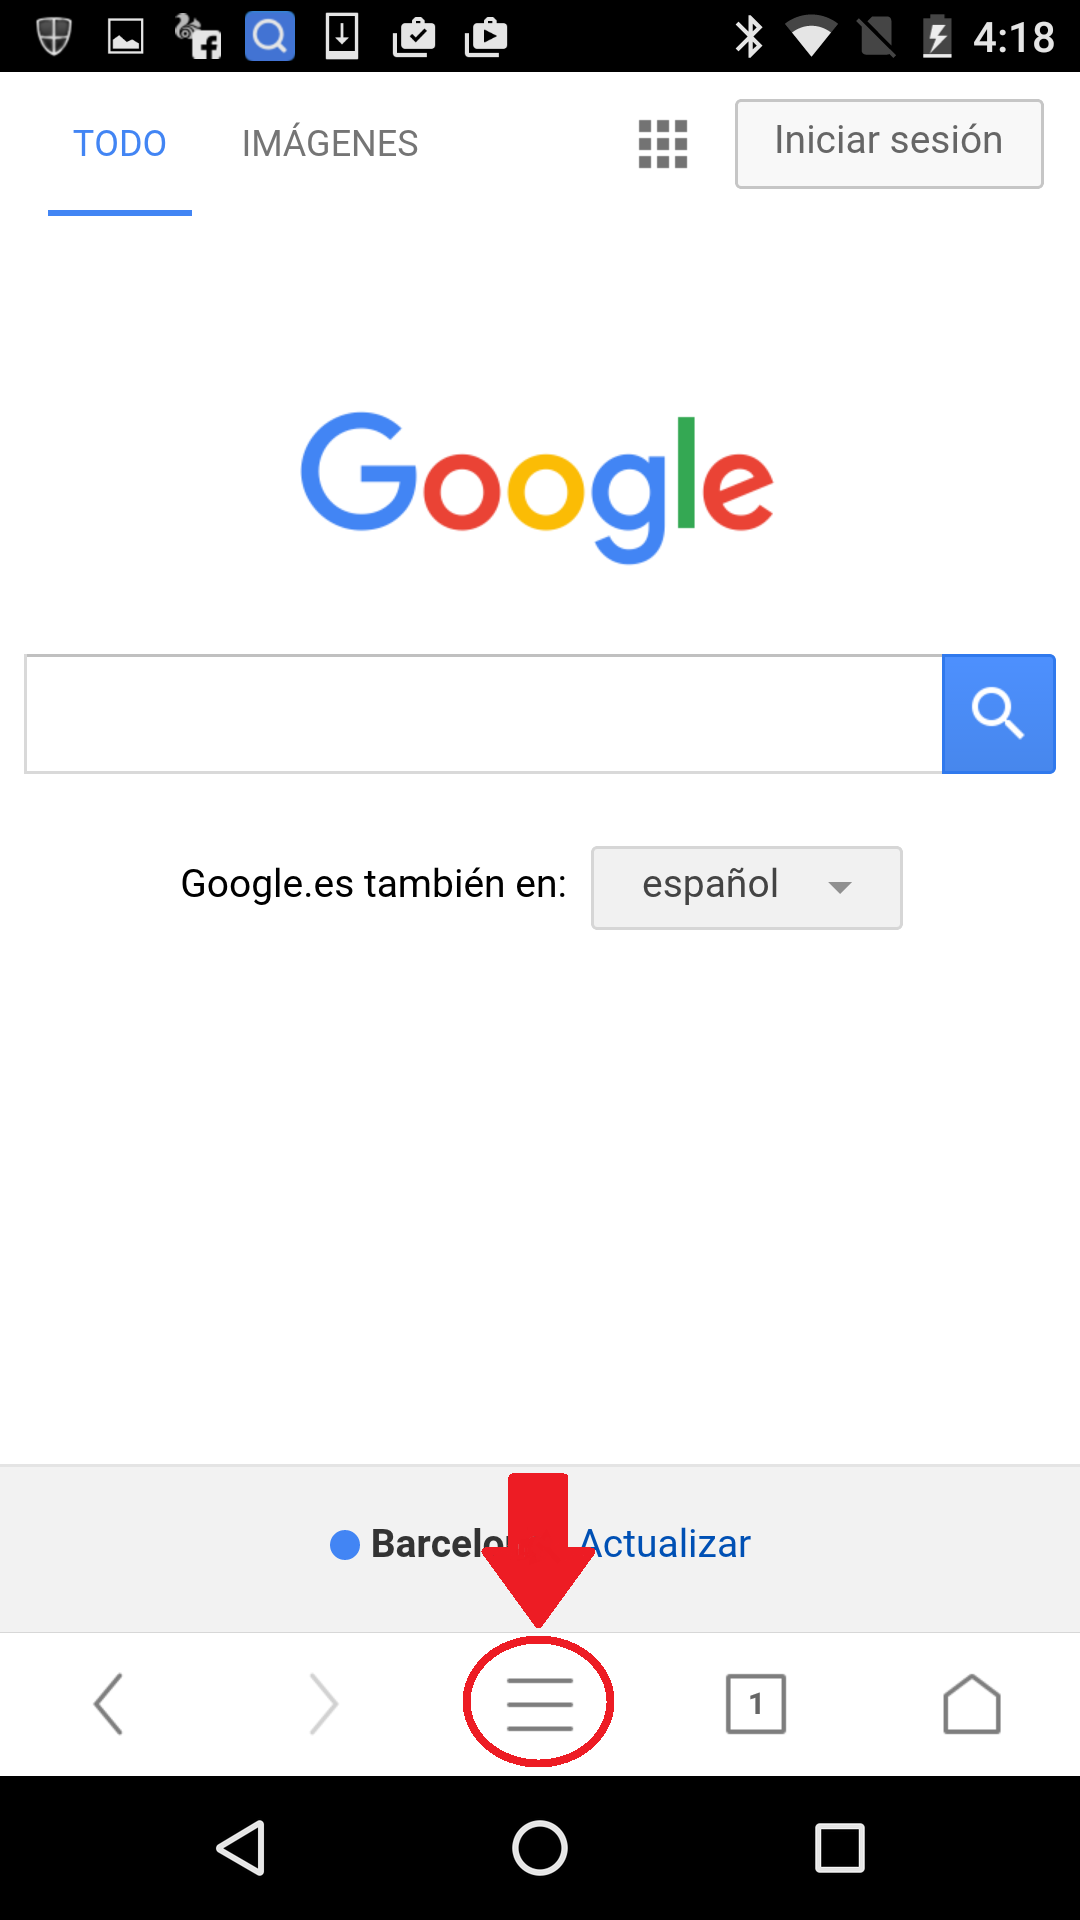
  1. First, press the Menu icon

    Menu
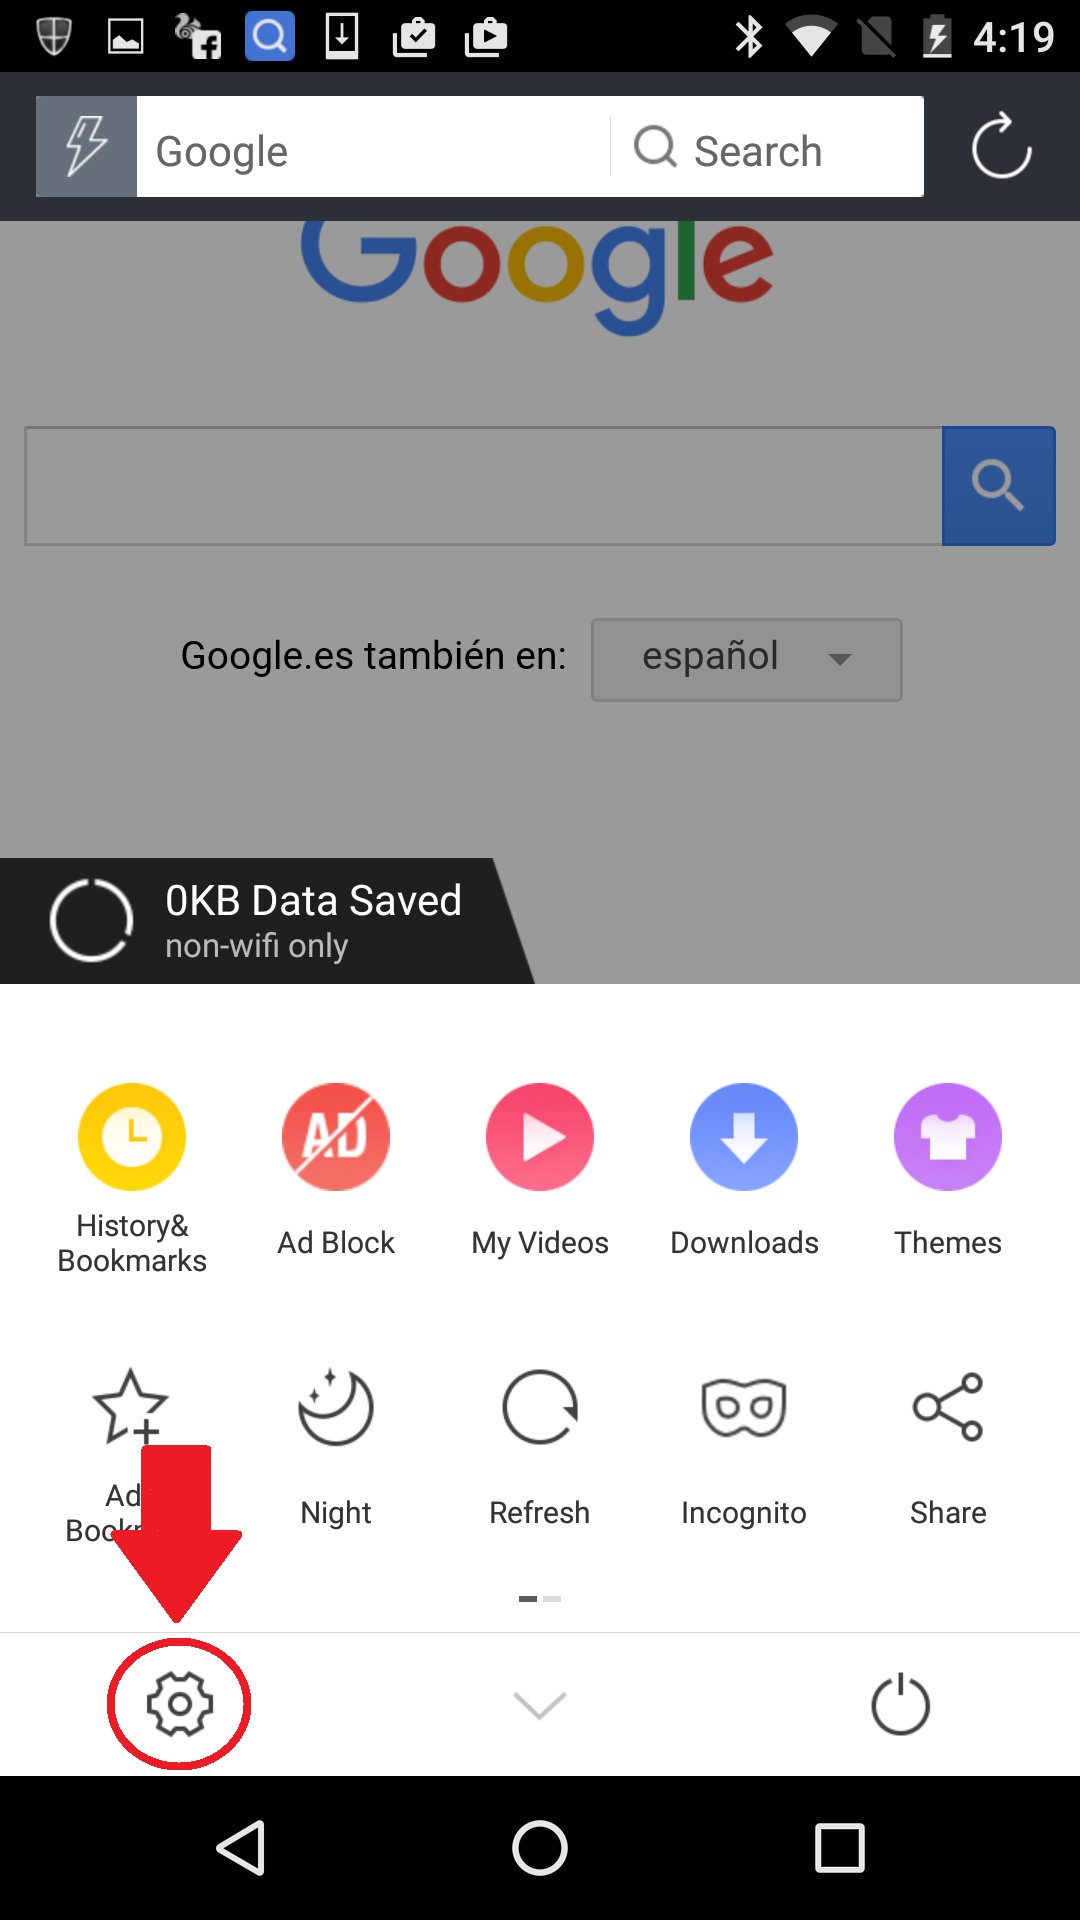
  2. Enter in Settings

    Click on the Settings gear icon in the UC Browser toolbar.

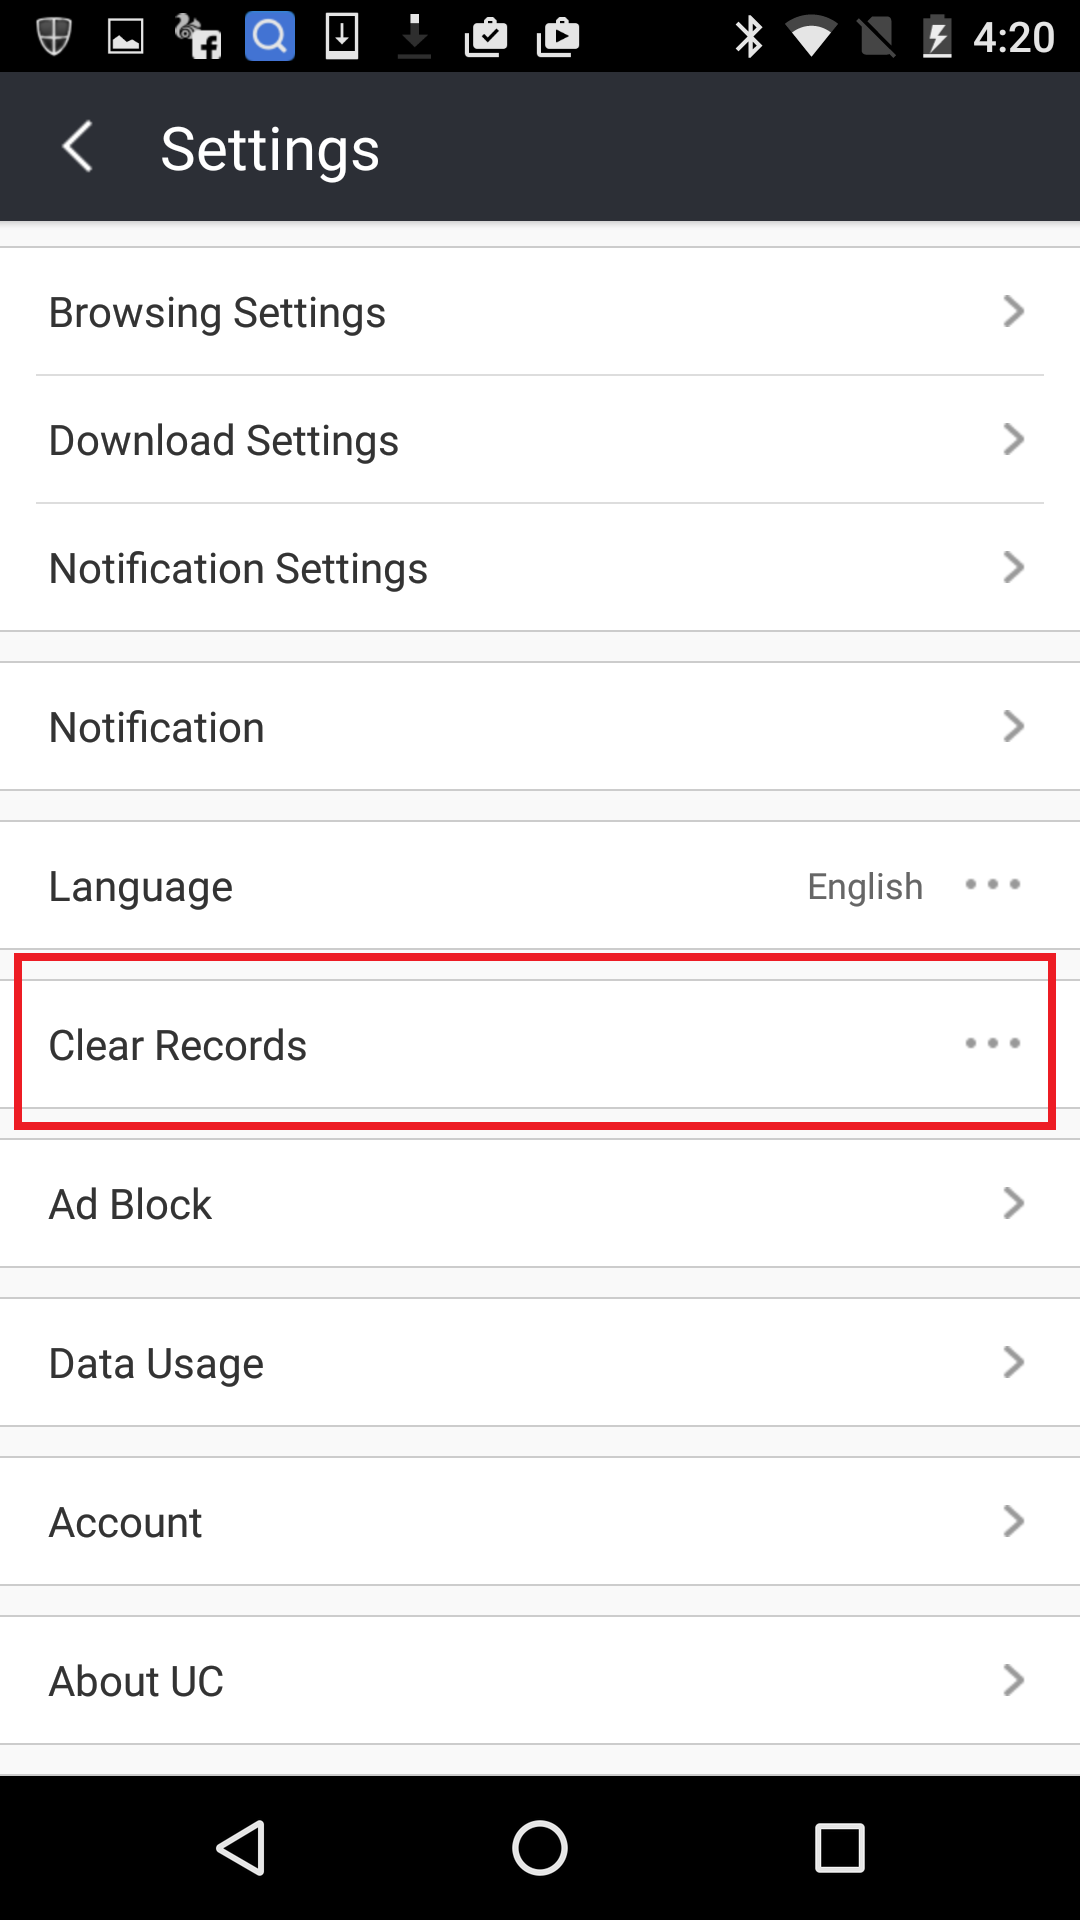
  3. Clear ’Records’

    Clear Records

    Scroll down to ‘Clear Records’ and press it.

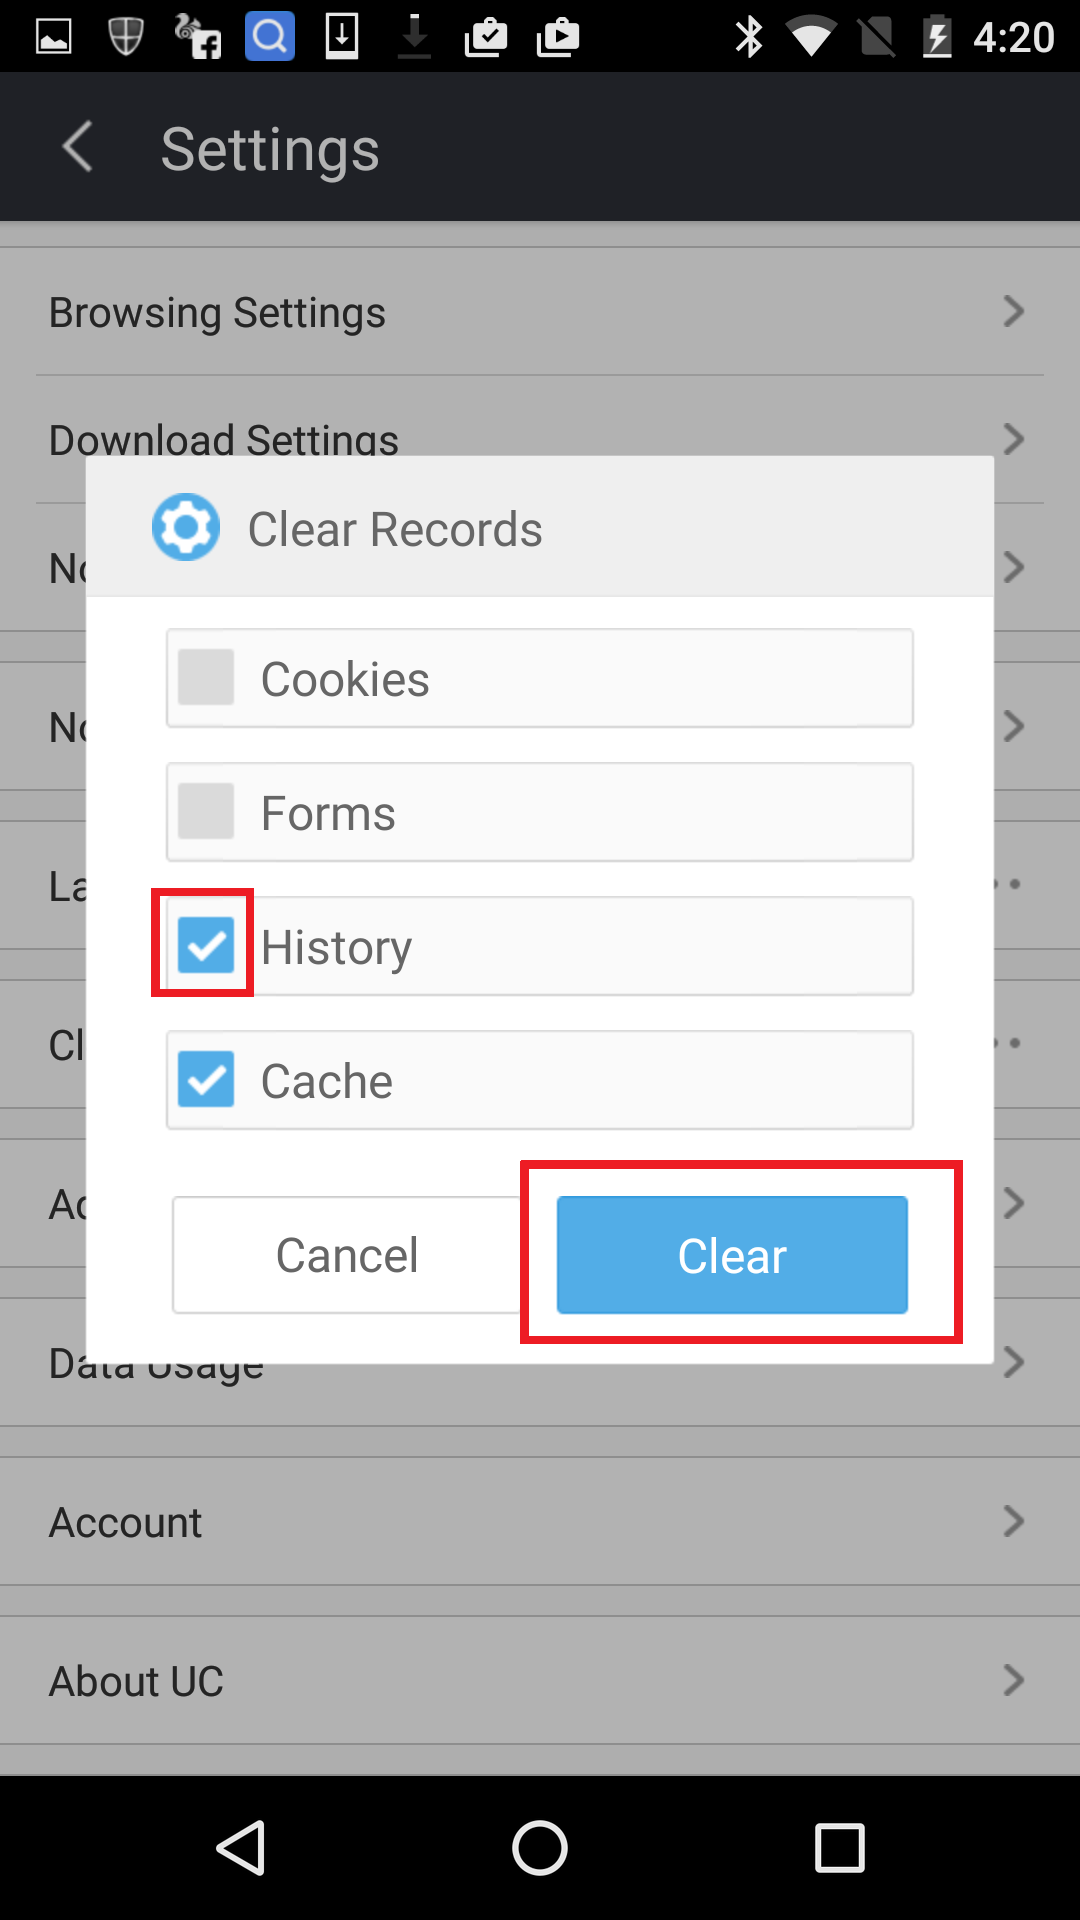
  4. Access ‘History’

    Clear Histroy

    You’re now given the option to clear Cookies, Form, History, and Cache. Make sure ‘History’ is ticked and hit the Clear button. After a couple of seconds your history will be removed from UC Browser.

Quick and simple

Now you are finished, your history gone, saving you space and protecting your privacy.

There’s something seriously impressive about this woman’s abilities

Jia Jia is the name of a new Robot from China, that looks so realistic – it’s scary.

The most impressive characteristic of Jia Jia, is that she is able to hold an actual conversation with humans. She doesn’t just talk – she also has the ability to move her lips (in a frighteningly realistic way), and also change her gaze and make head gestures accordingly.

They didn’t even miss out providing her a sense of humor! For example, if you get a bit close and try to take a picture of her, she’ll tell you not to get too close because her face will look too fat in the photo.

Although her capacity to interact is impressive, she doesn’t yet have the ability to laugh or cry, and she isn’t able to move her hands.

So what do you think? Cute or scary? Take a look at this video to see her in action!

Do you use URL shorteners for links? Be careful – you could be at risk!

URL shorteners (such as those from Google, Microsoft and bit.ly. etc) can be extremely useful for sharing links, however recent studies have revealed that they can weaken your internet security and make it very easy for hackers to access your information. Now, don’t panic, or refrain from using them just yet, first we’ll tell you why.

The issue is that these links usually contain the domain name of the site (ie, Google, Bit.Ly, Microsoft, etc) + a combination of random characters, that don’t tend to exceed eight digits. In some cases, such as Google, the default links that are shortened contain only six characters. This means that a hacker who uses a system of trial and error (experimenting with various numbers and letters until the code is cracked), can sometimes find it rather easy to find links that contain private information (address on Google Maps, privately-hosted photos, Google Drive documents, etc).

In the worst of cases, this could allow hackers to access your private files and introduce malware in the folders you keep in the cloud.

Researchers at Cornell Tech University are urging companies to improve the safety in their shortened links, but what can you do about it?

Well, that’s easy. If you send links that navigate to private information make sure that your documents have another security system – preferably ones that require a password to access them or that only allow access to registered users.

Source: Tech Source

Get rid of QuickTime on your PC – it’s not safe and it’s never going to change

If there’s any good time to delete QuickTime from your Windows PC, it’s now. Apple dropped the supports for the player back in January, and the Zero Day Initiative has recently published a list of critical vulnerabilities that are yet to be fixed by the creators.

The eventual death of QuickTime has been a somewhat slow and painful one. The media player had no official support from Windows 8 nor Windows 10, and actually had to cheat the system in order to install itself. In January, Apple withdrew the program extension for the browser, and updated it for the first time in two years with a version that fixed nine security flaws from the 7.7.9 version, however two new critical issues arose from the update.

Micro Trend (those responsible for the Zero Day Initiative) reportedly met with Apple to decide whether to publish the detailed report of these two vulnerabilities. The only thing that is clear to users at the moment is that there will NOT BE a new QuickTime for Windows, therefore it is recommended to uninstall the current version you have.

The smartphone of the future has legs and can dance

There’s a new “smartphone” that’s recently been circulating the internet, and it couldn’t be further away from the conventional devices we’re used to seeing.

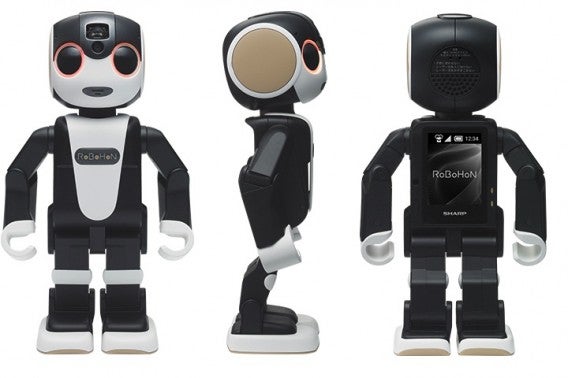
Costing around $1,300 (twice the price of an iPhone 6 Plus), meet “RoBoHoN” – a small and highly intelligent robot whose developers believe could one day replace our smartphones. We’re not convinced.

Standing at just 20cm tall, this Japanese-made “toy” has the ability to read your messages, make calls (you talk into its feet), and can even walk and dance (actually quite well) upon request.

RoBoHon runs on the Android 5.0 Lollipop operating system, and comes with a 2-inch screen which you can imagine is not particularly useful). It also features a 8MP camera, 3G and LTE connectivity, 16GB of internal storage, 2GB of RAM as well as a Snapdragon processor.

Watch the video!

It’s clear that this device is more of a novelty than an actual smartphone that could one day be taken seriously. Although it may not be the future of smartphones, it’s certainly something cool to have lying around the house, just in case you get very, very bored.

The device is said to go on sale in Japan next month, and the company has announced that it plans to ship overseas. Could you be tempted?

7 creative things you can do with your old floppy disks

It’s certainly been a long time since we’ve had to use one of these bad boys, but there are many of us who have held on to them – just in case one day, we might need that Geography homework from 1998, right?

Well, if you’re at a bit of a loose end with what to do with them, we’ve got a few quirky ideas that will get your creative side up and running. Check out these seven awesome things that you can do with your old floppy disks!

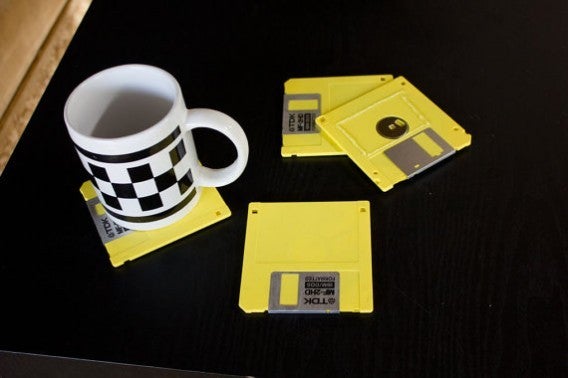
1) A set of retro coasters

This is for those of you who have zero handiwork skills. You don’t have to do anything, simply dig them out, and scatter them across the coffee table – your friends will get quite the surprise once they realize what’s under their cup!

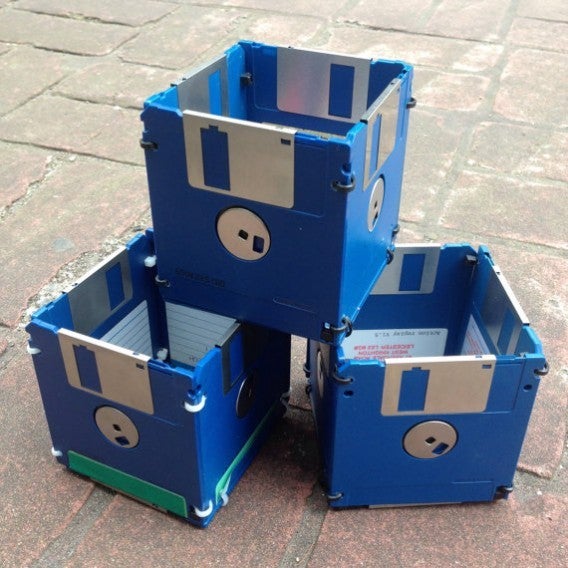
2) Boxes for anything!

Now, you can either try your hands at drilling holes in the correct places and fixing the boxes together with cable ties (obviously this can be quite fiddly), or you could just buy them ready-made from Etsy. Perfect for storing make-up, stationary, remote controls – anything you like!

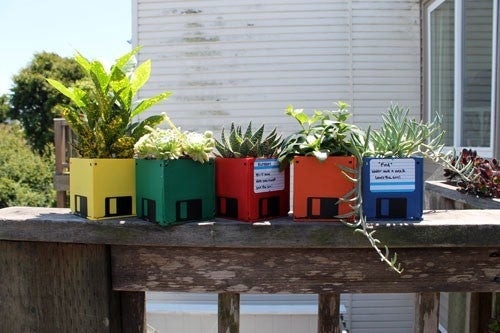
3)  Plant pots

Exactly the same process as the boxes above, although this time, a different use. You can even use the labels on the disks to label the plants (or if you’re really crazy, name each one!).

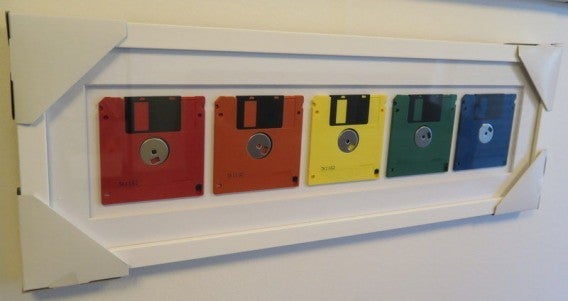
4) A postmodern work of art

Tired of the same-old landscape paintings? Aren’t we all! Well, fear not, because with the use of a cheap (or recycled) frame, you can create your very own work of art like the one above!

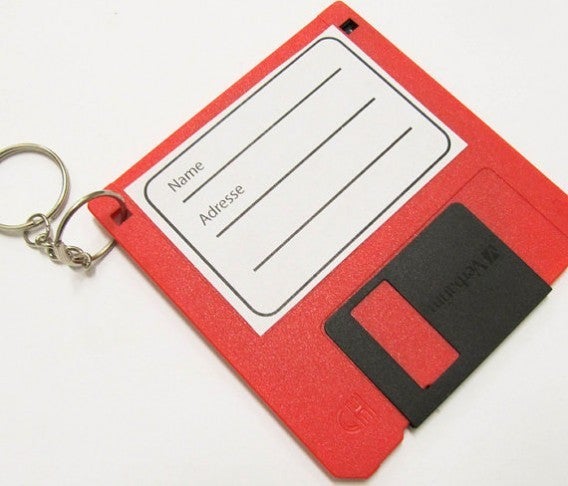
5) A tag for your suitcases

When was the last time you were impressed by a suitcase tag? This cheap and funky alternative will help you spot your suitcase a mile off!

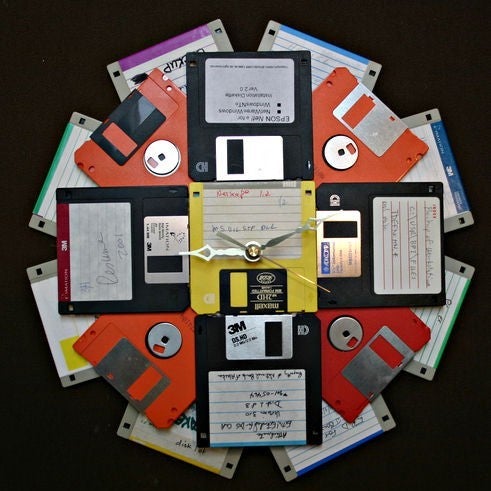
6) A unique clock

OK, this probably requires a bit more effort and a higher level of handiwork than the ones so far, but the final result is certainly worth the effort!  You can find out exactly how to make it here.

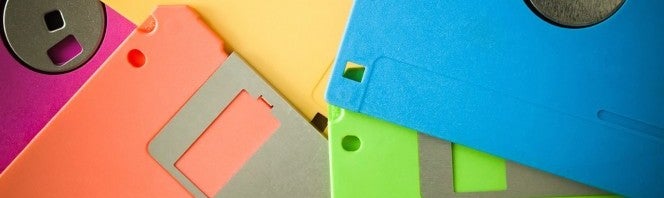
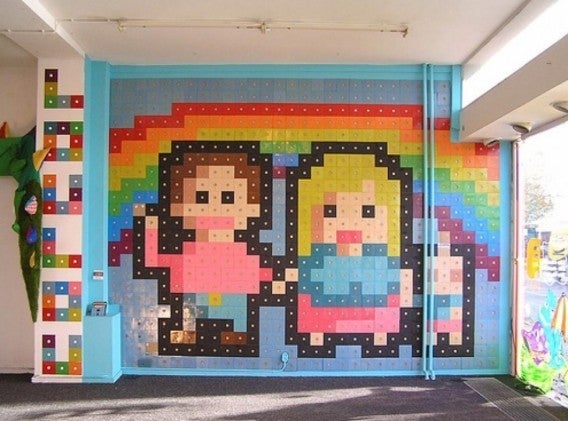
7) A wall mural

Yes, obviously you’re going to need quite a few floppy disks to produce something on this scale – plus it might be difficult to find so many different colors. It’s a good idea to ask your friends for their old floppy disks, and tell them it’s for a recycling project you’re currently working on. They won’t be disappointed when they see the finished product!

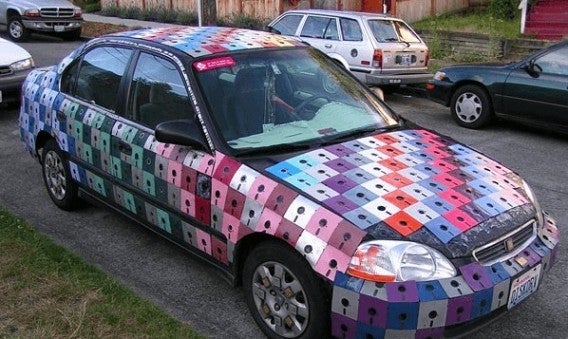
Bonus idea for the brave!

Ok, this might just be going a little over-the-top, but if you do happen to have loads of disks lying around, forget your wall mural, why not try “pimping” your car? They may not be particularly durable in extreme weather conditions, but the effect is pretty cool, huh?

Have you done anything wonderfully creative with your old computerware? Please send us your pics, we’d love to see them!

Print Labels on CDs and DVDs in NERO Burning ROM

Nero Burning ROM offers a number of ways to print labels for your CDs, DVDs, and other media. This allows you to not only identify your media easily, but it also provides you with the chance to customize the look of your discs when sharing with others. Having CDs, DVDs, and other media labels printed through a third-party can be expensive, but when you use the free tools included with Nero Burning ROM, you can get comparable results using your computer!

Using LightScribe in Nero Burning ROM

LightScribe technology allows you to print images and text directly onto the front of your disc when paired with certain writable drives. This means that you don’t even have to bother with printing out a label and attempting to affix it to the face of the disc. LightScribe utilizes laser technology to actually etch the image or text onto the surface of the disc, providing a permanent solution.

To use LightScribe in Nero Burning ROM, click on the Extras menu item at the top of the screen in Nero SmartStart. Start a new Composition and import the images or create the text you would like to use by selecting the Image Tool or the Text Tool to the left of the screen. Once added to the Composition, you can then change properties of both text and images in the Properties menu item. Finally, save your creation by clicking on the Disk icon at the top. Once saved, you can burn the image to a disc in the LightScribe Control Panel that should be included in the software that came with your disc drive.

Using Nero Burning ROM’s Cover Designer

Nero Burning ROM also provides additional label options with its Cover Designer software. In Cover Designer, you have a variety of options that allow you to create labels for discs, but also labels for CD tray covers. Cover Designer also provides the ability to add text as well as pictures, meaning you can customize and print out exactly what you want.

To use Cover Designer, select it on the main menu. Create a New Document or select one of the available templates. You’ll then be prompted to name the project and add audio files. The name you enter will appear on the label once created. Here, you can edit pictures and text using the intuitive tools to the left. Once you’re happy with your layout, print your creation on plain paper or disc labeling sticky paper, affix, and enjoy!

Don’t forget to check out The Easiest Way to Record a Disc With NERO Burning ROM!

What’s the Point of a Bootable Disc in Nero Burning ROM?

Nero Burning ROM provides many features and benefits, but one of the most important is that it allows you to create bootable discs that can be used for backups if a system failure occurs. A bootable disc is a physical disc that you can use in your PC to replace your operating system. In a sense, a bootable disc acts as a replica, down to the byte, of what you used to install downloaded data from the beginning.

Why Bootable Discs Are Important

Because a bootable disc burned using Nero Burning ROM functions as an exact replica, it can help in the event that your computer dies or your operating system completely crashes. In these events, you can simply insert a bootable disc made with Nero Burning ROM and get a fresh start without having to haggle with your operating system’s provider. Also, having bootable discs lying around can be a quick and easy fix in the event that you’ve lost the original copy of the physical disc.

How to Create a Bootable Disc

To begin, you’re going to need to extract data and create an .iso file using a program like Daemon Tools Lite, which is free. The program offers fairly straightforward directions on creating an .iso. Once you’ve got your .iso file, which is a digital copy of what’s on the disc you’re mirroring, you’ll need to mount the .iso file into the virtual drive created by Daemon Tools Lite. From here, open the drive and drag and drop all files from the newly-created folder into a new folder.

Once completed, open Nero Burning ROM and create a new bootable CD-ROM project. You can now select various options, and it’s recommended that you set your burning speed to the lowest possible setting for your drive in order to get the best quality in the final result.

Go ahead and insert a blank disc into your CD or DVD writer drive and select the Burn icon at the top of the screen. Nero Burning ROM will now create an exact copy of the .iso file, but the difference is that the disc will now act as the .iso. When you insert the finished disc into your computer, it will function as if you had clicked on the .iso file, just as the .iso file would act as if you inserted a physical disc when working within the virtual drive.

For more informatio, check out his video: Quick, Easy, and Secure Disc Burning!