5 reasons people hate productivity apps

The modern world is fast and unforgiving. We constantly have to get more than one job done while we’re being relentlessly bombarded by distractions that get in our way. On average, we spend only 1 minute and 15 seconds on a task before being interrupted, and then it can take us an average of 25 minutes to resume a task once we’ve been distracted. It is no surprise, then, that today’s modern world is filled with productivity apps to help us focus on the tasks at hand, work more efficiently, and manage our days better.

Studies have shown that the average mobile user in the US uses between three and four productivity apps over the course of a month. The issue with productivity apps, however, stems from their very nature. When the problem is that the average person already checks their phone 150 times per day, are apps that make us look at our phones really the answer?

Opinions are split on productivity apps; they are both loved and hated by the people that use them. Perhaps if we better understand why, we’ll be able to get a little more out of them – or, even better, out of ourselves.

Why do people hate productivity apps?

1. Because they make you less productive

Using productivity apps takes effort. They don’t just magically turn your life into a finely tuned machine that outputs effortlessly and efficiently. The apps can only help you to do what you’ve told them to help you to do. This takes the time that you could be spending actually getting jobs done.

If you add to this the sheer number of productivity apps, and the fact that each has its own ecosystem that needs maintaining, things quickly get out of hand. All of a sudden, the apps that are supposed to be helping you save time and focus are taking up a lot of your time and require your constant attention.

2. Because people aren’t using them properly

Notifications can be distracting rather than empowering. If a notification is going off for every little task you need to take care of that day, it will distract you from taking action, rather than encourage you to take care of business. These days, notifications come in fast and hard and the more we receive the more we’re likely to ignore them.

Imagine an email inbox with 10 unopened emails compared to an inbox with 1,000 unopened emails. People are much more likely to ignore the 1,000 unopened emails than they are the 10. The same is true of notifications. Before long, you start ignoring the pings telling you to do the laundry and even start resenting them.

3. Because they make you pay a regular subscription

Paying for something can be tough. Especially if that something is an abstract concept like software. You already have the program but you can’t use it because the features are locked away unless you make a regular payment.  Moreover, the program can just be copied an infinite amount of times and given to whoever wants it. What do you actually pay for?

What you pay for is the value it adds to your life. In the case of a productivity app, what you’re paying for is increased productivity. As this increased productivity still depends on your own effort, it could be difficult to conceptualize the added value you get with your paid subscription. If you’re not using your productivity app at all, forget about it.

4. Because it is difficult to know where to start

There are so many productivity apps available now that you’ll need an hour or two just to make sure you’re getting the right one for you. If the simple act of choosing which app will make your life easier is a laborious chore surely the concept is defeating itself. When you have article after listicle after infographic all trying to explain the finer points of each app that purports to make your life easier, you know you’re driving up a dead end. Which brings us to…

5. Because they overcomplicate things

This might seem counterintuitive in today’s modern world, but the humble pen still holds its own against the mighty smartphone. Using a pen and paper to organize your life frees up your screen for other tasks. In addition, that note you’ve written out won’t be pinging you throughout the day to get things done; and, as we’ve already mentioned, cutting down distractions is a surefire way to get more things done. A simple analog system could help you keep on top of your workload as well as giving you a visible archive of all the work you’ve done, and the satisfaction of scratching tasks off once they’ve been completed.

Despite the loathing they sometimes inspire, we know that a LOT of people couldn’t live without their productivity apps. For those people, we have looked in-depth at the best productivity apps, so make sure you check that out. If you think we’ve left out something frustrating about productivity apps, please let us know in the comments.

How to make your online accounts safer

We basically live our lives online these days, which means we have a ridiculous number of online accounts that we use to interact with the world. One survey last year showed that the average internet user has 27 discrete logins to online accounts. This has birthed an industry that is built on our data.

How to encrypt your hard drive and keep your folders and files safe

Companies like Google and Facebook ask our permission before taking our data and using it to offer us highly targeted ads so that they can make a lot of money from advertising on their sites. Unfortunately, a lot of cybercriminals are also trying to get our data, without our permission, so that they can make money off our most private secrets.

In order to stay one step ahead of these cybercriminals, you need to take active steps to make sure that all your online accounts are secure. If hackers can get their hands on the details for just one of your accounts, then they may be able to break into all of them. Let’s have a look at how to check if your online accounts are safe and also how to make your online accounts safer.

How to check if your online accounts are safe

Check your account activity

Many of your online accounts will let you check up on your recent activity. This is a very useful tool in your efforts to secure your online accounts as it enables you to check that you’re the only person who is using your account. You can check the activity on your Google account by clicking this link and you can do the same on Facebook here. You can use these tools to see if there is anything you don’t recognize and even revoke authorization for any devices you’re not familiar with.

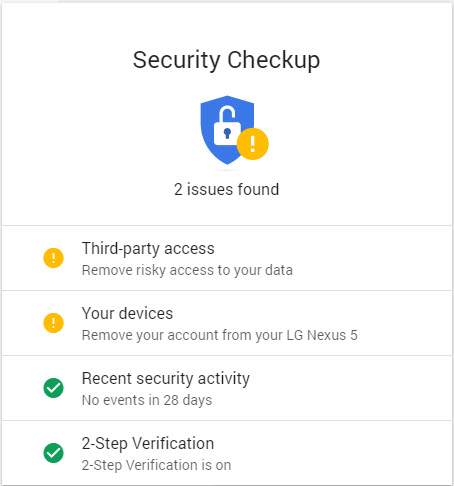
Google also has a really handy Security Tool and Security Checkup Tool. These are great ways to ensure that your account is locked up tight. Also, with the emergence of social login eliminating the need to sign in to individual services, this tool allows you to see all the interactions your Google Account is having with other web services. This brings us to another major way of checking if your online accounts are secure…

Check which 3rd party apps are authorized to access your accounts

It is much easier to just authorize apps to use your major accounts to gain access rather than setting up new accounts all the time. This can lead to huge lists of apps that you don’t use being connected to your accounts. All of these apps could be seen as potential security leaks, so it is worth your while to check which ones have authorization on your account and which ones don’t.

To find this out, click the following links:

AOL

Dropbox

Facebook

Google

Instagram

LinkedIn

Microsoft

Twitter

How to make your accounts safer

Once you’ve checked your major accounts, it’s a good idea to start taking steps to make them more secure. There are a lot of ways to do this.

Password Manager

If you ask any security expert, they’ll tell you that the most important step you should take is to use a password manager like Dashlane or 1Password. These will capture all of your saved passwords from your browsers and give you the option to replace them with much more secure options. You then hide all your credentials behind 1 secure password and you’re safe and sound. No need to remember 27 different passwords and no need to duplicate passwords on multiple accounts.

Change your password regularly

This will be made easier if you have a password manager, but even if you don’t it is definitely worth the effort. Every time you change your password you are removing any potential vulnerabilities that may have built up since the last time you changed it.

2 step verification

2 step verification means that your password alone is not enough to break into your accounts. It normally means being sent an SMS or email every time you try to access secure information or carry out certain types of transactions.

Avoid phishing scams

Hackers are constantly trying to come up with clever ways to get you to click on dodgy links or download dodgy attachments so that they can infect you with malware. Once you’re infected, they can do all sorts of terrible things, including getting their hands on data that might help them access your online accounts. Check out our definitive guide on avoiding phishing scams.
Set up remote wipe on your mobile devices

Unfortunately, phones get lost or, even worse, stolen. When they do, whoever gets their hands on them could potentially gain access to all of the owner’s most private secrets and accounts. To safeguard against this happening to you, enable the remote wipe feature so that you can delete all of your data should the unthinkable happen. If you have an Apple iPhone, click here to enable remote wipe;  click here if you use Google’s Android.

Be careful what you share online

Finally, we have some general advice. Be careful what you share online because you might be letting slip something that could be a clue to one of your passwords or security questions. For other reasons to be careful about what you share online, check out the video below.

Let us know in the comments if we’ve missed out any other ways keeping your online accounts secure.

Via: lifehacker, Google, Facebook, Buzzfeed, Gizmodo and The Guardian

Follow me on Twitter: @PatrickDevaney_

Fake WhatsApp downloaded by more than 1 million users

Apps are always trying to sneak into the Google Play Store pretending to be WhatsApp. The messaging app’s huge popularity makes it a prime target for hackers trying to infect unsuspecting user’s mobiles. Normally, these fake WhatsApps get caught before too long, but today the news is a little more severe. One of these fake WhatsApps has been downloaded over a million times.

The fake WhatsApp, called “Update WhatsApp Messenger,” had the same logo and screenshots as the normal WhatsApp in the Play Store. The only thing that set it apart from the real WhatsApp was the “Update” that was written before it and the space that came after the developer, “WhatsApp Inc.” A security expert might be able to highlight such small difference, but the average user probably wouldn’t notice.

The app went unnoticed by the Play Store for several weeks before finally being detected by experts on Reddit. Once the app was detected, Google quickly pulled it from the store, but not before it had been downloaded by a million users. The app left no trace on the user’s phone, so they simply thought they’d downloaded the regular WhatsApp.

All of this enabled the hackers to introduce new ads into the user’s experience and push them toward downloading other apps. In other words, a full-blown scam.

If you want to check whether you or a member of your family has downloaded the fake WhatsApp by mistake, you need to go to Settings on your Android mobile; then click Applications. If you see more than one WhatsApp icon, you know you’ve installed the fraudulent app and need to get rid of it.


Follow me on Twitter: @PatrickDevaney_

How to secure your Wi-Fi network Part 2

Continuing on from yesterday’s five tips for securing your Wi-Fi network here is part 2 with five more great ways to keep your Wi-Fi network safe. Today’s five mix up some common sense solutions with a few more advanced ways of stopping people from stealing your Wi-Fi or learning about how you’re using the internet.

How to boost your Wi-Fi security

6. Change your password regularly

We all do it. We all just hand out the password to our Wi-Fi network whenever we have guests over, as if it is nothing. The problem, however, is that this makes it so much harder to track who has access to our Wi-Fi network and who doesn’t. An easy way to take care of this problem is to reset your Wi-Fi password regularly. You’ll have to reconnect all of your wireless devices every time you reset your password but it’ll be a small price to pay for maintaining control over who has access to your Wi-Fi network.

7. Use a VPN

Virtual Private Networks (VPNs) are everywhere now, even if they have been banned in Russia. A VPN acts as a secure conduit that encrypts all of your web behavior. They stop even your ISP being able to monitor what you’re doing on the internet and can even mask your location so that, if you wanted to, you could access geo-restricted content. VPNs make it incredibly difficult for people to track your web use and having a reputable VPN sat at the heart of all proposed defenses against the recently discovered KRACK WPA2 Wi-Fi vulnerability.

Our Softonic Solutions users are talking about the best cheap VPNs. Join the conversation now!

8. Use a router that allows you to create a guest network

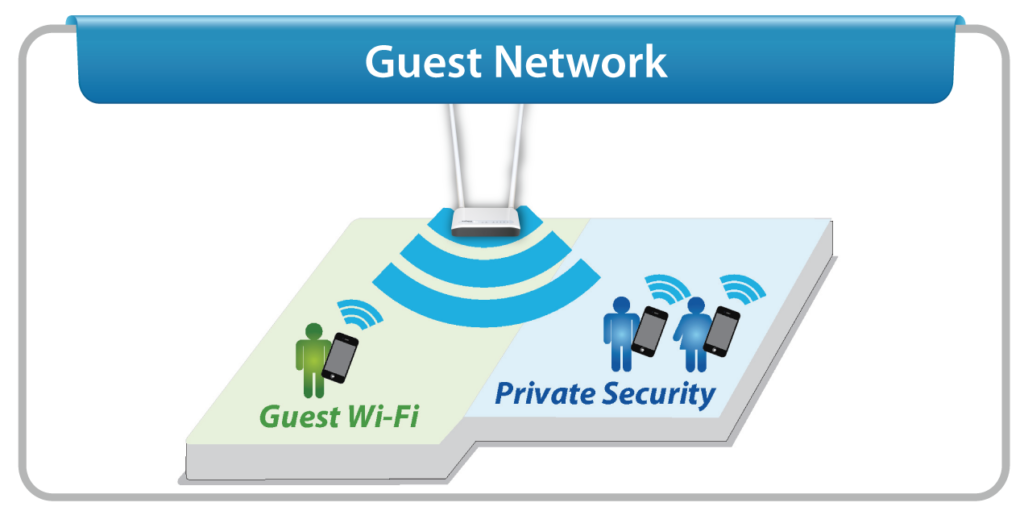
If your router allows you to create a guest network, then you’re in luck. A guest network allows you to separate your home network from the Wi-Fi network that you allow visitors to to access. This means that you don’t have to keep changing your Wi-Fi network password every time you have visitors. If your router doesn’t have this option then you could use the router your Internet Service Provider gave you for a guest network and your own router for your private network.

Image via: Edimax

9. Enable wireless MAC filter

A wireless MAC filter will only allow a device to connect to your Wi-Fi, if the MAC address of the device has been added to the filter list. This can make the process of connecting devices to your Wi-Fi network a little bit more annoying but it significantly ramps up the security on your network. It works really well if you have a dedicated guest network as it adds the extra level of security without having to faff around with MAC addresses every time somebody comes over.

10. Turn off Wi-Fi whenever you can

OK this one might sound annoying but think about the devices you’re using most regularly to access the internet. If you can connect your TV and Computer using wired connection then you’ve already cut down a huge amount of wireless traffic in your household. It is then a case of only using Wi-Fi on your mobile devices intermittently. If you can do this most of the time there won’t even be a Wi-Fi network at risk of security breach to worry about. This won’t be the most popular option but it is definitely worth a thought.



Did we get them all? We’re confident that if you follow all of the tips we’ve laid out your Wi-Fi network will be locked up tight. If you’ve any other Wi-Fi security tips we’d love to hear about them in the comments. Stay safe everybody.

Via: LifeWire (2), Gizmodo, ComputerHope and Softonic

Follow me on Twitter: @PatrickDevaney_

7 tips to get the best Black Friday deals

November 24 is Black Friday, one of the most infamous holiday traditions. If you can’t get into the festive spirit without feeling like you have managed to get a few deals between Black Friday and Cyber Monday, then we have some tips for you.

Most of these tips apply mostly to shopping online, but if you follow them all you’ll have a solid plan for all types of shopping come the big day. The main tactic for getting that deal of the century is to prepare, prepare, prepare! Let’s get to work.

How to get the best Black Friday deals

1. Save what you want to buy in your Favorites before the excitement begins

If you have an interest in specific products, go to different shops and save the links. Then, you will be ready to check everything you are interested in the moment the sales start. You can even check which is cheapest by store.

2. Always check the original price

Before clicking Buy, check the original store price. The shop is required to show it and, if it doesn´t, that’s a bit fishy – so it is worth double checking the price against a competitor.

3. Organize a “path”

Do you want to buy a number of different things? Make a list of the different shops/sites you want to visit so as not to forget anything and cross them off as you go. If a store’s server fails under the inevitable onslaught of shoppers, keep moving and leave it on your list – you can always come back later.

4. Buy from stores with a good return policy

Although you should go in with a clear list, you will probably end up buying a few things unexpectedly. While all shops are required to accept returns, some make it easier than others. Try to buy in shops that make returns simple. That way, if you regret something, you’ve only lost time and not money.

5. Follow your favorite shops’ social networks

Do you love certain brands of makeup, fashion, electronics, or collectibles? The best way to know which deals are on Black Friday is to follow their various social networks. Facebook is great for this, as most shops will promote their various discounts there.

Remember: you can also make sure these posts can be seen first on your timeline, so you never miss a deal. Just go to their page and select how you want posts displayed in your news feed – in this case, See first. Remember to turn this off after the sales, though.

6. Use price comparison sites

We know some shops and products are great, but if you are on an uncontrolled shopping spree, then it can pay to be safe. With sites like Ciao or Google Shopping, you can get useful reviews of stores, products, and prices to make sure your purchases will be hassle-free.

7. Have a spending limit… and try to stick to it

Cap your budget and try to stick to it. Yes, it’s hard, but so is not eating for the rest of the month. One way you can manage this is to transfer your sale budget to Paypal – then when you run out, call it a day.

We love to shop! Do you have any other tips to maximize the sales? Tell us in the comments.

Which smartphones have the best cameras?

Smartphones have come a long way. I still remember the first camera phone from 2000. The SCH-V200 was manufactured by Sharp and was a flip phone that had a 1.5 inch TFT-LCD screen and a 0.35-megapixel camera. The phone was capable of taking 20 photos at a 350,000-pixel resolution. That might not sound impressive now, but ask people who remember it. I am sure they’ll tell you that this phone started a technology revolution.

Since the launch of the SCH-V200, camera phones have made most regular digital cameras obsolete. Your phone is now many times better than a digital camera was just a year ago. But with so much choice comes a burning question. Which phones have the best camera? Let’s have a look.

Which phones have the best cameras?

Samsung Galaxy Note 8

This phone has an impressive dual camera system with X2 optical zoom, live focus, and dual capture. All these features add up to some great photos.

Via: Samsung

Full camera specs:

Primary           Dual 12 MP (26mm, f/1.7, PDAF & 52mm, f/2.4, AF), OIS, autofocus, 2x optical zoom, LED flash

Features         1/2.55″ sensor size, 1.4 µm pixel size @ 26 mm

1/3.6″ sensor size, 1.0 µm pixel size @ 52 mm

Geotagging; simultaneous 4K video and 9MP image recording; touch focus; face/smile detection; Auto HDR; panorama

Video   2160p@30fps, 1080p@60fps, 720p@240fps, HDR, dual-video rec.

Secondary      8 MP, f/1.7, autofocus, 1/3.6″ sensor size, 1.22 µm pixel size, 1440p@30fps, dual video call, Auto HDR

Google Pixel XL 2

Next up is an amazing phone from Google that packs a very powerful 12MP camera. The photos are crisp and clear, and video resolution is stunning, with a 2160p recording ability that will capture videos at 30 frames per second.

Via: GSM Arena

Full camera specs:

Primary           12.2 MP, f/1.8, OIS, phase detection and laser autofocus, dual-LED flash

Features         1/2.6″ sensor size, 1.4 µm pixel size, geo-tagging, touch focus, face detection, HDR, panorama

Video   2160p@30fps, 1080p@30/60/120fps, 720p@240fps

Secondary      8 MP, f/2.4, 1/3.2″ sensor size, 1.4 µm pixel size, 1080p

iPhone 8 Plus

This list can’t be complete without the latest iPhone from Apple. The 8 Plus version comes with a 12MP camera and a lot of functionality.

Full camera specs:

  • 12MP wide-angle and telephoto cameras
  • Wide-angle: ƒ/1.8 aperture
  • Telephoto: ƒ/2.8 aperture
  • Optical zoom; digital zoom up to 10x
  • Portrait mode
  • Portrait Lighting (beta)

If you are looking to make great high-quality photos, the iPhone 8 Plus will deliver.

It should be noted that these cameras are not even close to the Nokia Lumia 1020 when it comes to megapixels. For those who don’t remember, in 2013 Nokia caught us all by surprise with the Lumia 1020 model, which packs a whopping 41MP. It is still unmatched by any phone today. Just look at the specs:

  • Primary: 41 MP (38 MP effective), f/2.2, 26mm, Carl Zeiss optics, OIS, auto/manual focus, Xenon & LED flash, check quality
  • Features: 1/1.5″ sensor size, 1.12 µm pixel size, PureView technology, geo-tagging, face detection, panorama
  • Video: 1080p@30fps, 4x lossless digital zoom, check quality
  • Secondary: 1.2 MP, 720p@30fps

Lumia 1020 is still quite expensive, considering that the phone is almost five years old. The average price is somewhere around $200.

How to set up parental controls for YouTube

YouTube is a great place for hilarious cat videos and Minecraft walkthroughs, but it also contains plenty of videos that parents don’t want their children to see. Fortunately, YouTube has parental controls, and they’re not that hard to set up. If you are a concerned parent, follow these steps to get YouTube’s parental controls up and running.

This is How to Link to the Exact Part of the YouTube Video 

Browser-Based Parental Control

1. Go to YouTube and sign in with your Google account.

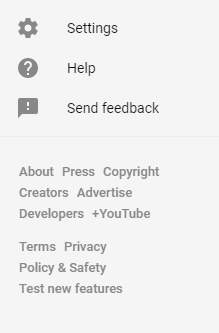
2. Click the Options button on the top left and from the drop-down menu choose Settings.

3. On the bottom of the page, you will find a button named Restricted mode.

4. By default, this will be set to Off, but with a simple click, you can turn it on. You can also lock your choice, which will prevent anyone else from being able to change the settings. Once locked, these settings can only be changed if your Google account is logged in to YouTube.

Mobile-Based Parental Control

On mobile, the process is a bit different but also easy.

1. Log in to your Google account.

2. Click Your Icon, in the top right-hand corner, and choose Settings.

3. There you will find Restricted mode filtering. Click it and choose the Strict option.

4. Hit the back button and you should see that the setting has changed from Don’t filter to Strict.

If you want your child to be protected from flagged and inappropriate content, then be sure to follow these steps. Once you’ve set up Parental Controls, YouTube will automatically filter everything out for you.

Get 100% Free Mobile Phone Service from FreedomPop

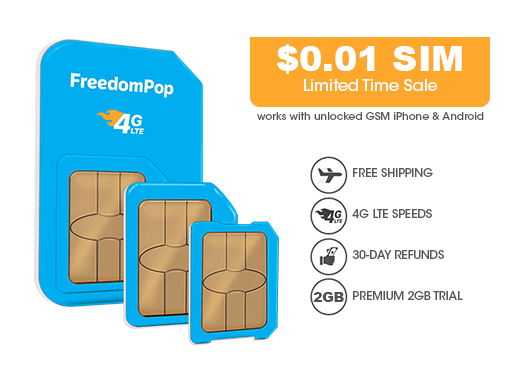
FreedomPop is kicking off Black Friday Deals early this year with a major price drop for their LTE SIM to only a  $0.01 from $14.99. Plus Free Shipping!

FreedomPop, the nation’s first and only 100% FREE mobile phone service , lets you chat, text, and surf the web for free. The LTE SIM works on the Nationwide 4G LTE Network in the US. There is no contract, no commitment, and you can cancel anytime. With a 30-day money back guarantee, they are worth giving a try.

For those of you paying for more minutes and data than you need every month, try their 100% FREE Basic plan, and you’ll be able to put some extra cash back in your pocket.

Here’s how it works.

FreedomPop’s 100% FREE Basic Plan

You get…

  • FREE – 200 minutes
  • FREE – 500 texts
  • FREE – 200 MB data

EVERY MONTH

** Special Black Friday Deal ** while supplies last

Get a 4G LTE Sim Card Kit for $0.01 

The SIM is bundled with a  Free Unlimited Talk, Text, and 2GB Trial (a $24.99 value) and comes with a 30-day money back guarantee.  Plus FREE Shipping!

After the free trial, do nothing and enjoy saving hundreds each year with Unlimited Talk, Text, and 2GB LTE data monthly for $24.99/mo or downgrade anytime to their 100% FREE Basic Plan.

Don’t miss out on FreedomPop’s Early Black Friday Deal by getting their LTE SIM for only $0.01 now!


(Hi-Res Version) How to Detect Fake/Scam Emails and Avoid Phishing Attacks

Do you know if that email is really from who it says it is from? It might not be and if it isn’t you could be in a whole lot of trouble, from damaging malware to terrifying ransomware. Cyber-criminals are constantly pretending to be people we know or even companies and banks that we associate with so that they can phish for our data or access to our machines. Follow these tips to make sure they don’t cath you out…

Click Here to share on Facebook and protect your friends against Fake/Scam Emails.

Click Here to share on Twitter and protect your followers against Fake/Scam Emails.

How to detect and avoid fake or scam emails

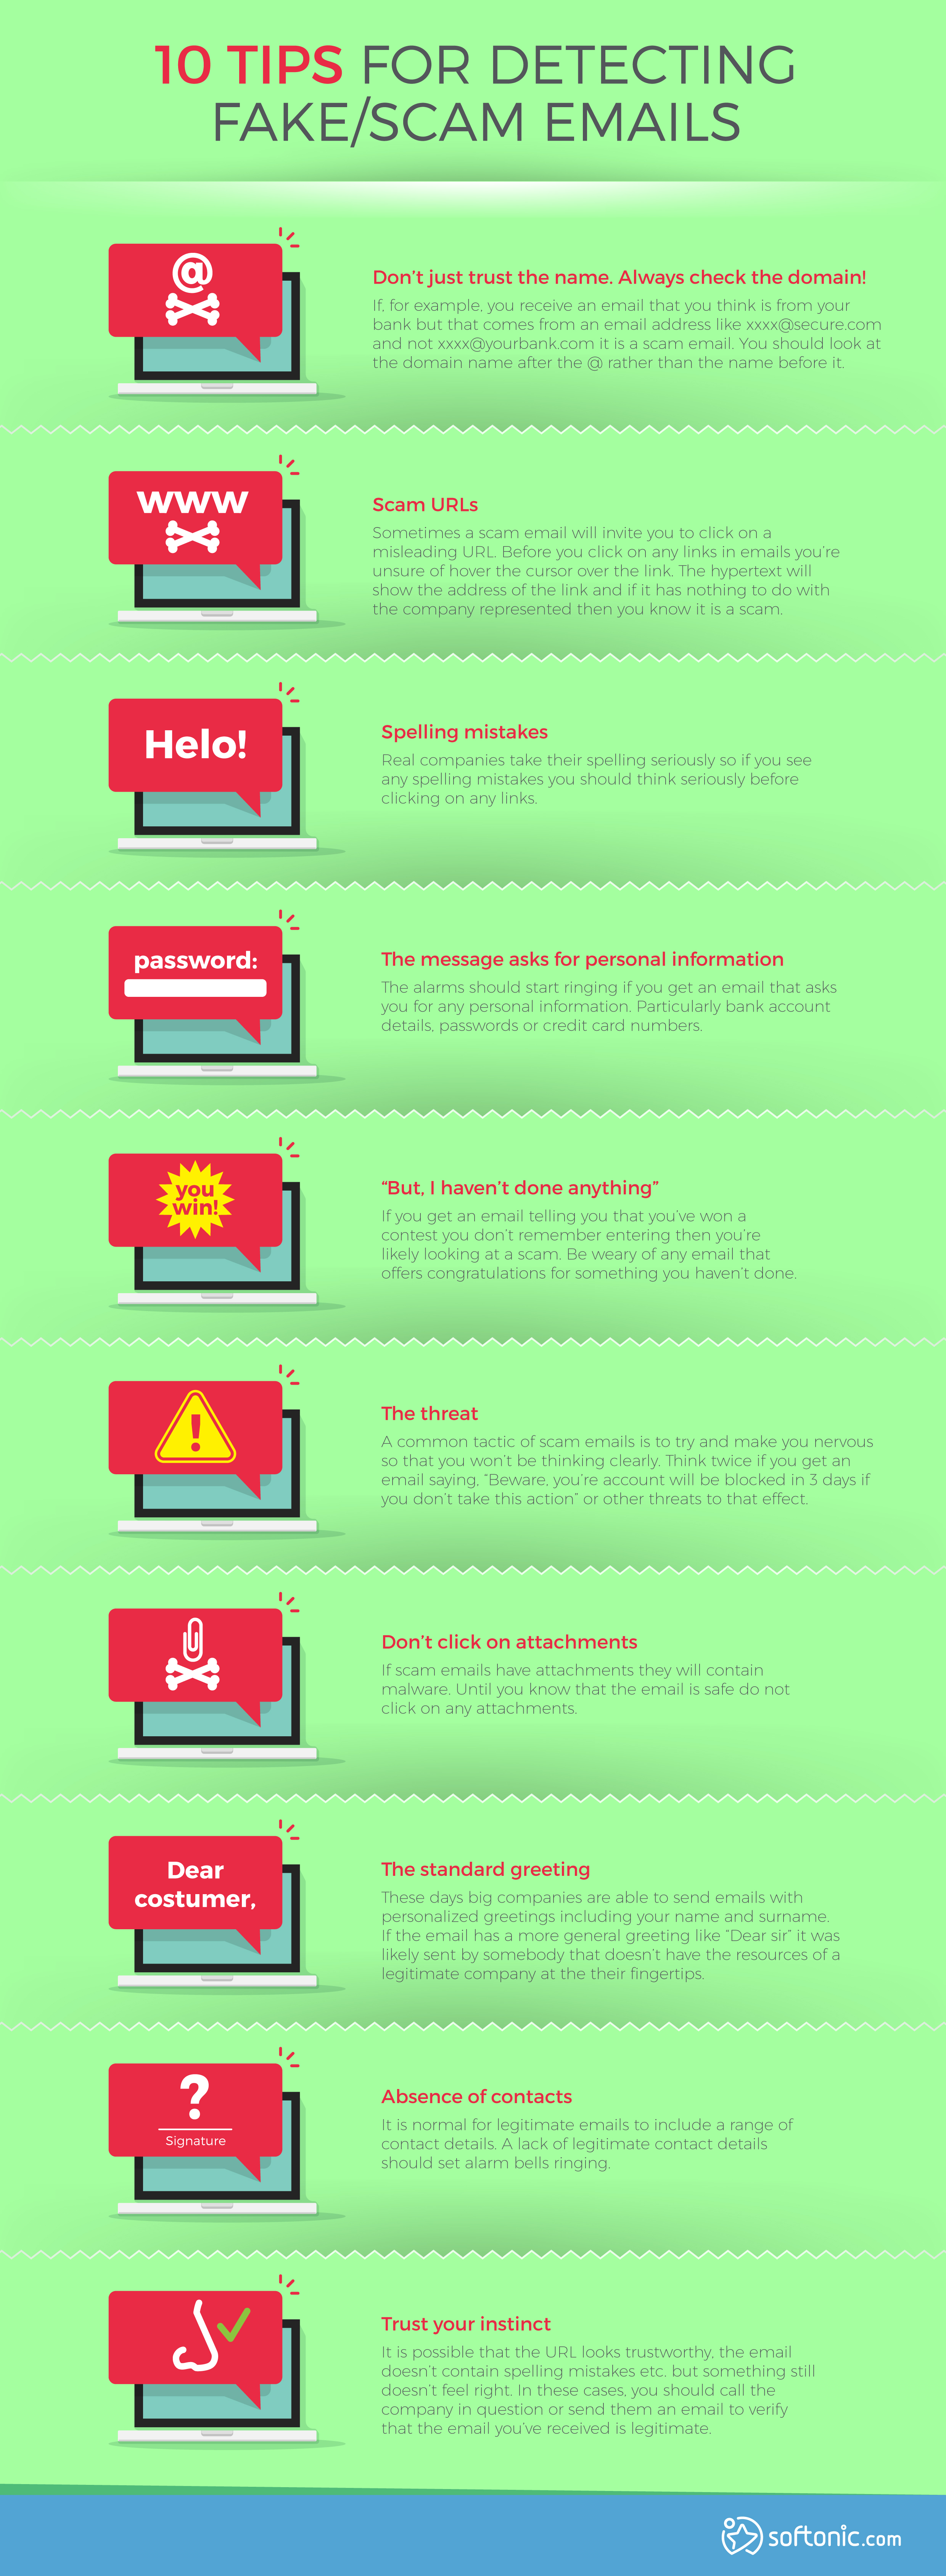
How to Detect Fake/Scam Emails and Avoid Phishing Attacks Hi-Res

1. Don’t just trust the name. Always check the domain!

If, for example, you receive an email that you think is from your bank but that comes from an email address like xxxx@secure.com and not xxxx@yourbank.com it is a scam email. You should look at the domain name after the @ rather than the name before it.

2. Scam URLs

Sometimes a scam email will invite you to click on a misleading URL. Before you click on any links in emails you’re unsure of hover the cursor over the link. The hypertext will show the address of the link and if it has nothing to do with the company represented then you know it is a scam.

3. Spelling mistakes

Real companies take their spelling seriously so if you see any spelling mistakes you should think seriously before clicking on any links.

4. The message asks for personal information

The alarms should start ringing if you get an email that asks you for any personal information. Particularly bank account details, passwords or credit card numbers.

5. But, I haven’t done anything

If you get an email telling you that you’ve won a contest you don’t remember entering then you’re likely looking at a scam. Be weary of any email that offers congratulations for something you haven’t done.

6. The threat

A common tactic of scam emails is to try and make you nervous so that you won’t be thinking clearly. Think twice if you get an email saying, “Beware, you’re account will be blocked in 3 days if you don’t take this action” or other threats to that effect.

7. Don’t click on attachments

If scam emails have attachments they will contain malware. Until you know that the email is safe do not click on any attachments.

8. The standard greeting

These days big companies are able to send emails with personalized greetings including your name and surname. If the email has a more general greeting like “Dear sir” it was likely sent by somebody that doesn’t have the resources of a legitimate company at the their fingertips.

9. Absence of contacts

It is normal for legitimate emails to include a range of contact details. A lack of legitimate contact details should set alarm bells ringing.

10. Trust your instinct

It is possible that the URL looks trustworthy, the email doesn’t contain spelling mistakes etc. but something still doesn’t feel right. In these cases, you should call the company in question or send them an email to verify that the email you’ve received is legitimate.

Follow me on Twitter: @PatrickDevaney_

How to secure your Wi-Fi network Part 1

We all love our precious Wi-Fi, as it makes our lives so much easier. It does have its drawbacks, however; it leaves us open to security risks and even makes it easier for people to steal the bandwidth we’ve paid for. Whether it is neighbors downloading movies over our Wi-Fi or serious security threats like the recent KRACK scarethere are plenty of reasons to beef up security on your Wi-Fi network.

We’re going to give you ten great tips for increasing security on your Wi-Fi network. Here are the first five tips;  we’ll bring you next five tomorrow.

How to make your Wi-fi network more secure

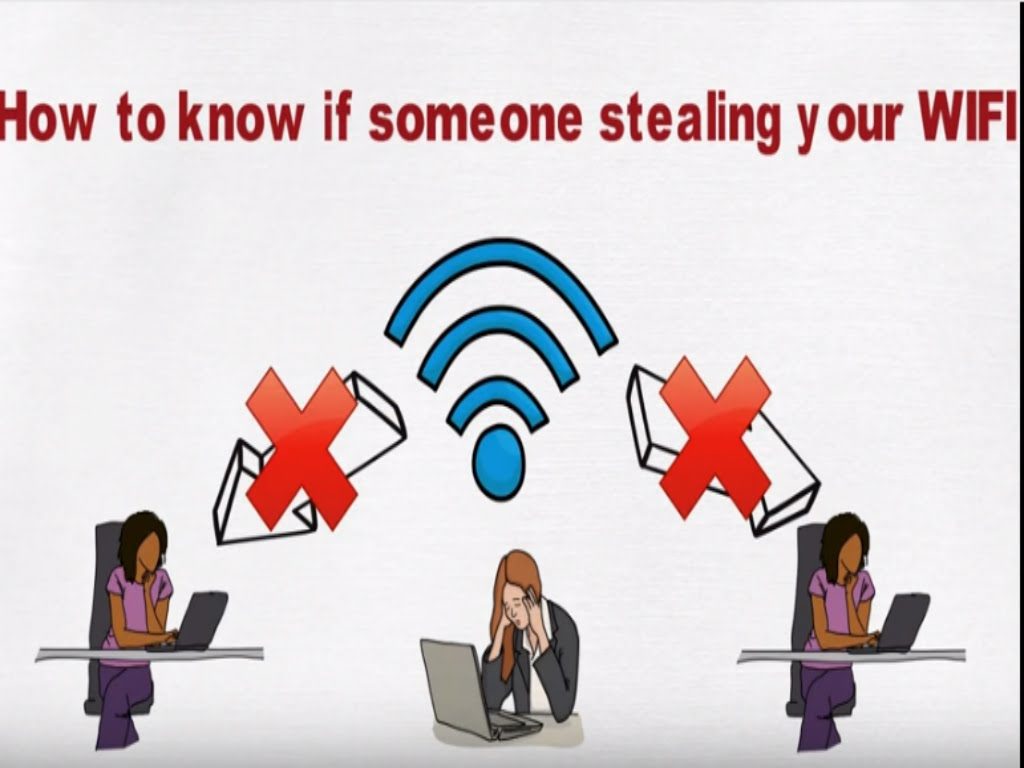
1. Check to make sure nobody is stealing your Wi-Fi

The first step to securing your Wi-Fi network is making sure that nobody is already stealing your Wi-Fi. There are a number of ways to do this, including turning off all the Wi-Fi enabled devices in your home and checking the traffic light on your router; checking the list of apparatuses associated with your router; or viewing the list of devices connected to the router and monitoring through software. To find out how to do each of these in greater detail, read How do I know if somebody is stealing my Wi-Fi connection?

2. Change the default SSID name

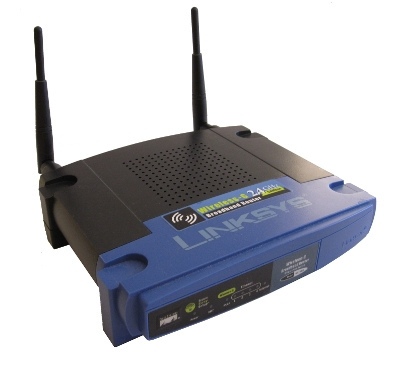
The SSID is the name of your Wi-Fi network. The default SSID of your Wi-Fi network is the brand of the router you’re using for your Wi-Fi. Even if it doesn’t explicitly include the brand like LINKSYS, for example, the brand will be identifiable from the default SSID. This is a problem because it tells anybody who is the vicinity of your Wi-Fi network the brand of router that you’re using, which creates a security risk. It is like giving a huge password hint to anybody who is trying to crack open your Wi-Fi network. When you’re changing the SSID, make sure that you don’t include any identifiable information for the same reason.
3. Enable the router firewall

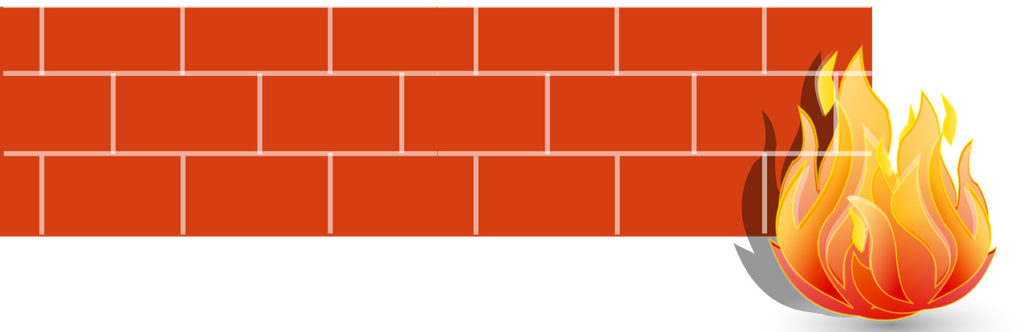
A firewall monitors and controls all incoming and outgoing traffic on a network based on the security procedures of that network. You’ll likely have a firewall enabled as part of your antivirus software suite (if you haven’t, get one now), but most routers also have firewalls. If your router has a firewall, you should activate it to give your Wi-Fi network an extra layer of security.

4. Configure and update your router

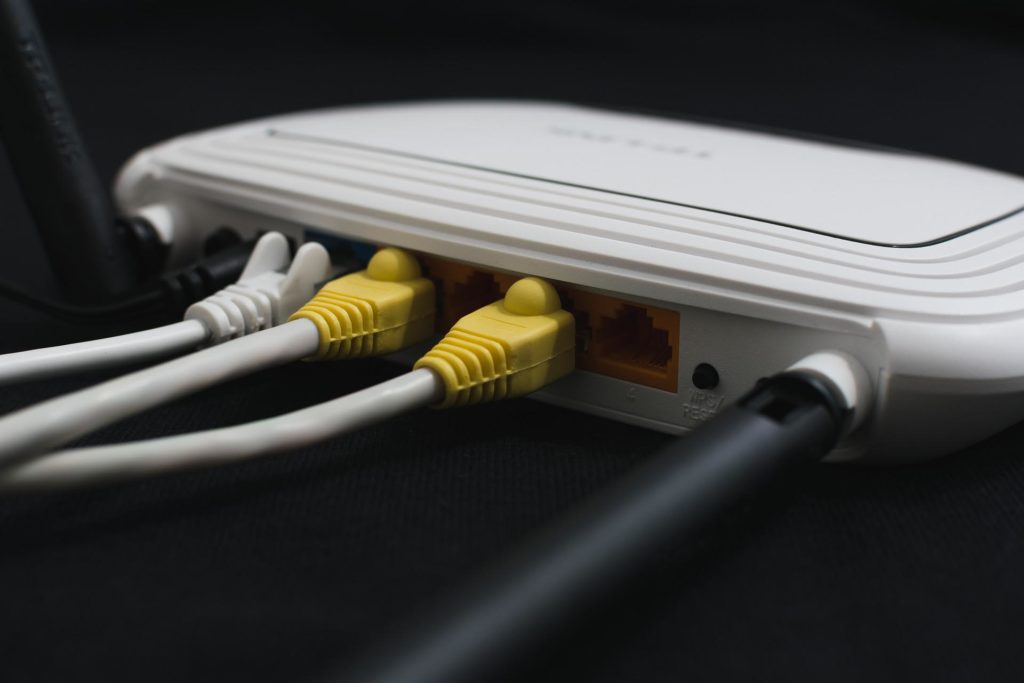
Though your mileage may vary based on your individual router, most routers will allow you to check the devices that are connected to your device and look for any type of suspicious behavior. You should also change the default username and password that is used to access the router settings (this is different to the password needed to access the Wi-Fi). Finally, update the router’s firmware to ensure that it has all of the latest security patches. This is especially important in the wake of the WPA2 KRACK vulnerability.

5. Disable wireless administration

Another handy thing you can do with your router’s configuration, to significantly increase security, is to disable remote administration. If you do this, it means that none of your router’s settings can be changed using a wireless connection. The settings can still be changed, but only on a PC that has a wired connection to the router.
So there you have five top tips for securing your Wi-Fi network. Let us know what you think in the comments below, and let us know if there are any you think we should add to tomorrow’s list. Make sure you check out part 2 more great ways to increase security on your Wi-Fi network.

Via: LifeWire (2), Gizmodo, ComputerHope, and Softonic

Follow me on Twitter: @PatrickDevaney_