How to Run AnyDesk in Ubuntu in 4 Simple Steps

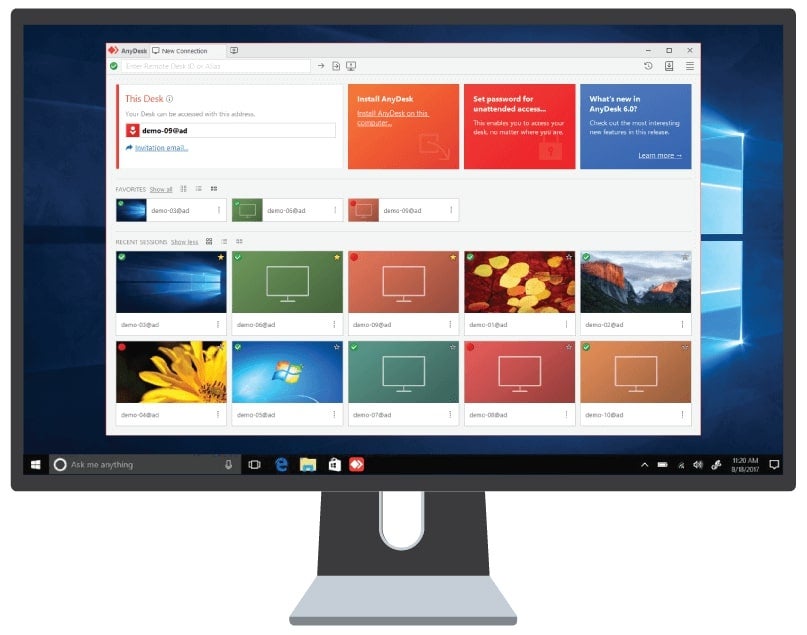
AnyDesk is a popular remote access program that can be used to gain access and control over another device that also has AnyDesk installed. Available on all devices, you can also run AnyDesk on Ubuntu.

AnyDesk is actually perfectly suited to the Linux operating system. This makes it a valuable program that allows you to also gain cross-platform control over different devices when you need to. But how do you run AnyDesk on Ubuntu?

  1. Update your Ubuntu System

    How to Run AnyDesk on Ubuntu

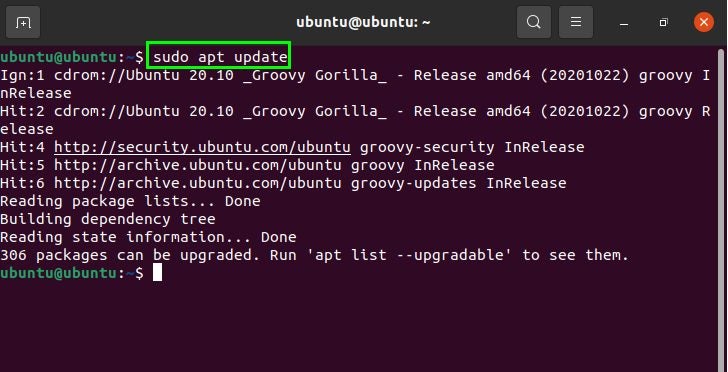
    The first thing you need to do before starting is to make sure that your version of Ubuntu operating system for desktop is up to date. To update your system, type: $ sudo apt update.

  2. Add the AnyDesk Repository

    How to Run AnyDesk on Ubuntu

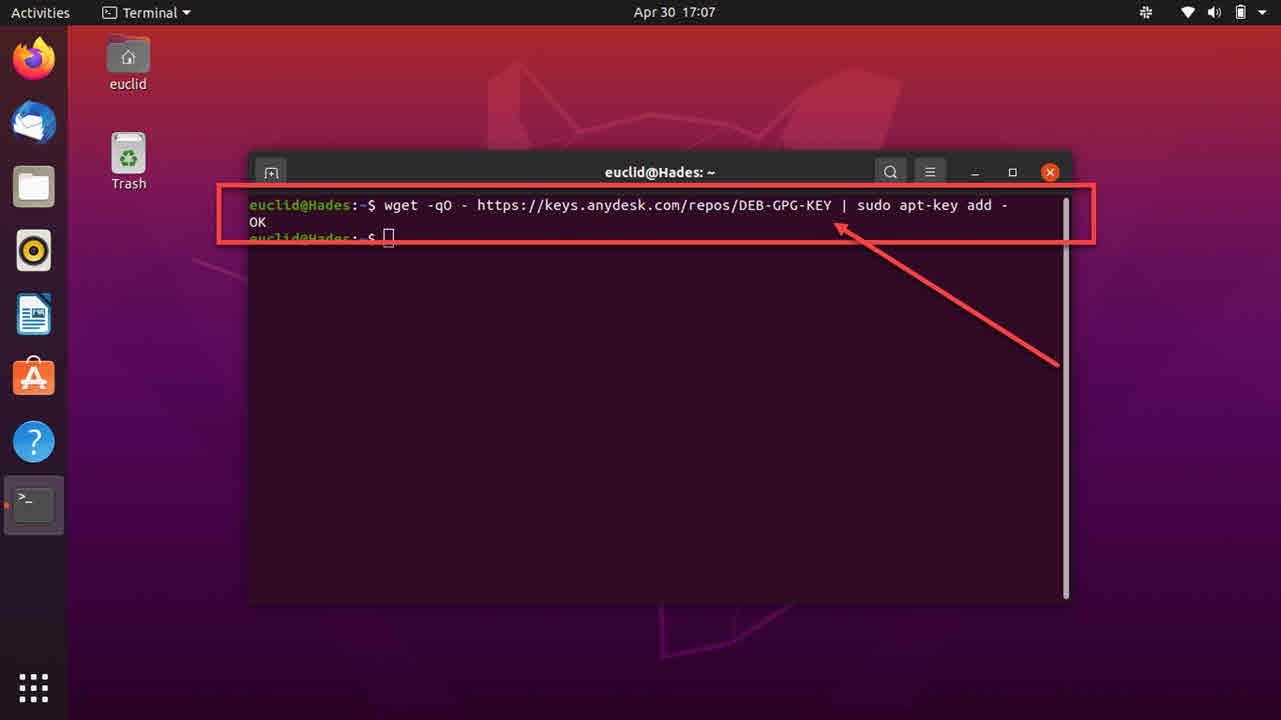
    Import the GPG key for signing APT packages. To do this, you will need to type in the following code: $ wget -qO – https://keys.anydesk.com/repos/DEB-GPG-KEY | sudo apt-key add -.

    Next, add the AnyDesk repository content to your version of Ubuntu. Type in: $ echo “deb http://deb.anydesk.com/ all main” | sudo tee /etc /apt/ sources.list.d/ anydesk-stable.list.

  3. Install AnyDesk on Ubuntu

    How to Run AnyDesk on Ubuntu

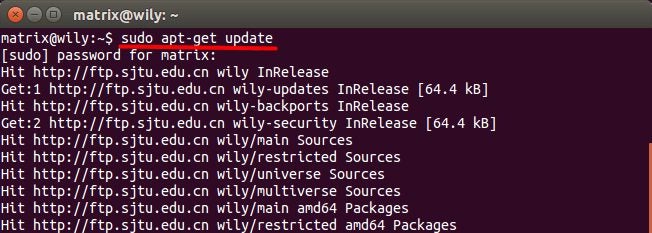
    Now you will need to update apt-cache and then install the latest release of AnyDesk. To complete this update, type: $ sudo apt update.

    • Next, install AnyDesk using the APT package manager by typing: $ sudo apt install anydesk
  4. Launch AnyDesk

    How to Run AnyDesk on Ubuntu

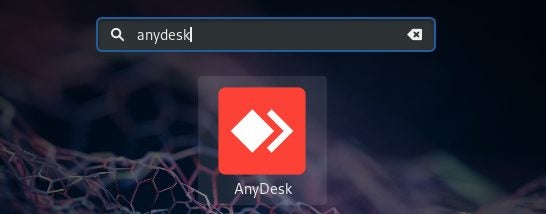
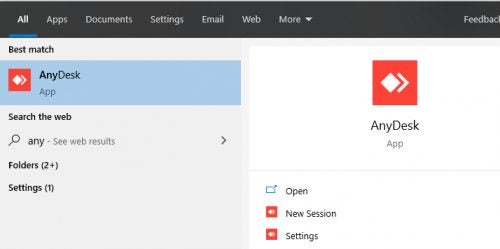
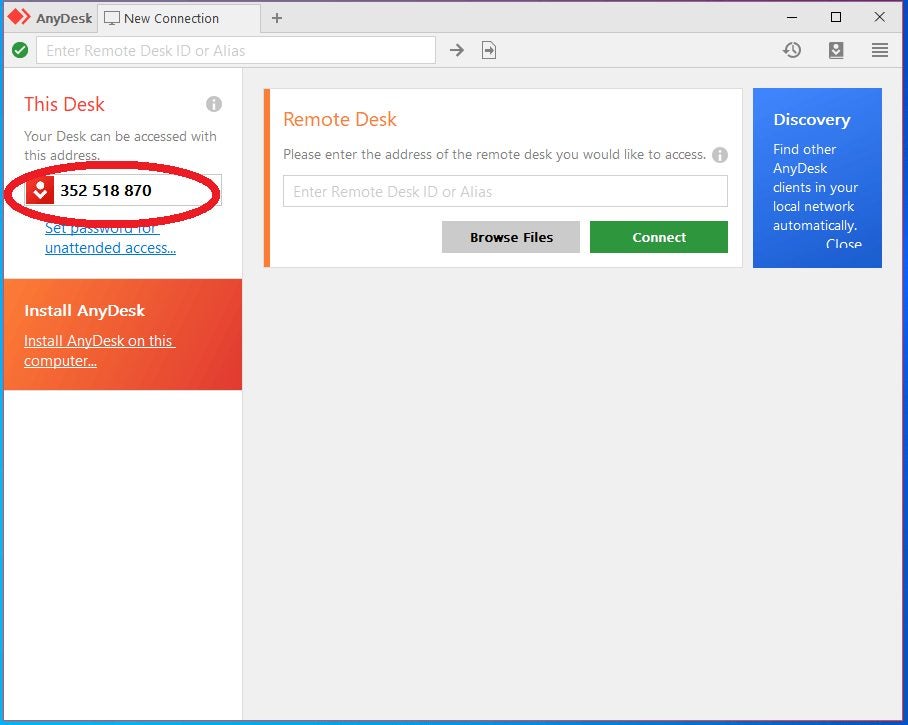
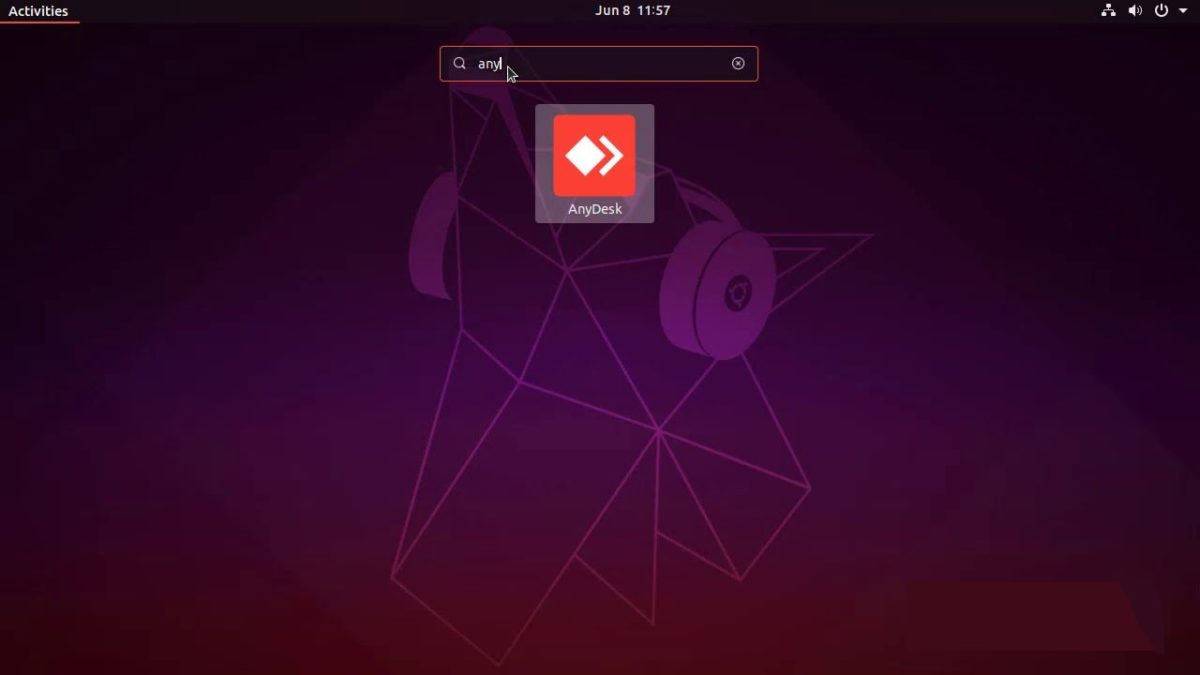
    After the installation has been completed, use the desktop applications launcher to start AnyDesk on Ubuntu.

Using Anydesk on Ubuntu

Install and run AnyDesk from your computer with Ubuntu. As you can see from the steps above, this is a simple enough process to do. So even if you use Ubuntu, you can still get all the functionality and benefits of using AnyDesk to access other devices remotely.

Opera GX Mobile Launches as the First Smartphone Gaming Browser

Now Gamers Can Enjoy Better Online Mobile Gaming With Opera GX

The Opera GX browser became a hit when it was released for gamers worldwide on desktop. The developer claims there have been over 9 million downloads so far. Opera GX Mobile has recently launched for those that play games on their tablets and phones, extending its functionality.

It’s no secret that there has been a growth in mobile gaming in the last few years, especially when everyone had to isolate themselves at home. We’ve seen titles like Call of Duty Mobile, Fortnite, and PUBG Mobile go viral, while new developers appeared to present similar offerings. Now, Opera has made it possible to improve your online game experience what the new browser.

Opera GX Mobile Launches as the First Smartphone Gaming Browser

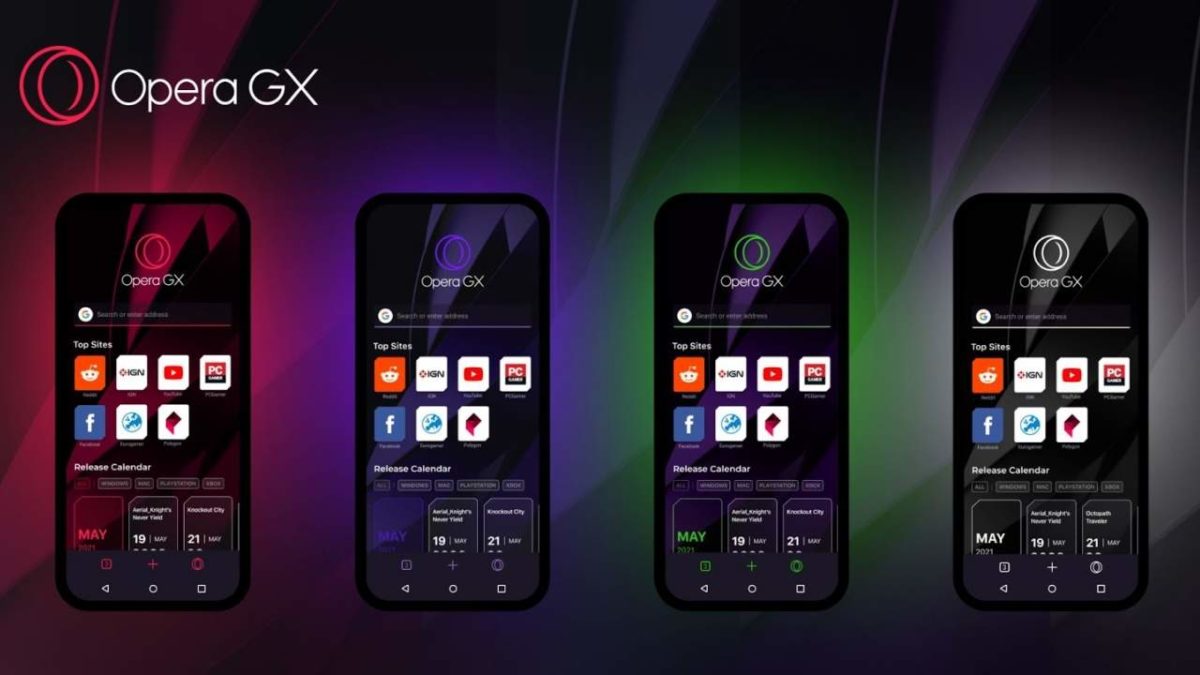
There are several features it will add so that gamers can really feel the effort that went into Opera GX Mobile. For one, you can adjust the navigation panel to suit your needs. It also lets you set the vibration for in-game action, there’s a Fast Action Button, and you’ll have haptic feedback. As if that wasn’t enough, you’ll have a Flow feature to sync your desktop and mobile browsers.

The Flow feature also lets you share content with other members. You can send guides, character builds, walkthroughs, and connect to GX Corner for the latest news and tips. With all these amazing tools available, is it possible that Google Chrome’s days are numbered?

Instagram Announces New Live and Reel Insights

You Can Now View New Insights for Live and Reel Features

Not too long ago, Instagram launched a remix tool for its Reels feature. The social media platform is determined to compete with TikTok as much as possible. Well, it seems like it’s going the extra mile with new insights for creators and businesses where you can view how well your content is performing.

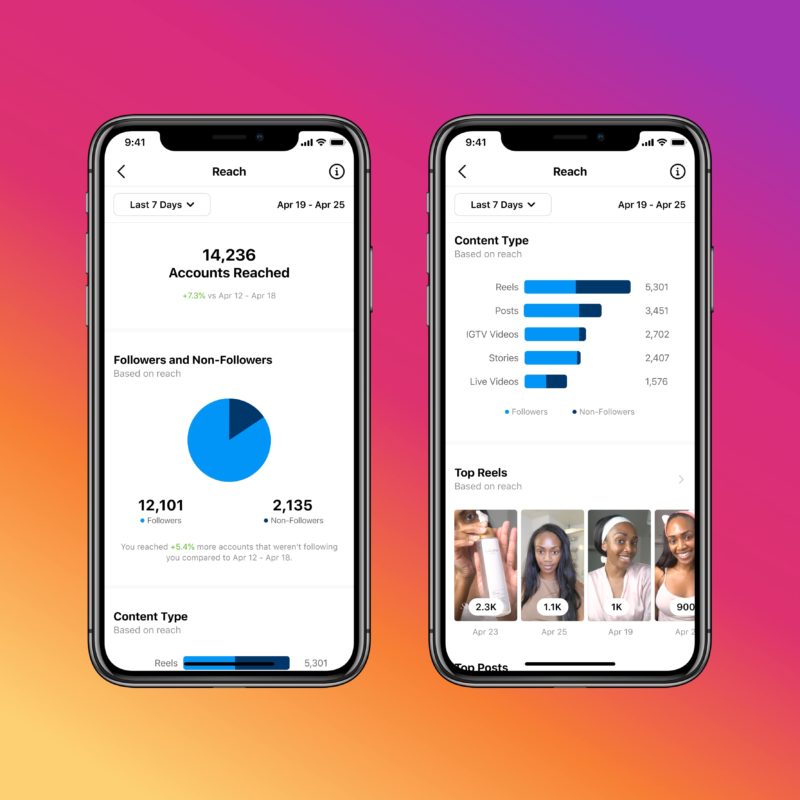
It appears that Instagram is once again releasing new features based on what the community has to say. Some of the metrics you can now measure include Accounts Reached, Plays, Likes, Saves, Comments, and Shares. Furthermore, the insights tab extends into your account to see how your content impacts your overall profile.

Instagram Announces New Live and Reel Insights

One of the most significant insights is Reach. You’ll be able to identify the account types that watch your live shows and reels, while you can also check which formats your followers enjoy. If you’re running a business, you’ll understand how essential this information is to your marketing strategy.

As if that isn’t enough, more updates are coming in the next few months. You’ll be able to set various time-frame options for your content to remain viewable for longer. Instagram will also place the new insights module into the desktop app. As you can see, it’s hoping to expand your experience as much as possible while knocking TikTok out of the virtual park.

How to Install AnyDesk on Kali in 3 Steps

While it’s straightforward to install AnyDesk remote desktop on Windows, Android, and iOS, Linux users need to have commands and scripting knowledge. They are likely not afraid to “talk” to the machine in the “Terminal.”

However, we offer you follow our step-by-step of the program’s Kali Linux version for ease of use.

  1. Update Debian

    How to install AnyDesk on Kali

    A system APT package update is a must before installing AnyDesk on your machine. Open the Terminal and put in the following console command:

    – sudo apt update

    • sudo apt install -y gnupg2
  2. Download and add AnyDesk

    How to install AnyDesk on Kali

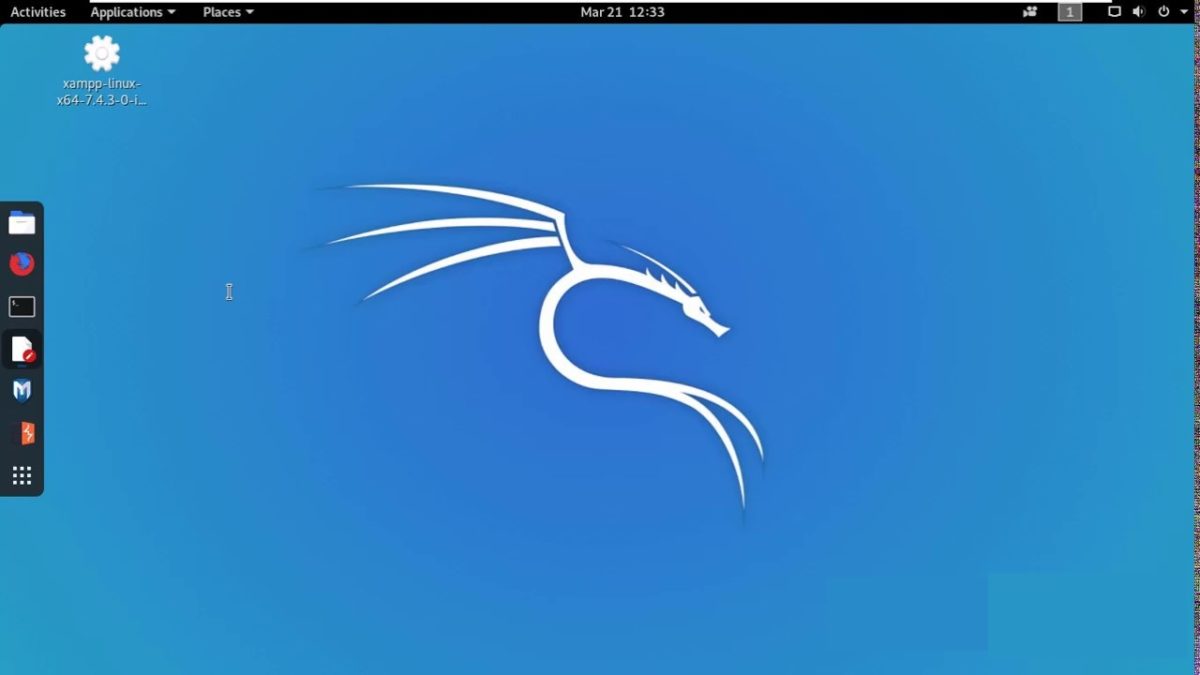
    Before you can proceed, you need the Kali Linux version of the application downloaded. To add the program to the system, write the following:

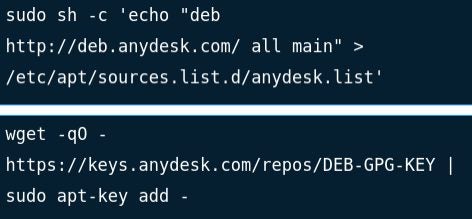
    sudo sh -c ‘echo “deb http://deb.anydesk.com/ all main” > /etc/apt/sources.list.d/anydesk.list’

    The next step is adding the AnyDesk GPG key:

    wget -qO – https://keys.anydesk.com/repos/DEB-GPG-KEY | sudo apt-key add –

  3. Install and launch the app

    How to install AnyDesk on Kali

    Use the command below to install the program. It will run the apt package manager:

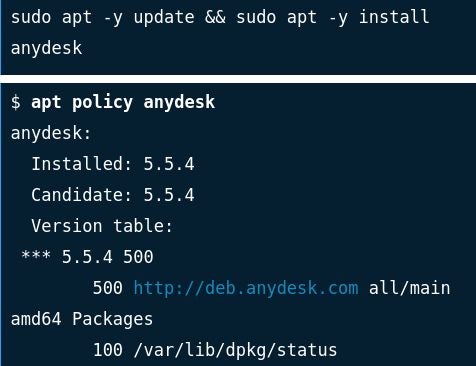
    sudo apt -y update && sudo apt -y install anydesk

    Ask the system to confirm the installation by inserting the following:

    $ apt policy anydesk

    anydesk:

    Installed: 5.5.4

    Candidate: 5.5.4

    Version table:

    *** 5.5.4 500

    500 http://deb.anydesk.com all/main amd64 Packages

    100 /var/lib/dpkg/status

    Now that the process is complete, you can open the app from the console or search the program in the installed application list and click it.


Setup and manage!

Once the app runs, you’ll be able to set up an address and ID and start connecting other desktops or mobile devices for remote control.

How to Record in Anydesk in 3 Easy Steps

AnyDesk allows you to remotely access another Windows, Mac, iPhone, or Android device from any location as long as both devices have AnyDesk installed. Another feature of the program is that you can also record your screen. This can be very valuable, as the recordings can be used as training materials and much more.

For example, if you work for a computer support company, then having recordings of your support sessions can help in training new employees and also as a record of your sessions. But, how do you record in AnyDesk?

  1. Open “Recording”

    How to Record in AnyDesk

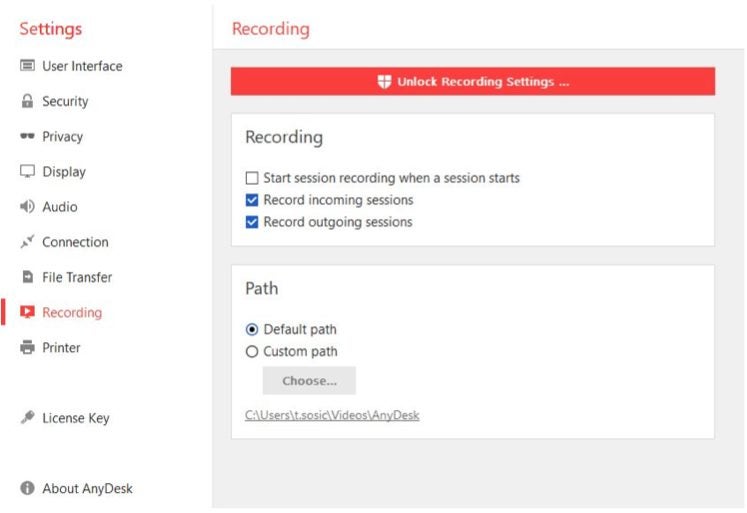
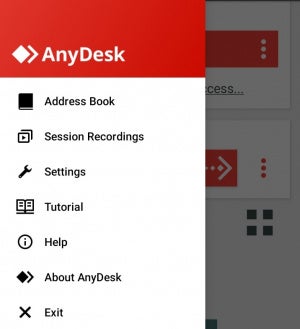
    Launch the AnyDesk application on your computer. Click on the three vertical dots that represent your settings menu. In the menu on the left side of the screen, click on the ‘Recordings’ tab.

  2. Unlock Recording Settings

    How to Record in AnyDesk

    First, you will need to click on the option to unlock the record settings at the top of the screen in the red button. Once the recording has been unlocked, you will have the record button on your main screen. You can also choose to enable one of the three different automatic options.

    – The first option is ‘Start Session Recording When a Session Starts,’ which will enable the global recording option. 

    – The next choice is ‘Record Incoming Sessions,’ and enabling this option will automatically record any incoming sessions

    – Then the last option is ‘Record Outgoing Sessions, ’ which, once enabled, automatically starts recording any outgoing sessions

  3. Record Sessions Using the ‘Record’ Button

    How to Record in AnyDesk

    If you don’t want to set automatic recordings, you can also choose to record a specific session or start in the middle of a particular session. There is a way to do that. You simply press on the record button when you want to start recording and again when you are done.

Record Your AnyDesk Sessions Easily

As you can see, recording your AnyDesk sessions is very simple to set up. If you use the above steps, you can set up your AnyDesk to record all your sessions or only some of them.

How to Update AnyDesk

AnyDesk updates are available periodically on all the software versions. While you can leave the Android and iOS to do their thing automatically, the Windows version update needs manual interference.

All new versions stay free unless you decide to upgrade to another license. Let’s dive in!

  1. Find the update

    How to update AnyDesk

    Suppose an update is available on the AnyDesk application on your desktop. In that case, you’ll see it as a notification in the “Connection” tab. Navigate there and identify the latest version of the program.

  2. Click the update link and wait

    How to update AnyDesk

    Make sure that you have a secure and stable internet connection. Click the latest version number to initiate the download. The rest of the process should be painless. If you’re prompted to allow some functionality, do it; after that, everything should go smoothly.

Why are the updates crucial?

While you might be happy with the current version of the application, remote desktop apps are a bit of a hustle to maintain. As this software allows another machine to enter and make changes to your computer. While it can be an excellent option for support personnel and family use, there’s a risk of unattended access while using these.

In addition to bugs fixed, crashes patched, and some features added, the new software releases strengthen security and make your AnyDesk sessions hack-free and more trustworthy.

How to Change My AnyDesk Address

There may come a time when you’ll need to change your AnyDesk address if you have a new Windows, Android and iOS device. The need may also arise if you’ve changed companies or you want to disconnect from a previous platform.

Changing it in the settings is straightforward. In this quick guide, we’ll show you how we managed to do it.

  1. Find the “ID and Alias” settings

    How to change my AnyDesk address

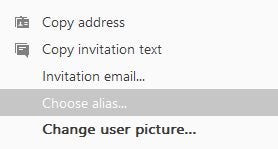
    Open the Anydesk app on your computer and click “Settings.” A window will pop up where you’ll find the “ID and Alias” settings. Select “Choose Alias.”

  2. Input the new address and save

    How to change my AnyDesk address

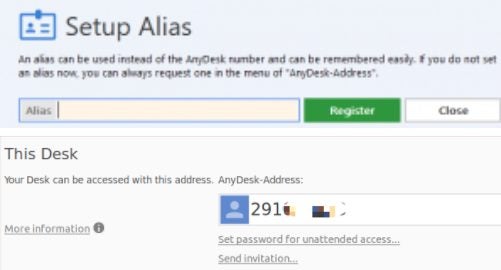
    Once you click the setting, another window will appear, where you’ll be able to set an easy-to-remember address, which usually consists of numbers, letters, and some signs (dots, minuses, and underscores). Ensure that the address you’re choosing is unique, as you’ll not be able to repeat one if it’s in use by someone else.

More about your AnyDesk address

AnyDesk remote desktop access has three tiers that offer different functionalities. It’s worth mentioning that while the “Free License” doesn’t allow changing the address, the “Paid” tier with a public namespace does (only for three times). The “Premium Licence” (personal namespace) gives you unlimited address edits for all the clients.

Another important thing with your alias and ID in AnyDesk is that they reside on the service.conf file, and if you lose access to it, restoring the account will be impossible. Thus you should keep the document safe.

How to Auto Connect AnyDesk in 3 Simple Steps

AnyDesk lets you connect to and interact with other desktops and devices remotely. This is an invaluable tool to have if you work from more than one device. Left your laptop at home and need a file not stored on the cloud? Simple! Just log into AnyDesk and browse your laptop’s files remotely with ease.

AnyDesk DOWNLOAD

It can, however, be a little inconvenient to have someone else on the other side to allow access to the other device. The way AnyDesk works is that you need the device’s address or ID to establish a connection. You’re up the creek without a paddle if you don’t have access to these two resources. In the article below, we’ll show you how to auto-connect to any of your devices with AnyDesk in 3 simple steps.

Steps to auto connect to AnyDesk remotely

  1. Have AnyDesk installed on applicable devices

    How to Auto Connect With AnyDesk

    Before you can use AnyDesk, you’ll need to make sure that you have the utility installed on both the devices you wish to connect. If you intend to create a network of various connected devices, each of these will need to have the app installed.

    No matter which device you have, or want to connect to, the installation process is painless and quick to complete. The added benefit of AnyDesk is that you can connect to any supported OS, even if each device runs on a different system. Cross compatibility at its finest.

  2. Set Password on Remote Device

    How to Auto Connect With AnyDesk

    Now, you need to open AnyDesk on the remote device you wish to connect to. Yes, this means that the remote device still needs to be local for this step. Do this before you forget your laptop or phone at home. 

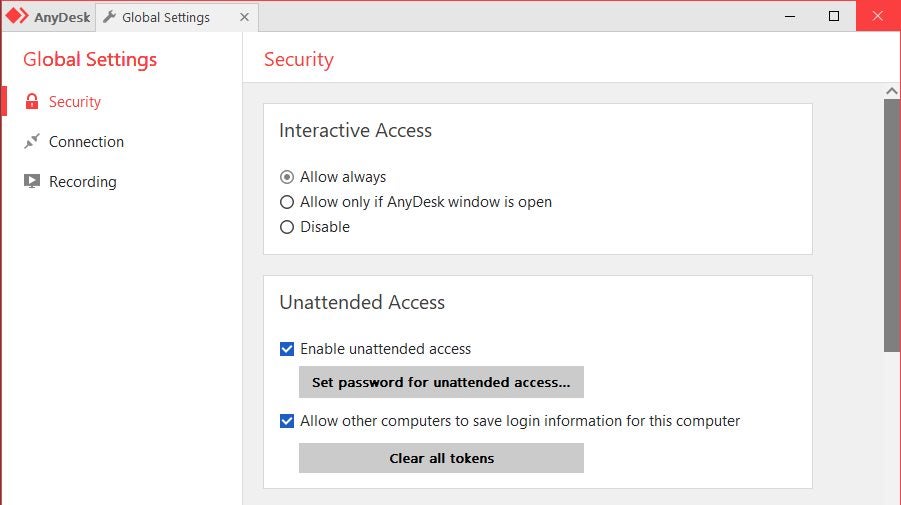
    Next, navigate to the Security tab within the AnyDesk menu on the left-hand side of the screen. You’ll want to make sure that the option for unattended access is enabled, and then you’ll want to set a password for unattended access so that only you can access the remote device unattended.

    Click on ‘Set Password for Unattended Access’ and enter a password of your choice. Note: ‘Password’ has never been a safe password and ‘1234’ should have been made illegal a long time ago. While we’re on the subject, if you’re required to use a special character, get creative. The exclamation mark is not the ‘special’ character you think it is.

  3. Connect remotely from your local device

    How to Auto Connect With AnyDesk

    This step is for once you’ve inevitably left an integral piece of tech at home, work, or anywhere else. 

    Now that you have remote access set up with a password on the PC you want to access, you can connect to it. To do this, all you need to do is launch AnyDesk and then start a remote session.

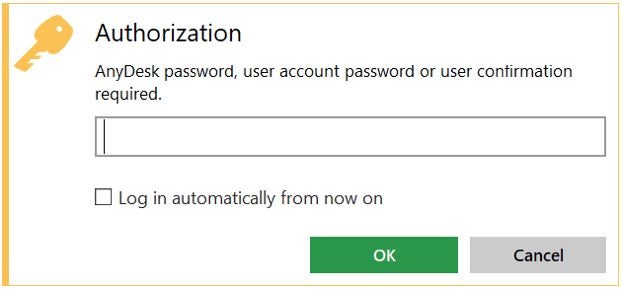
    You should see the Authorization dialogue appear. Here, you’ll be able to input the password you set up for the remote device when it was still a local device.

    Next, check the box ‘Log in Automatically From Now On’ if you plan on leaving your devices anywhere apart from where you need them again. (Who plans that? Just check the box for safety’s sake)

    Now you can click on ‘OK’ to connect to the remote computer and control that device. It is essential to know that if you have selected the option to log in automatically, AnyDesk does not save the password. Instead, it generates a specific token for that connection.

    This means that even if someone else has access to your computer, they will not be able to see the password to the other computer. This keeps the information safe and secure. So please, remember your password; AnyDesk isn’t Google and won’t do it for you.

Connect Remotely With Unattended Access

Welcome to the future. You can now connect to any of your supported smart devices with the click of a button. Better yet, you don’t need an assistant, messy roommate, or nosey relative around to give you access to your remote devices.

All you need to do is log in and connect. With AnyDesk, it really is that easy. If you’re using a phone, here’s a quick guide on how you can connect to AnyDesk from your mobile device.

How to Use AnyDesk on your Phone READ MORE

How to Control Mobile from PC Using AnyDesk in 3 Easy Steps

AnyDesk is a great option for accessing computers and other devices remotely. With the simple press of a button, you can access a smartphone from anywhere in the world. AnyDesk makes it possible to gain control remotely to Windows, Mac, iPhone and Android phones.

So, how can you control your phone remotely via a PC and AnyDesk? Let’s take a look at the steps we use to perform this task.

  1. Enter the Address of the Phone

    How to Control Mobile from PC Using AnyDesk

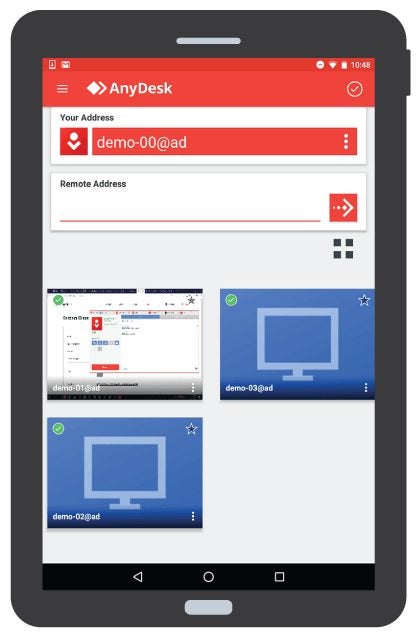
    You will first need to open AnyDesk on the remote computer and ensure that you also have AnyDesk open on the phone you want to control. On the remote computer, you will need to enter the address of the phone you want to have access to. This address is visible when you open AnyDesk on the phone.

  2. Accept the Notification for Connection

    How to Control Mobile from PC Using AnyDesk

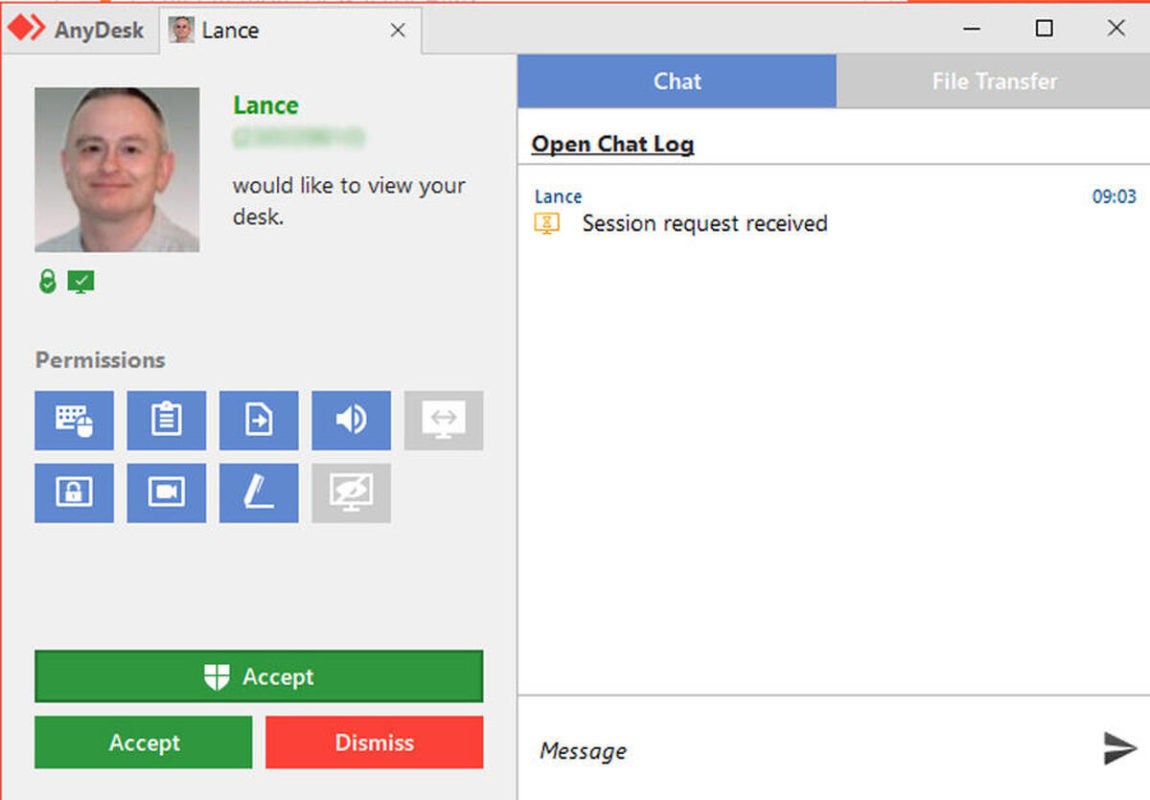
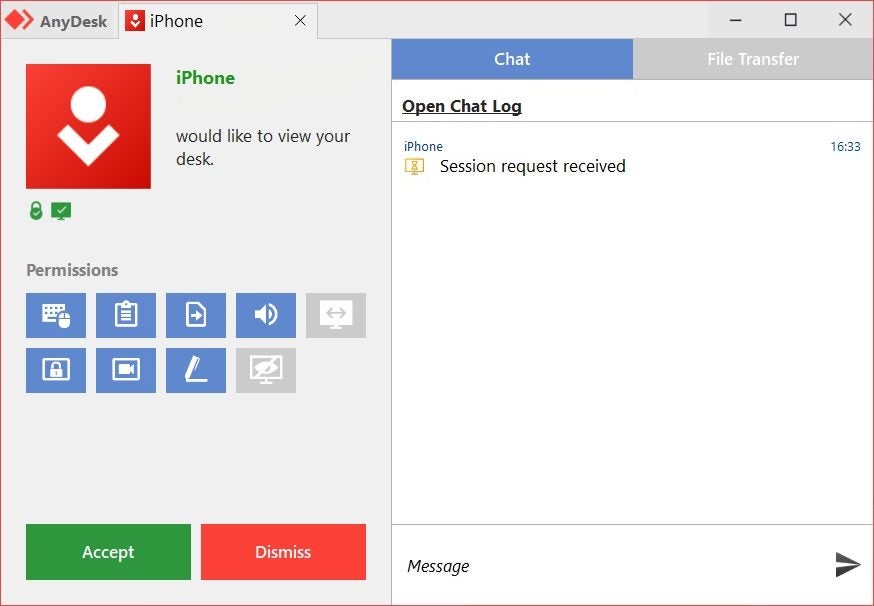
    Once you’ve input the mobile device’s address into the AnyDesk on your remote computer, someone will have to accept the notification on the mobile phone to allow you access and control over the mobile device.

  3. Control the Phone With AnyDesk

    How to Control Mobile from PC Using AnyDesk

    Once the connection has been accepted, you will control the mobile device from the remote computer. When you have completed your session remotely, you can end the connection by pressing the ‘X’ button on the remote computer’s version of AnyDesk. You will also need to close the session from the mobile device by pressing the red button at the bottom of the phone screen. If you do not do this on the phone, the session will continue.

Control Your Mobile Phone from Any Computer With AnyDesk

Being able to control your phone from anywhere by using a PC with AnyDesk can be very useful. Now, forgetting your phone doesn’t have to put a damper on your day.

How to Use AnyDesk on your Phone in 5 Steps

Has a co-worker gotten stuck, and you’re already at home? Or perhaps you need files from a computer at work, but you’re on the bus? 

AnyDesk allows you to access and then control these devices from your Windows or Mac computer remotely, and now you can also use AnyDesk on your iPhone or Android device.

  1. Download and Install AnyDesk

    How to Use AnyDesk on Phone

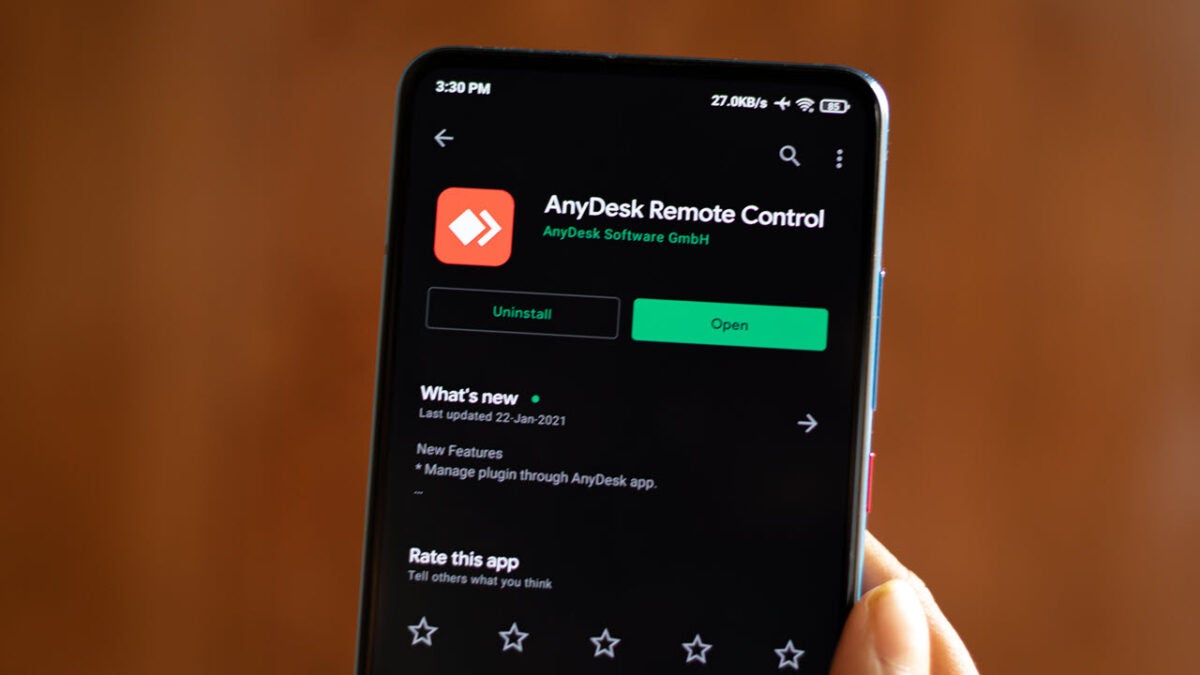
    First, you will need to download and install AnyDesk on your device. It is also important to note that you will also need to have the program installed on the computer you need access to.

  2. Open AnyDesk on Your Phone

    How to Use AnyDesk on Phone

    Open the application on your chosen device by tapping on the AnyDesk icon.

  3. Enter the Address or ID of the Device

    How to Use AnyDesk on Phone

    You need to enter the ID or address of the computer you want access to. You can see this ID/alias when you open the AnyDesk program on that computer, so make sure to get this information beforehand or have someone on that side give you these details when you need them.

  4. Tap the Red Arrow

    How to Use AnyDesk on Phone

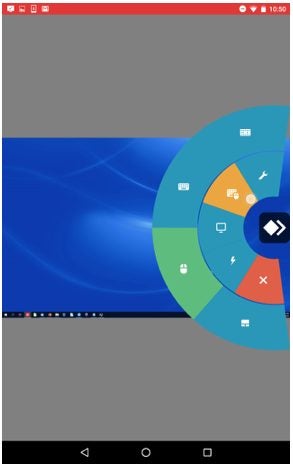
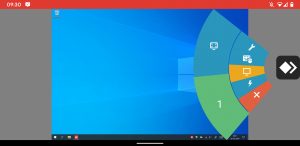
    Once you’ve entered the ID/alias, tap on the red arrow, and you will be connected to the other device. There will be a pie menu on the right side of the screen. These are the different settings for the program. From here, you can control the settings, choose to transmit audio, synchronize your clipboard, and more.

  5. Press the Red Button to End the Session

    How to Use AnyDesk on Phone

    You must tap the red button at the bottom of the screen to end the session. Otherwise, it will continue even though you may have returned to your home screen.

Use Anydesk Remotely With the App

Having AnyDesk available on your mobile device is great! Now, even if you aren’t close to a computer, you can still gain access and control of another device without having to find an internet cafe.