How to Update Lulubox in 4 Steps

Lulubox is a Plugin box for people playing mobile games on their Android phones. It should be updated whenever the developers release a new version to ensure it coordinates with updates of games that run on it.

Updating Lulubox is easy if you follow these steps.

  1. Check if Your Version is Outdated

    How to update Lulubox

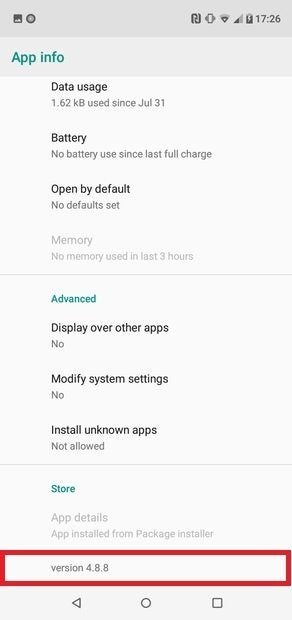
    Go to your App menu and find Lulubox. Click and hold on the icon and you’ll see App info. In it is a window. At the bottom, you’ll find the version number.

  2. See Which Version is on Offer

    How to update Lulubox

    Go to the Lulubox website and see which version is available to download. Or go to the Lulubox main window and Check for Updates in the Options menu. If a newer version than the one you have is available, it’s time to upgrade.

  3. How to Download the Latest Version

    How to update Lulubox

    On the Lulubox website, you’ll see a green Download button. Click on it, and the latest version will download onto your device. When it has finished downloading, you can access the file when the operating system informs you that the download is complete. You can also find it in your Downloads folder.

  4. Install the New Update on Your Device
    How to update Lulubox

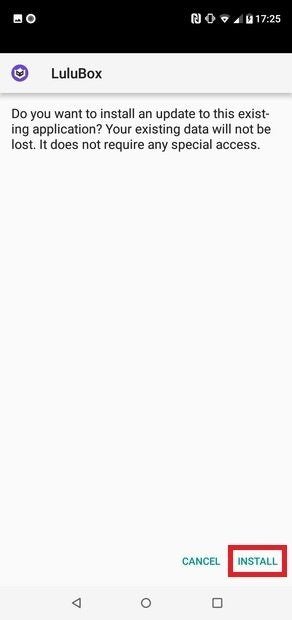
    You’ll be asked if you want to install the update. Click Install if you do. When the new version has finished installing, click on Open or go to the menu of your installed Apps and click on the shortcut icon.

Why You Should Use and Update Lulubox

Lulubox is a great place to play games.  It even has a chatroom, which makes it the perfect games hub. If you update it every time a new version is released, nothing will interfere with your fun. It’s also safer and more efficient to use the newest version of an App like Lulubox because it will have even more features than an older version. 

How to Unlock Skins in Lulubox in 2 Steps

Lulubox allows Android players to unlock skins to create characters and decorate weapons in popular games like Free Fire. Usually, players have to buy diamonds with cash to get the skins released every month, and they can be expensive.

Here is a step-by-step guide to how you can unlock all the skins you want without paying.

  1. Download and Install Lulubox

    How to Unlock Skins in Lulubox

    Go to a trustworthy website and download the Plugin App. Its size is about 15 MB. Once you have downloaded Lulubox, you have to go to the settings of your Android phone and allow access to Apps from an unknown source.

    After doing this, you can locate your Lulubox APK (Android Package Kit) and install it. This is the key to getting access to the games you want to play and unlocking the skins for free.

  2. Load the Game You Want to Play

    How to Unlock Skins in Lulubox

    From within Lulubox, type the name of the game you want to play, like Free Fire, in the search toolbar and download the mod. This connects you to your game automatically.

    Then you can unlock all the things you need to enjoy your game, including bundles, skins, and characters, by just selecting the item you require and starting to play. You can get character skins and weapons skins like the ones below.

Is There a Risk to Getting Skins for Free?

Some software developers and owners do not approve of the use of Lulubox for unlocking skins and threaten to ban the game accounts of players who do so.  But using Lulubox is very safe because only you can see your skins, so there is little risk of being banned.

How to Recover Microsoft Office After a System Restore in 2 Easy Steps

System Restore is a valuable feature and has helped many users out of a problematic situation when something will not uninstall, but it can also remove software loaded after the System restore snapshot was taken, such as Microsoft Office. Fortunately, System Restore will not affect any of your data.

If you find that your Office apps are not working correctly after the System Restore, or you know you have lost some software updates, you will need to reinstall Microsoft Office. This is not difficult and can be achieved quickly using a couple of steps.

  1. Go to your Microsoft Account

    How to Recover Microsoft Office After a System Restore

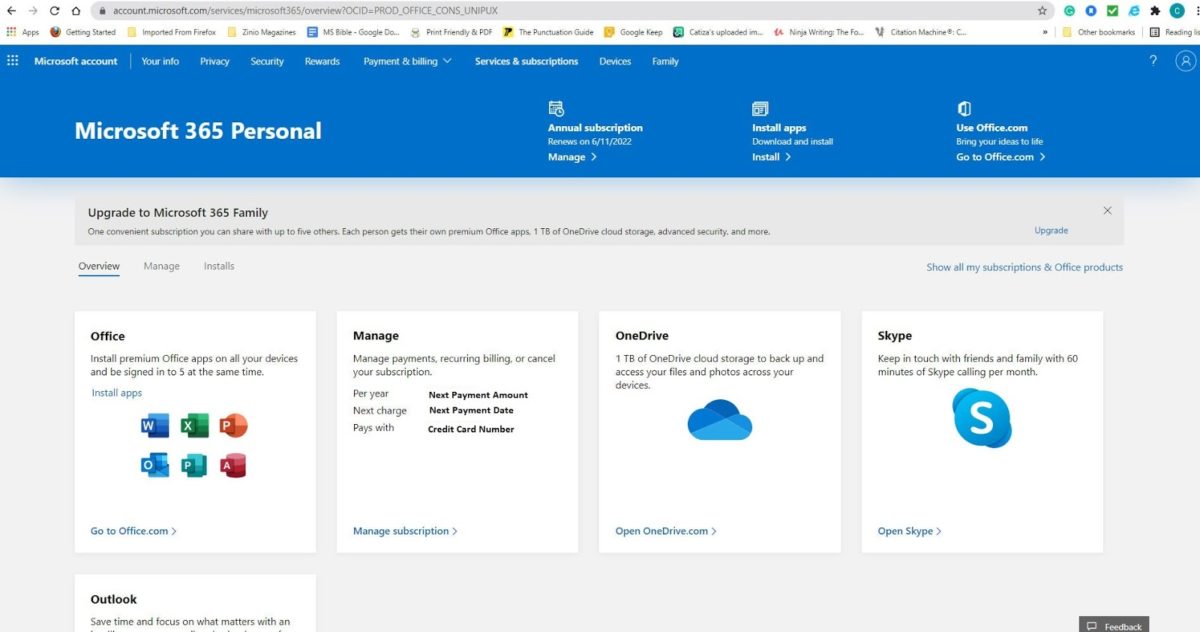
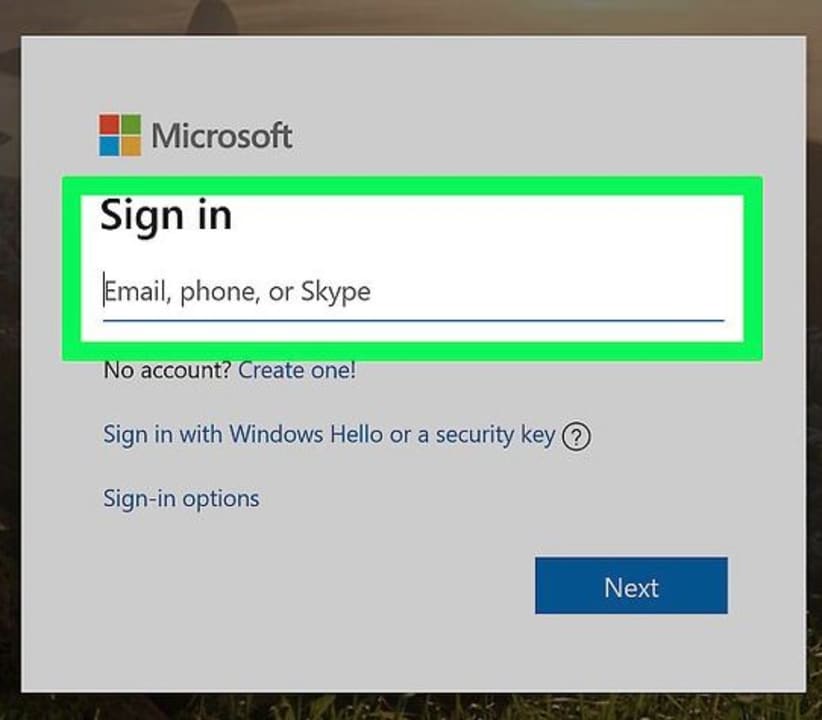
    Go to your Microsoft Account and sign in. When this screen comes up, click on Install Apps.

  2. Reinstall Your Apps

    How to Recover Microsoft Office After a System Restore

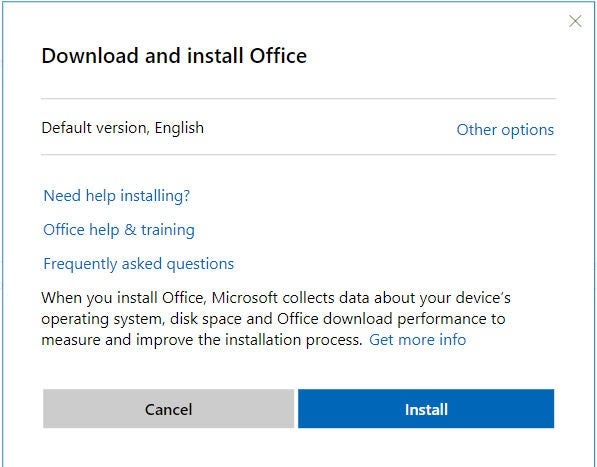
    Click on the Install button, and the software will be installed on your device, including all the updates that may have been rolled back when your System Restore was done.

Restoring your Office environment

System Restore is a useful tool, especially if you are unable to uninstall a problematic application or have some other error. Reinstalling all your legal software is not difficult, merely time-consuming.

A Restore point is automatically created when you do a Windows Update, install a new device driver, or a new application. If you are about to install software that you are unsure about, create a manual System Restore so you can easily roll it out if need be.

How to Renew Microsoft Office In 4 Steps

Do you want to keep your Microsoft Office programs up-to-date without having to worry about making new purchases and installations every time a new version is released? That is why Microsoft Office introduced Office 365, which is an annual subscription service. For as long as your subscription is active on your Windows or Mac computer, you will always have the latest version without paying more for it. 

This is useful when you use your office programs regularly. It is good to know how to renew your subscription to continue getting the benefits that come with an active subscription. Let’s look at the steps you need to take to renew your Microsoft Office.

  1. Choose Your Subscription

    How to Renew Microsoft Office

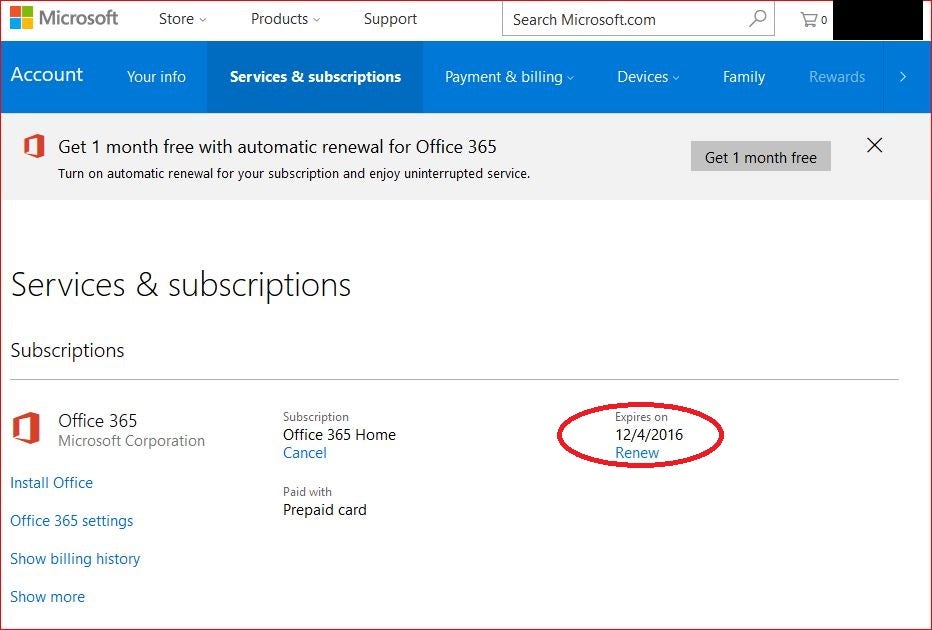
    Go to Office.com and head to the ‘Renew’ page. Next, you need to choose your subscription. The options are to renew and pay once-off for the following year. The second option is to renew and pay a monthly fee for the next year.

  2. Checkout Your Order

    How to Renew Microsoft Office

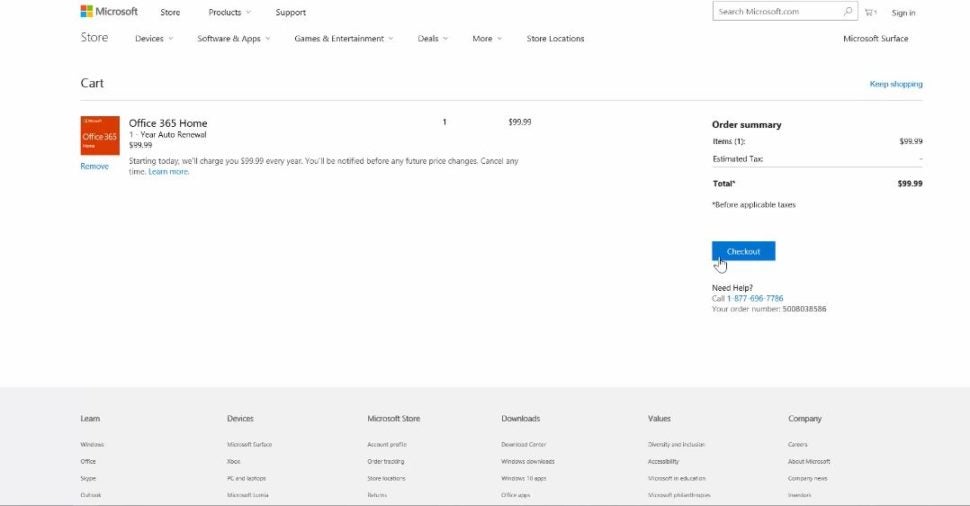
    Review and double-check your order, and once you are sure that everything is correct, you can proceed to checkout. Once you choose to proceed to checkout, you will be asked to sign in with your Microsoft Account.

  3. Renew Your Order

    How to Renew Microsoft Office

    On the final page, check all of your details, including the payment details. If you need to change your payment details, click on the ‘Change’ button to make amendments. If everything is correct, you can proceed by clicking on ‘Renew Subscription.’

  4. Manage Subscription

    How to Renew Microsoft Office

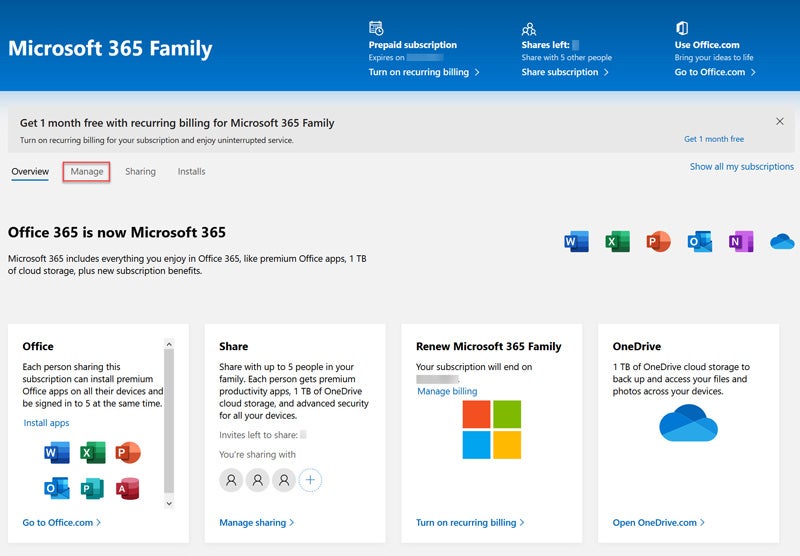
    Once you’ve renewed your subscription, the payment will be processed, and your account will be extended for the period chosen. Your account will be set up for recurring billing by default. If you do not wish for your account to automatically renew (and the payment to be taken), you can turn off recurring billing from the ‘Manage Subscription’ screen.

Renew Your Microsoft Office to Continue Working Undisturbed

By renewing your Microsoft Office subscription, you ensure that you have the latest version of Office, along with support and many other valuable features, without interruption.

How to Upgrade Microsoft Office In 4 Steps

Let’s suppose you download Microsoft Office on Windows and Mac and you would like to upgrade. You’ll unlock new features not available in the free version, but you’ll need to pay the subscription first.

In that case, there are a few ways you can go about upgrading your Microsoft Office to the newest version and enjoy all the benefits of using the latest versions of Word, Excel, Powerpoint, and other programs.

  1. Go to the Microsoft Account Page

    How to Upgrade Microsoft Office

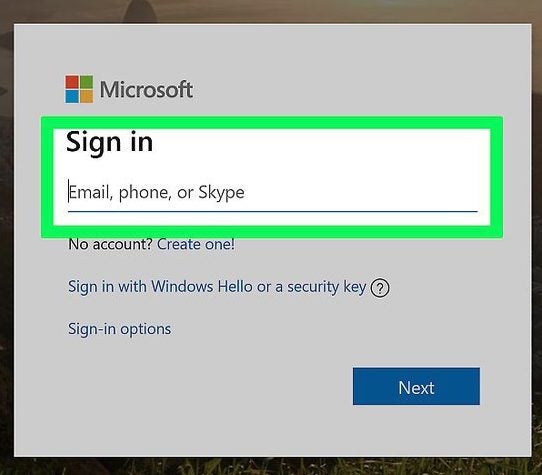
    First, you will need to navigate to the Microsoft Account page. You will need to use your Microsoft Account details to sign in.

    – Enter your email address, and click on next. You will need to use a Microsoft email address such as Outlook, Live, or Hotmail.

    – Enter your password, and click on next.

  2. Click on ‘Service and Subscriptions’

    How to Upgrade Microsoft Office

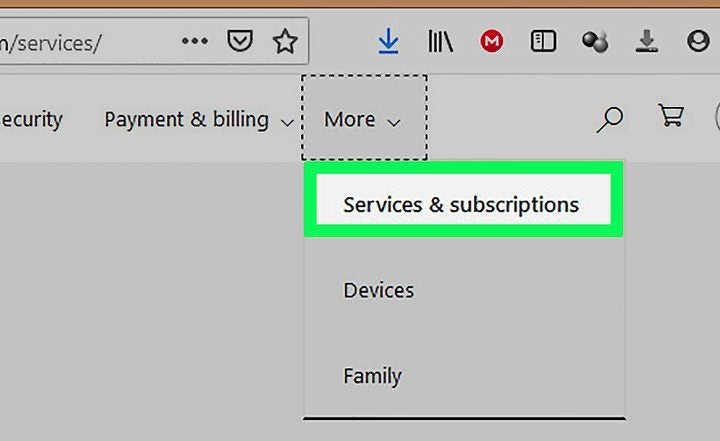
    Click on the ‘More’ tab to open a drop-down list with further options in the top ribbon menu. In the drop-down list, choose ‘Service and Subscriptions’. This should show you your current version of Office.

  3. Download Newest Office

    How to Upgrade Microsoft Office

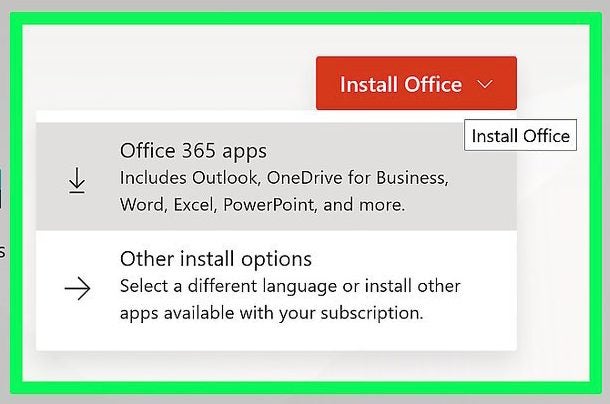
    If a newer version is available, you will see a message notifying you of the latest version. Next, you can click on ‘Install Office’ to download the newest version on your Mac or Windows computer.

  4. Install Newest Office

    How to Upgrade Microsoft Office

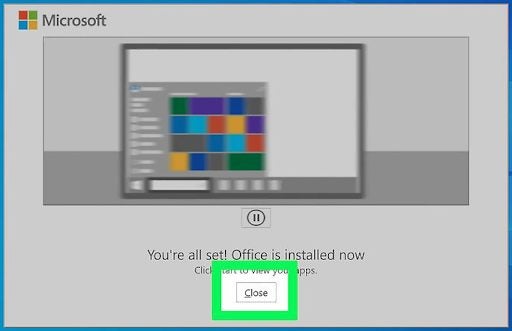
    Once the download has completed, you can run the installation file and follow the on-screen instructions from the installation wizard. This newest version will override the older one that was already on your computer. You will now have the latest Microsoft Office installed on your computer.

Upgrading as Easy as One, Two, Three

Microsoft Office has made the process of upgrading your program as easy as possible. With a few simple clicks, you can have the latest version of Office installed on your device. Why not try upgrading your Microsoft Office now?

Microsoft Office Tutorials for Beginners with 3 Top Tips

Microsoft Office might offer several packages, like Word, Excel, and PowerPoint, but there are some tips you can apply across the board. Many of them have similar functions, and it will be good for beginners to know how to use them.

We know these have saved us loads of time, so we’re happy to share some of our Microsoft Office tutorials with you.

  1. Create and save documents

    Microsoft Office Tutorials for Beginners

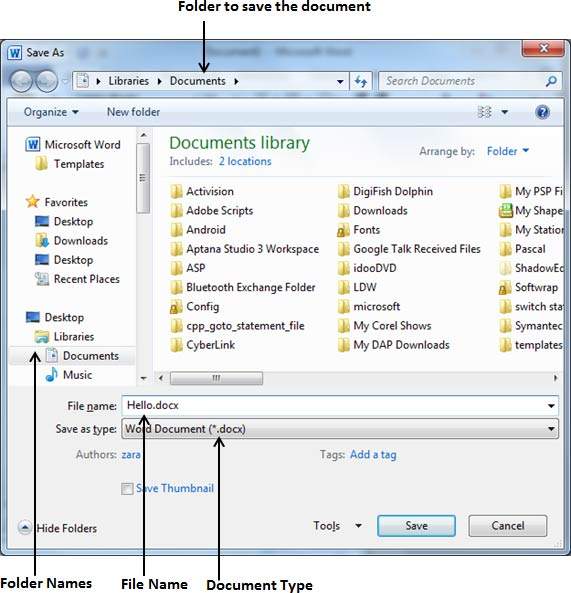
    No matter which Microsoft Office application you’re using, creating and saving documents has the same process across all of them. To create one, simply open the app, choose a template, and say “New”. Remember, you can click on File > Save As, or the Save icon, so that you don’t lose any of your precious information.

  2. Share and collaborate

    Microsoft Office Tutorials for Beginners

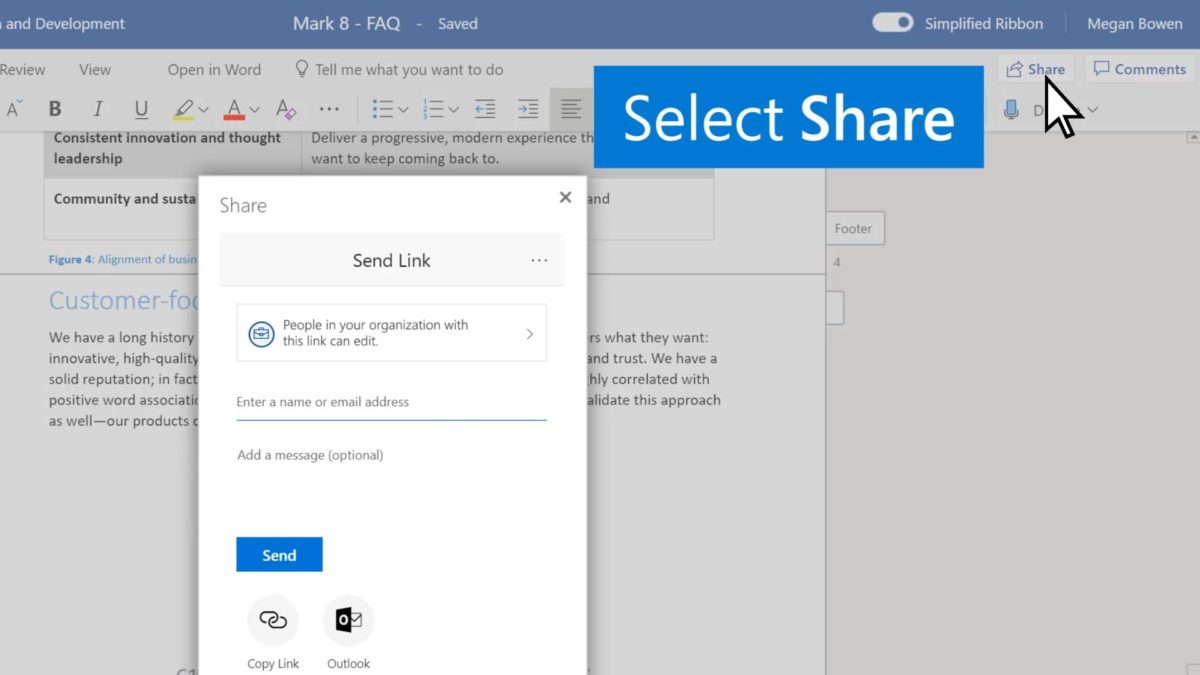
    You can share any of your documents with your team members, letting them work on them with you. All you have to do is click on Share, then Link Settings. You’ll need to adjust how many permissions they have, whether it’s editing, commenting, or just viewing. Don’t forget to share the link with them.

  3. Work remotely

    Microsoft Office Tutorials for Beginners

    Finally, you can access and work on your documents no matter where you are or which platform you use. You can sign in to your account from a mobile phone if you need to make any changes. All you need is your account details and the Microsoft Office app on your device to get going.

Become the elite

Now that you’ve learned the basics, don’t be afraid to try more advanced techniques. There’s so much you can do with Microsoft Office apps, and you shouldn’t feel limited by your lack of knowledge. Play around with settings and create something amazing.

How to Find Your Microsoft Office Product Key

Your Microsoft Office Product Key is a series of 25 letters and numbers that must be entered when software is activated on your devices. This Key certifies that the software is an original copy and has not been pirated from another source. If your PC or laptop came with Office pre-installed on it, then before following this entire procedure, search the case at the back or the sides to find the sticker that contains the Key.

In the Microsoft world, if you have Office 365, you will not have a Product Key as your ownership of the software is managed online through the Microsoft website. Losing the Product Key means that you cannot activate and use your Microsoft Office products, so you must find the Key. Fortunately, uncovering your Key is a straightforward procedure.

  1. Go to the Microsoft Website

    How to Find Your Microsoft Office Product Key

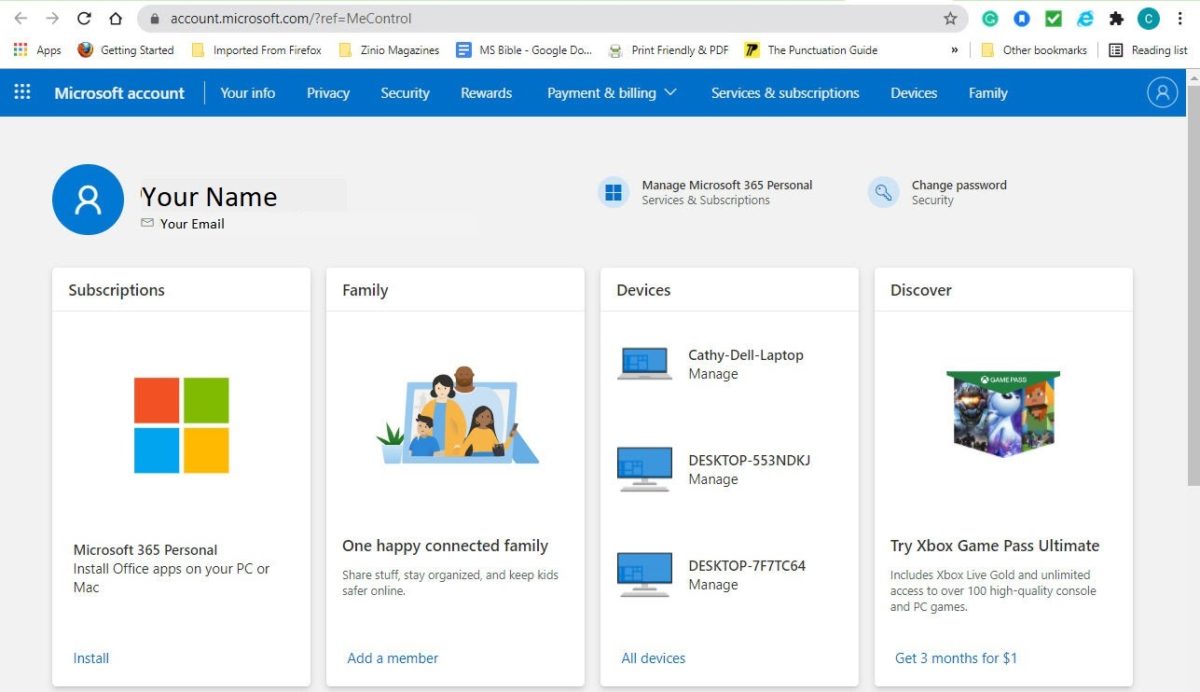
    Go to the Microsoft website and sign in to your account by clicking on the figure in the top right-hand corner of the screen.

  2. Go to Services and Subscriptions

    How to Find Your Microsoft Office Product Key

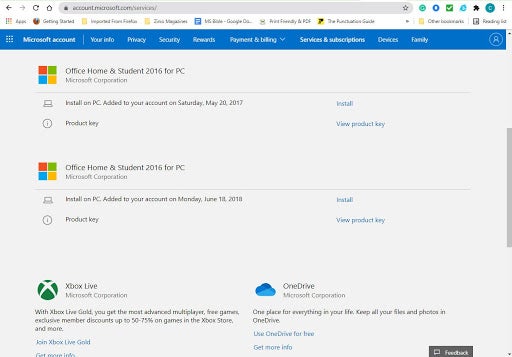
    Click on Services and Subscriptions in the blue menu at the top of the screen.

  3. Scroll to find the Key

    How to Find Your Microsoft Office Product Key

    Scroll down the screen until you find the Product Key that you need. Once you find the line you are looking for, click on View Product Key.

  4. Copy the Key to transfer to your new installation

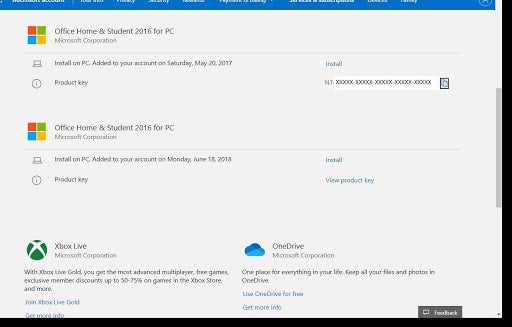
    How to Find Your Microsoft Office Product Key

    When you click on View Product Key, the 25 character key will be revealed. Clicking on the small icon to the right of the Product Key will copy the Key to the clipboard so you can quickly transfer it to your new installation.

Don’t lose your key

There are several software options that you can use that will find your Product Key by searching the registry of your machine. This will hold true for any old Microsoft Office installation. From Microsoft Office 2013, Microsoft changed how the product key was stored in the registry, and they only kept the last five digits.  

This means that any key finder program you use will not find the entire Key, and if it returns 25 characters, the first 20 digits are likely to be a generic code. 

The last five digits may give you enough data to search through your old emails to see if you can find the original Microsoft email containing the full product key.

If all of this fails, your only option is to do a full factory reset (providing you have the necessary software recovery partition) or purchase a new copy of Microsoft Office.

Transfer Your Microsoft Office License

Microsoft Office 365 and Office 2016 licenses are associated with the client’s email account and not the hardware. They can be moved easily. But transferring an Office 2010 or 2013 license is more complicated. 

You’ll need your 25-character Product Key and an installation disk or file that matches it. Not all Microsoft Office licenses can be transferred

  1. Can You Transfer Your License?

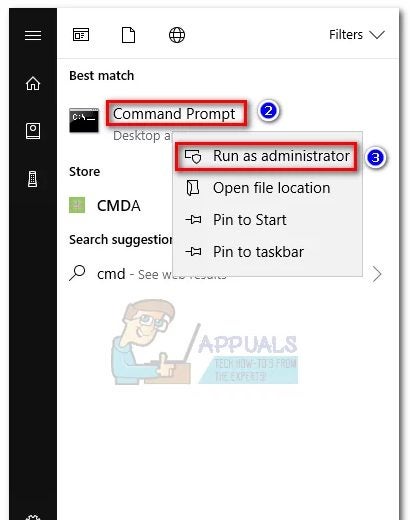
    Transfer Your Microsoft Office License

    In Office 2010 or 2013 Start menu, right-click Command Prompt and Run as Administrator. In the Office installation folder, type cd + *Office location path* and Enter. Type cscript ospp.vbs /dstatus in the elevated Command Prompt and Enter. Go to License Name and Description. If it has the text Retail or FPP, there’s still a chance to transfer it.

  2. How Many Installations Are Allowed?

    Transfer Your Microsoft Office License

    You might be allowed to install an Office 2010 license on another computer without transferring the license. From Office 2013, you’re only allowed one concurrent installation. You’ll be able to transfer a Retail license from one computer to another. You cannot move the other types of licenses.

  3. Transfer an Office 2010 or 2013 License

    Transfer Your Microsoft Office License

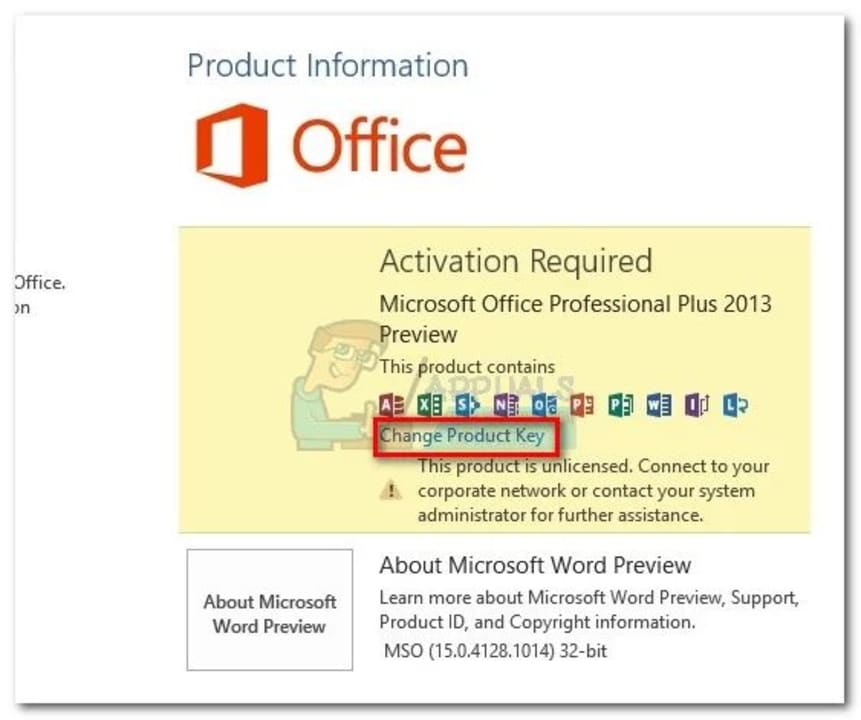
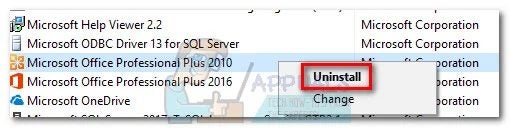
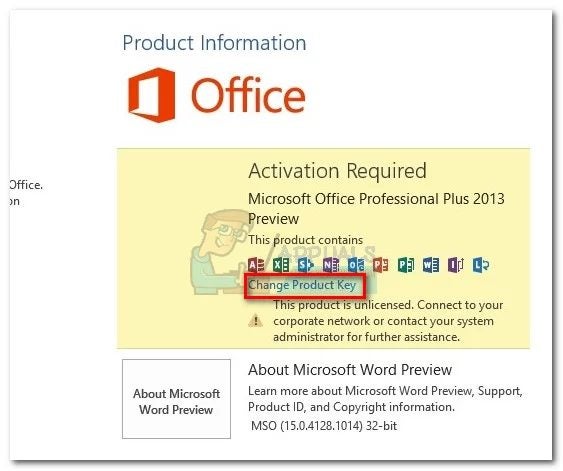
    Uninstall Office from your current computer using Programs and Features. Make sure your new computer doesn’t have a free trial copy of Office on it. If so, uninstall it. Install Office using a CD or installation file. Once it’s installed, open any program from the Office suite. Go to File > Account. Click Activate Product (Change Product Key) and type in your Product Key.

  4. Transfer an Office 365 / Office 2016 license

    Transfer Your Microsoft Office License

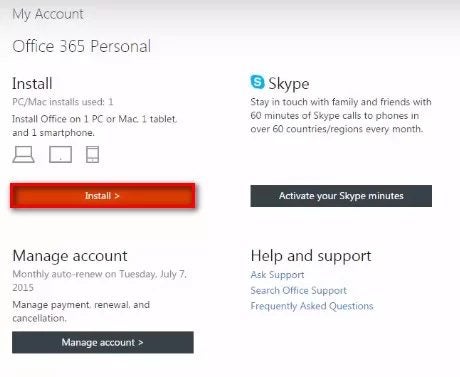
    Deactivate and uninstall the license on your old computer. On the new computer, click the install button under My account. You’ll see a setup.exe file download. When it’s done, follow the prompts to install Office. When it’s installed, you’ll be asked to sign in with your Microsoft account.

Some Licenses Can be Moved Easily

You can now move some Microsoft Office licenses from one computer to another. You don’t need to stress anymore by changing it from your desktop to your laptop, or vice versa.

How to Update Microsoft Office in 4 Quick Clicks

Updating your Microsoft Office is very important, and while you may rather click the ‘Remind Me Later’ box, it is not a wise thing to do. Software updates are critical for many reasons, but the main ones are to repair software loopholes that unscrupulous people may use to hack your machine, fix software bugs, or provide new features that you may find helpful.

The best way to ensure that your Microsoft Office is kept up to date is to have it updated every time your Windows updates are carried out. This will make it a painless exercise. To set this up, follow these few simple steps that will ensure your software is always kept current.

  1. Go to your Settings

    How to Update Microsoft Office

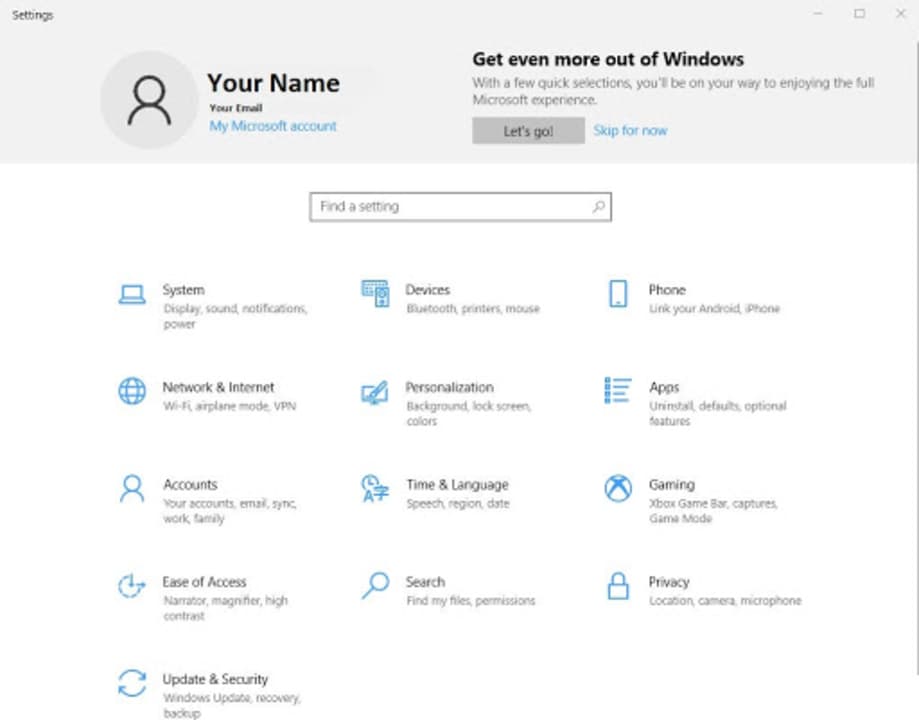
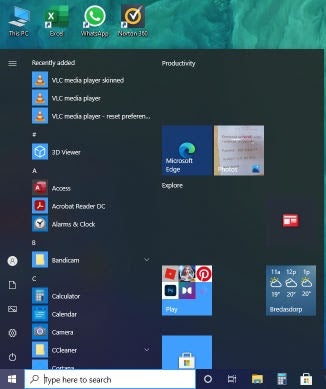
    Click on the Windows Icon in the bottom left-hand corner of your screen, then click on the Settings.

  2. Select Update & Security

    How to Update Microsoft Office

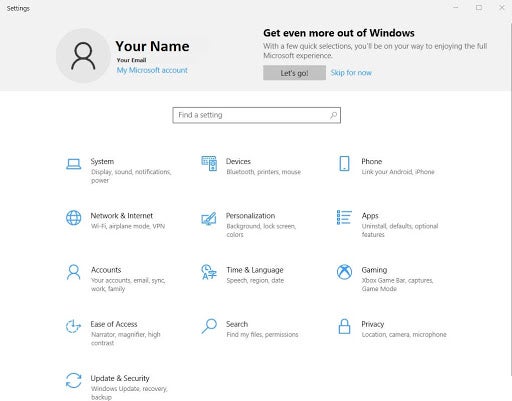
    Once your Settings Menu comes up, look for the Update & Security icon and click.

  3. Select Advanced Options

    How to Update Microsoft Office

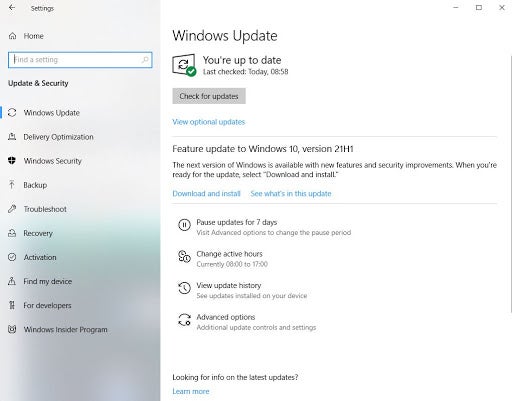
    The first screen that pops up is for your Windows Updates. To instruct the software to update your other Microsoft products, you must go to Advanced Options.

  4. Turn On to Receive Updates

    How to Update Microsoft Office

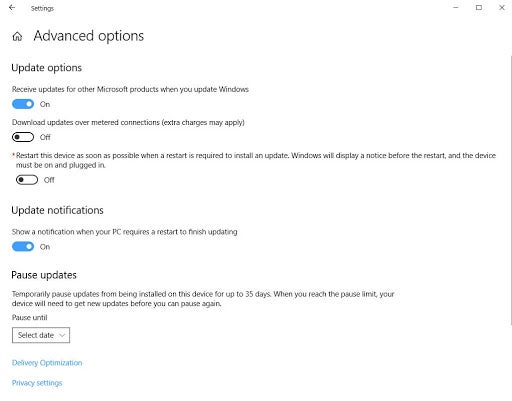
    If the slider for ‘Receive Updates for other Microsoft products when you update Windows’ is turned off, click on the slider to turn it on. 

Always remain updated

These simple steps will ensure that your Microsoft products are always kept up to date. As we have said, it is not good practice to allow your software to fall behind as it can expose your computing environment to unnecessary risks.  

By using the options given by Microsoft, you need never think about the updates for your Microsoft products again. You will always be using the latest software.

How to Install Microsoft Office on Mac

Microsoft Office is one of the giants when it comes to functional word processing, spreadsheet, and presentation programs, with their bundles remaining popular. Their bundles usually include Word, Excel, and Powerpoint. Other programs are included in more specialized bundles. 

On Mac, you can use iWork, but it has far fewer features than Office. So if you need more functionality, the Office may be a good solution for you. In this article, we will be looking at how to install Microsoft Office on your Mac computer.

  1. Download Microsoft Office

    How to Install Microsoft Office on Mac

    The first step is to download Microsoft Office for your Mac. You can download it from any reputable site or even the Microsoft website. Make sure to use reputable sites when downloading anything from the internet to ensure that you and your computer remain safe and secure.

  2. Complete the Steps from the Install Wizard

    How to Install Microsoft Office on Mac

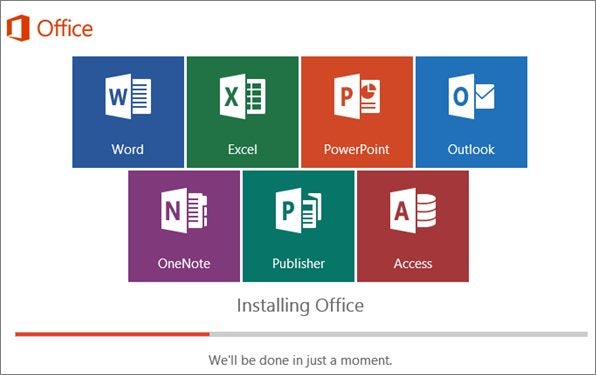
    Once the download has been completed, run the install file by double-clicking on it. This will activate the install wizard, which will guide you through the installation. Follow all the on-screen instructions from the Install Wizard to install your Microsoft Office to your Mac. Once the installation has finished, you will see a message notifying you that the installation is complete.

  3. Activate Microsoft Office

    How to Install Microsoft Office on Mac

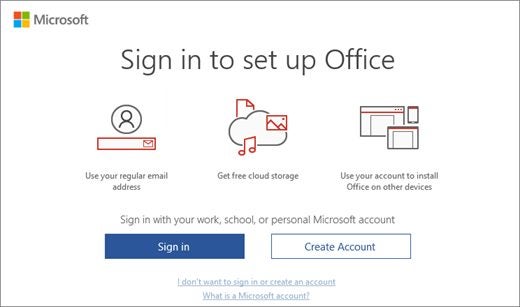
    Now you can run Office by double-clicking on any of the programs you want to use. The first time that you run Microsoft Office, you will have to activate it. A screen will come up to guide you through the process of activating your Office, and you can just follow the instructions and click on ‘Finish’ once done.

Have Fun With Office on Mac

It is a simple process to install Microsoft Office on your Mac. With just a few simple clicks, you can have Office up and running on your computer, ready to be used. Why not try installing Microsoft Office on your Mac now?