There are plenty of ways you can take a screenshot on Mac, but do you know where to find them? Read our detailed guide for more information!
Need to take a screenshot on your Mac? If you’re a Windows user you’ll know that Microsoft’s OS has a dedicated print-screen key that will capture any image in seconds. However, you won’t find this convenient button on any Mac keyboard. We know that this might be confusing at first, because how are you supposed to take screenshots on your fancy Macbook without a screen capture key?
Have no fear — the process of how to take a screenshot on Mac is very simple and straightforward. And you have more than one way to do it.
Take a Screenshot of Your Entire Mac Screen
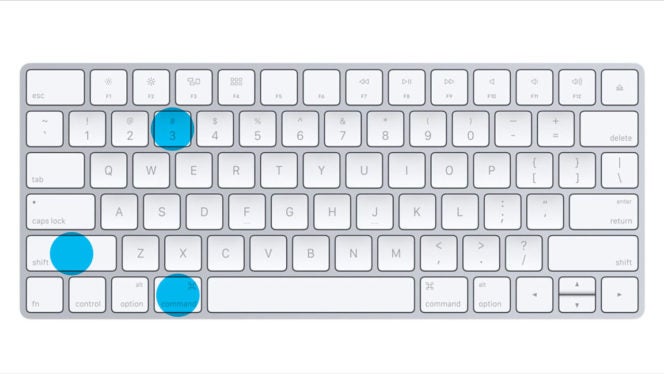
To take a screenshot of your entire visible screen, press the following buttons together: Command + Shift + 3. A file will be saved to your Desktop with the file name in the format, Screen Shot [DATE + TIME].
You can double-click on the screenshot icon on your Desktop to open it immediately with Preview. If you need to open the screenshot with a different app (like Photoshop), just right-click on it and choose “Open With…”
Note: if you’re a power user and have multiple screens on your desktop, this feature will create separate files for each of the running screens. This might not be ideal if you only need a screenshot of a specific page. Don’t worry, we’ll show you how to take a screenshot of only one page further in this guide.
Take a Screenshot of A Selection of Your Mac Screen
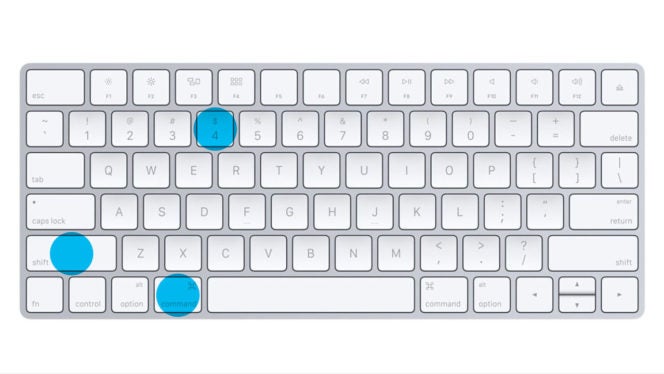
If you don’t need or don’t want your full screen captured, you can choose to select only a portion of your screen by pressing the following buttons together: Command + Shift + 4.
You’ll see a crosshair cursor appear on your screen. Choose one corner of the area you want to capture and then click and hold. Drag the cursor to the opposite corner of the region you want to capture and release.
The resulting area will be saved as a file on your desktop. Just as before, the file will be saved in the format, Screen Shot [DATE + TIME] and you can open it in Preview by double-clicking on the icon.
Take a Screenshot of One Window/App on Your Mac
Do you want to capture a screenshot of the contents of just a single window or app on your Mac? Don’t want to mess around with trying to get the Selection just right? Or sit with a screenshot of every single page you have open? Don’t worry, there’s a great shortcut to do this.
Just as before, press Command + Shift + 4 to start a selection. But then press your spacebar. Your cursor will change from a crosshair to a camera.
Place the camera over the window or app you want to capture. The active window will become shaded with blue.Then click the mouse and your active window will be saved to your Desktop as a screenshot.
Just as before, you can open the image with Preview by double-clicking on it.
Save a Screenshot to the Clipboard Instead of a File
Don’t want to clutter up your Desktop with screenshot files? Mac students can take shots by copying them to the clipboard so that you can paste them into another application immediately, there’s a great shortcut to help you achieve this.
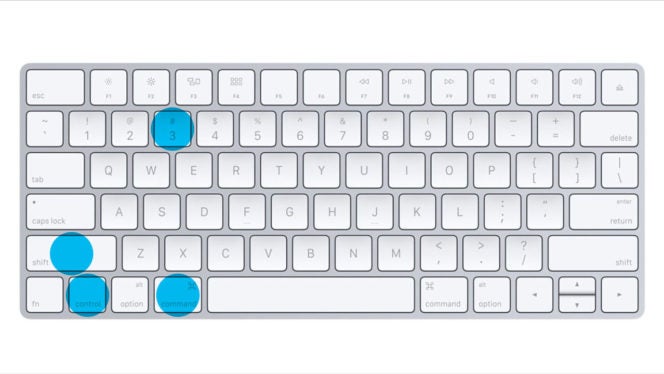
Simply use the steps above for either taking a screenshot of the entire screen or a selection of the screen. But this time, include the Control Key in the series of keys you press, like this:
Control + Command + Shift + 3
Control + Command + Shift + 4
When you add the Control key, the image is copied to your Clipboard instead of being saved to a file. Remember, you can only store one screenshot at a time in your clipboard. If you need to use multiple screenshots it’s best to let them go to your desktop while you’re working with them and move them once you’re done.
However, if you’re feeling adventurous, remember that you can install a Mac Clipboard Utility to extend your clipboard and store multiple items at once. This works for screenshots, too!
Screen recording on a Mac
Want to record and screen-capture anything you’re doing with your Mac? The process is very simple:
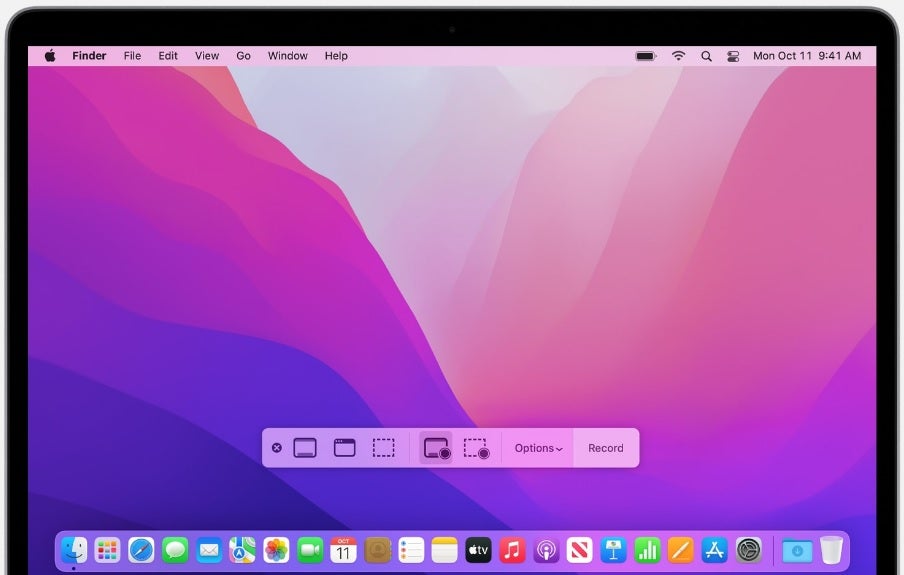
Press the “Command”, “Shift” and “5” keys at the same time to bring the screen-capture window.
Select the “Record the entire screen” or “Record a portion of the screen”.options.
Once you’re ready to screen-capture, click on the button “Record”
Stop recording by pressing “Stop recording” and access your clip for your Mac desktop.
Take a Screenshot on a Mac with Grab
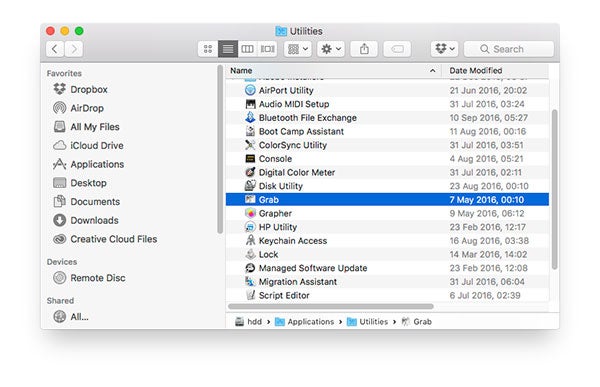
Perhaps keyboard shortcuts aren’t your thing? Do you prefer taking screenshots with the help of an App? Don’t worry — most Mac computers come with a dedicated screenshot app that everyone can use. It’s called Grab and you’ll find it safely tucked away in your Applications/Utilities folder.
Grab supports four different capture modes:
Selection
Window
Screen
Timed Screen
The first three modes work exactly the same as the keyboard shortcut methods outlined above. However, when you take the screenshot, it appears inside the Grab application, where you can save it anywhere you like. This method beats cluttering up your desktop with lots of “Screen Shot” files.
The fourth mode, Timed Screen, is special. It works just like the time delay function on your camera. It will take a screenshot of your entire screen 10 seconds after you start it. It’s ideal for capturing a screenshot that requires you to perform one or more actions beforehand. It might take a little practice to get the timing right, but in special situations, it can save you a lot of hassle.
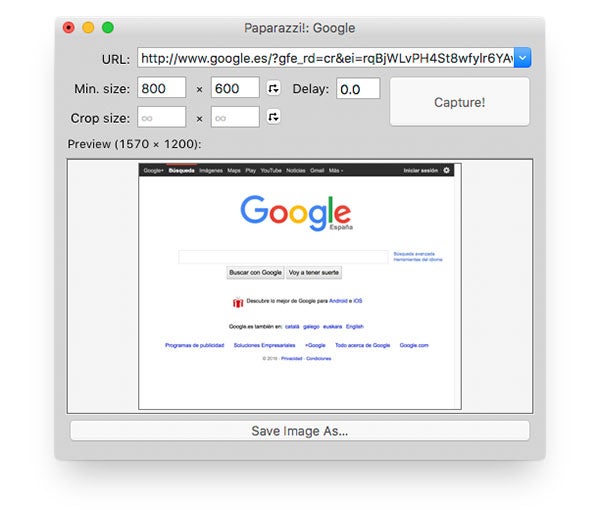
Take a screenshot on a Mac with Paparazzi
Paparazzi is a specialized tool for capturing screenshots from Web pages, and not direct shots from your screen. Simply provide the URL you want to capture and Paparazzi does the rest. It’s ideal for capturing a full web page when it won’t fit completely on your screen in one shot.
You can specify a minimum image size for the capture and even specify a time delay if you need one. This is perfect for Web pages that change their appearance after they initially load.
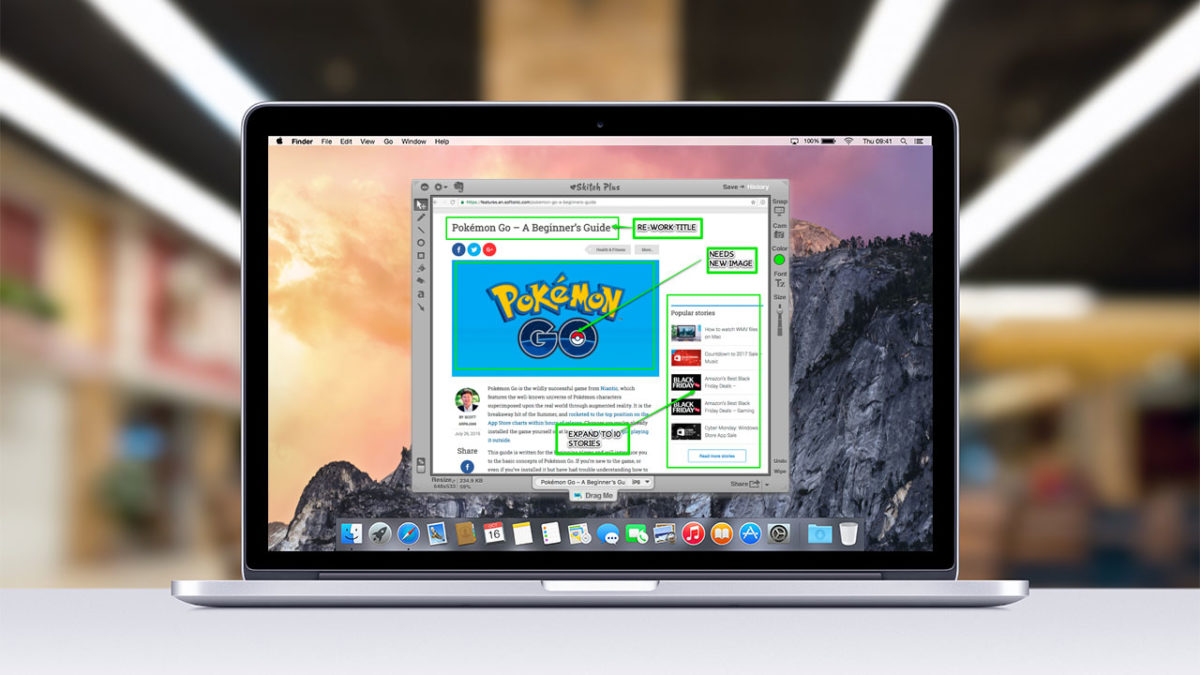
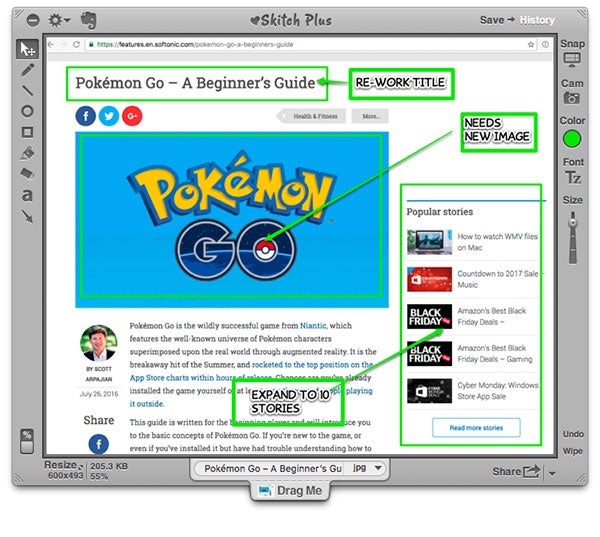
Take a screenshot on a Mac with Skitch
This is a bold claim, but Skitch is the best screenshot app ever made for the Mac. It was incredibly easy to use, allowed fast annotation of screenshots with intuitive controls, and preserved a complete history of everything you ever took a screenshot of without cluttering up your desktop or folder system.
Skitch was originally developed by Plasq, but later sold to Evernote, who proceeded to make a lot of changes to the app that proved deeply unpopular with hardcore users. And by that I mean me. And this is coming from someone who loves the Evernote app.
If you’re feeling adventurous, you can still find copies of older versions of Skitch floating around. Although version 1.0.12 of Skitch is officially unsupported, it still works for most users. There’s no guarantee it will work on all machines or in future upgrades of the OS. If you’re willing to work with unsupported software, I strongly recommend Skitch for all your screenshot needs.
Take a screenshot on a Mac with Napkin
Napkin is an advanced screenshot tool that excels at annotations. If you find yourself sharing a lot of screenshots and wanting to add annotations like text, arrows, or highlights, take a look at this tool.
It’s perfect for sending visual feedback to friends and colleagues and truly demonstrates that a picture is worth a thousand words.
Unfortunately, there’s no trial version. Napkin is only available for purchase via the Mac App Store. But you can take a peek at its features on the developer’s website.
There you have it: everything you need to put together screenshots quickly and easily on your Mac. Have some screenshot tips of your own to share? Don’t be shy–help out your fellow Mac users by posting in the comments section below.
One of the best ways to speed up common computing task is to learn and utilize simple keyboard shortcuts. So we’ve collected a lengthy list of the most useful Mac Keyboard Shortcuts you’ll need. Note for Windows users: we haven’t left you out! You can find a list of 45 Windows 10 Shortcuts here.
A quick keyboard command can save you precious seconds of time when performing certain tasks, like formatting text or moving files. And those seconds add up quickly. Brainscape estimates that the average worker could save 8 full working days per year by employing keyboard shortcuts.
Mac users are a very creative a smart group, but many of us don’t know the full range of common Mac commands that can be performed easily and with great speed using just a handful of simple keyboard shortcuts.
Learning just a handful of these key press combinations can make a huge time and productivity improvement.
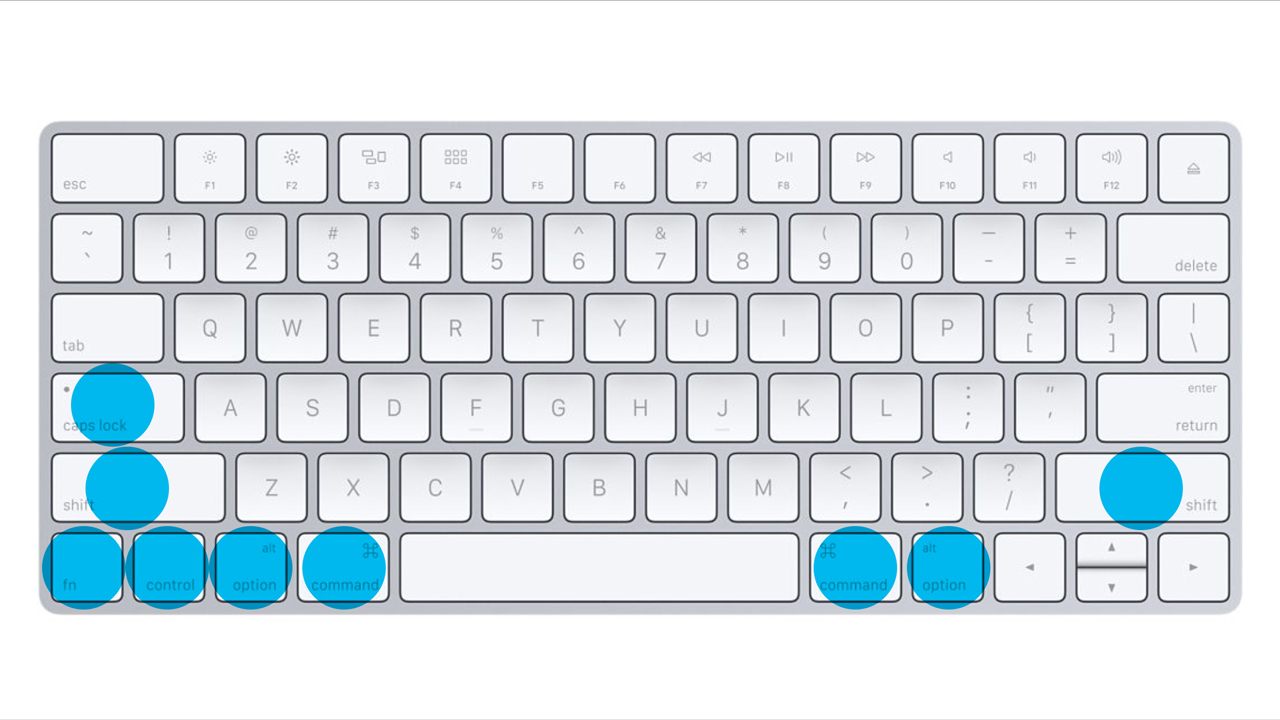
Before you jump into memorizing and practicing all the different Mac keyboard shortcuts available, it’s smart to familiarize yourself with the location of the most common keys used for shortcuts. Let’s take a quick look at the location of the following:
Command
Shift
Option
Control
Caps Lock
Fn
The most common keyboard shortcut modifiers for the Mac.
Take a moment to locate these keys on your keyboard, all of which tend to be grouped in the bottom corners. They will appear very frequently in the list of keyboard shortcuts below.
Ready to go? Dive right in by first looking at some of the most common keyboard shortcuts you’ll use on your Mac.
The Most Common Mac Keyboard Shortcuts
Think of these as the basics. If you, or someone you love, copies and pastes text using the mouse cursor and menu, it might be time for an intervention.
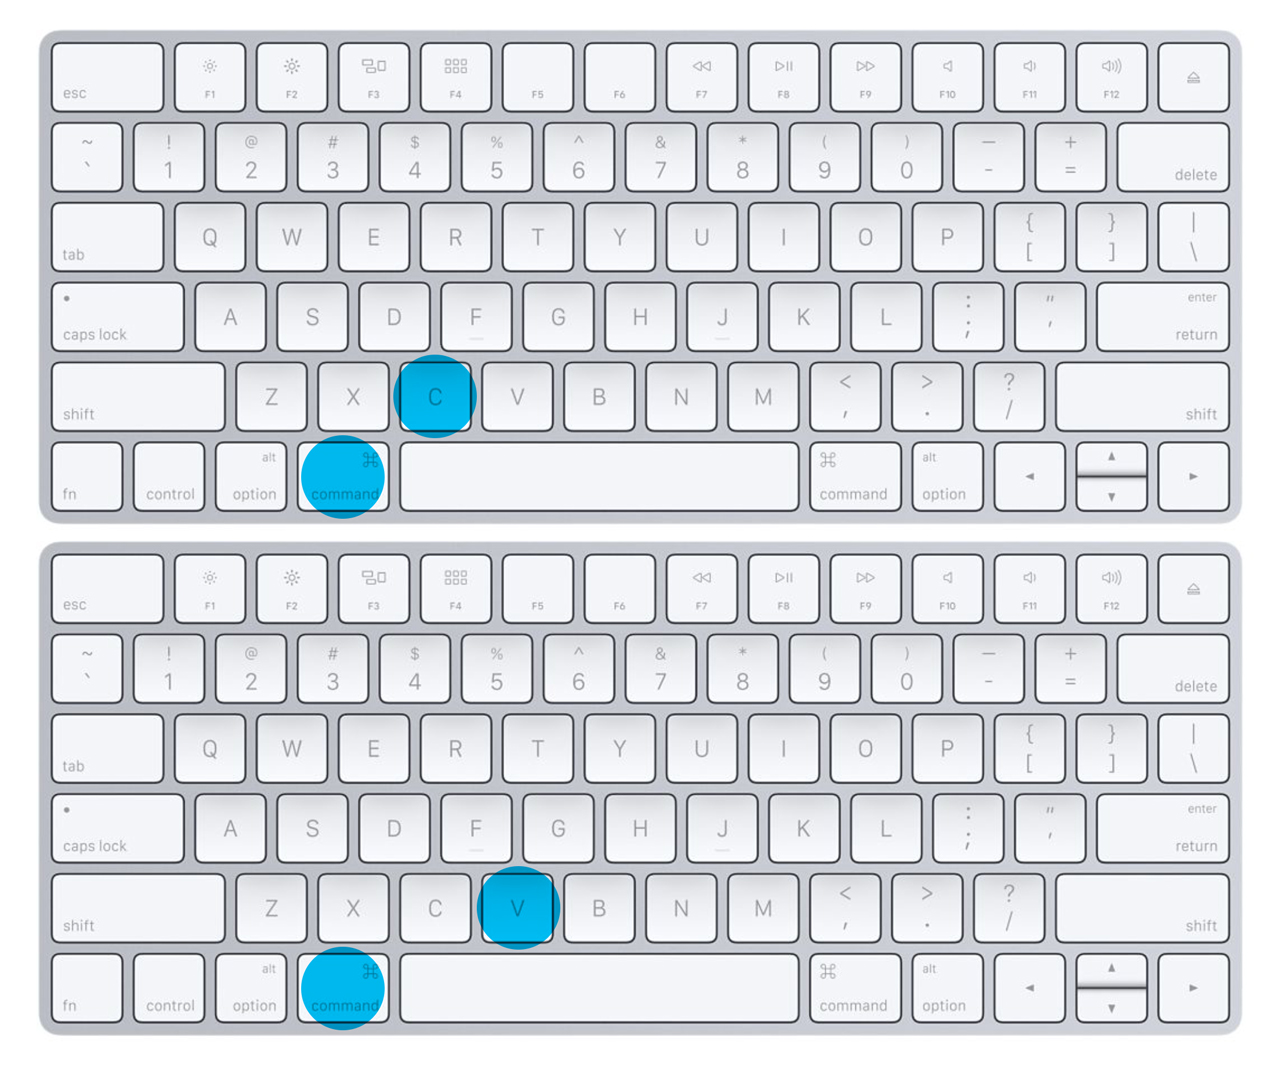
Cut, Copy and Paste
Command + X Cut the selected item and copy it to the Clipboard
Command + C Copy the selected item to the Clipboard. This also works for files in the Finder.
Command + V Paste the contents of the Clipboard into the current document or app. This also works for files in the Finder.
If you learn just two Mac keyboard shortcuts in your lifetime, make them Command + C and Command + V.
Bonus: Copying the Style Only
Adding the Option key to some of the above lets you play a cool trick with copy and paste. Using these shortcuts, you can copy just the formatting and style of a selection and then apply it to a different selection. All with just the keyboard!
Option + Command + C
Copy Style: Copy the formatting settings of the selected item to the Clipboard.
Option + Command + V Paste Style: Apply the copied style to the selected item.
Option + Shift + Command + V Paste and Match Style: Apply the style of the surrounding content to the item pasted within that content.
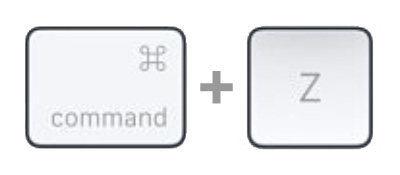
The Almighty Undo
Seriously, this might be the most useful and time-saving shortcut of all-time. Don’t forget about adding the Shift key for a Redo!
Command + Z Undo the previous command. You can then press Command + Shift + Z to Redo, reversing the undo command. In some apps, you can undo and redo multiple commands.
Command + Z is your friend. Sometimes it can be your very best friend.
Selecting, Finding, and More Basic Keyboard Shortcuts
The following list of Mac keyboard shortcuts rounds out the list of the basics.
Common + A Select All items.
Command + F Find items in a document or open a Find window.
Command + G Find Again: Find the next occurrence of the item previously found. To find the previous occurrence, press Command + Shift + G.
Command + H Hide the windows of the front app. To view the front app but hide all other apps, press Command + Option + H.
Command + M Minimize the front window to the Dock. To minimize all windows of the front app, press Command + Option + M.
Command + N New: Open a new document or window.
Command + O Open the selected item, or open a dialog to select a file to open.
Command + P Print the current document.
Command + S Save the current document.
Command + W Close the front window. To close all windows of the app, press Command + Option + W.
Command + Q Quit the app.
Command + Option + Esc Force Quit: Choose an app to force quit. Or press Command + Shift + Option + Esc and hold for 3 seconds to force just the front app to quit.
Command + Space Bar Spotlight: Show or hide the Spotlight search field. To perform a Spotlight search from a Finder window, press Command + Option + Space Bar. If you use multiple input sources to type in different languages, these shortcuts change input sources instead of showing Spotlight.
Space Bar Quick Look: Use Quick Look to preview the selected item.
Command + Tab Switch apps: Switch to the next most recently used app among your open apps.
Shift + Command + Tilde (~) Switch windows: Switch to the next most recently used window of the front app.
Shift + Command + 3 Screenshot: Take a screenshot of the entire screen.
Note: there are a lot more keyboard shortcuts you can use to get even more control over your screenshots on the Mac.
Command + Comma (,) Preferences: Open preferences for the front app.
Sleep, Logout, and Shutdown Shortcuts
Is the Boss walking around the corner? Need a quick way to shut down or put your Mac to sleep? Or are you experiencing the infamous “Beach Ball of death?”
Power Button Press to turn on your Mac or wake your Mac from sleep. Press and hold for 1.5 seconds while your Mac is awake to display a dialog asking if you want to sleep, restart, or shut down. If you don’t want to wait 1.5 seconds, press Ctrl + Power Button or Control + Media Eject. Press and hold for 5 seconds to force your Mac to turn off.
Control + Command + Power Button Force your Mac to restart.
Control + Shift + Power Button Put your displays to sleep.
Control + Command + Media Eject Quit all apps, then restart your Mac. If any open documents have unsaved changes, you’ll be asked whether you want to save them.
Control + Option + Command + Power Button Quit all apps, then shut down your Mac. If any open documents have unsaved changes, you’ll be asked whether you want to save them.
Shift + Command + Q Logout of your macOS user account. You’ll be asked to confirm.
Option + Shift + Command + Q Logout of your macOS user account immediately, without being asked to confirm.
Document Shortcuts
We all work with a lot of documents on the Mac. Here are some of the best keyboard shortcuts for handling everything from formatting to text selection and beyond. Once you start using these regularly, you’ll wonder why you ever even bothered with the mouse.
Formatting and Style Basics
Command + B Boldface the selected text, or turn boldfacing on or off.
Command + I Italicize the selected text, or turn italics on or off.
Command + U Underline the selected text, or turn underlining on or off.
Command + Left Curly Bracket ({) Left align.
Command + Right Curly Bracket (}) Right align.
Shift + Command + Vertical Bar Center align.
Shortcuts for Important Dialogs and Windows
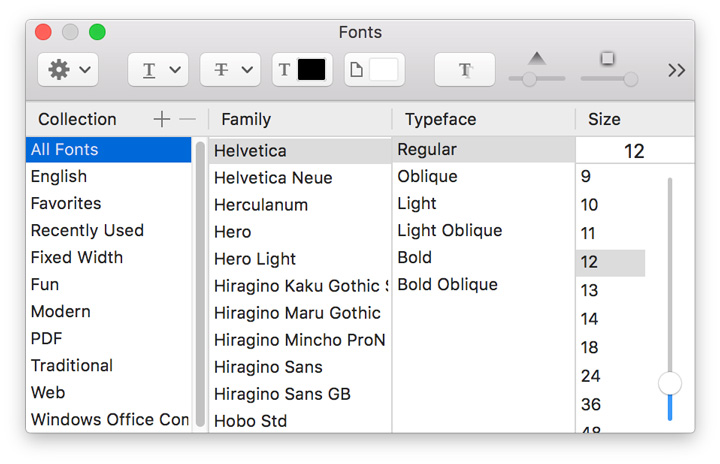
Command + T brings up the Fonts dialog window in most editing applications.
Command + T Show or hide the Fonts window.
Command + D Select the Desktop folder from within an Open dialog or Save dialog.
Control + Command + D Show or hide the definition of the selected word.
Shift + Command + Colon (:) Display the Spelling and Grammar window.
Command + Semicolon (;) Find misspelled words in the document.
Option + Command + F Go to the search field.
Option + Command + T Show or hide a toolbar in the app.
Option + Command + I Show or hide the inspector window.
Shift + Command + P Page setup: Display a window for selecting document settings.
Shift + Command + S Display the Save As dialog, or duplicate the current document.
Shift + Command + Question mark (?) Open the Help menu.
Faster Deletion with Shortcuts
Option + Delete Delete the word to the left of the insertion point.
Control + H Delete the character to the left of the insertion point. Or use Delete.
Control + D Delete the character to the right of the insertion point. Or use Fn + Delete.
Fn + Delete Forward delete on keyboards that don’t have a Forward Delete key. Or use Control + D.
Control + K Delete the text between the insertion point and the end of the line or paragraph.
Command + Delete Select Delete or Don’t Save in a dialog that contains a Delete or Don’t Save button.
Moving Around Your Documents with Speed
Fn + Up Arrow Page Up: Scroll up one page.
Fn + Down Arrow Page Down: Scroll down one page.
Fn + Left Arrow Home: Scroll to the beginning of a document.
Fn + Right Arrow End: Scroll to the end of a document.
Command + Up Arrow Move the insertion point to the beginning of the document.
Command + Down Arrow Move the insertion point to the end of the document.
Command + Left Arrow Move the insertion point to the beginning of the current line.
Command + Right Arrow Move the insertion point to the end of the current line.
Option + Left Arrow Move the insertion point to the beginning of the previous word.
Option + Right Arrow Move the insertion point to the end of the next word.
Control + A Move to the beginning of the line or paragraph.
Control + E Move to the end of a line or paragraph.
Control + F Move one character forward.
Control + B Move one character backward.
Control + L Center the cursor or selection in the visible area.
Control + P Move up one line.
Control + N Move down one line.
Control + O Insert a new line after the insertion point.
Control + T Swap the character behind the insertion point with the character in front of the insertion point.
Keyboard Shortcuts for Selecting Text
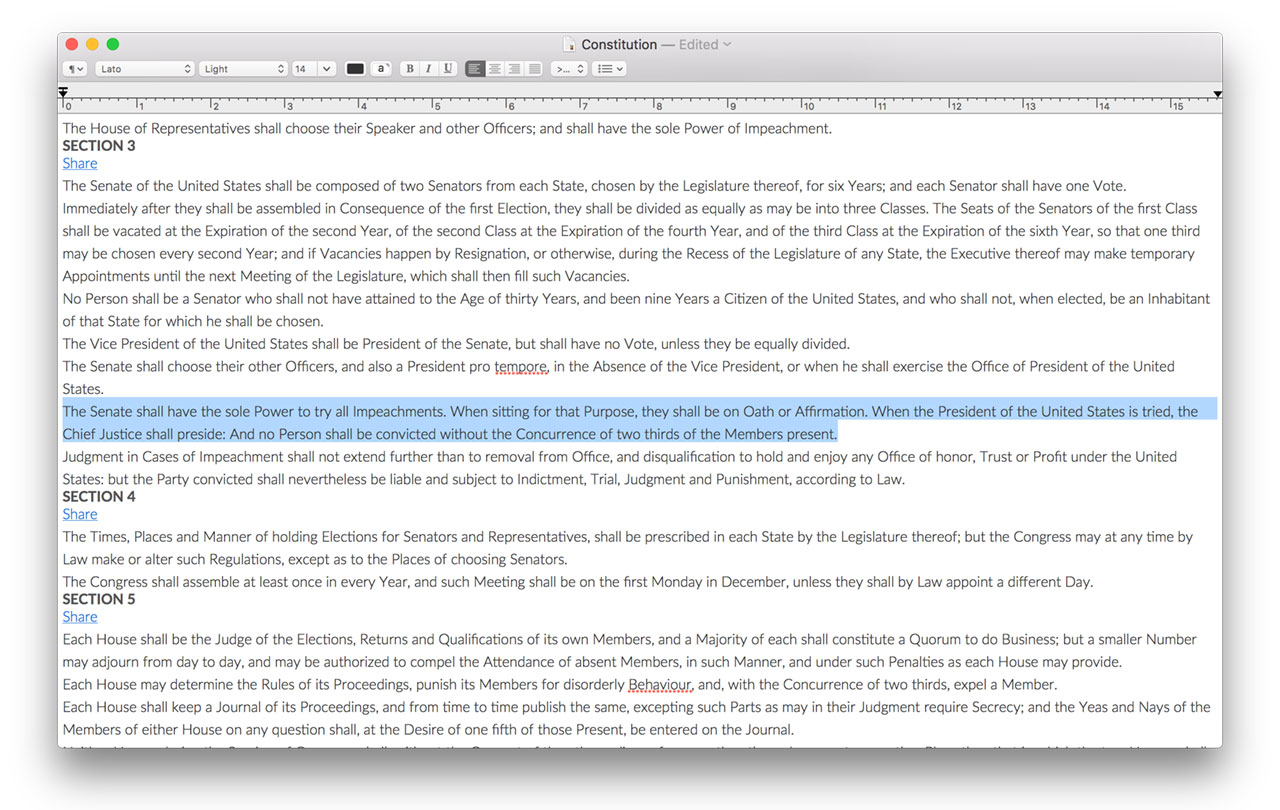
Use Option + Shift + Up Arrow to select everything from the current point to the beginning of the paragraph.
Shift + Up Arrow Extend text selection to the nearest character at the same horizontal location on the line above.
Shift + Down Arrow Extend text selection to the nearest character at the same horizontal location on the line below.
Shift + Left Arrow Extend text selection one character to the left.
Shift + Right Arrow Extend text selection one character to the right.
Shift + Command + Up Arrow Select the text between the insertion point and the beginning of the document.
Shift + Command + Down Arrow Select the text between the insertion point and the end of the document.
Shift + Command + Left Arrow Select the text between the insertion point and the beginning of the current line.
Shift + Command + Right Arrow Select the text between the insertion point and the end of the current line.
Option + Shift + Up Arrow Extend text selection to the beginning of the current paragraph, then to the beginning of the following paragraph if pressed again.
Option + Shift + Down Arrow Extend text selection to the end of the current paragraph, then to the end of the following paragraph if pressed again.
Option + Shift + Left Arrow Extend text selection to the beginning of the current word, then to the beginning of the following word if pressed again.
Option + Shift + Right Arrow Extend text selection to the end of the current word, then to the end of the following word if pressed again.
Changing the Size of an Item
Shift + Command + Minus sign Decrease the size of the selected item.
Shift + Command + Plus sign Increase the size of the selected item. Command + Equal sign(=) performs the same function.
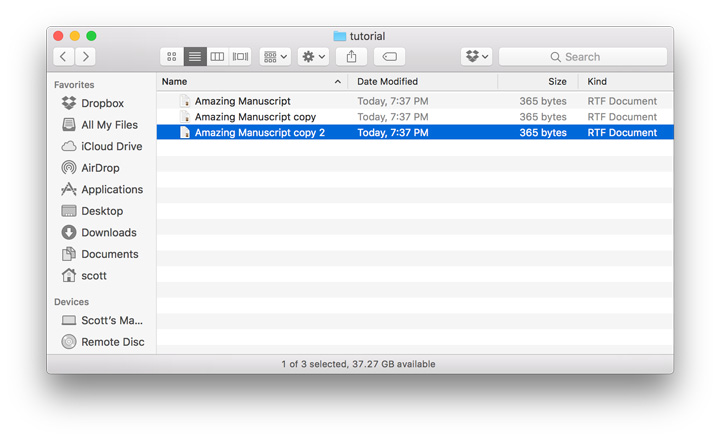
Command + D lets you quickly duplicate the selected file(s) in Finder.
Command + D Duplicate the selected files.
Command + E Eject the selected disk or volume.
Command + F Start a Spotlight search in the Finder window.
Command + I Show the Get Info window for a selected file.
Working with Folders
Shift + Command + D Open the desktop folder.
Shift + Command + G Open a Go to Folder window.
Option + Command + L Open the Downloads folder.
Shift + Command + O Open the Documents folder.
Shift + Command + U Open the Utilities folder.
Shift + Command + N Create a new folder.
Option + Command + N Create a new Smart Folder.
Getting Around in Finder
Shift + Command + C Open the Computer window.
Shift + Command + F Open the All My Files window.
Shift + Command + H Open the Home folder of the current macOS user account.
Shift + Command + I Open iCloud Drive.
Shift + Command + K Open the Network window.
Shift + Command + R Open the AirDrop window.
Command + N Open a new Finder window.
Advanced Keyboard Shortcuts for Finder
Shift + Command + T Add selected Finder item to the Dock (OS X Mountain Lion or earlier).
Control + Shift + Command + T Add selected Finder item to the Dock (OS X Mavericks or later).
Option + Command + D Show or hide the Dock. This often works even when you’re not in the Finder.
Control + Command + T Add the selected item to the sidebar (OS X Mavericks or later).
Option + Command + P Hide or show the path bar in Finder windows.
Option + Command + S Hide or show the Sidebar in Finder windows.
Command + Slash Hide or show the status bar in Finder windows.
Command + J Show View Options.
Command + K Open the Connect to Server window.
Command + L Make an alias of the selected item.
Command + R Show the original file for the selected alias.
Command + T Show or hide the tab bar when a single tab is open in the current Finder window.
Shift + Command + T Show or hide a Finder tab.
Option + Command + T Show or hide the toolbar when a single tab is open in the current Finder window.
Option + Command + V Move: Move the files in the Clipboard from their original location to the current location.
Option + Command + Y View a Quick Look slideshow of the selected files.
Command + Y Use Quick Look to preview the selected files.
Command + 1 View the items in the Finder window as icons.
Command + 2 View the items in a Finder window as a list.
Command + 3 View the items in a Finder window in columns.
Command + 4 View the items in a Finder window with Cover Flow.
Command + Left Bracket Go to the previous folder.
Command + Right Bracket Go to the next folder.
Command + Up Arrow Open the folder that contains the current folder.
Command + Control + Up Arrow Open the folder that contains the current folder in a new window.
Command + Down Arrow Open the selected item.
Command + Mission Control Show the desktop. This works even when you’re not in the Finder.
Command + Brightness Up Turn Target Display Mode on or off.
Command + Brightness Down Turn display mirroring on or off when your Mac is connected to more than one display.
Right Arrow Open the selected folder. This works only when in list view.
Left Arrow Close the selected folder. This works only when in list view.
Option + Double Click Open a folder in a separate window and close the current window.
Command + Double Click Open a folder in a separate tab or window.
Command + Delete Move the selected item to the Trash.
Shift + Command + Delete Empty the Trash.
Option + Shift + Command + Delete Empty the Trash without confirmation dialog.
Command + Y Use Quick Look to preview the files .
Option + Brightness Up Open Displays preferences . This works with either Brightness key.
Option + Mission Control Open Mission Control preferences.
Option + Volume Up Open Sound preferences. This works with any of the volume keys.
Command key while dragging Move the dragged item to another volume or location. The pointer changes while you drag the item.
Option key while dragging Copy the dragged item. The pointer changes while you drag the item.
Option + Command while dragging Make an alias of the dragged item. The pointer changes while you drag the item.
Option + click a disclosure triangle Open all folders within the selected folder. This works only when in list view.
Command + click a window title See the folders that contain the current folder.
There you have it. A complete list of all the essential Mac keyboard shortcuts. Think we missed some? Have some suggestions for more to include? Don’t be shy and leave your comments below.
Pokémon Go is a wildly successful game from Niantic, which features the well-known universe of Pokémon characters superimposed upon the real world through augmented reality. It is the breakaway hit of the Summer, and rocketed to the top position on the App Store charts within hours of release. Chances are you’ve already installed the game yourself or at least seen throngs of people playing it outside.
This guide is written for the beginning player and will introduce you to the basic concepts of how to play Pokémon Go. If you’re new to the game, or even if you’ve installed it but have had trouble understanding how to play, read on to learn everything you need to know to find, capture and do battle with your Pokémon!
What Is Pokémon Go?
Pokémon Go is an augmented reality game that uses your phone’s GPS and clock to determine where you are and what time you’re playing. The game will generate ‘wild pokemon’ in your area, which you can battle and attempt to capture. There will also be pokeshops and clinics in the area where you can get more items such as pokeballs, and you can even battle bosses for big rewards.
The game’s goal was to get users up and moving while hunting for Pokémon and new gyms to battle. The game has become so popular that it outranks Twitter in the number of active daily users on Android.
The Pokémon Go platform gives users the chance to experience what the series is all about in a closest-to-real way. Throughout the series and Nintendo games, the objective was to collect Pokémon and train them to become stronger. You can do exactly this in Pokémon Go.
Once you have the app loaded on your device, you need to create a Pokémon Go account. You can do this either with an existing Google account or by creating an account with the Pokémon Trainer Club. Due to the popularity of the game, the publishers are restricting the number of new Pokémon Trainer Club accounts that can be made — so you might have more success using a Google account.
The first thing you’ll do is customize your character. This is purely for personal aesthetics — the choices you make on how your character looks don’t have an impact on the game or your ability to catch the various Pokémon characters.
Selecting Your First Pokémon
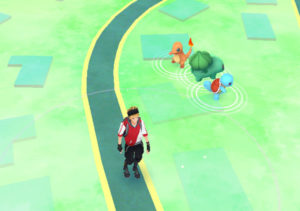
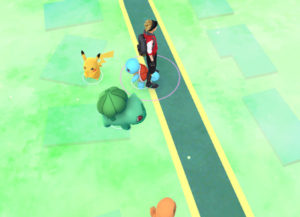
After you log in for the first time and customize your avatar, you’ll get your first peek at the main map screen. This shows a stylized version of your actual real-world location (powered by Google Maps). You’ll see three Pokémon characters next to your avatar. They are the Bulbasaur, Charmander and Squirtle.
You three starting choices in Pokémon Go.
Tap on any one of the three to capture it. This will be your first Pokémon. Don’t fret too much about your choice here. There will be plenty more Pokémon to capture, as this is the main part of the game.
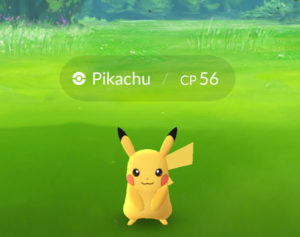
After you tap on one of the Pokémon characters you see on the map screen, you’ll go to the main capture screen. If you’ve enabled AR (Augmented Reality) mode and given Pokémon Go access to your camera, you’ll see the character you chose appear in the real world in front of you. If not, it will appear against a simple cartoon backdrop.
Pikachu in the Wild.
The main activity here is to tap on the Poké Ball at the bottom of your screen and to “flick” (drag) it up quickly towards the Pokémon. Try aiming for its head.
You need to give it enough power/speed for the ball to hit the Pokémon. You may need a lot of practice to get this right, but after a while it becomes second-nature.
As you venture out into the world to find and catch more Pokémon, you’ll discover that some are more difficult to catch than others. Here’s a few basic concepts around catching Pokémon that everyone should know.
Some Pokémon are More Difficult to Catch than Others
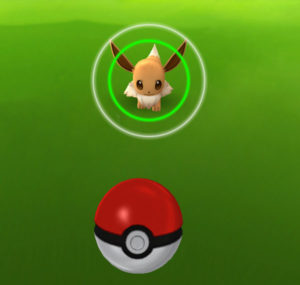
There are three colors of rings for Pokémon.
A green ring means that the Pokémon is easy to catch. Most of the time, it will only take a single Poké Ball to capture it.
A yellow ring means the Pokémon is more difficult to catch and about 50% of the time will escape, even if you score a direct hit.
A red ring means that the Pokémon is very difficult to catch. Expect to use a lot of Poké Balls to finally subdue and capture the creature. You can greatly increase your odds using more powerful Poké Balls or Razz Berries (see more on these below).
A green ring means this Pokémon is relatively easy to capture.
The Size of the Ring Around the Pokémon Matters
The size of the ring changes, going from large to small and then repeating. Your odds of catching a Pokémon are much better if the ring is at its smallest size when you release your Poké Ball.
Use Items to Improve Your Chances
You can greatly increase your chances for capturing a Pokémon by using more powerful Poké Balls or Razz Berries. The latter are special food that makes the target Pokémon more complacent and easier to capture. You should save these for Pokémon with red circles (or for the yellow circled ones if you’re running low on your Poké Ball supply).
Introduction to the Map – How to Find Pokémon
Pokémon Go is an augmented reality game, meaning that it superimposes its virtual world on top of the real one. For that reason, you’ll spend a lot of your time in the game staring at the in-game map, while you walk around the world looking for Pokémon to capture, PokéStops to visit, and special Gyms where you can train and level up your Pokémon.
Finding Pokémon
There’s really no secret to this. Just pick a direction and walk. Pokémon can appear anywhere in the wild, although you’ll find that they appear more frequently in populated areas and tend to congregate near PokéStops (more on those in a bit).
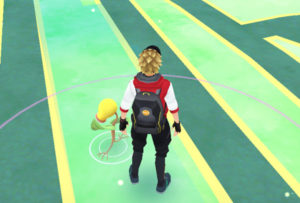
When you get close enough to a Pokémon on your map, your phone will buzz/vibrate and the Pokémon will appear on your screen. If you have your sound turned on, you’ll also hear the Pokémon give his unique sound.
Encountering a Pokémon in the Wild in Pokémon Go.
As long as the Pokémon appears within the pulsating circle around your avatar, you can then tap on it to bring up the Capture screen. From there, simply throw your Poké Ball as described above. Soon, you’ll have a new Pokémon to add to your collection.
Gotta catch ‘em all!
Visiting PokéStops and Lure Modules
When you walk around the world, you’ll see several blue pedestals with blue cubes floating above them. These are PokéStops, and they’re a source of valuable items, including additional Poké Balls and Eggs.
PokéStops are usually found in relatively populated areas, near major and minor landmarks. You’ll have much more success finding PokéStops in towns and cities than out in the countryside.
So many PokéStops, so little time.
When you get close enough to a PokéStop, it will change shape slightly, with a spinning circle appearing over the cube. Click on it and then tap and spin the photo disc in the middle to force the items to appear. Next, tap or swipe those items to collect them.
After you’ve collected from a PokéStop, it will turn purple and you won’t be able to collect items from it again until it resets — this usually takes several minutes.
Powering Up, Leveling Up and Evolving Pokémon
To give a Pokémon more power, you’ll need two things: Stardust and Candy. Both are collected by capturing Pokémon in the wild.
You earn Stardust with each capture. Candy is specific to the type of Pokémon. For example, you earn Zubat candy from capturing Zubats.
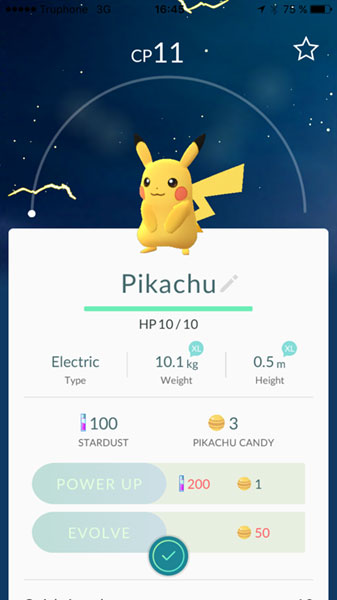
To power up your Pokémon, first go to the Pokémon menu. You get there by clicking on the red and white Poké Ball on the map screen and then selecting “Pokémon”. You’ll see a screen containing all the Pokémon you’ve captured.
Choose the Pokémon you’d like to power up and click on the Power Up button. You’ll be able to see how much Stardust and Candy you’ll need. Your Pokémon of choice will gain additional Combat Power (CP) and Hit Points (HP).
Click the Power Up button and spend Stardust and Candy to upgrade your Pokémon’s combat and hit points.
Evolution works a little differently in Pokémon Go than it does in earlier Pokémon games. To evolve your Pokémon, first you must capture several duplicate Pokémon to earn enough Candy to complete the evolution.
Once you have the Stardust and Candy that you need, select your most powerful Pokémon of the type you’d like to evolve and click on the Evolve button. Your Pokémon will be upgraded to the next level on its evolutionary chain. When you evolve a Pokémon, it will gain both CP and HP.
Sound complicated? Don’t worry. Powering up and Evolving Pokémon gets easier with practice. Read our Pokémon Go Leveling Up guide for more tips and tricks.
How to Battle in Pokémon Go
In Pokémon Go, you could always battle gyms, but battling other trainers hasn’t always been possible. Battling trainers in Pokémon Go is a relatively new feature that lets users battle friends and others nearby. Your Pokémon are awarded experience by winning a battle, which makes them stronger, and you also get various items. As such, it’s definitely worth giving it a try.
Step 1: Select Your Opponent
You can choose to battle with friends, or you can battle with other trainers nearby. To battle with friends, you go to your trainer page and tap on ‘Friends’. At the bottom of the page will be a ‘Battle’ button. Once you’ve tapped the button, you’ll be asked to join a league and choose your three Pokémon that will battle. Now Pokémon Go will send an invite to your friend, and once they accept, the battle will start.
To battle with trainers or leaders nearby, you can tap on the ‘Nearby’ menu at the bottom of your screen. Tap the battle section to see all three leaders and your personal QR code. If you tap on any of the leaders, you can initiate a battle with them. If you want to battle other nearby users, you can have them scan your QR code to start the battle.
Step 2: Tap the Screen to Attack
Once the battle starts, you will have to tap the screen to attack the opponent. Continue tapping and attacking as this charges your stronger attack.
Step 3: Use a Charged Attack
Once your charged attack has been built up, you can tap on it to release a strong attack. For the charged attack, you will see a bullseye appear on the screen, and you have to time the attack perfectly to determine the strength.
Using Items in Pokémon Go
Items are used in the game to help you capture Pokémon, lure them, and revive or heal them following battles at the Gym. You can access your items inventory by tapping on the backpack icon that appears after you tap on the Poké Ball from the main screen.
Most of the items you’ll find in-game can be acquired in one of two ways — collecting them from visiting PokéStops or by purchasing them from the Shop using PokéCoins (which are bought with real money).
Some of the main items that you’ll find in Pokémon Go are:
Pokémon Capture Items
Poké Ball – A device for catching wild Pokémon. It’s thrown like a ball at a Pokémon, comfortably encapsulating its target.
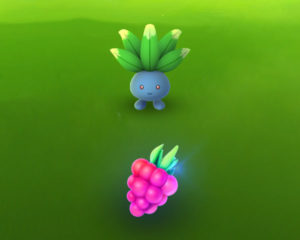
Razz Berry – Feed this to a Pokémon, and it will be easier to catch on your next throw.
Feed a Razz Berry to a Pokémon to make it easier to catch.
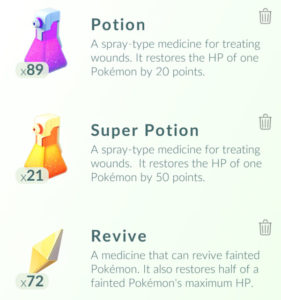
Pokémon Restoration Items
Potion – A spray-type medicine for treating wounds. It restores the HP of one Pokémon by 20 points.
Super Potion – A spray-type medicine for treating wounds. It restores the HP of one Pokémon by 50 points.
Revive – A medicine that can revive fainted Pokémon. It also restores half of a fainted Pokémon’s maximum HP.
The Potion, Super Potion, and Revive items are used to heal your Pokémon following a battle.
Pokémon Lures
Incense – Incense with a mysterious fragrance that lures wild Pokémon to your location for 30 minutes.
Lure Module – A module that attracts Pokémon to a PokéStop for 30 min. The effect benefits other people nearby.
Miscellaneous Items
Lucky Egg – A Lucky Egg that’s filled with happiness! Earns double XP for 30 minutes.
Egg Incubator – A device that incubates an Egg as you walk until it is ready to hatch.
Selecting a Team and Training at the Gym
Once you reach Level 5, you’ll have the option to visit a Gym and join a team. Just like PokéStops, Gyms are real-world locations in the game.
When you visit your first Gym after reaching level 5, you’ll get a choice of joining one of the three color teams in Pokémon Go: Valor (Red), Mystic (Blue), or Instinct (Yellow).
Each Gym you encounter in the world is controlled by one of the three color teams at any given time. You can train up your Pokémon at Gyms that are already controlled by your team or battle opposing teams to take over their Gyms.
When you enter a Gym controlled by an opposing team, you can select a Pokémon from your collection to fight with and then you’ll begin a Pokémon Go Battle against the opposing Leader/Guard of the Gym. When you battle, you essentially have three simple options:
Tap the screen to attack
Press and hold the screen to use your Pokémon’s special attack
Swipe left or right to dodge an opponent’s attack
The goal of the battle is to reduce your opponent’s Pokémon to zero hit points before he or she does the same to yours.
To take over a Gym that is controlled by one of the opposing teams, you must battle and defeat all of the Gym Leaders that occupy it. Higher level Gyms will require several successful battles for complete victory.
When you occupy a gym you earn PokéCoins. Every 20 hours, you can visit the Shop and redeem your coin reward, which is calculated based on how many gyms you currently occupy. Visiting and occupying several gyms can lead to significant rewards.
FAQ About Pokémon Go
Now that we’ve shared a lot about the basics of the game, here are a few more Pokémon Go tips to answer any last questions you may have.
What Is a Shiny Pokémon?
Shiny Pokémon are rare variations of existing Pokémon. Their color is slightly different from their normal counterparts, and they usually have boosted skills. You can find these shiny Pokémon in the wild randomly or during special events.
What Is the Best Pokémon in Pokémon Go?
While the best Pokémon is usually a personal preference that is very much based on your playing style, there are a few of the strongest Pokémon which do make formidable forces. In Pokémon Go, the strongest pokemon overall are Tyranitar, Dragonite, Snorlax, and Rhydon.
Rare Pokémon are much more difficult to find and usually occur only in specific locations or during particular times of the day. Some of the rarest Pokémon in Pokémon Go include Sandile, Noibat, Azelf and Unown.
Conclusion
Now you know everything you need to successfully explore and conquer the world of Pokémon Go. Remember to be aware of your surroundings as you play the game, but even more importantly, have fun!
Don’t want to be stuck with the default choices for your starting Pokémon in Pokémon Go? Eager to capture Pikachu, the most famous of all the Pokémon? Never fear! Read on for the hidden secret of how to get Pikachu as your first Pokémon in this exciting new game.
By now, you’ve heard of Pokémon Go. This long-anticipated game raced up to the top of the app store charts on its first day of release and has dominated the news in the past week. Sometimes for not so great reasons.
When you start the game, you normally have the choice between three different Pokémon characters to capture. They are:
Bulbasaur
Charmander
Squirtle
All three are solid choices, but there’s a secret way that you can start with Pikachu at the beginning instead of the other three. Here’s your step-by-step guide on how to do it.
Note: you’ll need to do this with a new account. You can start a new account by signing out of your current game and then signing up again using a new Pokémon Trainer Club account or by using a different Google account.
Once you have established a new account, you should end up at the starting map screen where you see three Pokémon to choose from. Don’t select any of them.
Next, just take a walk. Yes, it’s really that easy. Walk away from the three Pokémon and in a short time, they’ll disappear from the screen and “reset,” appearing again close to your new location.
Your next step? You guessed it. Keep on walking. Just walk away from Bulbasaur, Charmander, and Squirtle. You’re after the prize of Pikachu.
Repeat this process about four or five times. Ignore and walk away.
Eventually, a fourth Pokémon will join the other three on your screen. At long last, Pikachu has appeared.
There he is! Pikachu will appear on the map after four or five “resets.”
From here, simply tap on Pikachu and the Pokémon Go capture screen will appear. Tap and swipe the Poké Ball in Pikachu’s direction to capture him.
Congratulations! You now have Pikachu as the first Pokémon in your collection!
Now, complete your account sign-up as normal and you’re off in running in the world of Pokémon Go with the trusty Pikachu by your side.
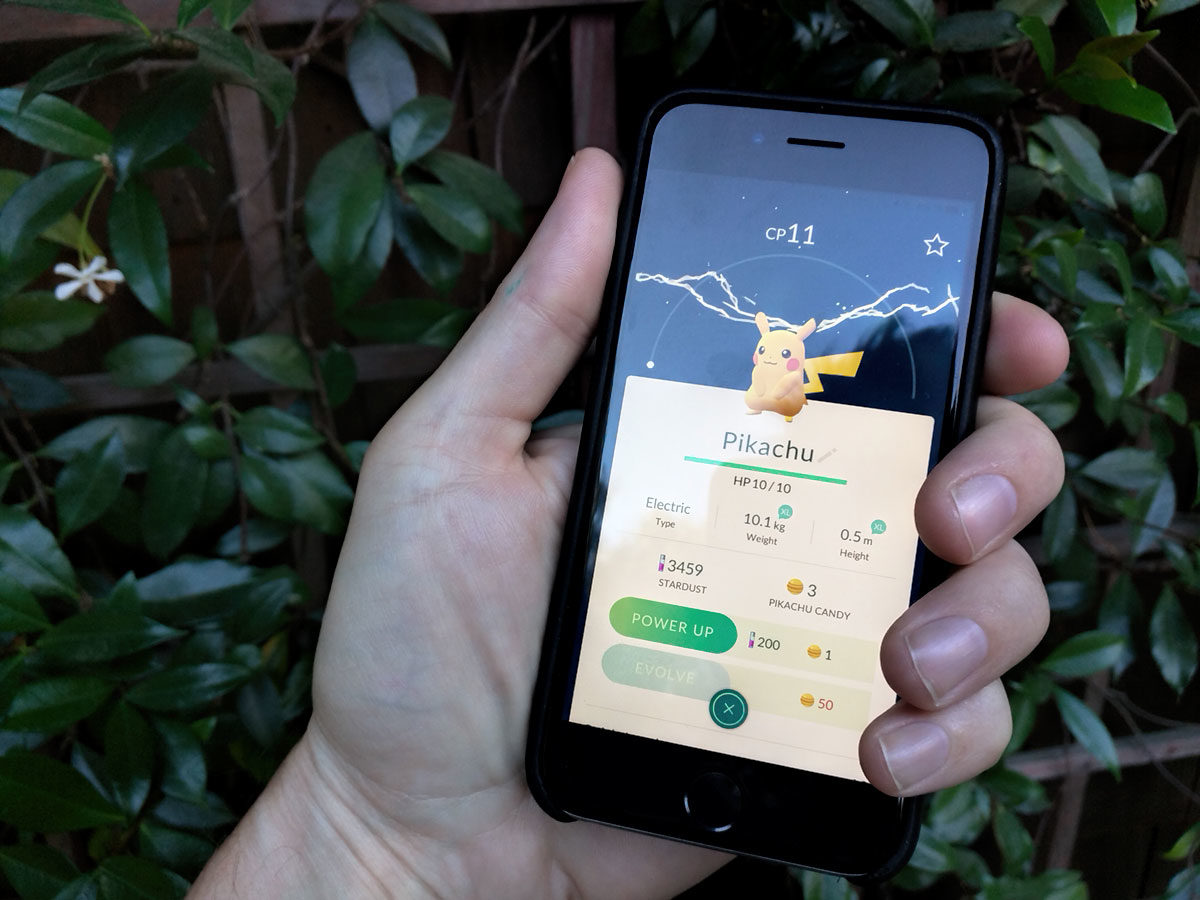
Your starting Pikachu isn’t very powerful, but who cares? It’s Pikachu!
Your starting Pikachu won’t be especially powerful (typically you get a CP 11 version), but there’s something very rewarding and nostalgic about beginning the game with him instead of one of the others.
Still don’t have Pokémon Go? You can download it here for iOS and Android. Looking for more Pokémon Go tips and tricks? Be sure to check out our collection of Pokémon Go videos and tutorials on Softonic Gaming.