Apple unveils its plans for the next generation of iPads with features similar to Mac

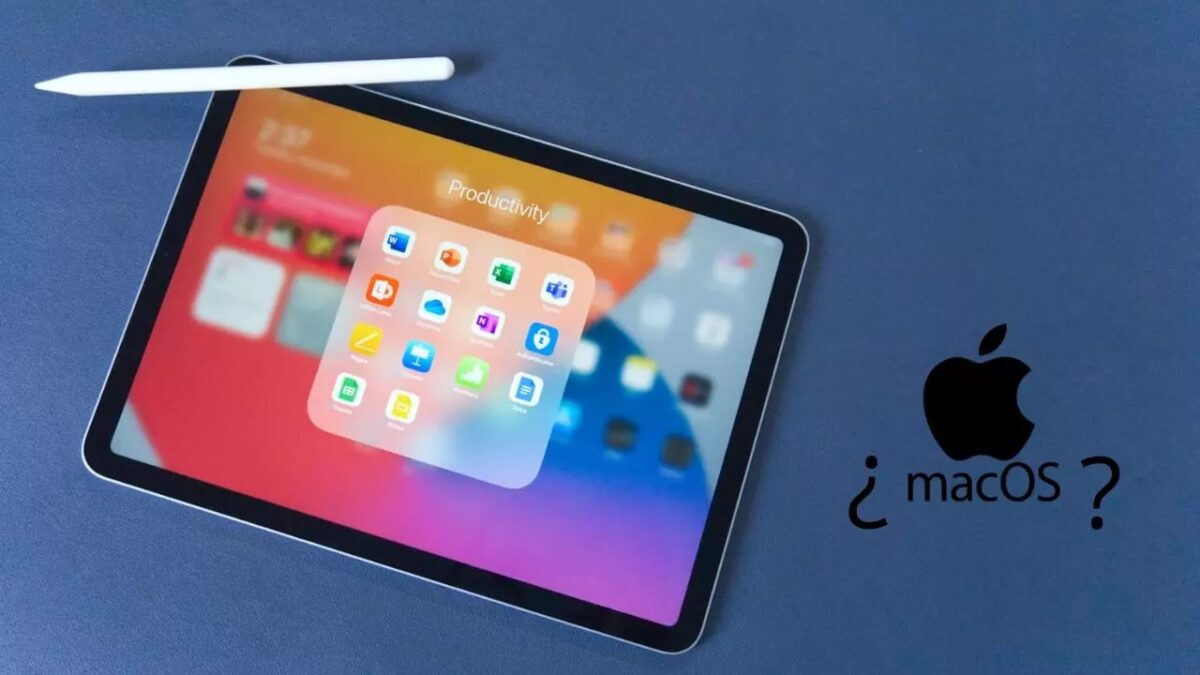
Apple is working on a new generation of iPads equipped with the M5 processor, which could bring their power closer to that of Macs. This hardware evolution will be complemented by an upcoming update to the iPadOS operating system, which will focus on improving productivity, multitasking, and window management. With these improvements, the user experience on the iPad will resemble more that of the company’s computers, all while not abandoning the characteristic operating system of tablets, which remains more similar to iOS than to […]

Apple is working on a new generation of iPads equipped with the M5 processor, which could bring their power closer to that of Macs. This hardware evolution will be complemented by an upcoming update to the iPadOS operating system, which will focus on improving productivity, multitasking, and window management. With these enhancements, the user experience on the iPad will resemble more closely that of the company’s computers, all while maintaining the characteristic operating system of tablets, which remains more similar to iOS than to macOS.

Getting the most out of your devices

During the upcoming Apple Worldwide Developers Conference (WWDC), the company is expected to make significant announcements about iPadOS 19. According to analyst Mark Gurman, the update will highlight the evolution of the operating system towards features reminiscent of macOS, a change that many users have demanded for years. Although the full inclusion of macOS on the iPad has not been confirmed, Apple seems satisfied with bringing some features of its computers to tablets, thus seeking to meet the needs of its consumers and maintain the hybridization of these devices.

The new iPad Pro, which will be launched on the market coinciding with the first anniversary of the iPad Pro M4, will be able to take advantage of all the improvements of iPadOS 19. In addition, it is expected that the models with M4 and M5 processors will have PC functionalities, allowing for optimized productivity and application management. This would mark a significant change in user perception, who have historically considered that the hardware of the iPad is superior to the available software. With this new approach, Apple aims to close that gap, offering a system that maximizes the performance of its most advanced devices.

The most popular horror and fishing game of recent years is coming to your mobile

Among indie games, very few manage to stand out. Even fewer are easy to predict as potential successes. That doesn’t change the fact that we, from the beginning, made things clear about this game: if a game about fishing in a sea infested with otherworldly beasts while trying to understand the mysteries of sinister coastal towns doesn’t work, then we don’t know how video games work. Fortunately, it seems we do. Because Dredge was a complete success. Developed by Black Salt Games, it was one of the games considered among the best games […]

Among indie games, very few manage to stand out. Even fewer are easy to predict as potential successes. That doesn’t change the fact that we, from the beginning, made things clear about this game: if a game about fishing in a sea infested with otherworldly beasts while trying to unravel the mysteries of sinister coastal towns doesn’t work, then we don’t know how video games work. Fortunately, it seems we do know. Because Dredge was a complete success.

Developed by Black Salt Games, one of the games that was in the running for the best games of the year was Dredge. Selling well, receiving great acclaim from critics and the public, and reaching both PC and consoles, it proved that this peculiar mix of fishing game and Lovecraftian horror worked perfectly.

So much so, that it now takes a step further, reaching mobile devices. iOS and Android users will be able to enjoy this terrifying and tense —yet surprisingly relaxing at times— experience starting from December 18th. Mac computer users will also be able to do so, as they will finally be able to play the game thanks to the fact that, taking advantage of the occasion, it is also being ported to the system.

It is currently possible to register on the App Store page for iOS users, although the Play Store page for Android users does not yet exist. This is something expected to be resolved in the coming hours or days. However, what the game’s page on the App Store does suggest is that it will be a free-to-play game that will probably require a one-time payment to fully experience it.

Pending to see the game in motion, Dredge is a game that, due to its particularities, can be easily translated to the logics of mobile control. That’s why it can be an interesting addition to any mobile game collection and, if you haven’t played it, or even if you have played it and want to replay it, perhaps this is the perfect opportunity to give a chance to one of the best games of 2023.

Dredge DOWNLOAD
5
DREDGE is a first-person fishing game designed for single players. It offers numerous unique environments, as well as many different species of fish to catch while players progress. It has an intriguing backstory, though it lacks an online co-op gameplay mode.

Palworld will arrive soon on Mac

Pocketpair has found its golden goose in Palworld. That’s why it’s natural that they not only want to kill it, but they have decided to take care of it and multiply it as much as possible. That’s what they revealed in their latest news, letting us know that they are working to bring us more content for the game and more.

-14%
Palworld

From: Instant-Gaming

€24.89 €30

Buy

As just announced, Palworld will have a version for Mac devices. Although it is still in development and they have not specified a specific release date, they have emphasized that it will be available at some point in 2024. Additionally, it will be fully equivalent to the PC version, which means it will have all the content that Windows computer users and Xbox console users can already enjoy.

Meanwhile, the next update of Palworld is already on the horizon. Sakurajima, a new island with obvious Japanese inspiration, will arrive as an update on June 27th. New friends have been confirmed for this new region, as well as subspecies for existing friends. Among other things, they will also add an arena mode, new buildings, and new bosses.

Palworld is now available in early access on Xbox One, Xbox Series X, Xbox Series S, and PC. And, as we told you, you will still have to wait a little longer on Mac, but it will be available this year.

Do you want more Resident Evil? Well, if you have an iPhone or Mac, you’re in luck

Si te gusta Resident Evil y tienes un iPhone, un iPad o un Mac, entonces estás de enhorabuena, porque Resident Evil 7 llega al ecosistema de Apple.

Uno de los anuncios más esperados del no-E3 fue la revelación de un nuevo juego de Resident Evil. Ya sea un remake de Code Veronica, Resident Evil 5 o el muy esperado Resident Evil 9, se esperaba que la franquicia de survival horror más famosa de Capcom presentara su última entrega la semana pasada. Desafortunadamente, todavía no tenemos información al respecto. Sin embargo, eso no significa que no tengamos un nuevo juego de Resident Evil. Puede que no sea el que esperábamos o de la forma en que lo imaginamos.

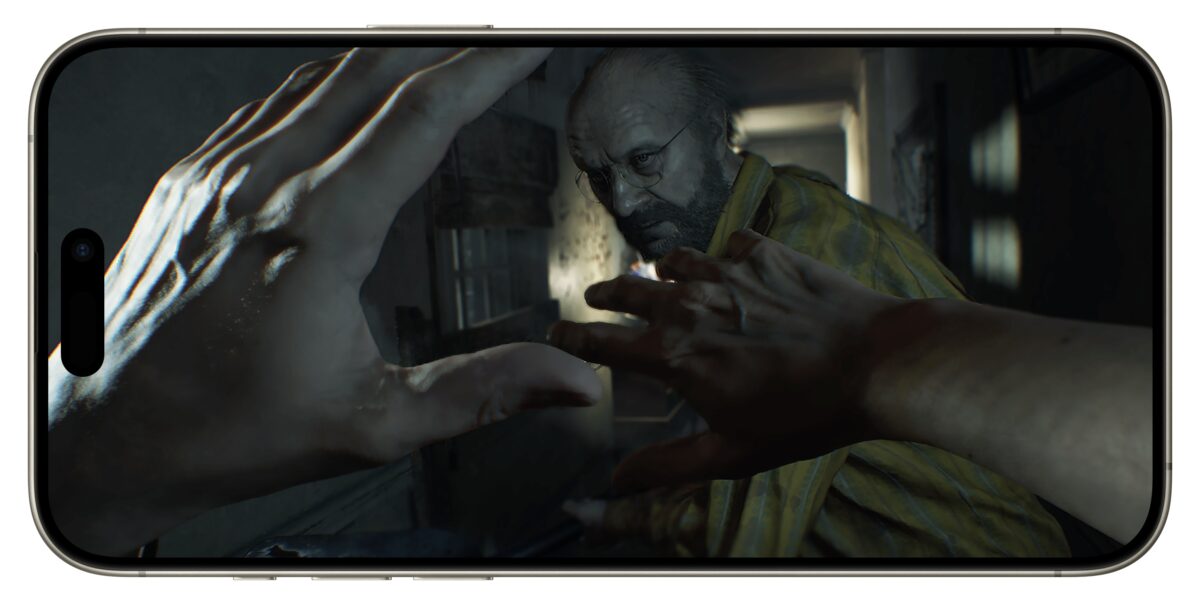
According to an announcement by Capcom, they’ll be releasing Resident Evil 7 into the Apple ecosystem. Available for iPhone 15 Pro, iPhone 15 Pro Max, and all iPads and Macs with an M1 chip or later, it’s also been announced that development is underway for a remake of Resident Evil 2 for these same devices. Excellent news for Apple users, who are often overlooked by the gaming industry.

One of the big unknowns is how the game will be played on mobile devices, since Resident Evil 7 is a game designed to be played with a controller. And Capcom clarified that the iPhone and iPad version will have improved controls to optimize gameplay experience on these devices. They highlighted the Auto Fire feature, which will allow automatic gunfire at enemies once you’ve been aiming at them for a certain amount of time. This feature should greatly facilitate game control.

Additionally, they’ve confirmed that game purchase will be shared across the entire ecosystem. So, it’ll be possible to buy Resident Evil 7 for one device but play it on any device you want. Your saved games will also be shared, so you can play some on your Mac and then switch over to a mobile device at any time, if you choose to do so.

Resident Evil 7: Biohazard is now available for pre-order. The game will also include the Not A Hero DLC, although those who want all the content will need to get the upgrade to Gold Edition. All of this becomes available on July 2nd.

Resident Evil 7 Biohazard DOWNLOAD
4.2
The Resident Evil team tries something new and rightfully so, after the disaster they made in Resident Evil 5 and 6.

How to Take a Screenshot on a Mac

There are plenty of ways you can take a screenshot on Mac, but do you know where to find them? Read our detailed guide for more information!

Need to take a screenshot on your Mac? If you’re a Windows user you’ll know that Microsoft’s OS has a dedicated print-screen key that will capture any image in seconds. However, you won’t find this convenient button on any Mac keyboard. We know that this might be confusing at first, because how are you supposed to take screenshots on your fancy Macbook without a screen capture key? 

Have no fear — the process of how to take a screenshot on Mac is very simple and straightforward. And you have more than one way to do it.

Take a Screenshot of Your Entire Mac Screen

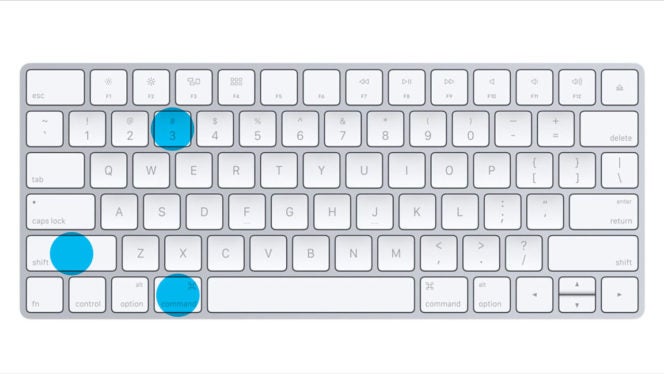
To take a screenshot of your entire visible screen, press the following buttons together: Command + Shift + 3. A file will be saved to your Desktop with the file name in the format, Screen Shot [DATE + TIME].

You can double-click on the screenshot icon on your Desktop to open it immediately with Preview. If you need to open the screenshot with a different app (like Photoshop), just right-click on it and choose “Open With…

Note: if you’re a power user and have multiple screens on your desktop, this feature will create separate files for each of the running screens. This might not be ideal if you only need a screenshot of a specific page. Don’t worry, we’ll show you how to take a screenshot of only one page further in this guide.

Take a Screenshot of A Selection of Your Mac Screen

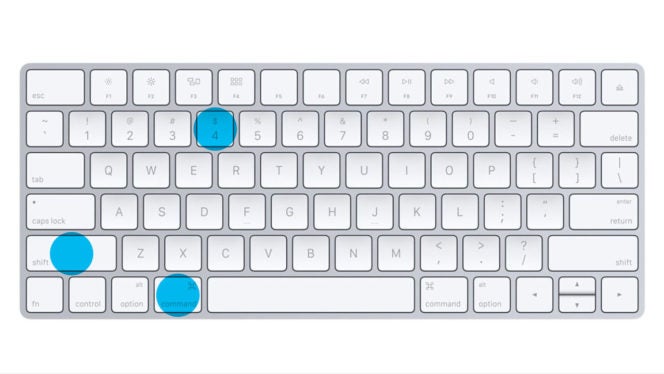
If you don’t need or don’t want your full screen captured, you can choose to select only a portion of your screen by pressing the following buttons together: Command + Shift + 4.

You’ll see a crosshair cursor appear on your screen. Choose one corner of the area you want to capture and then click and hold. Drag the cursor to the opposite corner of the region you want to capture and release.

The resulting area will be saved as a file on your desktop. Just as before, the file will be saved in the format, Screen Shot [DATE + TIME] and you can open it in Preview by double-clicking on the icon.

Take a Screenshot of One Window/App on Your Mac

Do you want to capture a screenshot of the contents of just a single window or app on your Mac? Don’t want to mess around with trying to get the Selection just right? Or sit with a screenshot of every single page you have open? Don’t worry, there’s a great shortcut to do this.

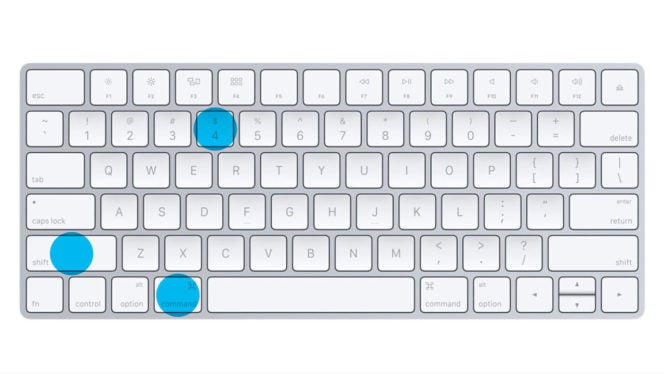
Just as before, press Command + Shift + 4 to start a selection. But then press your spacebar. Your cursor will change from a crosshair to a camera.

Place the camera over the window or app you want to capture. The active window will become shaded with blue.Then click the mouse and your active window will be saved to your Desktop as a screenshot.

Just as before, you can open the image with Preview by double-clicking on it.

Save a Screenshot to the Clipboard Instead of a File

Don’t want to clutter up your Desktop with screenshot files? Mac students can take shots by copying them to the clipboard so that you can paste them into another application immediately, there’s a great shortcut to help you achieve this.

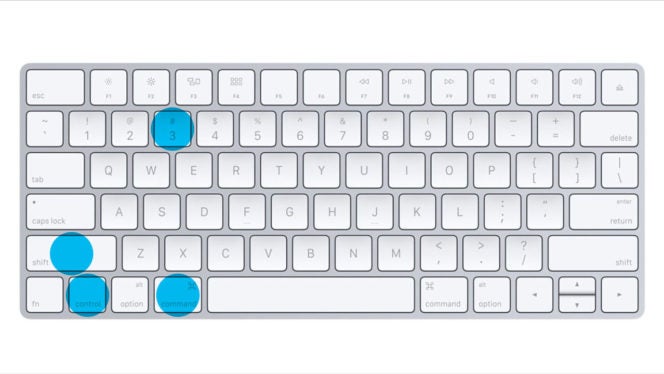
Simply use the steps above for either taking a screenshot of the entire screen or a selection of the screen. But this time, include the Control Key in the series of keys you press, like this:

  • Control + Command + Shift + 3
  • Control + Command + Shift + 4

When you add the Control key, the image is copied to your Clipboard instead of being saved to a file. Remember, you can only store one screenshot at a time in your clipboard. If you need to use multiple screenshots it’s best to let them go to your desktop while you’re working with them and move them once you’re done.

However, if you’re feeling adventurous, remember that you can install a Mac Clipboard Utility to extend your clipboard and store multiple items at once. This works for screenshots, too!

Screen recording on a Mac

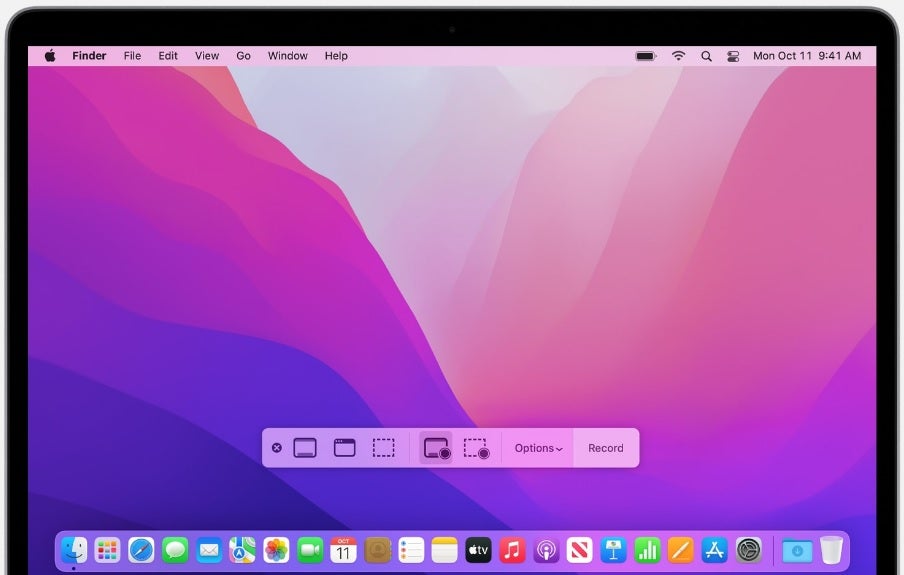
Want to record and screen-capture anything you’re doing with your Mac? The process is very simple:

  1. Press the “Command”, “Shift” and “5” keys at the same time to bring the screen-capture window.
  2. Select the “Record the entire screen” or “Record a portion of the screen”.options.
  3. Once you’re ready to screen-capture, click on the button “Record”
  4. Stop recording by pressing “Stop recording” and access your clip for your Mac desktop.

Take a Screenshot on a Mac with Grab

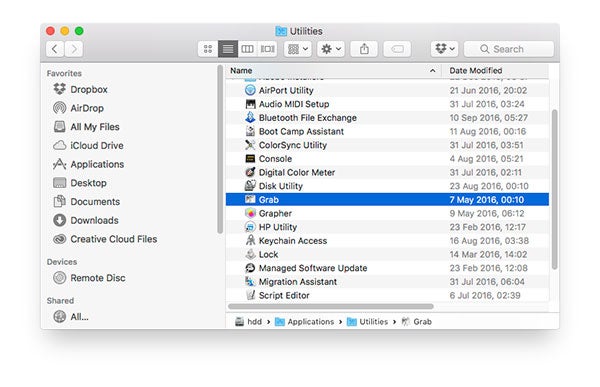
Perhaps keyboard shortcuts aren’t your thing? Do you prefer taking screenshots with the help of an App? Don’t worry — most Mac computers come with a dedicated screenshot app that everyone can use. It’s called Grab and you’ll find it safely tucked away in your Applications/Utilities folder.

Grab supports four different capture modes:

  • Selection
  • Window
  • Screen
  • Timed Screen

The first three modes work exactly the same as the keyboard shortcut methods outlined above. However, when you take the screenshot, it appears inside the Grab application, where you can save it anywhere you like. This method beats cluttering up your desktop with lots of “Screen Shot” files.

The fourth mode, Timed Screen, is special. It works just like the time delay function on your camera. It will take a screenshot of your entire screen 10 seconds after you start it. It’s ideal for capturing a screenshot that requires you to perform one or more actions beforehand. It might take a little practice to get the timing right, but in special situations, it can save you a lot of hassle.

Take a screenshot on a Mac with Paparazzi

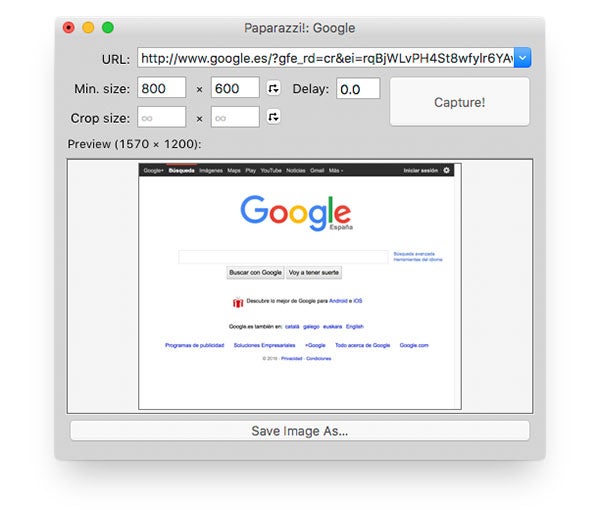
Paparazzi is a specialized tool for capturing screenshots from Web pages, and not direct shots from your screen. Simply provide the URL you want to capture and Paparazzi does the rest. It’s ideal for capturing a full web page when it won’t fit completely on your screen in one shot.

You can specify a minimum image size for the capture and even specify a time delay if you need one. This is perfect for Web pages that change their appearance after they initially load.

Take a screenshot on a Mac with Skitch

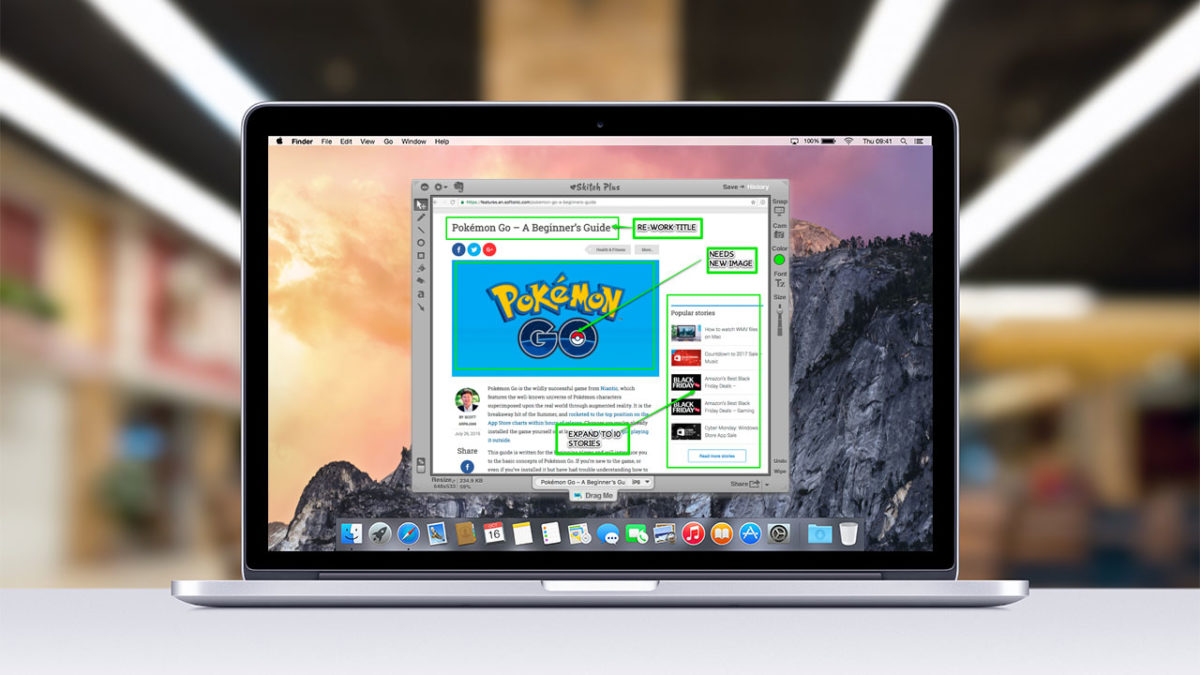
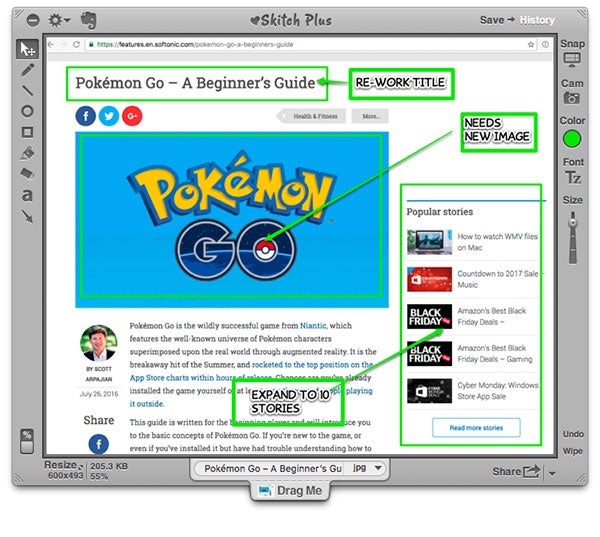
This is a bold claim, but Skitch is the best screenshot app ever made for the Mac. It was incredibly easy to use, allowed fast annotation of screenshots with intuitive controls, and preserved a complete history of everything you ever took a screenshot of without cluttering up your desktop or folder system.

Skitch was originally developed by Plasq, but later sold to Evernote, who proceeded to make a lot of changes to the app that proved deeply unpopular with hardcore users. And by that I mean me. And this is coming from someone who loves the Evernote app.

Although you can download and install the latest version of Skitch on your Mac (and enjoy tight integration with Evernote), I recommend you try version 1.0.12.

If you’re feeling adventurous, you can still find copies of older versions of Skitch floating around. Although version 1.0.12 of Skitch is officially unsupported, it still works for most users. There’s no guarantee it will work on all machines or in future upgrades of the OS. If you’re willing to work with unsupported software, I strongly recommend Skitch for all your screenshot needs.

Take a screenshot on a Mac with Napkin

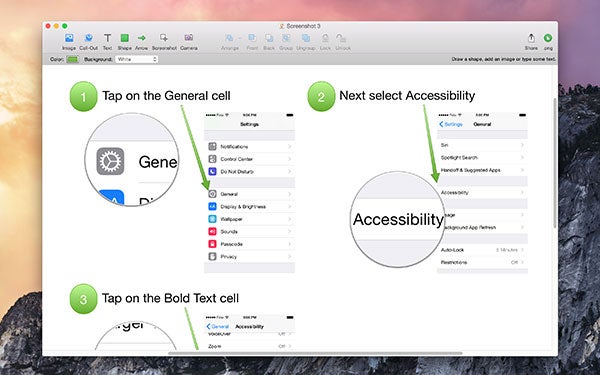
Napkin is an advanced screenshot tool that excels at annotations. If you find yourself sharing a lot of screenshots and wanting to add annotations like text, arrows, or highlights, take a look at this tool.

It’s perfect for sending visual feedback to friends and colleagues and truly demonstrates that a picture is worth a thousand words.

Unfortunately, there’s no trial version. Napkin is only available for purchase via the Mac App Store. But you can take a peek at its features on the developer’s website.

There you have it: everything you need to put together screenshots quickly and easily on your Mac. Have some screenshot tips of your own to share? Don’t be shy–help out your fellow Mac users by posting in the comments section below.