Mastering Instagram Reels: A Complete Guide to Creating Stunning Videos with Adobe Premiere Pro

Since its introduction in 2020, Instagram Reels has quickly become a cornerstone for content creators aiming to expand their reach and engagement on the platform. Whether you’re an aspiring influencer, a digital marketer, or just someone who loves creating engaging content, mastering Instagram Reels can be both fun and rewarding. This comprehensive guide will show you how to create high-quality Instagram Reels using Adobe Premiere Pro, ensuring your videos stand out in a crowded social media landscape.

Adobe Premiere Pro Plans DOWNLOAD

Whether you are trying to increase followers on the platform or just want to level up your production skills, here’s how to make high-quality Instagram Reels stand out with Adobe Premiere Pro.

Why Use Adobe Premiere Pro?

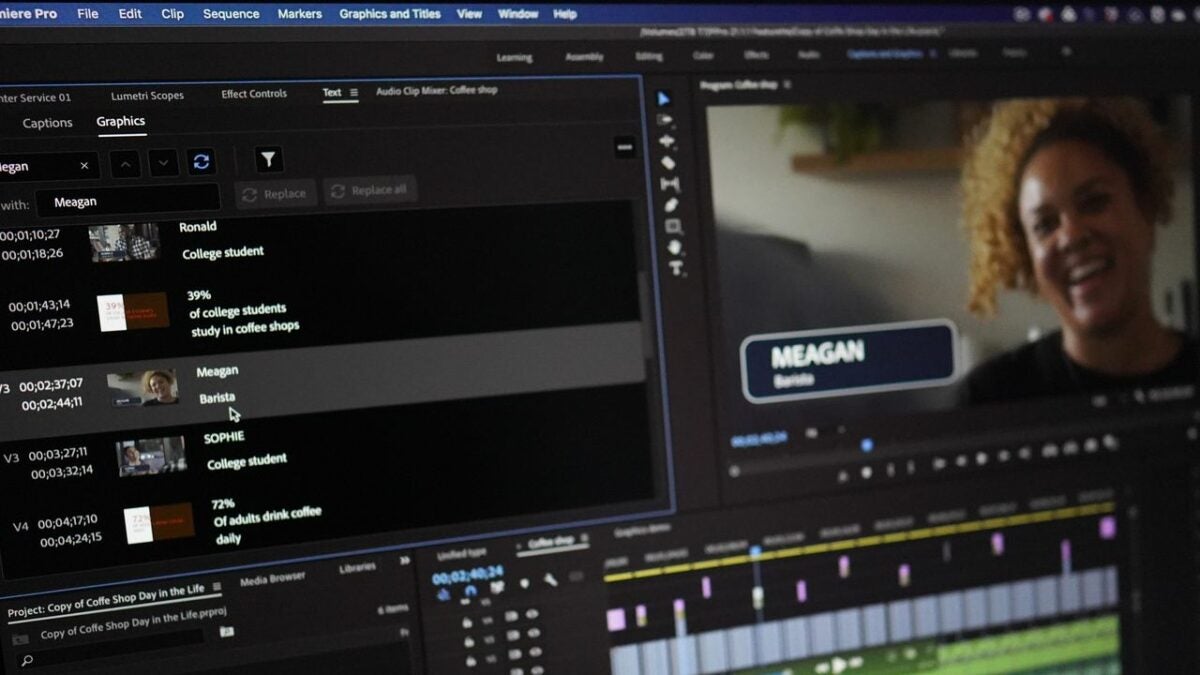
Adobe Premiere Pro is a powerful video editing software used by professionals across the film and television industries. Its robust features allow for precise editing, color correction, and the addition of effects that can elevate the quality of your Instagram Reels significantly above what can be achieved with simpler mobile apps.

  • Advanced Editing Tools: Premiere Pro offers a vast array of tools for cutting, trimming, and refining your video clips.
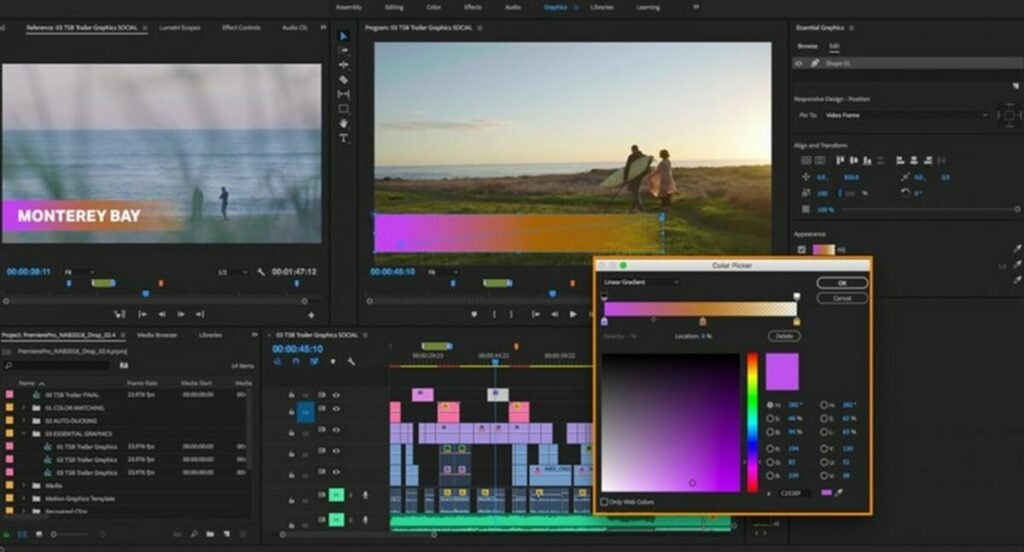
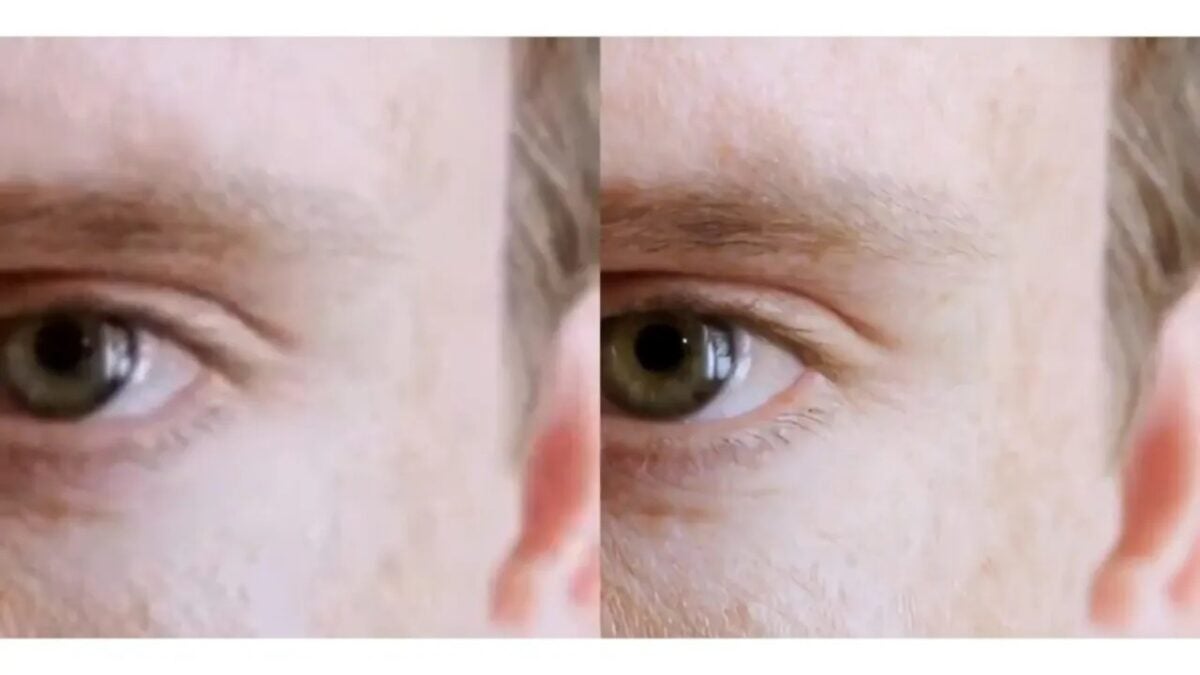
  • Color Correction: With the Lumetri Color panel, you can perform professional-grade color correction and grading.
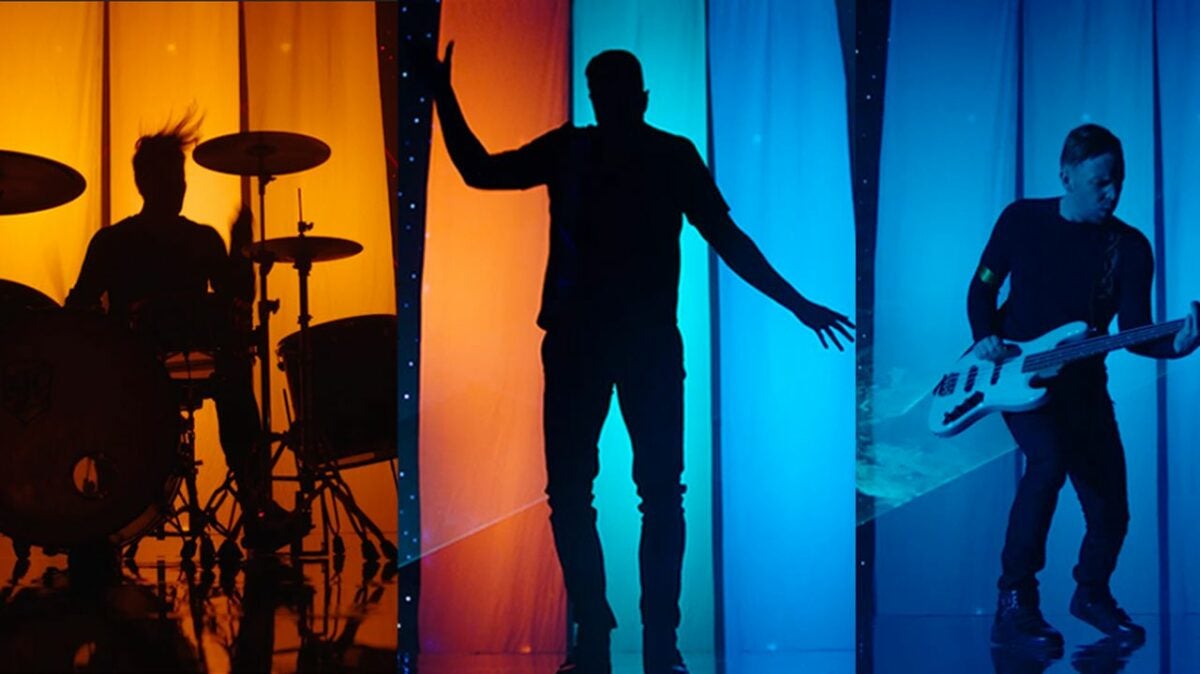
  • Special Effects: Add transitions, text overlays, and other effects to make your Reels visually stunning.
  • Audio Editing: Premiere Pro also includes comprehensive audio editing features, allowing you to fine-tune the sound quality of your Reels.

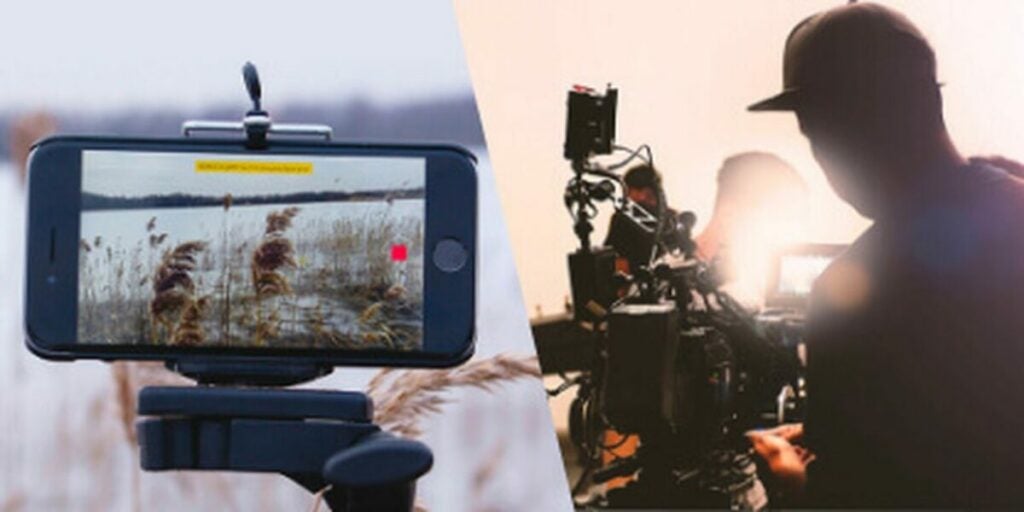
Getting Started: Essential Filming Techniques

Study Basic Mobile Phone Filming Techniques

Before diving into the editing process, it’s crucial to capture high-quality footage. Here are some tips to get you started:

  1. Stability: Use a tripod or a stabilizer to keep your shots steady.
  2. Lighting: Shoot in well-lit environments. Natural light is best, but if you’re shooting indoors, use soft, diffused lighting to avoid harsh shadows. Avoid filming under direct sunlight as it can create harsh shadows and overexpose parts of your video.
  3. Framing: Follow the rule of thirds to make your shots more dynamic. Ensure your subject is well-positioned within the frame.
  4. Resolution: Always shoot in the highest resolution possible, typically 4K, to ensure the best quality for editing. Higher resolution footage gives you more flexibility in post-production, such as cropping and zooming without losing quality.
Before you get started, familiarize yourself with the basics of cell phone filmmaking

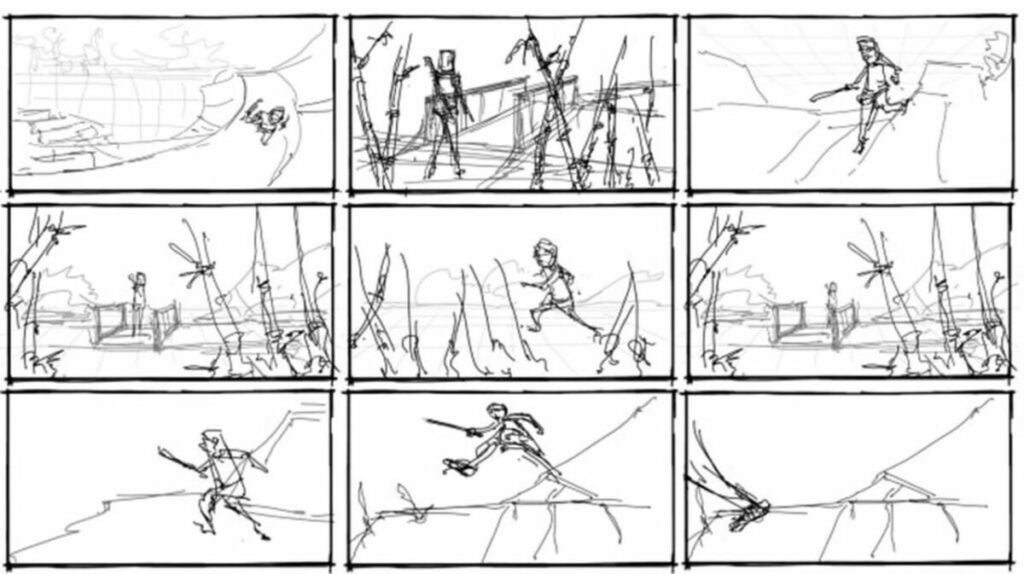
Pre-Production: Storyboard Your Clips

Plan Your Content

Storyboarding isn’t just for Hollywood blockbusters. Planning your Instagram Reels can save you a lot of time in the editing process and help you create more cohesive and engaging content.

  1. Concept: Define the main idea or theme of your Reel. What story do you want to tell? What message do you want to convey?
  2. Shot List: Outline the different shots you need. This can be as simple as sketching or writing down each scene. For example, list wide shots, close-ups, and any specific actions or dialogues.
  3. Timing: Instagram Reels can now be up to 90 seconds long​ (Later)​​ (Vista Social)​. Plan the timing of each shot to keep your Reel within this limit. Ensure you have a mix of shorter and longer clips to maintain viewer interest
Preproduction planning and storyboarding your Instagram Reels saves time in the editing room

Choosing Your Filming Locations and Times

The right location can add a lot to the mood and tone of your video. Here are some tips:

  1. Location: Choose locations that match the theme of your video. This could be anywhere from a scenic park to your own backyard.
  2. Timing: Film during the golden hours (early morning or late afternoon) for the best natural light. Avoid shooting in the harsh midday sun to prevent overexposed footage.
  3. Background: Ensure the background is clean and uncluttered. A busy background can distract viewers from the main subject of your Reel.
If you want to create dynamic and engaging videos for Instagram, good location scouting is essential

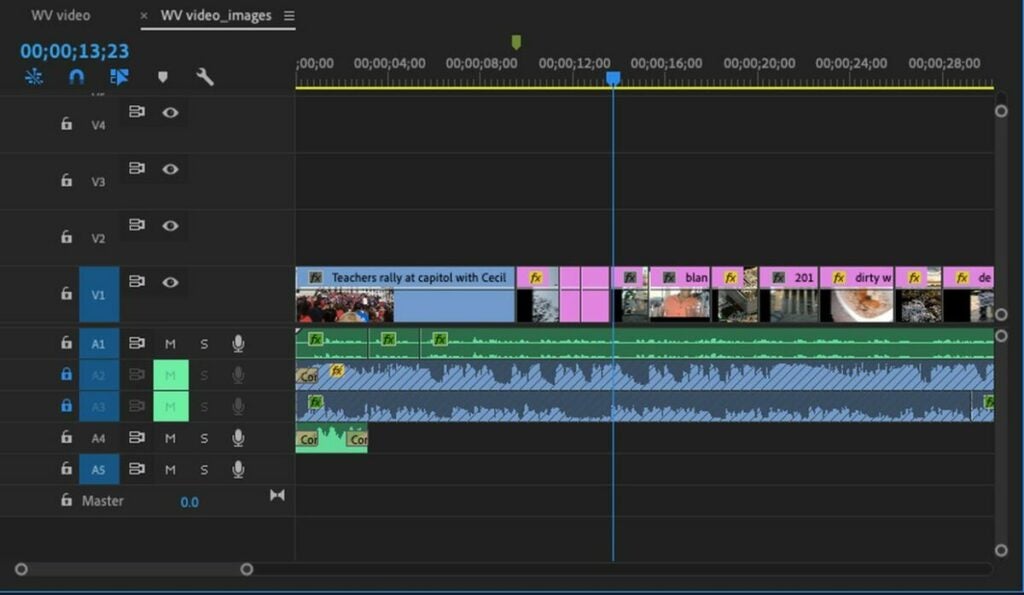
Creating a Rough Cut Edit

Import and Arrange Your Clips

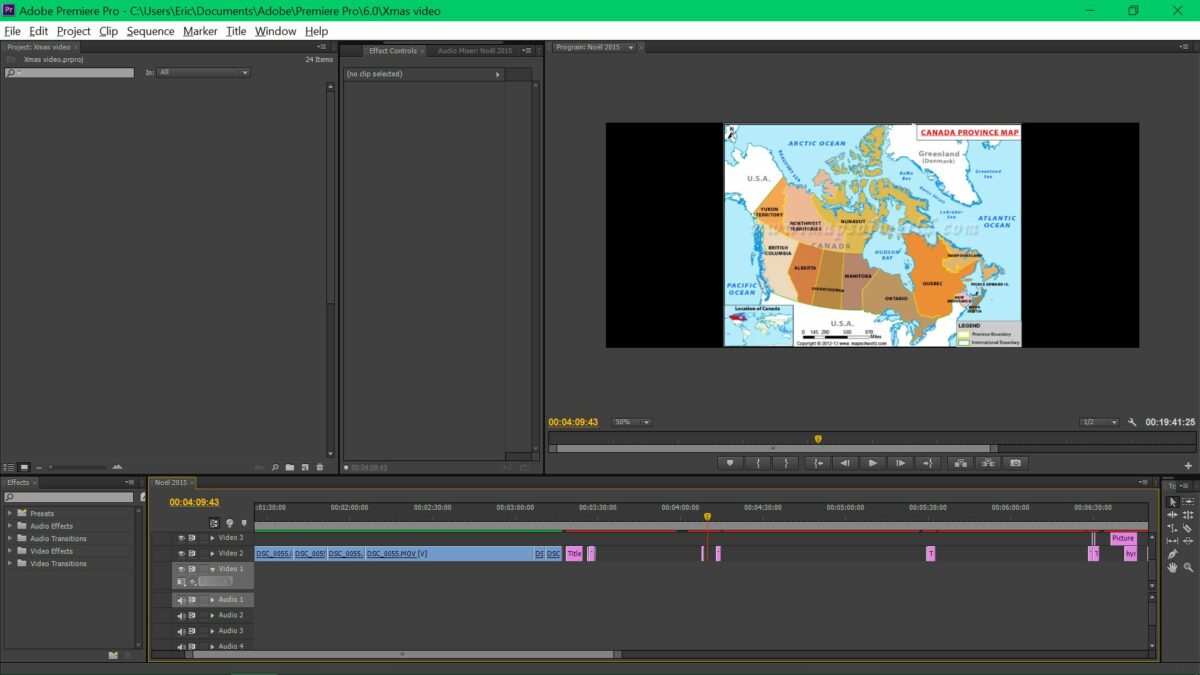
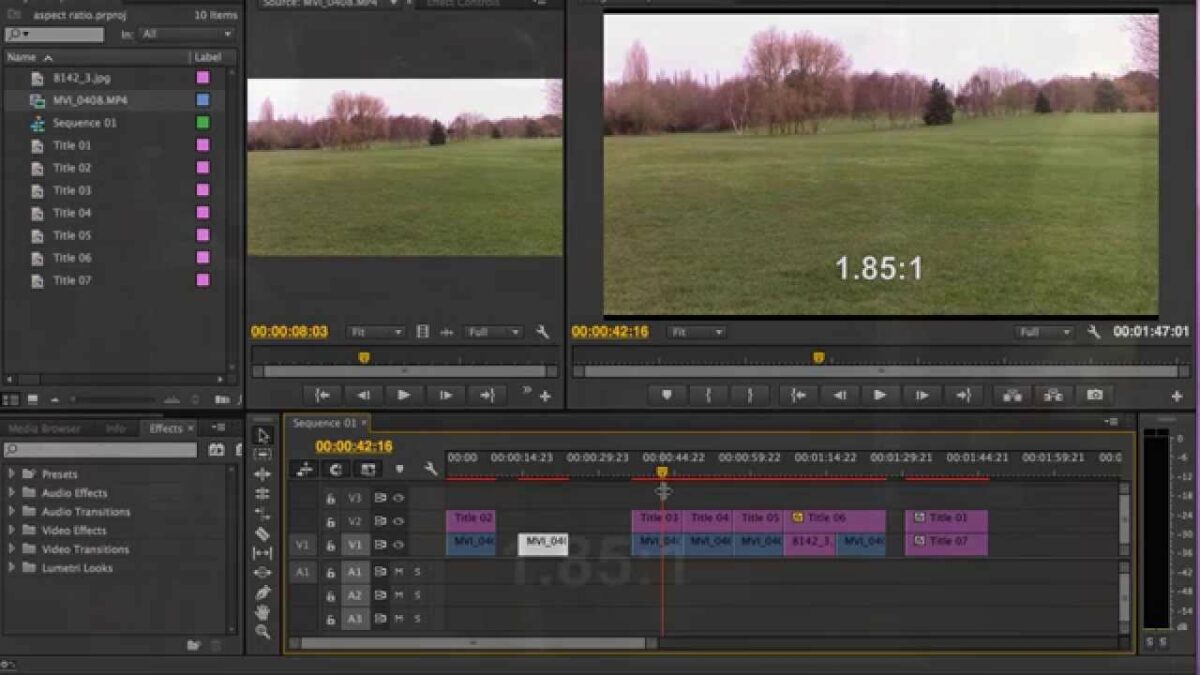
Once you have your footage, it’s time to start editing. Adobe Premiere Pro provides a comprehensive set of tools for this purpose.

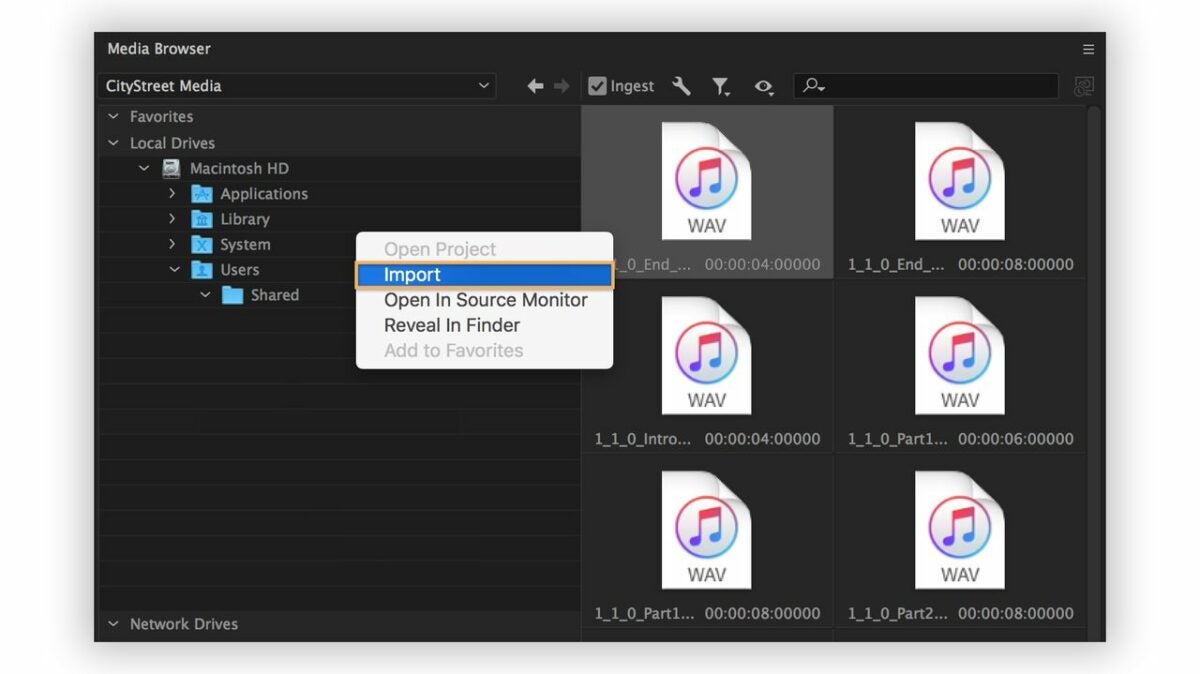
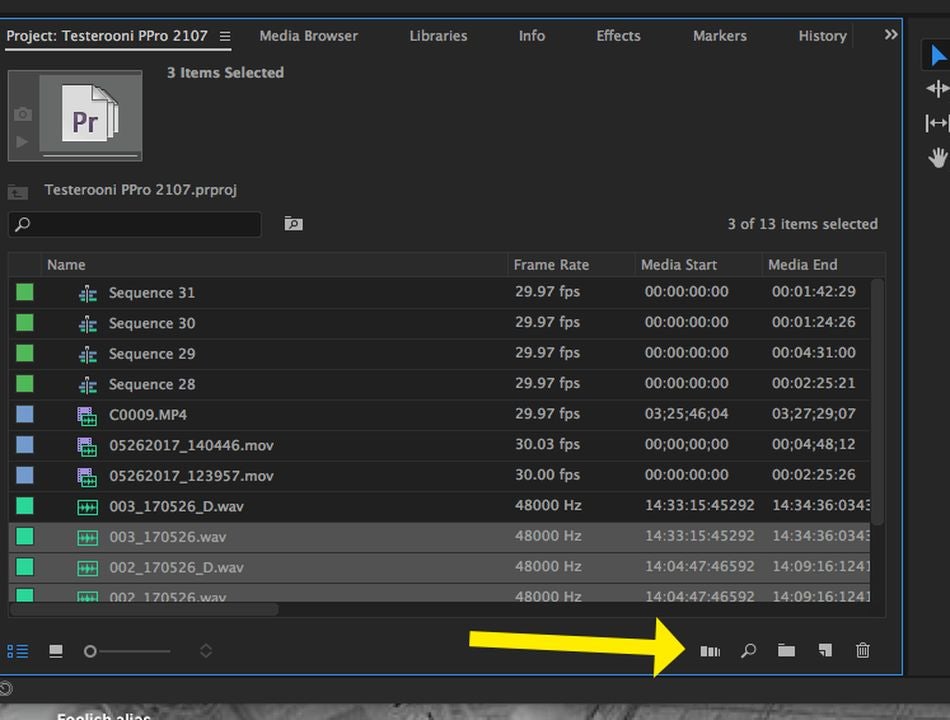
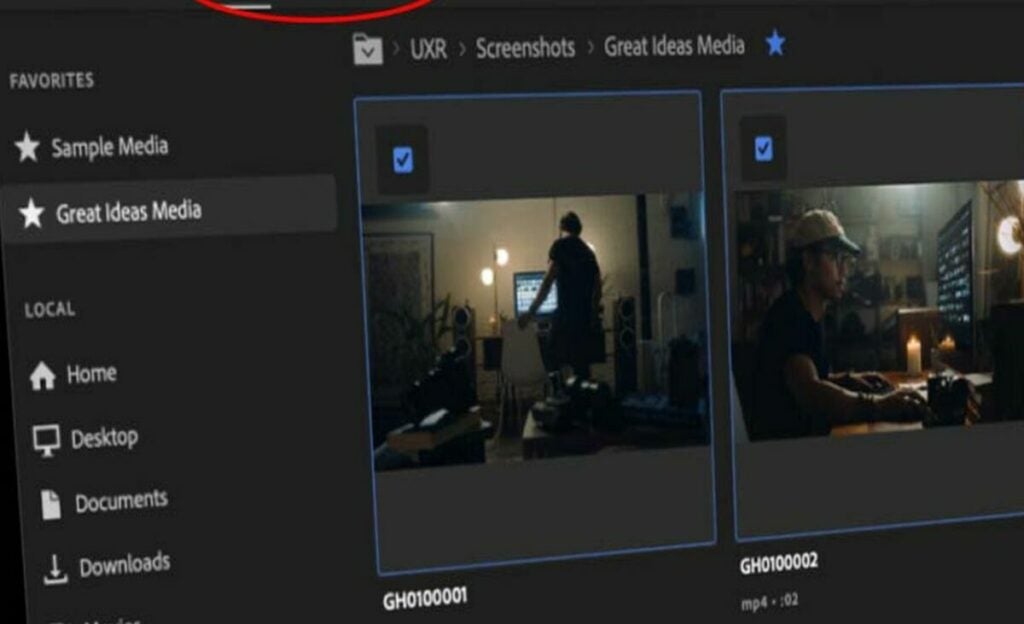
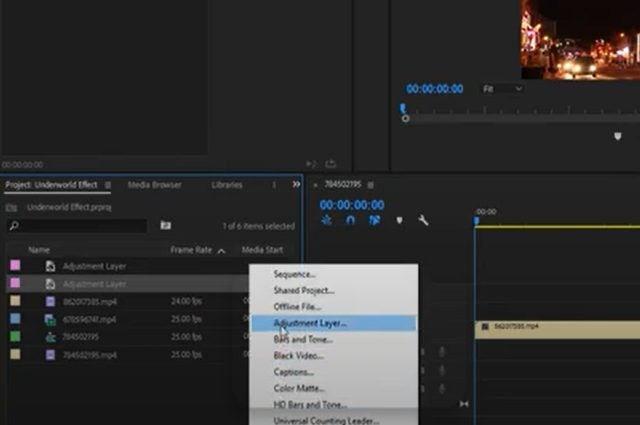
  1. Import Your Footage: Open Premiere Pro and create a new project. Import your video clips into the project bin.
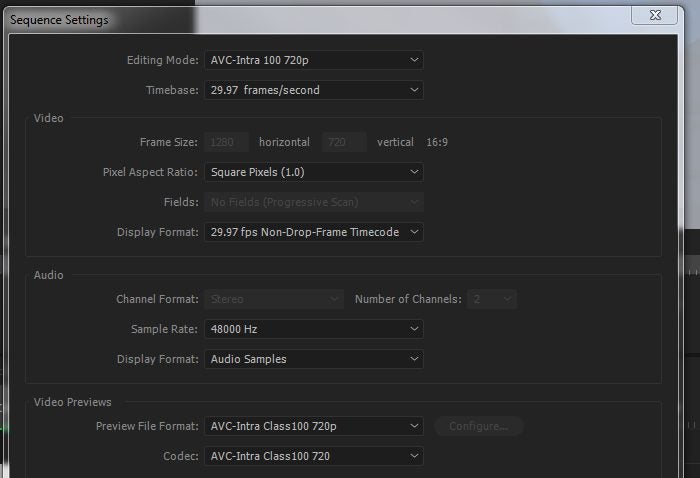
  2. Create a Sequence: Go to File > New > Sequence. Select the preset DSLR 1080p and adjust the settings:
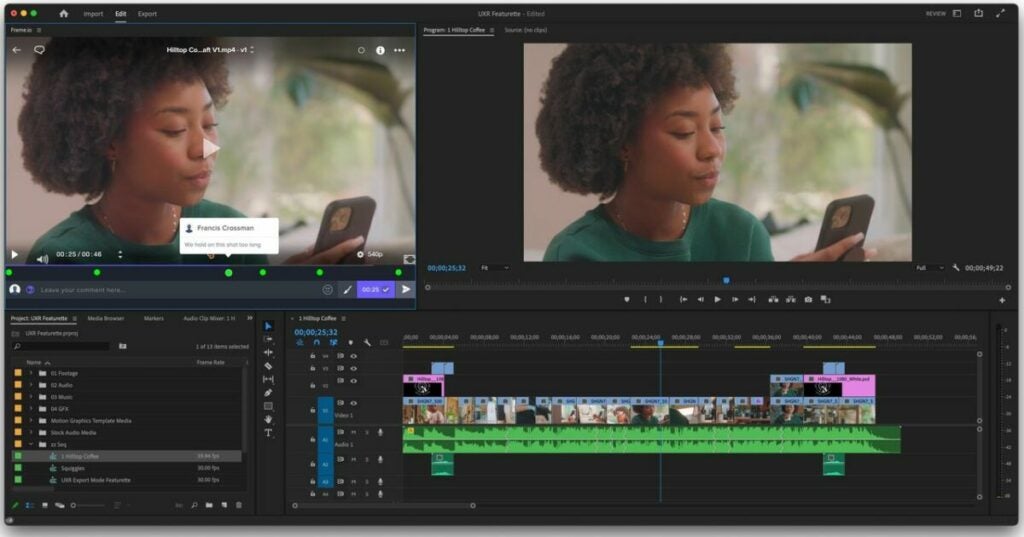
  3. Arrange Clips: Drag your clips onto the timeline and arrange them in the order of your storyboard. This is your rough cut.
For the rough cut, import your clips and arrange them in sequential order

Editing Your Fine Cut

Fine-Tuning for Impact

Once you have a rough sequence, it’s time to refine your edit.

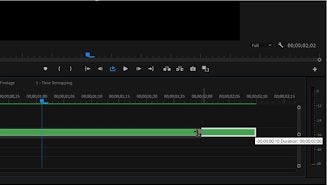
  1. Trim Unwanted Footage: Use the razor tool or keyboard shortcuts to cut out unnecessary parts of your clips. Ensure each clip starts and ends at the right moment.
  2. Transitions and Effects: Add transitions between clips for smoother viewing. Use Premiere Pro’s built-in effects to enhance your video. The Lumetri Color panel is excellent for color correction and grading​ (SocialPilot)​. Apply color grading to give your Reel a consistent look and feel.
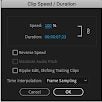
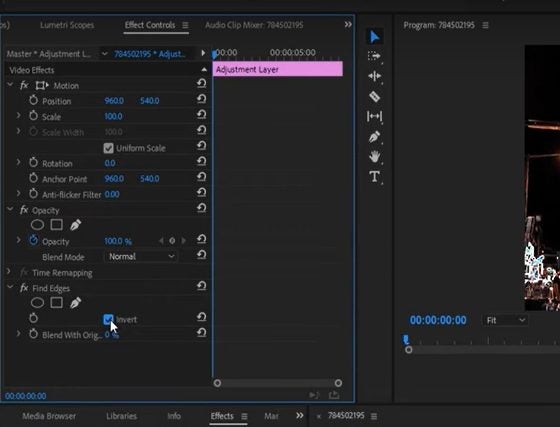
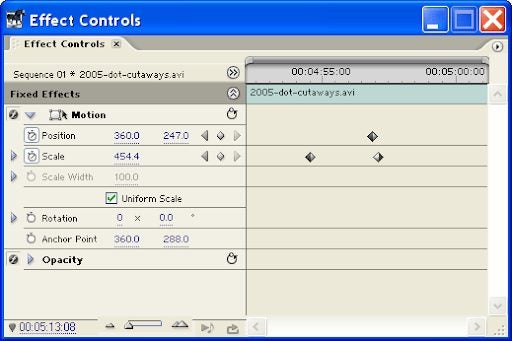
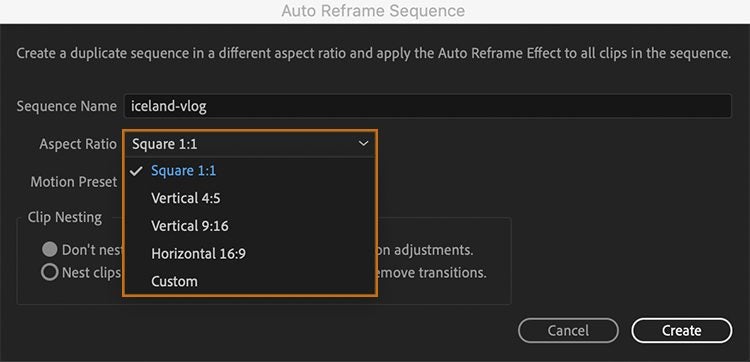
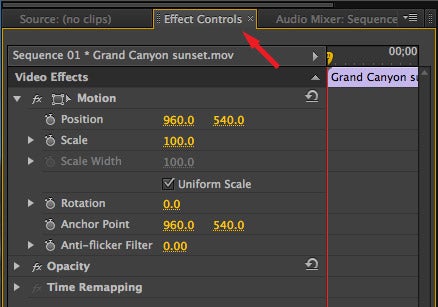
  3. Adjusting Framing: If your clips aren’t in the traditional 9:16 aspect ratio, you can adjust the framing by clicking on the clip and selecting the Effect Controls tab. Under Motion, find Position and Scale. Adjust the Scale to 105 to fill the frame horizontally and set the Position for ideal framing​ (SM Marketing Dashboard)​​ (Keyhole)​.
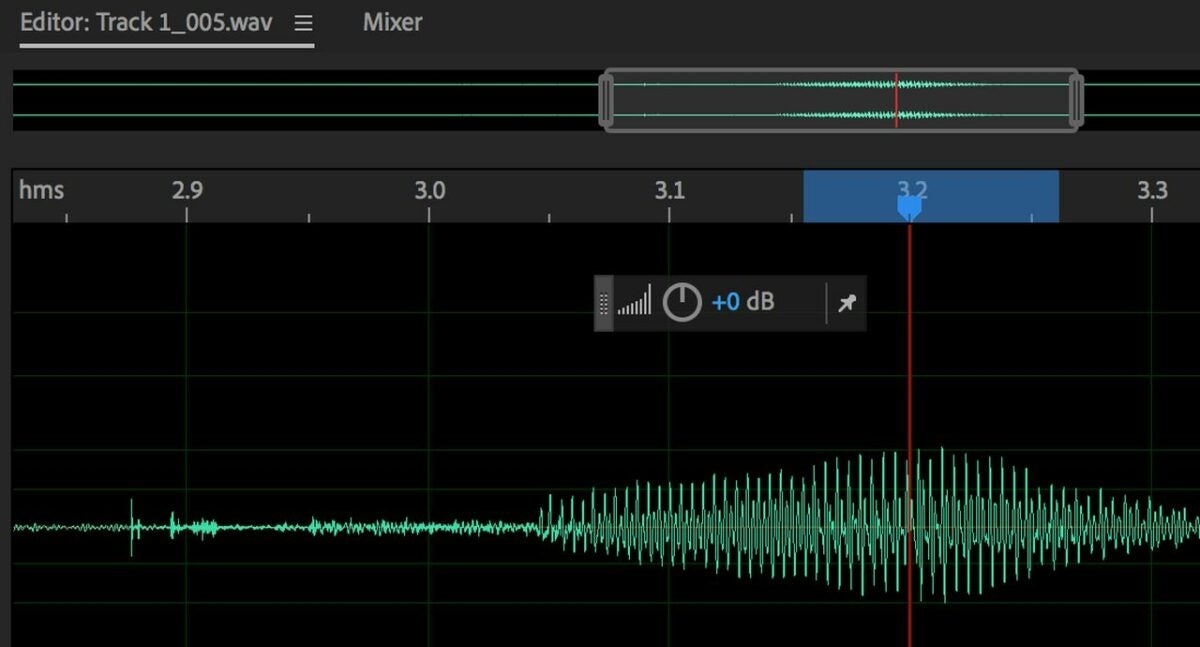
  4. Sound Editing: Add background music or sound effects to enhance the mood of your Reel. Premiere Pro allows you to adjust audio levels and apply effects like reverb or EQ to improve sound quality.

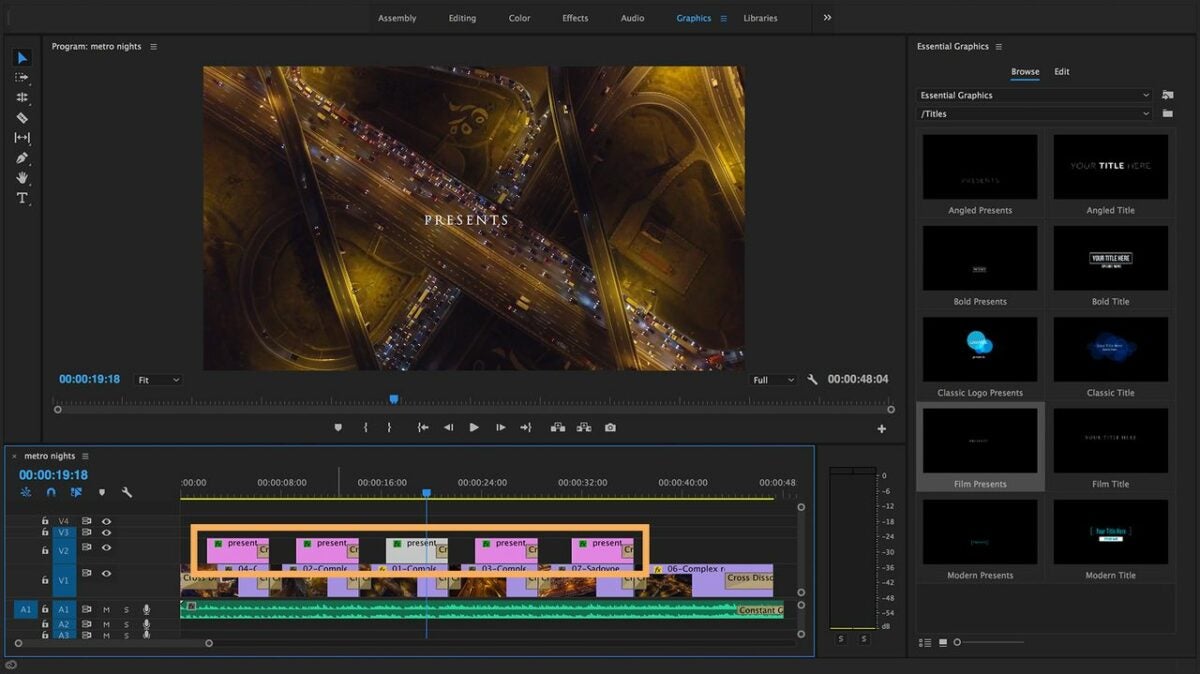
Adding Text and Graphics

Text and graphics can add valuable context or emphasis to your Reels.

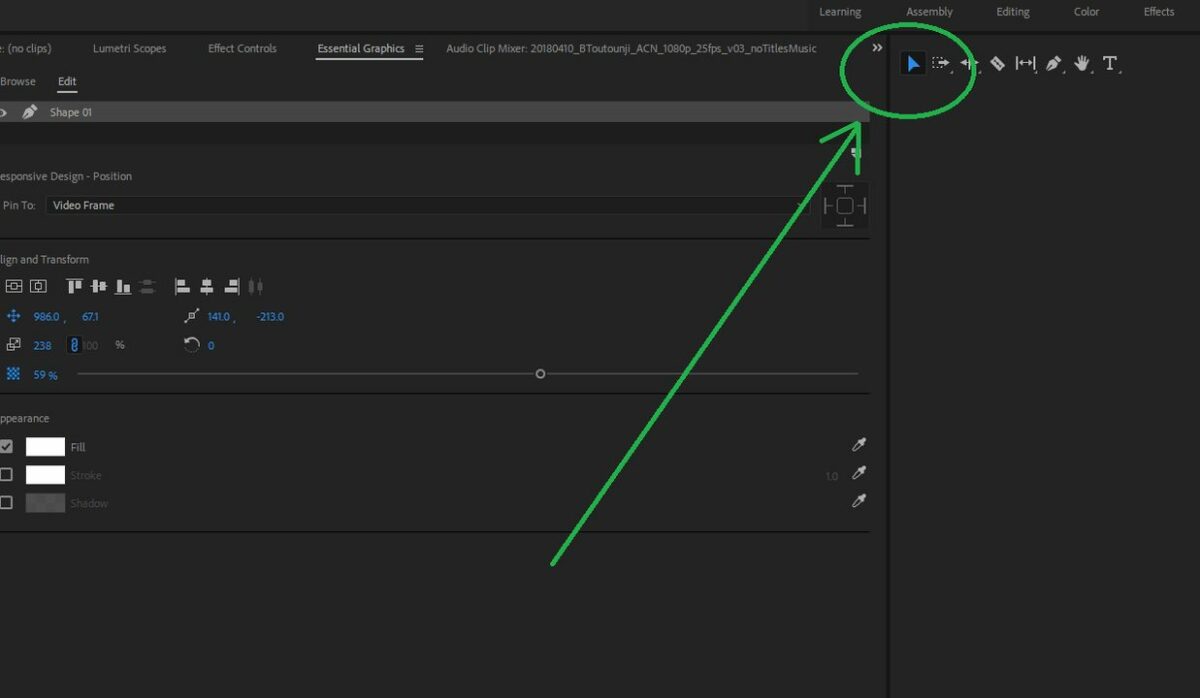
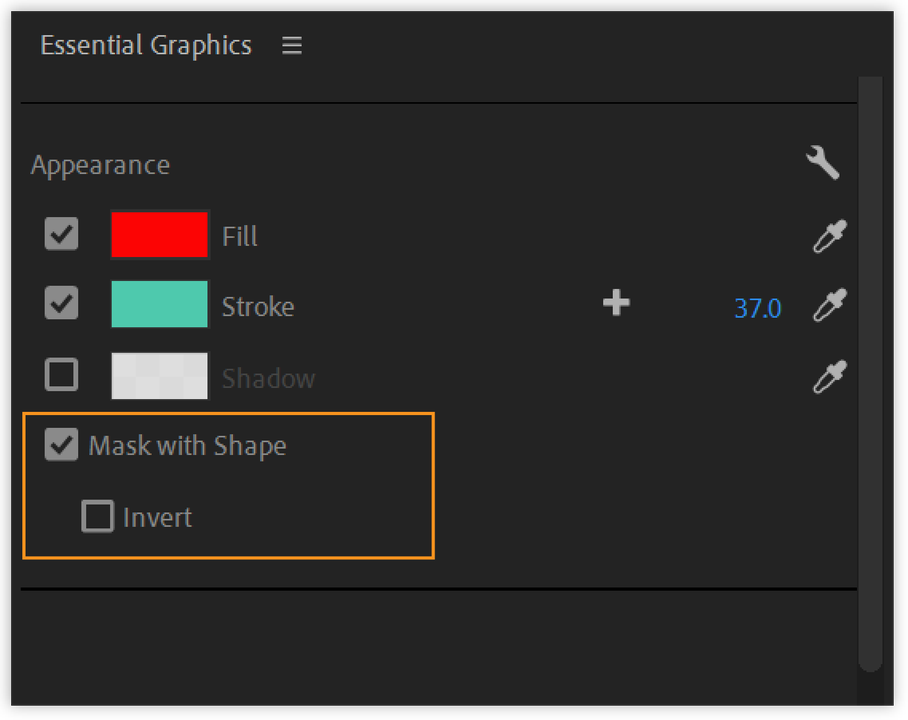
  1. Text: Use the Text tool to add titles, subtitles, or annotations. Ensure the text is large enough to be readable on small screens and positioned away from the edges to avoid being cut off​ (Riverside)​.
  2. Graphics: Add logos, icons, or other graphical elements to make your Reel visually appealing. Use motion graphics templates for dynamic text animations.
Trim unwanted footage and add eye catching effects and transitions in your fine cut

Exporting and Posting Your Reel

Optimal Export Settings

To ensure the highest quality for your Instagram Reels, follow these export settings:

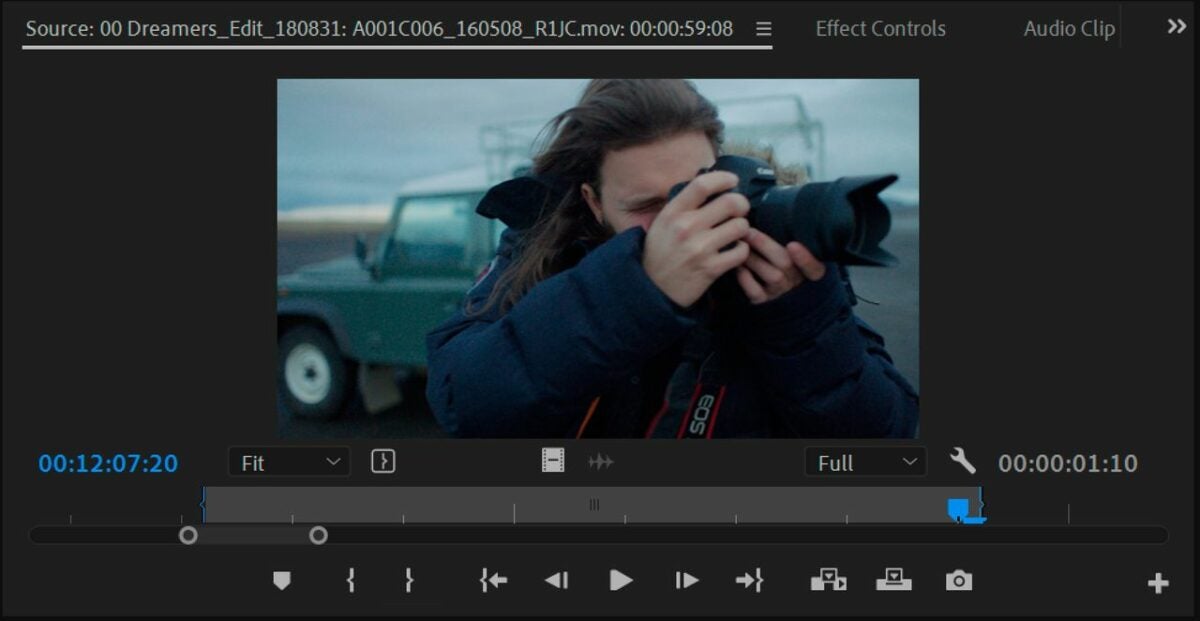
  1. Set In and Out Points: On the timeline, drag to the beginning of your clip and press I. Drag to the end and press O.
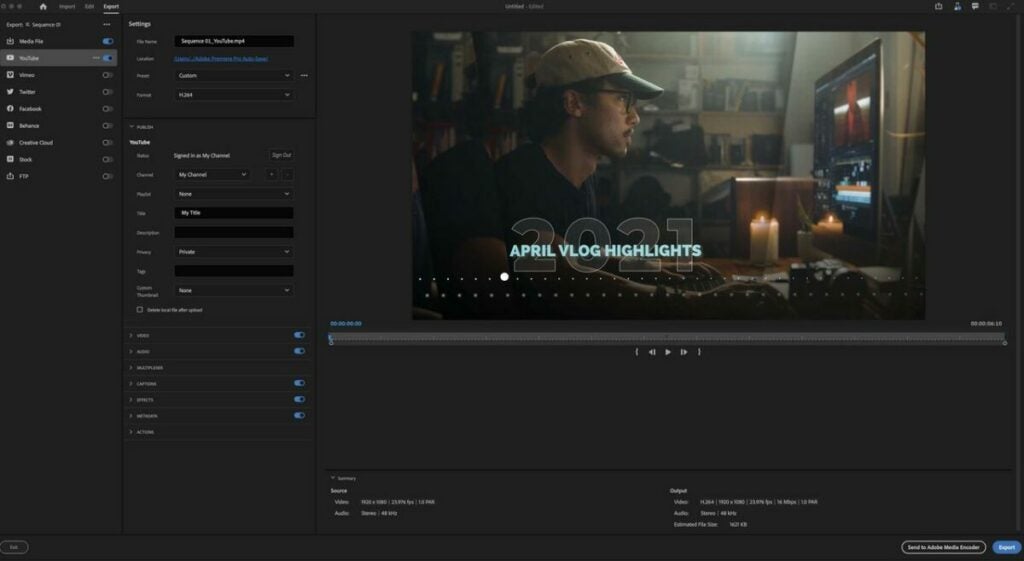
  2. Export: Go to File > Export > Media. Choose H.264 for the format. For preset, select Match Source High Bitrate.
  3. Bitrate Settings: Choose VBR 2 Pass. Set the Target Bitrate to 2 Mbps and the Maximum Bitrate to 3 Mbps​ (Later)​​ (SocialPilot)​.
  4. Use Maximum Render Quality: Check this option for the best export quality. Save your settings as a preset for future use and export the file.

Transfer and Upload

Transfer the exported video to your mobile device using AirDrop (for Mac users), Dropbox, or Google Drive. Open the Instagram app, navigate to the Reels section, and upload your video. Here are some additional tips:

  1. Cover Image: Choose a cover for your Reel. You can select a frame from the video or upload a custom image. Ensure the cover image is 1080×1920 pixels for optimal display​ (Riverside)​.
  2. Caption and Hashtags: Write an engaging caption and include relevant hashtags to increase discoverability. Instagram allows up to 2,200 characters for captions, but keeping it concise is often more effective​ (SocialPilot)​​ (Vista Social)​.
  3. Tagging: Tag relevant accounts and locations to broaden your reach. This can help your Reel appear in more feeds and increase engagement.
Adobe Premiere Pro Plans DOWNLOAD

Maximizing Engagement

Best Practices for Posting

To maximize the reach and engagement of your Reels, consider these tips:

  1. Timing: The best time to post on Instagram is generally early in the morning when there’s less competition and users are starting their day​ (Vista Social)​. Experiment with different times to see when your audience is most active.
  2. Hashtags: Use popular and relevant hashtags to increase discoverability. Research trending hashtags and incorporate them into your post. Tools like Hashtagify or Instagram’s Explore page can help identify popular hashtags in your niche​ (Vista Social)​.
  3. Engagement: Respond to comments and engage with your viewers. Building a community around your content can significantly boost its performance.

Analyze and Adapt

Use Instagram Insights to track the performance of your Reels. Look at metrics such as likes, comments, shares, and watch time to understand what works best with your audience. Adapt your content strategy based on these insights to continuously improve your engagement.

  1. View Insights: Navigate to the Reels tab on your profile and select the Reel you want to analyze. Tap the three dots and choose “View Insights” to see detailed performance metrics.
  2. Metrics to Watch: Pay attention to metrics like reach, impressions, engagement rate, and watch time. Higher engagement

Elevate Your Instagram Reels with Professional Techniques

Creating stunning Instagram Reels with Adobe Premiere Pro involves a combination of good filming techniques, meticulous planning, and precise editing. By following the guidelines outlined in this article, you can produce high-quality content that stands out and captures the attention of your audience. Remember to stay updated with the latest trends and platform changes to keep your content relevant and engaging. For more detailed tips and expert advice, be sure to check out our comprehensive Adobe Premiere Pro review and other related resources.

Adobe Premiere Pro Plans DOWNLOAD

With these tools and techniques, you’re well on your way to mastering Instagram Reels and making your mark in the world of social media.

This is Adobe’s new technology that will make your videos look better than ever before.

Researchers at Adobe have developed an artificial intelligence model called VideoGigaGAN, capable of increasing the resolution of blurry videos up to eight times their original resolution. Adobe claims in an article published a few days ago that VideoGigaGAN outperforms other video super-resolution (VSR) methods by providing more precise details without introducing typical AI anomalies in the sequences.

Adobe Premiere Pro DOWNLOAD

While generative adversarial networks (GANs) are effective at increasing the resolution of static images, they face serious difficulties when applied to videos, generating flickering and unwanted artifacts (visual imperfections).

VideoGigaGAN aims to offer the best of both worlds: the image/video quality of GAN models with fewer artifacts. Adobe has provided several examples that showcase their work at full resolution, where the results are incredibly natural, challenging the perception of whether generative AI has been used. In these examples, VideoGigaGAN’s ability to increase videos from 124×124 to 1024×1024 is demonstrated, highlighting subtle details that, when scaled, do not appear artificial at all, such as skin texture and folds.

It is important to note that these results are part of a preview and there is no guarantee that Adobe will make VideoGigaGAN available to consumers through Premiere Pro or other Creative Cloud programs. In October 2023, during the MAX event, Adobe introduced Project Res-Up, another experiment to improve the quality of videos and moving images based on a diffusion model, which also aims to enhance the quality of low-resolution GIFs and videos.

However, Adobe is not the only company in this field, as both Microsoft and Nvidia have also developed their own VSR scaling technology. These innovations indicate a growing focus on improving video quality through AI, which could have a significant impact on the entertainment and multimedia production industry in the future.

Adobe Premiere Pro DOWNLOAD

Adobe adds new features to Photoshop and Premiere that are basically magic

Adobe has released a number of new features in the new versions of Photoshop Elements and Premiere Elements, including new AI features.

If you enjoy editing photos and videos with Adobe‘s programs, get ready. The company has released the latest versions of Photoshop Elements and Premiere Elements this week, loaded with innovations to make your creative process easier, including many based on artificial intelligence. Below, we highlight the most notable ones.

Adobe Photoshop DOWNLOAD

In the case of Photoshop, there is a new tool that automatically selects objects and backgrounds for removal, editing, or replacement. This function bears a striking resemblance to Google’s Pixel Magic Eraser technology. Adobe states that you can use this tool to change the sky, allowing you to turn outdoor photos into, for example, a hellish landscape.

AI-powered tools also enable you to smooth a subject’s skin and perform a series of automatic intelligent adjustments. Additionally, Photoshop Elements 2024 uses AI for its new “Artistic Effect” options, allowing you to completely transform images and give them the appearance of famous artworks.

Adobe‘s AI also lets you enhance JPEGs to remove artifacts (small imperfections resulting from image compression and decompression), creating a “smoother and more natural” look. This feature provides more control over these types of files, which have never been the first choice for image editing due to such issues.

Regarding Premiere, the popular video editing program, it now uses AI to automatically create video summaries from the material you upload. Adobe says these AI-generated videos “draw you in by focusing on motion, close-ups, and your highest-quality imagery.”

However, it’s important to note that this is an Elements update, so there are many more features unrelated to AI. In this new version, Photoshop includes new color and tone presets, photo reels that can be saved as MP4 or GIF, a bunch of new one-click editing options, and an aesthetic facelift to streamline everything.

Additionally, there’s a new feature called “Guided Edits,” which teaches you how to do things as you go, serving as a tutorial.

Adobe Premiere Pro DOWNLOAD

Meanwhile, Premiere has received a set of new sound effects, such as reverb, and a series of built-in presets to create a unique atmosphere. Like Photoshop, there’s a visual redesign that offers a “fresh look” and access to a similar collection of tutorial-based Guided Edits.

How to sync videos to musical beats in Premier Pro while saving hours of editing time

The use of music in videos is one of the most effective approaches for linking different clips recorded across multiple locations and times to produce a logical and cohesive outcome. Music gives otherwise dull footage a sense of mood and atmosphere that no other editing effect can achieve on its own.

Adobe Premiere Pro Download

Whether you are making a music video, personal vlog, or corporate industrial video, these tips will simplify your musical synch edits in Adobe Premiere Pro.

  1. Import your video and audio

    Start by importing the footage from your recording device

    Begin by importing the previously recorded video onto your device and creating a new project in Adobe Premiere Pro. Locate your preferred audio file and listen to the track a few times. To start a new project, find the desired footage and sound in the Media Bin and select the File menu.

    Your video will typically include scratch audio. The soundtrack is a separate audio file, ultimately replacing the original audio, assuming you choose not to mix it into the clip. Since you are assembling the entire clip around the music, select your track carefully. Ensure that the audio file has distinct beats for synchronizing your cuts. To add the audio file to your sequence, import or drag and drop it from the Media Bin to replace the scratch audio.

  2. Add markers

    Set markers at the beats in your audio file to start creating your sequence

    Once you’ve gathered your media and created a new project in Adobe Premiere Pro, you’re ready to start adding markers to the sequence. Locate the Wrench icon above your timeline and click on it to display the dropdown menu. Select the Show Audio Waveform. The waveform graphic shows you where the beats are in your selected audio file.

    Now add markers to the sequence using the M on your keyboard as a shortcut. Using the waveform, locate the beats within the song to make your cuts on and apply markers to them throughout. This process involves an element of precision. Those who are less than musically inclined can rely on the waveform.

  3. Insert your in and out points

    Adding In an Out points trims unwanted footage and lets you automatically sync your edits later on

    From the Media Bin, start adding the In and Out points. You can either click on their respective icons or use the I and O keys as shortcuts. Set the In and Out points to each clip you want synchronized to the beat. This informs the editing software of where you want your cuts.

    After identifying all the clips to be used in the sequence and setting your In and Out points in the Media Bin, proceed to select the video segments in the desired order of appearance. Choosing them in order prearranges your rough cut on the editing timeline.

  4. Automate to sequence

    The Automate to sequence feature interprets your markers and In and Out points to automatically generate a sequence in your timeline

    Now that you have your markers in and and your In and Out points set, select Automate to sequence from the clip menu. Veteran Premiere Pro editors may be unfamiliar with this step, but Automate to sequence is the most efficient way of adding your clips to the timeline and editing them to a musical beat. The function lets you quickly create time-lapses, eliminate audio pops, and edit jump cuts without additional time-consuming steps.

    Choosing the Automate to sequence option produces a new window on your screen. At this point, navigate to the Ordering menu and choose the Selection order. Once you’ve enable the function, find the Placement menu click on the At Unnumbered Markers. Now, change the method to Overwrite Edit.

  5. Match your footage

    Rely on the waveform to set your marker a few frames ahead of the upbeat

    Confirm that the Use In/Out Range setting is enabled. If you haven’t deleted your scratch-recorded sound, click on the Ignore Audio option to eliminate it. Select OK to enable the changes. This prompts Adobe Premiere Pro to automatically synchronize your video with the markers you previously applied to the sequence.

    While the Automate to sequence feature lends itself to a more efficient editing workflow, it is worth reiterating that your clips must be in the correct order inside your Media Bin for the feature to work. Be sure to arrange the segments sequentially and set your In and Out points before selecting the Automate to sequence button. Lastly, never place your markers directly on the beat. Instead, aim for setting them a frame or two head of it for optimal results.

Syncing footage with Adobe Premiere Pro made simple

Adobe makes editing video to music easy, but it doesn’t necessarily offer a one-click solution for making complex synch edits that once took hours to finish. Instead, the Automate to sequence option gives a reliable departure point for creating a fine cut. You’ll almost assuredly make minor adjustments to your project before it’s complete. For more on making high-quality Instagram reels in Adobe Premiere Pro, check out this recent tutorial.

How to create Instagram Reels READ MORE

How to add animated titles using Essential Graphics in Premiere Pro

Adobe introduced a new approach to its motion graphics workflow when it updated The Graphics workspace and Essential Graphics panel in April 2017. The new Essential Graphics panel addressed the time-consuming video processing issue that required editors to jump back and forth between Adobe Premiere Pro and Adobe After Effects.

Premiere Pro FREE TRIAL

The 2017 update to the Graphics workspace was Adobe’s successful attempt at streamlining the workflow of professional editors who work in collaborative video production environments. The final result produced a far more manageable and beginner-friendly feature from Adobe. Editors can now animate and customize titles using easy-to-access After Effects templates with no prior experience and without ever opening the After Effects app.

Creating text effects and animations in Premiere Pro

Adobe simplifies the motion graphics workflow by giving all the required tools in a single panel where you can seamlessly design and animate unique text and graphics for your videos using the supplied presets in Premiere Pro. Creating original motion effects for your clips requires a basic familiarity with the workspace. Here’s how to easily generate text animations from scratch using the Essential Graphics panel in Premiere Pro.

  1. Choose your text

    Create animated titles and graphics with the Essential Graphics panel

    Start by clicking on Window > Essential Graphics. The next step is to use the Text Tool [T] to generate your title. Once you’ve added the text, this creates a new layer under the Editing tab. Selecting the Text layer reveals all corresponding properties and tools.

    To align your text in the desired position within the frame, access this under Align and Transform. This toolset lets you choose from an array of different font styles. Click on Appearance to adjust text color or insert visual elements like drop shadow, multiple strokes, and responsive background.

  2. Select your background elements

    Select your background using the graphic workspace to create a rectangle

    For your background, start by creating two Rectangle layers. Click on New Layer beside your existing at the top of the Essential Graphics panel. The rectangles should significantly outsize your text. The larger asset gives you enough room to crop and add masking later.

    To change the color of your rectangles, navigate to Fill in the Appearance at the lower right of the panel. Choose your colors by checking the box next to the background options. Now, you can arrange your layers. Put one color at the top and the other at the bottom. Now, position the text at the top.

  3. Mask your graphic

    Select mask with shape under appearance

    Adobe introduced masking to the revamped edition of the Essential Graphics panel, making this feature accessible directly in Premiere Pro. Before adding a mask, you need to create a new layer for your rectangular shape. Size and position the shape as desired, and then, select the Mask with Shape under Appearance, located at the bottom right.

    If you are working with several layers, the Graphics panel gives the option to group them so that the mask applies to each layer. Now, you’re ready to animate your graphic.

  4. Set your background and text in motion

    Use the Motion effect to position your graphic within the video frame and adjust effect properties

    Once you have arranged all the elements by following the steps above, you can now animate your text and backgrounds following a simple approach called the Y Position shift. Start by animating the text layer.

    Animate the Y Position by moving the Playhead over the two-second mark in your timeline. This times the animation over two-second intervals so that one color appears first, followed by the second color.

    Now that you’ve established where the animation ends, choose the Text layer on the panel before selecting the Position icon under Align and Transform.This step turns on the animation and adds a keyframe at the time indicator. Verify the motion effect is applied after the symbols turn blue.

    At this point, you can bring your playhead to the one-second mark. Now, adjust the Y attribute to put your text in the appropriate starting position within your timeline. Any time you make changes to a given attribute, a new keyframe generates, adding itself to the location. Now, you can animate both of your rectangles by following the same steps. Be sure to offset the time for each shape to produce the desired effect.

Customizing video titles is simple with Premiere Pro

With its seamless drag-and-drop interface and preset animated texts in one panel, finding the perfect look for your video titles couldn’t be easier in Premiere Pro. The software comes equipped with several advanced features to help you create stunning, professional-grade videos. For more on color-correcting night videos, check out our Premiere Pro latest tutorial.

Premiere Pro Offer CHECK IT OUT

Premiere Pro review: where does Adobe’s video editor shine?

Adobe Premiere Pro is the raw video editing app from Adobe’s Suite. Its timeline-based interface, organized workspaces, and powerful editing tools, effects, and motion graphics are loved and lauded by some of the most innovative directors and content creators around the world.

It can take a while to get to know all its capabilities, but that’s only because Premiere can really do just about any video editing task imaginable. The app has been used to edit everything from Hollywood blockbusters and Super Bowl commercials to humble YouTube sketches and video podcasts.

If you’re a beginner, you’ll be able to understand the basic features and start editing with Premiere Pro after reading this article or watching a few brief tutorials. If you’re a professional video editor, read on to find out where Premiere shines and where its weakness starts to show.

You can no longer buy the Premiere Pro app outright; it’s only available as a subscription service with monthly or yearly payments. If you’d like to try the demo version, you can download a free seven-day trial of Adobe Premiere Pro.

Adobe Premiere DOWNLOAD

How does Premiere Pro compare to other video editors?

Compared to other video editing apps, the subscription price is pretty expensive. How much Adobe Premiere Pro will be worth it to you depends on your budget and what kind of video editing you’ll be doing. Although there isn’t a single standout alternative to Adobe Premiere Pro, it does have a few interesting competitors.

Premiere Pro is currently the most popular choice in the general video editing world, but there are several groundbreaking apps that can perform certain specialized tasks better or work more efficiently in different operating systems. Alternatives to Premiere Pro include:

Final Cut Pro has a lot of the same features but is optimized for macOS users.
DaVinci Resolve is cheaper and more focused on color correction.
Adobe After Effects has better visual effects and motion graphics tools; however, Premiere Pro is better at overall video editing and assembly.

Adobe Premiere Pro’s system requirements

If you use a PC, you’ll need the 64-bit version of Windows 10 or 11 to run the latest version of Premiere Pro. If you use a Mac, you’ll need at least macOS 10.15.

Make sure your CPU is at least a sixth-generation Intel or an AMD Ryzen 1000 Series or better with a minimum of 8 GB of RAM. Premiere now also has full support for Apple’s Silicon M1. Your display’s resolution should be a minimum of 1920 x 1080.

Adobe Premiere Pro main modes are import, edit, and export

A look at some of Premiere Pro’s newest upgrades


Older versions of the app had workspaces for Assembly, Editing, Titles, Audio, Effects, and Color. Now, it’s been simplified to just three main modes: Import, Edit, and Export.

The welcome screen now has a Learn option that can guide beginners through the workflow or show experts all the latest upgrades. The app comes with eight built-in interactive tutorials that demonstrate how to import clips, add titles, use color correction, edit audio, etc.

Many features and graphics now come with ready-made templates and animations. For instance, you can select one of the available animated motion graphic templates and just replace the default text with your own message or logo to make an instant intro.

The captioning workflow has been overhauled to allow for easier formatting and editing of your captions. There’s also a new automatic captioning feature that is currently in beta.

If you upload your videos to various social media sites, you may have to export to a different aspect ratio for each site. Premiere now has an Auto Reframe feature that uses AI to identify the most important things in your video and crop it to various aspect ratios, whether horizontal, vertical, or square, without losing sight of your subject. Auto Reframe also lets you adjust the keyframes it automatically creates in case you want to make some manual corrections. Final Cut Pro also recently released a similar feature it calls Smart Conform.

When you subscribe to the Adobe Premiere Pro service, you now get a free online video sharing account at Frame.io with 100 GB of space. The service includes a web viewer and reviewer that allows your collaborators to check out your beta project and give you notes without having to install Premiere Pro.

Import practically any format

Premiere Pro can import video footage from pretty much any device that can record it. This includes practically any raw format from any professional camera, smartphone, or DSLR with resolutions up to 8K. With the right cables, you can even import video from tape with the timecodes intact.

Altering a video in Adobe Premiere Pro edit mode

Premiere’s editing layout is intuitive and adjustable

Once you’re in Edit mode, the workspace shows you four panels. If you like, you can undock these panels and move them around or remove them and add different ones.

  • Previews and thumbnails of your source footage are at the top left
  • A preview of your project video is at the top right
  • Your project’s assets are at the bottom left
  • Your track timeline is at the bottom right

Your track timeline has two separate sections to help keep you organized. All the audio tracks are placed in the bottom section, and all the video tracks, including images and graphics, are in the top section.

If you want to skip the Import screen, you can just drag and drop almost any type of media file from any file explorer straight into your timeline. Premiere Pro will automatically create separate but linked video and audio tracks and place your media in them so that you can jump right into editing. The app will also automatically save your project at regular intervals to make sure you don’t lose too much if the power goes out.

The basic editing tools are easy to learn

Premiere Pro offers four classic editing tools that sound like they might feel at home in a waterpark: Slip, Slide, Roll, and Ripple. These give you different ways to trim or shift clips quickly while preserving the length of the project or adjacent clips. You can edit tracks even while the project preview is playing.

The app also has a regular Trim mode that trims without shifting, which you can access by double-clicking on either end of any clip. In Trim mode, your preview window will split to display the outgoing frame of the clip you’re editing as well as the incoming frame of any adjacent clip. This mode gives you easy options to make adjustments one frame at a time or add transitions.

Adobe Premiere Pro’s transitions

Premiere Pro comes with a large library of transition effects, and you can find plugins online with many more. Once you have at least two clips in your timeline, you can search for a transition in the assets panel at the bottom left and then drag and drop it to where the clips meet.

Transitions are just as user-friendly as clips. You can drag the edges of a transition in your timeline to change its length or select the transition and delete it. Selecting a transition will also open a transition control panel beside your project preview panel where you can dig in and change even more details.

Lots of highly maneuverable effects

The app comes with hundreds of video and audio effects, all of which are searchable from a search box in the assets panel. These include toolkits for

  • Lighting
  • Colorizing
  • Keying
  • Warping
  • Stylizing

Premiere Pro lets you drag and drop any effect onto any track to apply it directly. You can also go to File > New > Adjustment Layer to create a new adjustment layer on your timeline. When you add an effect to an adjustment layer, it affects all the tracks below it.

You’ll find the Effects Control window in a tab in the top left panel. When you select any clip or adjustment layer, you’ll be able to tweak any effects you’ve applied to it here. That includes adjustments to the opacity, speed, position, scale, rotation, anchor point, and Lumetri colors of the clip. This window is also where you can apply time remapping to any effect by using keyframes.

Premiere’s built-in effects are user-friendly and powerful enough that they’ll work for most home content creators and even many professionals. If you’re making the next “Avatar” or you need advanced tools like automatic motion tracking masks, you may need a more powerful engine like Adobe After Effects.

Use export mode in Adobe Premiere Pro to choose custom templates

Export as simple or advanced as you like

When you’re happy with your project, you’ll move seamlessly to the Export workspace. The Export mode gives you a list of handy export templates you can pick, from common social media sizes to high-quality media files. You can also select various formats together to export to all of them at once.

If you want to get into the details, Premiere gives you dropdown menus in plenty of advanced categories so that you can tweak your export specs to taste. If not, the interface lets you breeze past the specifics and just export your video.

Final verdict: Adobe Premiere Pro is the king of raw video editing

Whether you’re a novice video editor or a demanding pro, Premiere has the best for both worlds. Its large professional-level toolkit has plenty of simple entry points for newbies. The app runs and renders quickly on most computers and fits into an expansive ecosystem of products and services that let users create and collaborate easier than ever.

Ready to try out some of the features of this video editing software? Check out our guide on how to color correct amazing nighttime videos with Premiere Pro.

Pros

  • Drag-and-drop media and effects
  • Detailed transition editing
  • Subscription service gives you regular free updates
  • Easy integration with full Adobe Suite

Cons

  • Steep overall learning curve
  • Unsatisfactory 3D graphics editing

Developer: Adobe, Inc.

Publisher: Adobe, Inc.

Top Features: Timeline-based video editing

Platform Reviewed: Windows PC

How to adjust the timing of your videos in Adobe Premiere

Video editing and timing are essential and useful tools in the world of video making. One such useful program in enabling that is  Adobe Premiere Pro. The speed and duration of a video can be edited using Adobe Premiere. This article will assist you in how that can be achieved.

The speed of a video clip is the amount of time at which the video plays back when compared to the amount of time at which it was recorded. The duration of a video clip is the amount of time it takes to play from the start to the end of the video. We’ll show you how to work with both.

Adjusting the timing of your videos in Adobe Premiere

  1. How to change the duration of a video clip using speed/duration command

    How to adjust the timing of your videos in Adobe Premiere

    – Click ctrl to select a group of video clips in the Project panel.  

    – Choose Clip then Speed/Duration or right-click over a selected clip and choose Speed/Duration

    – Click OK

    The following can also be achieved:

    – Reverse Speed allows you can play the video backward 

    – Maintaining Audio Pitch allows you to keep the audio at its current pitch.

    – Clicking Ripple Edit, Shifting Trailing Clips keeps videos playing as a slideshow.

  2. How to adjust the timing of your video using the rate stretch tool

    How to adjust the timing of your videos in Adobe Premiere

    The Rate Stretch tool is an effective method to change the duration of a clip in the Timeline while simultaneously changing the clip’s speed to fit the duration.

    If there is a gap in your sequence of a specific length and the gap must be filled with some speed-altered media rate stretch lets you extend or compress the speed to the percentage required.

    – Find the Rate Stretch icon in your main toolbar. The tool can also be selected by pressing the X key on your keyboard.

    – The next step is to click on the video clip that you want to stretch or shorten, and drag it in any direction. As the video clip’s length changes, the percentage value will adjust on the clip, this becomes easy to tell how slow or fast it is. Any label reading over 100% will play faster than the original clip. When you are satisfied with the Rate Stretch adjustments you can save the video. 

    – You can also use Rate Stretch to change speed-up and slow-down sections of a video clip. A few cuts on a longer clip can be achieved with the Razor tool. After that, head to the Rate Stretch tool to lengthen or shorten individual sections if you want to adjust their speed.

  3. How to adjust the timing of your video using time remapping

    How to adjust the timing of your videos in Adobe Premiere

    The speed of the video portion of a clip can be varied, Time Remapping is used to create slow motion and fast motion effects on a single video through the following steps:

    – Right-click on the video

    – Select Show Clip Keyframes

    – Time Remapping 

    – Speed. 

    A horizontal rubber band controlling the clips speed appears across the video’s center. A white speed-control track appears in the upper portion of the video, just below the title bar. For more clear visibility zoom out the screen.

    Drag the band downward or upwards to decrease or increase the video clip’s speed. A tooltip appears showing the change in speed as a percentage of the original speed. It is important to note that Time Remapping doesn’t change the clip’s audio portion; it remains linked to the video portion.

Get your timing right!

Adobe Premiere is an essential tool that is contributing to the evolution of media production. Anyone can edit a video clip to the desired specifications, preferences, and choices. Now that you know how to work with the timing, you can perfect your masterpiece. You can also learn how to add transitions in Premiere Pro to make your videos stand out even more.

How to color correct amazing night videos in Premiere Pro

High contrast, varying light sources, and video noise account for the biggest obstacles when it comes to capturing night footage. Fortunately, Adobe Premiere Pro offers some of the most advanced color correction effects available in the consumer and professional markets.

Adobe makes color correction easy by providing effects and tools that allow you to fix video captures directly on the timeline. They work just like standard effects, except Adobe’s color effects allow for fine color and luminance corrections to ensure vibrant, matching footage while optimizing your camera’s dynamic range. Below, we explain how to grade your night stock for optimal results.

Start by enhancing your night footage in Adobe Premiere Pro

  1. Capture your best night footage

    Proceed to upload the nighttime stock to your hard drive before launching Adobe Premiere Pro.

  2. Create your first Adjustment Layer

    Once you have the project set up in Premiere Pro and the clip is in your timeline:

    – Navigate to File at the top left and drop down

    – Scroll the mouse to New

    • Find Adjustment Layer and Open

  3. Locate the Effects Control tab

    Find the Effects Control tab on the clip you’re working within the timeline and right-click on the effect.

  4. Select and enable the Find Edges effect

    At this point, you’ll see multiple effects options. The Edges Effect falls just beneath the standard Video Effects and Stylized Effects. Drag and drop this effect onto the new Adjustment Layer you’ve already created. Now, select the box adjacent to Invert.

  5. Locate Opacity in Effects Controls

    Underneath Opacity, locate the Screen Mode. Switch from Normal to Screen Mode.

  6. Enable Tint

    Return to Effects. Find Tint and apply it to the new Adjustment Layer by dragging and dropping.

  7. Navigate to Map White in Premiere Pro

    Under effects controls, locate Map White. Now, pull up the Color Picker tool to select a particular color.

  8. Blend the image

    Under the Find Edges effect, look for an option called Blend. Next, Blend the edges with the original image with a setting no greater than 20%, so you don’t lose any fine details.

  9. Use the Camera Blur effect

    Drag and drop the Camera Blur effect into the night footage clip on your timeline. After applying this effect, bring the Opacity down somewhere closer to 80%.

  10. Create a copy of your Adjustment Layer

    Once you’ve duplicated you layer, delete the Camera Blur. Find Tint again, and set it to a color on the red spectrum to enhance the image. In the duplicate layer, lower Opacity to below 20%.

Now you can grade your nighttime video

Remember, if you’re grading an image for the big screen, the above grading procedure in Adobe is far more advanced. But if you’re simply creating online content or you need a quick insert for your video, follow these easy steps:

1. Find Lumetri Color

In the basic correction effects, open Lumetri Color and apply LogC2Rec709.

2. Adjust color and contrast

At this step, you can quickly adjust highlights, shadows, whites, and blacks along with your white balance until the image improves.

3. Choose the Fuji Eterna 250D effect

Continue to manipulate with your correction settings to Fuji Eterna 250D effect until the video looks vibrant.

In closing

Color grading for professional video is an advanced procedure and specialized career in itself. There are many, many more color correction features to unlock in Adobe Premiere Pro. However, the above techniques offer a relatively easy and fast way to produce fantastic-looking night shots.

How to add keyframes in Premiere Pro

Adobe Premiere Pro is a comprehensive software for video editing and production. It’s an Adobe Creative Cloud app with a flexible, intuitive interface packed with excellent features. You can create new projects and access others you’re working on.

Learning how to use keyframes is vital for getting the best out of Premiere Pro and creating stunning professional-quality videos to send out into the world.

40% off
BLACK FRIDAY

From: All Adobe Creative Cloud Apps

What are keyframes? 

You use keyframes to alter the properties of a video or audio effect in stages, which gives the impression that they’re moving. You create more than one keyframe and set values at each one. Premiere Pro will then gradually change the values between one keyframe and another. This is called interpolation.

For instance, you could set up one keyframe with a volume of -20dB and another 10 seconds later with a volume of 0dB. Premiere Pro will interpolate this into a smooth 10-second increase in volume. There are two methods for working with keyframes: the Timeline and the Effect Controls window.

How to add keyframes in Premiere Pro

  1. Method 1: Using the Timeline panel

    How to add keyframes in Premiere Pro

    To expand a video track to work on it, double click in the video header. Once expanded, you’ll see three buttons to help you use a keyframe: Go to Previous Keyframe, Add-Remove Keyframe, and Go to Next Keyframe. A white horizontal line will show along the length of your clip, allowing you to look at your keyframes in the Timeline panel. To change an attribute, Ctrl+click on the clip’s FX badge.

  2. Method 2: Using the Effect Controls window

    How to add keyframes in Premiere Pro

    To use the Effect Controls window, select your clip in the Timeline and open it (Window > Effect Controls). You’ll be able to see your image and any effects you have added.
    Using the Toggle Animation button will allow you to add keyframes. Navigating between the keyframes with the arrow buttons creates an animated effect.

    The right side of the window shows a mini timeline for the clip you’re working on. It shows keyframes as diamond-shaped icons. This view lets you see keyframes for all your effects simultaneously and gives you god control of the process.

When to use Keyframes

There are many ways to use keyframes in Premiere Pro. Here are a few:

  • Create dynamic graphics, including for your main titles.
  • Simulate camera effects such as panning and zooming.
  • Bring still images to life using Position and Scale keyframes.
  • Improve your audio using volume attributes.

Perfect your video

Adobe Premiere Pro is the ultimate package to use if you’re creating and editing videos. Using keyframes to animate parts of your video will play a significant role in creating the stunning effects you’re after.

How to change aspect ratio in Premiere Pro

Adobe Premiere Pro is the perfect video editing tool for producers and content creators. The Adobe Creative Cloud app provides you with everything you need to work with, including effects, transitions, color adjustments, layers, and filters. 

You can change the parameters of your video project as you go along. One is the ratio of width and height, known as the aspect ratio. Video frames have a Frame aspect ratio. Pixels that compose the frame have a Pixel aspect ratio (PAR). When you start a project in Premiere Pro, you set the frame and pixel aspects and cannot change them. But while you’re working on a sequence, you can change the aspect ratio and use items created with other aspect ratios.

40% off
BLACK FRIDAY

From: All Adobe Creative Cloud Apps

How to change aspect ratio in Premiere Pro

  1. Access Sequence Setting

    How to change aspect ratio in Premiere Pro

    Right-click the new sequence and choose Sequence Setting. Choose Square Pixels for the pixel aspect ratio. 

  2. Target the aspect ratio

    How to change aspect ratio in Premiere Pro

    You can change your aspect ratio in the middle of editing in Premiere Pro. 

    From the “Project Panel,” use the feature called ‘Auto Reframe Sequence,’ which provides different aspect ratios you can select from, like square 1:1, vertical 9:16, horizontal 16:9, and custom if you want cinema widescreen. Choose the ‘Target Aspect Ratio’ you want, say, vertical 9:16. Motion tracking and clip nesting should be on default. Click on ‘Create.’ Premiere Pro will automatically create a duplicate sequence with the updated aspect ratio.

  3. Adjust the frame

    How to change aspect ratio in Premiere Pro

    Now go through your video clips to adjust the framing. Use the ‘Motion’ parameters in the ‘Effect Controls’ panel. If the motion effects are disabled because of the ‘Auto Reframe Sequence’, click on ‘fx’ to enable them. Now you can adjust the framing using ‘Position’ and ‘Scale’.

Commonly used aspect ratios 

Your video is shaped by the aspect ratio. You should know what the shape of your video must be before you start shooting it. This will help you frame your video and set the correct aspect ratio. Here are some examples: 

Widescreen (16:9)

Used for films, documentaries and online videos. 

Vertical (9:16)

The typical video on your phone.

Fullscreen (4:3)

Used on TV before widescreen. Focuses on a single element.

Square (1:1)

This perfect square is often used on Instagram.

Anamorphic (2.40:1)

A widescreen used in movies. It’s like 16:9, but it’s cropped top and bottom. 

Setting the aspect ratio

Create a new sequence. Select File > New > Sequence. In the New Sequence dialog box, go to the Settings tab. Go to Video, and enter the Frame Size (height) as well as the horizontal (width). Premiere Pro automatically generates the aspect ratio. Name the sequence, fill out the required fields, then click OK. The aspect ratio is set for the sequence.

View it from a new aspect

Changing the aspect ratio in Adobe Premiere Pro is just one of the valuable features that this powerful video editing software package provides. It allows you to set the perfect relationship between width and height on your videos to suit your target market.