Help! I can’t empty the trash on my Mac

TrashThis has surely happened to you at least once: after pressing CMD+Delete on an item or selecting ‘Empty Trash’ in the Finder the following message pops up: “The operation could not be completed because the item ‘(item name)’ is locked.” If your trash is filled to the brim with files, then you don’t really want to go rummaging through it, removing the locked ones and opening their info page one by one just to unlock them. That could take ages and be incredibly tedious.

You can fortunately repair all files at once…using the Terminal. You may have noticed I’ve been frequently posting on the Terminal. It’s not the sexiest program on Mac OS, but it’s pretty effective, even in today’s age of the sleek new Leopard. For this particular issue, it’s probably the best tool around.

Anyway, here is how to proceed. Open up your Terminal in Utilities and type chflags -R nouchg Then open up the Trash to show all its contents. Select all items in the trash (CMD+A is the quickest way) and drag them to the Terminal window. Here you are not sending all the files to the Terminal, you are just adding their pathname to the Terminal, so it knows where the files you want to erase are located (this trick actually works whatever the command you want to perform in the Terminal, and it’s often much quicker than typing up the full path to a file). Then press Return, close the Terminal and empty the trash. All your files should by now have been deleted.

If removing very large files (over 1GB)  is what’s worrying you, then check out an earlier post on the subject.

[Via: Apple]

Top 10 reasons to use Windows

Top 10 reasons to use WindowsMost computers have Microsoft Windows preinstalled by default. The operating system, which will soon turn 25, has been widely criticised both by its own users and also users from other platforms.

Do you use Windows? According to statistics, you probably do. This is why we decided to start a series of posts about the main reasons to use different operating systems, starting off with Windows and covering also Mac OS and Linux. These are then the 10 main reasons why you should be proud to use Windows… at least until we find 10 reasons not to use it at all.

1. Out of habit
Be honest. You just bought a computer with Windows that already features pretty much anything you need. So why should you bother changing it?

2. Because you paid for it
When you buy a new computer, except for rare occasions, the Windows license is already included in the price. So if you’ve already paid for it, changing to another operating system would be a waste of money, wouldn’t it?

3. Because you’re a gamer
Windows is the platform of choice for hardcore gamers, mainly because PCs can be constantly upgraded to offer better and better performance. Many games are created only for Windows, and generally speaking, one can say that there’s more variety, they work better and are easier to configure and use.

4. For software and drivers
The same happens with drivers and software. Some developers seem to forget – fortunately not that often – about other platforms when developing hardware drivers and software applications. Although systems have their own alternatives, the truth is that there are more apps for Windows than for any other platform.

5. So that you don’t have to give explanations to anybody
If you have any less computer-literate friends, they’ll probably ask lots of questions when they see that weird operating system you use on your computer. We all know how tiring must be to tell the same tale over and over again, especially when you know your friends won’t understand a single word of what you say. So the best way to avoid these situations is by using Windows. Continue reading “Top 10 reasons to use Windows”

5 of the very best free podcasting programs

Podcasting logoUnless you’ve got your own radio station, podcasting is probably the easiest way to broadcast your message to millions of people across the world. Requiring no license fees or studio hire, you can literally become your own one man radio station with nothing more than a computer and a microphone. The best thing about podcasts too is that your listeners can constantly keep track of your latest releases because podcasts can be syndicated, subscribed to, and downloaded automatically when new content is added, using an aggregator or feed reader capable of reading feed formats such as RSS or Atom. There’s a huge market out there for podcasts as this list of some of the nets most popular podcasts proves. As you can see, everything from better parenting to politics and PSP hacking find a place in the most popular list. Here’s a look at 5 of the very best free podcasting apps to produce your broadcast with:

Audacity – Mainly used for editing and recording rather than publishing podcasts but one of the most poplar choices on the net for it’s ease of use. It works across platforms and for Mac users, it’s even a competitive replacement for Garageband.

Odeo Studio – Anything that you’ve edited or produced on Audacity, you may find easier to publish with Odeo Studio. Allows you to easily upload MP3’s for free although there is a catch – if someone listens to it in a different player, they get a brief Odeo ad.

podOmatic – Don’t want to mess around with downloading anything? podOmatic is an online podcast creator which offers free hosting, detailed listener statistics and allows you to design your own customised podcast page with all your latest broadcasts.

Gabcast – A great solution for those that don’t have access to a PC or microphone, Gabcast allows you to record your podcasts by phone. You can post audio directly to your blog and even host conference calls during your podcasts – great for doing interviews.

WildVoice – Cheap and cheerful style podcasting application for all ages and hosts your podcasts immediately the second that it’s finished. Very easy to use and features a step-by-step guide to get you recording podcasts in minutes.

Today’s downloads for Windows, Mac and Mobile

Download Portable GIMPWindows: I guess you already know GIMP, the popular open-source image editor. The good news is that now you can take GIMP anywhere with you with Portable GIMP, a special version of this powerful photo editing software that has been specifically developed to be installed and run from a removable USB memory device.

WireTap StudioMac:  After playing around with WireTap Studio for a while I’ve found it to be an excellent application to record anything on your Mac. The program captures any hardware or software sound and includes a basic yet intuitive editor to clean up your tracks. You can save to any popular audio format and then send the track to your iPhone or iPod or share via email. Highly recommended.

Record your conversations with Total RecallSymbian: Do you ever find yourself constantly repeating things to your friends only for them to turn around and say “yeah, but you’ve told me that before”? Total Recall allows you to record mobile phone calls with the push of a button, saving them as audio files in either WAV or AMR files, so you never forget a conversation again!

!– /* Style Definitions */ p.MsoNormal, li.MsoNormal, div.MsoNormal {mso-style-parent:””; margin:0cm; margin-bottom:.0001pt; mso-pagination:widow-orphan; font-size:12.0pt; font-family:”Times New Roman”; mso-fareast-font-family:”Times New Roman”;} @page Section1 {size:595.3pt 841.9pt; margin:70.85pt 3.0cm 70.85pt 3.0cm; mso-header-margin:35.4pt; mso-footer-margin:35.4pt; mso-paper-source:0;} div.Section1 {page:Section1;} –>

/* Style Definitions */ table.MsoNormalTable {mso-style-name:”Tabla normal”; mso-tstyle-rowband-size:0; mso-tstyle-colband-size:0; mso-style-noshow:yes; mso-style-parent:””; mso-padding-alt:0cm 5.4pt 0cm 5.4pt; mso-para-margin:0cm; mso-para-margin-bottom:.0001pt; mso-pagination:widow-orphan; font-size:10.0pt; font-family:”Times New Roman”; mso-ansi-language:#0400; mso-fareast-language:#0400; mso-bidi-language:#0400;}

/* Style Definitions */ table.MsoNormalTable {mso-style-name:”Tabla normal”; mso-tstyle-rowband-size:0; mso-tstyle-colband-size:0; mso-style-noshow:yes; mso-style-parent:””; mso-padding-alt:0cm 5.4pt 0cm 5.4pt; mso-para-margin:0cm; mso-para-margin-bottom:.0001pt; mso-pagination:widow-orphan; font-size:10.0pt; font-family:”Times New Roman”; mso-ansi-language:#0400; mso-fareast-language:#0400; mso-bidi-language:#0400;}


Mac applications that make smart use of Bluetooth

mac and bluetoothHave you ever used the Bluetooth connection settings on your Mac? It allows you to connect wirelessly with any mobile phone, PDA, keyboard, mouse or other Bluetooth-enabled electronic device and easily exchange information in a short range. Bluetooth is very simple to set up, as easy as opening up Airport access and is as effective. You may not know this, but more and more applications now have some sort of Bluetooth capability. Although most are related to some sort of mobile device, you will find more traditional Mac applications that handle the wireless connection protocol. I’ve singled out a few. Let me explain to you how they use Bluetooth.

  • Bluetooth Texter – Nifty little Dashboard widget that connects to your mobile device via Blutooth and uses it to send SMS messages.
  • Phone Wallpaper X – Select and edit your wallpaper on your Mac then send it to your mobile phone via Bluetooth. Easy and quick way of updating the appearance of your mobile device.
  • Delicious Library – The award winning cataloger lets you add new books, videos and more with a Bluetooth barcode scanner…if you have one at home. A quick way of scanning your items instead of using your iSight camera.
  • wiSync – Still have an old iPhone model? If it’s jailbroken you can set up wiSync and make use of fast Bluetooth synchronization features. This will ensure you have the same files on  your iPhone and your Mac.
  • SteerMouse – Make use of that snazzy Bluetooth mouse you bought recently. Assign functions, customize the scroll ball and set both speed and mouse movements.
  • Booxter – Just like with Delicious Library, the Booxter cataloger lets you add items with a handheld Bluetooth bar code scanner. Small shops with a Mac will find this extremely handle to keep track of items.

Switchers – Mac alternatives to PC internet apps

Times readerIn this switchers series, I look for the best PC program in its category, find a Mac counterpart, and explain why it’s better, all in the hope that those of you that are still on PC will be tempted to switch, and those that are on Mac hopefully discover something new. We started off last week by looking at common computer tasks, like communicating with friends, exchanging emails or burning discs. It’s now time to take this series a little deeper and compare more specific PC and Mac applications. Today I want to focus on programs only related to internet, albeit without counting browsers, messengers and mail clients as these were already covered last week.

The term ‘internet application’ is pretty vague, especially nowadays when we are connected most of the time anyways.  This is why I’ve limited this list to very specific applications: BitTorrent clients, P2P tools, download managers, RSS readers, Usenet clients and FTP programs. I’ve tried to pick what I consider the best application in each category for both Mac and PC, however give a shout if you think there is a better program than the one mentioned.

  • uTorrent – Transmission – uTorrent is fast, lightweight and gives you extensive information on torrents. Transmission does all that AND has a speed limit mode, filtering and priority settings.
  • Ares Galaxy – Acquisition – It’s no surprise that Ares is so popular with PC users. It offers a large network, is fast and responsive and isn’t bogged down in features. Acquistion can search both the Gnutella and BitTorrent networks and has a beautiful and structured interface.
  • Internet Download Manager – Leech – Heavy duty downloaders will like having a program to handle all their files. Leech keeps downloads well organized, adds password protection and lets you mark URLs for future downloads.
  • Abilon – Times – News junkies will appreciate having a powerful desktop RSS reader. While Abilon for PC is both attractive and powerful, I prefer the original newspaper view of the Mac Times reader , the way you can stack articles to read and toggle feeds and pages.
  • UseNeXT – Unison – Addicted to newsgroups? UseNeXT provides a great way to browse through them and download at once. Unison for Mac is nothing short of impressive though: simple and intuitive, yet filled with features like multiple browser views, grouping and easy server setup.
  • SmartFTP – Transmit – The Mac client still beats the feature rich SmartFTP thanks to Amazon S3 support, handling of remote URLs, droplets and a functional interface.

Top software tools for pranksters

You were the official prankster in your class. Whenever you were around, nobody was safe from the classic paper doll or the more aggressive “kick me” notice. Later on, you learnt from Bart Simpson’s phone jokes on Moe. Now you feel a bit too old to keep on playing jokes on the people around you. But hey, we’re in the era of technology and computers have become your best allies, providing you with a wide array of prank software.

Custom error messages
A common way to play computer jokes is by creating customized error messages. You can start with MBoX, an easy-to-use error generator that saves error messades as self-executable files. Another option is Dr. Windows, which already includes a few predefined messages.

Top software tools for pranksters

Stubborn mouse
Another way to laugh at your workmates is by tweaking their mouse. The easiest trick is swapping the left and right buttons in the Control Panel, but if you’re looking for a more sophisticated joke try SakasaMouse, a tool that swaps the mouse’s vertical and horizontal axis. User paranoia guaranteed! If that’s not enough yet, the last ace up your sleeve can be ButtonShyMouse, with which the mouse won’t click on buttons or the Start menu. Continue reading “Top software tools for pranksters”

5 reasons to start using Google Gears

Google GearsA few months ago I asked the question whether Google Gears is one of those rare Google apps that has actually been a flop. One of the biggest problems I noted was that even a year after its initial release, Google Gears still only supported a handful of applications. However, it seems like Google have finally got their act together and have announced that Google Gears will soon work with two of their most successful applications – Gmail and Google Calendar. With this in mind, here are 5 reasons why should start using Google Gears.

Google Reader – Google Reader is my favourite way of keeping track of blogs, website updates and RSS feeds. Using it with Google Gears means that I can download everything I want to read before disconnecting my laptop from the net and going on the road.

Gmail – Gmail is my e-mail client of choice and I’m looking forward to being able to being able to check my mail offline. Rather than have to rush through all my mail while using a dodgy internet connection or Wifi spot, I can download all pending mails and read them at my leisure. It’s also a great way to backup mail.

Google Calendar – No need to rely on having an internet connection to check what appointments, meetings and events I have coming up. Soon I’ll be able to check Google Calendar as if it were a desktop tool that’s always at my disposal.

Google Docs – Now that it’s supported by Google Gears, I can now envisage the day when I won’t need Microsoft Office anymore – or any office suite for that matter. I can do all my word processing and spreadsheets (but not presentations yet unfortunately) whether I’m on or offline.

Zoho – If Google Docs doesn’t offer all I need in an office suite then Zoho does. Zoho allows me to create absolutely anything from spreadsheets to invoices and even databases. Since it was one of the first apps to support Google Gears, I can work on all of them on or offline.

How to move your iTunes library on an external drive

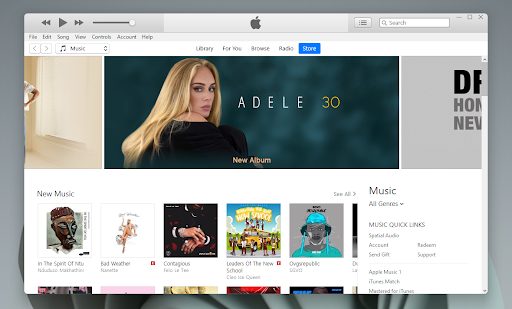
iTunes is an incredible repository for music, movies, and TV shows across your Apple devices, but no device lasts forever. This is why it’s always good to have a backup plan for when you inevitably get a new device or something happens to your current one. Moving your iTunes library between devices that run on Apple’s software is super easy.

iTunes DOWNLOAD

However, if you use iTunes on a Microsoft device, the process won’t be quite as effortless. The article below will show you how to move your iTunes library to an external drive.

Moving your iTunes library on an external drive

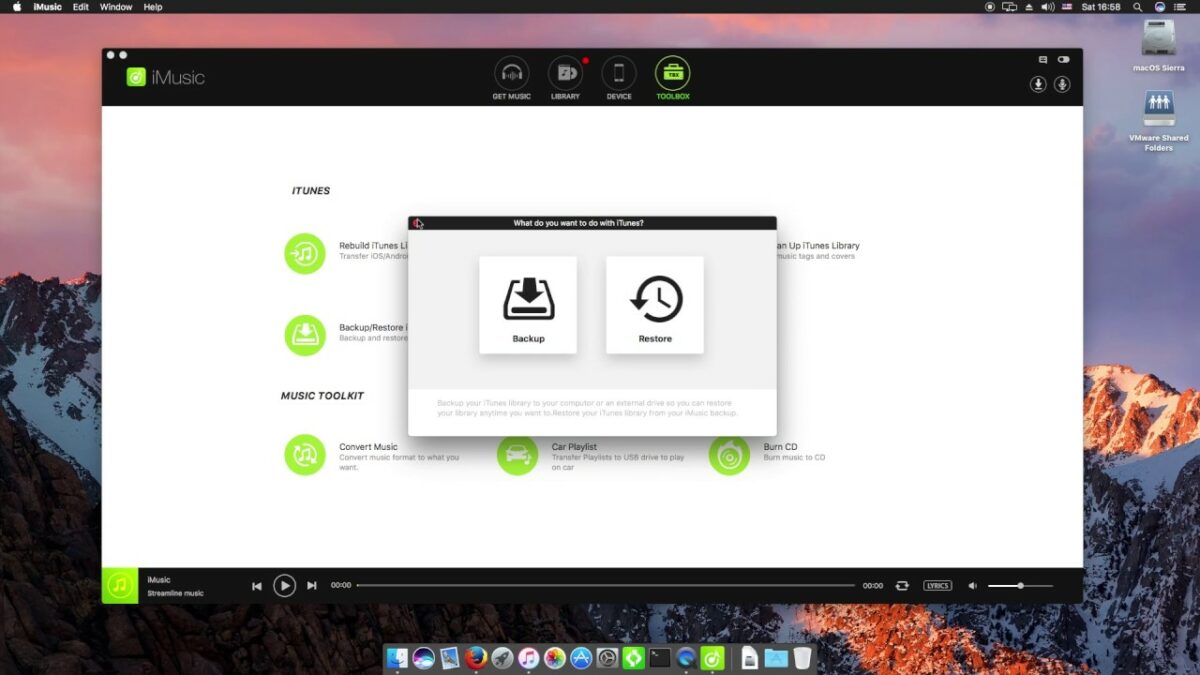
There are a few steps involved in this process, so be sure to follow each one attentively. We’re going to show you 4 main steps, namely:

  • Consolidate your iTunes library
  • Find your iTunes media folder
  • Backup your iTunes library and media folder
  • Restore your iTunes library from a previous backup

Now that you have a roadmap of your iTunes backup and restoration journey, let’s get started.

  1. How to consolidate your iTunes library

    How to Move your iTunes Library to an External Drive

    Consolidation, in this context, is just a fancy word for moving all of the files that iTunes uses to one folder. This way, you don’t have to go hunting through your entire C: drive for files associated with iTunes. Here’s how to do it:

    Step 1: Open iTunes

    A lot of the steps involved with the process of moving your iTunes library happen within the file explorer utility. This first step, however, takes place directly in your iTunes for Windows app. Head to wherever your iTunes icon is on your computer, and click on it. 

    Step 2: Organize iTunes

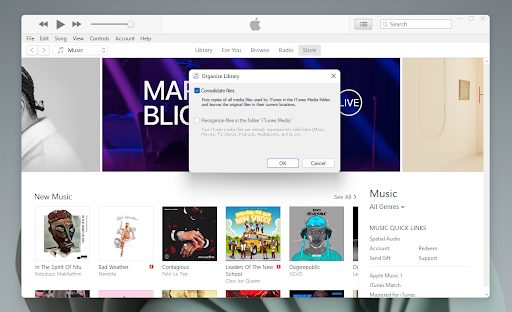
    Now, you’ll need to organize your iTunes media folder. Don’t stress though, the app will do the heavy lifting for you. All you need to do is head to the menu bar at the top of the iTunes interface and click on File. Next, you’ll want to hit Library from the drop-down menu, and then click on Organize Library

    Step 3: Consolidate iTunes

    You should see a new window open up with the heading Organize Library. Here, you’ll see two available options, depending on the state of your iTunes library. Check the box next to the first option – Consolidate files. This will begin the process of moving every file associated with iTunes into one neat folder. 

    Step 4: OK

    All you need to do now is hit OK and you’re done! 

    Just to be clear, while the term used in this process is ‘move’, the app actually creates a copy of any file associated with iTunes that isn’t in your iTunes media folder. Therefore, it’s a good idea to go around your PC and delete the original versions of these outsider files once you know that the copies are safe and secure in the new consolidated folder. If you’re not much of a fan of saving space, feel free to chuck this pearl of wisdom back into the ocean.

  2. How to find your iTunes media folder

    How to Move your iTunes Library to an External Drive

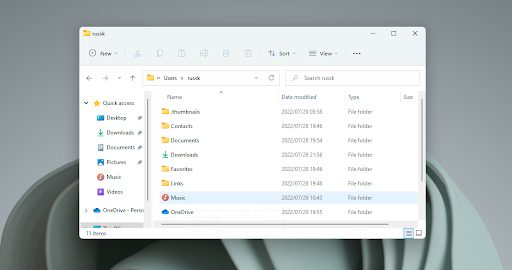
    Not everyone knows their way around a Windows PC – especially the filing system outside of ‘Desktop’ or ‘This PC.’ If you’ve ever messed around with mods or custom content for PC games, you’ll know that while most games save a sub-folder to your Documents folder, the real treasure of the inner workings of the game are nestled in your User folder. iTunes also uses your User folder for storage. 

    By default, you should find your iTunes folder under User > Music > iTunes > iTunes Media

    If, for any reason, your iTunes media folder is not the above location, we’ve got a way for you to track it down: 

    Step 1: Open iTunes

    Yip, you’ll need to head back to the iTunes app for this one. 

    Step 2: Preferences

    Preferences are all the rage right now. In this step you’ll see what kind of preferences your iTunes app has. Head to the menu bar again, and click on Edit. Now, hit Preferences and then click on the Advanced tab. 

    Step 3: Location

    All you need to do now is look at the big block toward the top of the Preferences interface. You’ll see a heading – iTunes Media folder location. Below that, you’ll see the exact directory path to follow on your computer. On any default iTunes configuration, it should read something like: 

    C:\Users\YourNameHere\Music\iTunes\iTunes Media

    Whatever your directory path says, if you follow it, you should find your iTunes Media folder.

  3. How to backup your iTunes library and media folder

    How to Move your iTunes Library to an External Drive

    Once you’ve consolidated all of your files associated with iTunes, you can back the folder up to an external drive of your choice – supposing it has enough space for all the music you listen to while living your best life. My music folder on my PC spans years, genres, and so many memories. 

    Step 1: Exit iTunes

    Sorry iTunes app, you’ve outlived your usefulness for this guide. We’re just going to go ahead and close you up really quick. Click the red X icon at the top right-hand side of the iTunes interface to close the app. 

    Step 2: Locate your iTunes folder

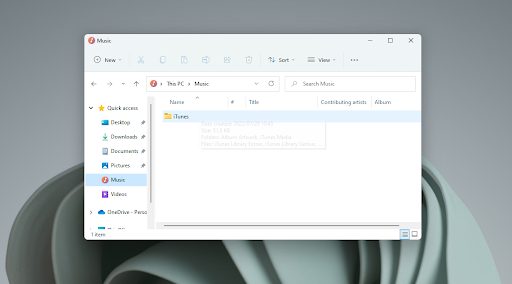
    Your iTunes Media folder and iTunes folder are two different folders in two different places. The one you’re looking for now will be in This PC > Music. It’s that simple to find. This folder will contain your entire iTunes discography. 

    Step 3: Move your iTunes folder

    This next step is as easy as hitting right-click and selecting Copy. All that’s left is to head to your external drive of choice and then click Paste.

  4. How to restore your iTunes library from a previous backup

    How to Move your iTunes Library to an External Drive

    Once you’ve got your iTunes library saved to an external drive, you can move it to any device. Just keep in mind that if you intend to restore your iTunes library on a different computer to that where it was first saved, you’ll need to ensure that the new device has the latest version of iTunes. With that out of the way, let’s head into how to restore your iTunes library. 

    Head to This PC and locate your external drive. 

    Next, find the iTunes folder you moved to your external drive in the previous main step and right-click on it. Select Copy

    Now, you’ll need to go to the location on your computer where you’d like to save your iTunes Library, and then right-click and hit Paste

    Your next step is to hold down the Shift key while you open the iTunes app. You’ll see a window pop up prompting you to choose your iTunes library. Click on Choose Library, and then select the Library.itl file associated with your itunes library. 

    Lastly, click Open, and your iTunes library will be restored.

Clean the download list in Firefox automatically

Clean the download list in Firefox automaticallyOne of the areas that gets most cramped in Firefox is the download manager – especially if you, like me, download hundreds of new files a week. And an overcrowded download list renders the manager completely useless, despite the new features introduced in Firefox 3.

One quick way to solve this bottleneck is using the browser’s built-in cleaning tools, which you can configure to clean up certain areas automatically every time you close Firefox. It’s as easy as going to Options > Privacy and check the option that says “Always clear my private data when I close Firefox“.

However, as there may be some elements you don’t want to get rid off (such as saved passwords, cookies and the likes), you can click on the Settings button and select exactly the elements you want Firefox to erase –  in this case, Download History would be enough.