How to Change Your Netflix Region in 3 Easy Steps

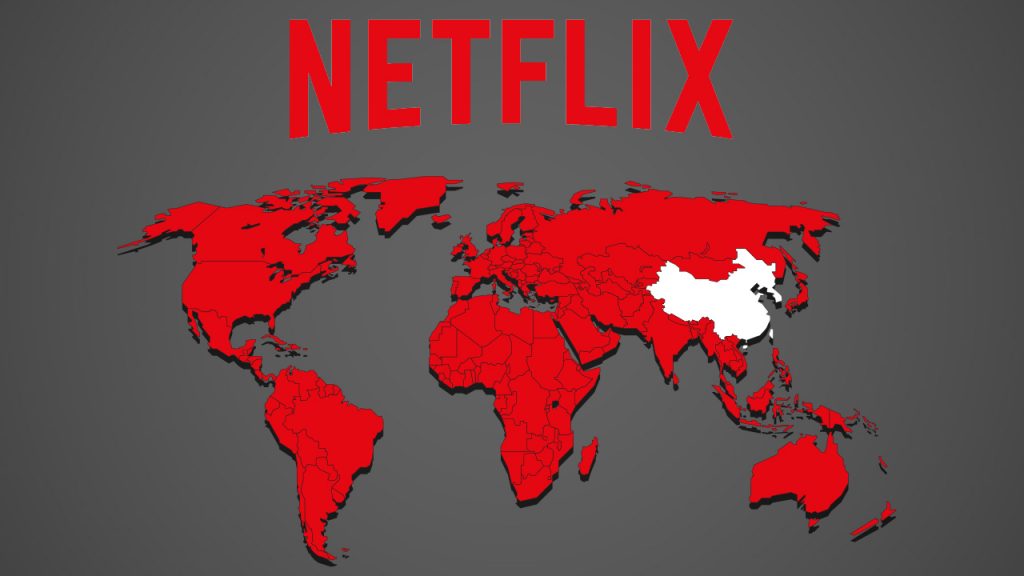
Netflix has released onto Windows, Mac, Android, and iOS and receives thousands of downloads a day, but frustration tends to kick in when you look at how much of their content is region locked. Sure, the US has an immense variety of content, but Japan has enough anime to keep every weeb locked in their room for weeks. 

The UK has a wide variety of classic British comedies and dramas, and we all know the quality of these shows. So, how can you change your Netflix’s region to get in on the action in other countries without having to go there physically? We’re here to answer that question for you.

How to Change Your Netflix Region

Here are the easy steps to changing your Netflix region.

Step 1

You will need to download a VPN for this process to work; we recommend you to read our VPN selection for Netflix.

Step 2

Once you’ve installed your VPN and set it up, you’ll need to run it. Select the country that you want to connect to and connect. Now your IP address will show that you’re in that country.
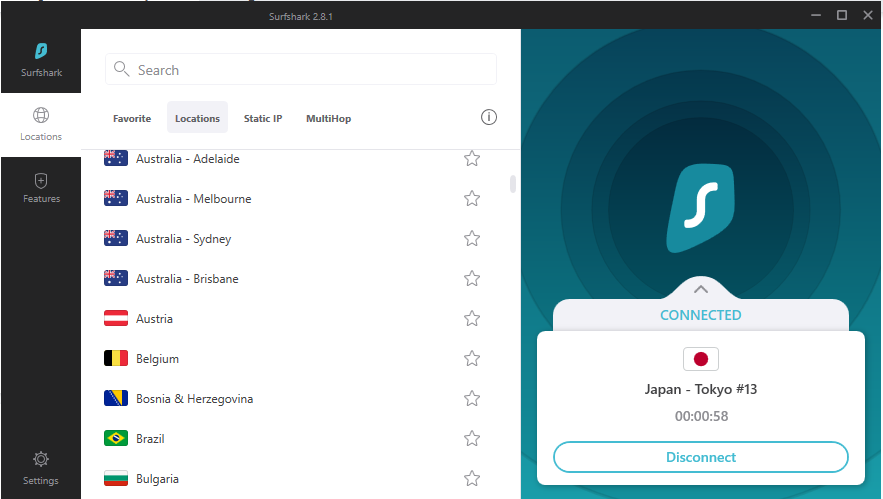
Step 3

Now head over to the Netflix app and sign in to your account. You’ll see that Netflix will now show everything available in the country that you connected to with your VPN.

More Netflix and chill

Unfortunately, there are no free VPNs that work with Netflix, but there are a few that will offer free trials before you need to sign up and pay. But it’s worth it to gain access to the plethora of content provided by the different regions of Netflix. While Netflix will never ban or cancel your account if you use a VPN, they have begun to clamp down these methods. 

Luckily for us, programmers tend to be a wily bunch and keep on finding new ways to ensure that these VPNs can connect to Netflix. And who are we to turn down the opportunity for more content to binge?

How to Dance in Roblox in 3 Easy Steps

Have you been playing Roblox on Windows or Android and noticed your friends breaking some moves on the dance floor or the local park? Learning how to dance in Roblox is a neat trick, but there isn’t a special button assigned for the task.  We were eager to try it out for ourselves, just to have a few laughs while we were gettin’ jiggy wit it.

Roblox Free download
9

How to Dance in Roblox

The Roblox developers have a feature called Emotes in their animation system. You can wave, point, cheer, and laugh, as if playing the game wasn’t enough fun. If you want to dance, you need to enter the emote commands for the variations available.

Step 1: Enter a game server

Firstly, you can’t merely dance in the Roblox lobby. Before you can start entering any commands, you’ll need to enter a game server that permits emotes. You can use any of your favorite ones to bust a move.

Step 2: Open the chat window

Once inside the game, open the chat window by hitting the ‘/’ button. You’ll see the window appear on your screen, awaiting your command. Just don’t hit the button too hard…you’ll still want that keyboard, and your parents won’t be impressed.

Step 3: Insert the dance command

There are three dance moves available in Roblox, aptly named ‘dance’, ‘dance2’, and ‘dance 3.’ With the chat window open, enter ‘/e’ for emotes, followed by the correct command. For example, you’ll insert ‘/e dance’ for the first move.

Hitting that pixel tango

Now that you’ve seen how to dance in Roblox, let your groove go wild and show your friends what you’ve got. Of course, it may become boring after the first few minutes, but at least you can join any groups that are dancing together in a game.

Be sure to read some of our other tips, such as how to get Roblox Premium and fixing error code 277.

How to Make a Bed in Minecraft in 3 Fast Steps

Are you feeling sleepy after mining and crafting all day? Hitting the sack in Minecraft isn’t only crucial for restarting the day and avoiding monsters. It also creates a save point for when you die and respawn. Discovering how to make a bed in Minecraft is one of the first tasks to undertake when you begin playing the survival sandbox game.

What you need before you start

Tools needed

1 x Crafting table

Materials needed

3 x Wood Planks

3 x Wool

Time estimation

Immediate

How to Make a Bed in Minecraft

Crafting a bed in Minecraft doesn’t happen like magic. You’ll need to make an effort to run around and obtain some items first. 

Step 1: Collecting resources

You’ll need three wood planks and three wool blocks. It doesn’t matter what planks you obtain, as long as all three are the same. However, the color wool you collect will link to the bed’s hue. So, if you want a pink bed, you’ll need to dye a sheep before clipping the wool with some shears. You can also kill the sheep, scoring some mutton in the process.

Step 2: Head to the crafting table

Now that you have all your resources at hand, head on over to your trusty crafting table. You’ll need to place the three planks in the central row and the wool above it. If you think about it, that makes logical sense.

Step 3: Create your bed

When you hit the craft button, your bed will appear, ready and fluffed. You can carry it around with you and place it down when you’re ready to sleep. However, keep in mind that it will create a spawn location on that spot, and you can’t sleep if monsters are nearby.

Go ahead and count your sheep

As you can see, making a bed in Minecraft is easy, as long as you have sheep around. One of the most frustrating aspects we’ve encountered is running around hoping one will appear. You may be better off creating a farm, taming and breeding them for a constant supply of wool.

If you enjoyed this guide, feel free to check out how to get honey or tame a cat in Minecraft.

How to Get a Cape in Minecraft in 3 Simple Steps

Have you seen your friends running with a cloth behind their backs and wondered how to get a cape in Minecraft? The chances are that they received it as a prize from the Mojang team. However, there are some mod developers who have taken it into their hands to create customized capes that you can use.

How to Get a Cape in Minecraft

Unfortunately, the only way to get a cape in Minecraft is to install a utility software program or mod. You should keep in mind that other players must run the same mod to be able to see your cape. Can you imagine how funny you must look sporting an item that no one else can witness?

Step 1: Install Optifine

You can use any Minecraft mod program, but we recommend Optifine that’s usually used to install shaders in the game. All you need to do is download the installation file and let the wizard help you with the setup. Remember to move it to your Minecraft folder.

Step 2: Download a cape mod

Next up, you’ll need to find a cape mod that you like. There are several available on the internet, such as Advanced Capes. You’ll need to extract the zip file to your mods folder.

Step 3: Run around with your cape

When you run your  Minecraft launcher, remember to switch to Optifine or the mod program you selected. As soon as you’re in the game, you can start using the new capes you downloaded.

It’s a bird, it’s a plane…

Ok, so this method of getting a cape in Minecraft isn’t ideal, but it’s the best solution available at this point in time. We’ll have to wait until the developer introduces capes in the same way it did banners not so long ago. 

How to Get Roblox Premium in 5 Easy Steps

Roblox has an in-game currency known as Robux. You don’t need Robux to enjoy the game. But Robux allows you to purchase unique skins, items, or in-game specials.

To get Robux, you will need to buy them. And the easiest way to ensure you have a steady stream of Robux is to upgrade your account to Roblox Premium.

There are three tiers to Roblox Premium. 

What Is Roblox Premium?

Roblox Premium is not free but a paid subscription that gives players additional benefits.

Benefits include:

  • A monthly Robux allowance.
  • 10% off buying Robux.
  • The opportunity to earn Robux when players purchase something in a game you created.
  • You can also trade items with other Roblox Premium players.

You might be thinking that this sounds a lot like Builders Club. That is true since Roblox Premium is the new Builders Club, having replaced it on December 15, 2020.

You can buy the Roblox Premium directly through Roblox, with a gift card, or even with Microsoft Rewards

How to get Roblox Premium

Below is a list of easy instructions on activating Roblox Premium?

Step 1: Log in to Roblox

First off, you need to log in to your Roblox Account

Step 2: Go to Roblox Premium

Head on over to the Roblox Premium page from your Roblox Account.

Step 3: Choose Your Option

Choose one of the three available options, and click on ‘Buy Now.’

Step 4: Redirect to the Payment Gateway

You will be redirected to the payment gateway to make your purchase.

Step 5: Make Purchase

Input your credit card details to make the purchase.

Is Roblox Premium Worth It?

Are you a Roblox fan who enjoys the games as well as customizing your character? Do you enjoy creating games for others to play? Are you already spending money on Robux regularly? If you answered yes to any of these questions, then Roblox Premium is definitely for you! 

How to Get Honey in Minecraft in 3 Easy Steps

Gamers were extremely excited when Minecraft received a bee update. It introduced new items, such as beehives, honeycomb, and bottled honey. Of course, you can’t just walk up to a hive and merely take the honey, as the bees are rather protective. You’ll need a more subtle touch.

What you need before you start

Resources needed

Crafting table

Materials needed

1 x Campfire

1 x Empty Glass Bottle

1 x Shears

Time estimation

A few minutes

How to Get Honey in Minecraft

You can either obtain honey in a glass bottle or as honeycomb. We’ll show you how to do both in these three easy steps.

Step 1: Prepare for your journey

Firstly, you’ll need to get your crafting table ready. Besides having an empty glass bottle or shears prepared, you should primarily focus on the campfire. You’ll use it to calm the bees down so that they don’t attack you when you take their precious golden liquid. 

Step 2: Find bees

Now, let’s head out to the open fields. Bees love to build hives on trees close to flowers. They use these flowers to collect pollen, forming the basis of honey-making. Once you spot a bee, you can follow it to its hive to see if there’s any honey for you to collect.

Step 3: Collect your honey

The hive will be dripping with honey once it’s full. Before you take any of it, remember to put your campfire down directly beneath it, preferably with the bees inside. With them sound asleep, you can fill your glass bottle or use your shears to collect honeycomb. If you have enough of the latter, you can make your own hive at home for taming bees in Minecraft.

The Bear Necessities

With the golden honey at hand, you can make delicious food or create a bee farm. You’ll be buzzing with excitement after breeding bees and watching them get to work on the local flowers. If you have any stories to share about your bee experience, please feel free to let us know.

How to do a Disintegrate Effect in PaintTool SAI in 3 Easy Steps

Ever since Avengers Infinity War erupted on screens worldwide and the might entity Thanos snapped his fingers to wipe out half of the Marvel universe, artists have been attempting to replicate the disintegrate effect. While most do so on Photoshop, performing this task on PaintTool SAI isn’t as easy.

Fortunately, you have us to show you a quick trick in how to do a disintegrate effect in PaintTool SAI.

How to do a Disintegrate Effect in PaintTool SAI

Until more brush effects for PaintTool SAI becomes available, you’ll have to be a bit innovative in your design if you want a disintegrate effect. We’ll show you the basics, but it’s up to you to master this technique.

Step 1: Layer the disintegrate area

Firstly, select the image you want to use. Photo’s with light backgrounds work better, but you can challenge yourself to something more difficult if you choose. Once the image is loaded, select the Lasso tool and clip the area you want to disintegrate, turning it into a new layer by copy-pasting.

Step 2: Stretch it out

With the layer and area still highlighted, got to Layers in the top menu and Transform. Move the shape outwards to stretch while still maintaining the attachment to the base. You’ll want to ensure that the new layer still looks good, unless you’re going for a crazy effect.

Step 3: Erase select parts

Once completed, you’ll have the stretched layer superimposed over the original. Head to Eraser on the side, and change the type to Spread&Noise. Also, ensure you have the right size for your selection. You can start randomly erasing parts to make them vanish, showing the original layer underneath. Continue performing this task until you reach the desired effect.

Vanishing into thin air

Of course, an easier way would be to download a brush textures pack online and using the appropriate brush to create the disintegrate effect. However, we thought you’d have more fun using the basic tools on PaintTool SAI to have more artistic control. If you have a better way of creating this effect, please let us know.

How to Tame a Cat In Minecraft in 3 Easy Steps

Minecraft contains so many animals that you can tame, such as foxes and horses. However, nothing is as fuzzy and adorable as a cat! They’re lightweight, cute, and follow your every step meowing away. If you’re more into kitties than wildlife, you’ll have fun collecting as many breeds as you can find.

Here’s a quick guide on how to tame a cat in Minecraft.

What you need before you start

Animals needed

1 x Cat

Materials needed

Raw Salmon

Time estimation

A few minutes

How to Tame a Cat In Minecraft

Before you can lure and tame a cat in Minecraft, you’ll have to obtain some fishy food to gain its interest. Let’s go through these steps carefully.

Step 1: Catch some raw salmon or cod

First up, it’s time to go fishing. You can either use a rod that you’ll craft or you can simply jump in the closest lake or river. Most gamers enjoy the simple pleasure of fishing by the waterside, but there’s nothing wrong with punching the lights out of a cod or salmon.

Step 2: Find the cats

Locating cats are as easy as finding your local village. There must be at least four beds to spawn one feline. Therefore, if you want to find a maximum of ten cats, you’ll need a village with 40 beds. You’ll find plenty of different colors to choose from, so choose your bundles of joy carefully.

Step 3: Tame your kitties

Now that you have your cat in sight, you need to crawl up to it slowly with the fish in hand. When it moves towards you, carefully feed it several times and wait for hearts to appear. As soon as they do, the kitty is officially your pet.

Can you hear them purrrrrr?

You’ll hear the joy and love of this animal by the furious purring when sitting nearby you. You can also use a leash to direct the creature around or tell it to sit. We hope you have a meow-tastic time!

How to Allow Pop-Ups In Chrome in 4 Fast Steps

Chrome is one of the most popular web browsers on the market and it’s also available across platforms. It’s fast, free, and user-friendly. But some things are a bit more challenging to figure out. 

One of Chrome’s many features is a built-in pop-up blocker. But that doesn’t exactly help when you’re performing a task that requires pop-ups. Luckily, that can be fixed. So, how do you allow pop-ups? 

Well, it’s relatively simple. Below you’ll find a step-by-step guide for how to allow pop-ups In Chrome

How to Allow Pop-Ups In Chrome 

Chrome pop-ups have several benefits to make your browsing a more satisfying experience. Here’s how you set it up.

Step 1: Download The Browser

 You can use this link to download Chrome onto your desktop or smartphone. After you’ve installed the app, an icon should appear on your main screen. Now, you’re just a few clicks away from a resolution. You’ll want to follow the instructions below to allow pop-ups.

Step 2: Open Chrome 

You’ll have to launch your browser by clicking the tile (iPhone and Android users) or the icon (Mac and PC) on your main screen. The browser should launch after that. 

Step 3: More is Helpful

To the right of the address bar, you should see three bullet points. You’ll want to click on them to open the options menu. Then, you’ll scroll down to settings and select that option. Select Privacy and Security. You’ll find site settings close to the top of the list.  

Step 4: Enable Pop-Ups 

After opening site settings, you should see a tab for Pop-ups and redirects. For mobile users, this step is as simple as sliding a toggle bar. After you’ve enabled pop-ups, you can always go back to site settings to disable them. 

Popping up like daisies

As you can see, enabling pop-ups is a simple process. It can be helpful if you’re filling out applications or if you happen to use Chrome to sign in to your accounts automatically. Also, one feature that we haven’t discussed is the Google search engine. Have a question? Just type it into the search bar, and boom! Google has an answer. 

Not only this, but the search results are consistently updated, so if you don’t find what you’re looking for, all you have to do is refine your search. Don’t believe us? Try it out for yourself.

Mobile Legends Builds – Top 3 Tips

If you’re looking for a game like League of Legends that’s easier to ascend to the top of the leaderboard, you’ll want to download Mobile Legends Bang Bang for iPhone or Android. Of course, learning how to play and win at such an exciting game can be daunting, which is why we’re sharing our top 3 tips for Mobile Legends Builds.

Top 3 Tips for Mobile Legends Builds

Tip 1: How to copy a pro player’s build

If you’re looking at another gamer’s build that you want for your team, there’s a quick way to copy it:

  • Go to preparation. 
  • Click on ‘Equipment’
  • Choose a hero whose build you want to copy
  • Go to ‘Pro-builds’ and select your preferred option.

Tip 2: How to copy a build from the leaderboard

In the same way, you can head to the leaderboard and steal a build from there:

  • Go to ‘Leaderboard.’
  • Click on the ‘Heroes’ tab.
  • Select the top player’s name.
  • Click on ‘Inspect.’
  • You’ll be able to see all the items and specs they used.

Tip 3: Best builds for defense

If you are in one-on-one combat, the two best builds for a physical attack are:

  • Blade of Despair
  • Hunter Strike

If you’re a tank or a fighter, you have to increase your armor to minimize these two builds’ effect on you. The two best builds to help you achieve this is:

  • Blade Armour
  • Dominance Ice

If your opposition has already built up their armor, you can further counter it by getting the Malefic Roar armor penetration to build.

The best builds for magic attacks are:

  • Holy Crystal
  • Blood wings

If you are a tank or fighter, you can defend yourself from magic attacks with:

  • Athena’s Shield
  • Oracle

If your enemy has the magic resist builds, you can recounter them with a magic penetration build like Divine Glaive.

Build your best and become a Mobile Legend

There is no one perfect recipe for a hero build but rather an ideal build for every type of situation you’ll face. Why re-invent the wheel? Learn from the pros and add or take away to customize your unique build.