Updating Your VLC Media Player in 2 Fast Methods

VLC is a top-rated media player that enables you to watch videos, listen to music, and even make recordings on your Windows and Mac computers.

It’s important to know how to update VLC to the latest version to keep it working correctly. There are two main methods, updating VLC on Windows and updating it on Mac. Let’s look at both options below.

  1. Updating on Windows

    How to Update VLC Media Player

    Below is how to update your media player on Windows computers.

    – Launch VLC on your Windows computer.
    Click on ‘‘Help’’ in the top menu bar.
    – Click ‘‘Check for Updates’’ in the drop-down list that appears.
    – If there is an update, the program will offer the option to download it. Click ‘‘Yes’’ to start the process.
    – Once the update has been downloaded, you will receive an option to install it. Click on ‘Install’, to start the installation.
    – Run through the installer and click on ‘Finish’ once it has been completed.

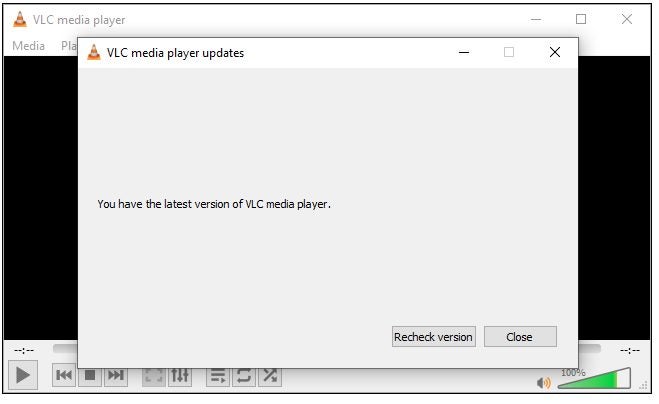
    Now you’ll see a notification stating that your media player is up to date.

  2. Updating on Mac

    How to Update VLC Media Player

    Below are the steps to update your VLC player on Mac computers

    – Launch VLC on your Mac computer.
    Click on VLC in the top menu bar.
    – Now click on ‘‘Check for Update’’ in the drop-down list.
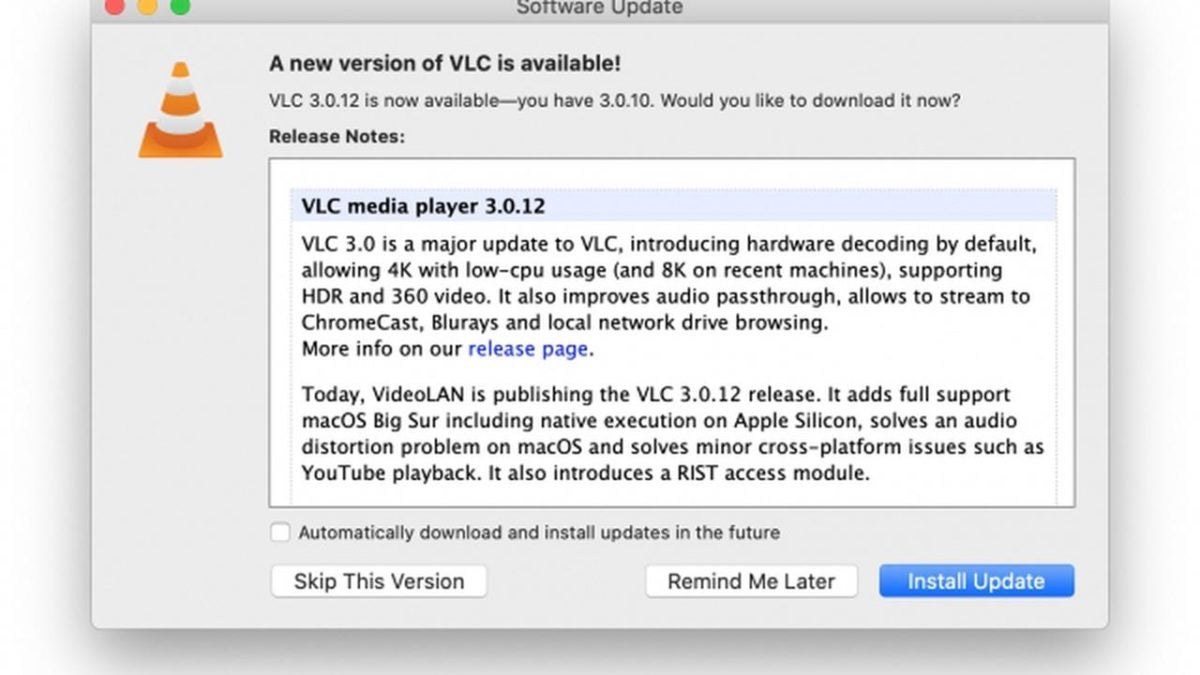
    – If there is an update available, VLC will let you know and provide an option to update it. Click on ‘‘Install Update.’’
    – Once it is done with the download, click on ‘‘Install and Relaunch.’’
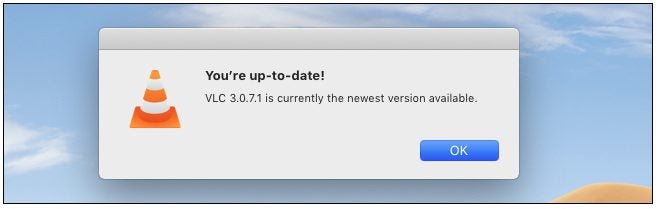
    – If you were to click ‘‘Check for Update’’ again, you will see a notification that your player is up to date.

Keep Your Programs Update

As you can see, it is straightforward to keep your program updated, and keeping your player updated is essential to keep it working correctly. Why not check your VLC media player now to see if you have any updates waiting to be installed?

Recording With VLC Media Player in 9 Easy Steps

VLC Media Player is a great program to play movies, videos, and music on Windows and Mac devices. But, did you know that you can also use this media player to make recordings?

This function is not one of the best-known features because it’s not available on the home screen as it’s an advanced setting and a very useful feature if you want to record from a DVD or stream, or even record your desktop.

  1. Open VLC

    How to Record With VLC Media Player

    Launch VLC by clicking the app icon.

  2. Go to ‘Media’ and Then ‘Convert/Save’

    How to Record With VLC Media Player

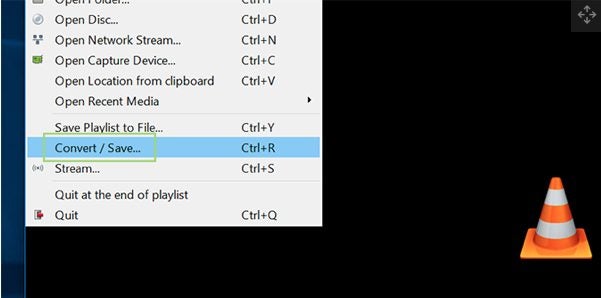
    Navigate to the ‘Media’ tab in the top right corner of the media player. In the drop-down list, click ‘Convert/Save.’

  3. Click on the ‘Capture Device’ Tab

    How to Record With VLC Media Player

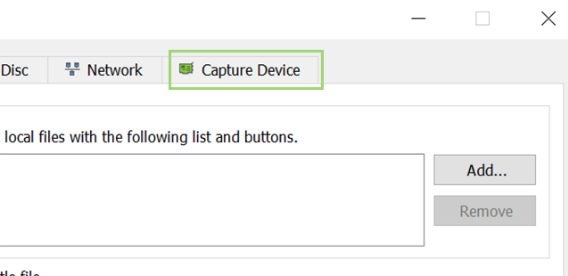
    In the new window, choose the tab on your right titled ‘Capture Device.’

  4. Set Capture Mode

    How to Record With VLC Media Player

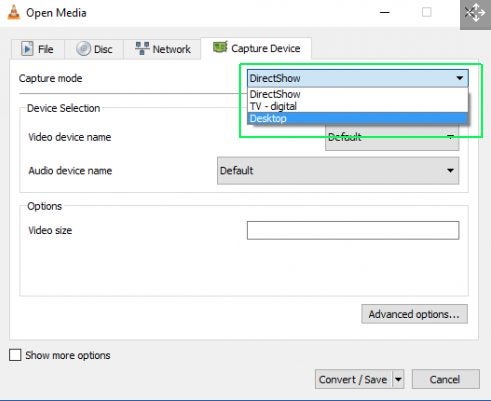
    The first line lets you set the capture mode. By clicking this option, a drop-down list will appear with the available options. DirectShow taps into your webcam and allows you to record with the webcam. The TV-Digital option lets you record from a TV tuner card. Finally, the Desktop option enables you to record what’s happening on your desktop screen, such as streaming videos and DVDs.

  5. Set Your Frame Rate

    How to Record With VLC Media Player

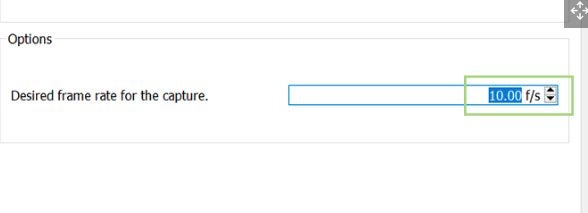
    Set your desired frame rate; we recommend using about 10f/s (frames per second), as this will be enough for most recordings.

  6. Click ‘Convert/Save’

    How to Record With VLC Media Player

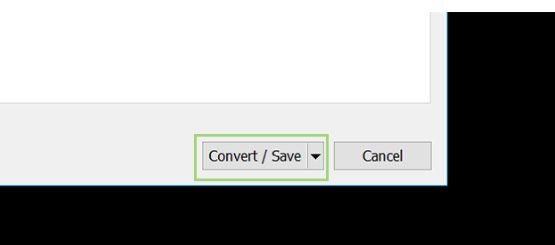
    Click ‘Convert/Save’ at the bottom of the screen.

  7. Choose the File Name and Destination for Your Saved Recording

    How to Record With VLC Media Player

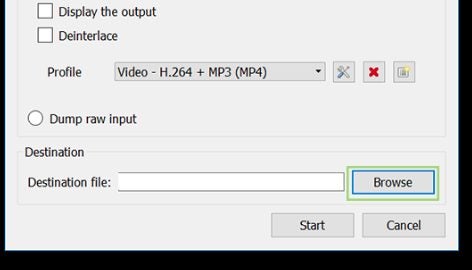
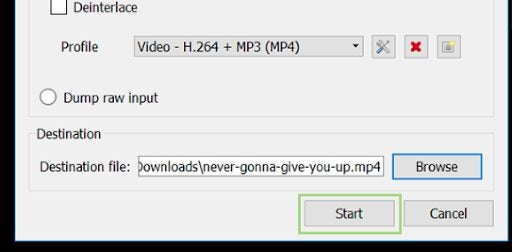
    Next, type in the file name and destination folder you would like to save the recording to once completed.

  8. Click on ‘Start’

    How to Record With VLC Media Player

    Click on ‘Start’ to start with your recording.

  9. Click on ‘Stop’ When Finished

    How to Record With VLC Media Player

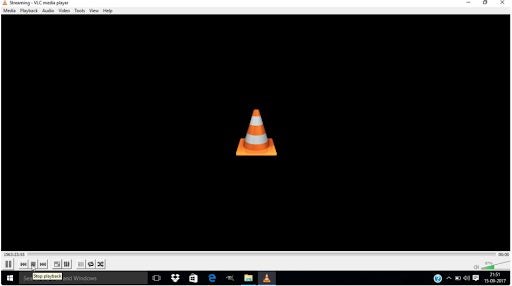
    Click ‘Stop’ once you have finished your recording.

Watch, Listen, and Record

Not only can you watch videos and listen to music with VLC media player, but you can also make recordings. Why not try taking a recording now?

How to Use WhatsApp Without Phone Number in 2 Easy Methods

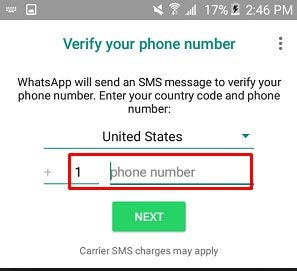
Privacy and security is a number one issue these days. Still, most messengers, including WhatsApp, require personal details for verification both on Android and iOS.

If sharing your phone number isn’t an option, you have a few other ways to trick the system.

  1. Connect a landline

    How to Use WhatsApp Without Phone Number

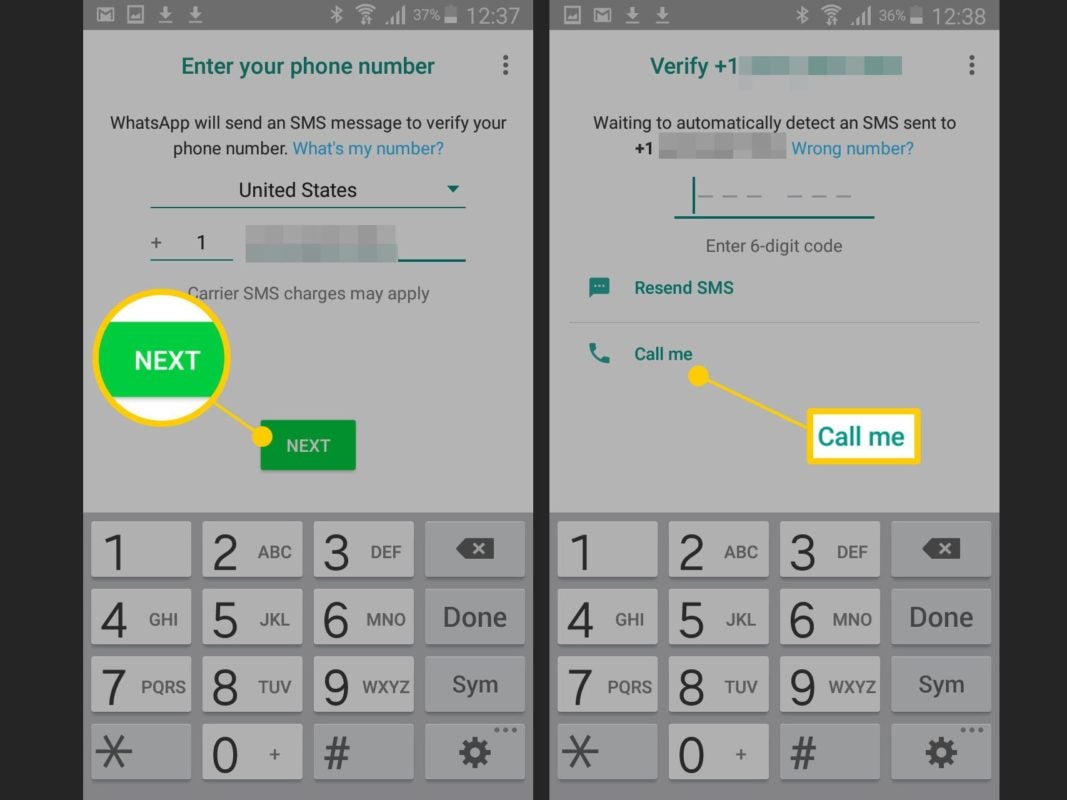
    While the verification is a must, you don’t have to use personal mobile digits for an account. Use a landline during registration and click the “Call Me” option instead of the SMS like you would when registering. Also, don’t forget to choose the country of origin.

    Once you get the 6-digit verification code over the bot call, enter it in the app. Voila!

  2. Connect a virtual number

    How to Use WhatsApp Without Phone Number

    This method includes getting a virtual number from a third-party application such as Grasshopper, Phone.com, or Nextiva. To get one, you need to find a provider that suits your needs and install the app or log in to your account on the web. Like the previous method, you need to skip the SMS verification and wait for the bot call.

    You’ll receive the verification number during the call and will be able to start chatting on WhatsApp.

Stay private

If you step on this route, make sure you’re using a decent operator with ethical practice. The problem with these services could surpass the privacy considerations of just sharing your phone number on WhatsApp. In any case, ensure that you’re trusting the right company.

Blizzard Lowers Costs for World of Warcraft Classic Character Cloning

Clone your Character in World of Warcraft at a Cheaper Price

Kaivax, a community manager on the Blizzard forums, has announced that the publisher will be lowering the price of character clones for World of Warcraft Classic. If you’re unfamiliar with the concept, this function lets you create an exact replica of your WoW character so that you can use it in another version of the game. For instance, you can transport it to The Burning Crusade Classic while retaining the original.

While many WoW players are excited about this notion, it doesn’t mean they’re completely satisfied. Blizzard says it’s listened to the community concerns by lowering the character clone rate, but reading the forum responses paints a different picture. It seems many are wondering why they should pay for cloning at all when they are already forking out for an annual subscription.

Clone your Character in World of Warcraft at a Cheaper Price  Kaivax, a community manager on the Blizzard forums, has announced that the publisher will be lowering the price of character clones for World of Warcraft Classic. If you’re unfamiliar with the concept, this function lets you create an exact replica of your WoW character so that you can use it in another version of the game. For instance, you can transport it to The Burning Crusade Classic while retaining the original.  While many WoW players are excited about this notion, it doesn’t mean they’re completely satisfied. Blizzard says it’s listened to the community concerns by lowering the character clone rate, but reading the forum responses paints a different picture. It seems many are wondering why they should pay for cloning at all when they are already forking out for an annual subscription.    Some games also provide others solutions. For one, there’s the option for a six-month subscription to clone 50 characters, instead of paying for each one individually. Unfortunately, many still see it as a money-grabbing scheme for something that should be a free tool.  A few weeks ago, the gaming world was abuzz with the leak of a possible World of Warcraft: The Burning Crusade Classic release date. Blizzard had accidentally posted the news on its site for the product, just before pulling it down again. Subscribers who caught wind of it quickly posted it on social media, making everyone wonder if they should expect the new title at the start of June.

Some games also provide others solutions. For one, there’s the option for a six-month subscription to clone 50 characters, instead of paying for each one individually. Unfortunately, many still see it as a money-grabbing scheme for something that should be a free tool.

A few weeks ago, the gaming world was abuzz with the leak of a possible World of Warcraft: The Burning Crusade Classic release date. Blizzard had accidentally posted the news on its site for the product, just before pulling it down again. Subscribers who caught wind of it quickly posted it on social media, making everyone wonder if they should expect the new title at the start of June.

How to Transfer WhatsApp From Android to iPhone in 3 Easy Ways

While it may be easy to transfer WhatsApp chats between similar operating systems, such as Android to Android, chat history might pose an issue if you have to move between an Android device and an iPhone.

As you will see, moving the account between phones isn’t tricky, but you’ll need some magic in case of the chat history.

  1. The official version

    How to Transfer WhatsApp From Android to iPhone

    WhatsApp help center notes that there’s no option to save the chat history if you’re moving from Android to iPhone. However, you can keep your phone number and the profile as it was on the old phone. You’ll just need to log into the system using the same phone number.

    – Download WhatsApp on your iPhone
    Register your Phone number

    Alternatively, if you’re changing the phone with a phone number, you can start everything from scratch:

    – Download the app
    Register your Phone number
    – Delete the account registered on your old phone number

  2. Using the email chat feature

    How to Transfer WhatsApp From Android to iPhone

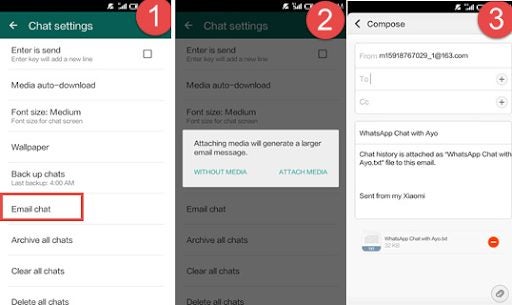
    If you want to keep WhatsApp messages, but not necessarily in the WhatsApp interface, you can use the “Email Chat” feature to send them to yourself or a friend. It lets you keep the .txt files of your conversations. You just need to:

    – Access the conversations you want to keep one by one
    Tap on the three dots on the top right
    – Choose “Email Chat”
    – Select the option to include or exclude media from the conversation
    – Input the email you want to send the file to

  3. Using a third-party solution

    How to Transfer WhatsApp From Android to iPhone

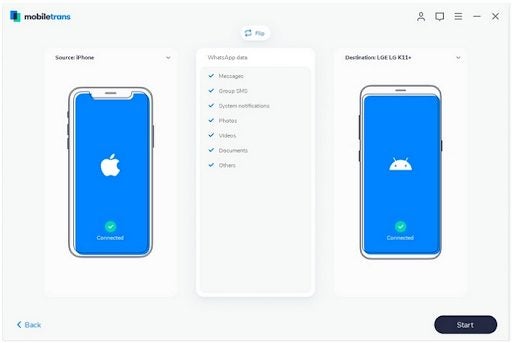
    The market has a few paid programs that let you connect your old and new phones to a computer or each other and parse WhatsApp data. Dr.fone, Mobiletrans, and Bacuptrans are only a few of those programs that could be helpful.

Why is it so hard to transfer chat history?

As you might know, Android natively saves WhatsApp backups on Google Drive, and iPhone saves it to iCloud. The difference between storage locations wouldn’t be an issue if the formats of the saved files were compatible.

Top Ways To Find Someone On WhatsApp | 3 Easy Steps!

WhatsApp is a straightforward application. You just need to get a bit comfortable with its settings.

It’s also pretty consistent on Android and iOS. This article speaks about how you can find somebody with a phone number or add a chat if you have them in your contact list. 

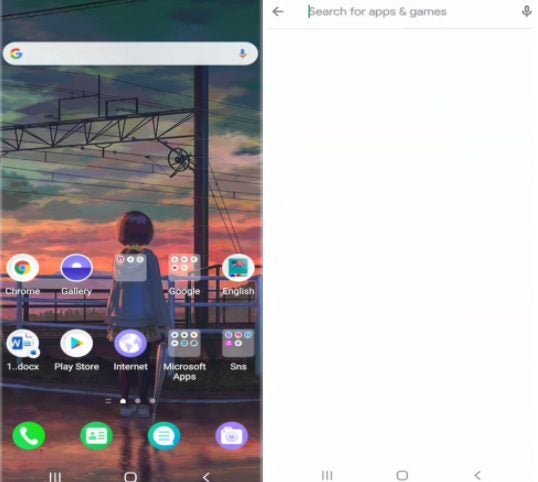
  1. Open Play Store and search for WhatsApp

    How to update WhatsApp

    Find the applications manager from your Home screen and tap to open it. Use the search bar in the Play Store to type “WhatsApp” and tap the most relevant option in the list.

  2. Open the Update section

    How to update WhatsApp

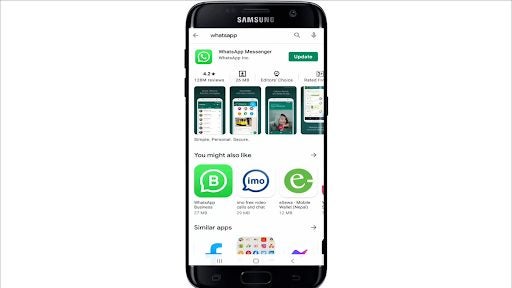
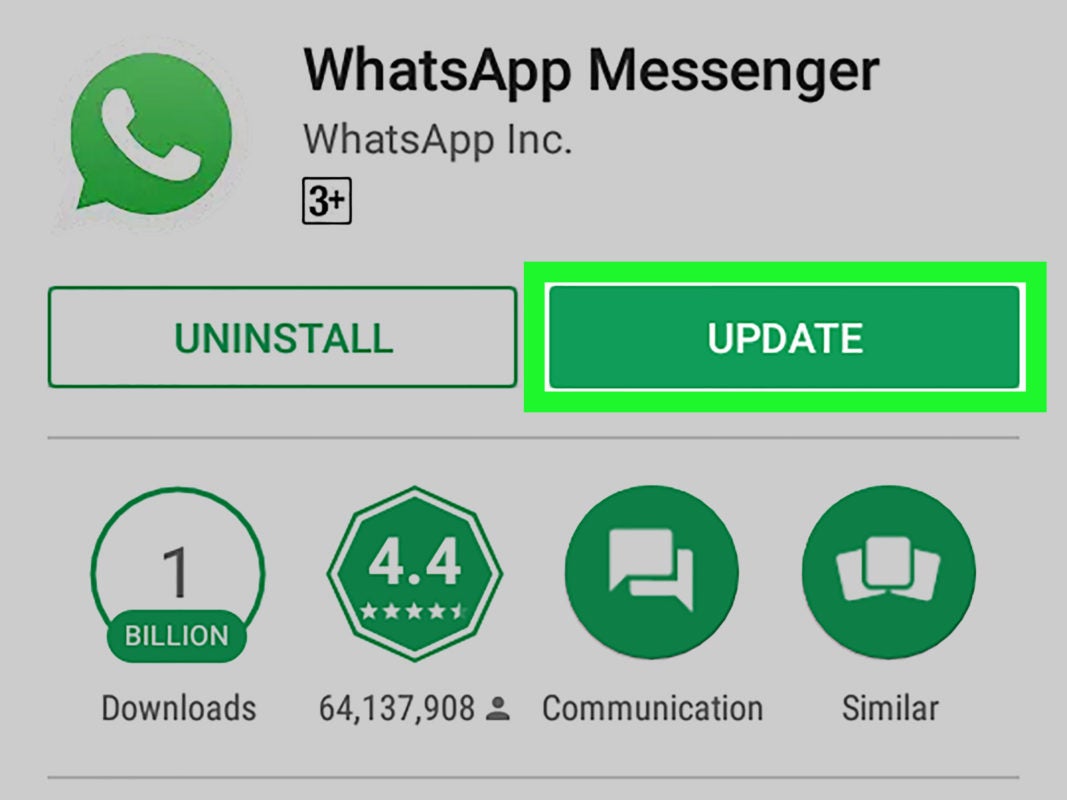
    Once you do the previous step, the app will redirect to the WhatsApp page, where you’ll see two buttons: “Uninstall” and “Update.” The second one will be there only when the update is available.

  3. Click “Update”

    How to update WhatsApp

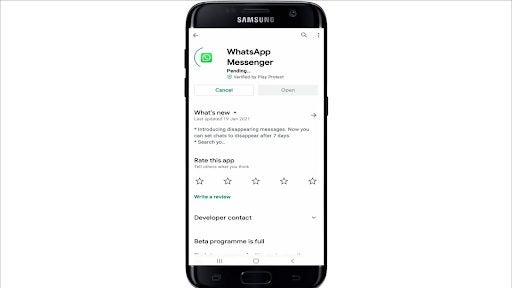
    Tap the green “Update” button and let the program download the latest version. Much like in the App Store, the button will change to “Open” once the program is available.

Update and stay safe!

Some people love to have beta software on their devices (we call them “update junkies”). There’s the other end of the spectrum: people who never download the new versions. While the former is an “untreatable illness” that only causes minor inconveniences like bugs, older software is outright dangerous, as it’s always easier to hack. Follow these uncomplicated steps to keep your device and personal details safe.

Quick Way to Backup WhatsApp

Whether you’re a WhatsApp user on Android or iOS, the messaging app lets you save conversations on the corresponding storage option.

On Apple devices, it’s the iCloud, and on Android, you can choose to use Google Drive. Your chat backups will be available for restoring previous conversations and in case you need to transfer the history to another device.

  1. Access chat settings

    How to Backup WhatsApp

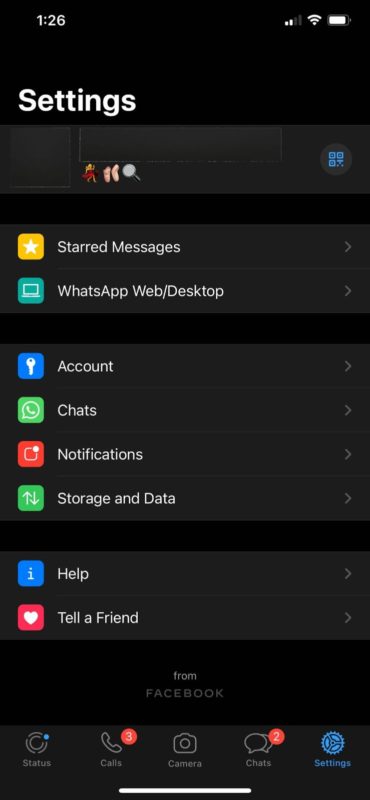
    To start backing up your chat history, you need first to open the app and go to the settings. Click the gear icon on the bottom right side of the screen. Below “Account,” you’ll see “Chat.” Tap the line to access options.

  2. Choose “Chat Backups”

    How to Backup WhatsApp

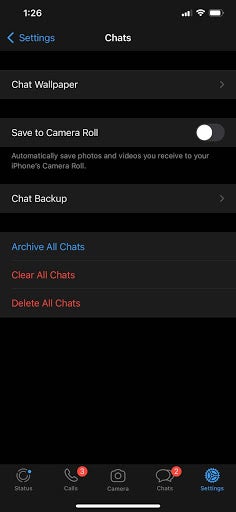
    This page controls the chat background, camera roll settings, allows you to clear, delete, or archive all the conversations. It also includes the chat backup option. Once you tap that, it’ll redirect you to the next screen.

  3. Choose “Backup Now”

    How to Backup WhatsApp

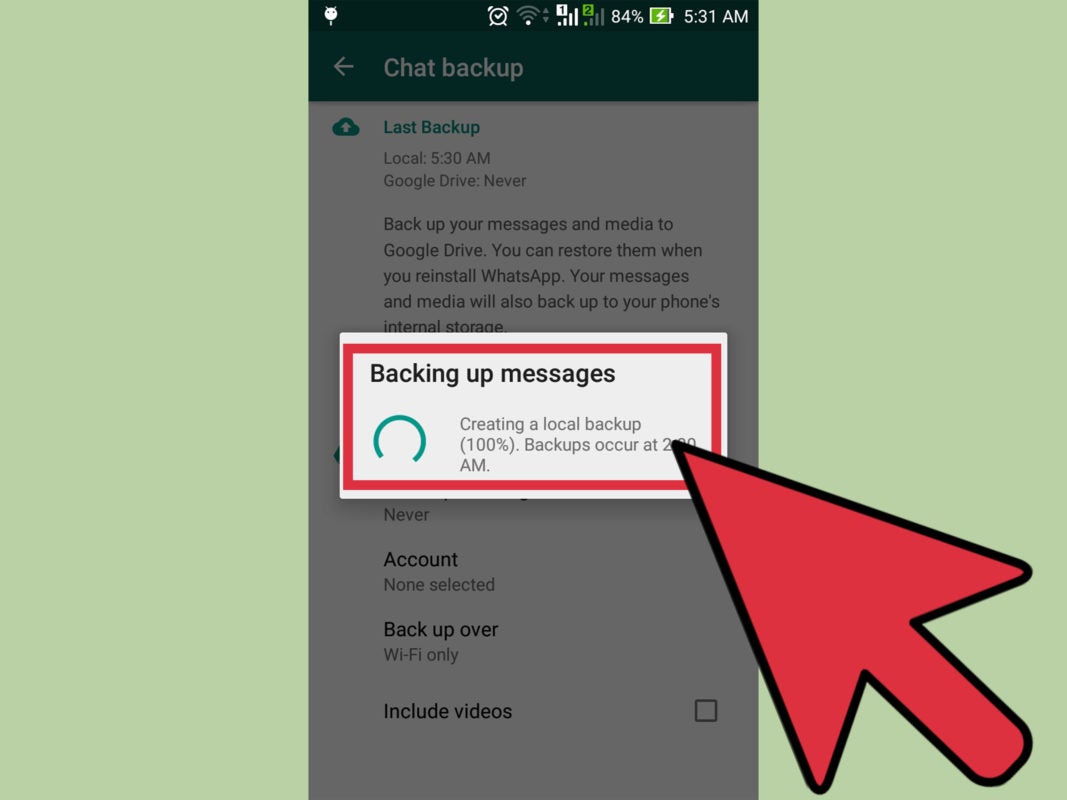
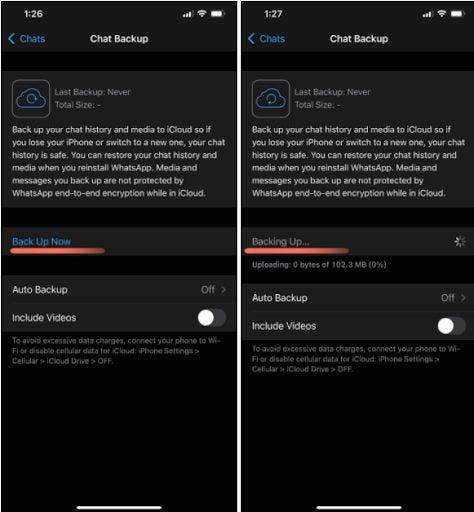
    If you’ve never backed up your chat history, the “Last Backup” line will show “Never.” Alternatively, it’ll indicate when you performed it last. The second block on the screen shows the “Backup Now” option. Click it to initiate the process and wait for a few minutes.

Keep an Eye on Your Conversations on All Devices

If you’re using your PC in addition to a mobile device to access WhatsApp chats, there are a few backup options. One of them is to use a third-party backup program like Copytrans Contacts. These usually connect to your phone and save your conversation history in a selected location in a preferable format.

How to Update WhatsApp in 3 Easy Methods

Having your apps up to date is not only a whim of having the latest and greatest versions on your devices but also a necessity against malware and bugs.

WhatsApp, like all software with support, gets frequent updates. Whether you’re on iPhone or Android, if automatic updates are disabled, you’ll have to do it manually.

  1. Method 1: Update on iOS through “All Updates”

    How to Update WhatsApp

    For this method, you’ll need to go through the following steps: 

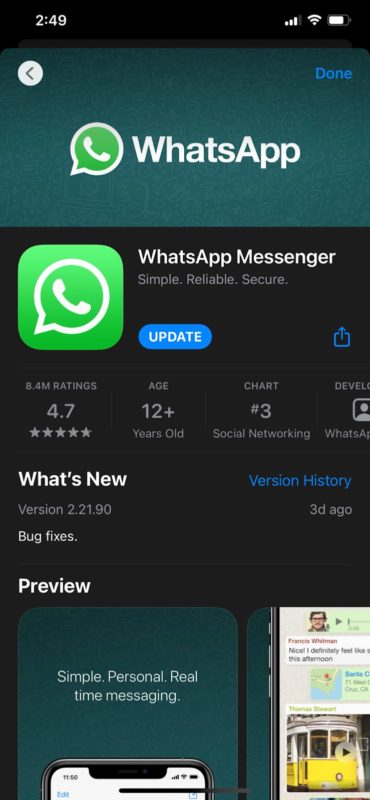
    – Open App Store
    Click the “Account” icon on the top right
    – Scroll down to the “Updates” section to find WhatsApp
    – Click “Update”

  2. Method 2: Access through search on iOS

    How to Update WhatsApp

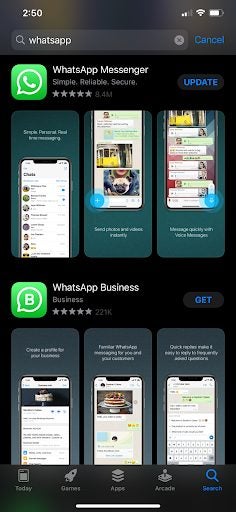
    Another option is to find the app through the App Store search bar:

    – Open App Store and click the search icon on the bottom right
    Type WhatsApp on the search bar and select the top option
    – Click “Update”

  3. Method 3: Upgrade on Play Store for Android

    How to Update WhatsApp

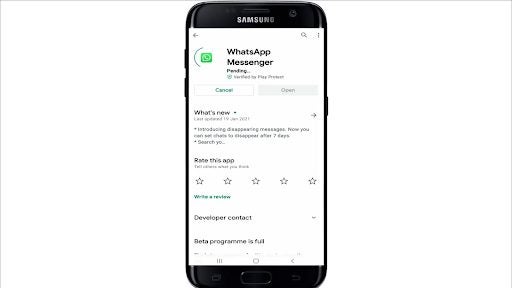
    The process for Android goes similarly. You need to access the app’s page in the Play Store. Here are the three steps to take.

    Find the applications manager from your Home screen and tap to open it. Use the search bar in the Play Store to type “WhatsApp” and tap the most relevant option in the list.

    Once you do the previous step, the app will redirect to the WhatsApp page, where you’ll see two buttons: “Uninstall” and “Update.” The second one will be there only when the update is available.

    Tap the green “Update” button and let the program download the latest version. Much like in the App Store, the button will change to “Open” once the program is available.

Update and stay safe!

Some people love to have beta software on their devices (we call them “update junkies”). There’s the other end of the spectrum: people who never download the new versions. While the former is an “untreatable illness” that only causes minor inconveniences like bugs, older software is outright dangerous, as it’s always easier to hack. Follow these uncomplicated steps to keep your device and personal details safe.

How to Open Magnet Links With uTorrent in 2 Easy Methods

No matter if you’re a uTorrent user on Windows or Mac, you should be familiar with magnet links.

They are a faster and easier method than adding the downloaded file to uTorrent manually. We’ll quickly show you how you can open magnet links safely.

How to open magnet links with uTorrent

While it’s an easy task, we have two methods with a few easy steps for each. Before you can start the process, you need to find the magnet link in a torrent site first in both cases. 

Method 1: Pasting the link into uTorrent

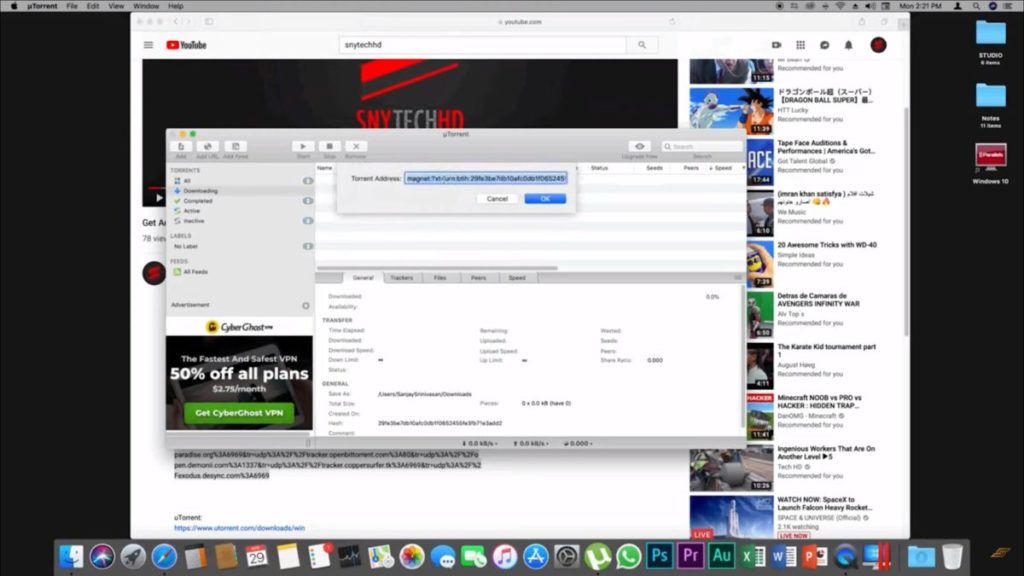
The first step in this method is to click “Add Torrent from URL.” For MacOS, you can find it in the “File” tab, and for Windows, just click the link icon near the “Plus” sign in the horizontal toolbar. If you’ve already copied the post link from a torrent site, the prompt window will have it as it appears. If it doesn’t, just paste it and click “Okay.”

You will also see a window that asks to choose the directory you want the file to download. Once you do, the file will start downloading immediately. If it doesn’t, use one of the solutions we have in this article for connecting to peers in uTorrent.

How to Open Magnet Links With uTorrent

Method 2: Clicking the magnet link on the preferred torrent site

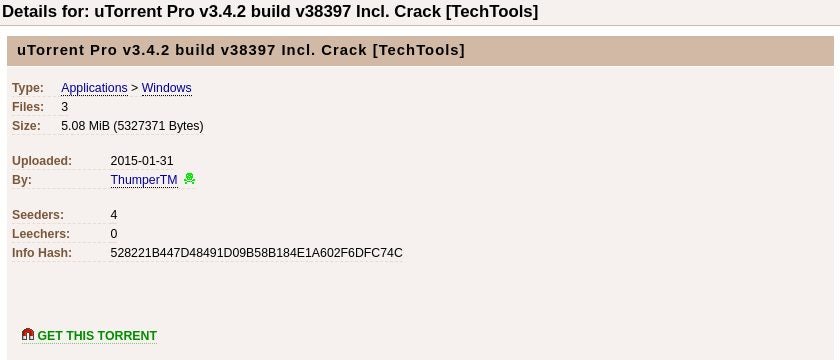
Whether you’re using The Pirate Bay or other sites for finding your torrent files, the search process is always the same. In the window below, you can see the list of files we found for the uTorrent program. Click the magnet link for the preferred program version.

Another way to get the file is to open the page itself and click “Get this torrent.”

Either way, your system should open the associated torrent client (in this case, uTorrent) and prompt the download as described in the previous method.

How to Open Magnet Links With uTorrent

Your security is above all!

While peer-to-peer sharing can be useful in some cases, you need to be careful regarding malware. Using torrents is in a legally gray area, and keeping yourself safe against various cybersecurity and legal risks is your own responsibility. Use a VPN and ensure that your antivirus is running correctly before jumping in.

Watomatic Sends Auto Replies For WhatsApp and Facebook

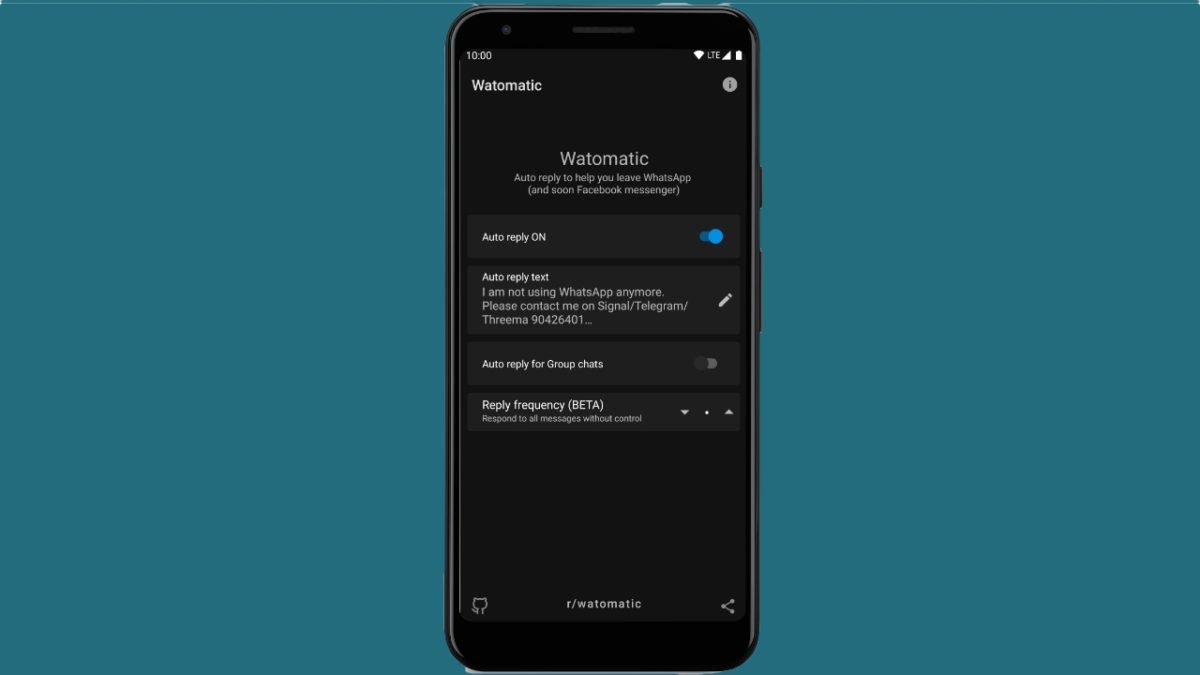
If You’re Migrating From Whatsapp or Facebook, Watomatic Will Send Auto Replies For You

Facebook Messenger and WhatsApp chat applications have seen a decline in members later, with many of them shifting to alternatives like Telegram. However, many of their contacts don’t know that they’ve migrated to a new platform, leaving them to do all the dirty work. Enter Watomatic to take care of these issues for you.

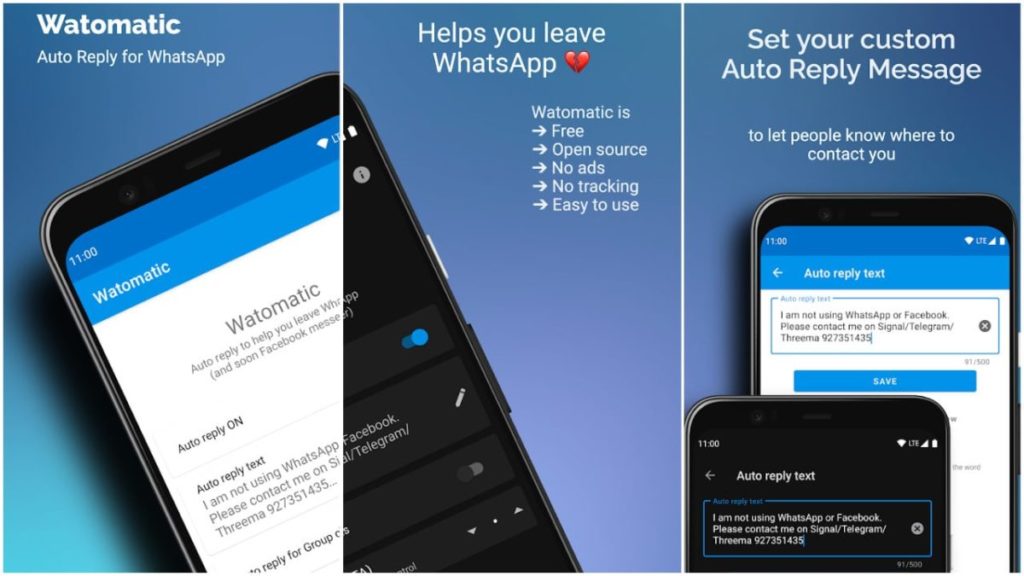
The auto reply application works well on Android devices, sending responses to anyone who tries to contact you. You can adjust what the message says, while it also works in any of your group chats. It’ll be up to the admins of those groups to remove you once they see the Watomatic auto reply appear.

Watomatic Sends Auto Replies For WhatsApp and Facebook

Of course, you should ensure that the response informs your contacts where you’ve migrated to. For instance, it should direct them to Telegram, Signal, or whichever alternative you’ve chosen. The last thing you want is your father rocking up at your house or calling you, wondering why you’re not answering your Whatsapp or Messenger messages. Of course, it’s alright if your ex is having trouble getting hold of you.

Watomatic has a group of community developers at the helm, which means that it’s an open-source app. Since it uses some of the lesser-known features, it might not work on all devices. You’ll need to contact them if you encounter any issues, which helps develop it further.