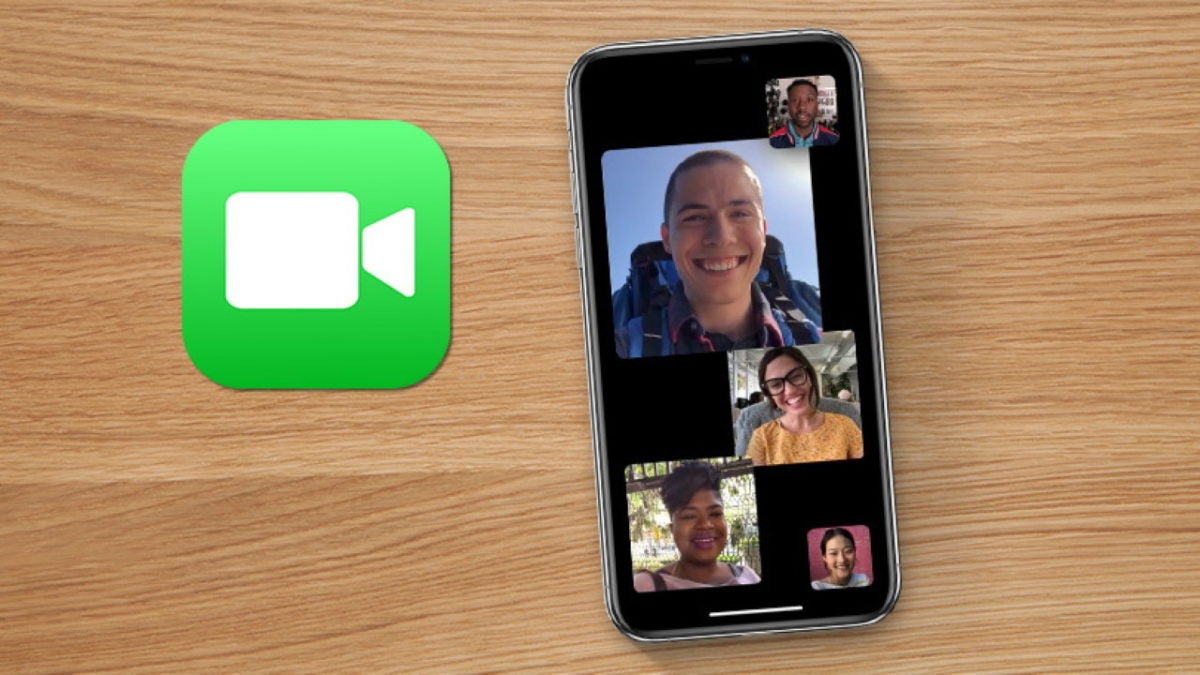
What to Expect with FaceTime’s Latest Features

Apple Gives FaceTime New Functions To Play With

Last week, we mentioned how FaceTime will become available for Android and PC users on the web. Well, it also appears from the WWDC 2021 that more features are coming to the iPhone version. If you read through them carefully, you’ll notice how it’s doing its best to beat competitor apps like Zoom.

One of the top new options is sending scheduled meeting links to others. While this option may have been available for iPhone, you can now send them to Android and PC members too. It means you can share links on Whatsapp and other platforms even if they don’t have iOS. The attendees will also receive a calendar notification if enabled.

FaceTime’s Latest Features

Following hot on the success of Teleplay is SharePlay. You’ll be able to watch videos and listen to music with other members in the meeting, which you can do for business or entertainment purposes. Some of the partners who are buying into this partnership include Hulu, Disney+, and Twitch. You should also expect some Apple products to participate.

Finally, Spatial Audio will give you the sense that you’re sitting in the same room as the other attendees. There are also wide spectrum and voice isolation features, where the former boosts ambient sounds and the other blocks them. 

As you can see, there are plenty of tools coming to FaceTime, and we don’t even have the full list yet. We can’t wait to see what else is on the table.

How to Download In UC Browser in 4 Easy Ways

UC Browser is becoming increasingly popular, and is now top of the browser pops in China, Indonesia, and India. You can use it to stream, play online games, or download torrents and files.

If you’re keen on using it, here’s how to download different things.

  1. Download free Music

    How to Download In UC Browser

    UCWeb has partnered with Hungama Music to allow free downloads of thousands of songs on UC Browser.  On the browser, click on Hungama under top sites. This will take you to a page dedicated to this service. You can then either download or stream them.

  2. How to Download movies

    How to Download In UC Browser

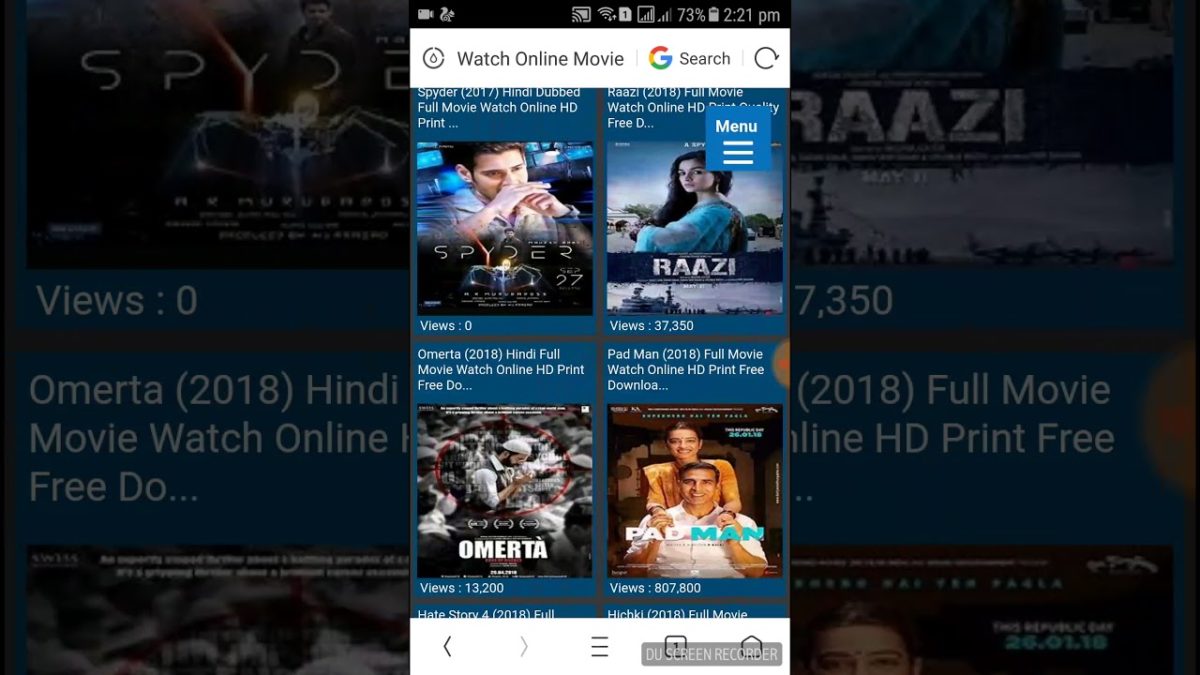
    Go to any website for downloading movies through a download link. If the link takes you to an ad page, close it and try again.

    On the link, a download bar will pop up showing Download for movies. Choose your movie, download and watch it.

  3. Download WhatsApp

    How to Download In UC Browser

    Make sure you have the latest WhatsApp version on your phone before you start. To open WhatsApp on your UC Browser, type web.whatsapp.com in the address bar and go to the site, where you will see a QR code. On your phone, open WhatsApp Web and scan the QR Code.

    You’ll then be able to see and use WhatsApp on your PC screen. You will have to keep your phone connected to the Internet for it to work.

  4. Download games

    How to Download In UC Browser

    Using any reliable apk source on UC Browser, you can access one of the most extensive galleries available for Apps and downloading games using UC Browser on your Android device.

 Why Use UC Browser as Your default?

UC Browser is gaining market share, especially in Asia, because it has some attractive additional features. Among them are cloud acceleration and syncing and a fast option that downloads files in multiple parts simultaneously.

UC Browser Turbo 2020 offers a safe, secure, and clean browsing experience that is attracting more and more users, not only in Asia but around the world.

How to Refresh Mozilla Firefox Automatically

When you are browsing on Mozilla Firefox, you may find yourself on a website that has to refresh for you to see the latest information. If this happens frequently enough, you may want to set your browser to reload automatically.

Let’s take a look at how to set Mozilla Firefox to refresh automatically.

  1. Click on the Firefox Icon

    How to Refresh Mozilla Firefox Automatically

    Open the Mozilla Firefox web browser on your chosen computer or device. Click the orange Firefox icon in the top-left corner of your browser.

  2. Select ‘Advanced’

    How to Refresh Mozilla Firefox Automatically

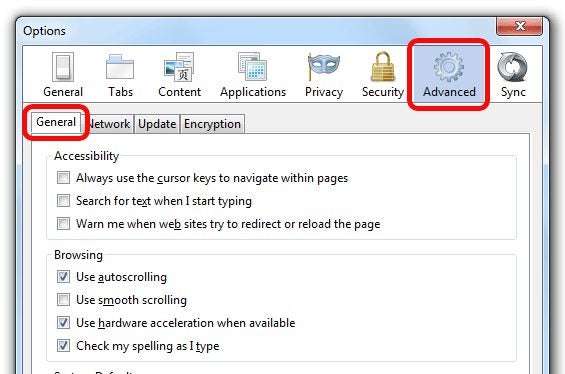
    In the drop-down list, choose ‘Options’. From the new list that appears, choose the ‘Advanced’ option. Navigate to the ‘Accessibility’ section of the window and click on the ‘General’ tab.

  3. Remove the Checkmark

    How to Refresh Mozilla Firefox Automatically

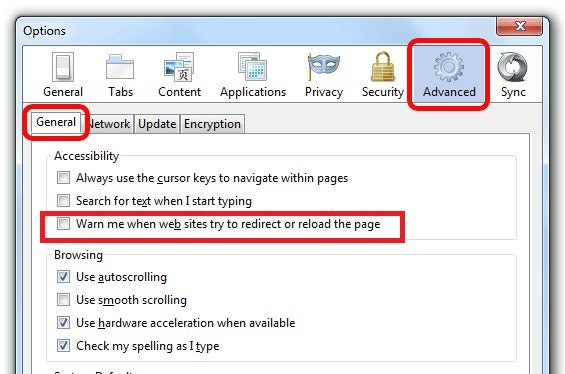
    Remove the checkmark next to the section ‘Warn me when websites try to redirect or reload the page’. By removing this option, your browser will now automatically refresh web pages.

    If you would like to have some more features when it comes to refreshing your webpages, such as setting the refresh intervals, it might be worth considering a Firefox add-on. A few free add-ons enable you to refresh pages, set reload intervals, and more automatically. You could look at Tab Auto Reload or Auto Refresh as optional add-ons that have these extra features.

Keep on Track With All the Latest Information Automatically

By enabling automatic refresh of web pages in your Mozilla Firefox web browser, you can ensure to stay on top of all the latest up-to-the-minute information from around the world. Enable automatic reload now and remove the need to refresh pages to see the newest content manually.

How to Remove Certificate Error in Mozilla Firefox in 3 Steps

If you are browsing with Firefox, you may come across a certificate error that usually comes with an ‘Invalid Certificate’ or SSL error. This is because Firefox automatically attempts to validate any websites that show a certificate for your security. 

So, what can you do to keep Firefox from rejecting these sites and giving a certificate error?

  1. Click on the Hamburger

    How to Remove Certificate Error in Mozilla Firefox

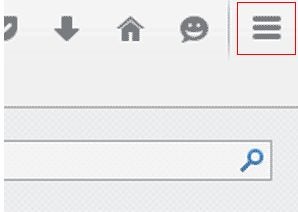
    Open the web browser on your computer by clicking on the shortcut on your desktop, the icon on your hotbar or dock or from your app menu. Click on the three horizontal lines (hamburger) at the top right of the screen. This will open up a drop-down list of your browser settings

  2. Click on ‘Options’ and Then ‘Advanced’

    How to Remove Certificate Error in Mozilla Firefox

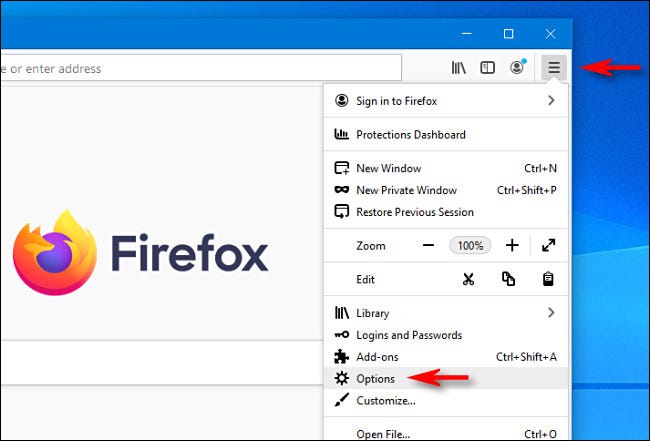
    In the drop-down list, click ‘Options’. Next, click ‘Advanced’.

  3. Remove Certificate Validation

    How to Remove Certificate Error in Mozilla Firefox

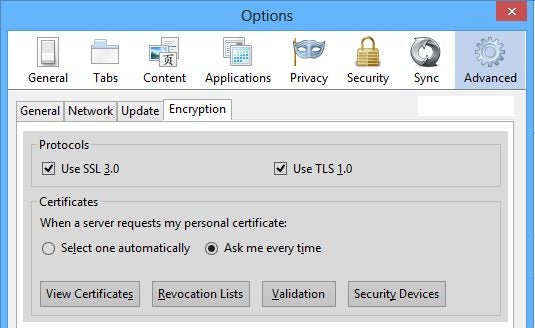
    Now click the ‘Encryption’ option from the options provided. In the encryption window, click the ‘Validate’ button. Remove the checkmark next to ‘Certificate Validation’ and click ‘Ok’.

    From now on, Firefox will accept all certificates without validating them first. You will no longer get an ‘Invalid Certificate’ error when trying to gain access to different sites.

Resolve the Certificate Error Easily and Browse Freely

By following the above steps, you will resolve the certificate error when using Firefox. You can get back to exploring different websites without fear that your browser will block them because of a certificate or SSL validation error.

Why not try following these steps the next time you get a certificate error and see how quickly it can be fixed.

How to Set Mozilla Firefox as Default Browser In 4 Methods

If you want to set Mozilla Firefox as your default browser instead of others like Google Chrome, Microsoft Edge, or Safari, there are 4 easy methods to use. These options depend on whether you use a Windows PC, a Mac, an Android device, or an iPhone. The steps, detailed below, are slightly different on each platform.

  1. Changing to Firefox in Windows

    How to Set Mozilla Firefox as Your Default Browser

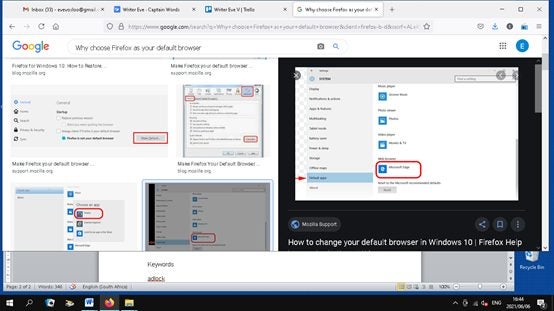
    – Click on the menu button in your current browser.

    – Select Options. Click Default in the General panel. Windows Settings will open with a screen that says Choose default. Click Web browser.

    A list will open in a dialog box. Choose Firefox. Click the X on the top right to close Settings and save the changes.

  2. Changing to Firefox on a Mac

    How to Set Mozilla Firefox as Your Default Browser

    – First, install Mozilla Firefox on your computer. 

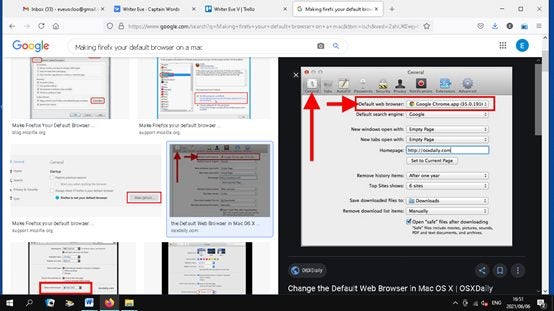
    – Select System Preferences in the Apple menu and then click General.

    – A list of Web browsers will appear in the Default web browser menu.

     – Choose Mozilla Firefox.

  3. Changing to Firefox on an iPhone

    How to Set Mozilla Firefox as Your Default Browser

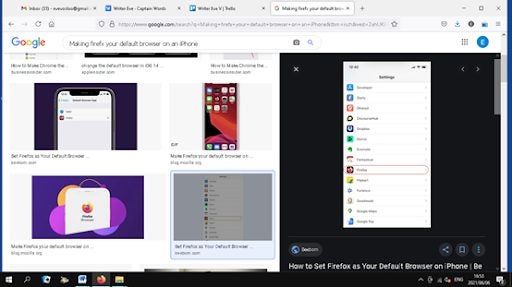
     If you don’t have it, download the Firefox app for your iOS browser. Make sure you have the latest version. In Settings, go to the Firefox app. Tap on the Default Browser App and select  Firefox.

  4. Changing to Firefox on Android

    How to Set Mozilla Firefox as Your Default Browser

    – Tap Menu on the right at the top of the screen. –

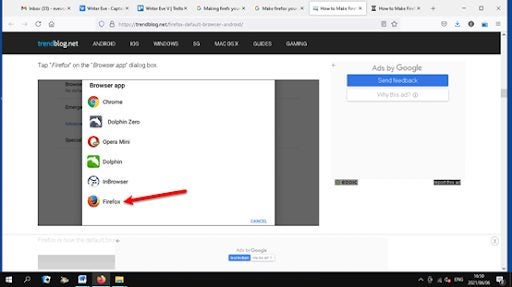
    – Tap Settings. Then tap the switch to Make Firefox Focus the default browser. This will open the Default apps screen.

    • Tap Browser app. Tap Firefox Focus to select it.

Why make Firefox Your Default Browser?

The choice of a default browser is a very personal one. Some people start with one browser and don’t ever try another. Although all browsers allow you to navigate the internet, there are differences between them.

Mozilla Firefox is a highly regarded browser, especially for its high speed, which beats its competition. It also automatically guards against tracking like fingerprinting and crypto mining by blocking more than 10 million trackers daily.

How to Disable AdBlock in Mozilla Firefox in 3 Steps

AdBlock is a browser extension supplied by Firefox that blocks adverts and stops advertisers from tracking you across the web. This improves your browsing speed and protects your privacy.

But if you want to see the ads, it is straightforward to remove AdBlock and allow the adverts to pop up.

  1. Find your Add-ons and Themes

    How to Disable AdBlock in Mozilla Firefox

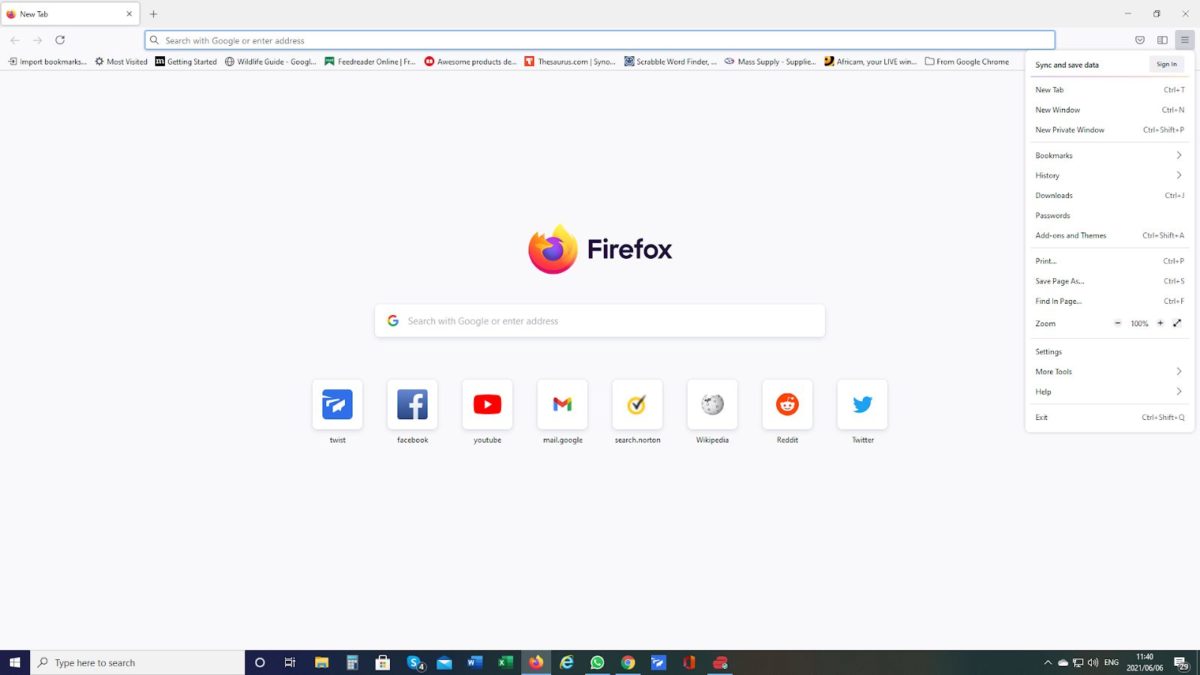
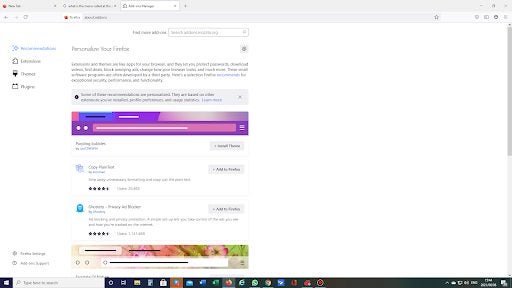
    Click on the three horizontal lines on the top right-hand corner of your screen, called a Hamburger Menu. This will open a menu and from that menu, click on Add-ons and Themes.

  2. Select Extensions

    How to Disable AdBlock in Mozilla Firefox

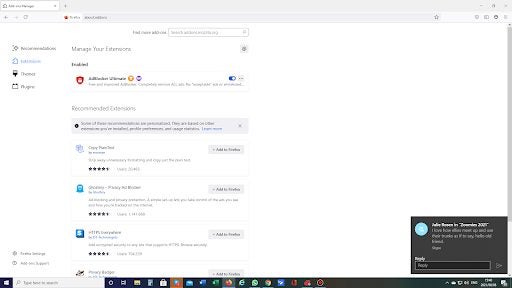
    Extensions add features to Firefox or modify existing features. AdBlock is an extension in Firefox.

  3. Modify AdBlock

    How to Disable AdBlock in Mozilla Firefox

    Here you have two options; you can disable AdBlock, which means it will remain part of your Firefox but not work until you enable it again, or you can choose to remove it altogether.

    To disable AdBlock, click on the blue slider to move it to the left, and the slider turns grey.

Be cautious with blocking

Sometimes, a site may ask you to disable the ad blocker so you can do something, like leave a review. If you have AdBlock already disabled, it may be Firefox’s Enhanced Tracking Protection feature that is causing you trouble.
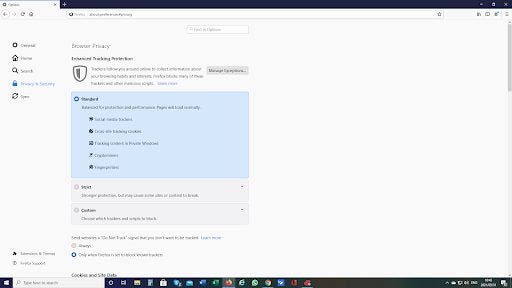
To see what this Firefox feature is stopping, click on the shield on the far right of your screen. This will show you what is being blocked on a specific page. You can then modify protections for that site.

Before you delete AdBlocker, please think about what you are doing. If a particular site requires you to turn off the AdBlock, I suggest you think about why. Many adverts today come with an unpleasant load; malware. If you absolutely have to do something on this site, disable AdBlock while you undertake this dangerous mission and then enable it as soon as you can.

Raya and The Last Dragon, Free to Watch on Disney+

A lone rider. A dystopian world. A land that’s gone to waste. These are the opening lines of Raya and The Last Dragon, the latest Disney gem that, as of this past June 4, is free to watch for all Disney+ subscribers.

Inspired by the legends and culture of Southeast Asia, this new classic invites us on an epic adventure to rebuild a shattered world in which action, drama and humor come together to deliver an extraordinary film.

In search of the legendary dragon

Raya and The Last Dragon follows the adventures of Princess Raya, one of the last survivors in a world ravaged by the Drunn. Her only hope is to find Sisu, a legendary dragon who saved humanity from these creatures in the past. But Raya will need a lot more than magic to bring the utopian kingdom of Kumandra back to life. She’ll have to recover her trust in others and learn that by working together, you can accomplish any feat.

A journey through the magical kingdom of Kumandra

Since its release, this film has been praised for both its exciting story and its astonishing atmosphere. Raya must travel through five kingdoms to track down the different parts of the dragons’ gem. Each land has a unique look, design and ecosystem, resulting in a real feast for the eyes and an amazing way of traveling without leaving your living room.

A broken world, healed by friendship

But without a doubt, one of the most interesting things about Raya and The Last Dragon is its inspiring message about the importance of friendship to achieve any goal. This is masterfully presented by the charming cast of characters who will accompany Raya on her journey to defeat the Drunn. Adorable, brave and emotionally expressive, the princess’ new friends will be her main support to help her achieve her goal.

An unforgettable adventure for the whole family

Raya and The Last Dragon is the perfect way to spend an unforgettable summer with Disney+. Get ready to laugh and be thrilled while watching this incredible film that’s fun for everyone, whether you’re a kid or a grownup.

How to Delete History in Mozilla Firefox in 3 Steps

Your browsing history, along with cookies, cache, and forms, all make your browsing on Mozilla Firefox extremely easy, but, as with most things in life, doing things the easy way can come back to attack you from the rear!

Hackers can use your cookies and browsing history to gain access to your bank account and any other online persona that you have without having to know your passwords. This is a scary thought, and you should get into the habit of clearing your history regularly. 

  1. Find your History

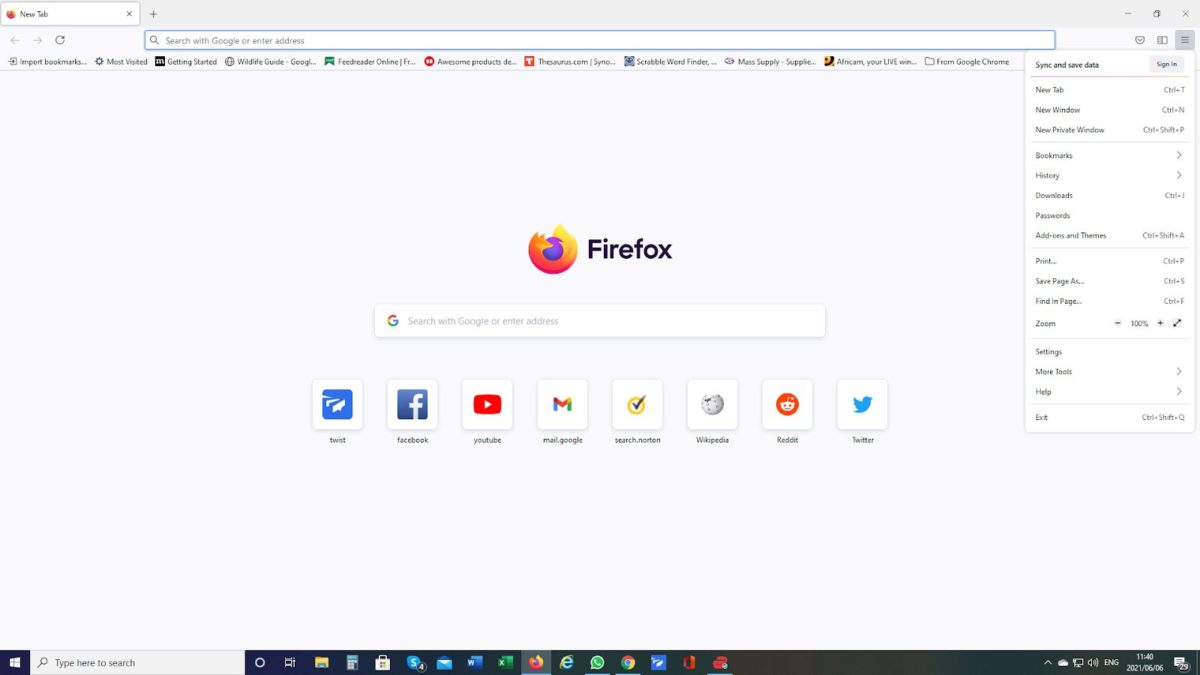
    How to Delete History in Mozilla Firefox

    Click on the three horizontal lines on the top right-hand corner of your screen. This will open a menu and from that menu, click on History.

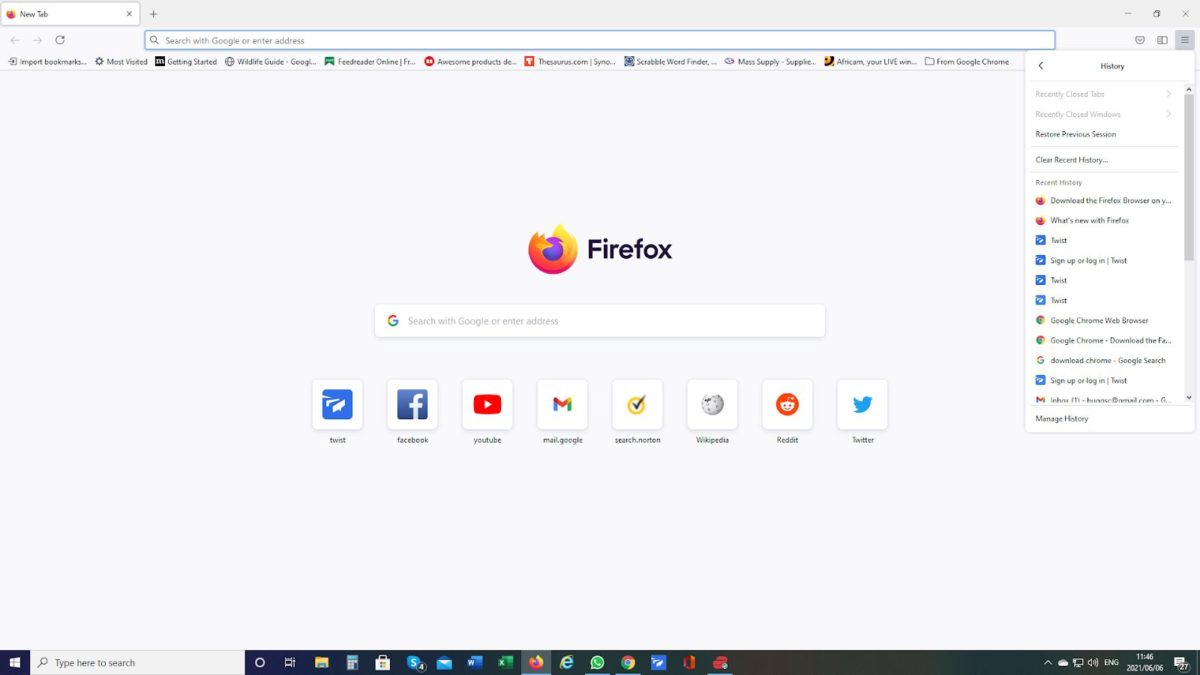
  2. Select Clear Recent History

    How to Delete History in Mozilla Firefox

    Click on the menu item, “Clear Recent History.”

  3. Select What to Clear

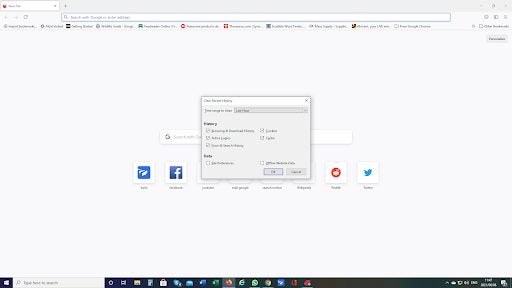
    How to Delete History in Mozilla Firefox

    Once you select the option “Clear Recent History,” you will be given a pop-up box with several selections on it. Work through each one that is relevant for what you want to achieve.

As good as gone!

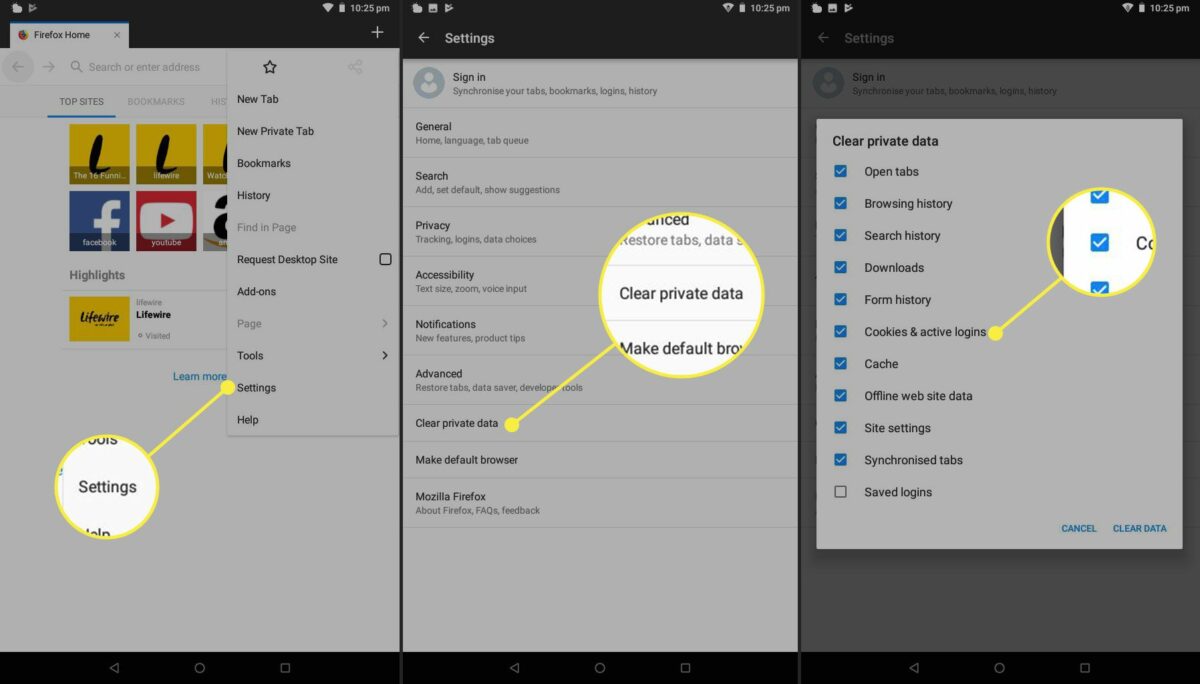
You don’t have to clear everything; you can remove the items you want by clicking on the relevant boxes. Clearing your history can also solve some browsing problems, especially clearing the cache, not to mention hiding your purchase of those gifts!!

How to Enable Cookies on Mozilla Firefox in 4 Steps

Cookies are tiny bits of information that are stored on your computer by websites that you visit. They are used by websites to remember you, perhaps your login information or your preferences. 

If you do not allow cookies to be stored, you will get reminders from most websites that you visit. To stop these annoying reminders, you can turn on or enable the cookies on your computer. To enable cookies on Mozilla Firefox, follow these easy steps.

  1. Open the Options Menu

    How to Enable Cookies on Mozilla Firefox

    Click on the three horizontal lines on the top right-hand corner of your screen and choose the Options menu item.

  2. Select Privacy & Security

    How to Enable Cookies on Mozilla Firefox

    Click on the Privacy & Security option in the menu on the left-hand side of the screen.

  3. Adjust your Browser Privacy Settings

    How to Enable Cookies on Mozilla Firefox

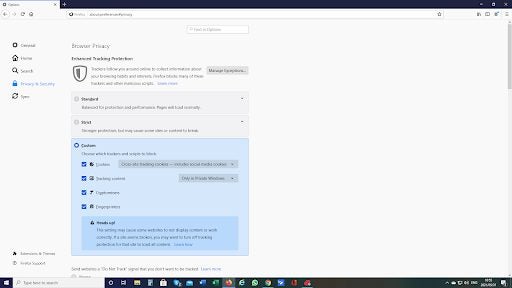
    Click on the option to set up Custom Settings.

  4. Select the Cookie Setting you want to use

    How to Enable Cookies on Mozilla Firefox

    If you click on the box next to Cookies, all cookies will be accepted by your computer.

    If you click on the drop-down box, you will find other options:

    – “Cross-site tracking cookies – includes social media cookies” – this means that if the web page you are on has a button to another page, Firefox will not allow a cookie from that other page to be stored on your computer. This includes pages for social media such as Facebook, Instagram, etc.

    – “Cookies from unvisited websites” – this is self-explanatory and stops the page you are on from storing cookies from pages you have not visited on your computer.

    – “All third party cookies – may cause websites to break” – an example of this would be that the page you are on has a ‘Like’ button. If you click that ‘Like’ button, the website will store a cookie from that site on your computer.

    • “All cookies” – again, this is self-explanatory. No cookies from any website will be permitted to be stored on your computer. Be careful before using this, as it can affect your browsing experience. An example would be a shopping cart may not work correctly as the page cannot track all the items you have stored in your cart while browsing around the products for sale.
Would you like cookies with that?

These are not the cookies you enjoy with your coffee, but they are handy and are not the evil gnomes of the Internet! They can easily be cleaned out when clearing your browsing history.

These small data items can improve your browsing experience, and in many cases, websites rely on them to function well, so let them be.
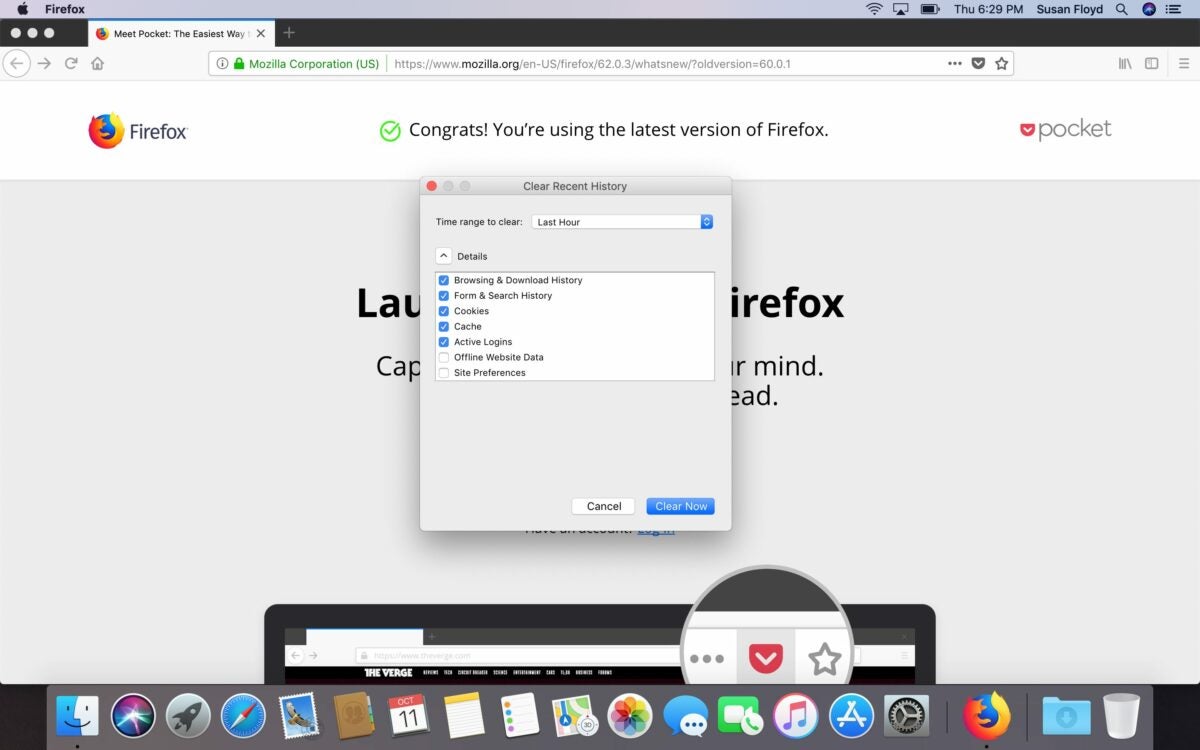
How to Clear Cache in Mozilla Firefox in 3 Steps

If you’ve been using Firefox for a while, you might notice that it becomes slower with regular use. This can be attributed to the stored data that the browser saves in the background to use to recall popular sites that you’ve visited.
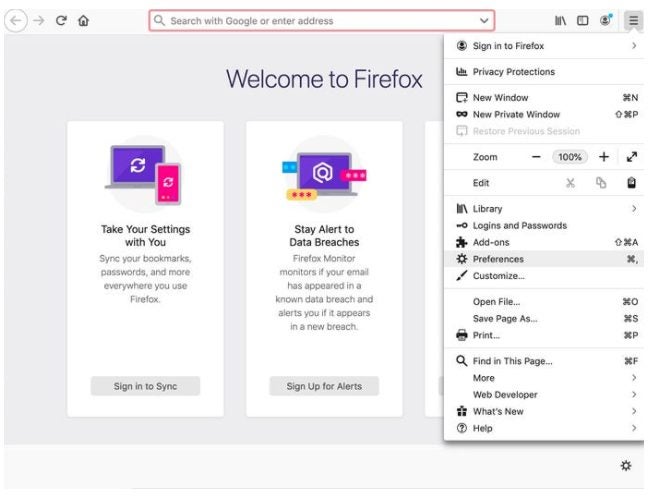
In order to return your browser speed, you will need to clear your site data and cache. Let’s look at how you can clear your cache.

  1. Choose ‘Preferences’

    How to Clear Cache in Mozilla Firefox

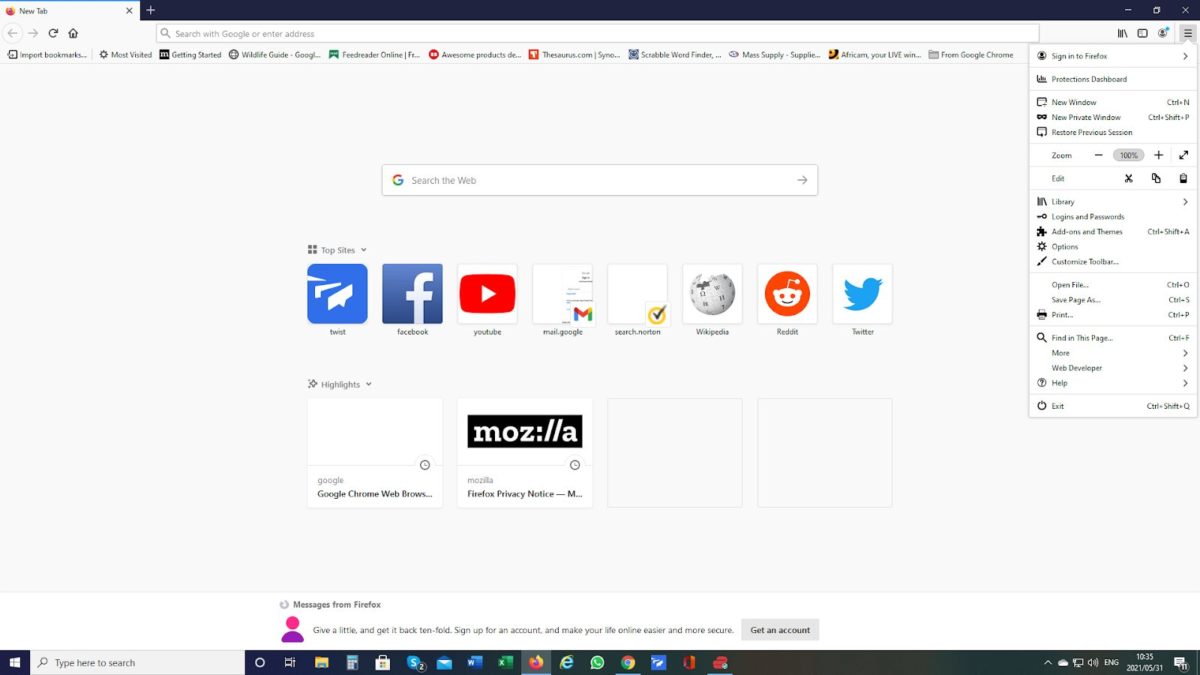
    Open your Firefox browser on your computer. Click on the three horizontal lines (burger) in the top right of the screen. Now, click ‘Preferences’ in the drop-down list.

  2. Clear Your Browsing Data

    How to Clear Cache in Mozilla Firefox

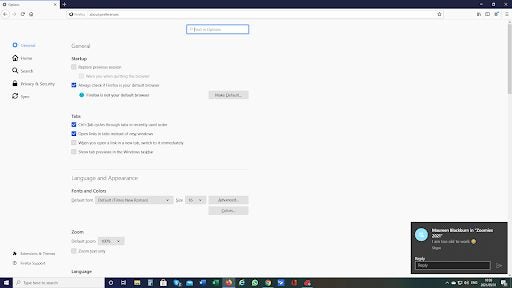
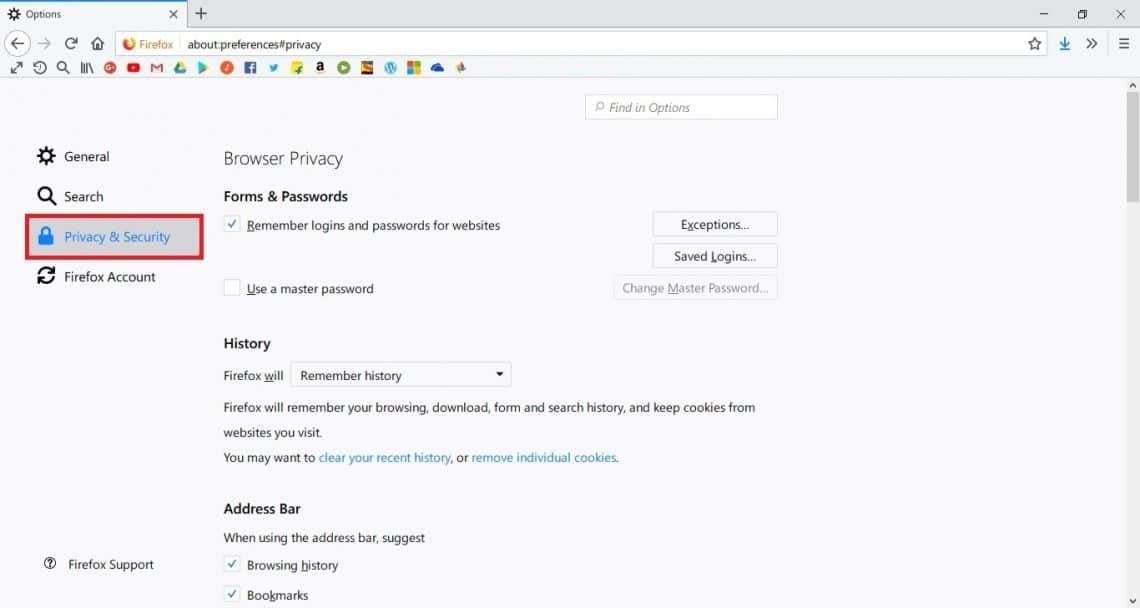
    Choose the ‘Privacy and Security’ option from the list on the left-hand side of the screen.

    Scroll through the list provided and click on ‘Cookies and Site Data’. When you’re done, click on ‘Clear Data’ to the right of the screen.

  3. Choose to Clear the Caches Web Content

    How to Clear Cache in Mozilla Firefox

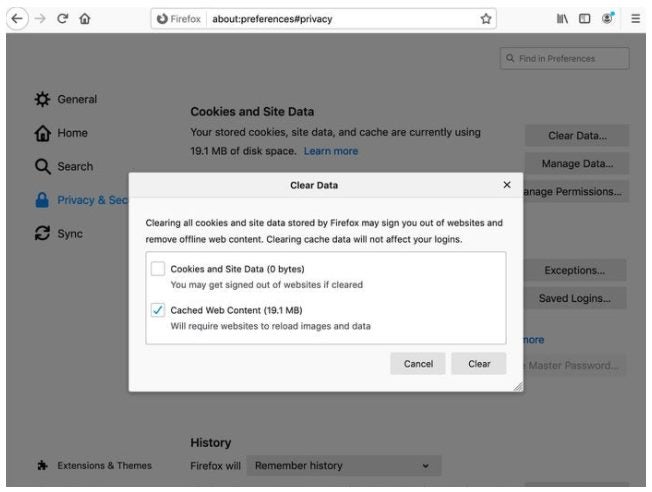
    In the new pop-up window, select the option to clear ‘Cached web Content’. You can also choose to clear cookies and site data, but be aware that you may be signed out of all websites and will remove offline web content by selecting this option. When you’ve decided what data to clear, you can click on ‘Clear’ at the bottom of the window to finalize the process.

Clear You Cache and Return to Fast Browsing Speeds

By routinely clearing your cache, you can keep your browser functioning at its best and fastest speed. Why not try to clear your cache on your Firefox browser and see if you notice any difference.