The top 7 most useful features of Notepad++

Notepad++ is a completely free source code editor that doubles as a replacement for the Notepad software that comes standard on Windows. The added functionality of Notepad++ makes it a worthy upgrade and a powerful source code editing solution. To showcase why this software is so useful, here are the seven best features available in Notepad++.

Notepad++ Download

Targeted browser launching

When testing code for web development projects, it is common practice to have a specific browser in mind. Notepad++ allows you to set which browser your code will launch in at runtime, all in just one click. Hover over the Run tab at the top of the screen, and select run from Firefox, Chrome, or your supported browser of choice. Clicking your desired option will run the code within seconds.
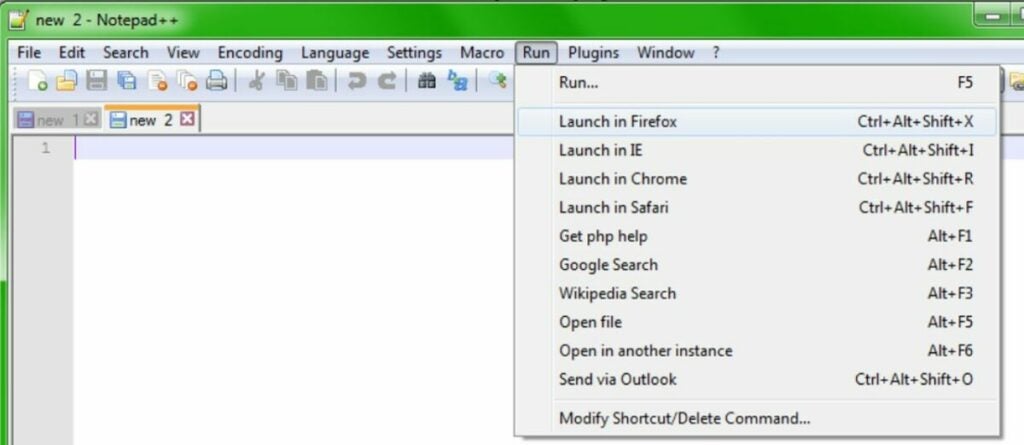
Launch into a specific browser with just one click

Automate work with macros

Next up is the ability to automate simple tasks with macro commands. Macros allow you to record your mouse or keyboard input and repeat it later with an automated script. You can record new loops and play old ones from the macros menu located in the same top section where the run menu is located. Simple tasks such as reformatting text can be completely automated with the proper macro.
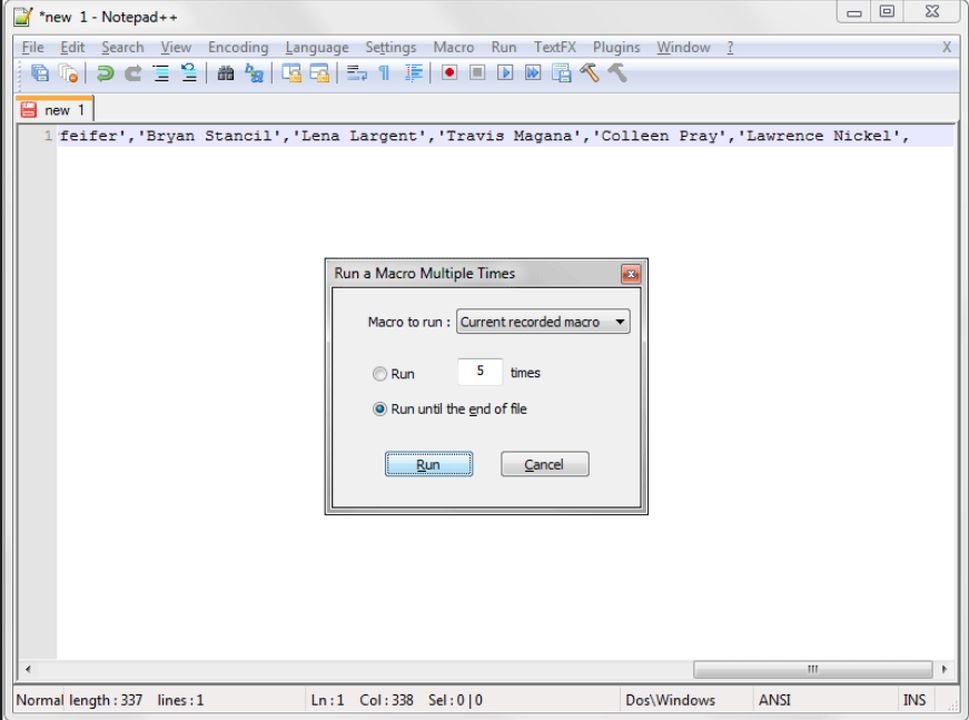
Run macros to save time and energy on simple tasks

Customize or create your theme

When using an app for extended periods, the inclination to customize the experience grows stronger. Notepad++ has many preset themes to choose from and even allows you to create your own. Just write the code, and save the file in .xml format. Then, you can import your file with the style configurator menu pictured above. The style configurator is also where you can change colors and select the premade theme templates that come with Notepad++.
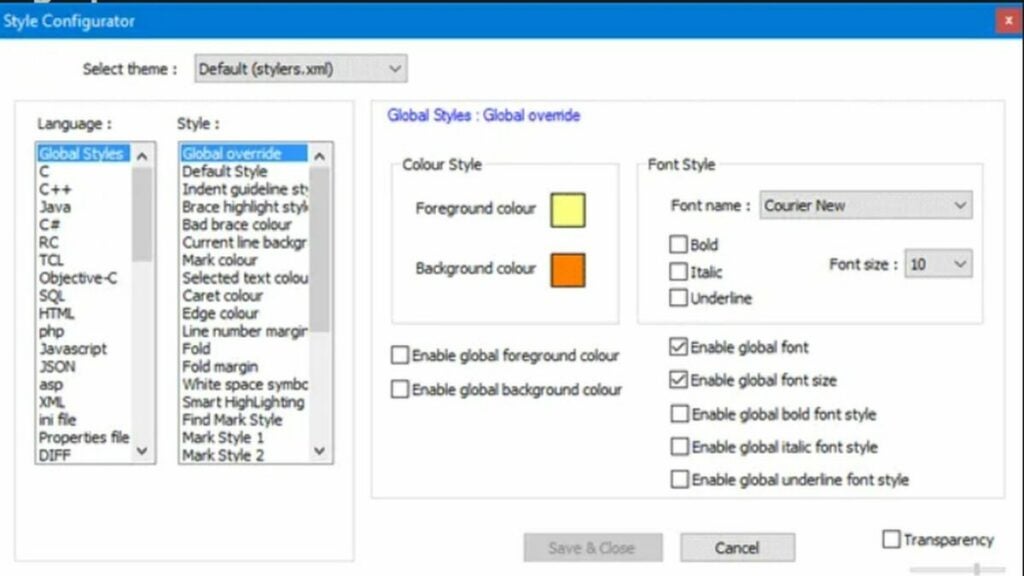
Customize the look of your software with created themes

Folder as a workspace

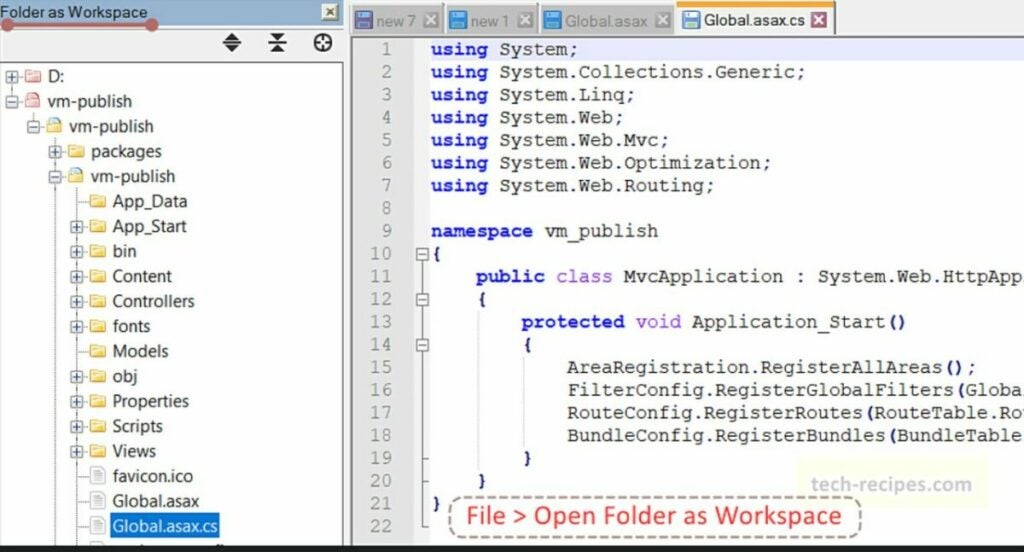
When developing large projects, you often have dozens of files to sort through that all belong to the same workflow. The folder as workspace feature allows you to view each item in a folder simultaneously with a specialized tree view. This allows you to stay organized and quickly navigate between the various files that comprise your project. With a folder selected, click File and open folder as workspace to enable this feature.

View everything in a project folder simultaneously

Find words and strings across multiple documents

Sometimes, you need to address errors that span multiple files. You can search for the relevant spot in each file where your targeted string is located. First, hit Ctrl + F to open the find menu. Type in your desired string and click the find all in all open documents button to search. Keep in mind that you must have all documents that you wish to check already open for this to work.
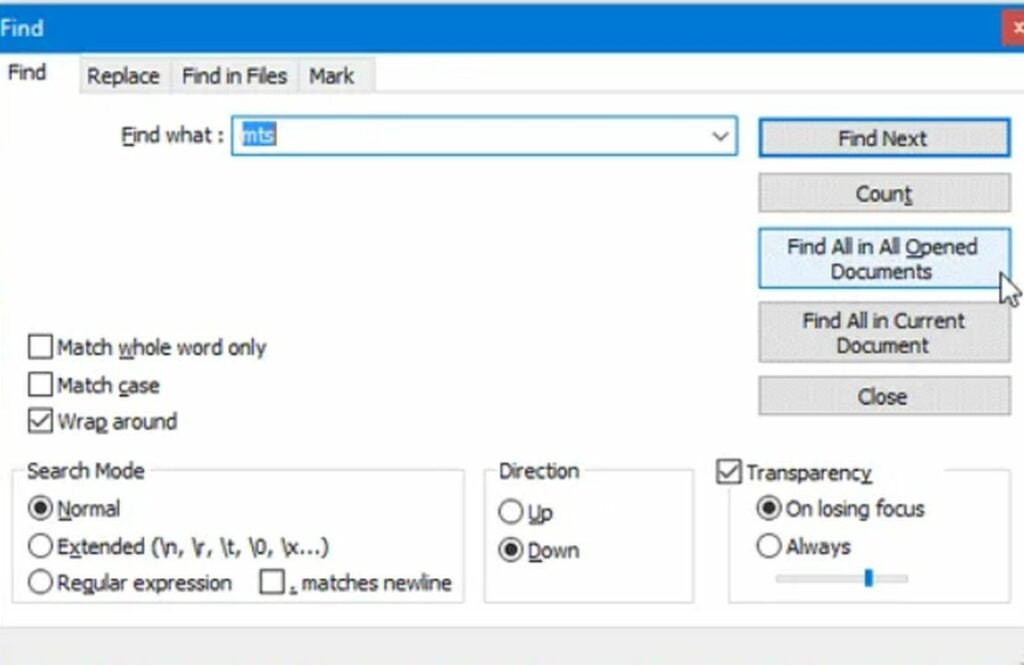
Find unique character strings across all of your files

Replace words and strings across multiple documents

In addition to just searching for strings, you can also replace them across multiple documents. This is perfect for when you rename a function or parameter. You can make changes across all instances at once without risking typos in different areas. To do this, hit Ctrl + H with all relevant documents open. Type your string into the field, and click the “replace all in all open documents” button to apply the edit. You can then save all the edited documents with the shortcut, Ctrl + Shift + S.
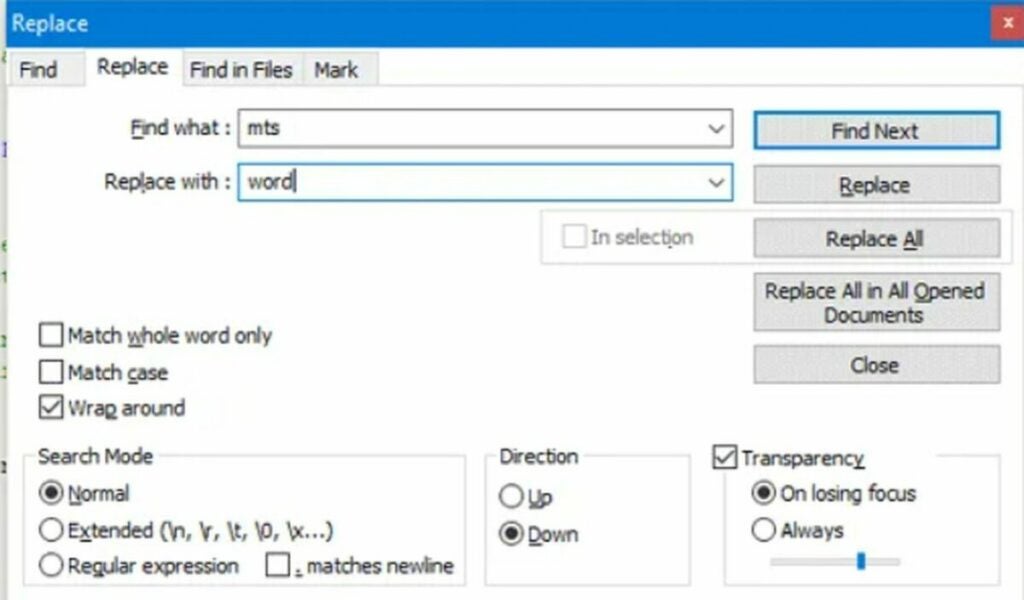
Replace strings in multiple files at once

Compare two versions of the same file

You can compare two versions of the same file for easy editing. With a file open, right-click and select clone to other view from the dropdown menu. This lets you choose previously saved versions of the file to view side-by-side for comparison and bug hunting.
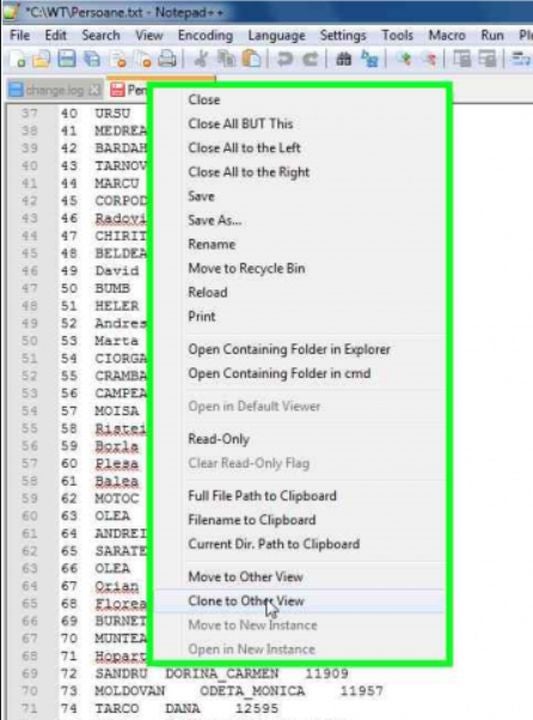
View a side-by-side comparison of two versions of the same file

This is just a sample of what Notepad++ can do

The robust feature set of Notepad++ does not stop with the seven useful features listed above. There is so much more for advanced users to dive into. For instance, the automerge feature. This article explains how to condense multiple data points into a single line of code and save loads of time.


Top new Zoom features to try in 2022

Zoom has quickly become the world’s go-to app for online meetings and professional communications. If you are unfamiliar with the service, check out this handy guide to get started. For returning users, we have prepared a rundown of all the latest features implemented in 2022. The added functionality and enhanced performance make this the best iteration of the program yet.

Zoom Meetings Download

The five tabs

Zoom’s latest update introduced five new tabs that organize each of the main functions of the app. The following list of functions and improvements will be split into five different tab categories. Tackling the tabs one at a time is the most efficient way to highlight all the new features.

Change tabs at the top of the application window

The home tab

The main page is the first thing you will see when loading the software. The expanded view of the home tab now allows you to view upcoming appointment details. With a single click, you can join any of the meetings listed on this screen. The home tab also provides the option to change your background picture. The elevated search functionality has been improved by suggesting relevant files, chats, messages, and contacts as you begin typing. To make navigation easier, a collection of keyboard shortcuts has also been added.

Get an overview of your account via the home tab

The chat tab

The first of the new tabs act as a messenger hub for all your contacts. Each person now has their own chat channel, and you can create group channels for multiple users. Each channel gives you the option of starting a meeting with the group via a right-click. There is even a personal chat channel for your notes and other storage. When chatting for extended periods or late at night, you can toggle the dark mode interface from the sidebar settings. You can also assign special importance to a chat by starring it. A star keeps the chat pinned to the top of your list of ongoing communications.

Chat with your contacts with the new messaging features

The phone tab

One of the biggest additions is the Zoom Phone add-on available to businesses who subscribe to the cloud service. Employees can make and receive phone calls on any device connected to the company network. Company extensions are supported with the virtual dial pad that enables you to enter numbers with a click or tap. Employers can see call history and use existing PSTN phone lines to connect with modern computers. Voicemail functionality is also included, so the Zoom Phone add-on is an all-in-one-telephone solution for businesses.

Make and receive calls with a Zoom Phone subscription

The meetings tab

Meetings are the bread and butter of the Zoom software. There are a variety of quality-of-life improvements to go over on this tab. For starters, you can now blur your background to conceal the space directly behind where you are sitting. You can also conceal background noise to further enhance your privacy. There is even the option to insert a PowerPoint presentation as a background overlay. To round off the accessibility features, live call transcription is a toggle away.

Once a meeting is wrapped up, the host can clip and share highlights instead of posting the full recording. The backend also features increased data protection that keeps the connection secure during calls and meetings.

Blur backgrounds and enhance your privacy during meetings

The contacts tab

This tab organizes your contacts into a convenient list. Here, you can sort, star, delete, and add new accounts you wish to connect with. The “+” button allows you to invite additional people via email. In addition to individual contacts, this tab displays the group channels you belong to.

View both your contacts and group channels in a simple list

The exciting pipeline ahead

Even though Zoom just completed this major overhaul, the company continues to expand the functions and services it provides. To get all the latest news and updates surrounding the Zoom platform, check out the latest Zoom news featuring all the fresh headlines. It seems that there’s no stopping this tech giant from securing additional market share.

How to use Silhouette Studio for Windows

Silhouette Studio is a robust software program that integrates with Silhouette® electronic cutting machines. While its main function is to create and send designs to the cutter, the free tool is versatile enough to be used in a variety of graphic design projects. Just keep in mind that you’ll need a Silhouette machine to take full advantage of the software.

Silhouette Studio Download

If you want an ultra-precise drawing grid and precise cuts, then Silhouette Studio has you covered. To learn how to get the most out of your time, simply follow this beginner’s guide.

  1. Downloading Silhouette Studio for Windows

    Download the app

    Since the program is available for both Mac and PC, the first step is to make sure you install the correct file. You can download Silhouette Studio on Softonic and follow the installer prompts for your device.

  2. Setting up your cutting mat page

    The page setup tab allows you to adjust dimensions of the mat

    Before any drawing can be done, you must first set up your cutting surface with the proper dimensions and material. This mat represents what you will physically place into your Silhouette cutting machine.

    You can adjust the dimensions by typing a custom number into each field on the far right of the screen. There are also preset scraps such as 4 x 6 that serve as templates for project types such as letters. Next, you’ll need to adjust the width and height of the material itself. If you’re planning to feed a specific material into your cutting machine, be sure to verify the dimensions of the physical paper and enter them accordingly.

  3. Adjusting the grid boundary

    Adjust grid boundaries of your project

    To get the best designs possible, you can use the grid settings to adjust the boundaries of your project. Click on the grid icon at the top of the page setup tab used in the previous step to toggle the grid display. When the grid is off, a gray and a red line will appear. Dragging the red line adjusts the cut boundary, and the gray line establishes the print border. Once you have adjusted the boundaries to your liking, turn the grid back on to lock in your settings.

  4. Understanding file types

    Import file formats here

    Silhouette Studio is compatible with three different file formats. The .studio and .DXF files can be used automatically on any version of the software. However, you can only import .SVG files if you have a license for the paid Designer Edition of Silhouette Studio. Opening each file type is as easy as using the file menu. With that said, .DXF files have a few extra options to mull over. The first is the ability to merge with other files. Combining files is a terrific way to pull off complex designs.

    You also have the option of filling in your desired color for the printed material. This makes .DXF files the go-to for clothing and other usable items.

  5. Adding text to a design

    Add text to your designs

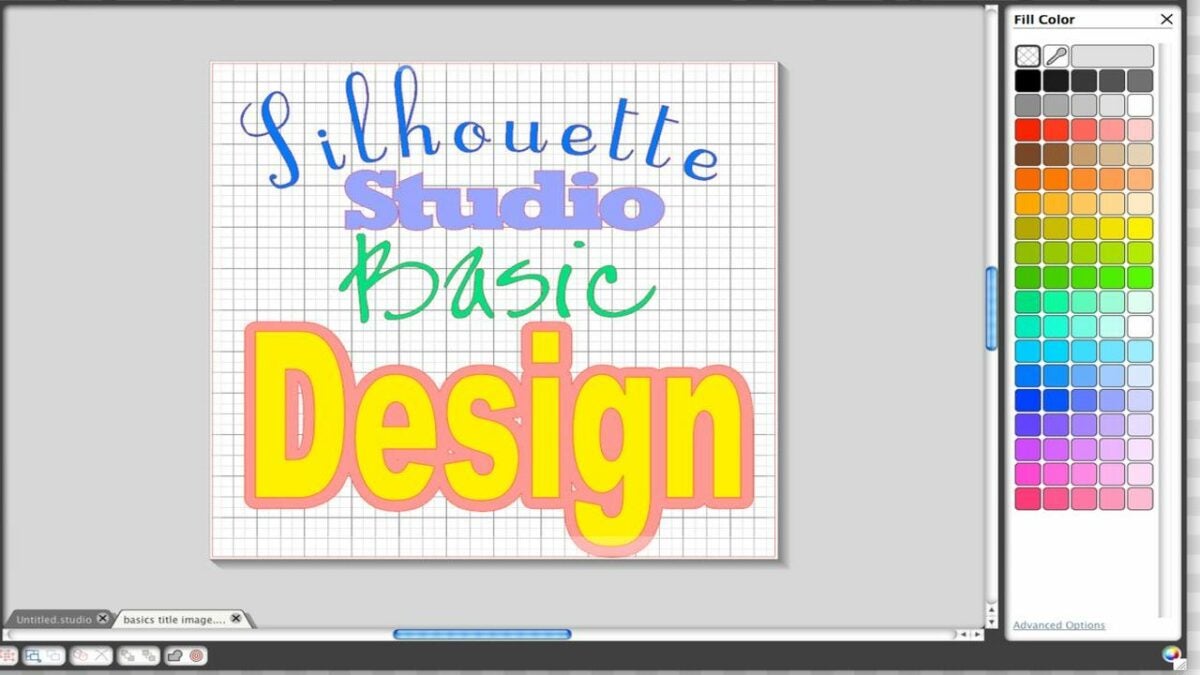
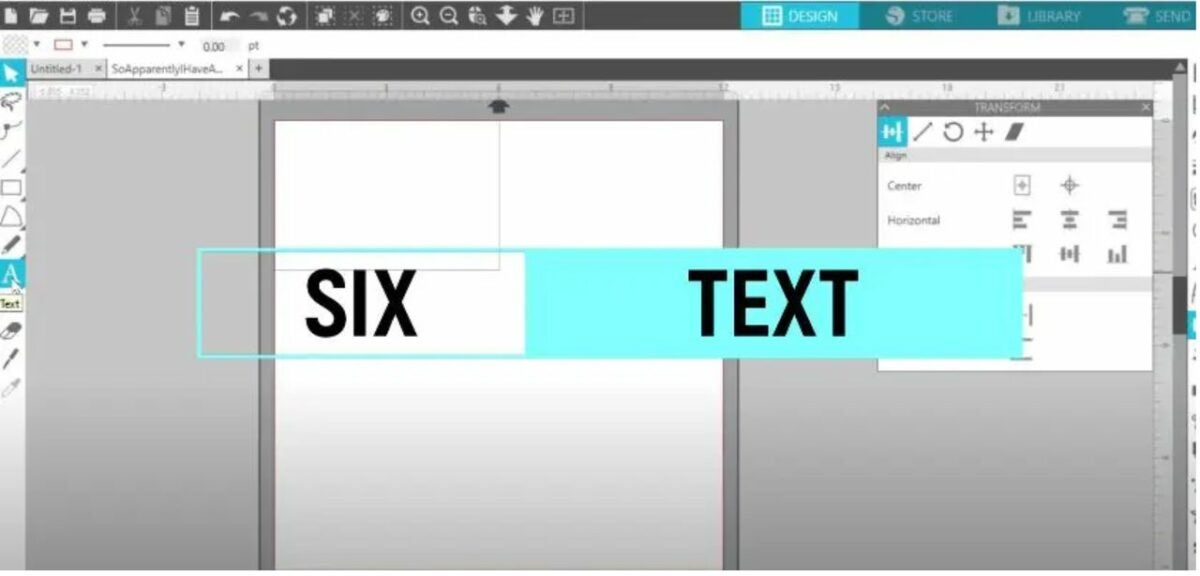
    Drawing in Silhouette Studio will feel very familiar if you’ve ever used programs such as MS Paint. However, adding text is done in a quirky manner. Notice all the unused space to the left of the cutting mat? Click on the blank space and begin typing. This brings up the text toolbar on the right side of the mat. The toolbar lets you adjust letter size, color, and font of your text. You can also import new fonts you find online from this screen. Upon adding a new font, restart Silhouette Studio for the changes to take effect. Be sure to save any work before doing so!

    After you adjust the properties of your text, you can drag the words as you would any other design element to place the text in any position on the mat.

Exploring other options

Silhouette Studio is a wonderful graphic design program; although, sometimes you need to go beyond what your cutting machine can do. When it comes to digital projects, there are many other programs that do not force you to use specific hardware. A notable example of this is Canva, a completely free graphic design app compatible with most devices. Learn more by reading our guide about how Canva works.

The top 10 contact information extractors for Google Chrome

When you need to contact an organization or person who does not list a lot of information online, there are several third-party contact information extractor apps you can turn to. In fact, there are several convenient Google Chrome extensions that integrate the feature right into your browser. With just a few clicks, you can share your voice with the people who need to hear it.

Google Chrome DOWNLOAD

Find anyone’s email – Contact Out

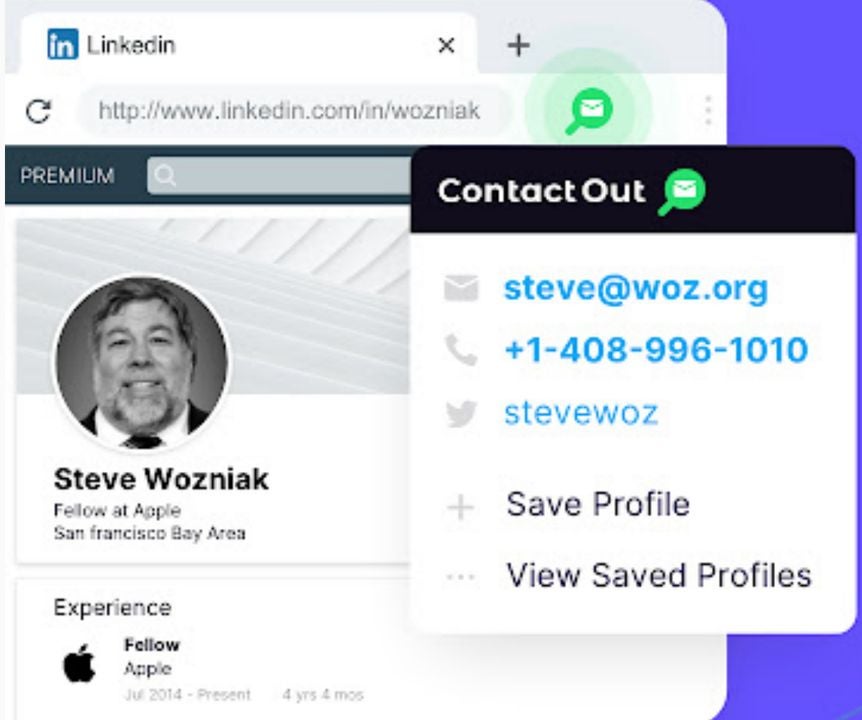
Contact Out is an excellent extension for recruiters and other heavy users of LinkedIn. It allows you to view a person’s email, phone number, and links to their other social media accounts. The comprehensive guide can be pulled up just by going over a user’s profile.

Find anyone's email - Contact Out DOWNLOAD
Pulling up phone numbers just takes a second

Share Google Contacts with ShareContacts®

As the name implies, this extension allows you to share your Gmail contacts with other users. This is perfect for collaborative projects or for transferring data between two personal email addresses. You can manage which groups see which emails and alter permissions at any time.

Share Google Contacts with Shared Contacts® DOWNLOAD
Sharing Gmail addresses has never been easier

Klenty: Email Outreach & Tracking from Gmail

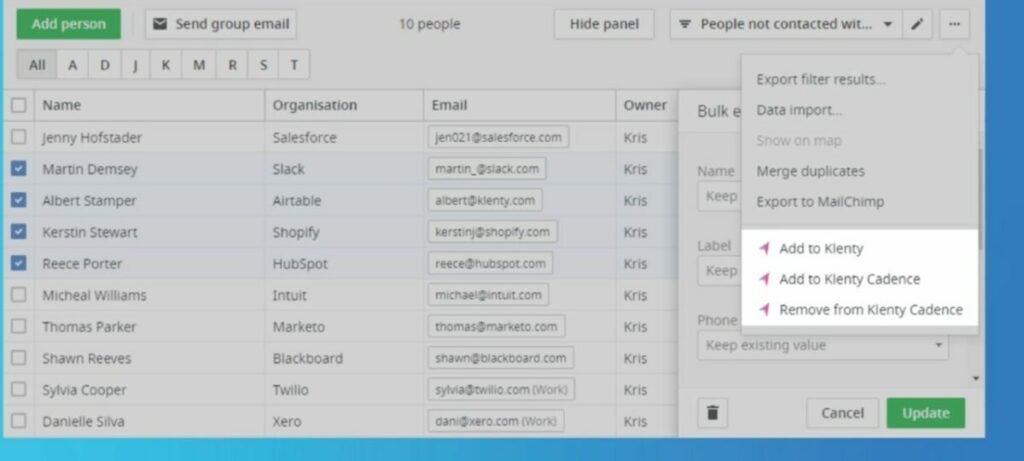
Klenty is a powerful tool for sending personalized emails. By splicing in some personal information about a client, emails become far more effective. Sales funnels can easily be formed with the proper mailing setup. Klenty automates most of this, so you can reach clients that much faster.

Klenty: Email Outreach & Tracking from Gmail DOWNLOAD
Klenty adds the personal touch to your emails

Contact Finder

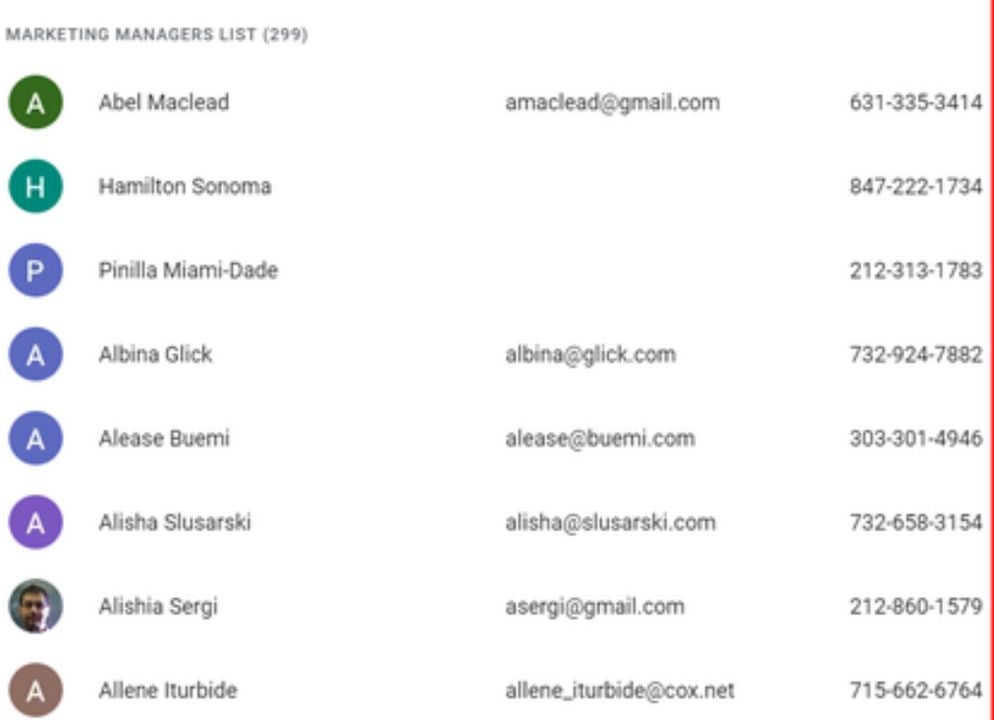
Using natural language processing, this app organically pulls contact information from various websites you visit. You can create your own email lists just by browsing sites with plentiful public profiles. From there, you can extract your email list to the marketing manager of your choice. With contacts finder, lead generation becomes too easy.

Contact Finder DOWNLOAD
Contact finder lists personal details of public profiles

Contacts+ for Gmail

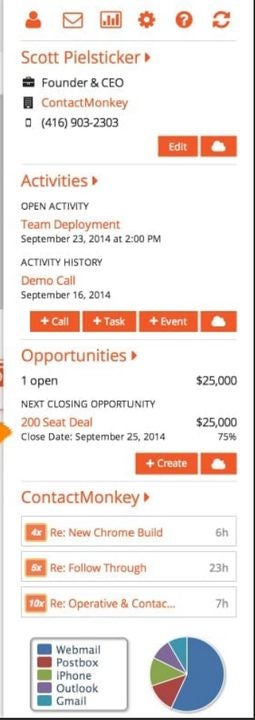
This powerful extension puts a substantial amount of information at your fingertips. By clicking on any email thread, you can pull up an information readout on the sender. The report includes a photo, name, address, place of employment, and phone number when applicable.

Contacts+ for Gmail DOWNLOAD
Contacts adds a whole new layer of info to the mix

Contact Editor for Google Contacts

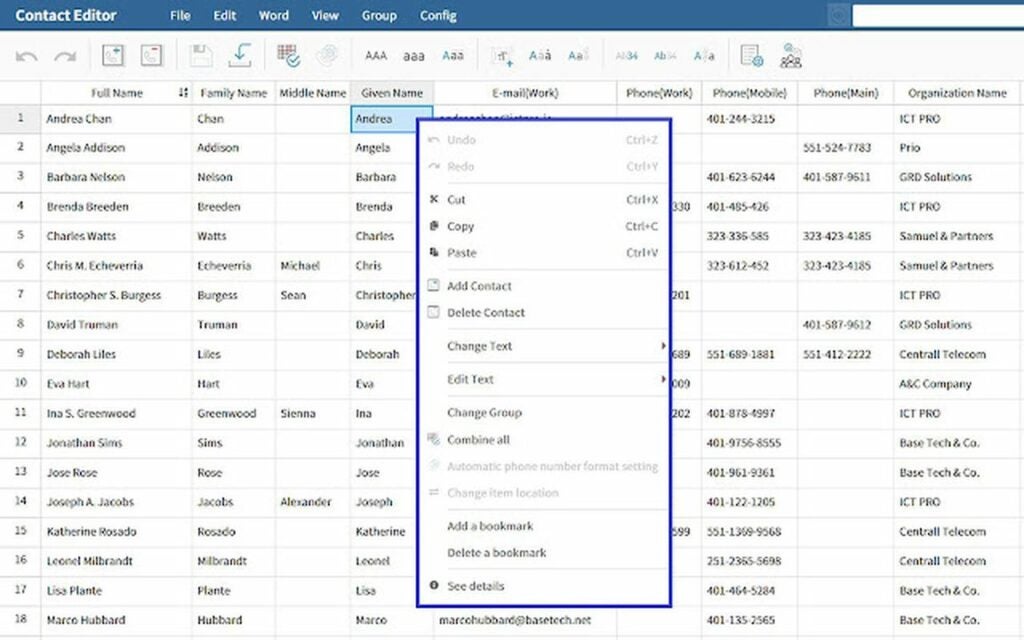
Spreadsheets are one of the most effective ways of organizing long lists of information. That is why they are the perfect solution to a lengthy list of Gmail contacts that you wish to edit. With just a few clicks, you can manage your whole list and make the adjustments you need to your roster of contacts.

Contact Editor for Google Contacts DOWNLOAD
Contact editor provides spreadsheet functionality to Gmail

RingCentral Contact Center Voice

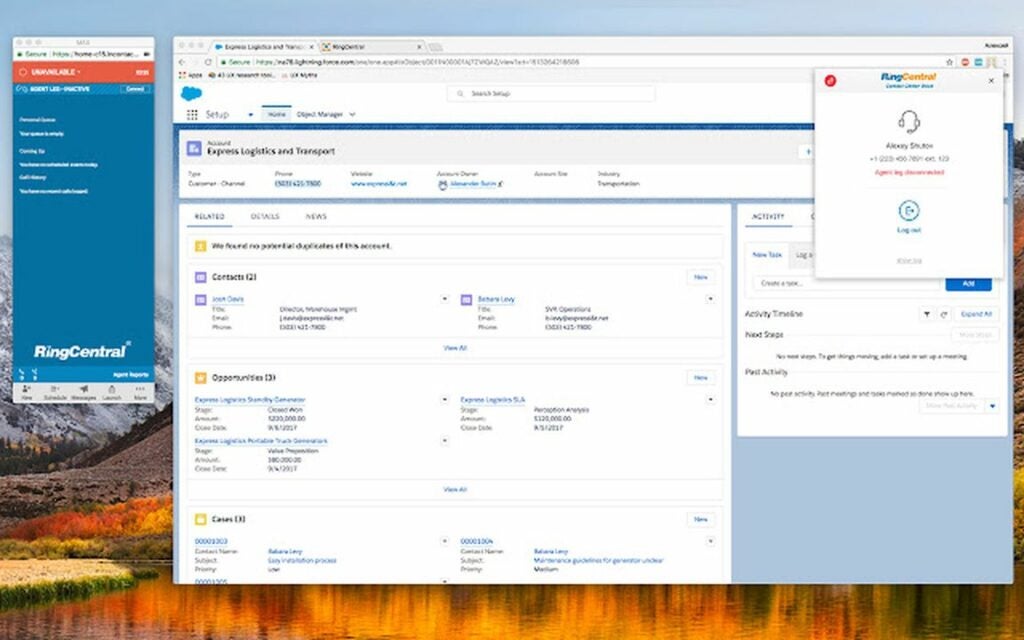
With the phone numbers you have obtained with the other apps on this list, wouldn’t it be great to call those new contacts directly from your browser? RingCentral Contact Center Voice sets up virtual phone calls using an internet connection instead of the usual cellular signals. When written text will not do, call the client instead.

RingCentral Contact Center Voice DOWNLOAD
Call people directly from Chrome with this effortless communication app

Gmail email templates & newsletters

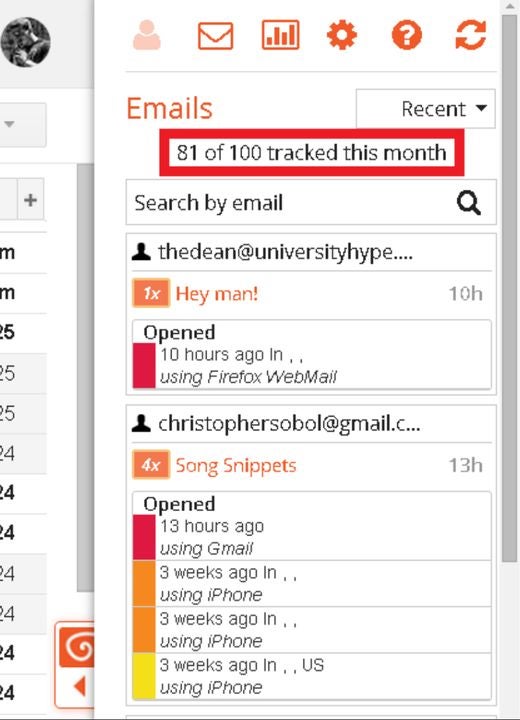
HTML email templates are an effective marketing tool in every situation. With this extension, you can give your messages a professional look and feel before sending them out. It also helps track your email list’s responses to your recent communications. The helpful metrics allow you to make informed decisions that improve your advertising efforts.

Gmail email templates & newsletters DOWNLOAD
Track the engagement of your email list to gauge your marketing effectiveness

InTouchApp Phone Contacts & Data Saver

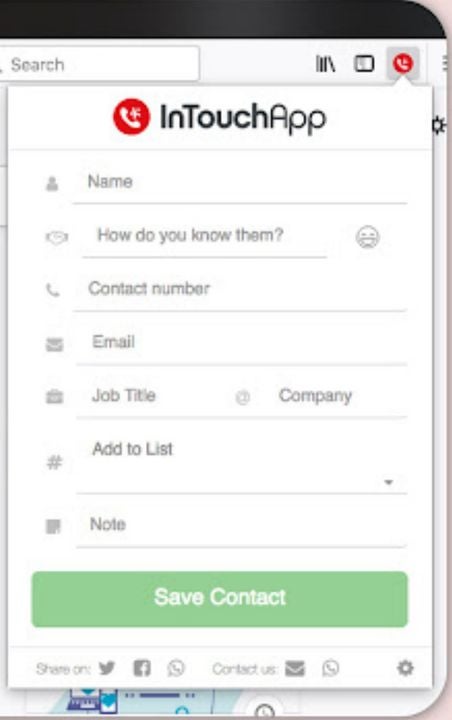
When you see a phone number you need online, your first instinct is to call it directly. Now you can do just that without manually typing the number into your phone. InTouchApp connects your phone and computer so you can add new contacts and call phone numbers you see online.

InTouchApp Phone Contacts & Data Saver DOWNLOAD
Connect your phone to the web to add new contact numbers quickly

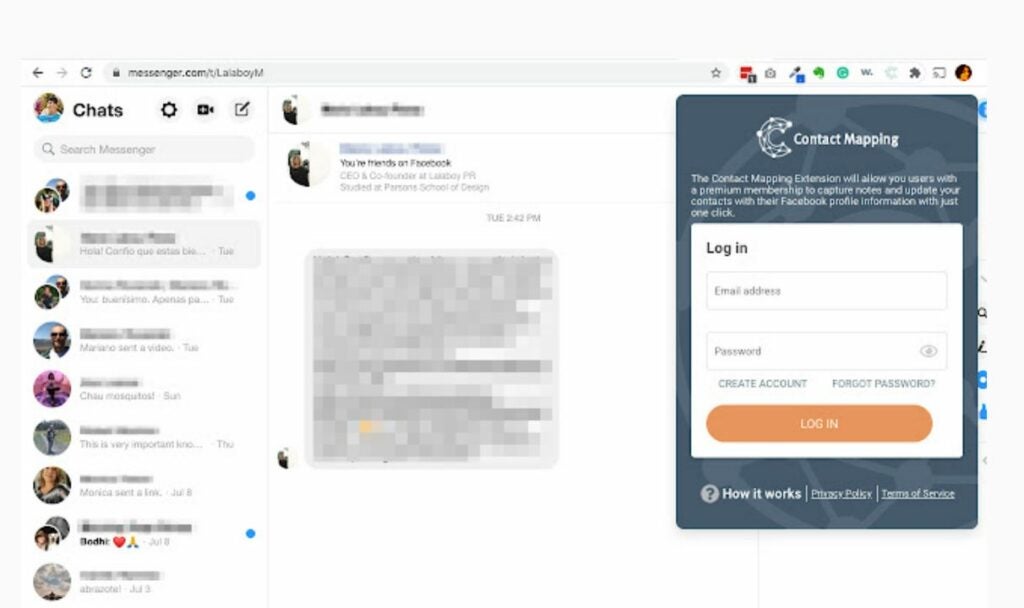
Contact Mapping Extension

Your Facebook Messenger inbox can fill up incredibly fast as your contacts list grows. You can keep track of all the key details and appointments with the Contact Mapping Extension. The app allows you to set message reminders, alter notifications, and add detailed information about upcoming dates. With Contact Mapping Extension, you’ll never have to worry about missing an appointment or an important alert again.

Contact Mapping Extension DOWNLOAD
Navigate Facebook Messenger without problems with this extension

How to use the JSON Viewer Chrome Extension in 3 steps

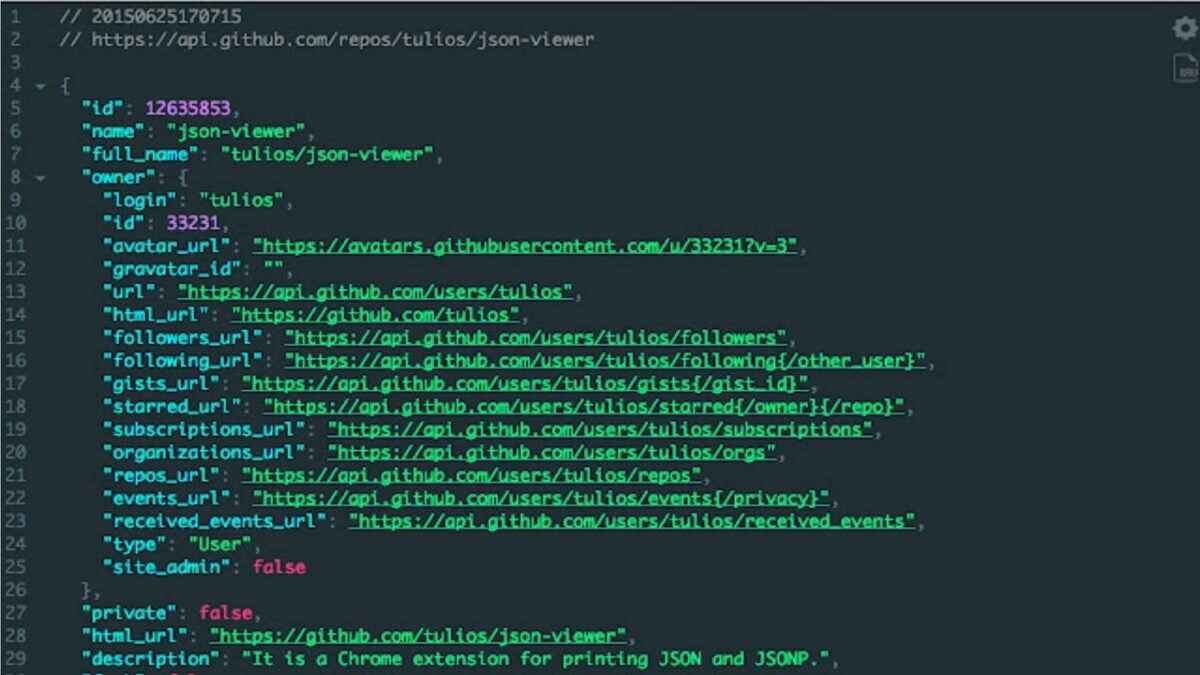
JSON, or JavaScript Object Notation, is a popular format for sending and storing data on the internet. Coders and webmasters use JSON content all the time to power the websites you love. When developing webpages or performing bug fixes, it can be helpful to highlight the JSON strings hidden within a body of code.

JSON Viewer DOWNLOAD

With the completely free JSON Viewer extension for Google Chrome, you can easily highlight the syntax you are looking for.

  1. Toggling the extension

    Your extension icon will only appear on websites that allow it

    Upon acquiring JSON Viewer from the link above, you can toggle the add-on by clicking on the JSON Viewer icon that appears on the extension bar at the top of Chrome. Keep in mind that the icon will be invisible on sites that block it. For instance, Google’s chrome store does not allow the use of JSON altering add-ons. Navigate away from the download page to verify your extension is working. If your icon still doesn’t appear, check that JSON Viewer is pinned to your extension bar by clicking on the jigsaw icon and selecting the pin next to JSON Viewer in the add-on list.
  2. Determine website permissions

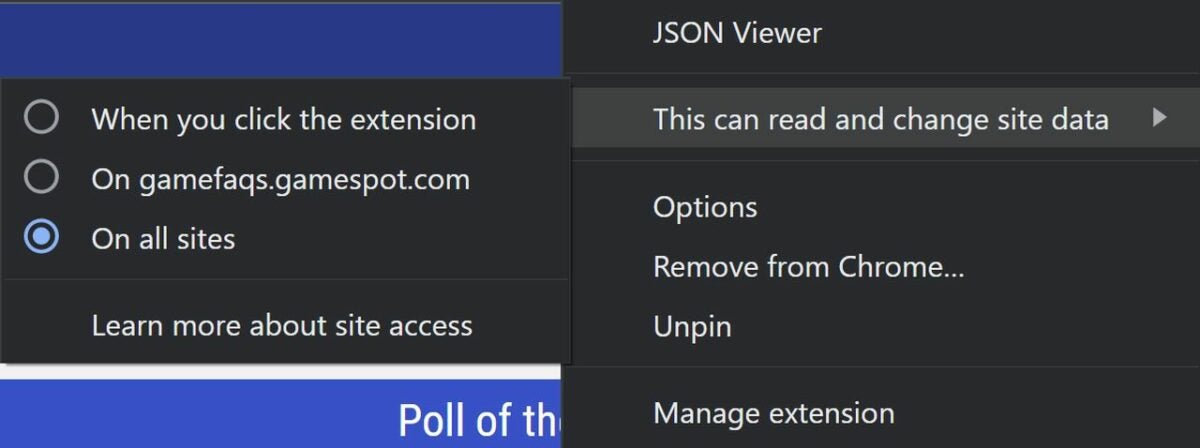
    From this menu, select how you want JSON Viewer to interact with sites you visit

    JSON viewer can be placed into one of three settings for reading and editing site data. You can have it run automatically on every website, just the website you are currently visiting, or you can choose to manually activate the extension by clicking the JSON Viewer icon. To change this setting, click the JSON Viewer icon in your extension bar. Scroll over the field that says “this can read and change site data” to see the three options listed. Click on your preference, and the changes instantly take effect.

  3. Changing your theme to dark mode

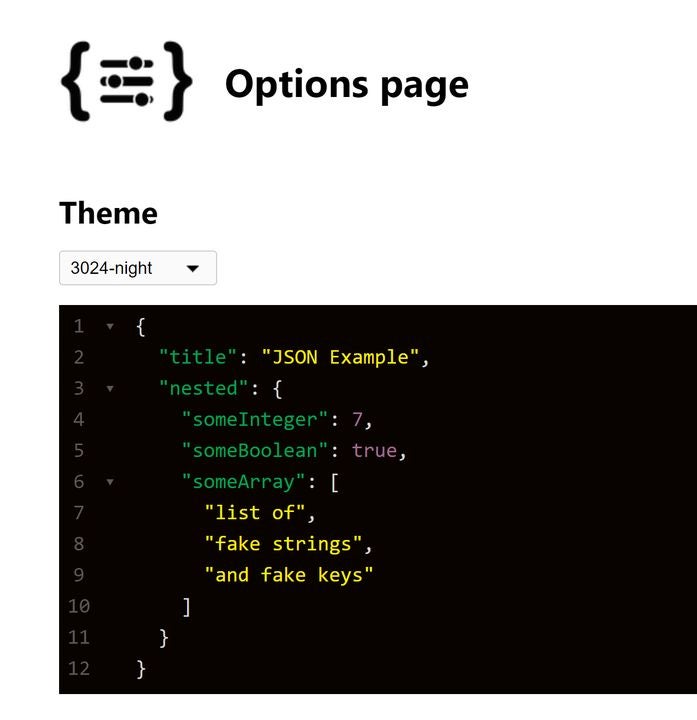
    Change your theme on this options screne

    When working for hours or late into the night, reducing eye strain is a must. You can activate dark mode by navigating over to the options page. From the JSON Viewer drop-down menu, select options. You will notice the themes selector listed at the top. Click the drop-down menu and select 3024-night for a basic dark theme. The same menu provides 26 additional options as well.

How to use the Video Downloader for Reddit Chrome extension in 4 steps

Have you ever been browsing Reddit and wished it had a video downloading feature built-in? While the service is not intrinsic to the platform, you can install the Video Downloader for Reddit extension with Google Chrome.
Video Downloader for reddit - Redditsave Download

As the name implies, it allows you to download videos from Reddit completely for free using the same process as the classic Redditsave.com website.
  1. Accessing the extension

    Make sure your extension is enabled and pinned to the Chrome add-on bar

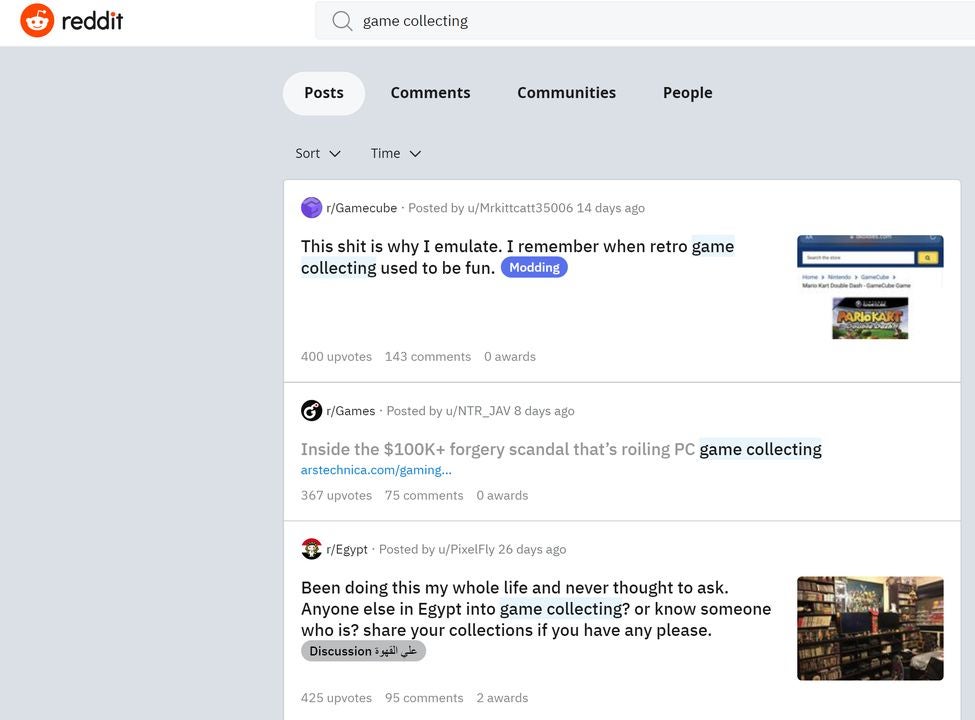
    After installation is complete, you can toggle the extension by clicking the red icon on your extension bar. If you do not see the RedditSave icon, click on the extensions jigsaw icon to pull up a list of downloaded extensions. Click the pin icon next to RedditSave to permanently add it to the top of Chrome when browsing.

  2. Finding a valid Reddit post

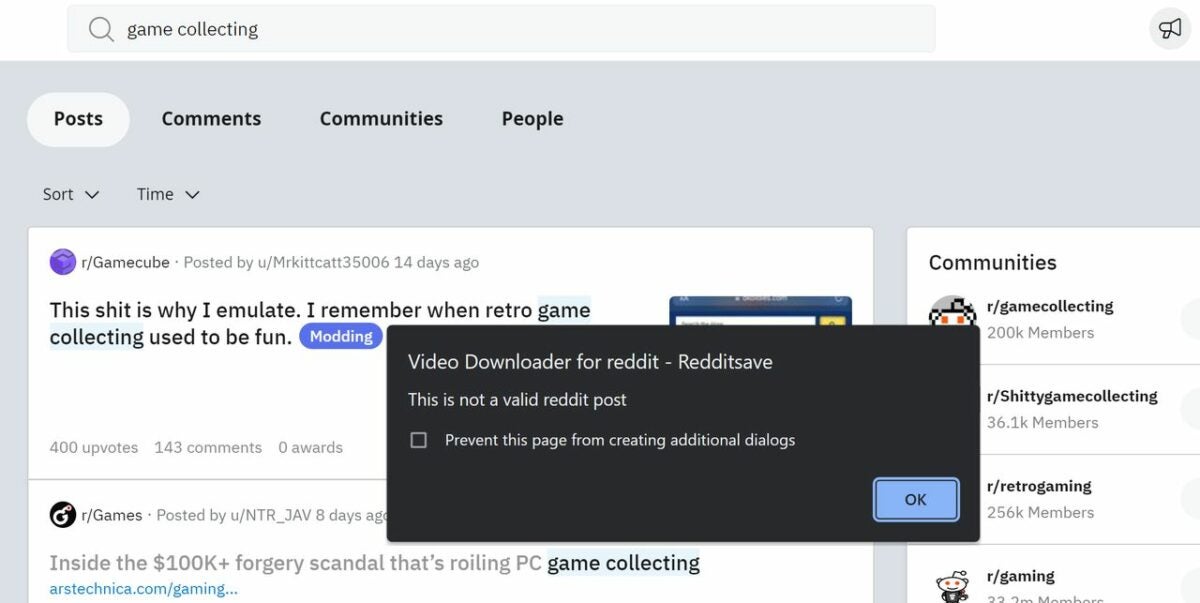
    This alert window pops up on invalid pages

    RedditSave will only work properly on Reddit posts that meet one simple requirement — it must have a valid video embedded into it. Keep in mind that a mere hyperlink to a page with an embedded video will not be picked up by the extension’s scanner. You can always check a page anyway by clicking the RedditSave extension icon. The pop-up pictured will warn you that the action is invalid.

  3. Downloading a video

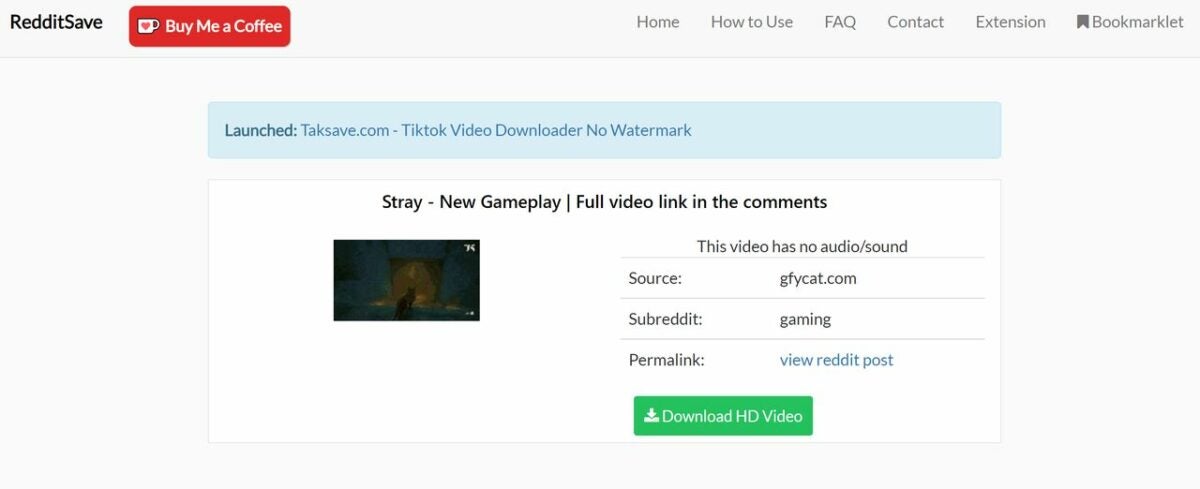
    Click download to transfer the video to your hard drive

    With a valid post pulled up, click the RedditSave extension icon at the top of your Chrome browser. You will see a screen with an option to Download HD Video

    Click the big green download button to get the video in the highest possible quality. If there are multiple versions with different bit rates, you can choose which quality level to download by selecting the corresponding button. Regardless of which quality level you select, the video will download in the .mp4 format.

  4. Locate and watch your downloaded video

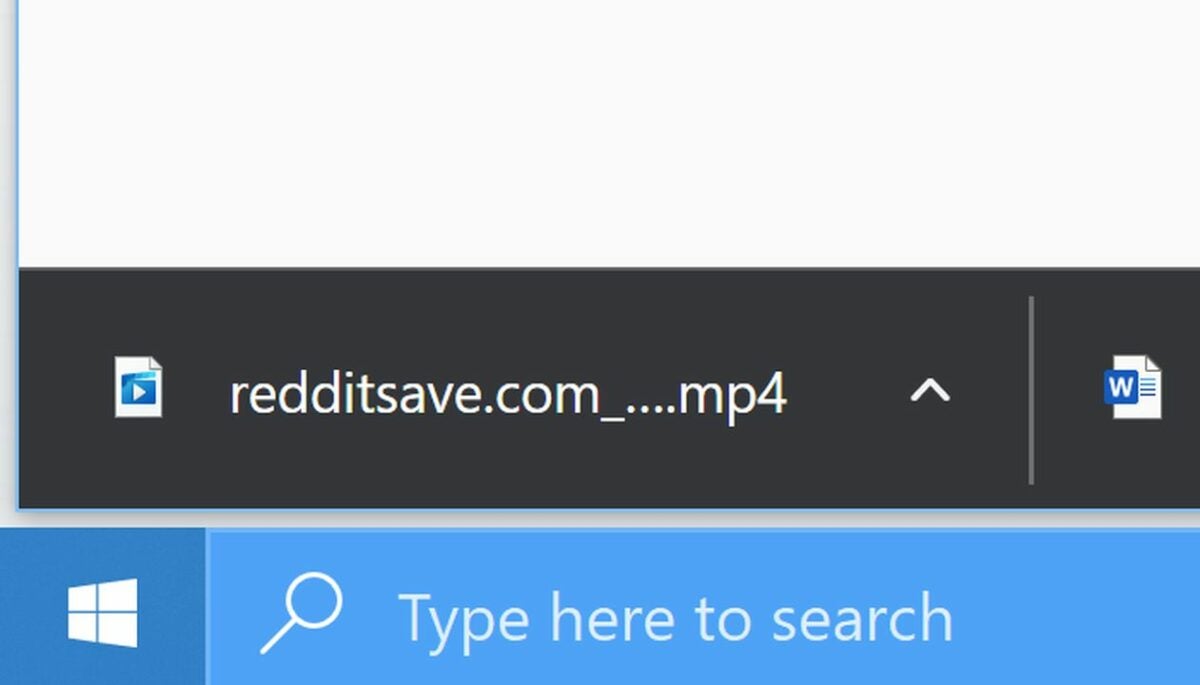
    Find the video on your download list

    As soon as your download completes, you can watch the video on any media-playing app that supports the common .mp4 format. You will find the video in your download list, which appears on the bottom left of your screen in Google Chrome.

    Alternatively, you can click the three bars in the top right corner of Chrome and select downloads. The keyboard shortcut Alt + J will take you right there also.

Looking for more apps to help you download videos from websites? Read our guide to the best video downloaders for Chrome.

The top 15 Salesforce extensions for Google Chrome

Salesforce is a cloud-based software that offers numerous tools for promoting sales and managing clients. When combined with Google Chrome, this Customer Relation Management app turns into the most robust sales platform on the market.

Salesforce DOWNLOAD

Here are the best 15 Chrome extensions to enhance Salesforce.

Salesforce

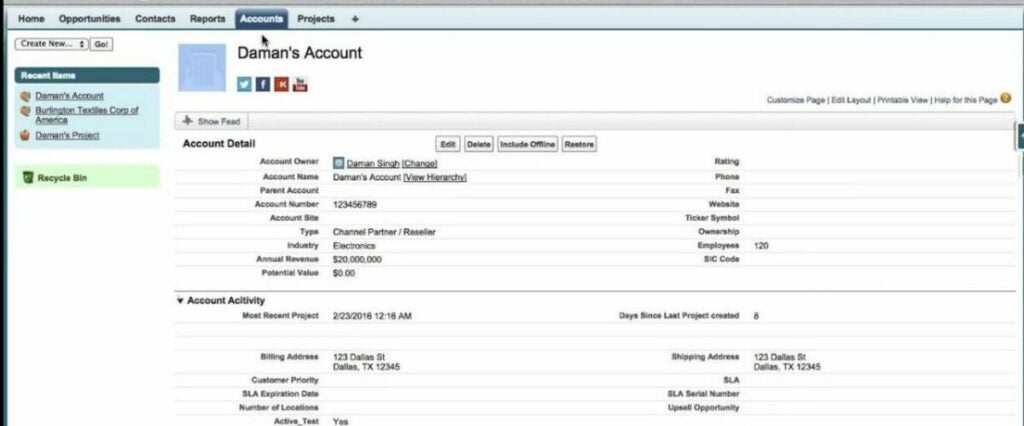
This simple Gmail integration blends all the Salesforce features you love with your email client. You can view your contacts or clients, browse records, implement appointments, see when your messages have been read, and use Salesforce email templates. All without slowing down Gmail’s impressive performance.

Salesforce DOWNLOAD
Connect to Gmail for added functionality

Salesforce Inspector

Developers and administrators can use this extension to view metadata and other stats. The inspector UI is overlaid above the basic Salesforce UI for easy use. The data facilitates enhanced productivity in the Salesforce backend.

Salesforce Inspector DOWNLOAD
Inspect each component with this tool

Dark Mode for Salesforce

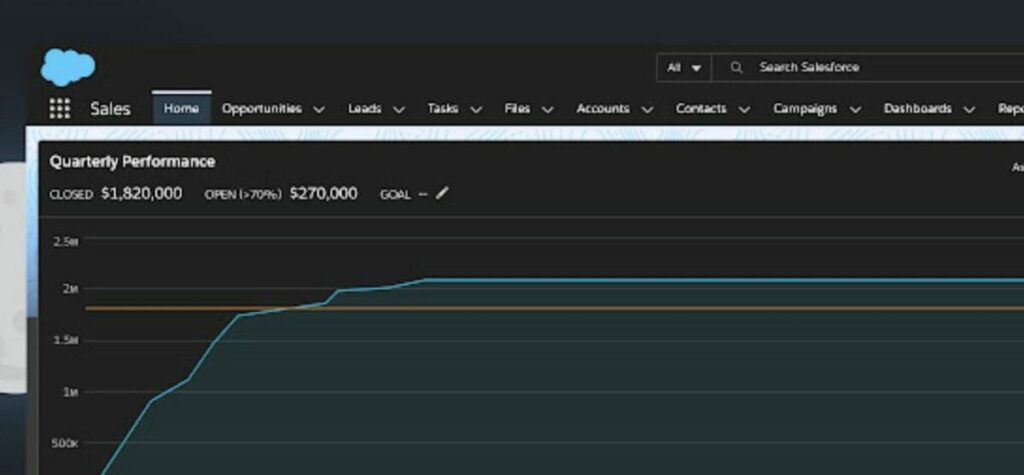
Dark Mode is increasingly popular with computer users who work into the night. As Salesforce does not provide a way to darken your screen intrinsically, download this handy extension to enable it. You can also toggle a blue light filter to prevent eye strain and damage.

Dark Mode for Salesforce DOWNLOAD
Example of Dark Mode

ORGanizer for Salesforce

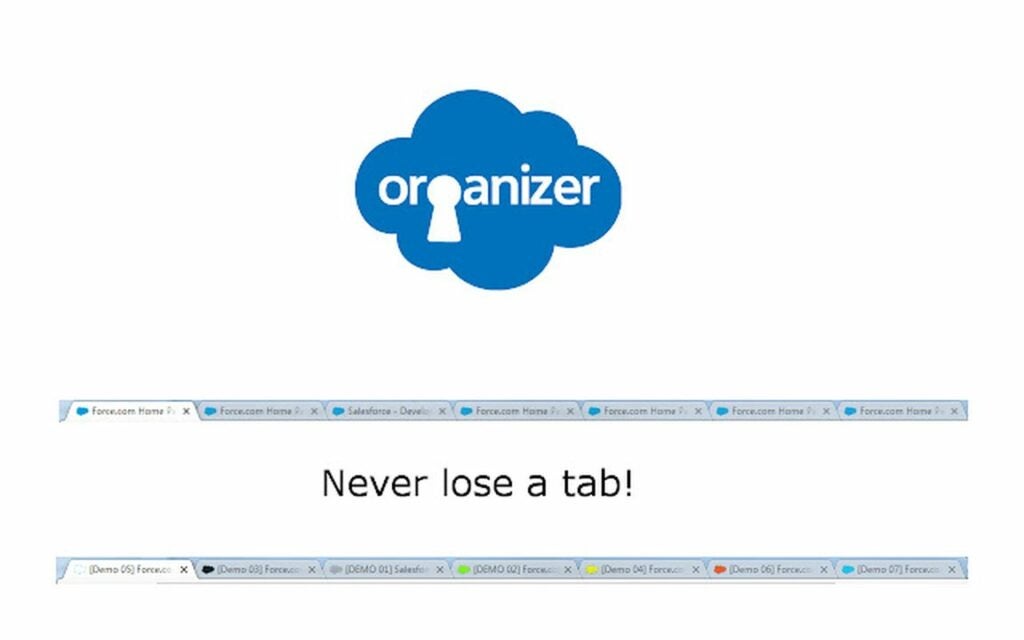
This extension allows you to swiftly access the accounts of your most frequent clients. You can open multiple organization tabs at once and cycle between them with just a click. Use the quick links tool to keep your reliable Salesforce links at the ready in an easily sharable format.

ORGanizer for Salesforce DOWNLOAD
Organize contacts automatically

Salesforce Lightning Inspector

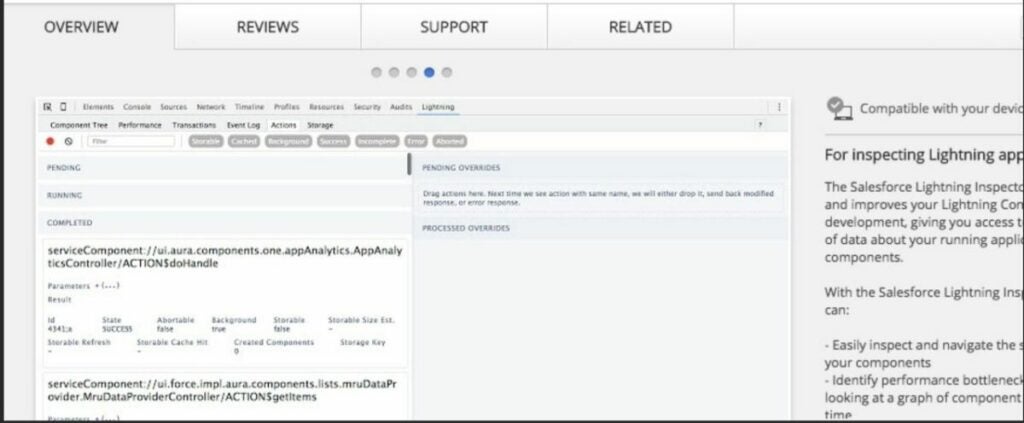
Lightning Inspector offers multiple improvements to component development. You can inspect components, navigate through them, identify performance bottlenecks, and monitor server debug responses. Finally, the app tracks event firing and handling sequences.

Salesforce Lightning Inspector DOWNLOAD
Like inspector but for lightning components

Salesforce Colored Favicons

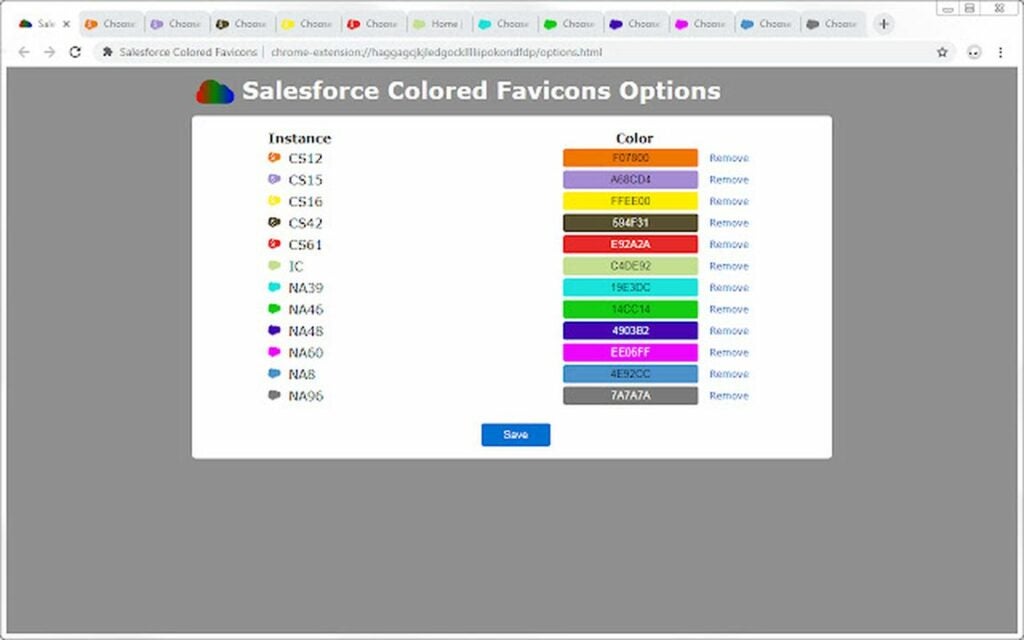
Keeping each favicon organized can be tricky by default. However, this extension allows you to color-code each organization tab with unique favicons. When a new tab opens, a random color is selected. You may also manually pick the color of each tab from the options page.

Salesforce Colored Favicons DOWNLOAD
Colored Favicons make organization easy

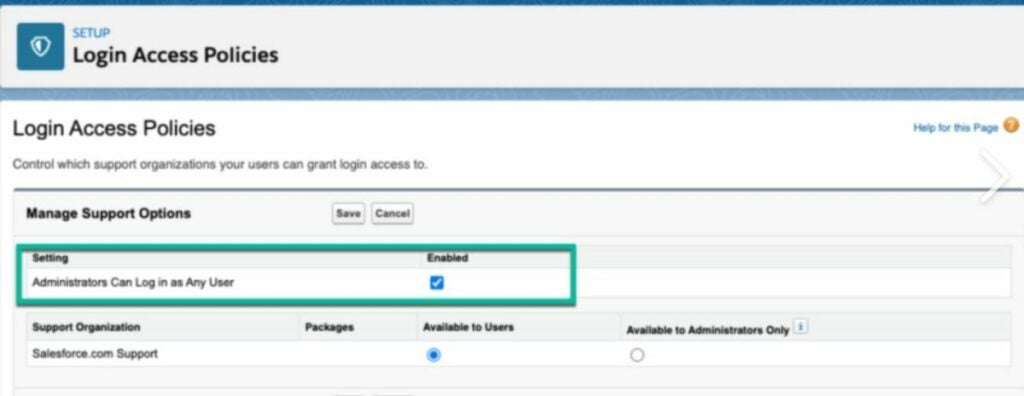
Salesforce.com Quick Login As

Swapping between user accounts can be a pain because you must reopen the current page you are viewing. With Salesforce Quick Login As, you can switch user logins while remaining on the same page. Each tab is also maintained. The extension supports both classic and lightning configurations.

Salesforce.com Quick Login As DOWNLOAD
Swap users instantly

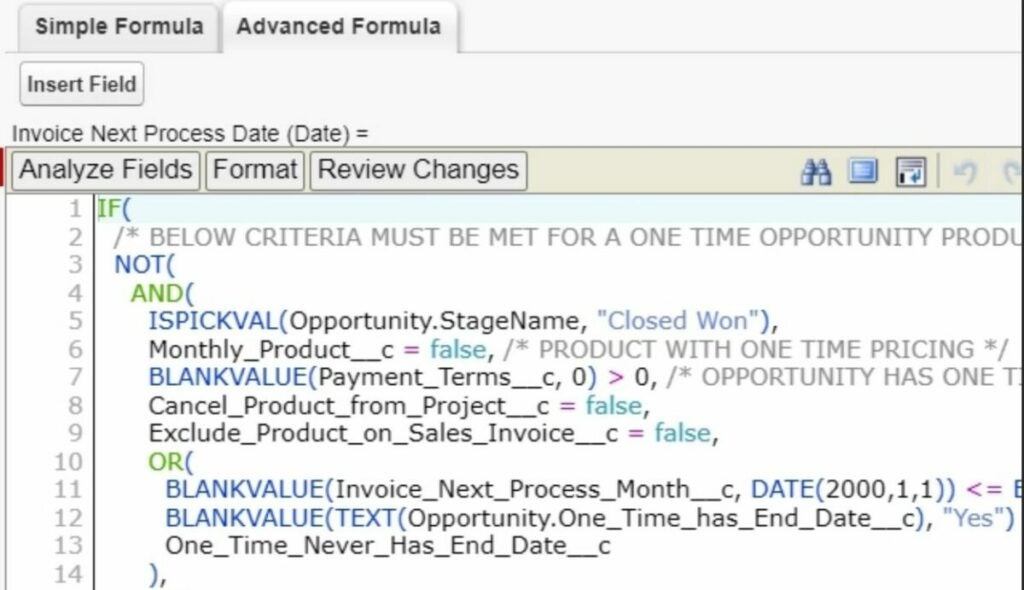
Salesforce.com Enhanced Formula Editor

Salesforce coders should download this add-on immediately. With Enhanced Formula Editor, you can highlight syntaxes, format auto-complete functionality, run field analysis, and simplify syntax checking. When using Salesforce formulas, the handy interface will allow you to edit and debug with haste. The code editor pop-up menu includes data on numerous formulas running in the application.

Salesforce.com Enhanced Formula Editor DOWNLOAD
Enhance your formula reading today

Salesforce LinkedIn Integration by Salesbolt

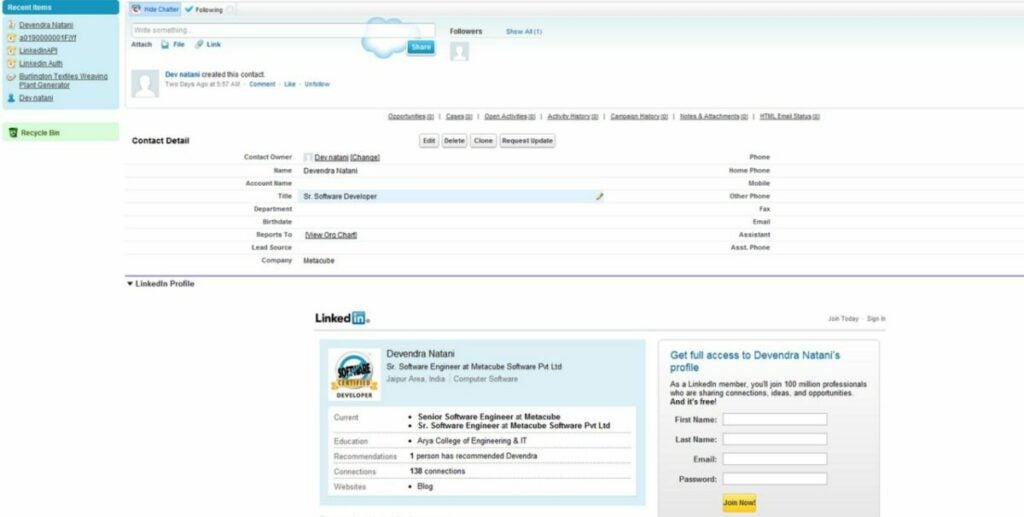
This app supports full integration with LinkedIn services, making it perfect for both regular users and recruiters alike. You automatically receive Salesforce data while browsing LinkedIn profiles. This helps you build new leads, candidates, accounts, and contacts. Each function is available without any prior configuration on your side.

Salesforce LinkedIn Integration by Salesbolt DOWNLOAD
Integrate LinkedIn to save time

Enhance Salesforce Dashboard

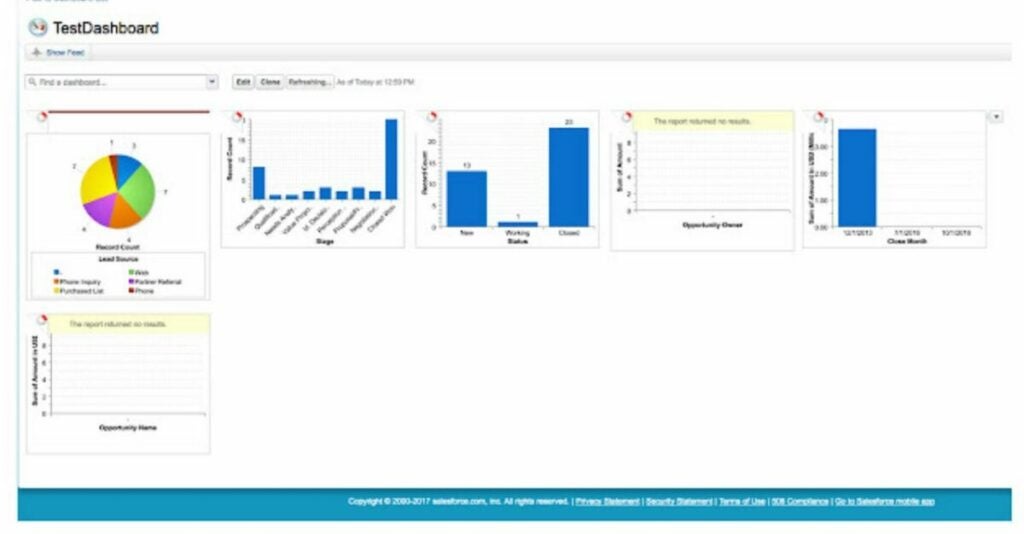
The basic Salesforce dashboard is a bit cumbersome for larger operations. This Enhanced dashboard extension adds a total of 7 columns for components. You can even hide dashboard headers to save space. The auto-refresh feature updates your sales data in real-time by checking for new data every second.

Enhance Salesforce Dashboard DOWNLOAD
Refresh the dashboard every second

Gmail to Salesforce

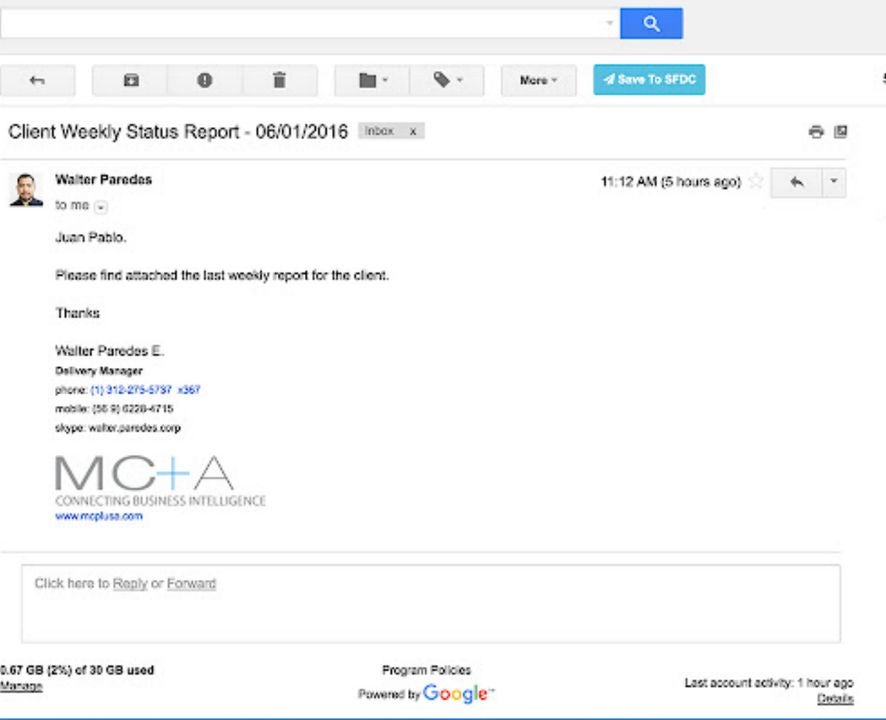
Add the power of Salesforce to your Gmail inbox with this extension. By clicking the Salesforce button, you can attach received components directly to your emails. Conversely, you can create emails and send them directly to Salesforce object accounts.

Gmail to Salesforce DOWNLOAD
Email integration makes everything easier

Salesforce Security

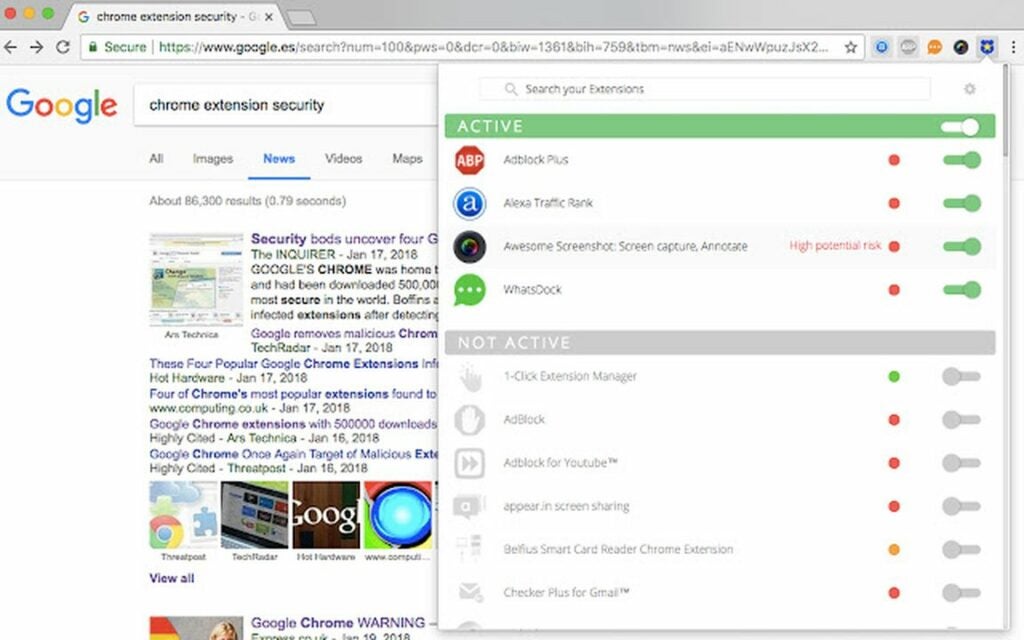
This Chrome add-on protects your most sensitive data via a variety of methods. It scans every extension on your system for agents that steal Salesforce data. When using Salesforce sites like visualforce.com, all extensions unrelated to Salesforce are temporarily disabled. This blocks malicious attempts such as Facebook hijacking, spyware, ads injection, and user tracking to name a few.

Salesforce Security DOWNLOAD
Bolster security by checking other extensions

Salesforce DevTools

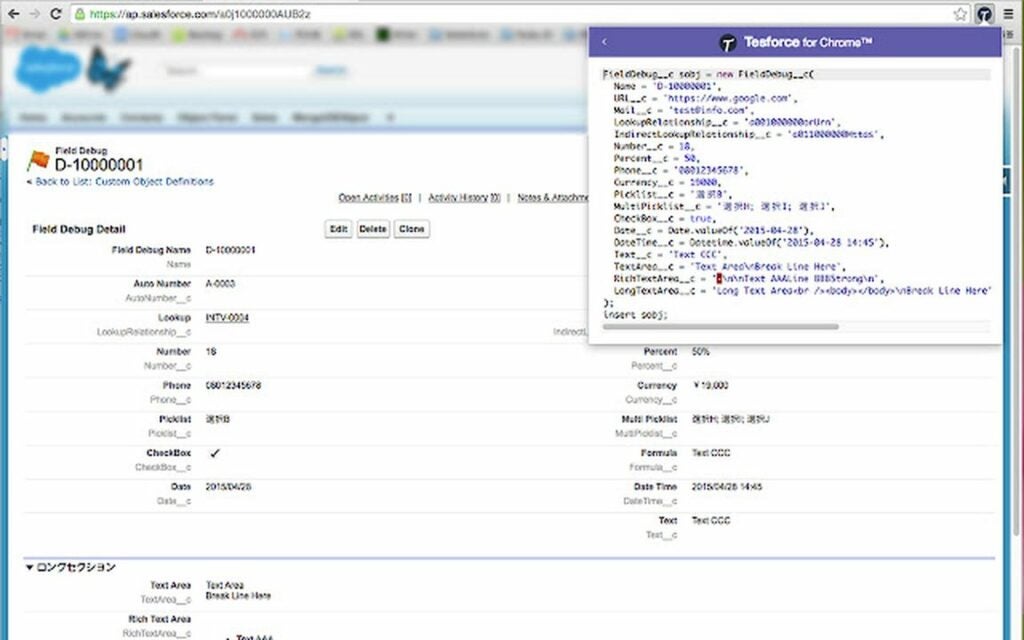
Salesforce DevTools offers advanced features such as exporting object fields and page layout definitions into Microsoft Excel files. There is a modal data generator, and even a way to view the display files API name on the object detail page. If you need to generate Apex code or SOQL, this extension has you covered.

Salesforce DevTools DOWNLOAD
Use DevTools to swiftly add new code

Salesforce Enhanced Code Searcher

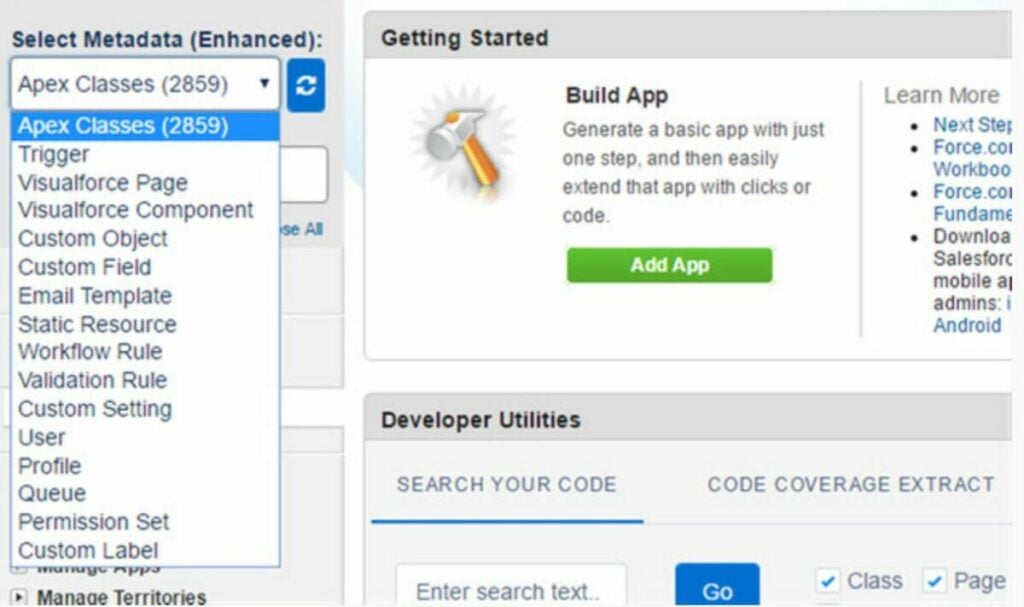
The fastest search method is one you customize yourself. With Salesforce Enhanced Code Searcher, you can search customized fields and set permissions. The app also lets you look up individual names and user profiles individually. Creating your own labels helps you keep it all organized. When first learning this extension, follow the tooltips to get started quickly.

Salesforce Enhanced Code Searcher DOWNLOAD
Search for code with enhanced metadata

15 to 18-Digit ID Converter

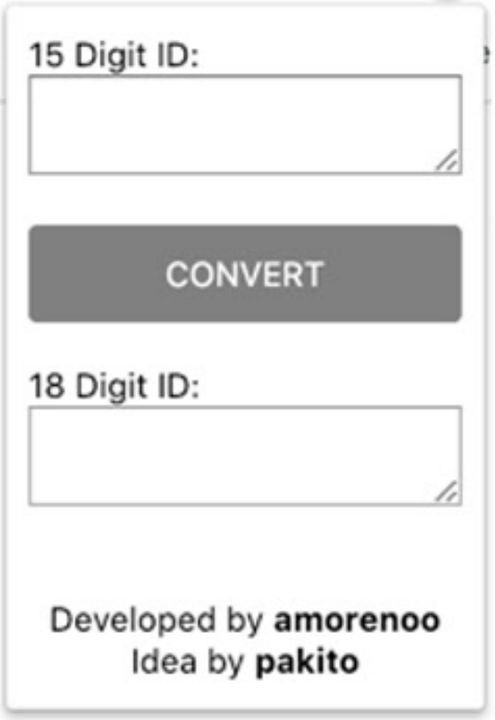
Your old 15-digit IDs will not always be compatible with the latest Salesforce extensions and updates. Using this tool allows you to convert your old numbers to the contemporary 18-digit format. Type in the old value and click convert to complete the process in a manner of seconds.

15 to 18 Digit ID Converter DOWNLOAD
Convert numbers to 18 digits

How to get the most from Inkscape’s features

Inkscape is a robust graphic design tool that allows you to draw and modify vector-based images. Vector graphics provide numerous opportunities for artists to create satisfying visual pieces. The best part is that you can download and use Inkscape completely for free. Of course, a tool this expansive comes with a learning curve that will smooth out as you get a feel for the platform.

Inkscape DOWNLOAD

To learn how to get the most from this powerful application, follow the steps provided below.

  1. Controlling the canvas

    Adjust the size of your canvas and control the zoom

    Inkscape gives you abundant drawing space each time you begin a new project. Since the canvas extends far beyond the limits of your screen, use these handy controls to pan and zoom your viewing angle. To pan the canvas, hold down Ctrl and use the arrow keys to scroll in your desired direction. Alternatively, holding Ctrl and pressing the B key will bring up a mouse scrolling wheel on the perimeter of the screen.

    To adjust zoom levels, simply press the + and – keys. Inkscape keeps a record of previous zoom levels used in the project. Access prior perspectives with the apostrophe key.

  2. Learning the Inkscape toolbar

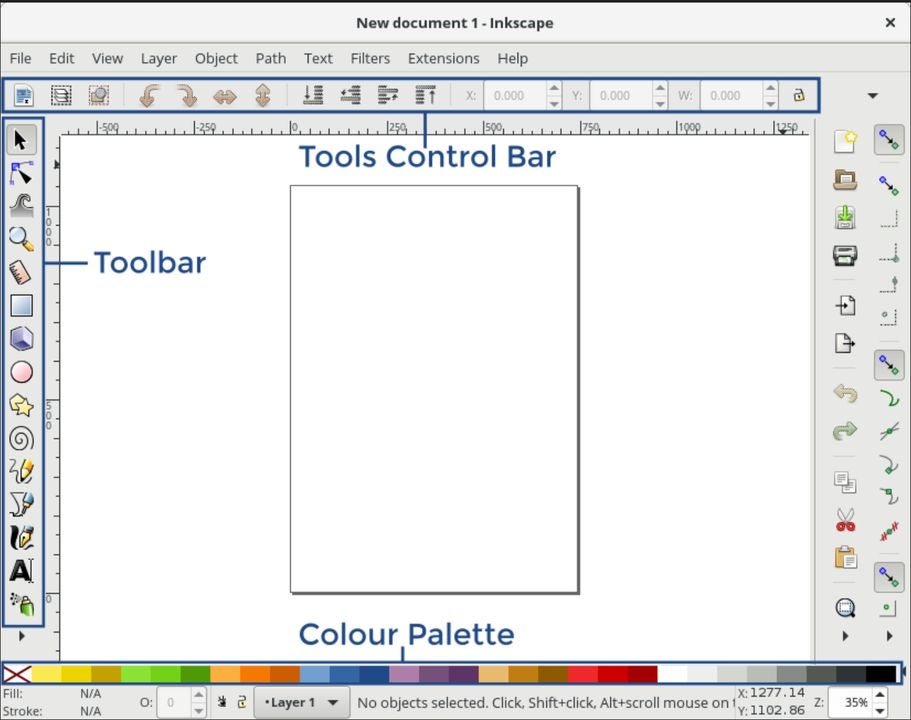
    Identify the different toolbars

    Like many productivity applications, Inkscape features a comprehensive set of toolbars that provide access to commonly used functions. At the top of the screen, you will find the command bar. This section allows you to perform major actions like saving and printing your projects. You will find the tool control bar directly above your drawing canvas. Here is where you will set the parameters for each drawing and creation instrument used in the project.

    There is even a helpful status bar located at the bottom of the screen. The status bar offers hints and advice as you progress through your task.

  3. Drafting and managing your documents

    Set up documents in Inkscape

    Each graphic design project is split into separate documents. You can open a document by clicking on file and selecting new from the command bar. To create a new document from one of Inkscape preexisting templates, click on file and select new from template.

    Inkscape uses the Scalable Vector Graphics (SVG) file format. To open SVG files, hold Ctrl and press the letter O key. To save an SVG file, hold Ctrl and press the S key. When you have multiple documents running simultaneously, hit Ctrl + Tab to cycle between them.

  4. Creating shapes and figures

    Create complex shapes with ease

    Vector images combine simple shapes to form complex graphic designs. Creating and placing shapes is one of the main actions you will perform with Inkscape. To create shapes, select one from the shape toolbar on the left side of the screen. You can choose from rectangles, circles, stars, and spirals.

    Each shape has a draggable icon placed next to it. Click and drag your mouse to modify the scope of each object. Alternatively, the toolbar will update with specific options when you highlight any shape. If you wish to undo your last action, simply hit Ctrl + Z to revert the document to the previous state. You can also reverse an undo by hitting Shift + Ctrl + Z.

  5. Select and modify existing shapes

    Select and edit shapes

    After creating each shape, you must still arrange them to create a design. The selector tool is how you will access these features. The selector tool is the topmost icon on the toolbar, or you can hit the space bar to toggle it. Clicking on any object will then select it. Once selected, move an object by dragging it with the mouse. For precise vertical and horizontal movements, hold Ctrl as you drag the mouse. To scale an object, drag the handle on the side of it. The Ctrl key can also be used to preserve the original height to width ratio.

    Clicking the same object a second time will provide new option handles. To rotate an object, drag the corner handles with your mouse. You can rotate exactly 15 degrees at a time by holding Ctrl as you drag. To skew an object, drag the non-corner handles on each side. Holding Ctrl will limit the shearing to 15-degree increments.

Getting more from graphic design

The world of graphic design is always innovating with new applications that enhance what artists can do. To take advantage of the plentiful tools at your disposal, check out this list of the best graphic design apps you can download right now.

How to get the most out of AVG Online Security

Like many Google Chrome extensions, the amount of use you receive from AVG Online Security depends on how well you understand the setup process.

AVG Online Security DOWNLOAD

While you can just leave AVG running on its own to some decent results, the best strategy is to manually set up tracker blocking and the ability to opt-out of advertisements. It is also wise to learn how to contribute to the community feedback system that evaluates each website. These tools help you get the most out of your AVG extension.

  1. Installing the extension

    Add this extension to Chrome to beef up your security

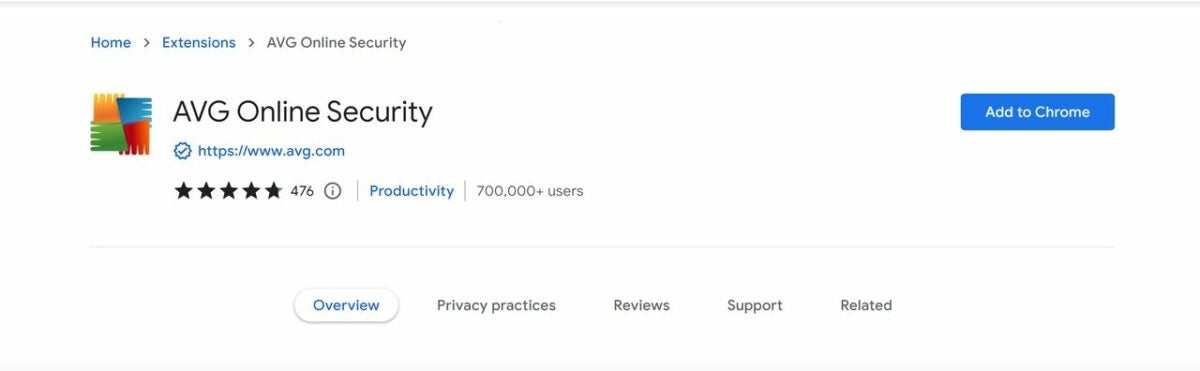
    Upon navigating to the AVG download page, click add Extension in Chrome to begin installation. To ensure AVG is running, click on extensions in the Chrome toolbar and toggle the pin icon next to AVG Online Security in the extension list.

  2. Blocking website trackers

    Block the numerous trackers that slow down your PC and steal data

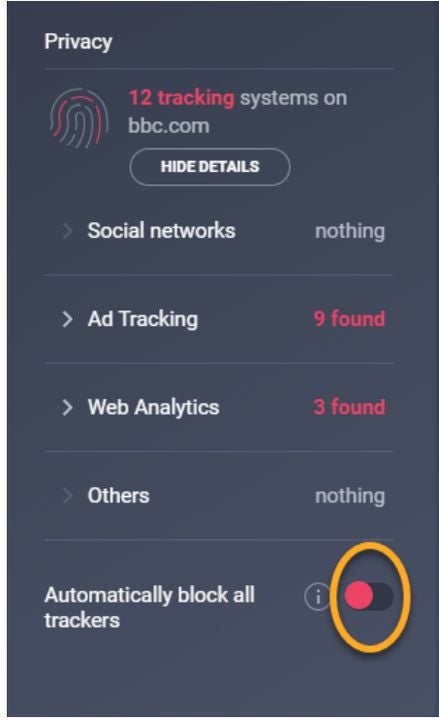
    When visiting a website, AVG will alert you to how many unique tracking systems are working on the page. This is represented by the number over the AVG icon to the right of the address bar in your browser. Click this icon to open the setting panel. Under privacy, select details to learn more about each tracker.

    You can block each tracker individually or toggle the “automatically block all trackers” button located at the bottom of this screen. For most users, blocking all trackers is the best bet when browsing online.

  3. Opt out of intrusive advertisements

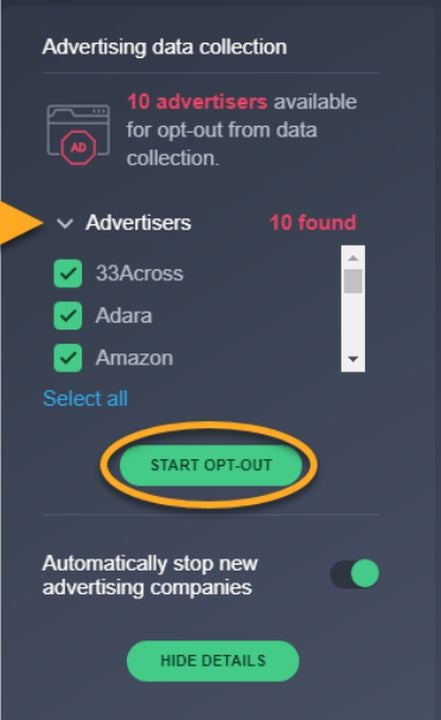
    Opt out of advertising to clean up your online experience

    If you have ever seen an ad for something you were just talking about in real life, then you know how intrusive some advertising campaigns can be. AVG allows you to block ruthless targeted advertisement campaigns that follow you around the internet.

    To do this, click the AVG icon next to the address bar. Look for the Advertising Data Collection section of the setting panel. Click scan available advertisers to get a rundown of the current webpage. Once the scan is complete, click on details to learn more. You can choose to disable the list of all advertisers or manually select which ones can send you targeted commercials. Also, be sure to toggle “automatically stop new advertising companies” below the scanned list of names. This eliminates the need to constantly check the extension yourself.

  4. Rating a website

    Rate websites fairly so the community wins

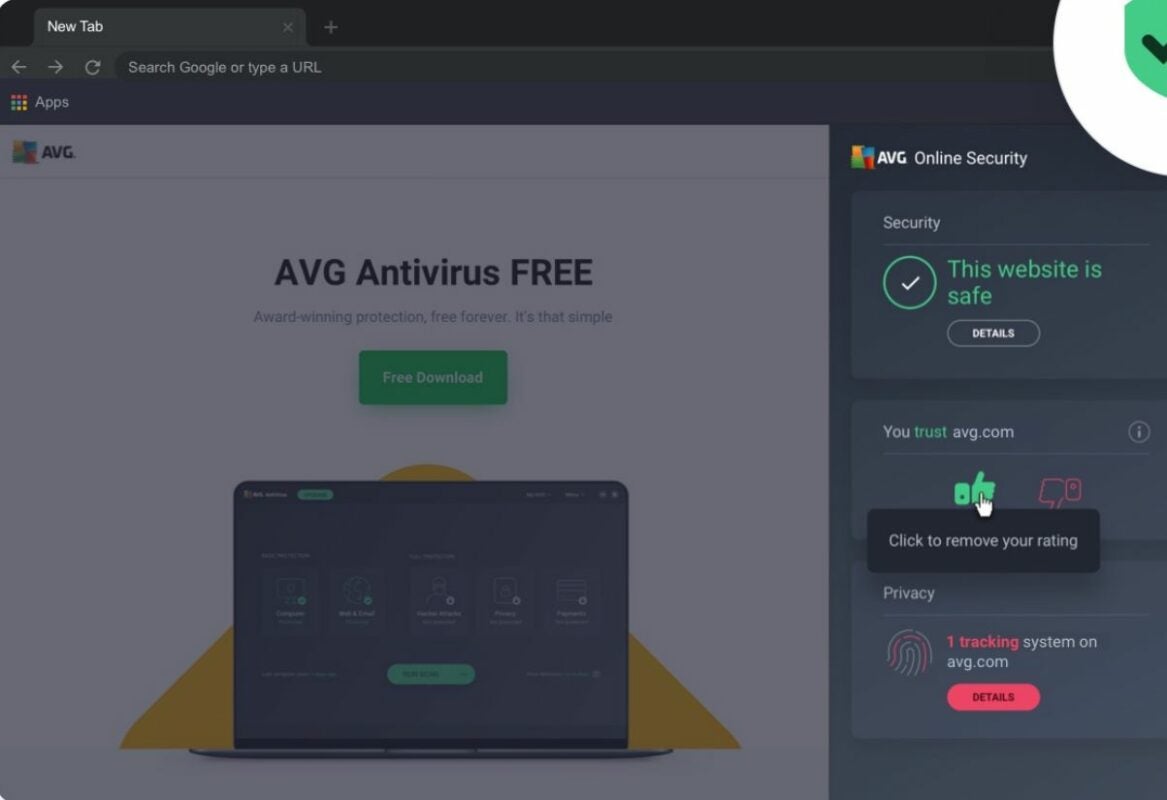
    The extension includes a handy tool that determines how safe each website is. This rating system is entirely driven by regular users who visit each webpage. To add your own ratings, click on the AVG icon next to the address bar. You will see either a safe, untrustworthy, or unknown status for the site you are on. Click the thumbs up or thumbs down rating to add your feedback and assist other users who arrive at the site.

How to install the SetupVPN extension for Google Chrome

Virtual private networks are the perfect tool for getting the most of your internet connection. You can hide your activity from your ISP and unlock additional functionality in a variety of apps. VPNs allow you to select a country or region that is different from your home address.

SetupVPN - Lifetime Free VPN DOWNLOAD

The best part is that you can get certain VPNs for free. SetupVPN is one such service that is completely free to install on any Google Chrome browser.

  1. Downloading the software

    First, you’ll need to download Setup VPN extension. Once the webpage loads, click the big blue download button on the top right.

    The link takes you to the Chrome extension store. Click the add to Chrome button and hit add extension when the dialog box appears to complete the first step.

  2. Pin extension to toolbar

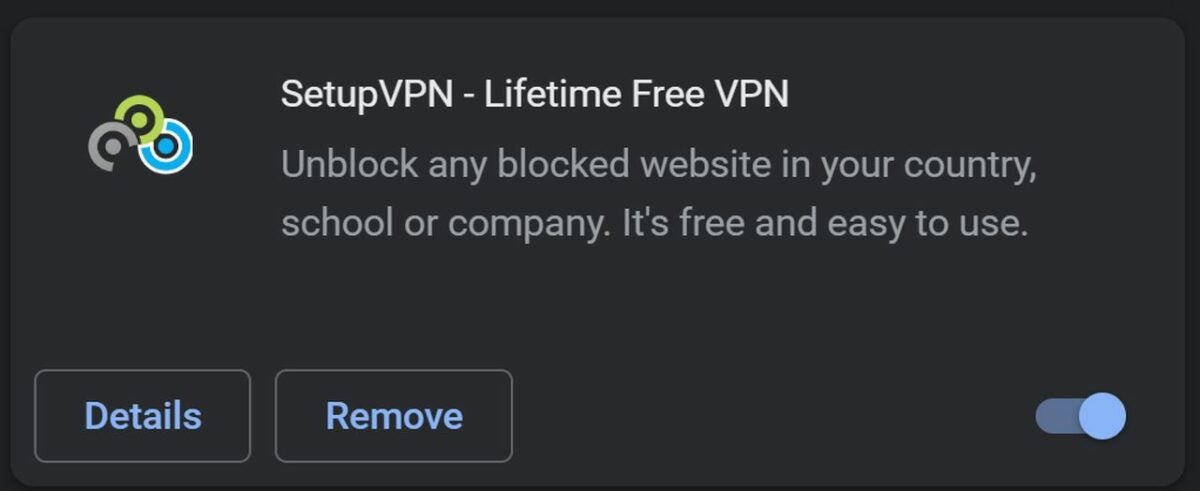
    Ensure the extension is enabled in Chrome

    To make sure SetupVPN is readily available, you can pin it to the toolbar at the top of Chrome. To do this, click on the extensions jigsaw icon. From the list of extensions, click the pin icon next to Setup VPN.

  3. Choose a language and create an account

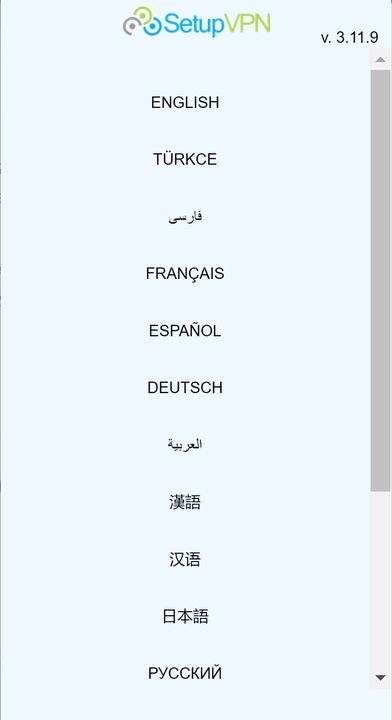
    Starting an account is easy

    When you first click your newly pinned SetupVPN icon, you will be asked to choose a language and make an account. Select your preferred language from the menu and click create account. After entering your credentials, you must verify your email by clicking the link sent to the address you provided during account creation. Now, you will be able to log in normally when clicking the Setup VPN extension icon.

  4. Check your IP address

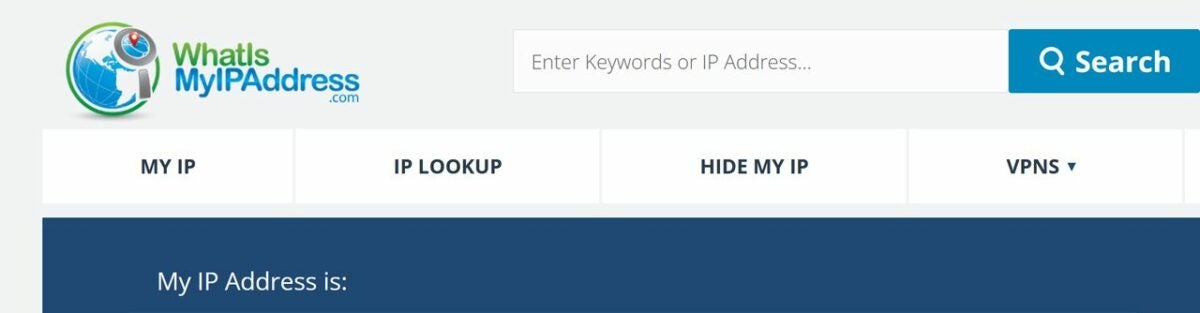
    Check your IP before changing locations

    The easiest way to know your VPN is working is to check your IP address before tinkering with it. Then, check your IP again once you have connected to another country. To see what your IP address is, go to a website such as what is my IP? Your current IP will be listed on the box labeled IPv4.

  5. Connect to a new location and verify your IP changed

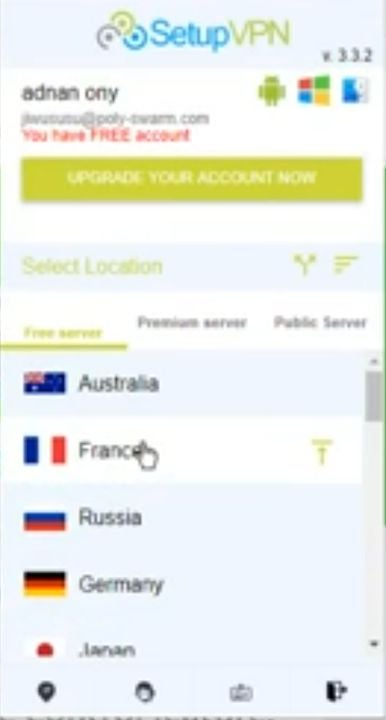
    Select another country from this list

    Once registered, open the extension by clicking on the SetupVPN icon on the Chrome toolbar. Click on the disconnect button to drop your current IP address location. You will automatically be brought to the list of available countries to connect to. Click on the country of your choice to generate a new IP address.

    Upon connecting to the new location, you should verify your IP was altered before resuming your activities. Go back to the IP checking site and refresh the page. As long as address shown has changed, you’re all set! Now, you can enjoy the web from the perspective of someone on the other side of the planet.