Ever since his brother brought home the original PlayStation, Doug Fakler knew he would be a gamer for the rest of his life. He has been glued to the screen with a controller in hand for over 20 years. While he will always acknowledge that gameplay is king, he's equally interested in the stories that can be told through interactive means. This inspired him to earn a bachelor's degree in Game Design from Full Sail University in 2015.
Adding some custom flair to your Windows 11 experience is a fantastic way to personalize your digital workspace. With Microsoft’s latest operating system, you can customize folders to improve readability and productivity.
Although the functionality is not built-in by default, you can easily customize folders via free third-party software add-ons such as Rainbow Folders.
Installing the Rainbow Folders Extension
A straightforward way to organize Windows 11 is to customize the individual colors of each folder. With the Rainbow Folders program, you can color-code your files for massively improved organization.
– After the download is finished, you can extract Rainbow Folders from the ZIP file stored on your PC.
– Upon extraction, clicking on Rainbow Folders will initialize the setup wizard. Choose where you wish to save Rainbow Folders and click install.
Changing folder colors with Rainbow Folders
– Open Rainbow Folders from the location you installed it. If you are unsure of the exact location, you can use the Windows key + S shortcut and type Rainbow Folders into the search box.
– Once inside, click This PC when asked to select a directory. As the list of folders appears, click on the one you wish to customize. If you would like to add the same tint to multiple folders simultaneously, click the multiple select option.
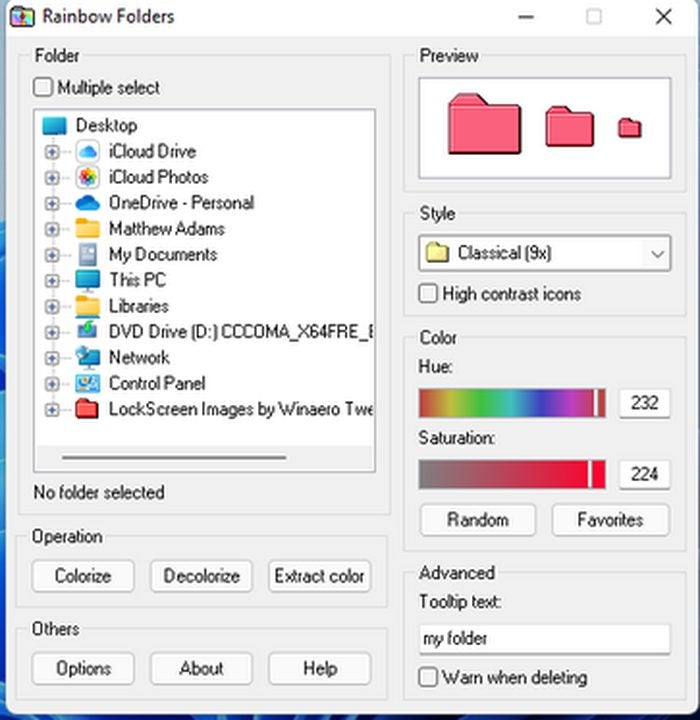
– The Rainbow Folders menu allows you to customize the color of your folders as you see fit. Drag the hue slider to alter the shade of the icon.
– If you want a truly custom color, adjust the saturation slider as well. When you are done, click colorize to apply your changes.
Check your work in file explorer
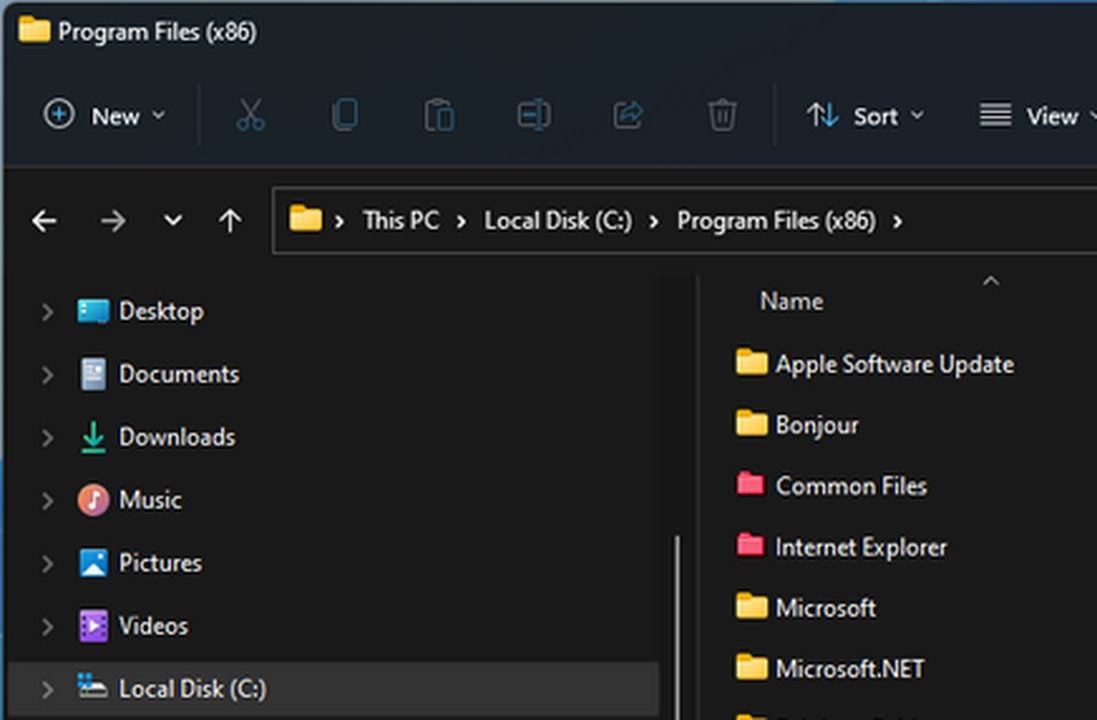
– Upon closing Rainbow Folders, navigate back to the directory that stores the folder you just customized. You may need to wait a few minutes for the change to take effect.
– After a refresh, your file explorer should include the folders with the colors you selected.
How to change folder thumbnails in Windows 11
– Next, you can customize the thumbnail preview using the CustomizerGod extension. This app allows you to change the appearance of folder icons from one central location. You can download CustomizerGod here.
– Much like with Rainbow Folders, you may extract CustomizerGod wherever you like.
– Once inside the extracted folder, click CuztomizerGod.exe to immediately start using the software.
Backup the original thumbnail
In case you need to restore a corrupted folder thumbnail, it’s wise to back up the default look of any folder you customize.
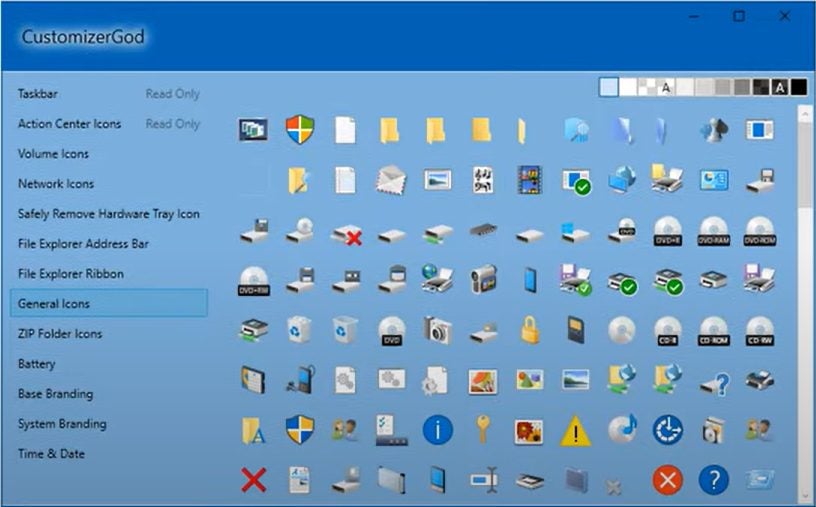
– To back up the default look, select any folder once CustomizerGod is open.
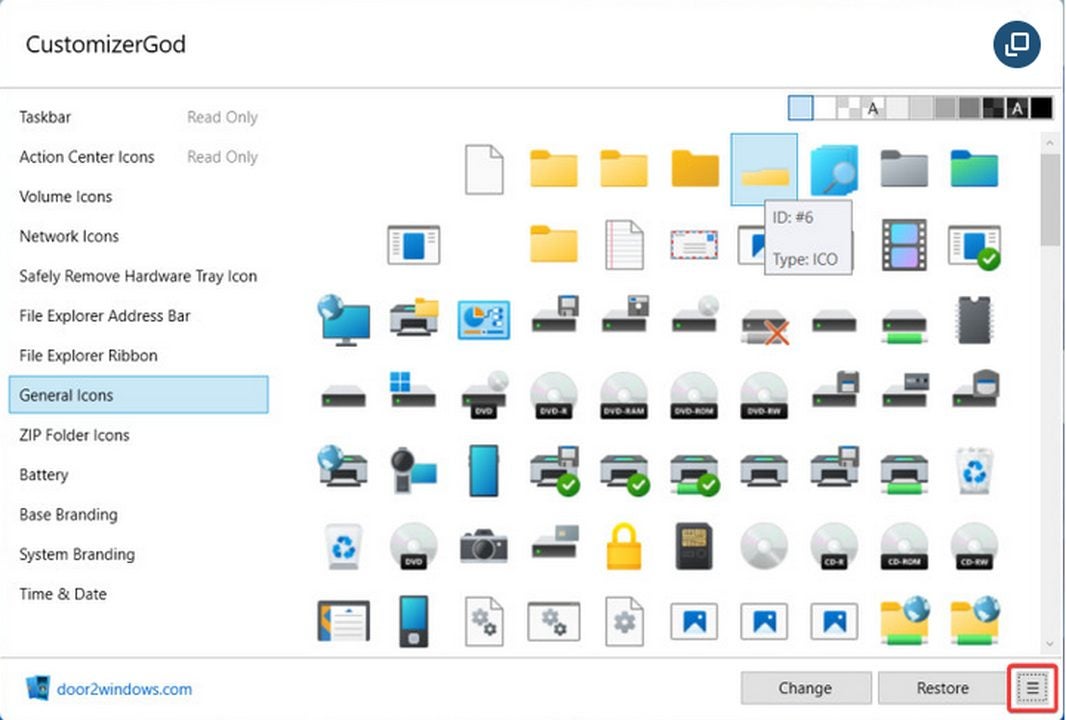
– Use the general icons tab to find folders. Once a folder is selected, click on the icon with three lines in the bottom-right corner of the window.
– Click on export resources to save a backup of the file somewhere on your PC. You may wish to create a new folder exclusively for thumbnail backups.
Create your thumbnail changes
Once the original file is safe, you’re free to customize to your heart’s content.
– Find the same folder from the previous step and this time click on the change button located at the bottom of the CustomizerGod program window.
– The change button opens a new file explorer window. Select any image on your PC that you wish to use as a thumbnail replacement. File explorer should automatically reset so the changes take effect.
– On the off chance the picture causes an error, you can simply revert to the original thumbnail using the backup created in the last step. Simply click on Rebuild Cache.bat from the CustomizerGod main folder.
Taking Windows 11 to the next level
This folder customization process is only the beginning of what can be done in Windows 11. If you wish to learn more, check out our guide on how to change the speed of your mouse cursor. Doing so is an excellent way to further enhance your productivity.
Microsoft OneDrive is a free and useful cloud storage option that comes standard with both Windows 10 and 11. While many functions of OneDrive will automatically run in the background, it is worth taking a few moments to properly set up your OneDrive for maximum efficiency and utility.
With just a few simple steps, you can take full advantage of Microsoft’s potent cloud technology.
Getting started with Microsoft OneDrive
Each free OneDrive account comes with 25 GB of storage on the house. This is plenty of space for your documents, images, videos, and audio clips. Each file type will automatically be uploaded to storage when you save it on your PC or phone. Then, you can easily access the files from any other device that has access to your Microsoft account.
Enabling OneDrive on your mobile device
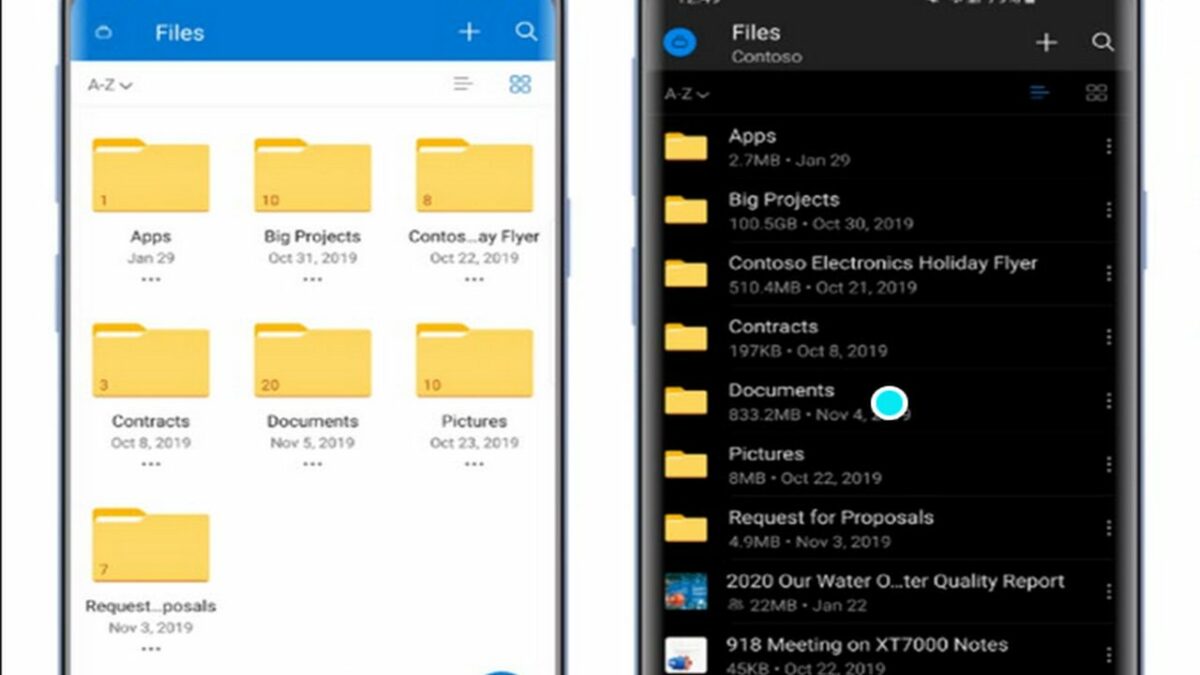
The first thing you will want to do is ensure your files appear on both your PC and phone. The main benefit of cloud storage is the ability to access your files anywhere. Go to the Google Play Store (or the app store if you have an Apple device) and search for OneDrive. The top result on either platform should be the official version. To verify this, ensure the publisher of the app is Microsoft before downloading.
After the installation is complete, log in with the same Microsoft Account you use on other devices. This step can be repeated for all devices that you own.
Determine where files are located
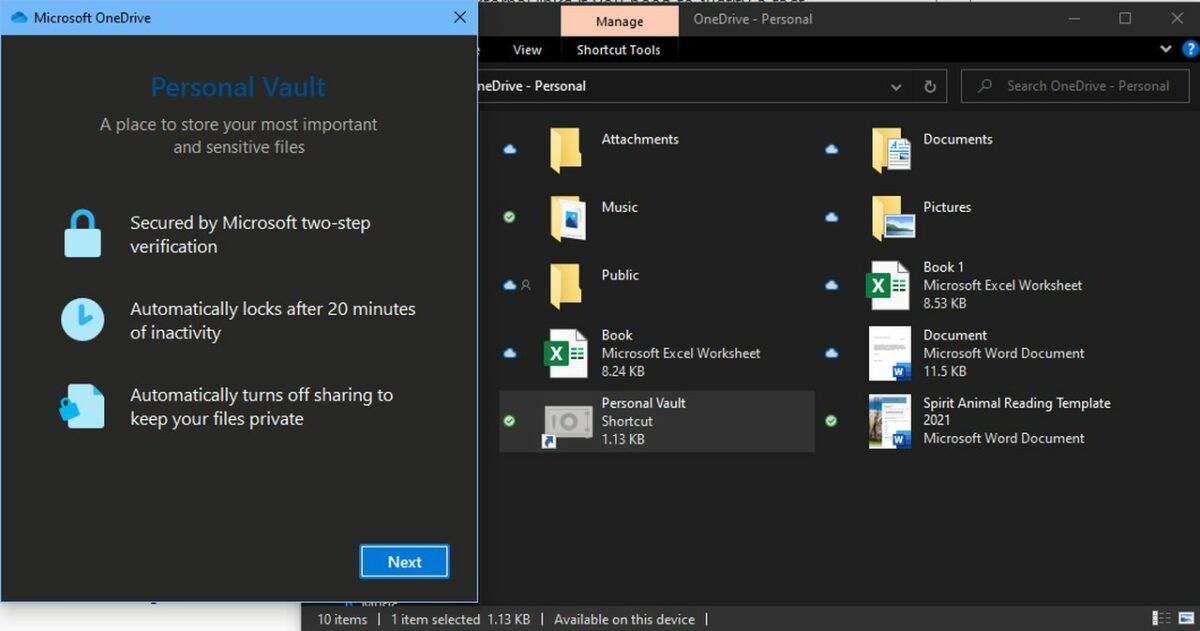
To determine where a file is located, you need to observe the symbol under each file icon. A green circle with a checkmark denotes that the file is both on your device and stored in the cloud. If you simply see a cloud symbol, then the file in question is not stored on your device.
The person icon indicates when a file has been shared with at least one other user. If you see arrows next to a file, it means it is currently being uploaded to the cloud. To see more information about any file, simply click on it. You can then see a list of users that have access to the file.
Sharing files with other users
In addition to transferring files between your own devices, you can selectively share files with other Microsoft OneDrive users. The process is as simple as right-clicking on the file and selecting share from the drop-down menu. Clicking anyone with the link can edit will allow you to set some basic parameters before sending a file.
If you have a paid Microsoft 365 subscription, you can enable password and expiration timers for added levels of security. If you trust the user completely, you can simply click share link to save time and bypass additional setup.
Track the version history of files you share
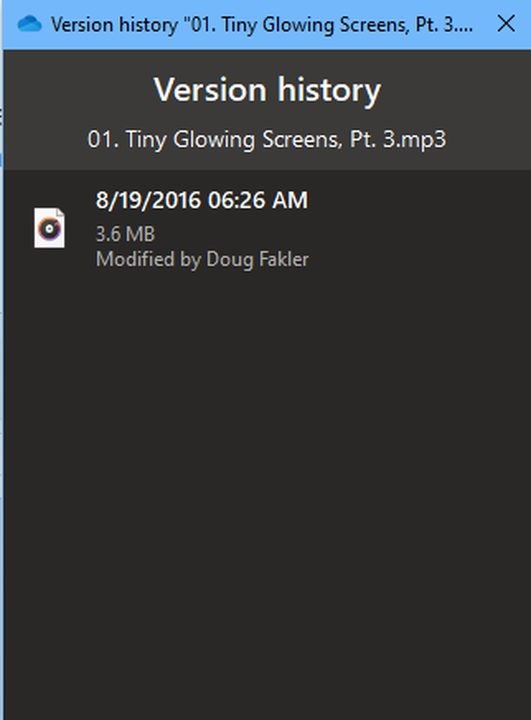
– When collaborating with multiple users, it is vital to know which changes have been made to each file and at what time each edit occurred. OneDrive automatically records each change to files stored in the application.
– When things go awry, you can even revert to previous file versions from before the issue occurred. Right-click on the file you wish to examine and select version history from the drop-down menu.
When the list of file version appears, click the ellipses next to the version you wish to interact with. This menu allows you to download the specific file version or revert the shared file back to a previous state.
Vaulting sensitive files
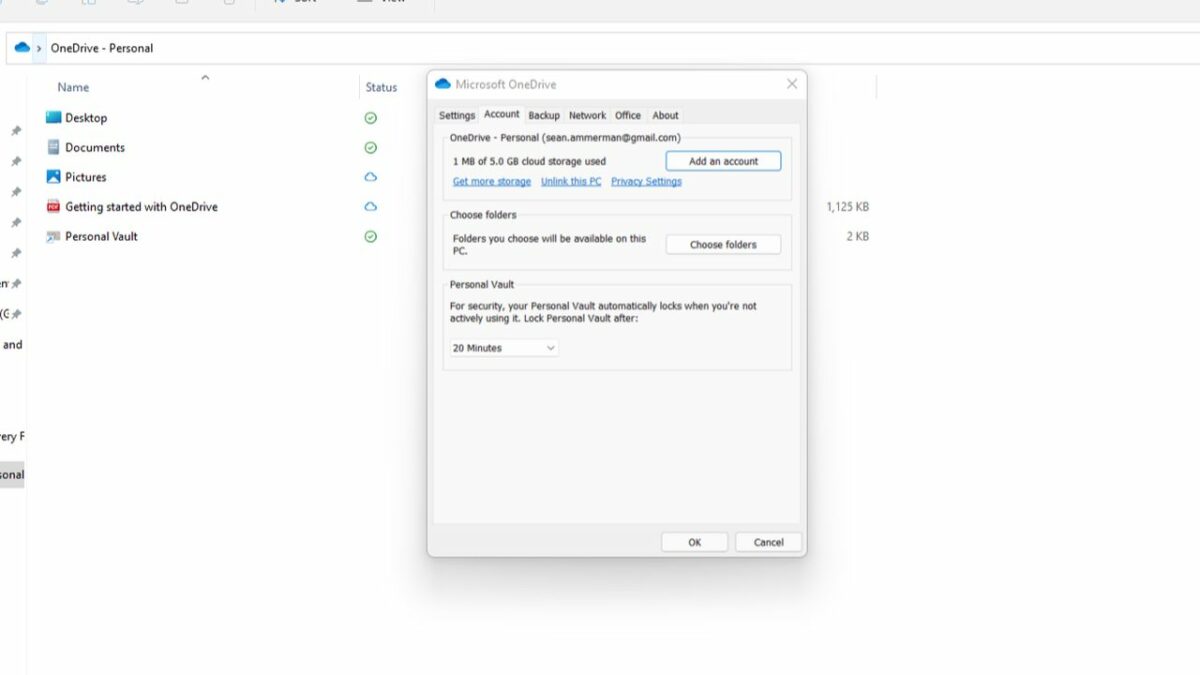
For files that must remain secure, Microsoft introduced a vaulting system. You can lock files behind two-factor authentication and have each session expire within 20 minutes of inactivity. To do this, find the personal vault under my files. You can add files to it just as you would any other folder. To access each file again, you will need to verify your identity by entering a code sent to your email.
Alternatively, you may download an authenticator app on your phone to speed up the 2FA security check.
To the Cloud and beyond
Now that your Microsoft OneDrive is set up to take advantage of all major features, you can get back to what matters most — staying productive and having fun while doing so. When cloud storage is used effectively, you can work and play as hard as you need to. To get started, download Microsoft OneDrive app for free today.
One of the best features of Microsoft Applications is the seamless integration of the programs such as Outlook and OneNote. After spending a bit of time on prior setup, you will be able to automate and simplify a substantial portion of your workload. For instance, sending a page of notes from OneNote through an Outlook email will be as simple as making sure that both programs are initialized.
However, some advanced features like automatizing signatures can be harder to master without some guidance.
Emailing notes from OneNote through an Outlook account
For starters, let’s get the information about basic email functionality out of the way. If you have Outlook 2010 or later, OneNote makes it simple to send emails without needing to open Outlook in a separate instance:
– Open the notebook that you wish to send via email.
– Then switch to the home tab at the top of the screen.
– From the home menu, move your mouse over the email page button. When you click this, it will open a window with all the relevant fields you need to complete your message.
Attaching notes to older versions of Microsoft Outlook
If you are running a version of Outlook from before 2010, you can still send notes by manually attaching them to your emails. Simply follow these steps:
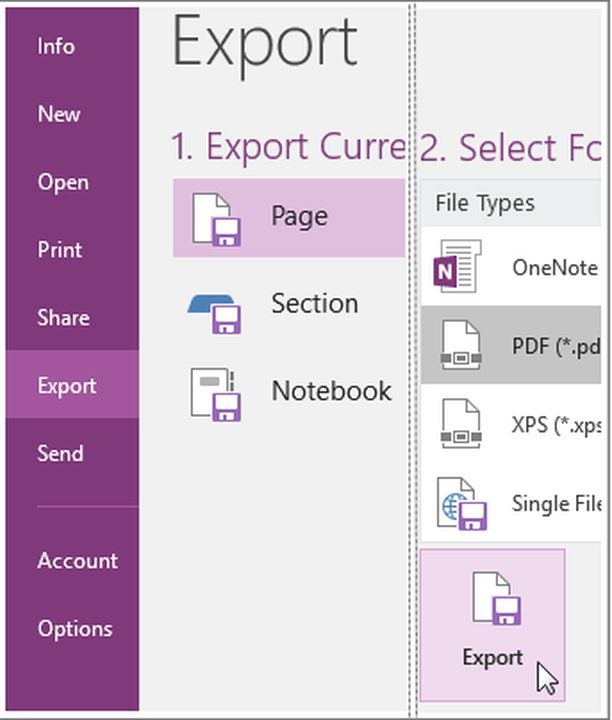
– Once you open the notes you wish to send, navigate to the export tab.
– From the export current menu, choose the parameters of whatever you wish to send.
– You can send the whole notebook or individual sections at your discretion.
– Under select format, choose the file type you wish to attach to your email.
– Once you have created the file, open Outlook and attach it to the body of an email.
Attach your signature to emails you send from OneNote
Each time you send an email via OneNote, the system will prompt you to fill in your signature and BCC information. You can automate this process should you plan to use the same credentials in each message.
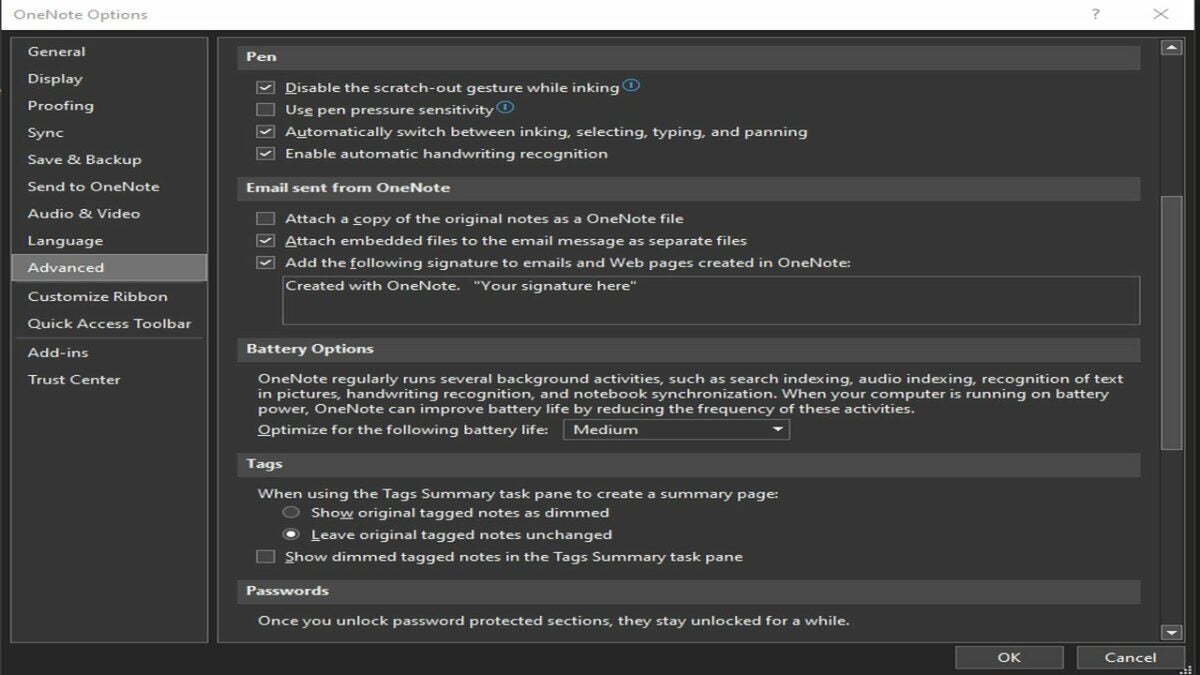
– With OneNote open, click on File. Navigate to the bottom left corner of the page and select Options.
– From the Options menu, click on the Advanced tab.
– In the “email sent from OneNote” section, you will find a list of settings as well as a place to enter your signature.
After you have typed your signature, be sure to click OK to save your changes.
Use Microsoft Applications to work smarter, not harder
By taking advantage of the integration between Microsoft OneNote and Outlook, you can dramatically enhance your productivity. While it only takes a few seconds to type out your signature, those seconds add up quickly over the course of thousands of emails. Spending a few minutes to automate your workflow will save you many hours each month.
Apex Legends is a massively popular free-to-play battle royale game originally released on PC and consoles. Now that the smash hit FPS has arrived on Android devices, you may be wondering how to download and install the title. While some players are fortunate enough to access Apex Legends through the Google Play Store, this method is not available in many regions. That is where .APK files come in.
This guide provides step-by-step instructions that will have you loaded into your first match in just a couple of minutes, without Google’s help.
Make sure your Android can run Apex Legends
Apex Legends is an immersive shooter with a vast map that supports 60 players simultaneously. This means that the title will hog some resources when actively running. To ensure a smooth experience, be sure your Android device has at least these minimum required specs.
– Android OS 8.1 or higher
– OpenGL 3.0 or higher
– At least 3 GB of RAM
– Minimum of 6 GB storage space (for both download and install)
– Mid-tier processor no more than a few years old
Find and download the .APK files
– Once you have confirmed your phone has the minimum specs, the next step is to locate the relevant Android package for Apex Legends. As one of the most popular free-to-play battle royal games of all time, Apex Legends follows a very straightforward download process. Simply click download from a trusted site and save.
– If you have never downloaded an Android file outside of Google Play before, you might not be familiar with the .APK format. This extension is known as an Android Package file. Think of .APK files just as you would .ZIP files on a PC. Large programs such as video games are condensed into .APK folders so they can easily be transferred onto Android devices. This makes .APK the perfect format for downloading and installing Apex Legends on a smartphone or tablet.
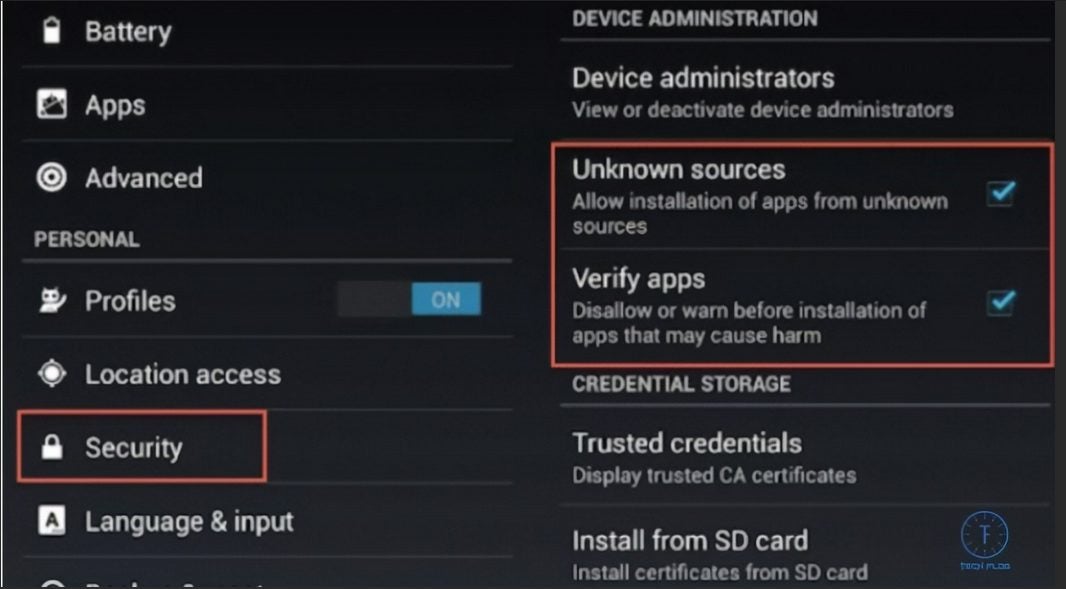
Head to your Privacy and Safety settingsBefore you can install the downloaded file, you will need to bypass the default block imposed by Google. While this protection does keep unwanted viruses away from your device, it also prevents you from downloading genuine .APK files such as Apex Legends. From your settings menu, scroll over to the “Privacy and Safety” tab. From here, check the option to “Install apps from Unknown Sources.”
Locate and install your Apex Legends .APK file
Navigate to the file browser on your Android device and select Apex Legends. It may also appear on your recently downloaded file list, depending on which version of Android you are running. If you enabled installations from unknown sources, your game will successfully install in a matter of minutes.
Open Apex Legends and finish installing firmware updates
No multiplayer battle royale game would be complete without constant updates. When you first attempt to log in, expect to download a collection of new files. We recommend that you have at least 1 GB of additional storage space beyond the minimum requirements to facilitate any updates down the line.
Climb the leaderboards
Now you are free to explore the suite of competitive features that made Apex Legends so popular to begin with. A new platform like Android offers the perfect opportunity to hop in and make a name for yourself in the Apex community.
Media playback solutions are a dime-a-dozen these days. Most modern operating systems come with a serviceable video player pre-installed. Back when VLC Media Playerwas first introduced in 2001, there was a much stronger demand for ways to natively play audio and video files on-demand for free.
Despite the abundant nature of basic media playback software, VLC boasts several additional features that are worth taking a glance at. Whether your default app fails to play a file, or you are looking for editing functionality, VLC Media Player likely provides a specific feature that will help. After over 20 years of updates, this open-source app can recognize and play an impressive list of uncommon audio and video formats. With that in mind, let us take a closer look to determine if VLC Media Player is worth the download.
A free playback solution for obscure audio and video formats
Media playback solutions are a dime-a-dozen these days. Most modern operating systems come with a serviceable video player pre-installed. Back when VLC Media Player was first introduced in 2001, there was a much stronger demand for ways to natively play audio and video files on-demand for free.
Despite the abundant nature of basic media playback software, VLC boasts several additional features that are worth taking a glance at. Whether your default app fails to play a file, or you are looking for editing functionality, VLC Media Player likely provides a specific feature that will help. After over 20 years of updates, this open-source app can recognize and play an impressive list of uncommon audio and video formats. With that in mind, let us take a closer look to determine if VLC Media Player is worth the download.
A straightforward ‘play-everything’ media player
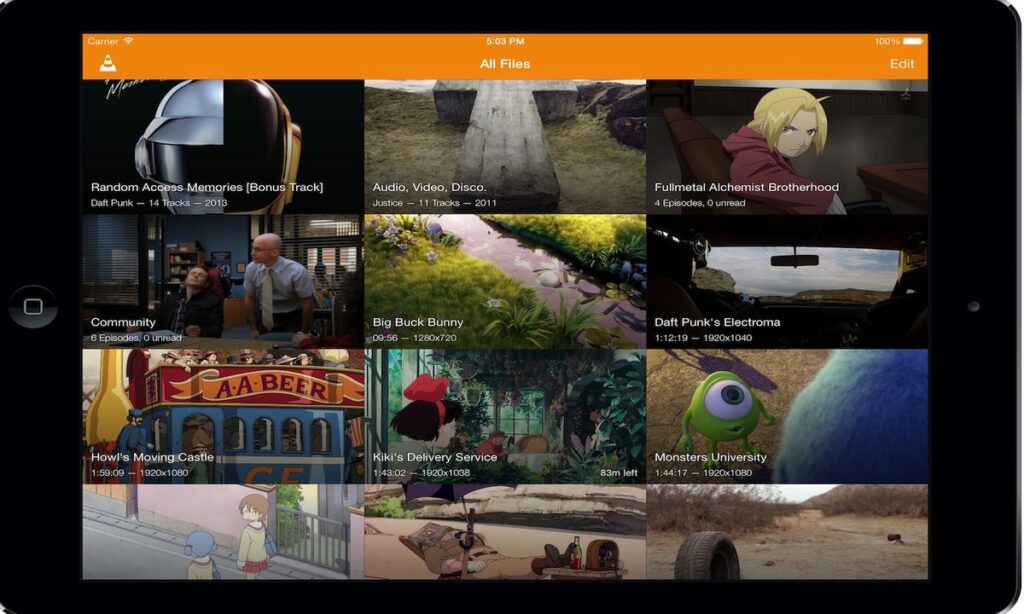
Launched by French developers in 1996, VLC has always touted a simple and clean interface. That no-nonsense, play anything reputation is well deserved. VLC gives easy access to all your device’s files without any additional bloat such as advertisements or premium subscription offers. The secret behind this ease of use is the vast array of video and audio codecs supported by VLC. This permits playback of nearly any file format under the sun without the use of conversion software. Once a file is running, the app offers unprecedented control over playback. You can change subtitle languages, synchronize audio, and apply a variety of filters to the content.
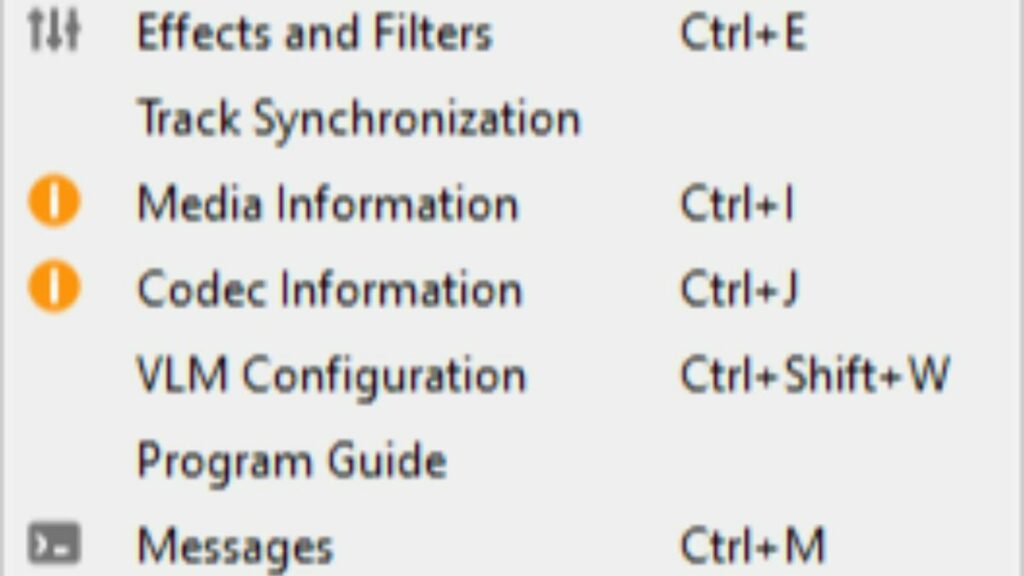
Options at your disposal, hover your mouse over the tools tab at the top of the screen.
Users also have access to simple video editing features such as cropping scenes and rotating images. You can learn more about these features here. When it comes to streaming, a wide range of content networks are available. You can even start video playback before the file is finished downloading. The instant playback feature works on P2P connections provided you set your torrent software up for sequential downloading.
Can you convert videos into different file formats using VLC Media Player?
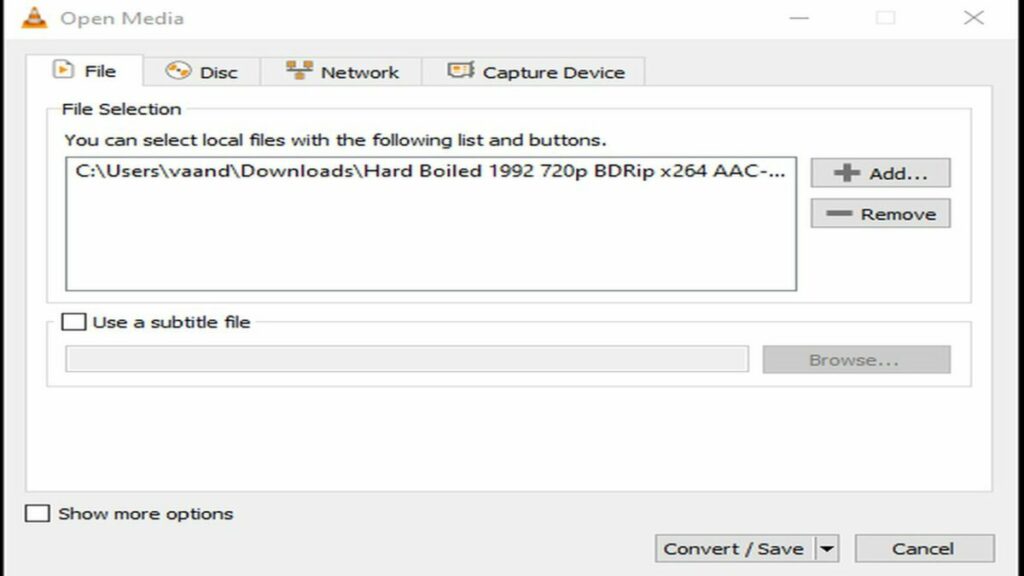
VLC Media Player not only recognizes an enormous collection of video codecs, but you can even convert your files with obscure formats into a more universal extension. For instance, you can convert the rare H.264 video format into an MP4 file container. This feature is perfect for when you need to make your files more portable. Your MP4 video can then be comfortably played on most devices. Even if your goal is not to change the format outright, the conversion process can be used to reduce file size. Content creators who keep a library of past work will appreciate the ability to condense each file with ease.
This is the interface for converting your files into another format.
Is VLC media player safe?
With the number of frauds and malware going around the internet these days, it is wise to investigate foreign applications before installing them. Fortunately, the files for VLC Media Player are completely clear of any threats. Just be sure you download VLC Media Player from a trusted portal or directly from the publisher’s site. However, VLC does not scan the video and audio files you run through it for potential viruses. As with the program itself, be sure to acquire your audio and video files from a reputable source.
There are no viruses to see here, just your library of content.
Is VLC better than Windows Media Player?
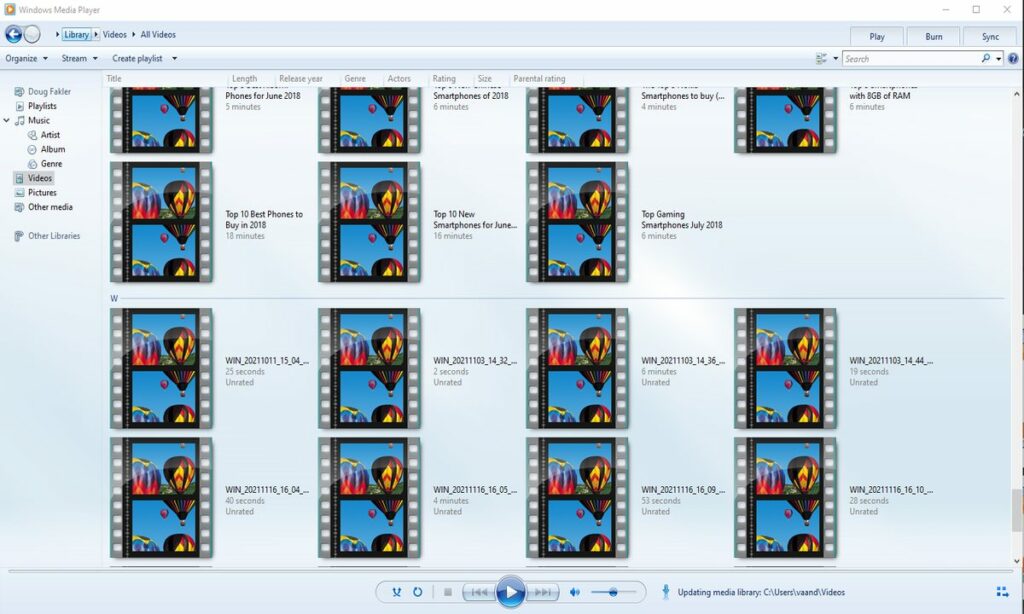
If you have a Windows operating system, then you may be wondering if VLC is a substantial upgrade over Microsoft’s built-in playback application. Windows Media Player is a convenient choice for quickly watching short clips in popular file formats. The ability to rip data directly from discs is also an appreciated feature. For some basic users, the convenience of Windows Media Player will outshine VLC.
With that in mind, VLC’s advanced features are a huge step-up from what Microsoft provides out of the box. You are bound to run into a few file formats that Windows Media Player does not recognize. With VLC, it is extremely rare when a file will not play as intended. Once you have VLC installed, you never have to worry about compatibility again.
A simple overview of the GUI and layout that comes standard on Windows.
Is VLC media player customizable?
While customization options are not as robust as Windows Media Player, VideoLAN has provided numerous options for changing both visual appearance and runtime performance. On the cosmetic side, you have numerous skins to choose from that alter the visual theme. If none of the presets suit your fancy, you can create your own theme using the VLC skin editor.
When it comes to performance, VLC offers the ability to download extensions. Much like your web browser, VLC extensions are capable of adding any functionality an independent developer envisions. In the case of media playback, audio and visual filters are especially popular in the community.
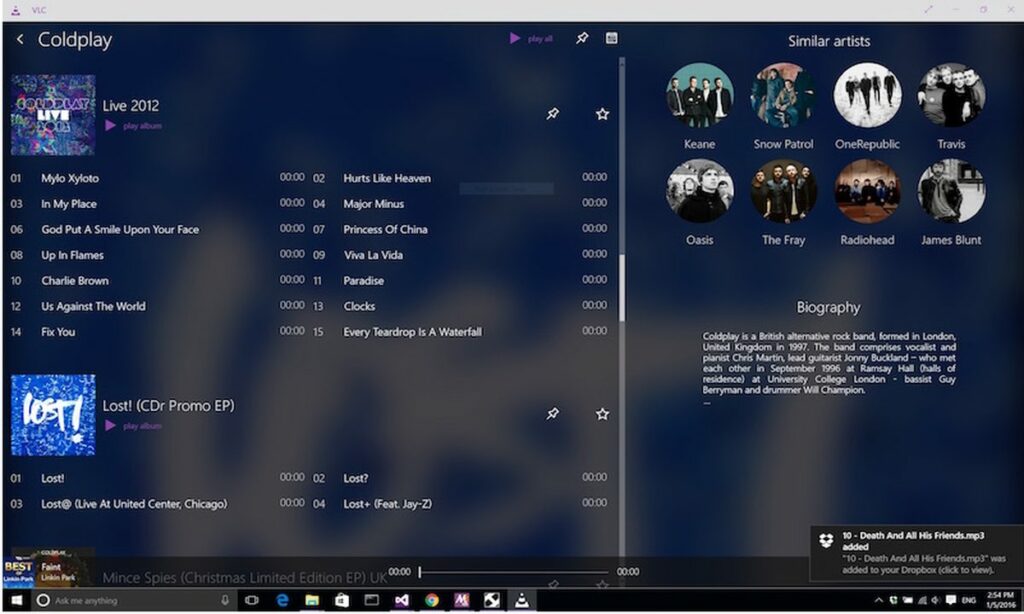
One example of a custom VLC Media Player experience.
Does VLC media player support subtitles?
When watching anime or other foreign content, you need a reliable way to add subtitles to each viewing. The good news is VLC makes it simple to add subtitles in the language of your choice. If you already have a subtitle file, it should activate immediately. In some rare cases, you may need to right-click the video and manually select your subtitle file from the drop-down menu.
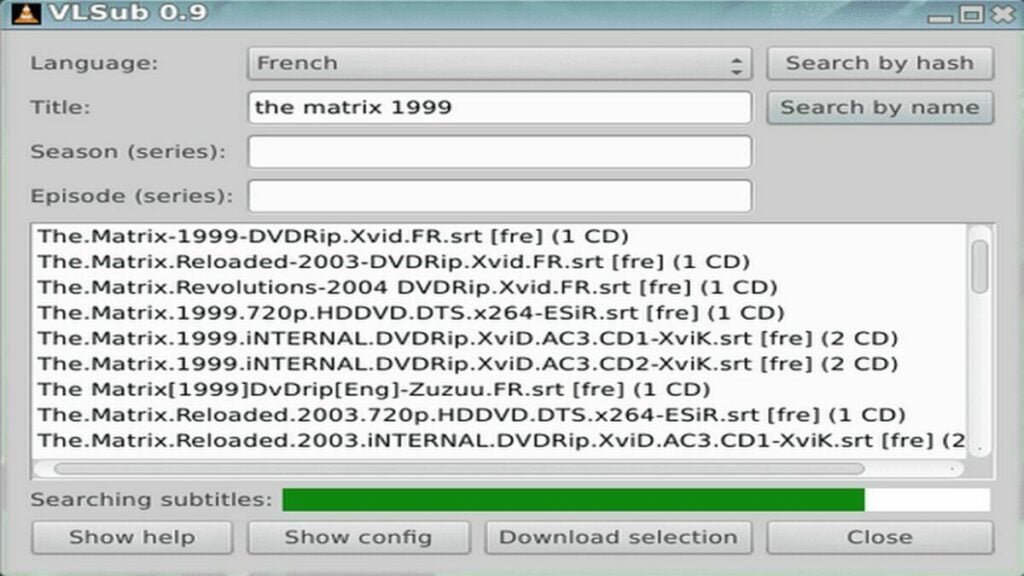
For shows that did not come with a subtitle file, you can use the handy extension, VLSub. This extension is available for free directly from the VLC add-ons store. Just type the name of your movie and desired language. VLSub will search the internet for the most relevant subtitle files and let you download them quickly. Once installed, VLSub allows you to complete the language setup without leaving the VLC Media Player app itself.
This extension makes adding subtitles a breeze.
The final verdict on VLC media player
Overall, VLC provides a smooth and reliable media playback service that can play virtually any media file. The ease of use, wide range of acceptable formats, subtitle support, and the suite of video editing coupled with conversion features make VLC media player a worthy addition to any of your devices. It was originally designed as a video player, so it’s not as well suited for music playback. However, there is an impressive degree of value for a free application with no other monetization schemes beyond the main website’s donate button. The fact that users have supported VLC for over 20 years is a clear indication of the media player’s efficacy. To find out how simple this app really is, download VLC for freetoday.
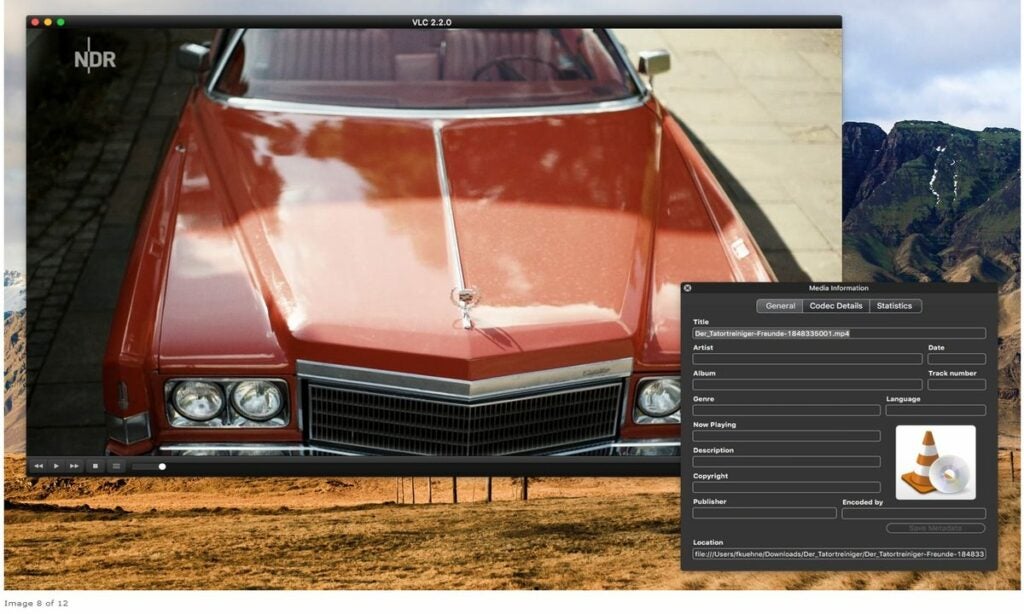
VLC Media Player runs on everything, including relatively closed ecosystems like macOS
PROS
Massive assortment of media codecs
Allows for playback while a video is still downloading
A suite of video editing features built in
CONS
Files must be selected in their directory folders to initiate playback
Interface is better suited for video rather than audio
Compared to other players, it lacks customization options
Fonts are an essential part of graphic design. They can set the tone and create a certain mood or feeling for your project. In Adobe Illustrator, you have access to more than 17,000 different fonts.
You can import these via Adobe Fonts (formerly called Typekit), which comes with your Creative Cloud subscription. Changing text font in Adobe Illustrator just requires a few simple steps.
Add a line of text
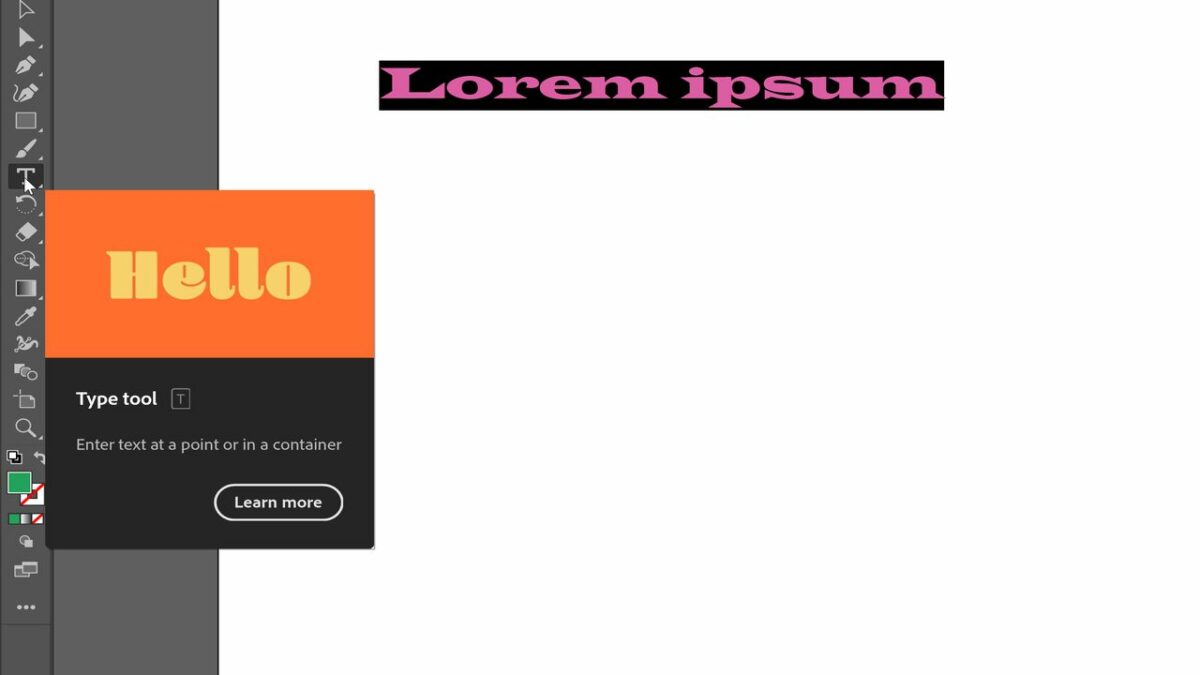
The first step is to add text to your project. After you’ve opened your project in Illustrator, select the Type tool panel located in the Tools bar on the left side of your screen. Click in the document where you want to create a text box. The text that appears is called point-type text. You can use point-type text in everything from headlines and copy blocks to logos and other objects.
To allow further editing, go to the selection panel located at the top left of your screen. A box will appear around your text. The box around your text indicates that the text got selected and is ready for editing. Pick a corner and drag to resize the text box.
You can also add more text by clicking and dragging in the document to create a new text box. The Type tool will automatically create point-type text in a new layer.
Make a few edits
With your text on your artboard, you can now proceed to make text changes to the font, size, and style with a few clicks. Drag across your text, or press Control+A (For Windows) or Command+A (For macOS), to select it. Then, go to the Character panel located on the right side of your screen.
You’ll find the wide variety of fonts that Adobe Illustrator comes with at the top of the Character panel. To change the font, simply click on the drop-down menu and choose the font you want.
You can also experiment with different font styles like bold or italic by clicking on the respective buttons on the Character panel. To change the size of your text, enter a new value in the Font Size field or use the slider.
Explore more font options
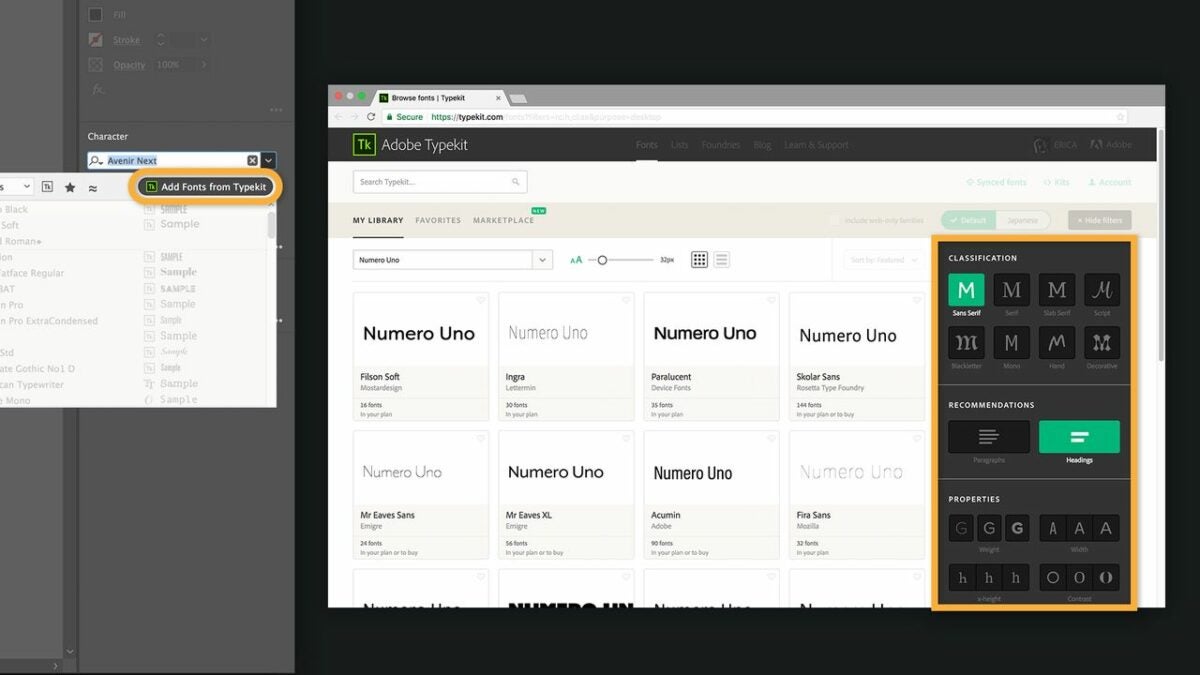
To maximize the potential of your project, it is important to explore as many font options as possible. You can easily change Adobe Illustrator text font to match the look and feel of your document. This is where you can use the Adobe Fonts library that comes free with your Creative Cloud subscription. This library offers more than 2,500 font families that you can sync to your computer.
To access Adobe Fonts in Adobe Illustrator, go to the Character panel and click on the font drop-down menu. Select More Options from the list. A new window will appear with a search bar to type in the name of the font you want to use.
Select the fonts you want to add to your library and click Add to Library. The fonts will now be available in Adobe Illustrator. There are also many free and paid font libraries that you can explore. Some of these include Google Fonts, DaFont, and Font Squirrel.
Work on the letters
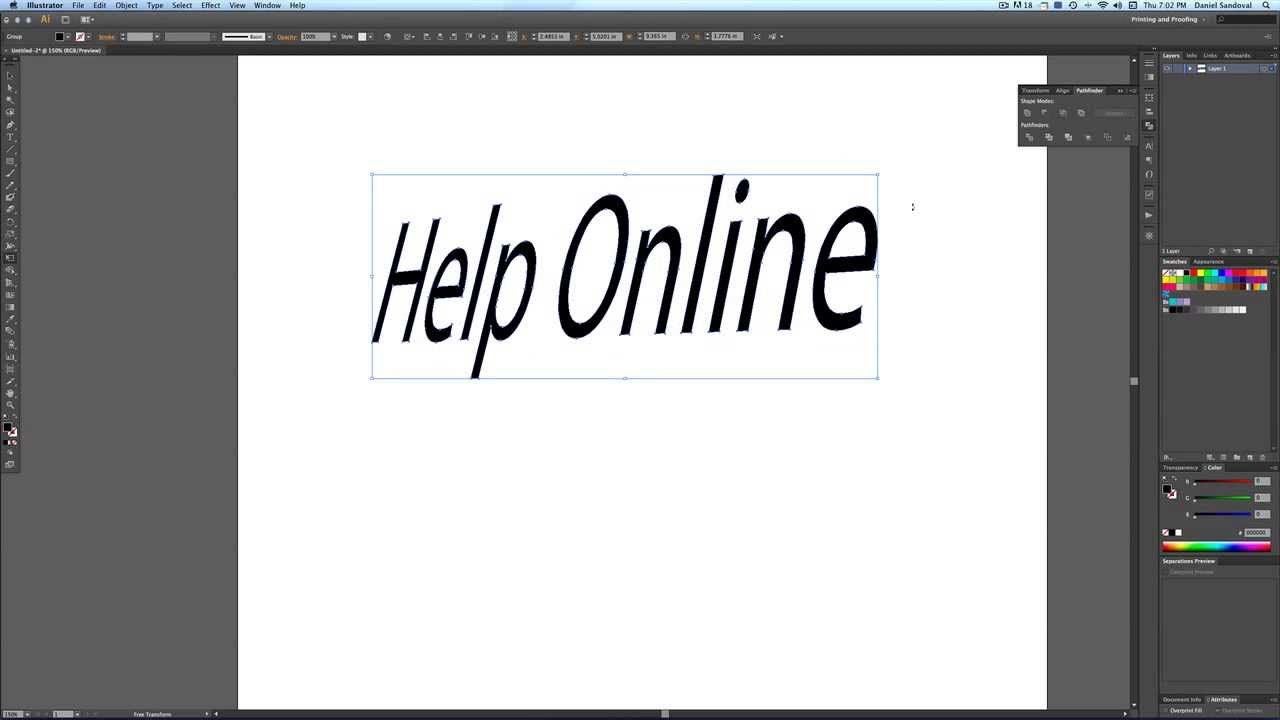
Now that you have changed the text font in Adobe Illustrator, you can start adjusting the individual letters. To do this, go to the Layers panel located on the right side of your screen.
Click on the layer that contains your text to select it. Then, click on a letter to choose it. You will see a box around the letter with a blue outline. The box indicates that the letter got selected and is ready for editing.
Simply click and drag it to the desired location to move the letter. To change the size of the letter, go to the Character panel and enter a new value in the Font Size field or use the slider.
You can also change the color of the letter by clicking on the Color panel and choosing a new hue. You can also add a stroke to the letter. Go to the Stroke panel and select width and color for the stroke of your choice.
There are many other things that you can do to edit individual letters. Experiment with different options and see what works best for your project.
Save your work
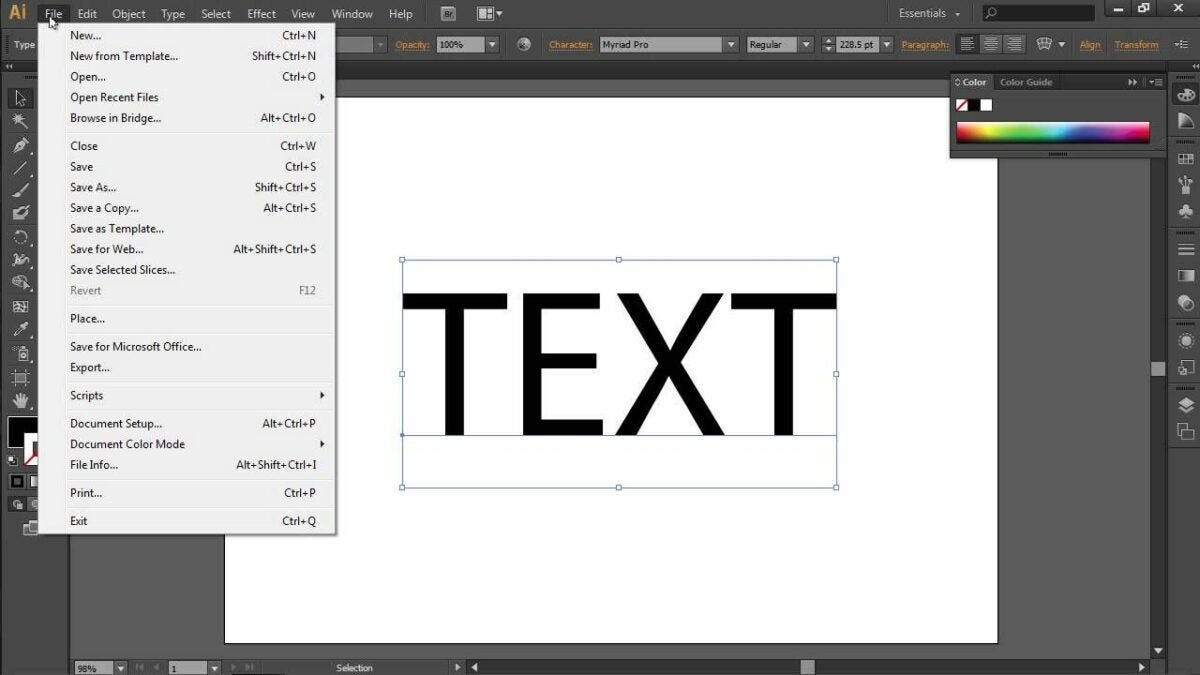
When you are happy with the changes you have made, it is time to save your work. To do this, go to File > Save As (give it your desired name) and choose a location for your file. Make sure to select Adobe Illustrator from the Format drop-down menu.
Click Save, and your file will get saved as an Adobe Illustrator document. You can now close the file and open it at any time to continue working on it.
With these tips, you should be able to change text fonts in Adobe Illustrator with ease. Try out different fonts and see which one best suits your project. Remember to have fun and be creative.
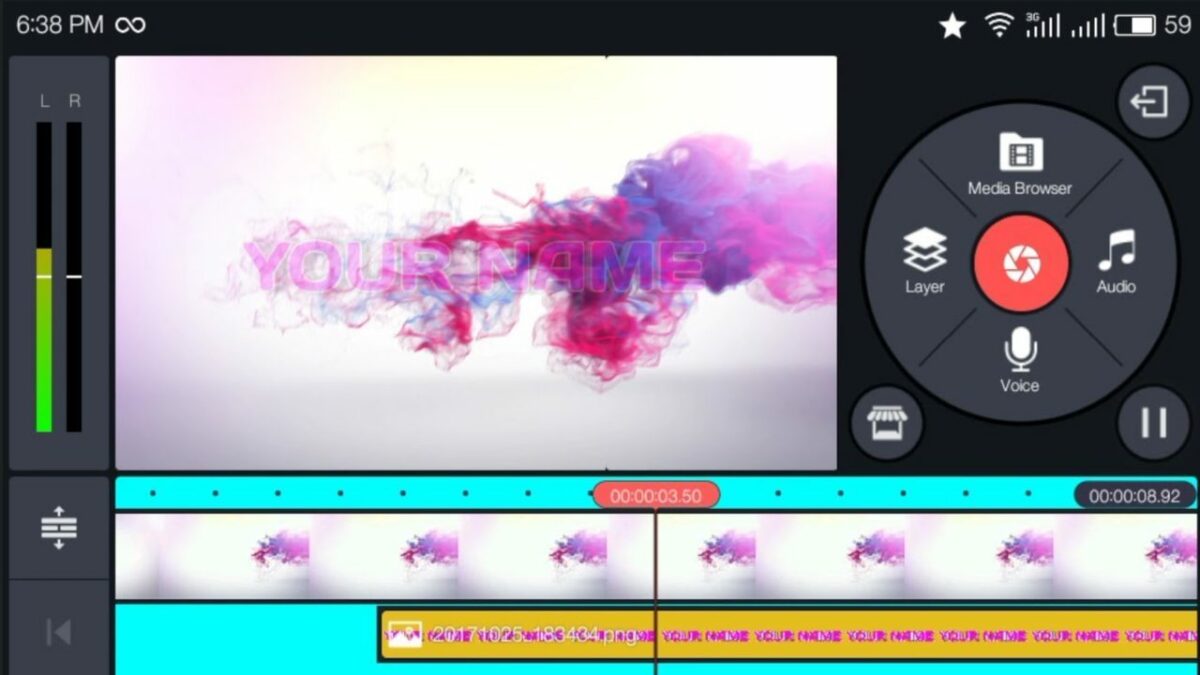
KineMaster is a versatile tool for creating and editing videos with your PC or mobile device. Both Android and iOS users can enjoy the easy-to-use interface that relies on simple phone controls and foolproof templates to get video content off the ground. As for PC users, Windows provides the best experience on desktop. Of course, the reason you edit video footage in the first place is to eventually share your creation with as many people as possible. Luckily, KineMaster allows you to easily export your .mp4 videos to other popular platforms and services.
Before you can export videos from KineMaster, you must have the app and at least one .mp4 file to transfer. You can create a .mp4 video with KineMaster if you do not have one already. Otherwise, you can open existing .mp4 files from your device with KineMaster to make any necessary changes to the video before exporting.
Use the share feature
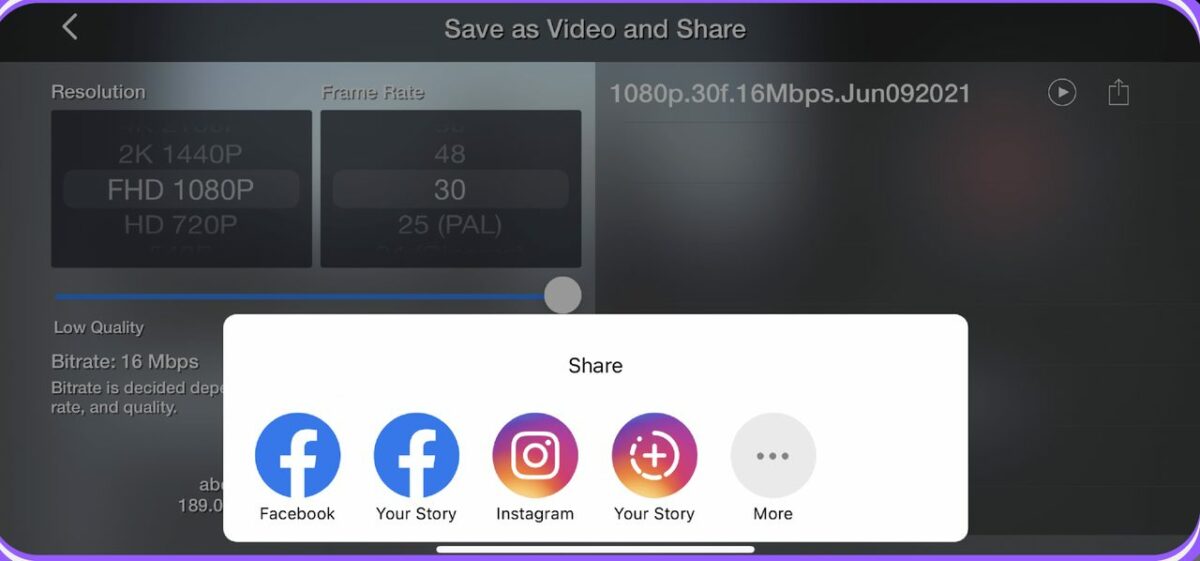
Like most modern apps, KineMaster allows you to share your work with just the press of a button. With a file selected, click the share button in the settings panel. The share button icon has the appearance of three dots linked with two lines. After clicking the share button, you are greeted with several options on where you want your files to go.
The most popular services like Facebook and Instagram are front and center. However, you can click the more button with the three dots to be taken to the full menu of exportable platforms. Hover the mouse cursor over your desired export location, and click on it to finish the first step.
Make final edits and adjustments
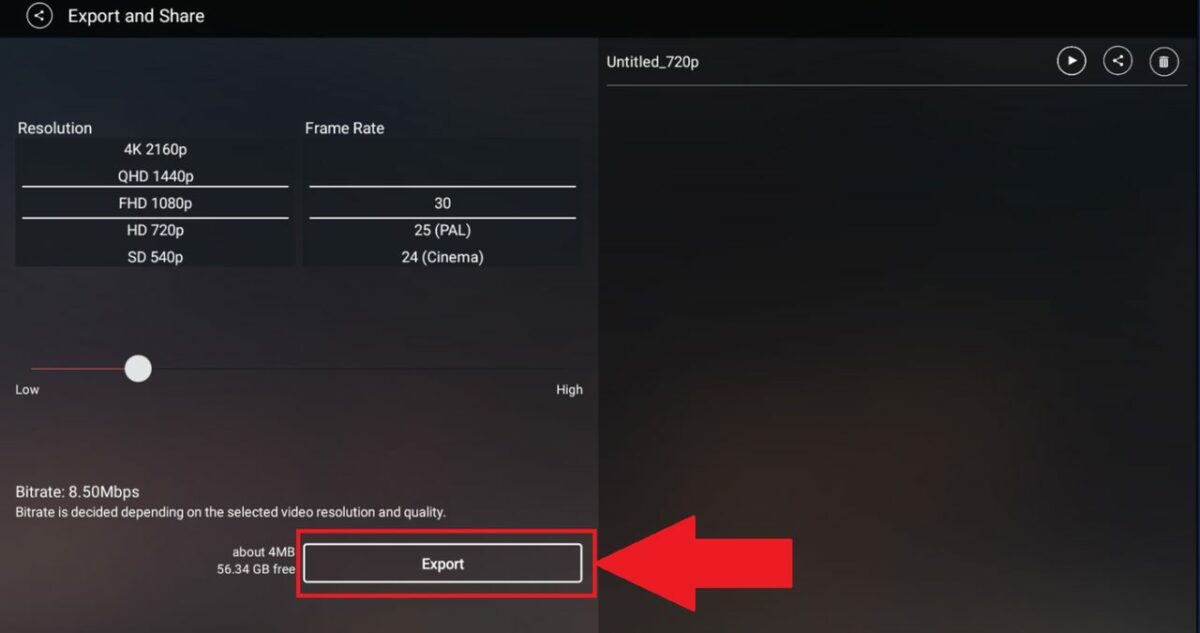
A selection of settings for your video file appears after hitting share. KineMaster allows you to adjust video resolution, bit rate, and playback frame rate to name a few. You can enhance the resolution up to 4K and play the file at 60 fps if your device is powerful enough to facilitate high-end configurations. Keep in mind that the further you enhance the specs from the video’s original settings, the more likely you are to encounter issues when exporting the file. This means you should shoot any video footage in the highest resolution possible to reduce the number of post-processing glitches that affect your project.
Export to the program of your choice
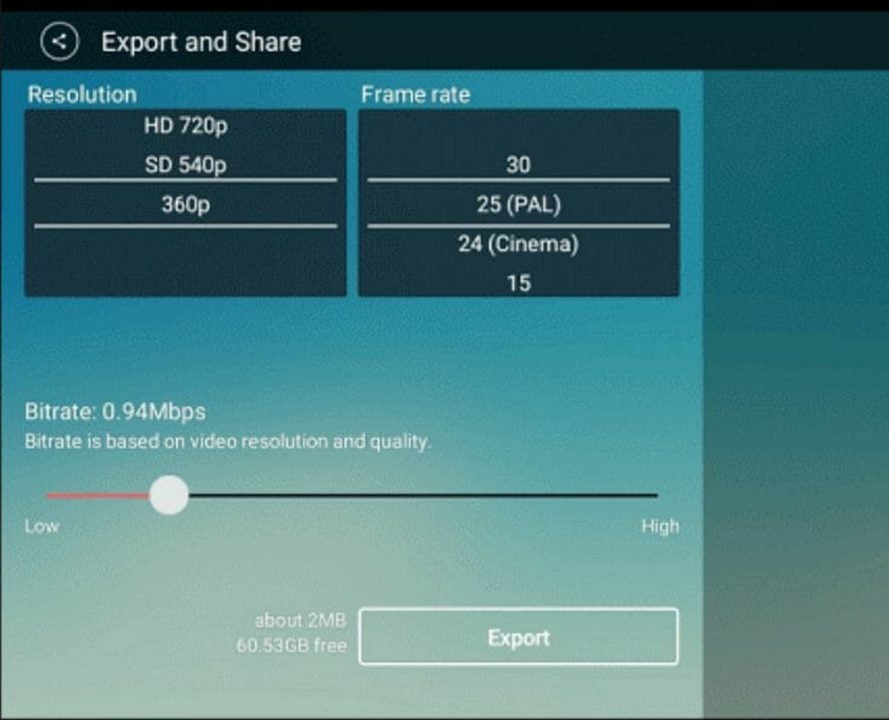
With your final settings established, you are ready to export your file. It is recommended to use the .mp4 file format, as these videos are compatible with the greatest number of platforms and services. Click on the export button that appears at the bottom of the editing menu. You can select which file format you will use on this export screen. Clicking export one more time will start the file transfer process.
Depending on the length of the video and which settings you applied for the export, you will have to wait for the file transfer to complete. Higher resolutions, frame rates, and bit rates will inevitably make the file size larger. This lengthens the time needed to complete the export process. Make sure your device has adequate power, and then, feel free to walk away for several minutes. After a few small tasks around the house, your video file should be fully exported.
Improving KineMaster video quality
Now that you know how to transfer your video files, you may notice that some KineMaster projects do not look as sharp as they would in other video editors. This is likely due to the default settings that came with the program. If you would like to learn about which settings improve video quality, check out our guide on how to fix poor quality in KineMaster.
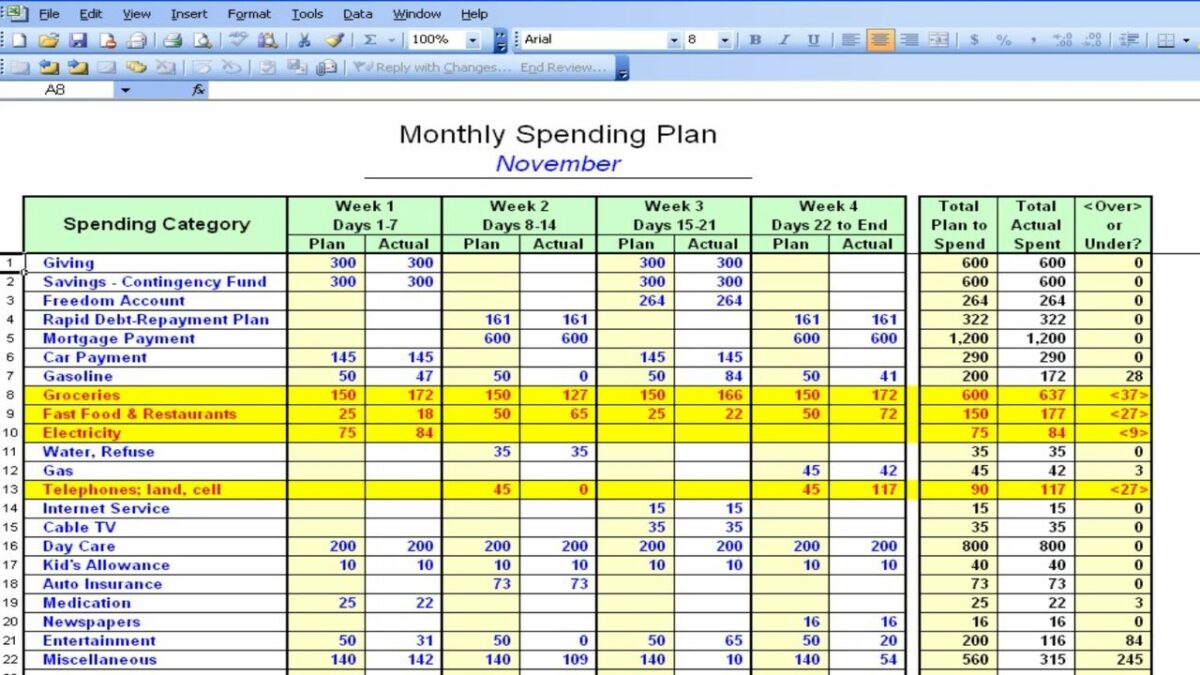
Microsoft Excel has become such a popular spreadsheet application thanks to the numerous advanced features it provides to users in the know. One of the best tricks to learn is how to add several lines into the same cell on your spreadsheets. Adding additional data to a cell can be an excellent way to stay organized while making your information readily accessible. It is also an effortless way to attach written notes to the spreadsheet.
While Excel does not traditionally offer word processing, you can use the multiple lines trick to bypass this limitation. In just four steps and a few seconds, you will be customizing your Excel spreadsheets like a pro.
Choosing a spreadsheet cell to modify
First, you will need a spreadsheet that could use some additional formatting. You most likely already have one in mind before viewing this tutorial. Good reasons to modify a spreadsheet cell include adding notes, writing long strings of characters, or to organize the data in question. Once you have a specific cell in mind click on it to select it in Microsoft Excel.
Adding new lines to the cell
Modifying the cell is as simple as holding down the alt key and pressing enter. If done correctly, your text cursor will start blinking on the line below. Like in any word processor, you are now free to type directly below the previous row of information. You can repeat the alt + enter technique as many times as you need on any given spreadsheet cell.
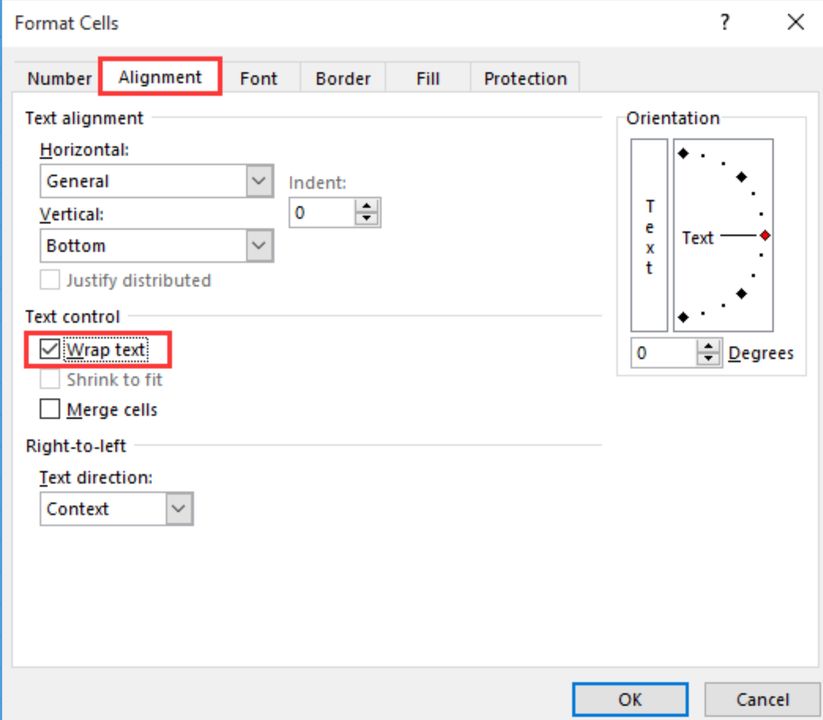
If you wish to dive deeper, there is a more comprehensive way to achieve comparable results using the wrap text feature in Microsoft Excel. This is perfect for when your cell already has a bunch of text without any of the nice formatting. Right-click on the cell you wish to modify and select Format Cells from the drop-down menu that appears. From the Format Cells window, click on the box that says wrap text under the alignment tab. Be sure to confirm your changes by clicking on OK before leaving this window.
Adjusting the cell’s height
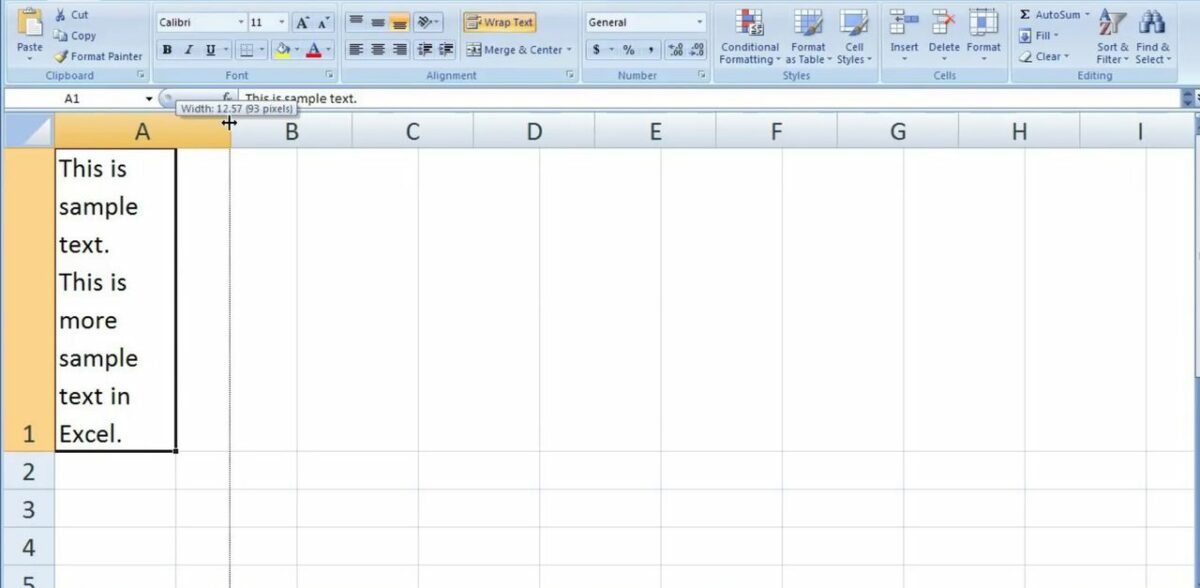
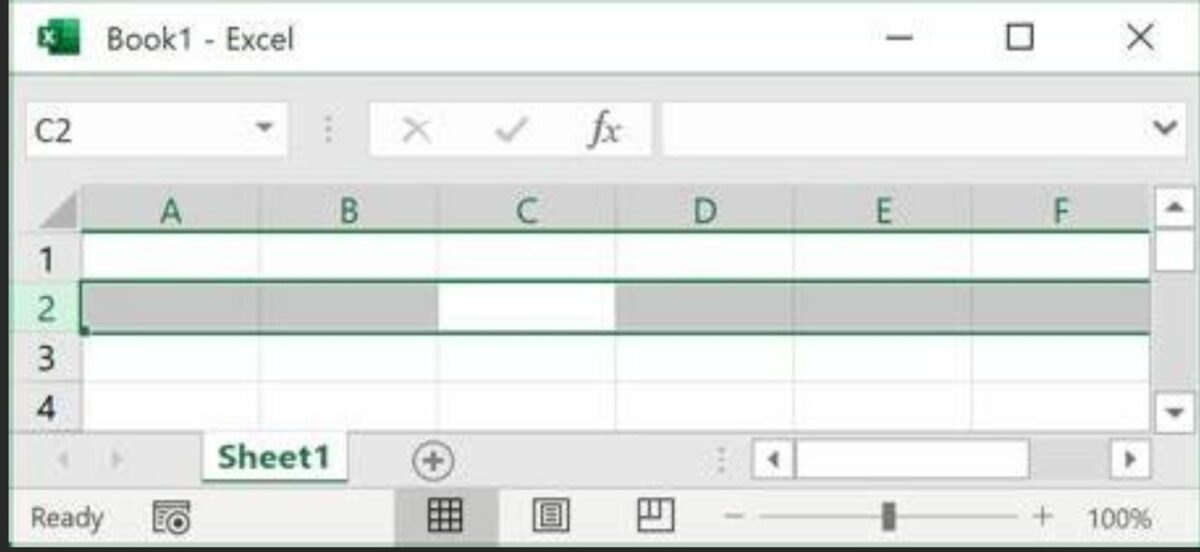
As you continue to add more lines to the same cell, you may notice the formatting start to falter. Luckily, you can readjust the height of any cell to complement your recent changes. To do this, look on the left side of the screen for the panel that displays which row is selected in Excel.
In the picture above, the selected row is row 2. This is shown by the box highlighted in green. If you wish to make the cell larger, click the line between rows 1 and 2 and drag the mouse cursor up until the row is resized to your liking. To make the cell shorter again, grab the line between rows 2 and 3 and drag the mouse cursor down. Again, do this until the row is big enough to fit every line you added in the previous step.
Saving your progress
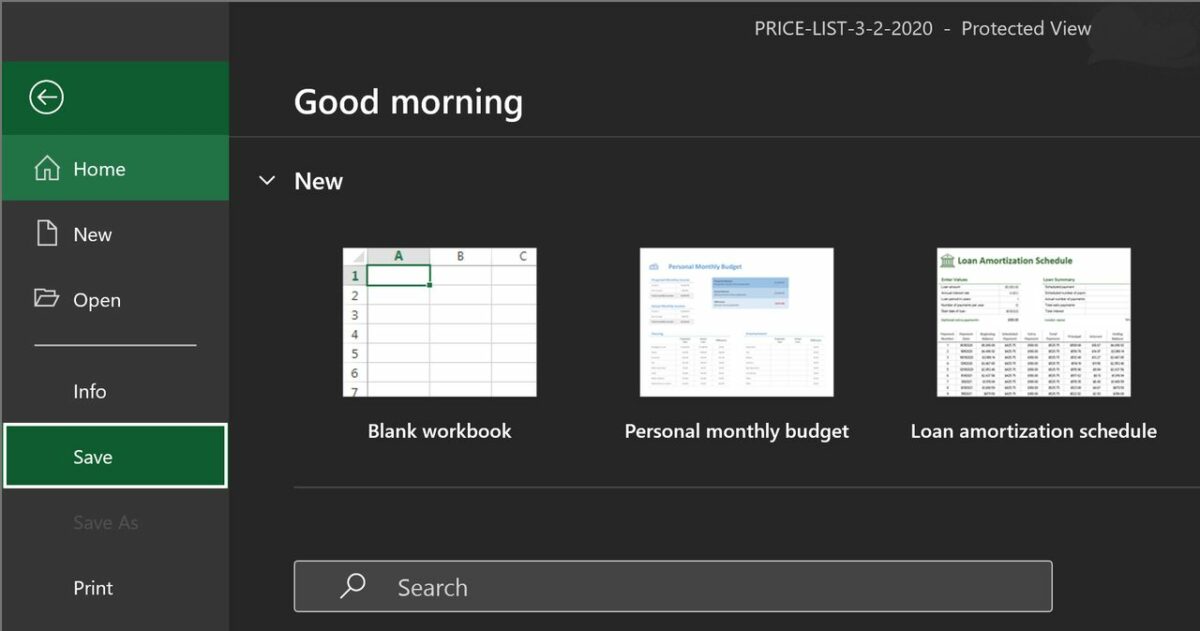
Since it is quite easy to forget to save your work when practicing a new skill, be sure to record your new progress before closing the program. It is especially important to save when you are making final adjustments before a deadline. To save the spreadsheet, click on File in the top left corner and select save on the dropdown menu that appears. Alternatively, you can click the floppy disk icon at the top of the screen if you have previously saved the spreadsheet before. After saving at least once, you can also toggle the autosave feature from the panel right next to the floppy disk icon.
Taking Microsoft Excel to the next level
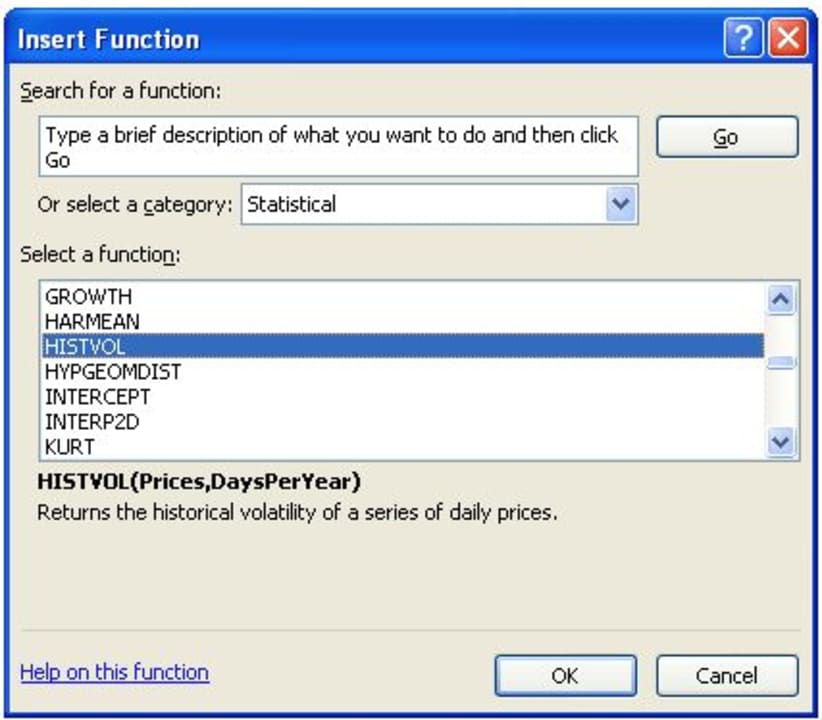
After learning how to add additional lines to each cell, the next step is to continue learning more about the advanced options available in Microsoft Excel. A wise place to start would be with the formula wizard. Don’t worry, you will not have to do any math. Instead, Excel’s formulas allow you to implement numerous exciting functions that will save you loads of time in later projects. To learn all about the formula wizard, check out our article on the subject.
When using social media apps and platforms, it is well known that everything you do is vigilantly tracked by each company involved in your activities. Twitter is no exception to this rule and leverages the promise of free service to harvest all the data users are willing to share.
While it is unfortunate that everything you do on Twitter is monitored, at least the platform offers a chance to view the personal information that has been collected so far. Not only can you view a readout of your data, but you can also download a copy for your offline records.
Finding your collected data on the mobile app
The method for accessing your data is slightly different depending on the device you are using. For mobile devices, head to the settings menu, and select the privacy and safety tab. Near the bottom of this tab is the data and personalization options. Tapping this option provides another menu. From this list, select privacy settings, and tap the button labeled see your Twitter data to view your profile.
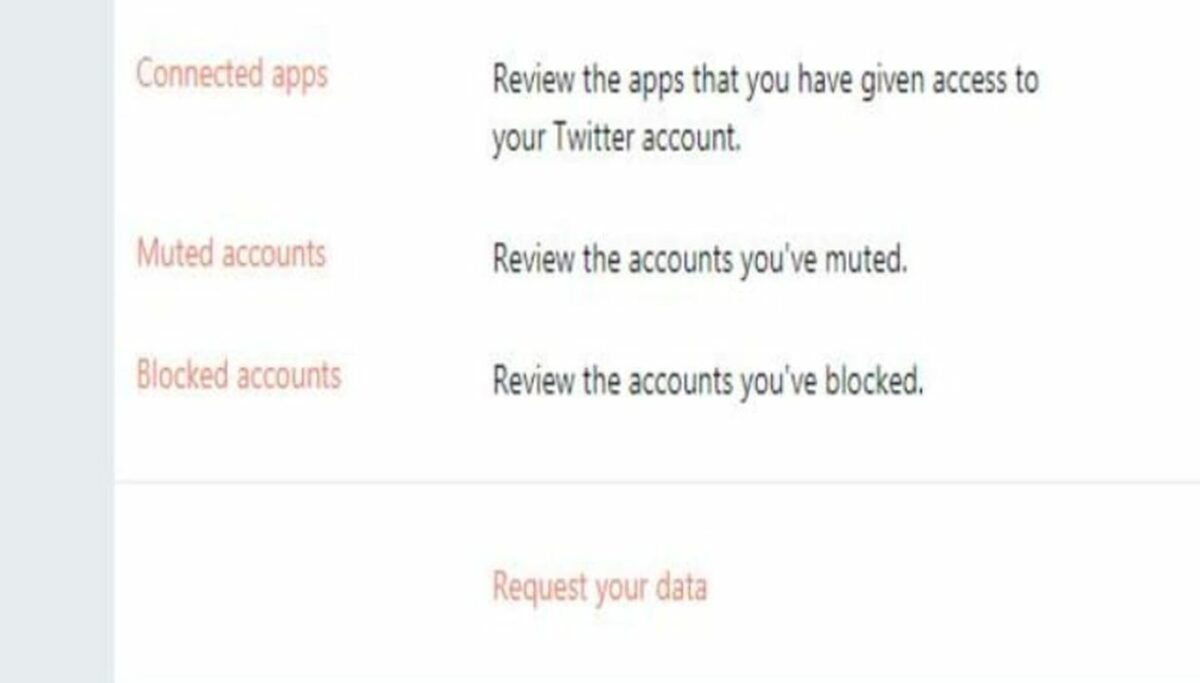
The profile features multiple tabs to choose from. Click on the your data tab to view a record of what Twitter has collected since you created your account. This includes the browsers, apps, and devices that are all associated with your profile. Each time you log in to Twitter, it tracks the exact methods you used. This tab also tracks your tweet activity, which users are muted or blocked, your targeted topics of interest, and which external apps have access to your account. Finally, you can also view the information Twitter shares with its advertising partners.
Finding your collected data on the desktop interface
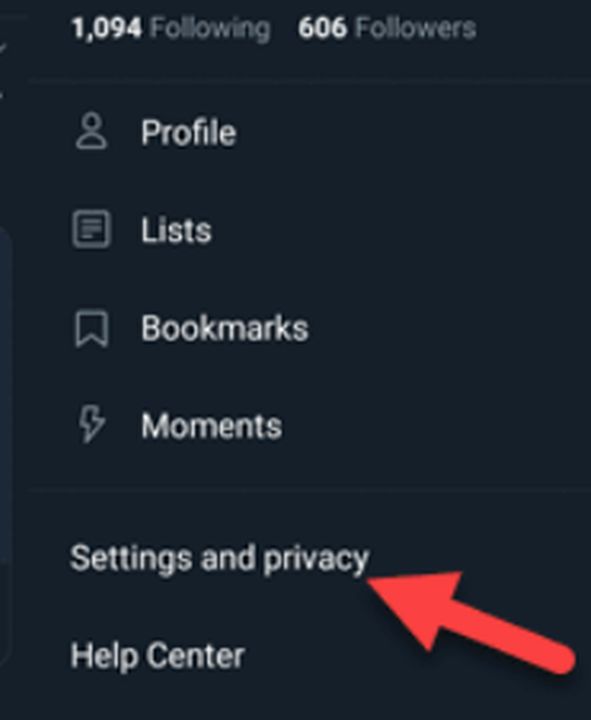
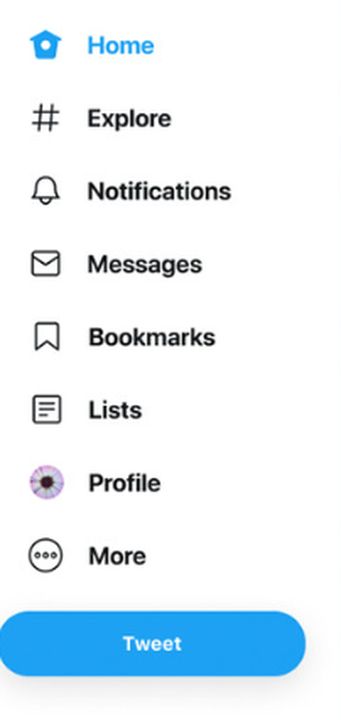
The process of accessing the personal information Twitter has stored on you is much simpler on desktop. Ensure you are logged in, and click the more button on the main homepage. On this page, click on settings and privacy. From there, click on the button labeled your Twitter data to open a new page. If you have not entered your password in a long time, you will be asked to do so to verify your identity. Upon accessing the page, you will see the same personal information readouts as on your mobile device.
Note that some of the advertising information will be different from the mobile readout. This has to do with your browser cookie configuration and what you have previously searched on each device. You can tell what topics you have searched for on each device by observing the unique list of interests that is logged on your machine.
Downloading a copy of the personal information Twitter collects
The best way to keep track of what Twitter knows about you is to keep extensive records on your devices. You can have a report emailed to you and download it from there. To do this, scroll all the way down to the bottom of the your Twitter data page on mobile or desktop. Here, you will find the request your data link. Clicking this will start the automated process of emailing your report.
After a few hours, the report will arrive at the email address associated with your Twitter account. Check your spam folder if you do not see it in your inbox. In addition to all the information listed in this article, you also get a log of every tweet you have ever published. This list is far easier to navigate than the frontend Twitter platform, especially when you go searching for tweets from several years ago or older.
Safeguarding your data
Now that you have firsthand knowledge of the sheer volume of personal information social media platforms collect, you will understand why protecting your privacy is paramount. An effective way to prevent tech companies from harvesting your data is through the use of a VPN service such as Hamachi. While you cannot stop Twitter and other apps from collecting data when you directly use their services, a virtual private network will prevent these platforms from tracking you as you browse unrelated corners of the internet.