The top 5 ways to personalize and improve your Windows 11 experience

Windows 11 is among the most versatile operating systems yet. The updated operating system offers many personalized settings to change visual elements and improve your experience.

While Windows 10 was highly customizable in its own right, Microsoft’s latest operating system provides several new unique elements.

Personalize the desktop background on Windows 11 OS

You’ll be seeing your desktop background every time you use your computer. So why not take a few seconds to update personalize it rather than sticking with the stock image. To choose a new desktop background, follow these steps below:

  • Open Settings.
  • Click on Personalization.
  • On the right side, select and click Background.
  • Personalize your background by choosing the either the Picture, Solid color, or Slideshow options.
  • If you just want a single image as your background, select Picture and click Browse photos to select an image from your PC’s folders. You’ll also see a few suggestions under Recent photos.
  • If you’d rather have a plain color background, select Solid color. You’ll see several hue options appear under Choose your background color. Alternatively, you can select another hue under Custom colors.
  • Select Slideshow if you want to have a rotating batch of images appear as your background. Click Browse to select images to add to your background slideshow. You’ll also see options appear for how often the images will change and if you want the picture order shuffled.
  • If the dimensions of an image are out of proportion with your screen, select the Fill option. This adjusts the image so that it fits the entire screen. You can tweak the picture further by exploring features like Stretch, Fit, Tile, Center, and Span for a more custom look.
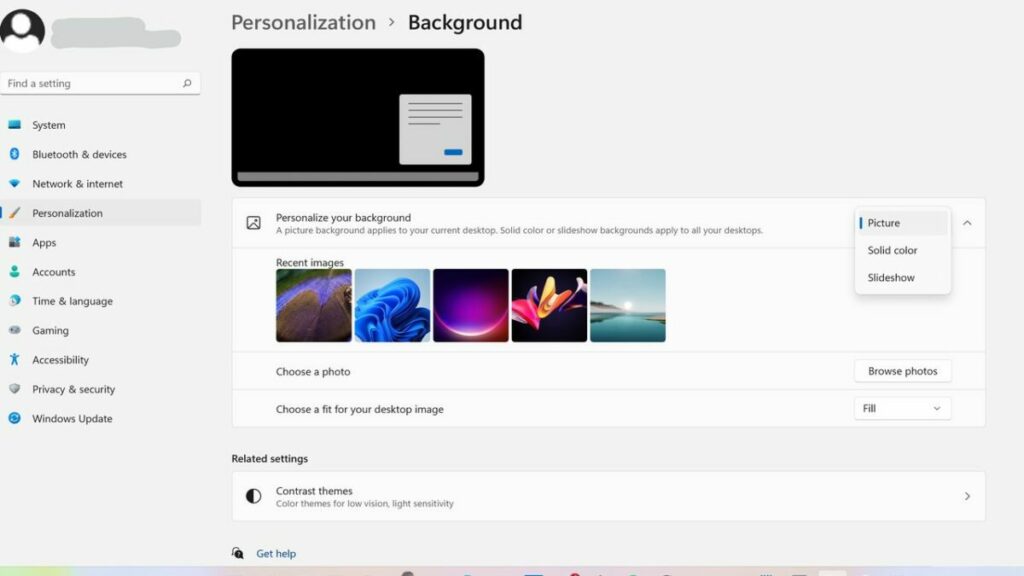
Navigate to Settings>Personalization>Background to update your background image to a picture, solid color, or slideshow

Here’s a shortcut to updating your background that will bypass the above steps:

  • Find your image of choice in your folder or on your desktop.
  • Right-click the image.
  • Chose Set as Background Image.

Customize different backgrounds for each of your virtual desktops

Unique to Windows 11 is the ability to configure different backgrounds for every additional desktop (formerly called virtual desktops). Previously, you could only choose one visual scheme for all backgrounds. This updated feature for Windows 11 is convenient because it helps users quickly distinguish one desktop from another.

Use these steps to set a different background for each of your desktops:

  • Open Settings.
  • Click on Personalization.
  • On the right side, select and click Background.
  • Personalize your background by following the aforementioned instructions for tip one.
  • Right-click your desired image and choose Set for desktop.
  • Repeat this process for each one of your virtual desktops, assigning each one a unique image or theme. You may set one image for all desktops, as well, by right-clicking and choosing this option from the submenu.
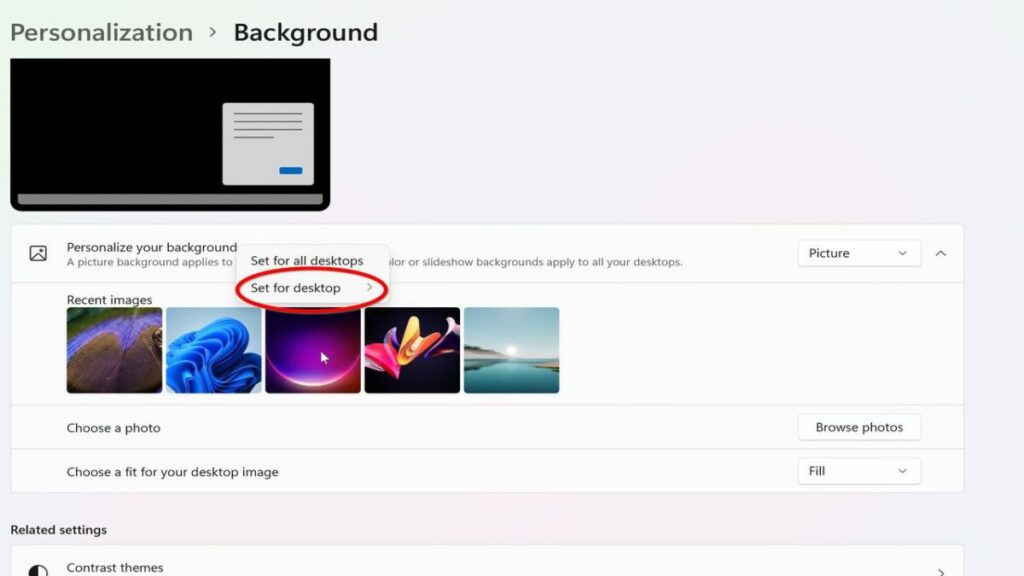
It’s much easier to distinguish between desktops if you give them each their own background, a new feature for Windows 11.

Configure your desktop themes

If you want to improve the look of your desktop but don’t have time to pick out wallpaper, colors, and sounds, select one of the premade Windows 11 themes. Your theme is important as this will affect your overall experience and how you’ll interact with Windows. Here’s how to configure themes:

  • Open Settings.
  • Click on Personalization.
  • Select Themes, located below Colors.
  • Under Current theme, you’ll see different premade themes with various wallpaper, sounds, and color combinations.
  • Want something a little more interesting? It’s also easy to add more themes from the Microsoft Store. Click on Browse themes to pull up any array of installable theme apps like Rambling Pathways and Animal Mothers. Most of these apps are free.
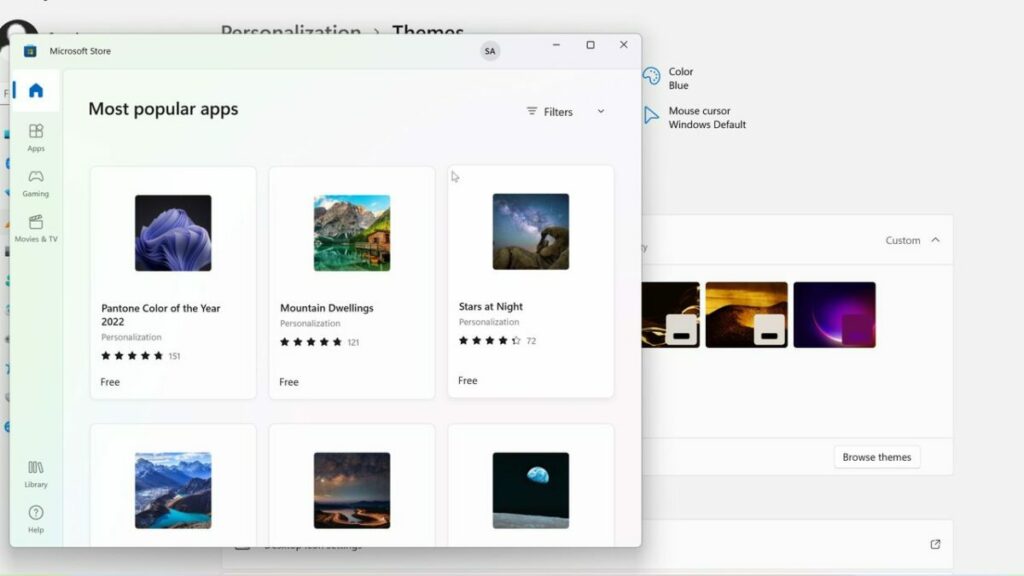
Take advantage of the cool desktop themes offered in the Microsoft Store.

Pair your phone with Windows

In Windows 11, you’ll use the Your Phone application to pair your phone with your PC. While it does not work with iPhones, the app is very handy for making calls and sending messages on Android phones. Here’s how to set up Your Phone:

  • Open Start or Search from your Taskbar.
  • Type Your Phone in the search bar and launch the program.
  • You’ll need to pair your phone if this is your first time using the app. To do this, select Link new device under My Devices.
  • Once pairing is complete, you’ll see an interface that’s integrated with your phone. It will include options for Notifications, Messages, Photos, Calls, and Contacts.
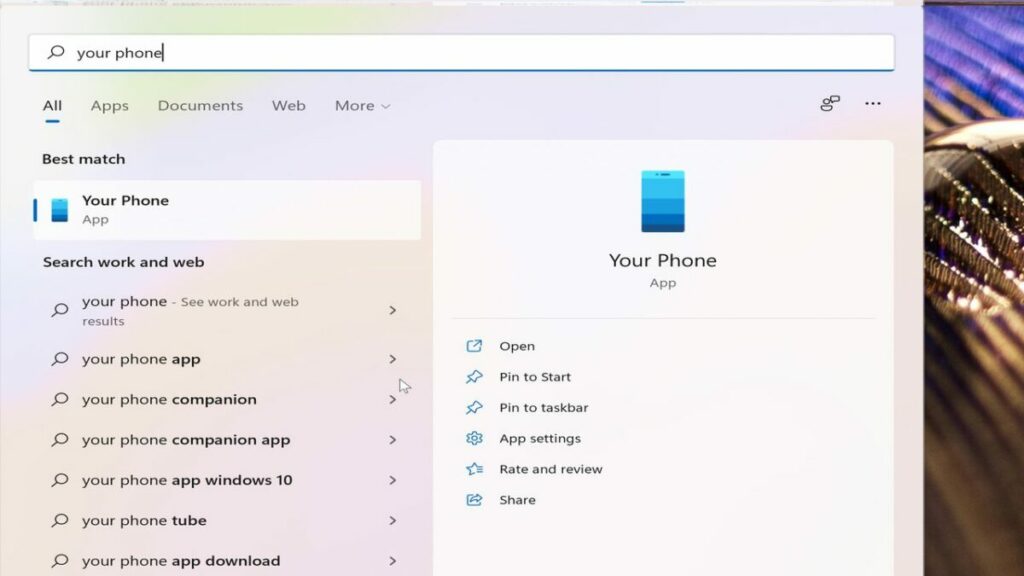
With the Your Phone app in Windows 11, you can pair any Android phone to your computer.

Set up Windows Hello to avoid re-typing passwords

If you’re tired of entering your password every time you want to log in to your computer, try setting up Windows Hello. It takes just a few steps to set up this convenient face recognition app:

  • Open Settings.
  • Click on Accounts.
  • Select Sign-in options
  • Click on the top option, Facial recognition (Windows Hello)
  • In the dropdown that appears select the option to set up facial recognition. A window will pop up that scans your face once you type in your password.
  • If you wear glasses, select Improve recognition and do a scan without your spectacles.
  • Select Automatically dismiss the lock screen if Windows recognizes your face. This will prevent unnecessary password typing to log in.
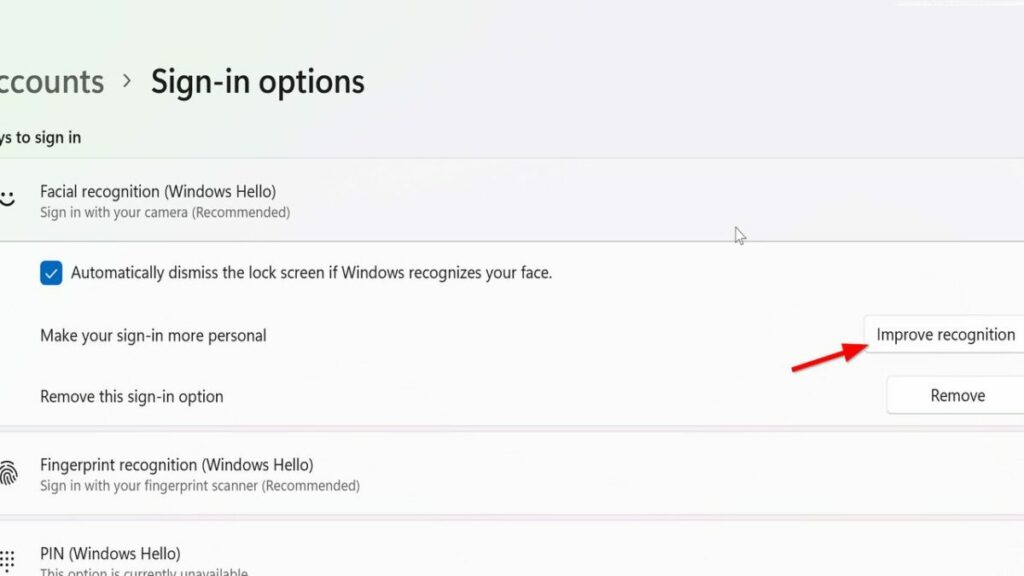
If you’re having difficulty using the Windows Hello facial recognition, select Improve recognition to re-scan your face.

These are only five ways among several to get you started with improving your Windows 11. While there have been some changes to the OS, you should have no trouble personalizing the new Windows 11 if you’re used to Windows 10.
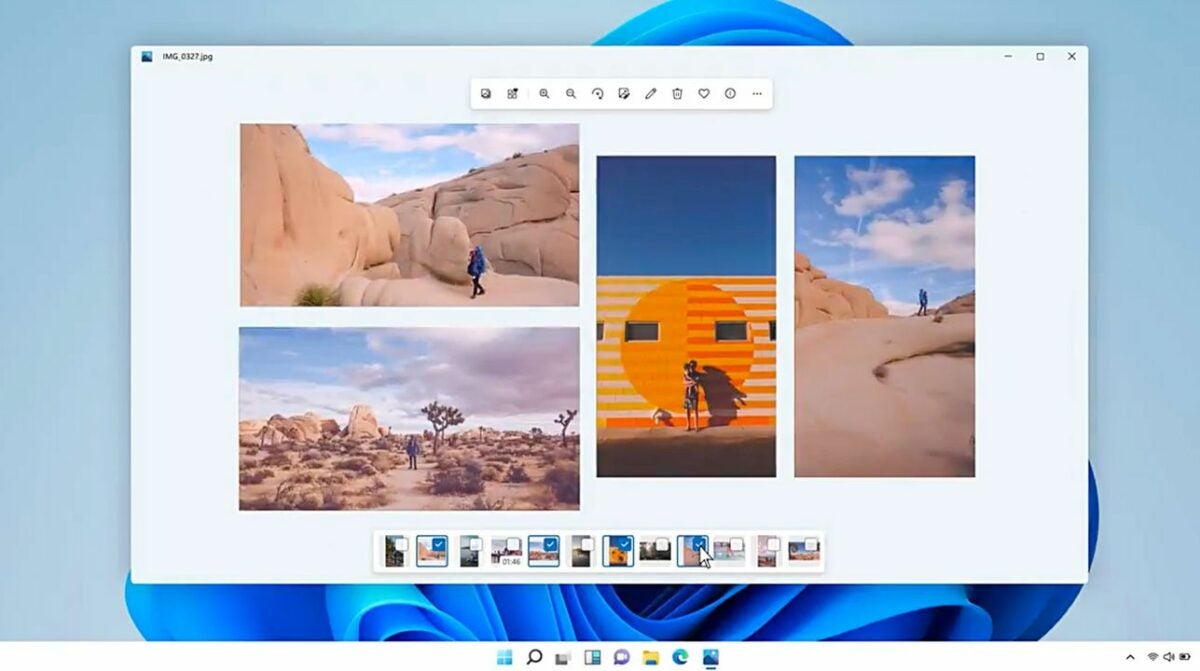

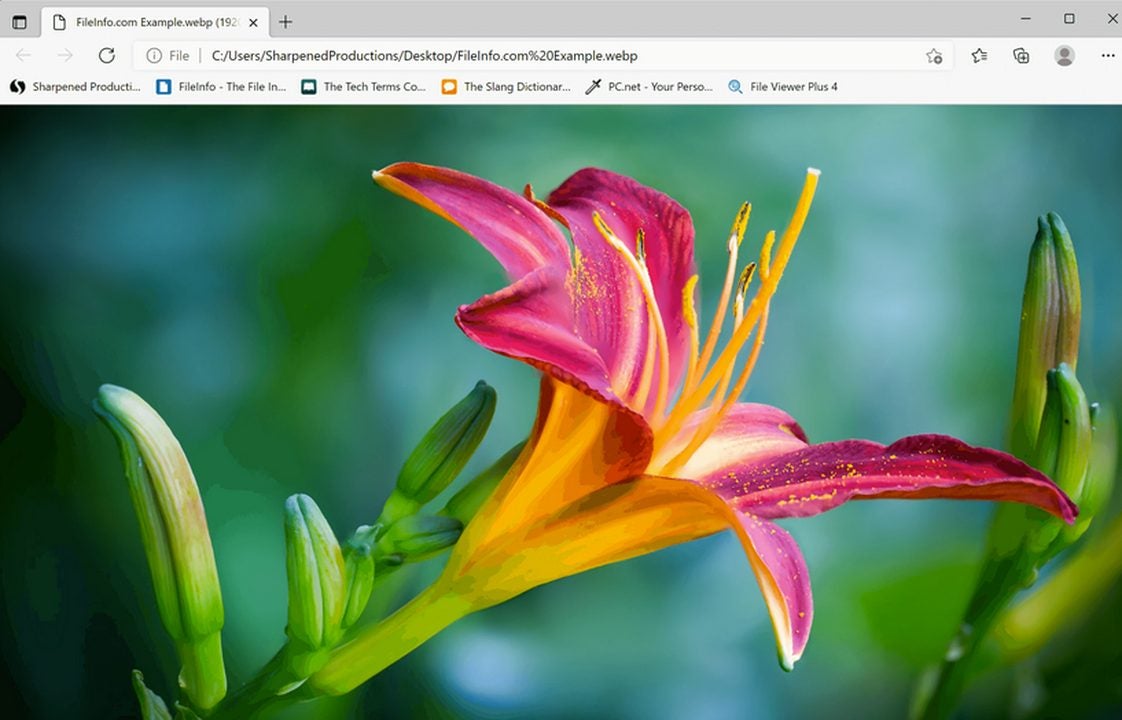
4 easy ways to open WebP images in Windows 11

When you’re surfing the web for images, downloading the typical JPG or PNG file from the primary modern browsers is relatively simple. You just right-click the image before selecting save or dragging and dropping it to your desktop. However, Google has recently introduced a loss image compression file called WebP that requires slightly more effort to open on a Windows device.

Windows 11 DOWNLOAD

Google Developers describe WebP files as roughly one-third smaller than the typical JPEG image encountered online. Google’s WebP format is meant to help website developers and owners reduce their bandwidth usage and enable faster page load times. Yet, the two main Windows 11 image viewers still don’t recognize the new file format. The following four methods will give you a set of easy options for opening WebP format files in Windows 11.

  1. Open a WebP file with your web browser

    Locate a WebP image file and drag and drop it into a new browser tab to open it.

    The primary web browsers like Chrome, Firefox, and Microsoft Edge support the WebP image format. Finding a WebP file online shouldn’t take long. And this first approach shows you how to use the browser itself to open a WebP file as an independent link.

    Once you’ve located a WebP image file, use your mouse to drag and drop it into a new tab at the top of your browser. The image will appear, and this is the quickest way to open a WebP image on a device running Windows 11. The approach, of course, requires a network connection to display the file.

  2. Install the WebP Codec to open your WebP files in the Windows Photo Viewer

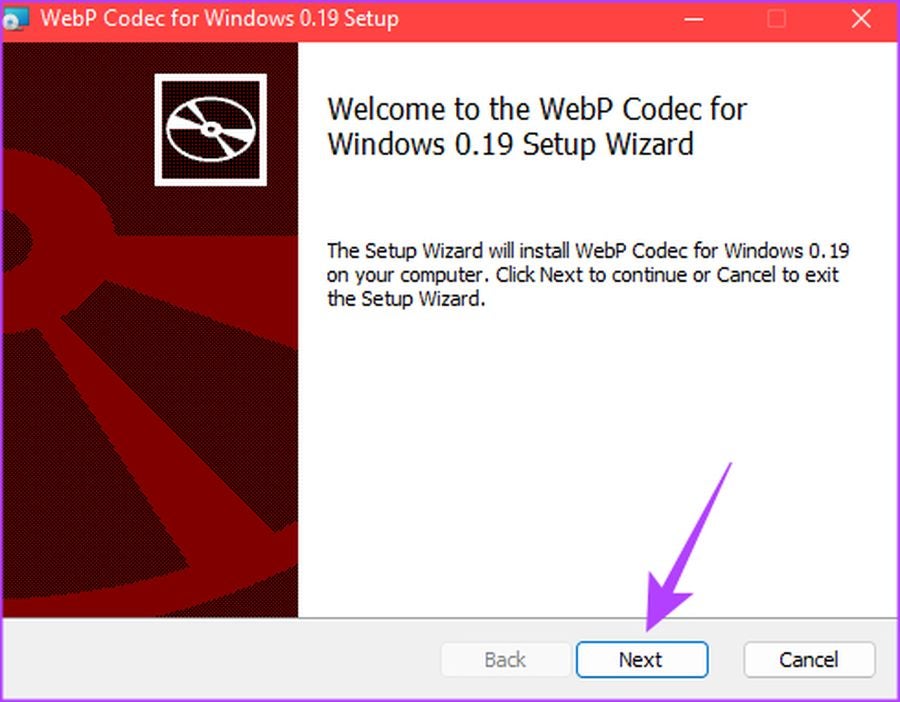
    Install WebP Codec by Google to allow your default image viewers in Windows 11 to open WebP files.

    There may come a time when you need to open multiple WebP images on your desktop and sort through each of them independently. In this case, you can access the Windows Photo Viewer or Microsoft Paint to open the files. But the two viewers must support the WebP format first. Windows has not yet adapted to this new file format, so there is currently no option for opening WebP files by default.

    Google offers a solution for this problem in its WebP Codec. To view WebP files with your Windows 11 Photo Viewer, install the WebP Codec by Google. This add-on allows you to use your inbuilt applications like Windows Photo Viewer and Microsoft Paint.

  3. Open your WebP file in the Windows photo app and replace the .WEBP extension

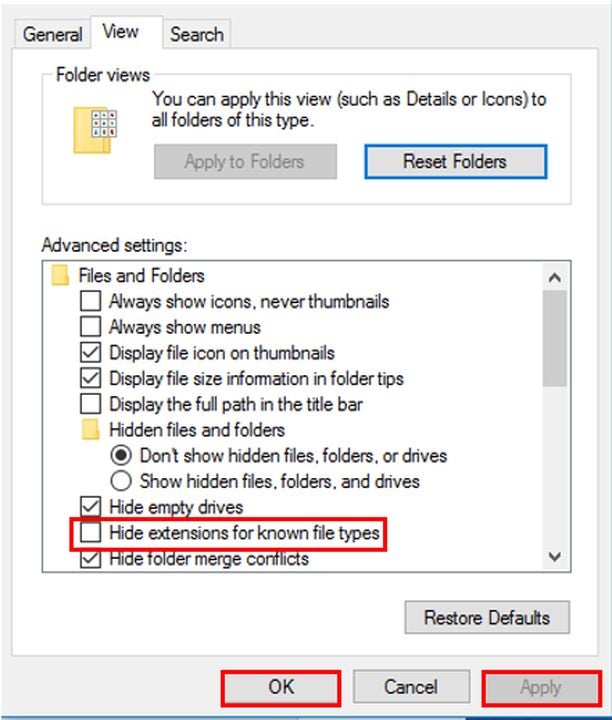
    Download WebP files by changing the file extension in your advanced settings.

    If, for some reason, you can’t download the Google WebP Codec to your device, you can still open the file using the Windows 11 Photo Viewer or Microsoft Paint. This approach requires you to alter the File Explorer Options.

    To open a WebP image on Windows 11 under this method, find your search bar and type in File Explorer Options. Next, click on the folder titled File Explorer Options.

    After opening File Explorer Options folder, select the View tab. Within Advanced settings, locate Hide extensions for known file types and disable this option by unchecking it. After that, click Apply and then OK to activate and save your changes.

    Now, locate your WebP file, right-click on it, and choose Properties or type in Alt + Enter to pull up this function. Replace the .WEBP extension trailing the file name with .JPG, .JPEG, or .PNG. After you made this change to the file extension, select OK and then Yes to bypass the confirmation prompt.

    Next, use your Photo Viewer to open the file you just renamed by right-clicking on the image and selecting Open > Photos. This method lets you view WebP images on Windows 11 without installing the WebP Codec by Google or adding a file converter.

  4. Download a file converter to open WebP images in the Windows image viewer

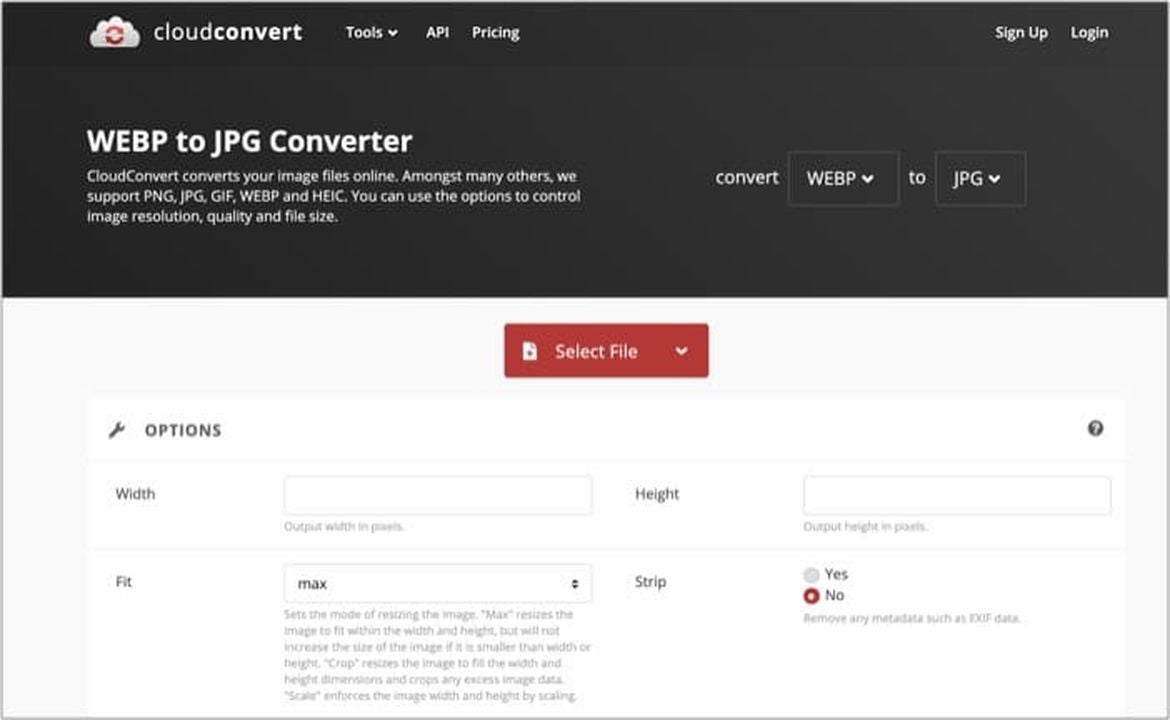
    Download your preferred file converter to switch the WebP image's output format to a JPG or PNG file.

    The last reliable method for opening WebP image files in Windows 11 you can try is to download a free application like cloudconvert and switch them over to JPG files automatically.

    Download and access your file converter before uploading your WebP image. Next, click Convert, and choose your output file format type.

Managing your WebP image files on Windows 11

WebP files aren’t especially challenging to deal with on Windows 11 as long as you’re prepared to complete a few additional steps. One can undoubtedly envision a future update to Windows that eventually incorporates a default option for viewing WebP image files, but there’s no telling when. In the meantime, the four approaches listed above give you a few simple options for completing the task. If Windows updates interest you, read more about the latest Windows build 25211.

How to merge layers in Photoshop: 5 ways

Layers in Photoshop have several valuable applications. And this unique feature is primarily what distinguishes the software from the basic photo editing application included with your standard operating system. Layers allow you to do things like composite multiple images into one document, overlay text, and introduce vector graphic shapes to your image without significantly degrading your original file.

Adobe Photoshop DOWNLOAD

Understanding how to manage the Layers in Photoshop is the best approach for maximizing the application’s impressive design capabilities. Familiarizing yourself with Layers will also help you deliver stunning, professional-looking results after minimal effort. In this brief tutorial, you’ll learn how to merge layers in Photoshop documents. First, make sure you download Adobe Photoshop.

  1. Merge multiple layers from the layers menu

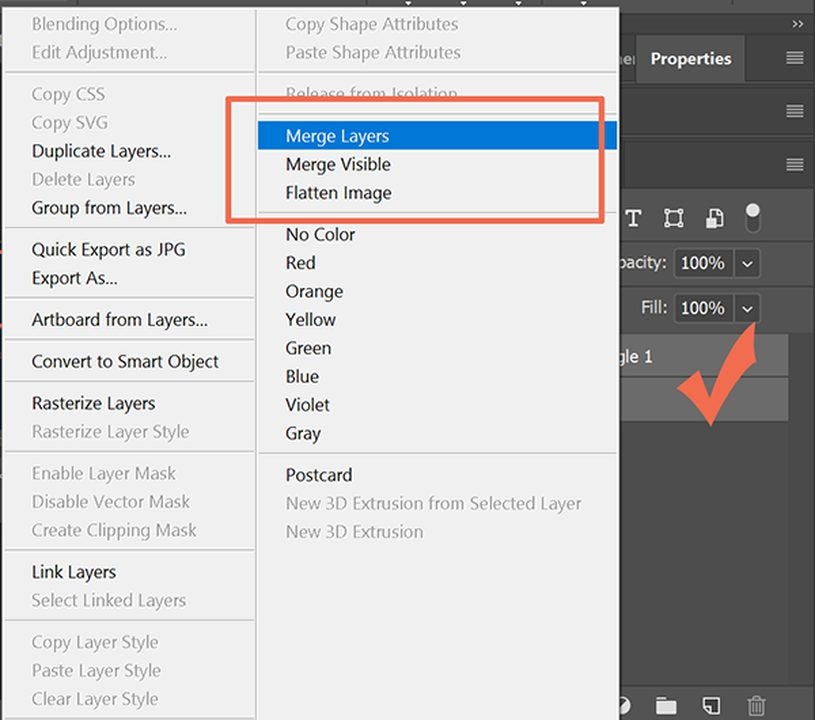
    Merge multiple layers from the toolbar at the top of your screen in Photoshop.

    Any Layers-based project in Photoshop will, by definition, have at least two layers. Adobe engineered the program this way to let you work with specific elements of your image without changing the others. This type of workflow is considered a non-destructive approach to digital image editing because it helps preserve your file’s original characteristics.

    Once you’ve finished all your edits in your project, you’ll need to merge any layers that no longer require individual attention. This point could mark the completion of your project or just a specific stage. Merging the multiple layers ultimately reduces the overall size of your image file and makes your Photoshop project easier to manage.

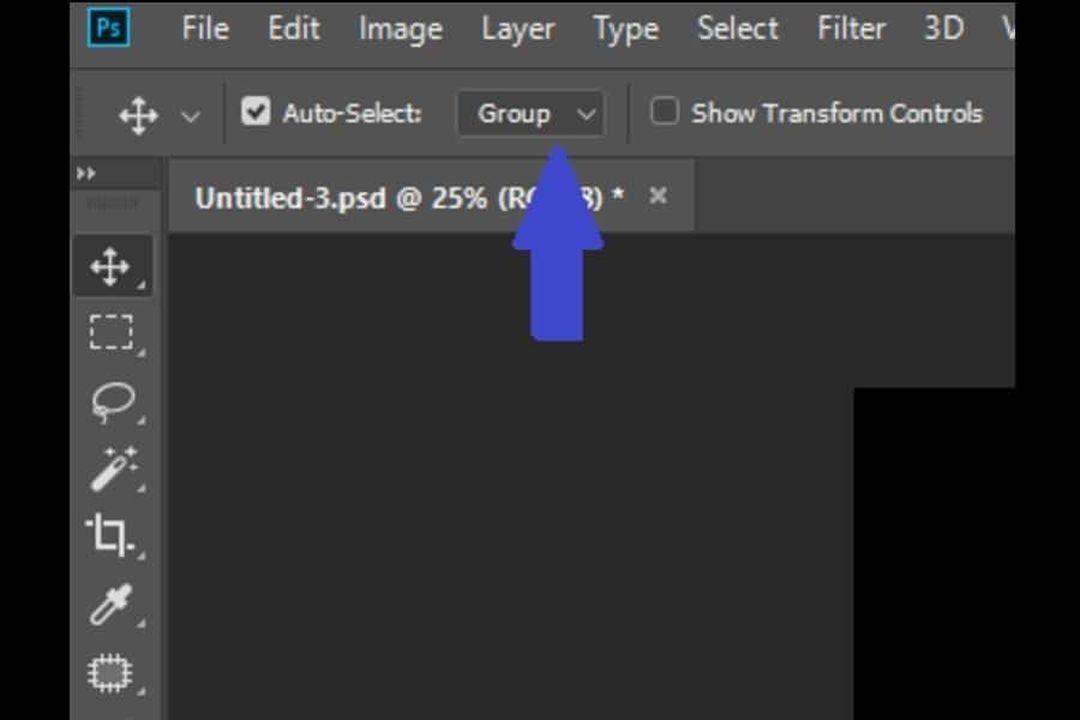
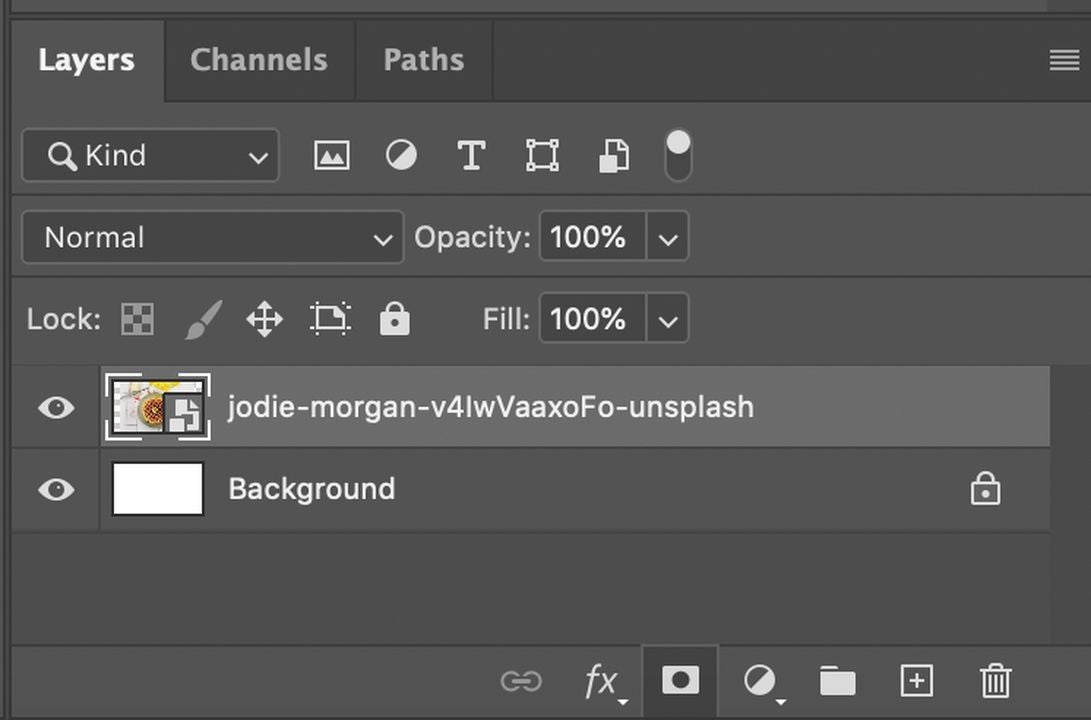
    To merge multiple layers, start by ensuring all your layers are visible in the Layers Panel. To show or hide your layers, press Alt + the Layer Visibility icon for Windows or Option + the Layer Visibility icon for Mac. This shortcut lets you toggle between hiding and revealing every layer in your current project.

    After you’ve set all your layers to visible, you’ll notice they each have Eyeball icons enabled to the left of the layer name. If you can see these graphics, then all your layers are visible. An empty checkbox means the layer is marked hidden. Click the empty boxes to add the Eyeball and render the layers visible.

    Next, choose the layers you wish to merge. You don’t have to combine them all, and you can continue adding new layers to your project after bringing them together. To merge your layers, hold down Ctrl on your keyboard while selecting each layer you want to merge.

    If you’ve grouped your layers, follow this same procedure to merge these sets. They will conjoin as a single layer. After the layers merge, the Layers Panel will display the merged file as the topmost layer and retain the same name as the initial primary layer in your project.

    Navigate to the Layer menu option at the top of your screen. From the dropdown list select Merge Layers. Alternatively, you can type in the shortcut Ctrl + E to execute this same step. Your selected layers will now coalesce into one, retaining all the previous edits you made thereto.

  2. Merge all layers

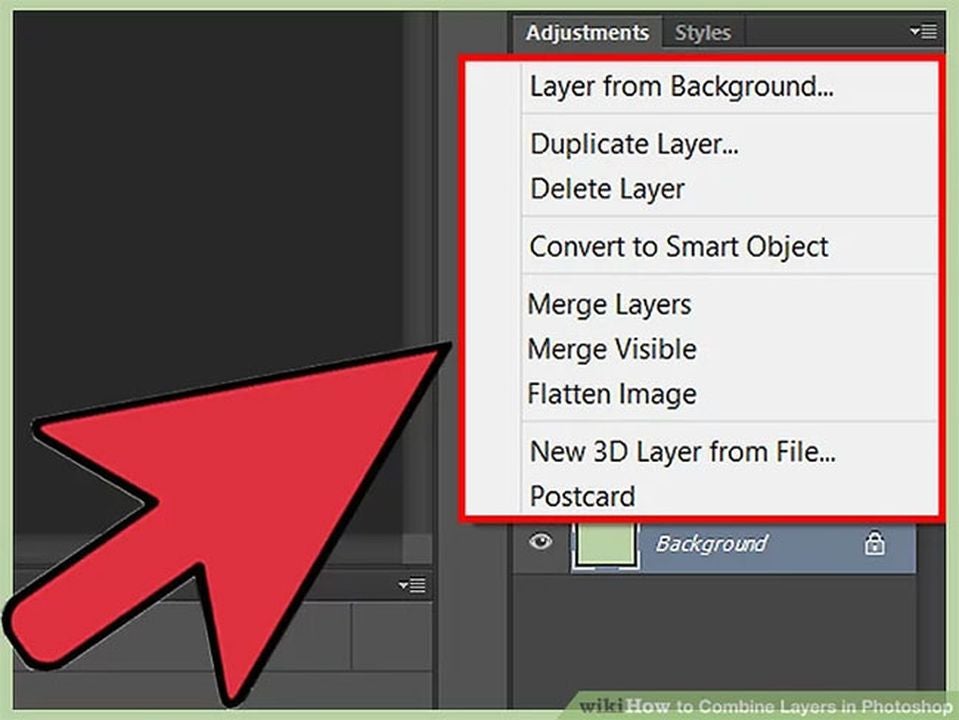
    Arrow pointing to photoshop menu that allows you to merge all your visible layers at once.

    Follow the steps above to confirm all your layers are visible. Remember, the Eyeball icon indicates whether or not they’re hidden. Select the layer menu at the top of the screen and, from the dropdown, click on Merge Visible.

    The shortcuts for this step are Ctrl + Shift + E on a Windows device or Cmd + Shift + E on a Mac. This action will merge all your visible layers. If you need to merge any hidden layers, choose Flatten Image from the layers menu instead.

  3. Combine selected layers into a new layer

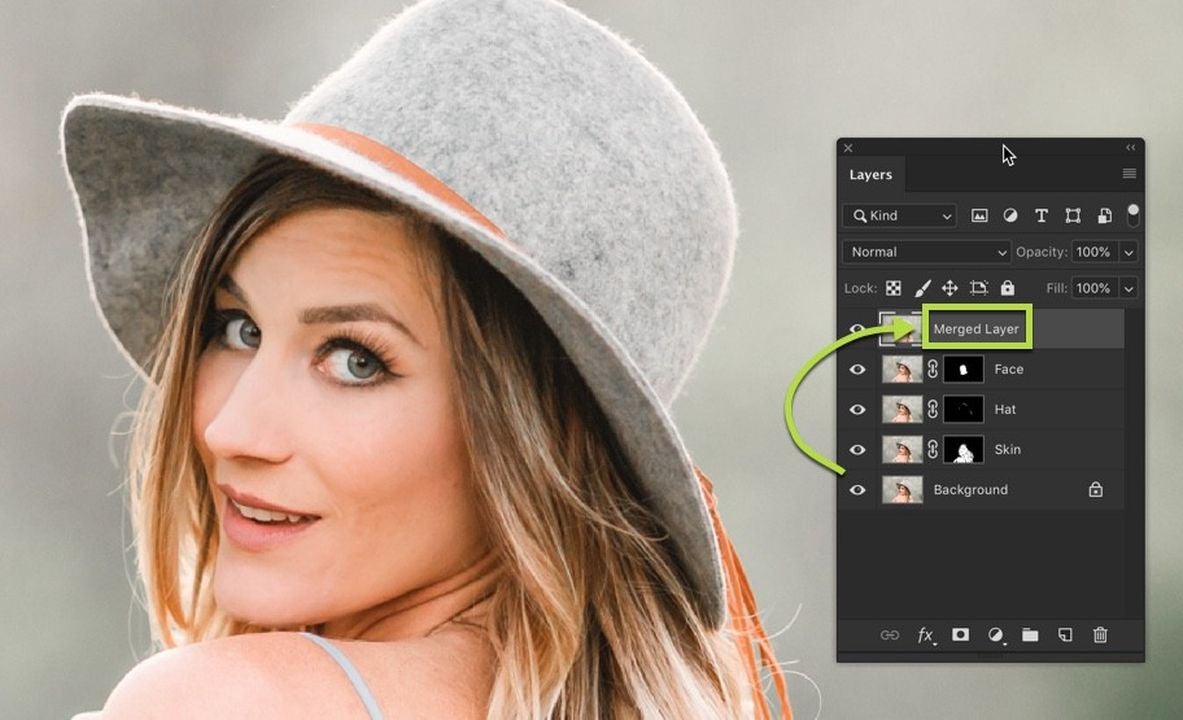
    Graphic showing how to combine select layers to form a new one from the Layers menu.

    Again, confirm all your layers are marked visible. The nice thing about the Photoshop Layers feature is that it allows you to merge your existing layers in multiple ways without impacting the ones you want to leave alone. This comes in handy when you’re working on a complex project that requires several layers or more.

    To combine a select set of layers into a new one, press Ctrl + Alt + E on your PC or Cmd + Option + E for Mac. This will generate a new layer containing all the elements and edits of the layers you chose to merge.

  4. Merge within a clipping mask

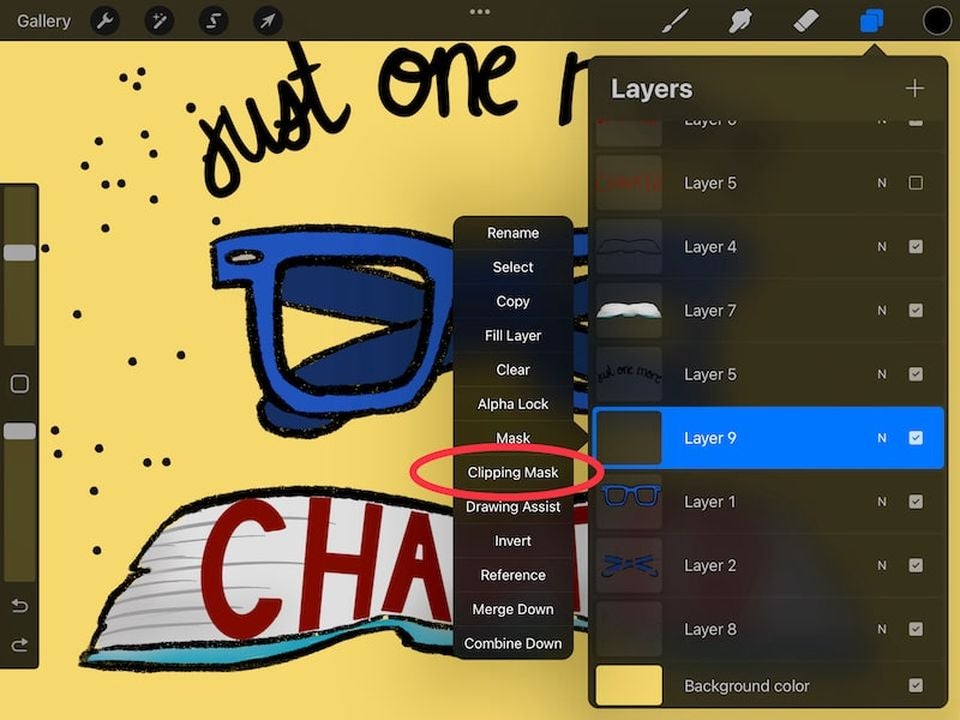
    Graphic showing if you're working in a Photoshop Clipping mask, the Ctrl + E shortcut combines them into one.

    Working with a Clipping Mask means you are dealing with a group of layers with a mask applied to it. This method of merging requires you to hide any layers you want to keep unmerged.

    To hide your layers, uncheck the box to remove the Eyeball icon. Now, navigate to the bottom layer in the Clipping Mask with the underlined name. Select Layer from the menu bar at the top of your monitor. Scroll down to Merge Clipping Mask or press Ctrl + E to combine all your Clipping Mask layers into one.

  5. Alternative approaches to merging layers

    Arrow showing how to form a Layers Group in Photoshop.

    One way to combine your layers without actually merging is to link them. This will allow you to continue editing the layers as one. When you link a set of layers, any adjustments you make to individual layers will apply to all its other connected layers. To link them, select the layers you want to connect before clicking the Link icon in the layers panel.

    You can also create a Layers Group in Photoshop. This will have a similar effect as merging or linking the layers. To create a Layers Group, press Cmd + Shift + G on your Mac or Control + Shift + G if you’re running Photoshop on a PC.

Organize your design projects better with Photoshop layers

Layers in Photoshop might seem tricky at first, but familiarizing yourself with how they work and using them frequently is the only way to optimize your projects. The Layers feature offers an efficient way to organize your work, and it allows you to deliver impressive results with the least amount of hassle. For more info on Adobe innovations, read about Photoshop and its latest updates.

How to make amazing Photoshop textures

Photoshop textures are digital overlays designed to blend with your images. They make your photos look more like physical objects of art. Unlike elements in a photograph or painting, textures are rarely the subject of an artwork. Instead, Photoshop textures, consisting primarily of a specific motif, give your digital image the impression of being tactile. Photoshop provides several texture overlays that simulate those discoverable in the wider world of fine art production, and you can even create your own.

Adobe Photoshop DOWNLOAD

The application includes several texture templates that make your photos look smooth, rough, blurry, and even fuzzy. But if the right texture isn’t there, adding one in Photoshop is simple. To get started, all that’s required is a digital picture and your preferred texture. If you’re not an Adobe PS subscriber, here’s how to get Photoshop for free. In this step-by-step tutorial, we’ll guide you through exactly how to add a texture to your images in Photoshop.

  1. Import your texture and image into Photoshop

    Gray and red texture to import in Photoshop.

    Photoshop textures work best with images that aren’t overly saturated with objects and artifacts. For this exercise, choose a photo with an ample supply of negative space around your main subject.

    The primary photograph can be of anything, but the less busy it is, the more your texture will stand out. Regarding how to source a unique texture, you can create your own with a camera or download a unique overlay from the various free or paid sites that offer them.

    Once you’ve found a texture and a suitable image you can apply it to, open both your primary image and texture file by right-clicking them. Then select Open in Photoshop or choose File > Open at the top of your monitor and upload it from your device.

    Now you’re ready to create a new Photoshop project by setting the two files up as individual layers. If you don’t see the layers panel on your screen press F7 or click on Windows > Layers at the top of your monitor.

    To create a blank new layer, which looks like a gray and white checkerboard, select the rectangular icon with the + symbol from the lower toolbar inside the Layers panel or navigate to Layer > New > Layer. For this exercise, you will start with two layers, one for the primary image and a second containing your digital texture. The primary image should be labeled Background.

    Name your secondary layer Texture, click OK, and then drag and drop you texture file into this new layer. Once you’ve effectively copied your texture into the second layer, you can start resizing it to match the dimensions of your primary image.

  2. Resize your texture image

    Resize your texture image to match the primary layer.

    If you prefer your texture layer to overlay your main image entirely, you’ll need to resize the texture layer so that it fits your background layer. Ensure that you’ve selected the texture layer and then find the Edit drop-down list of options. Select Edit > Free Transform or type Ctrl or Cmd + T.

    Begin resizing the texture file by dragging the corners until they fully cover the first main image layer. Adjust individual sides of your texture file by holding down Shift and moving them accordingly.

    Continue pulling the white squares until they lock into place and cover your primary layer. Once complete press Return or select check mark at the top right of your workspace. For a different look, try rotating your texture image around to find the effect you want.

  3. Blend your two layers

    Access Photoshop's blending feature to begin blending your two images together.

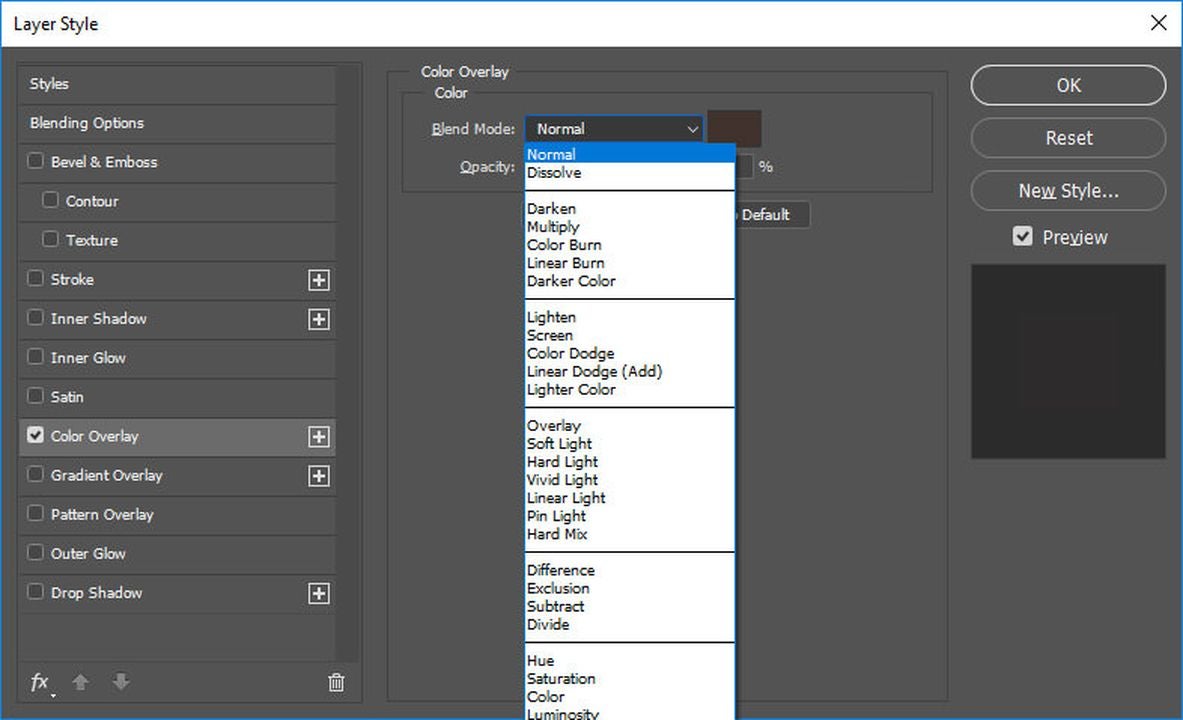
    The way layers interact in Photoshops is through its Blending modes. To access this feature, navigate to the top of the Layers panel where you’ll find Photoshop’s various blending options. Adobe sets this tool to normal by default, but how you want to blend the layers is entirely up to you.

    There’s no one way of blending layers. The two most commonly used blending features for a project like this are Lighten and Overlay. Feel free to experiment with the different modes to achieve your desired effect.

  4. Refine the texture overlay

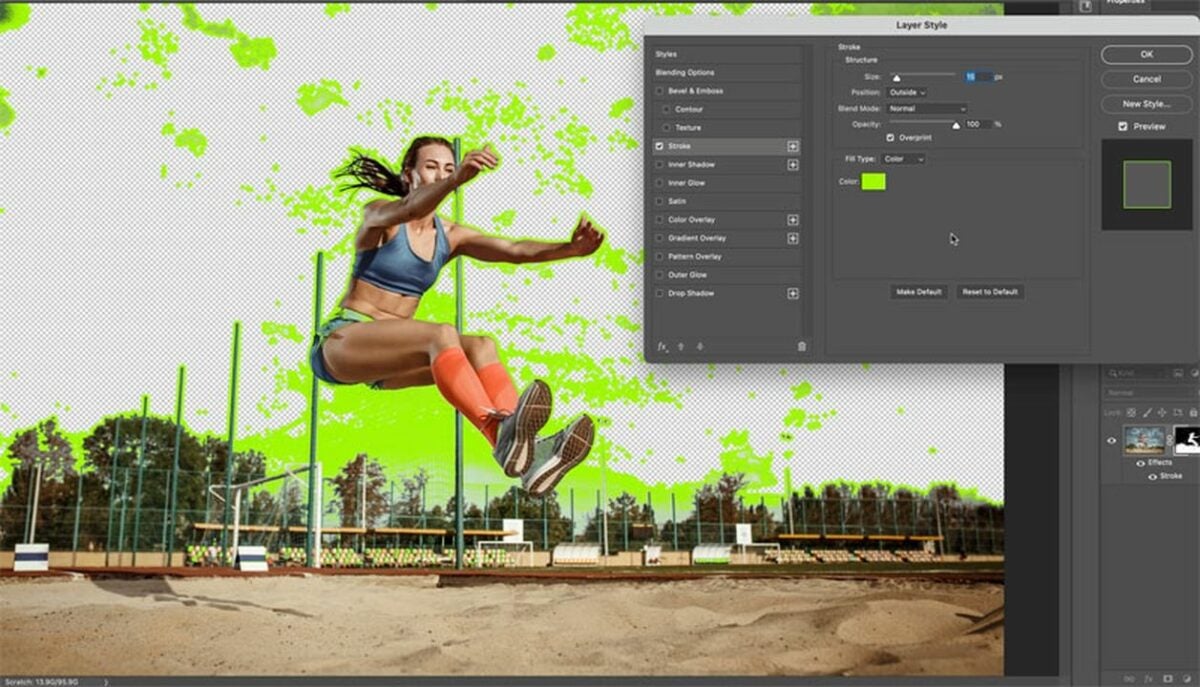
    Refine the texture overlay by adjusting the opacity and creating a Layer Mask in Photoshop.

    As we previously mentioned, the texture shouldn’t be the main subject of your image. You’ll have to make a few refinements to the layer so that it doesn’t dominate your primary photo. Start by bringing the opacity of your texture layer down to roughly 50% and evaluate how it looks. The opacity setting is your preference, however. Just make sure that the texture layer doesn’t overwhelm the main subject for the best results.

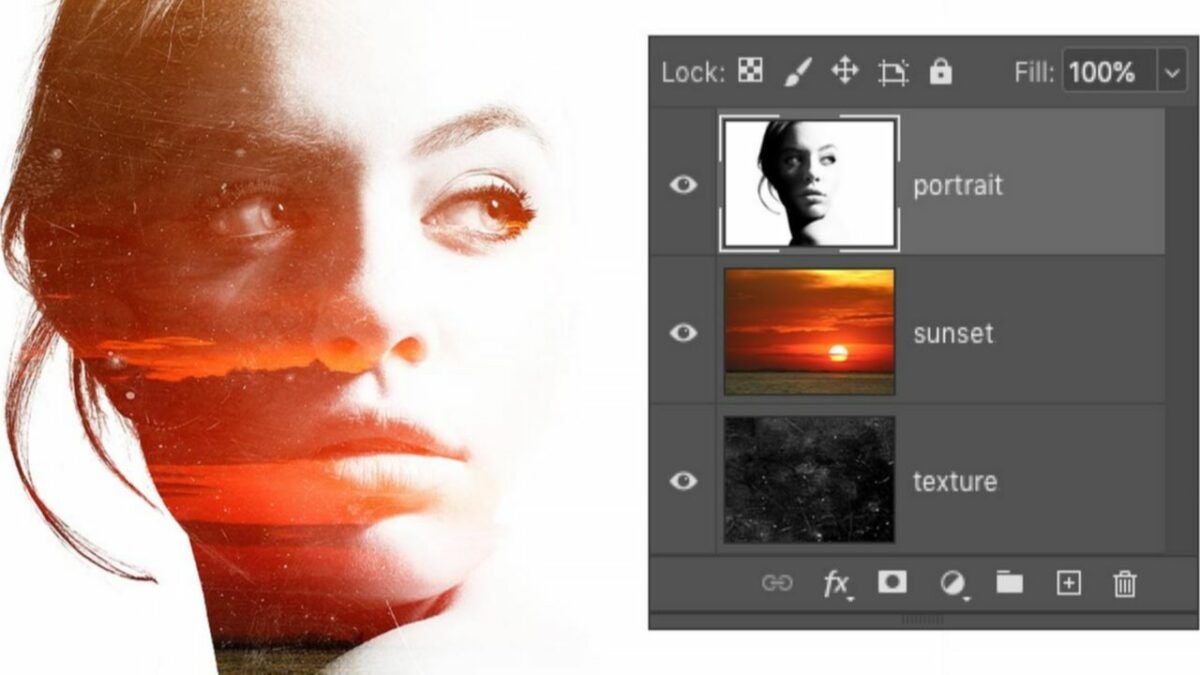
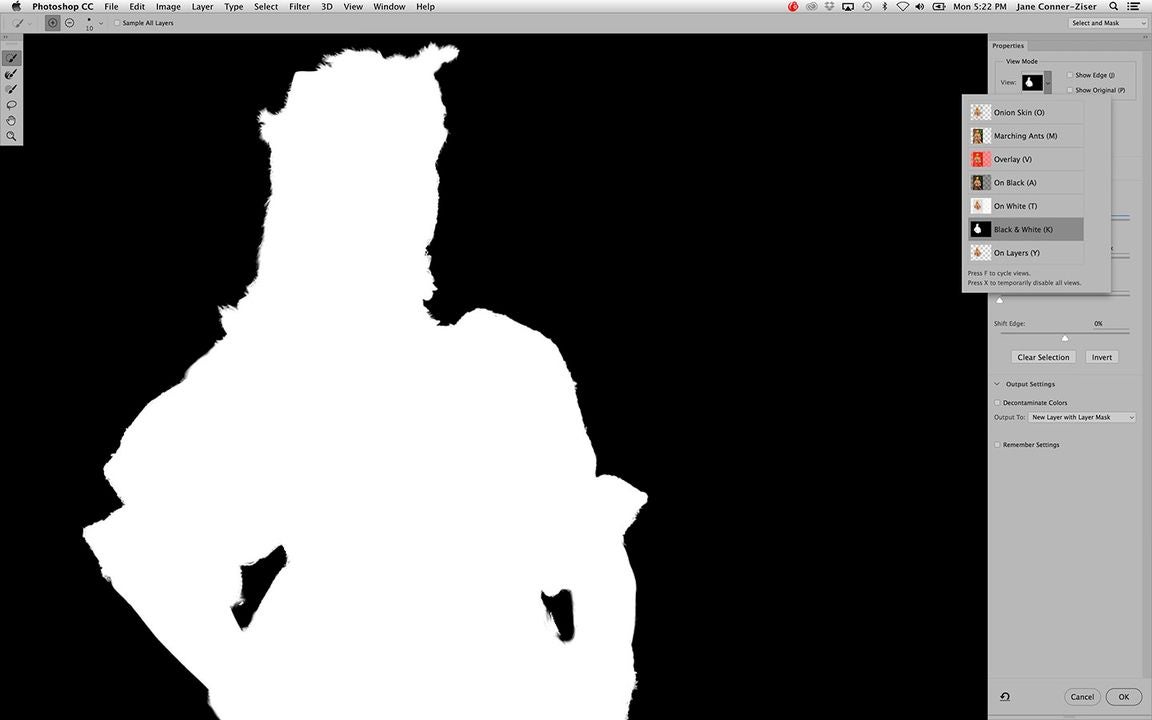
    Photoshop lets you lighten portions of the texture, as well. Let’s assume, for example, your subject happens to be a person as opposed to a landscape. Photoshop lets you select the figure in your shot and remove or lighten the texture across the entire body or in specific areas such as the face. To achieve this, you need to create a masking layer.

    Find Layer at the top of your screen. Then choose Layer Mask > Reveal All or click on the Layer Mask icon, which is the rectangle containing an interior circle. When the white rectangular object appears, click on this to display the white masking layer.

    Now engage the Paintbrush tool and set its color to black. A soft brush will give you more opacity, making it easier to paint over the areas where you wish to remove the texture. The color black presents over the white layer mask, effectively eliminating the texture layer. To reverse your changes or add more texture back into the image, set your paintbrush as white and follow the same steps listed above.

Get the most of Photoshop by adding unique textures

The ability to add textures and generate an original digital creation that might find itself hanging on a museum wall is just one area where Photoshop thrives. The options you have with texture layers in the application are limitless, and they’re a fantastic way to bring more life to your less-than-exciting photographs. For more info on the program, check out our latest Adobe Photoshop review.

How to use Photoshop layer masking in 6 easy steps

Since its inception, Photoshop has always used layer masking to hide or expose elements of an image while letting you apply edits to each specific layer. Yet most Photoshop users who haven’t been formally trained on the program still use the application just like they would any other basic photo editor. So, why use layer masking when editing your images in Photoshop?

Adobe Photoshop CC Download

Layer masks allow you to nondestructively hide or disengage adjustments to an image without erasing them. Photoshop masking layers are also the most effective tools to make advanced edits to your photos, such as image composites, object removal, and background modifications for the most professional-looking results. Layering in Photoshop lets you target specific portions of your images and apply edits to those areas. In this tutorial, we’ll cover how to use layer masking in Photoshop while underscoring a few ways to make your layering workflow more efficient.

  1. Create a layer mask

    Create a new mask layer in Photoshop

    Creating a layer mask in Photoshop isn’t complicated. Start by locating the Layers panel to begin a new layer. If you’re running Photoshop on a Mac, the keyboard shortcut for this is Shift+Cmd+N. On Windows, type Shift+Ctrl+N in sequence to select a new layer. Now add the image you wish to edit.

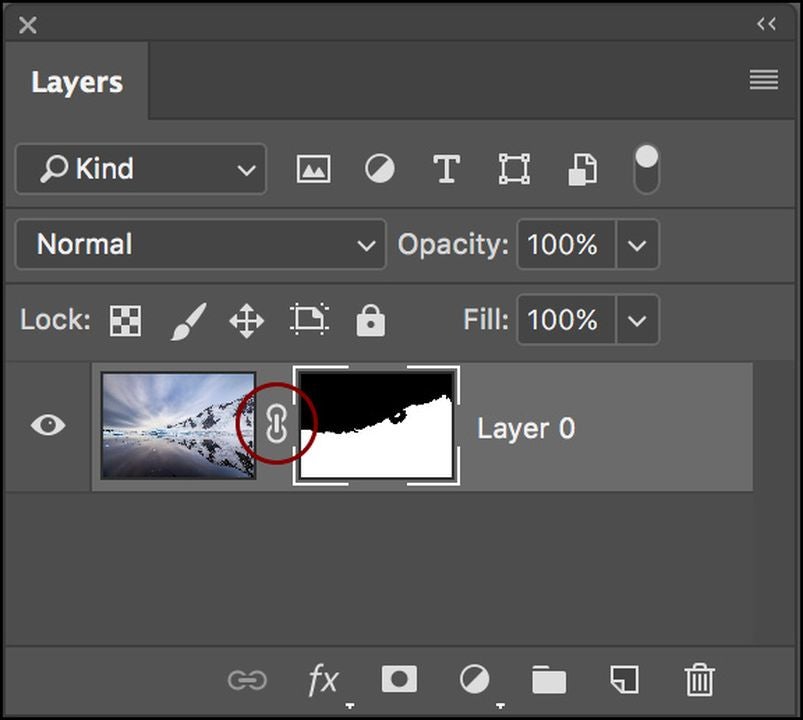
    Click the Add layer mask button next. It’s located just below the Layers panel. You’ll notice a white layer mask thumbnail appear on the selected layer. This feature shows you all the layer’s elements.

  2. Add black to conceal

    Use the toolbar or keyboard shortcut below

    In the Layers panel, choose the layer masks to set it as your active layer. Now select the brush tool, making black the preferred foreground color. The keyboard shortcut for the Brush selection tool is the letter B. You can also find the Brush picker under the Options bar, where you choose the size and hardness of your brush.

    Press the letter D on your keyboard to make white and black the default colors in your toolbar. Now type X to switch the colors and fill in your foreground with black. With the Brush tool, paint over any portions of the image you want hidden. It’s worth mentioning brush selection here matters. A sharp-edged brush helps you create a distinct line between the opaque and transparent image elements, while a broader, softer brush makes it easier to create a fade.

    When you paint over the image with your brush, you’re adding black to the individual layer mask you created. The black effectively conceals the layer mask so you can see the additional layer below, reflected in a checkerboard pattern that tells you it is set to Transparent mode.

  3. Add white to your layer mask to reveal

    Add a white layer

    Adding white to a layer mask exposes the layer containing the mask itself. Use the Brush tool to paint with white on a layer mask to show any elements you previously concealed with black on the layer mask.

    Use the letter X keyboard shortcut to toggle between the foreground and background colors in the Photoshop Toolbar. Now, make the foreground color white. With your Brush tool, paint over the hidden layers of your image and add white to the layer mask. This effectively brings the exposed corresponding areas of your mask back into view.

  4. Refine your layer masks

    Locate and select the subject you want to isolate

    To fine-tune your layer, locate an element you want to isolate, and ensure you’ve selected this layer in the Layers panel. Engage the Quick selection tool by typing W on a Mac or SHIFT + W on your Windows device if the W key alone doesn’t pull up your Wand and other quick selection options.

    Pick your preferred selection tool. You can use either the Wand or Quick Selection tool — whichever is most effective for your purposes and helps you make the most accurate selection. Next, in the Layers panel select the Add layer button. You’ll notice the resulting layer is black in the areas outside your selected object and that the background is now hidden. Your mask edging may not be perfect, but we’ll get to how you should address that in a moment.

  5. Use the Properties panel controls to modify and enhance your layer

    Open the Properties panel to refine your mask

    Confirm you’ve highlighted the layer mask you’re working on within the Layers panel. Now start experimenting with the available controls under the Properties panel. If this panel isn’t visible, navigate to Window at the top of your screen and select Properties from the dropdown menu options.

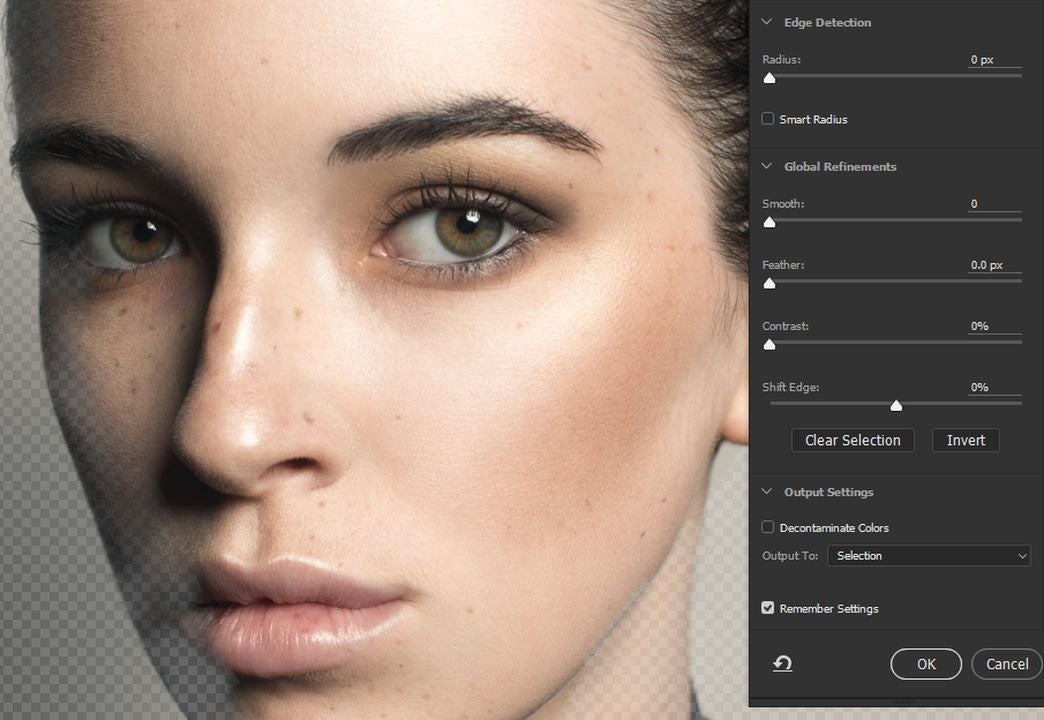
    Within the Properties panel, locate the Density slider and drag it slightly to the left the increase your layer’s transparency. You will notice the partially concealed portions of the masked layer. To refine your mask edging, use Feather slider just off to the right. This tool helps soften your mask layer edges, blending your subject more naturally with the underlying layer.

  6. Save your work in Photoshop

    Save your image as a TIFF or PSD

    At this point, you made several changes to your file, and you want to make sure you save your project. Saving the image file in .PSD or TIFF format retains the mask layers and lets you continue working later on. To create any new layers, follow and repeat the steps listed above.

Image layering in Photoshop is efficient and gives you more flexibility

Photoshop is a complex design application. It takes a lot of know-how to get the most out of this software. Understanding layer masking in Photoshop is important because it’s one of the most effective tools for increasing workflow efficiency. Layer masking allows you to isolate and hide parts of the image as you make changes without ever reloading the file and starting from scratch. Looking for some more Photoshop tips? Check out our guide to the latest updates in Photoshop.

How to create impactful videos and grow your following on Likee

Likee, a short-video creation and sharing app, is set to join the ranks of TikTok as one of the fastest growing social media apps of its kind on Google Play. And while Likee still has a ways to go, it was, according to a Sensor Tower report, among the top five most-installed apps not long after its release in the second quarter of 2019.

Likee APK Download

Growing your personal brand on legacy social media apps like Facebook, Twitter, and YouTube can be challenging for several reasons. But TikTok’s monumental rise in 2020 let users know that getting attention online is about finding the right people at the right moment. In this tutorial, we’ll cover the basics of how to create impactful videos on Likee before offering a few helpful pointers on growing your following in this new social sharing app.

  1. Install the Likee app and create an account

    Begin by downloading Likee onto your iOS or Android device

    Start by downloading the version of Likee that corresponds with your device. Likee is a mobile app that works with both Android and iOS. Next, create your account. It allows you to log in with Facebook, Google, Instagram, and other popular services.

    After tapping on one of the icons listed above, sign in to that account. Likee will then ask you to enter your name, date of birth, and gender. Tap Next, and you’ll see a prompt inviting you to discover people you already know who are currently on Likee. If you don’t want the app to access your contacts at this time, skip beyond this step. Finally, tap Start, and Likee brings you to its main page.

  2. Create a video and upload it to Likee

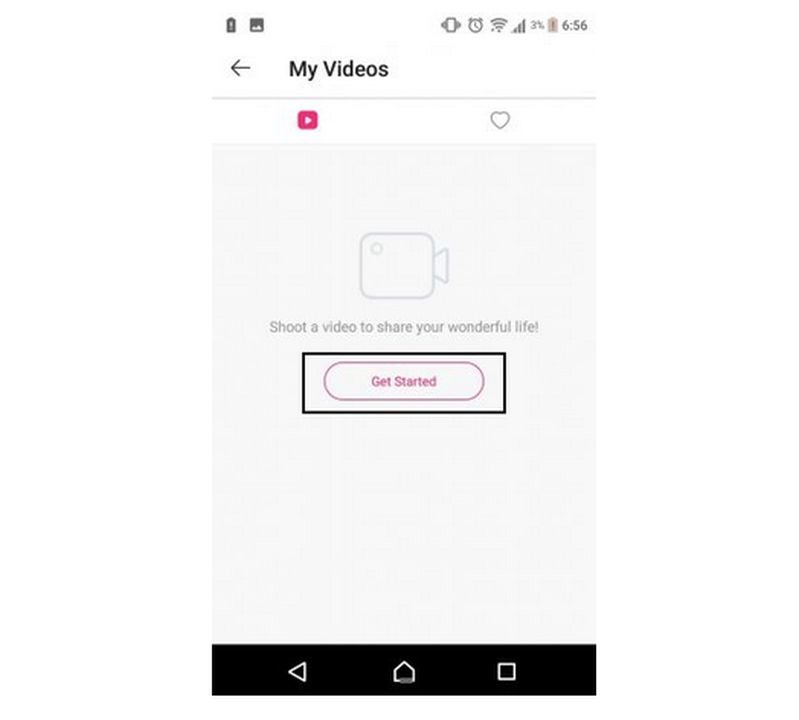
    Tap

    From the main screen in Likee, select My Videos in the menu screen or click on the red and white video camera icon at the bottom center of your screen. Now, select Get Started.

    Likee allows you to create and edit videos using an array of augmented reality features. After you click Get Started you’ll notice over a 100 custom video editing tools, including various stickers, effects, and soundtrack options that even incorporate a unique menu of Local Music.

    To create a new video in Likee, select Shoot from the options at the bottom of your screen, and then, tap the circular red record button just above it. As you start capturing, select your creative filters, apply an animated sticker, or change the video recording speed to add original effects.

    When you’re done filming, tap the checkmark to the right of the delete key symbol. Likee lets you continue editing your clip by trimming its length or adding text and subtitles or more stickers.

  3. Get your Likee videos trending

    Use hashtags as you would on other social media sites to gain more exposure to your Likee videos

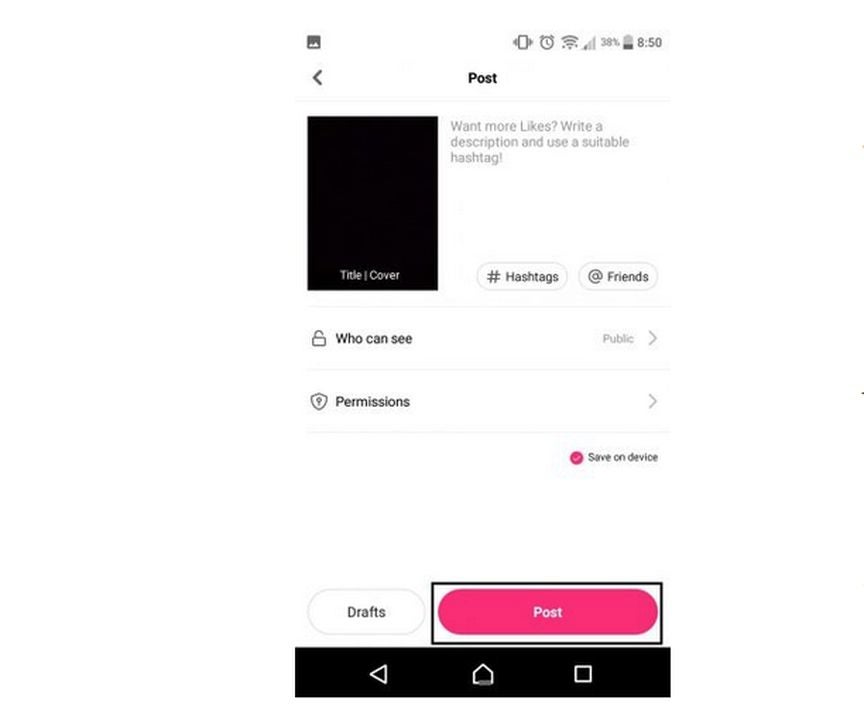
    To ensure that as many people see your videos as possible, set your privacy permissions to public, and add a few popular hashtags in the video description. Hashtags work on Likee just like any other social sharing site. Your audience is more likely to find your videos when you use them. Once you’ve added your description with hashtags and are satisfied with the results, click Post.

    Unlike the major social sharing sites, new Likee users report that their videos can go viral after just a few hours. Now that you have the gist of how to create and post videos in Likee, let’s explore a reliable content creation strategy for the app in the final two steps.

  4. Discover your target audience on Likee

    The Likee app supports an increasingly diverse range of users, making it easy to find your target audience

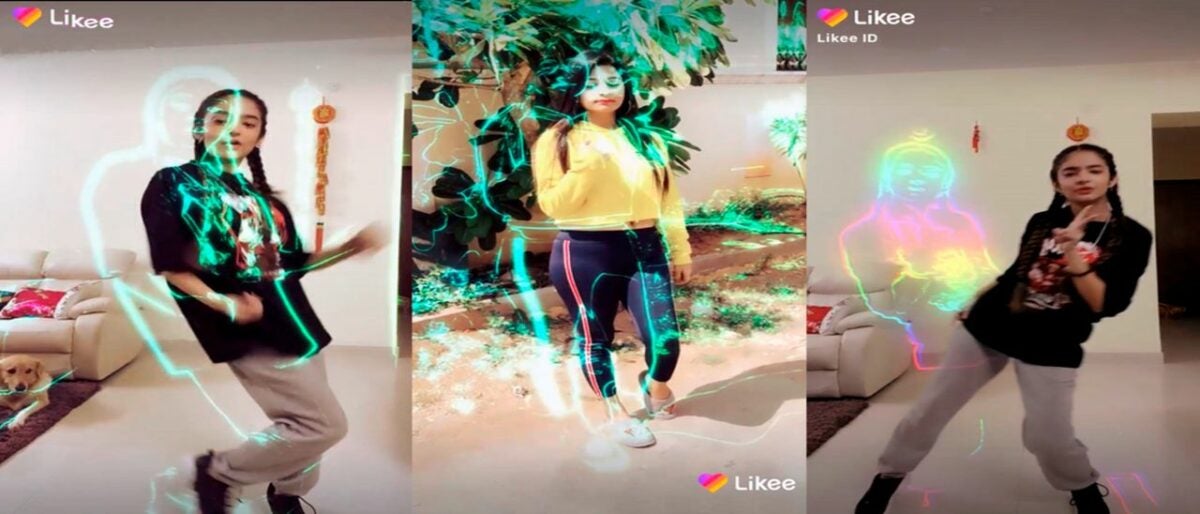
    Likee was initially popular with younger content creators under 25, but the platform has recently started to support a more diverse range of users. Not unlike any other social media platform, the trick is how to tap into a specific audience while generating content that sets itself apart from the crowd.

    And while a specific demographic of users may view social media as the new vector for becoming a cultural celebrity, there are plenty of other more viable reasons to identify your niche market in Likee to promote your brand.

    For example, if you own a small business or are just now starting a new one, Likee’s search features make it simple to target the specific demographic that might be interested in your products. It just takes a bit of solid marketing acumen to determine the age groups and tone preferences of the audience you wish to engage.

  5. Cross-promote your Likee videos on the major social media sites

    The Likee app is comparatively new, which presents a great opportunity to get in from the ground up as it were. With that in mind, the application is still gaining traction as many social media users haven’t discovered the benefits of Likee yet.

    One of the best ways to get results and increase your views on Likee is to cross-promote your videos on the legacy social media channels like Facebook, Instagram, and Twitter. And don’t forget to include a call-to-action, inviting your viewers on these third-party sites to visit and follow your Likee account.

Discover your original creative voice on Likee

If your goal is to gain thousands of social media followers and a short time, the Likee app is promising. With more than 150 million users across the globe, Likee is a great starting point for new content creators. The app allows users to leverage their popularity on the platform to gain further traction on the more ubiquitous social sharing sites. If you’re looking to expand your social media posting potential, learn more about how Twitter has introduced a way to write longer posts.

How to edit and enhance your mobile photos with Photoshop Touch

Advanced photography equipment has grown exponentially smaller, and some of the most capable digital consumer cameras are built directly into our phones and other small connected devices. The technology that powers our smartphones undeniably forms the foundation for a vast supply of mobile photography today. Since the onset of these new and powerful in-phone cameras, the primary drawback has always been the noteworthy absence of an advanced editing solution installed on the mobile device itself.

Adobe Photoshop Touch is one of the original mobile photography editing programs. It was the first to give you many of the same core tools and features of Photoshop, Adobe’s dedicated, professional design app for laptops and PCs. It’s worth noting that Touch is no longer officially supported for future updates. Adobe Photoshop Express formally replaced PS Touch in recent months. However, you can still download its final 2021 release. Now, let’s explore how PS Touch helps you achieve many of the same professional results as Adobe’s full version of the app directly from your mobile device.

Adobe Photoshop Touch APK Download
  1. Download and launch Photoshop Touch on your tablet or smartphone

    Adobe no longer supports updates for PS Touch, which was replaced by Adobe Express, but you can still download the final version on third-party sites

    Photoshop Touch works with both Android and iOS mobile devices, either of which you’ll need to access the program. Start by booting up your preferred device and downloading the version of Adobe PS Touch that pairs with its operating system.

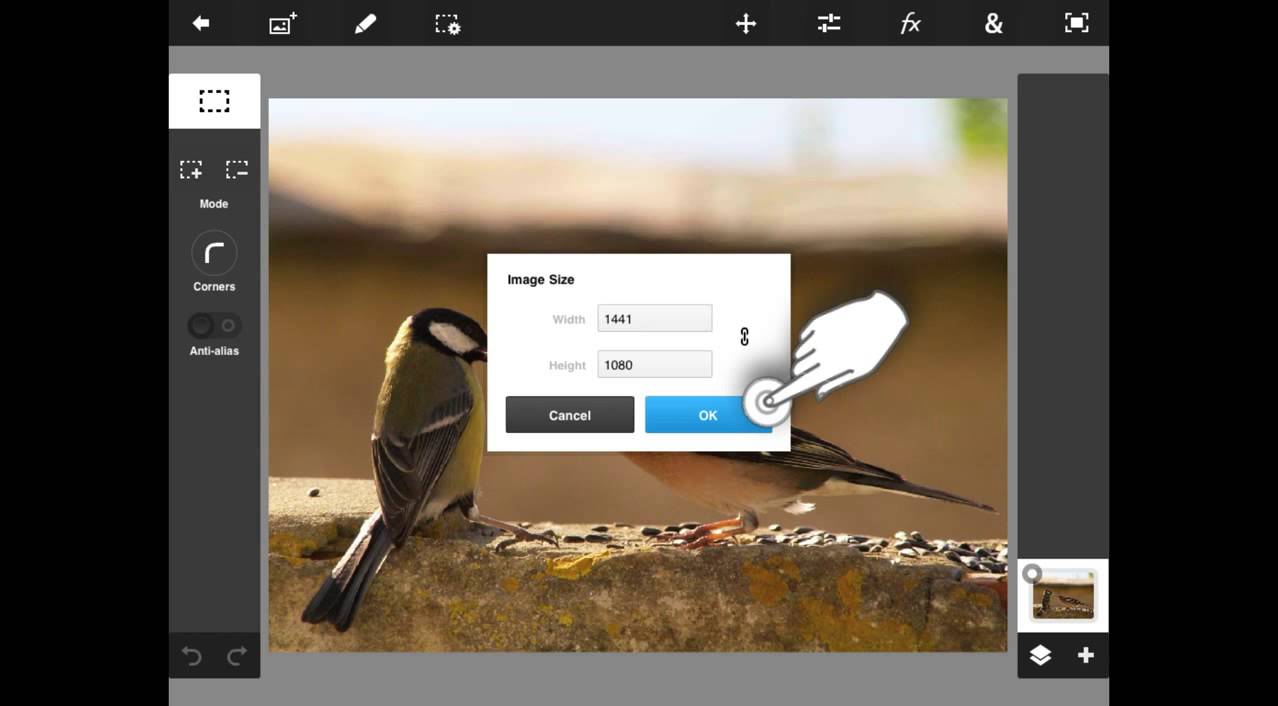
    When you open PS Touch, you’ll first notice the main page supporting a few default layouts and introductory tutorials from Adobe. At the bottom of your device, in the center, is a Plus icon that will start your new project after tapping it. When you click on the Plus symbol, a small window pops up, prompting you to enter the pixel size of your next creative undertaking.

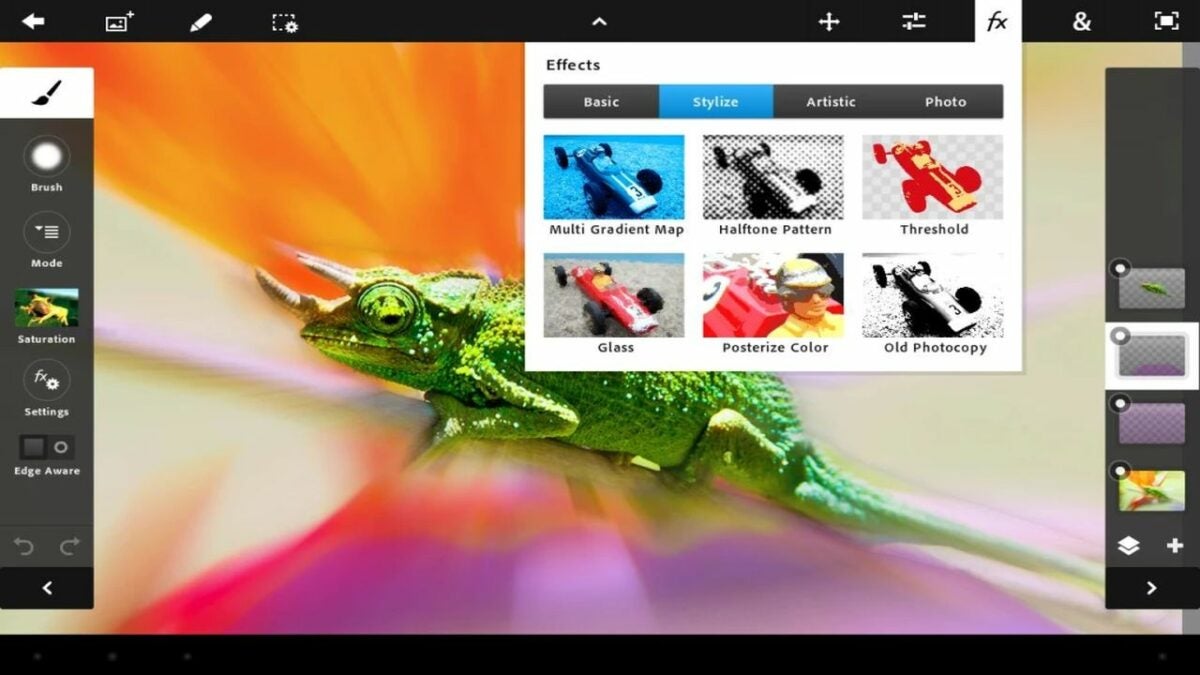
    Once you enter the pixel dimensions, you’ll immediately find access to the workstation screen that provides you with several advanced photo editing tools and layer palettes. If you’ve worked with Photoshop Elements on a PC before, PS Touch offers the same core features.

  2. Import an image layer

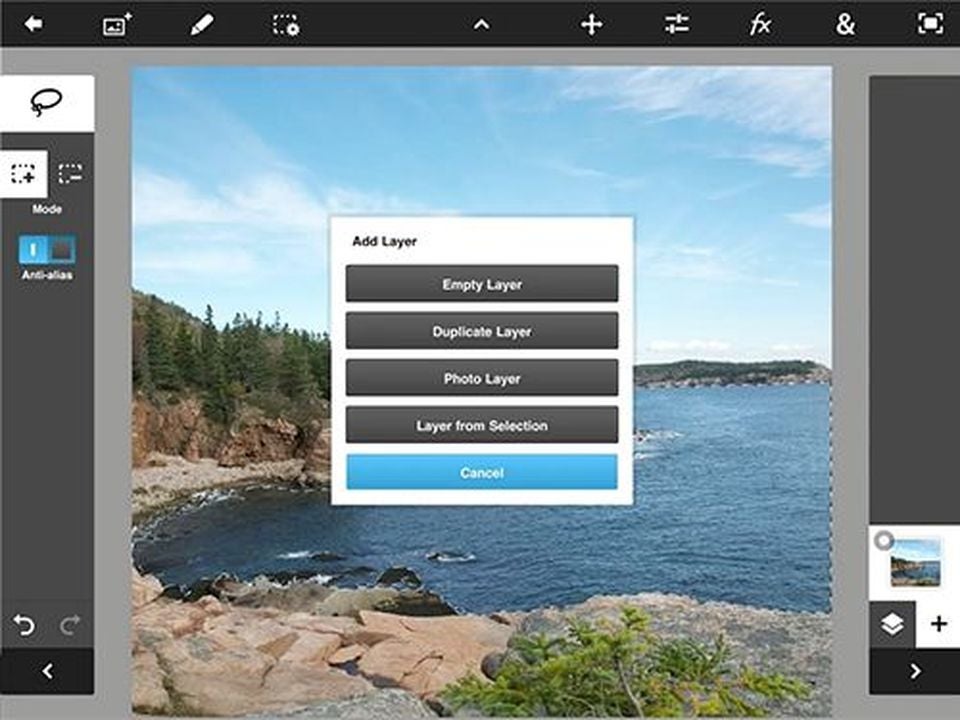
    Begin your next project in Photoshop Touch by importing a new image layer

    At the top left of the PS Touch workspace, you’ll notice another smaller Plus symbol. Pressing this opens a new screen for adding a new image layer. Photoshop Touch is fundamentally a graphic design tool and not strictly a photo editor. So this layer could be a picture, embellishment, artifact, or solid background. To add more images, use the layers feature to scroll through the photos in your device’s camera roll. Photoshop Touch also allows you to upload pictures directly from popular social sharing sites like Google and Facebook.

  3. Position your image into place

    Resize and reposition your image layers by adjusting the white dots at the permiter or manually entering the new dimensions into the fields shown

    Whenever you open a new image layer, every Photoshop application gives you the option of moving it around on the palette and resizing it to your preferred specifications. Grabbing the white dots at the corners of your image allows you to enlarge or reduce your photo’s measurements. Access the circular arrow on your touchscreen to move the image into the desired place.

    Now, enable the white checkmark inside the blue box to save your image placement. This returns you to the main workstation. To continue repositioning your image, use the small Plus with the arrows along the upper-middle right of the screen to reopen the image placement workspace.

  4. Organize your layers palette

    The final step is to organize your layers before merging and blending them into one compressed file

    Within the main workstation, locate the layers palette along the right-hand side of your screen. To identify the layer you’re currently editing, look for the white box surrounding it. As with any Adobe Photoshop app, PS touch is a layers-based program. The software lets you rearrange your layers to achieve the desired effects and outcomes. The only difference here is that, on your mobile device, you will use the touchscreen to move the layers around instead of your mouse.

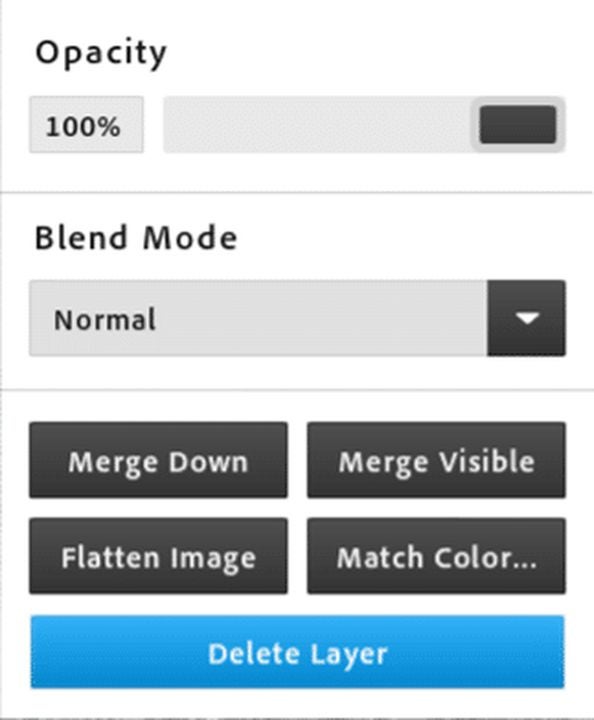
    To hide a particular layer, tap the corresponding white dot. You’ll see an exclamation point signaling that you’ve hidden the image layer. This tool is invaluable when you’re working with several active layers because PS Touch limits the number of them you can see. Either hide or occasionally merge these layers by selecting the Stacked Papers icon below the Layers palette. This tool helps you blend and converge your layers into one file and, ultimately, finalize your project.

Adobe PS Touch isn’t Photoshop, but it comes close

When you edit your images with Photoshop Touch, you’ll have access to dozens of the same features and tools offered in Adobe’s complete edition of Photoshop. You can use the eyedropper tool to match local image colors or play with opacity to fine-tune your layers. PS Touch lets do things like controlling the direction and blur of your shadows while providing many of the same paintbrushes, filters, and effects as Photoshop. You can also use Photoshop tools in Creative Cloud Express, Adobe’s unified task-based design app. Check out our Adobe Express expert review to learn more.

How to improve image lighting quality with Adobe Lightroom

After lens construction and quality, proper lighting is the most crucial element for producing refined, high-quality images. Every professional photographer will tell you the best approach to ensuring a properly exposed image is to find the results you want in-camera. Nevertheless, they all understand that suitably lighting a subject isn’t always possible. Even the most skilled photographers struggle to set up the perfect shot in-camera 100% of the time.

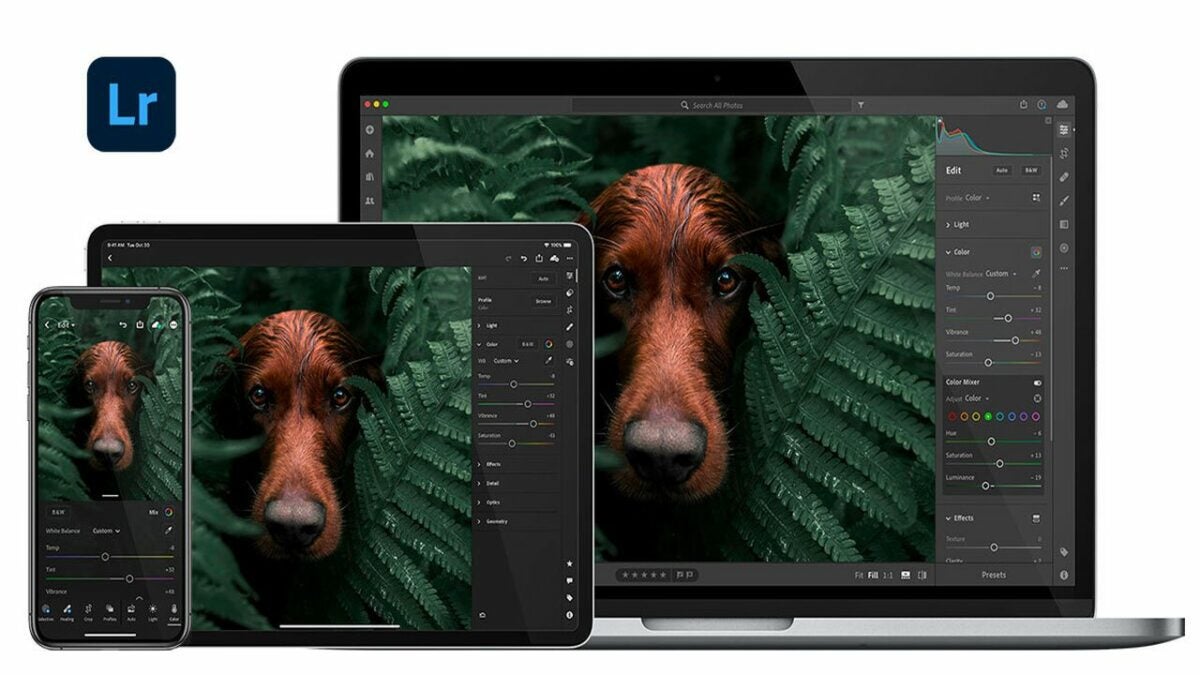
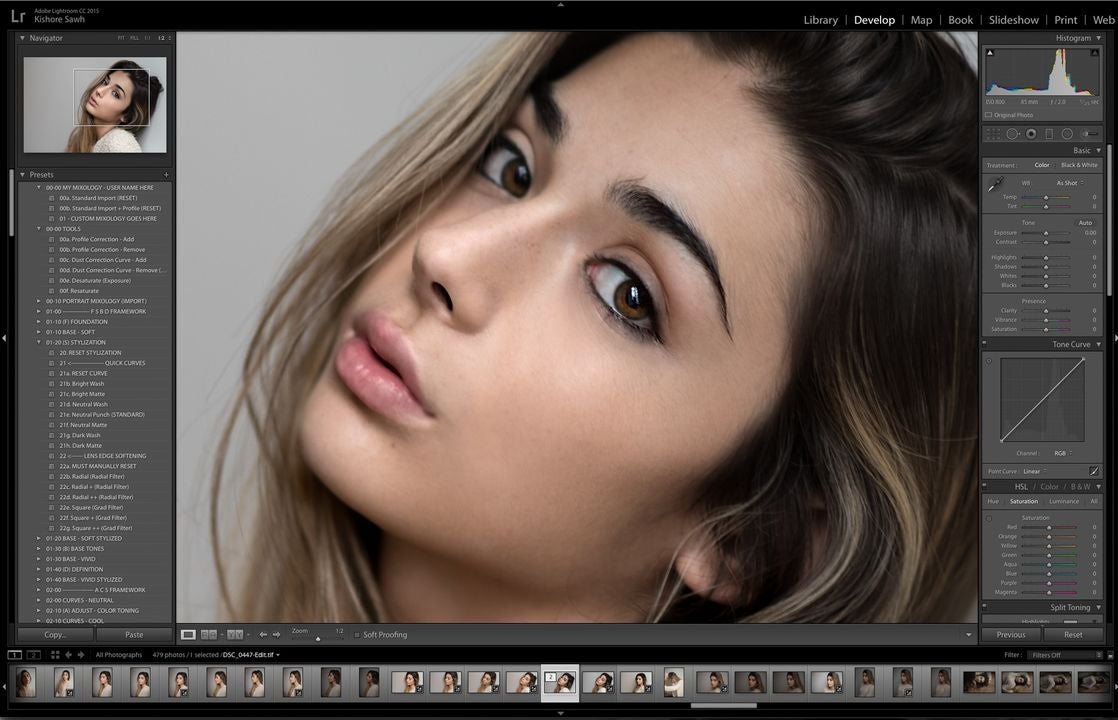
So many different environmental factors exist that can potentially impact the lighting of your photographs. Unless you’re constantly working in a controlled studio setting, you’ll invariably come to rely on postproduction editing techniques to save your less-than-perfect shots. If you’re wondering how to bring poorly lit photos back to life, we’ll walk you through the best techniques for fixing your pictures with bad lighting in Adobe Lightroom in the five simple steps to follow.

Adobe Photoshop Lightroom Download
  1. Set up your pictures in-camera

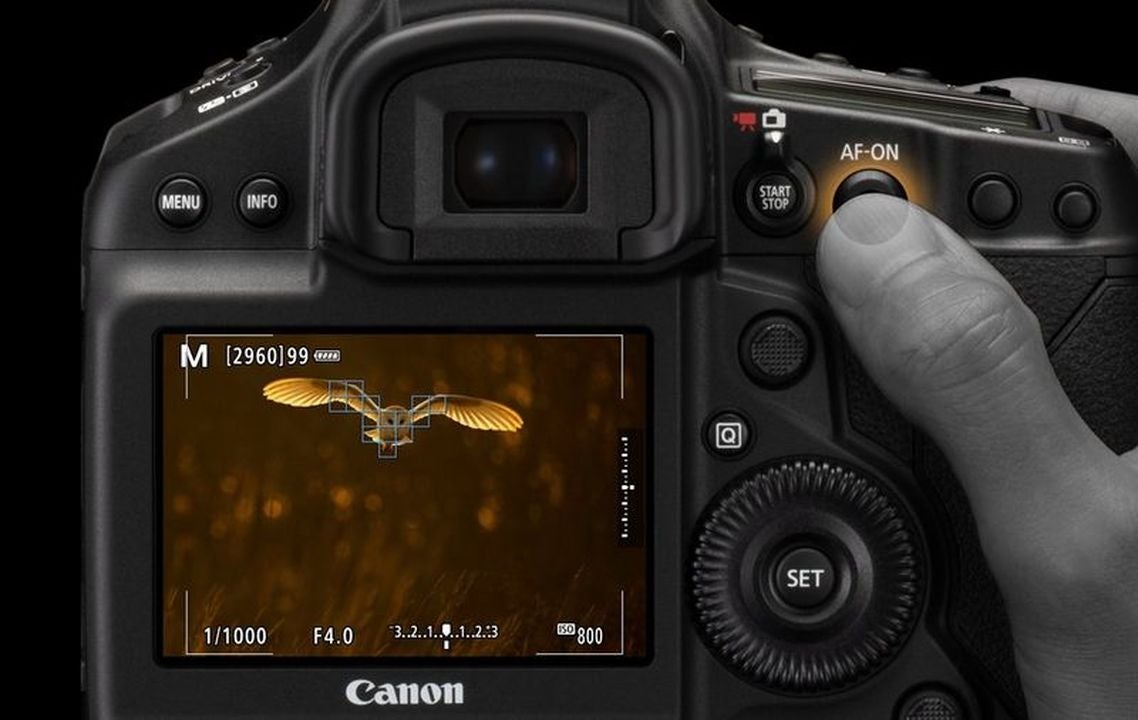
    Set up your pictures in-camera_Before diving into Adobe Lightroom, leverage the tools you have in-camera to ensure you capture the highest quality of light

    Even when shooting on the fly, there are steps you should take in advance to guarantee the highest quality of lighting. Unless a photographer faces data storage constraints, most professionals and advanced amateurs shoot in the RAW format. This file format lets you capture as much information as possible, including the diverse qualities of the existing light.

    Understand how to interpret your camera’s light meter and compensate for any reading that might be slightly off. For the most accurate results, try using a professional-grade external light meter to identify the proper shutter speed, aperture, and ISO settings. External meters help to optimize the detail in the shadows and highlights while giving you a precise reading of the ambient light.

  2. Modify the exposure

    Right click on the image or locate the exposure sliding tool under the Basic Panel in the Development Module

    Assuming you’ve followed the first step closely, you should find that most of your photos are properly exposed. However, even after paying careful attention to your camera settings, you’ll still encounter photos in which the lighting is off. Start correcting your badly lit images by setting the exposure in Adobe Lightroom. Launch Exposure by right-clicking the image and then selecting Edit In.

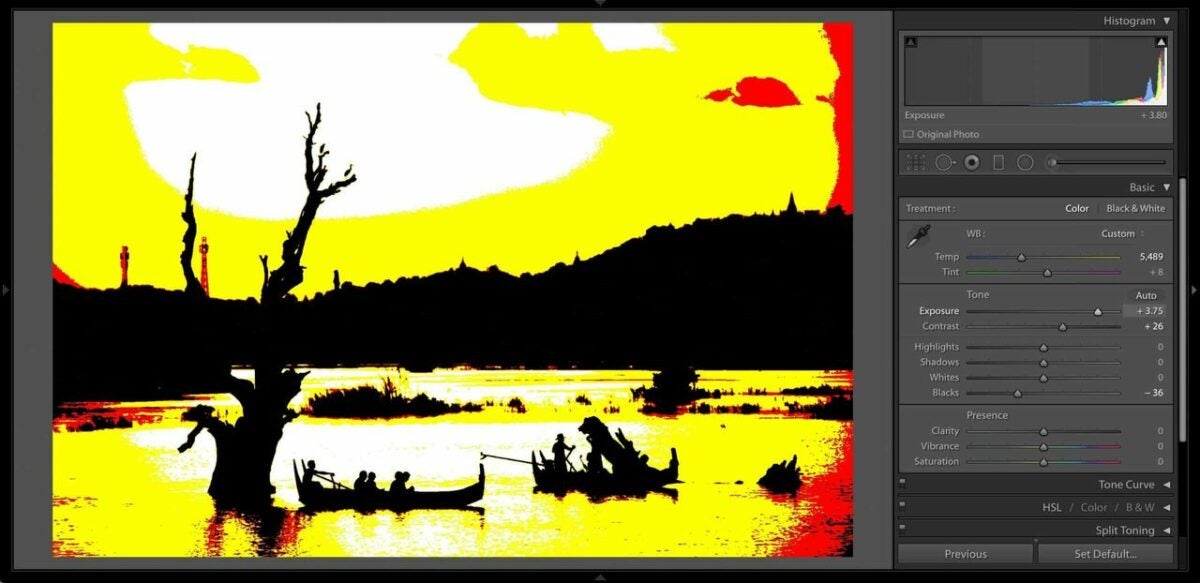
    If the entire image is underexposed, a simple downward adjustment to the exposure slider may suffice. However, when you have contrasting light sources, such as a shaded foreground against a bright background, you’ll quickly notice the well-lit portions of the image look blown out. In a case like this, follow the next step to restore any specific areas where overexposure or underexposure rendered a loss of image detail.

  3. Correct your clipped highlights and shadows

    Fix image clipping issues by accessing Lightroom's Highlights and Shadows adjustments tool

    When you adjust your clipped Highlights and Shadows, you’re able to target specific areas of your image that have either gone black because of underexposure or the “hot,” overexposed portions of the image that have turned white. Lightroom is among the best solutions for adjusting clipped Shadows and Highlights and can do wonders for restoring lost image details.

    Either right-click the image again to pull up Lightroom’s editing tools and features, or locate the basic panel in the Develop Module below the Histogram display. When you expand this panel, you’ll reveal all the basic controls in Lightroom. Find the Highlights and Shadows adjustment slider. Begin by decreasing the Highlights, moving the slider to the left. This lowers the intensity of the highlights in the overexposed areas of your image. To identify the brightest and darkest areas of your images, access the Whites and Blacks slider. These tools help you find the underexposed and overexposed sections of your photo.

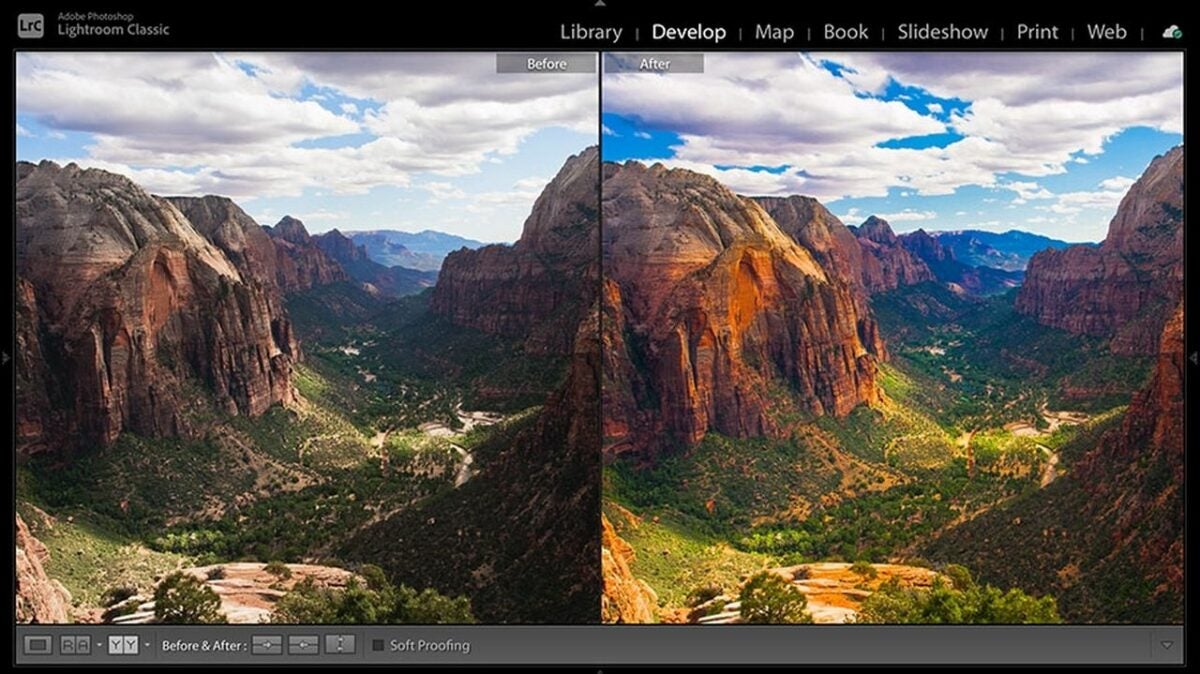
  4. Enhance the image contrast

    After adjusting your highlights and shadows, use the Contrast slider to restore the contrast settings of the original image

    Whenever you make adjustments to elements like the highlights and shadows of your photos, you will lose the original contrast. To restore it, locate the Contrast slider. Use this tool to increase or lower the contrast until it starts to look more like the original image file. Alternately, try using Tone Curve to help you choose which range of image tones you should alter, including your contrast, highlights, and shadows.

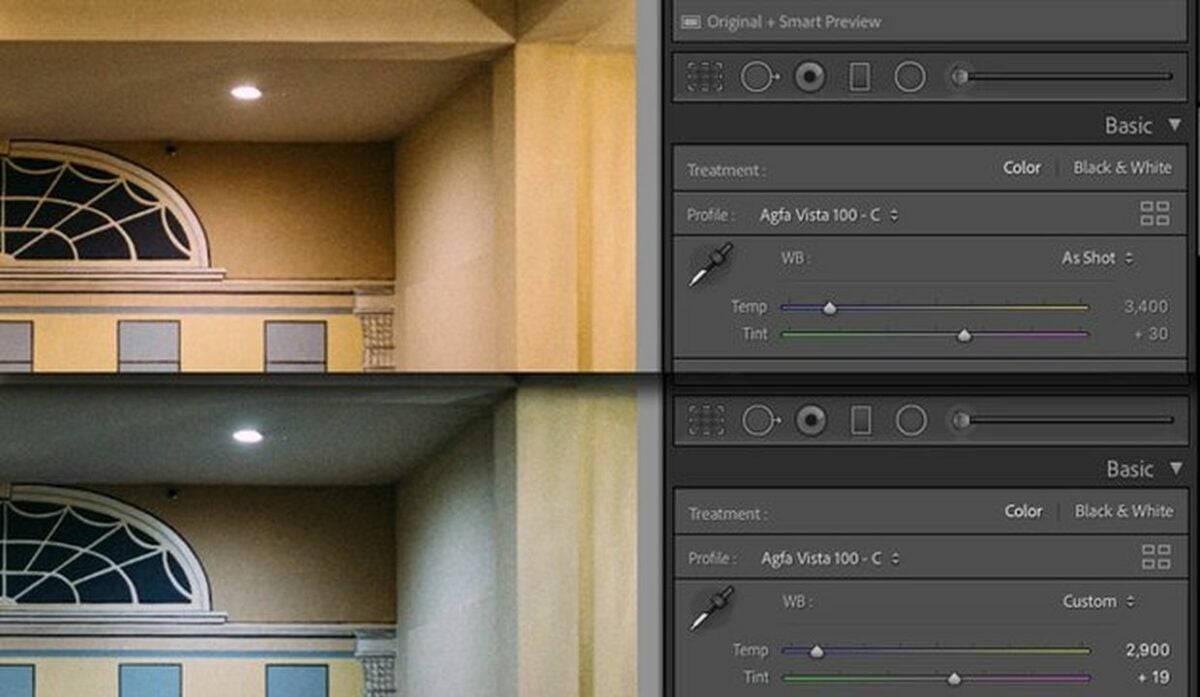
  5. Fix the white balance

    Use Temerature and Tint or the Eyedropper tool to correct an offset whitebalance

    Beginning photographers commonly overlook this last step because they tend to underestimate the challenges of shooting in low-light settings. If the time is after sunset or recently you’ve moved indoors, a change like this may require a faster lens or a settings adjustment to avoid overly warm-looking images from an offset white balance.

    If you neglected to address the white balance in-camera, the best way to correct this is by fixing it on the backend in Lightroom. There are two ways to accomplish this in the app. Most photographers use the Temperature and Tint sliders to restore the image’s original natural colors and intonations. You can also use the EyeDropper tool in the Color section of the Basic Panel. Now, find a white area within the image with your mouse. After you point the dropper and click on it, Lightroom will automatically adjust the white balance of the entire frame.

Lightroom lets you photograph in all kinds of situations

Depending on your camera and lens kit, you could potentially limit where and when you can produce high-quality images. Access to Lightroom and its impressive suite of editing tools means you can fix any photos you took in less-than-ideal lighting. Lightroom expands the areas where you can effectively shoot and will undoubtedly help set your photography apart from those who don’t use the app. For a no-cost alternative to Adobe’s photo editing tools, consider testing out PhotoScape for basic image retouching and more.

How to use Microsoft Paint 3D in 6 simple steps

Paint 3D is a unique creative application that updated the classic Microsoft Paint tool to provide additional features for 3D modeling in Windows 10. Microsoft Paint has been included with every version of Windows, offering users a basic raster editor that lets them draw, scribble, or doodle with any Windows-compatible device. While Paint 3D comes inbuilt into Windows 10, the only way to enable the latest version on Windows 11 is through a software download.


Microsoft Paint 3D Download

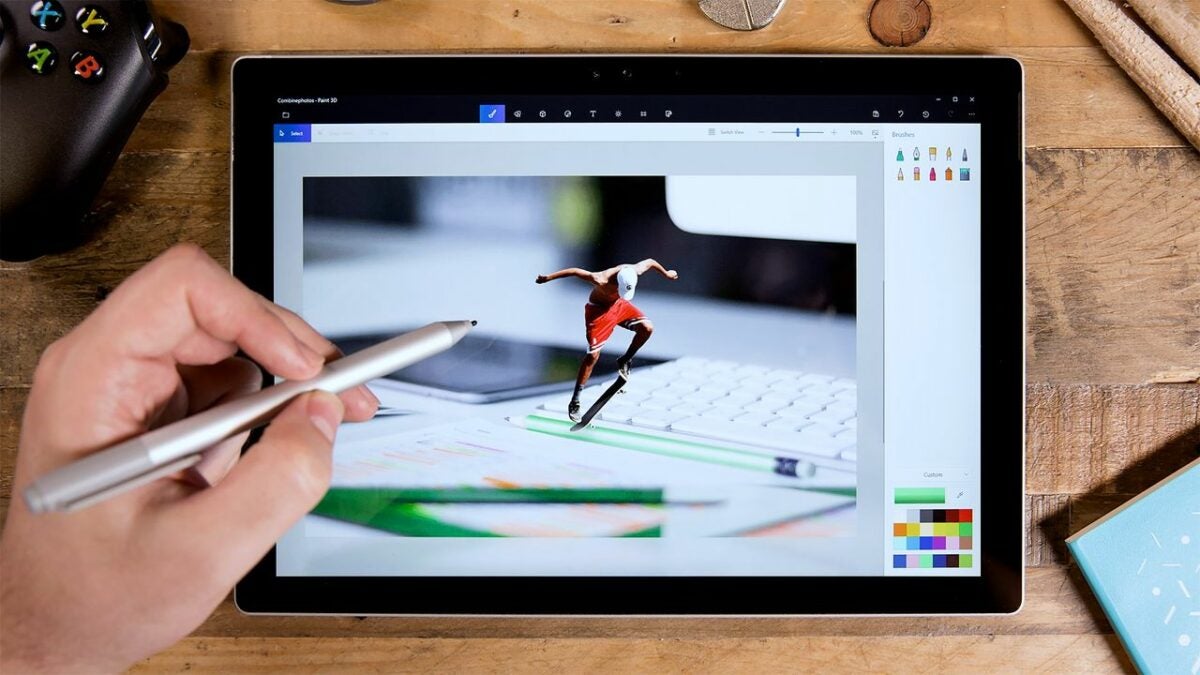
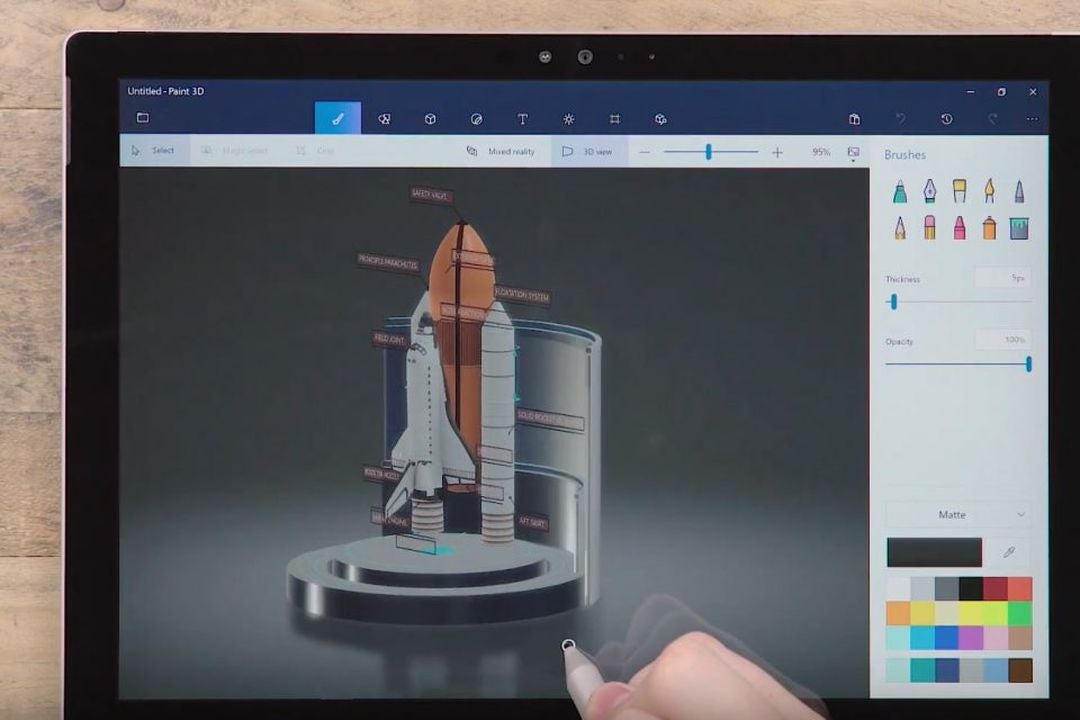
Explore how to create dynamic 3D drawings and change their characteristics with Microsoft Paint 3D in this brief introductory guide.

  1. Launch Microsoft Paint 3D

    If you don't have a version of Windows 10 with Paint 3D already installed, start by downloading the app

    If you’re running the Windows 10 operating system with the Creators Update, you should already have Paint 3D installed on your device. If not, download the application since 3D is unavailable in previous versions of Windows 10 and the current edition of Windows 11.

    Once you’ve installed the software, you’re ready to start creating 3D objects within a scene by using the Magic Select tool. The editor supports 3D and 2D images alike and is very simple to use. To launch the program, head over to the Windows Ink Workspace or choose Start > All Apps and locate Microsoft Paint 3D.

  2. Insert an image into Paint 3D

    Choose a two-dimensional file that will easily convert into a 3D object

    Begin by downloading a basic template. Or, if you wish, use an existing file on your device. Advanced drawing artists may want to sketch the image directly onto the canvas with a stylus. We’ll get into how at a later step. But, for beginners, it is best to start with a basic 2D file that will readily translate into a nice 3D object. After selecting a file, access the Hamburger Menu dropdown in Windows and choose Insert.

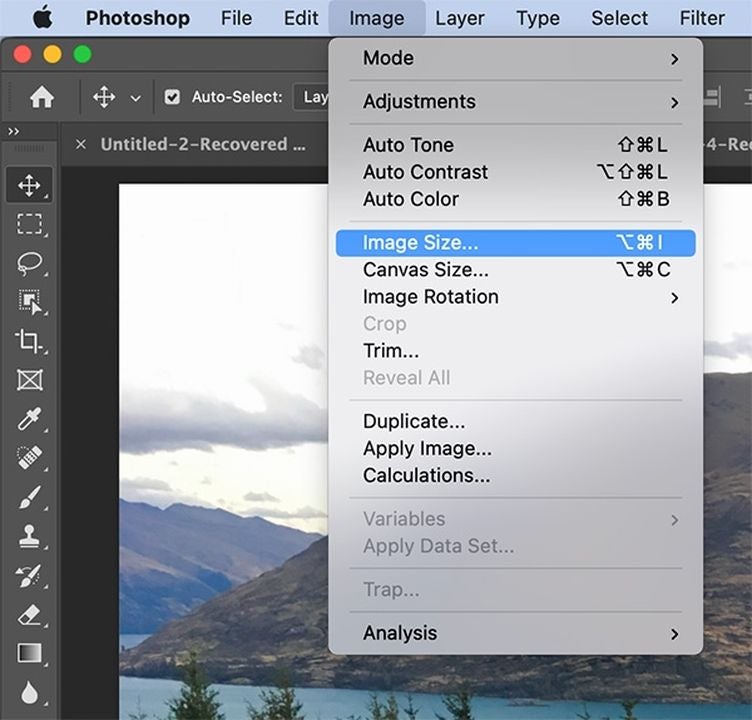
    Take a moment to select your canvas and resize it using the Canvas tab, and bring your object to the desired scale. We recommend the Transparent Canvas if you don’t want the final product to display a white background. If you have the precise dimensions, enter them in the width and height boxes. To crop this image, click on the Select button, and access the crop tool. Press Crop to reframe the image template.

  3. Mask your image into a 3D object

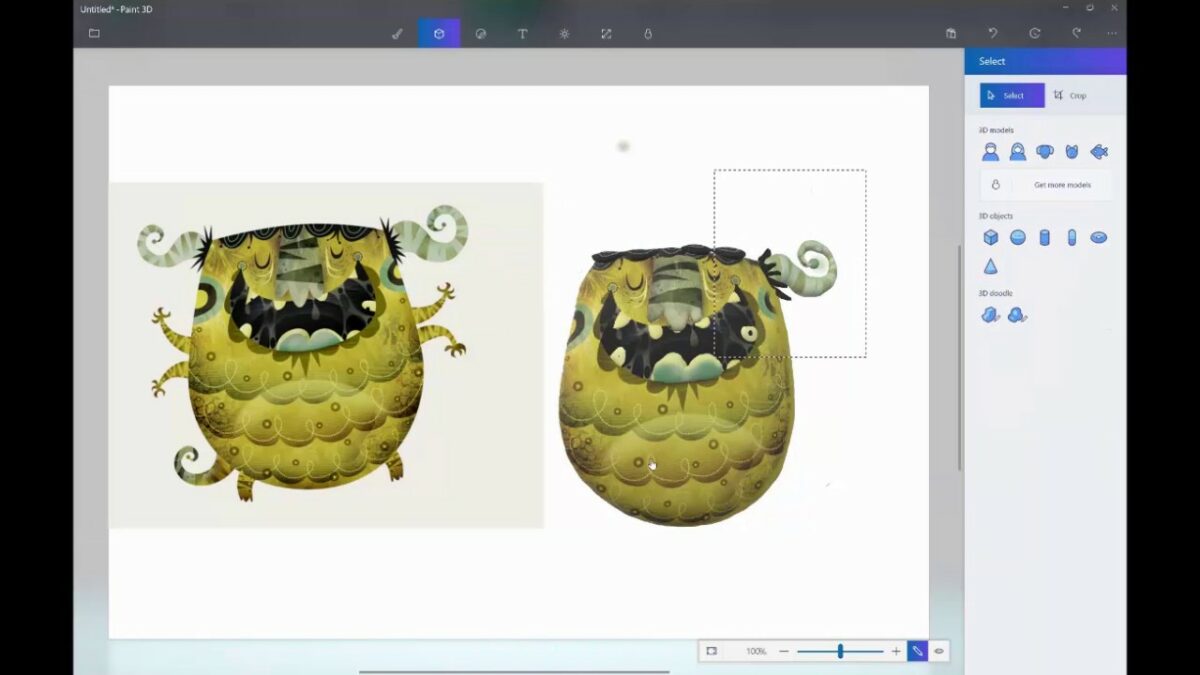
    Locate the 3D Object feature in Paint 3D to render your two dimensional image into a 3D shape

    Your object is still two-dimensional, so you need to access the 3D Object tab before rendering it into 3D. For illustration purposes, let’s assume you chose a basic 2D sphere as your template. Now, using your stylus, draw a facial expression on the object by hand after choosing the Objects > 3D doodle. Those who aren’t artistically inclined can access the various custom Microsoft stickers under the Stickers tab and apply one of these graphics to the sphere.

  4. Change the color of your object

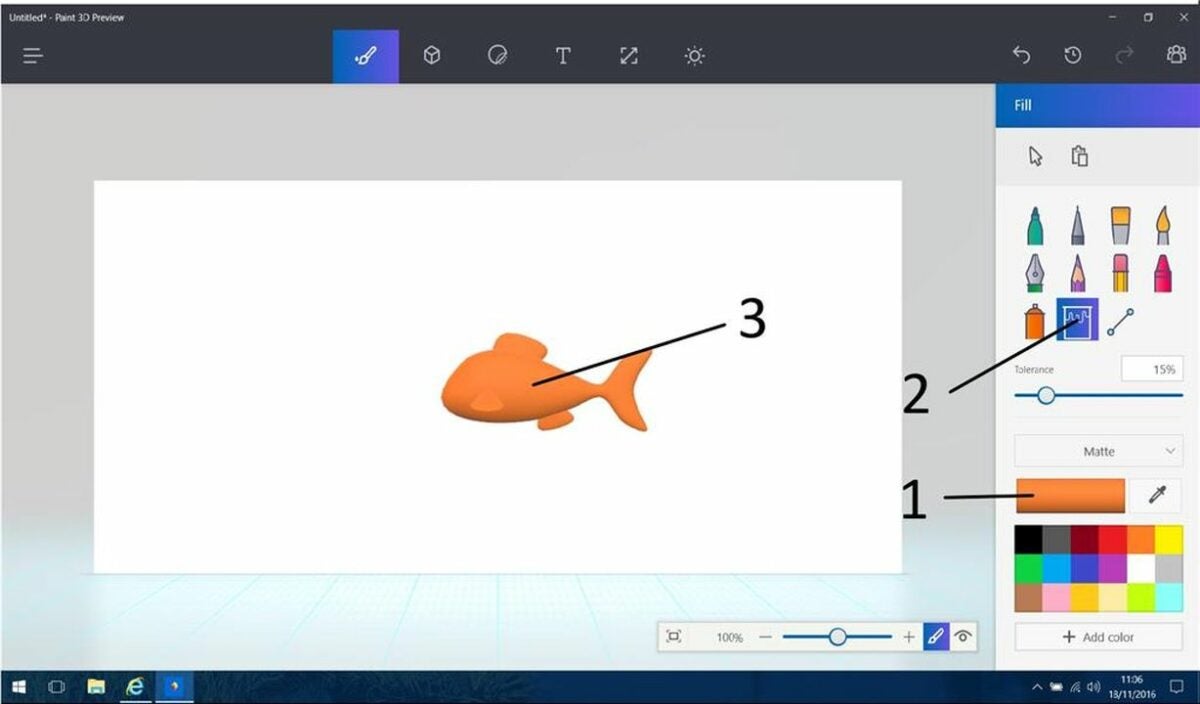
    Change the color of your object completely with the Fill tool

    To change the color of your object, locate the Tools tab. From there, choose the Fill, and find your preferred color by selecting Color. Use your mouse to tap on the object, and the action will fill it with your preferred shade.

    If you want to fill multiple objects, use either the Multiselect or Select all tools, and apply the new color to each file. To duplicate an object, all you need to do is select it and click on Copy and then Paste. Resize the objects by manipulating the anchors at their corners to establish their appropriate scale within your scene.

  5. Rotate your 3D object

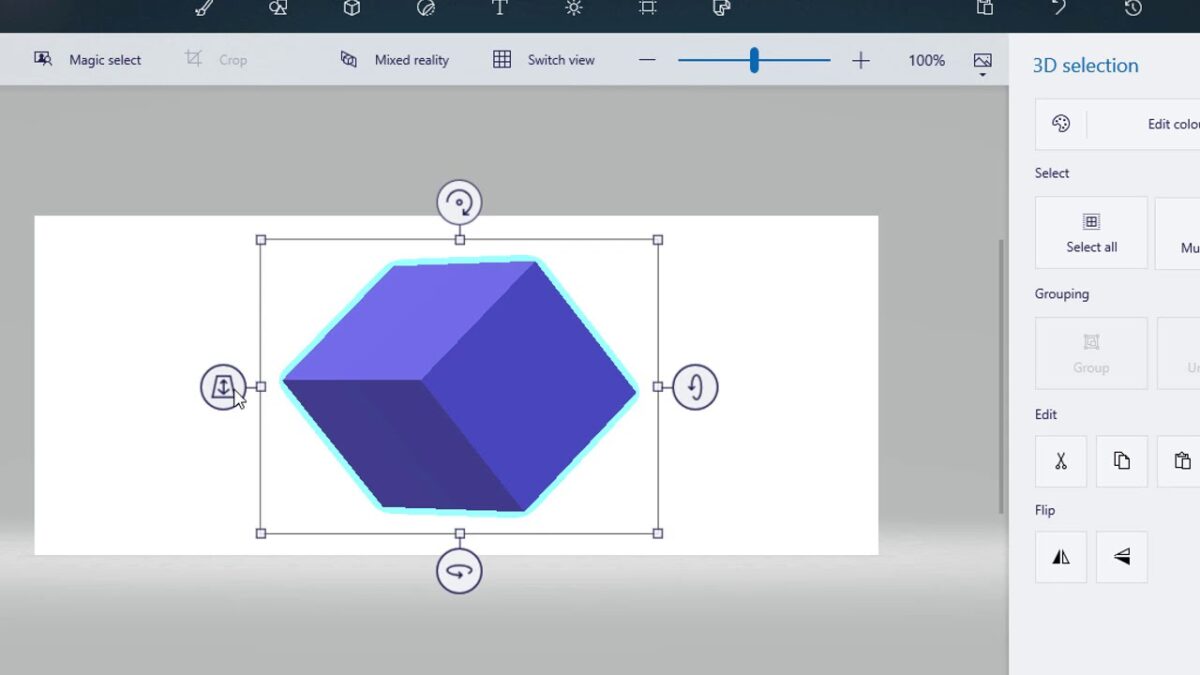
    Rotate your image by degrees using 3D Paint's Perspective Anchors

    You already rendered your creation into 3D with the 3D Object mask in a previous step, so now you can rotate it using the Perspective Anchors to reposition the figure(s) within the three-dimensional canvas. If you’re working with multiple objects, try resizing them while rotating the figures around at different angles to give more depth and dimension to your canvas.

    Finally, to preview your work in 3D, click on the object, and select the 3D preview icon, sliding it up or down. Save the project to your desktop or a folder by clicking Menu > Export file.

Ready to start exploring Microsoft Paint 3D?

Paint 3D is a no-cost, accessible digital content creation tool that lets you generate models from scratch or convert existing 2D templates into professional-grade 3D objects. Even if you’re a non-artist or complete beginner, Microsoft’s Paint 3D offers a great opportunity to unlock your creative side, and the software is entirely free to use. For more on the latest graphic design tools, check out our tutorial on how to paint strikingly realistic watercolors with Procreate.

How to quickly set up end-to-end encryption for your Thunderbird email account

The latest version of Mozilla’s Thunderbird now supports leading-edge end-to-end encryption, and this feature is fully integrated into its main application. The new encryption tool is good news for those who use the service because the recent integration means the application no longer requires add-ons like Enigmail.

Mozilla Thunderbird Download

The OpenPGP nonproprietary encryption is free and lets you send encrypted messages directly from your Thunderbird account. You can also digitally sign your emails to alert your recipient that the message wasn’t modified in transit. Now, let’s take a closer look at how to get started with encryption in Mozilla’s Thunderbird.

  1. Install the latest version of Thunderbird

    Begin by downloading the latest edition of Thunderbird to install

    The first step is to download Thunderbird. You will need version 78.2.1 or later to access the OpenPGP encryption tool. Thunderbird works with both macOS and Windows. If you use the Ubuntu operating system, Thunderbird comes installed by default.

  2. Set up your Thunderbird email address

    You'll need to establish a Thunderbird email account before access its encryption feature

    Once you’ve opened a Thunderbird email account, proceed to choose a personalized email address. This process is rather straightforward since Thunderbird walks you through each step in a series of prompts. If you have an existing Thunderbird email, you can skip this process. In that case, all you will need is your email address and password to get started.

    After establishing your new email or logging in with your existing credentials, verify that the outgoing server is not set to port 25. Thunderbird blocks this port because of spam, so set your account to port 456 with SSL/TLS. Alternatively, if you have issues with port 456, try port 587 with STARTLS.

  3. Generate a unique key pair

    Establish your personal key pair in Thunderbird, if you haven't already

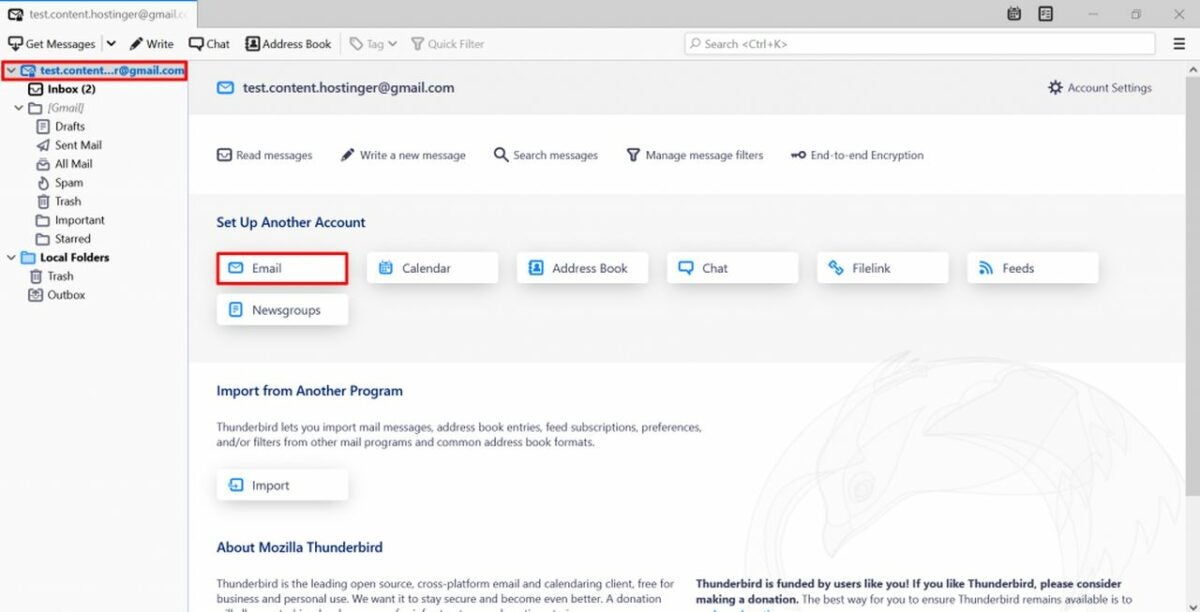
    Now that you’ve opened a Thunderbird email account, you can click on the email address on the side of Folders in the side panel and open Settings. You will see End-to-End Encryption displayed in the menu. Click on this option.

    Again, if you’ve already set up a key, then bypass this step. If not, you’ll see a message that reads Thunderbird does not have a personal key for your account. Alongside this prompt, you will encounter the option of adding your own key pair. Click on Add Key.

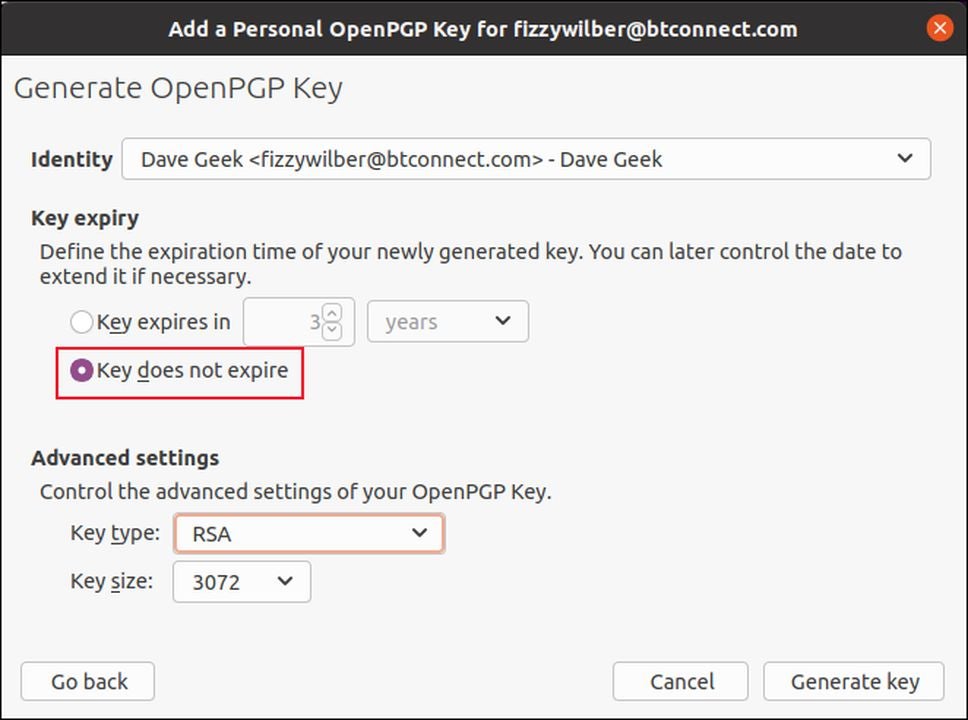
    Next, confirm that Create a new OpenPGP Key is selected, and press Continue. Thunderbird does give you the option of importing an existing key if you have one. If that’s the case, you can proceed to import it at this stage of the setup. If you haven’t established one, go ahead and select the key type RSA and the key size 4096. Finally, choose Generate Key, and press Confirm. Now, wait for the Thunderbird email application to produce a unique key pair. You will see a green confirmation box indicating the key was successfully created. The new key pair automatically applies itself to your account.

    Once the system generates your new personal encryption key, click Close. At this point, you’re essentially ready to start sending encrypted emails after completing these last few steps.

  4. Configure Thunderbird to attach your public key and sign your emails automatically

    Thunderbird allows you to attach your public key to every message and sign them automatically

    If you want to ensure your outbound messages are always encrypted and attach your public key to every mailing, go to Account settings and navigate to End-to-End Encryption again. Check the Add my digital signature by default box. Now, under Advanced settings, find Attach my public key when adding an OpenPGP digital signature, and check this box.

  5. Import your recipient’s public key

    You'll need access to your cotact's public key as well to deliver encrypted messages in Thunderbird

    This process shouldn’t be overlooked. You need the key pair you generated in step three and your contact’s public key to send encrypted emails. Here are the procedures for importing one:

    Whenever you receive a public key as an attachment, right-click on the file and choose Import OpenPGP Key. To locate publicly available keys, try searching for them by entering your recipient’s email. Find the user’s email in your inbox, and click on their address. You’ll notice a pop-up that reads Discover OpenPGP key. Click on this, and the recipient’s public key will display.

    Thunderbird also lets you manually import a public key for users who display them on their websites or a key server. Companies that routinely handle sensitive information will often publish their public key so that you can deliver encrypted messages. To manually import a public key, select End-to-End encryption. Click on OpenPGP Key Manager. Locate File, and choose Import Public Keys from File. Now, you can select the OpenPGP Public Key from your device.

    In the final steps, you’ll need to navigate to the Keyserver tab and choose Discover Public Keys Online. Click Okay to confirm the key’s validity and fingerprint. This completes the process of manually importing a public OpenPGP key.

Access free end-to-end encryption with Thunderbird

End-to-end encryption use is on the rise, and it’s a great way to add an extra layer of protection to your electronic communications. What’s most appealing about the Thunderbird application is that it’s free, and you don’t have to be an IT expert to set it up. For more on encryption, check out this recent article on how to use Encrypted Client Hello for a safer browsing experience on Microsoft Edge.