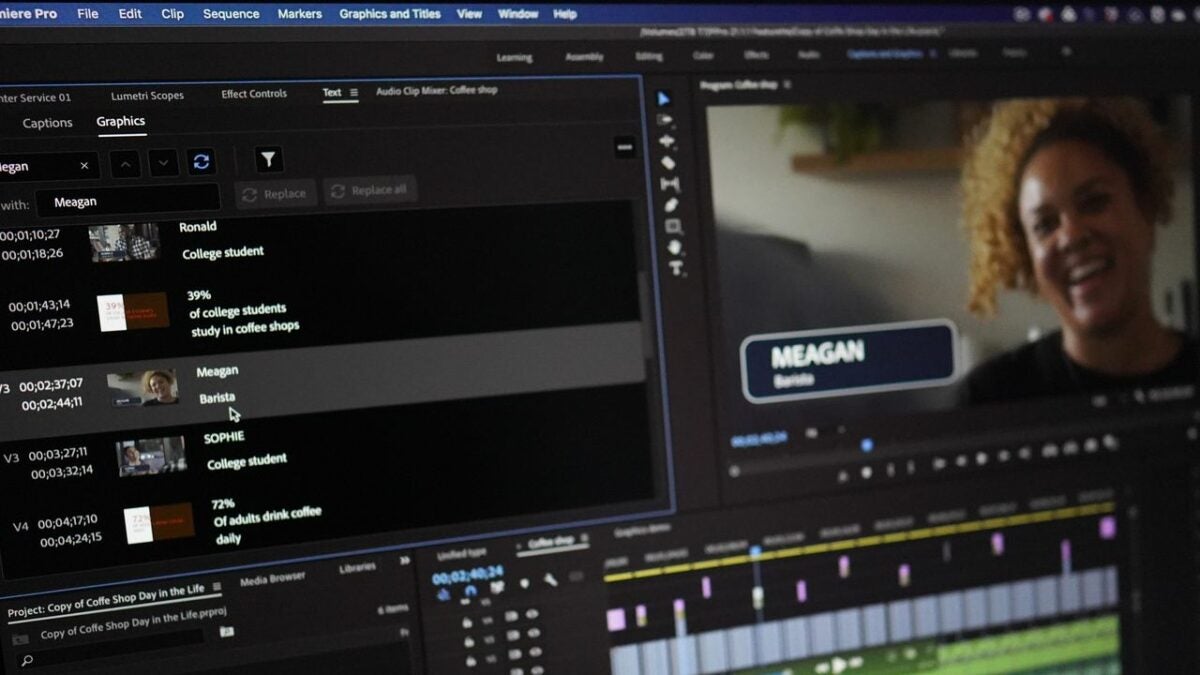
Premiere Pro review: where does Adobe’s video editor shine?

Adobe Premiere Pro is the raw video editing app from Adobe’s Suite. Its timeline-based interface, organized workspaces, and powerful editing tools, effects, and motion graphics are loved and lauded by some of the most innovative directors and content creators around the world.

It can take a while to get to know all its capabilities, but that’s only because Premiere can really do just about any video editing task imaginable. The app has been used to edit everything from Hollywood blockbusters and Super Bowl commercials to humble YouTube sketches and video podcasts.

If you’re a beginner, you’ll be able to understand the basic features and start editing with Premiere Pro after reading this article or watching a few brief tutorials. If you’re a professional video editor, read on to find out where Premiere shines and where its weakness starts to show.

You can no longer buy the Premiere Pro app outright; it’s only available as a subscription service with monthly or yearly payments. If you’d like to try the demo version, you can download a free seven-day trial of Adobe Premiere Pro.

Adobe Premiere DOWNLOAD

How does Premiere Pro compare to other video editors?

Compared to other video editing apps, the subscription price is pretty expensive. How much Adobe Premiere Pro will be worth it to you depends on your budget and what kind of video editing you’ll be doing. Although there isn’t a single standout alternative to Adobe Premiere Pro, it does have a few interesting competitors.

Premiere Pro is currently the most popular choice in the general video editing world, but there are several groundbreaking apps that can perform certain specialized tasks better or work more efficiently in different operating systems. Alternatives to Premiere Pro include:

Final Cut Pro has a lot of the same features but is optimized for macOS users.
DaVinci Resolve is cheaper and more focused on color correction.
Adobe After Effects has better visual effects and motion graphics tools; however, Premiere Pro is better at overall video editing and assembly.

Adobe Premiere Pro’s system requirements

If you use a PC, you’ll need the 64-bit version of Windows 10 or 11 to run the latest version of Premiere Pro. If you use a Mac, you’ll need at least macOS 10.15.

Make sure your CPU is at least a sixth-generation Intel or an AMD Ryzen 1000 Series or better with a minimum of 8 GB of RAM. Premiere now also has full support for Apple’s Silicon M1. Your display’s resolution should be a minimum of 1920 x 1080.
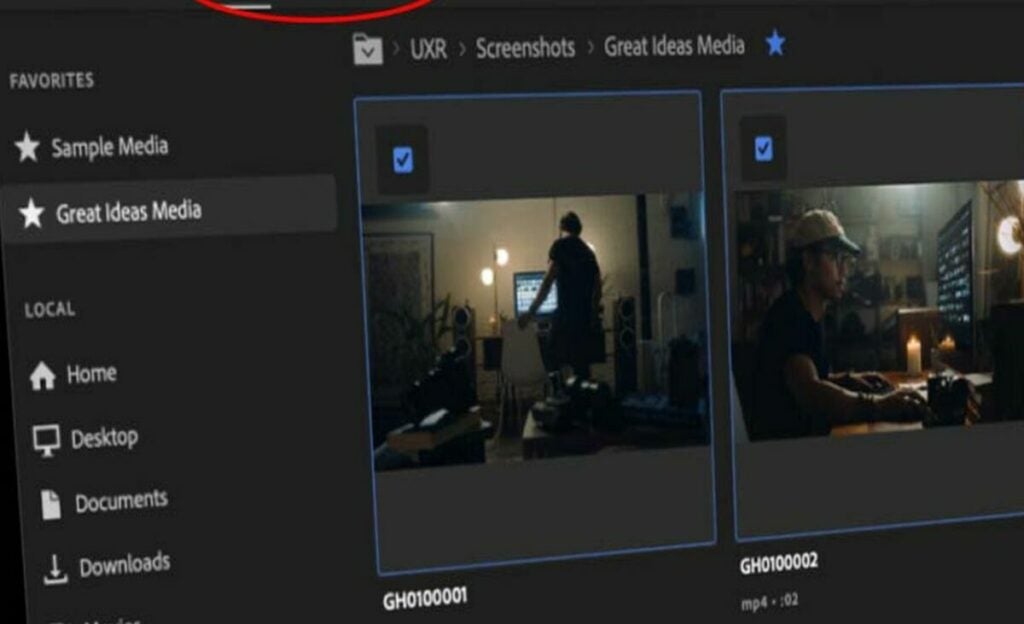
Adobe Premiere Pro main modes are import, edit, and export

A look at some of Premiere Pro’s newest upgrades


Older versions of the app had workspaces for Assembly, Editing, Titles, Audio, Effects, and Color. Now, it’s been simplified to just three main modes: Import, Edit, and Export.

The welcome screen now has a Learn option that can guide beginners through the workflow or show experts all the latest upgrades. The app comes with eight built-in interactive tutorials that demonstrate how to import clips, add titles, use color correction, edit audio, etc.

Many features and graphics now come with ready-made templates and animations. For instance, you can select one of the available animated motion graphic templates and just replace the default text with your own message or logo to make an instant intro.

The captioning workflow has been overhauled to allow for easier formatting and editing of your captions. There’s also a new automatic captioning feature that is currently in beta.

If you upload your videos to various social media sites, you may have to export to a different aspect ratio for each site. Premiere now has an Auto Reframe feature that uses AI to identify the most important things in your video and crop it to various aspect ratios, whether horizontal, vertical, or square, without losing sight of your subject. Auto Reframe also lets you adjust the keyframes it automatically creates in case you want to make some manual corrections. Final Cut Pro also recently released a similar feature it calls Smart Conform.

When you subscribe to the Adobe Premiere Pro service, you now get a free online video sharing account at Frame.io with 100 GB of space. The service includes a web viewer and reviewer that allows your collaborators to check out your beta project and give you notes without having to install Premiere Pro.

Import practically any format

Premiere Pro can import video footage from pretty much any device that can record it. This includes practically any raw format from any professional camera, smartphone, or DSLR with resolutions up to 8K. With the right cables, you can even import video from tape with the timecodes intact.
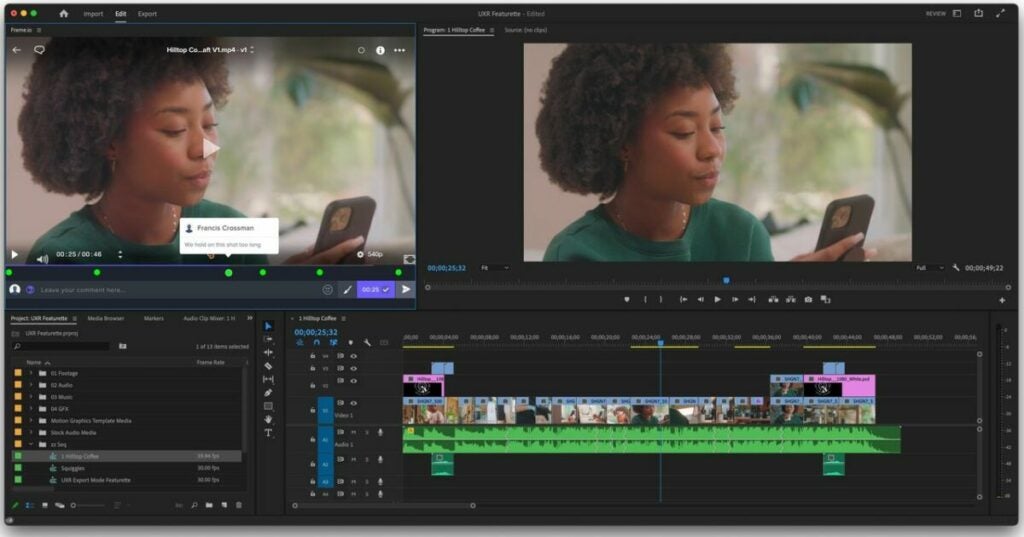
Altering a video in Adobe Premiere Pro edit mode

Premiere’s editing layout is intuitive and adjustable

Once you’re in Edit mode, the workspace shows you four panels. If you like, you can undock these panels and move them around or remove them and add different ones.

  • Previews and thumbnails of your source footage are at the top left
  • A preview of your project video is at the top right
  • Your project’s assets are at the bottom left
  • Your track timeline is at the bottom right

Your track timeline has two separate sections to help keep you organized. All the audio tracks are placed in the bottom section, and all the video tracks, including images and graphics, are in the top section.

If you want to skip the Import screen, you can just drag and drop almost any type of media file from any file explorer straight into your timeline. Premiere Pro will automatically create separate but linked video and audio tracks and place your media in them so that you can jump right into editing. The app will also automatically save your project at regular intervals to make sure you don’t lose too much if the power goes out.

The basic editing tools are easy to learn

Premiere Pro offers four classic editing tools that sound like they might feel at home in a waterpark: Slip, Slide, Roll, and Ripple. These give you different ways to trim or shift clips quickly while preserving the length of the project or adjacent clips. You can edit tracks even while the project preview is playing.

The app also has a regular Trim mode that trims without shifting, which you can access by double-clicking on either end of any clip. In Trim mode, your preview window will split to display the outgoing frame of the clip you’re editing as well as the incoming frame of any adjacent clip. This mode gives you easy options to make adjustments one frame at a time or add transitions.

Adobe Premiere Pro’s transitions

Premiere Pro comes with a large library of transition effects, and you can find plugins online with many more. Once you have at least two clips in your timeline, you can search for a transition in the assets panel at the bottom left and then drag and drop it to where the clips meet.

Transitions are just as user-friendly as clips. You can drag the edges of a transition in your timeline to change its length or select the transition and delete it. Selecting a transition will also open a transition control panel beside your project preview panel where you can dig in and change even more details.

Lots of highly maneuverable effects

The app comes with hundreds of video and audio effects, all of which are searchable from a search box in the assets panel. These include toolkits for

  • Lighting
  • Colorizing
  • Keying
  • Warping
  • Stylizing

Premiere Pro lets you drag and drop any effect onto any track to apply it directly. You can also go to File > New > Adjustment Layer to create a new adjustment layer on your timeline. When you add an effect to an adjustment layer, it affects all the tracks below it.

You’ll find the Effects Control window in a tab in the top left panel. When you select any clip or adjustment layer, you’ll be able to tweak any effects you’ve applied to it here. That includes adjustments to the opacity, speed, position, scale, rotation, anchor point, and Lumetri colors of the clip. This window is also where you can apply time remapping to any effect by using keyframes.

Premiere’s built-in effects are user-friendly and powerful enough that they’ll work for most home content creators and even many professionals. If you’re making the next “Avatar” or you need advanced tools like automatic motion tracking masks, you may need a more powerful engine like Adobe After Effects.
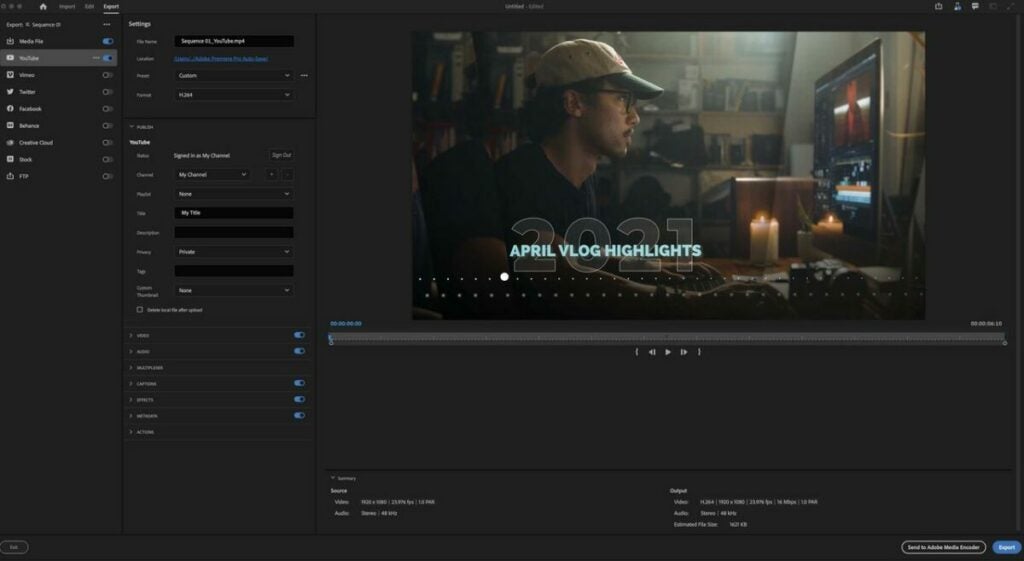
Use export mode in Adobe Premiere Pro to choose custom templates

Export as simple or advanced as you like

When you’re happy with your project, you’ll move seamlessly to the Export workspace. The Export mode gives you a list of handy export templates you can pick, from common social media sizes to high-quality media files. You can also select various formats together to export to all of them at once.

If you want to get into the details, Premiere gives you dropdown menus in plenty of advanced categories so that you can tweak your export specs to taste. If not, the interface lets you breeze past the specifics and just export your video.

Final verdict: Adobe Premiere Pro is the king of raw video editing

Whether you’re a novice video editor or a demanding pro, Premiere has the best for both worlds. Its large professional-level toolkit has plenty of simple entry points for newbies. The app runs and renders quickly on most computers and fits into an expansive ecosystem of products and services that let users create and collaborate easier than ever.

Ready to try out some of the features of this video editing software? Check out our guide on how to color correct amazing nighttime videos with Premiere Pro.

Pros

  • Drag-and-drop media and effects
  • Detailed transition editing
  • Subscription service gives you regular free updates
  • Easy integration with full Adobe Suite

Cons

  • Steep overall learning curve
  • Unsatisfactory 3D graphics editing

Developer: Adobe, Inc.

Publisher: Adobe, Inc.

Top Features: Timeline-based video editing

Platform Reviewed: Windows PC
How to get started with Microsoft Publisher

Part of Microsoft Office’s suite, Microsoft Publisher helps you design projects and publications that include both text and graphics. It provides user-friendly templates and customizable objects that make professional-looking graphic layout and typography as easy and intuitive as possible.

In this Microsoft Publisher tutorial, we’ll explain the app’s basic tools and features so that you can get started right away creating content like newsletters, brochures, business cards, and more.

  1. Pick a template

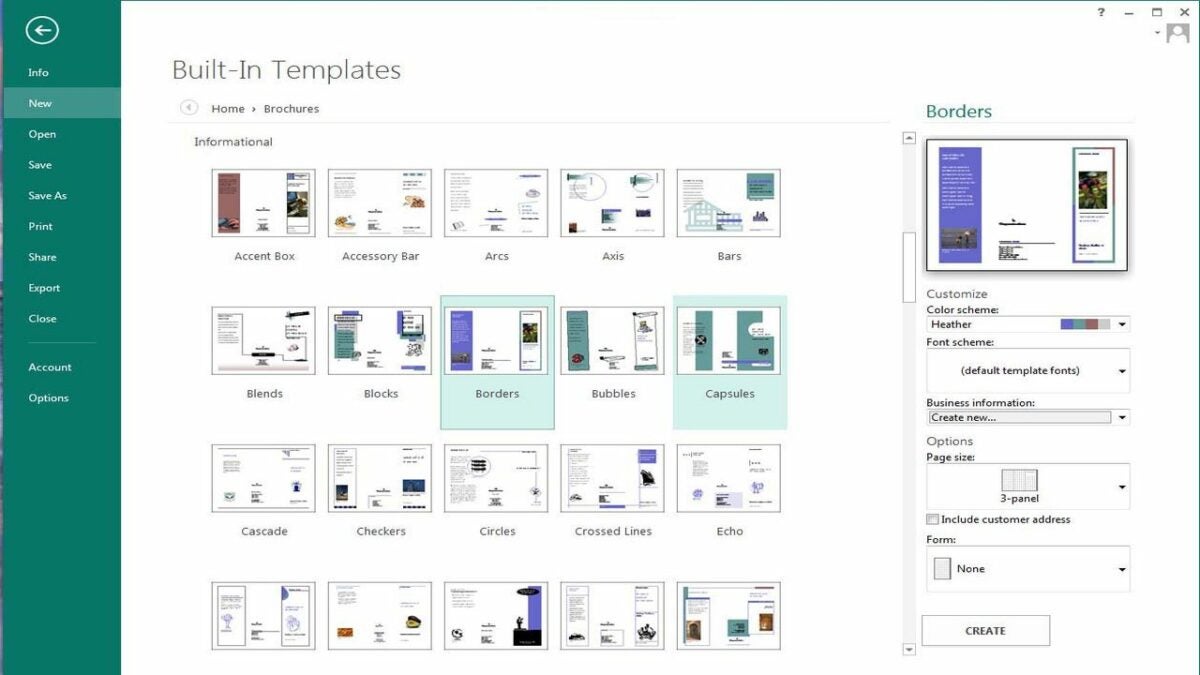
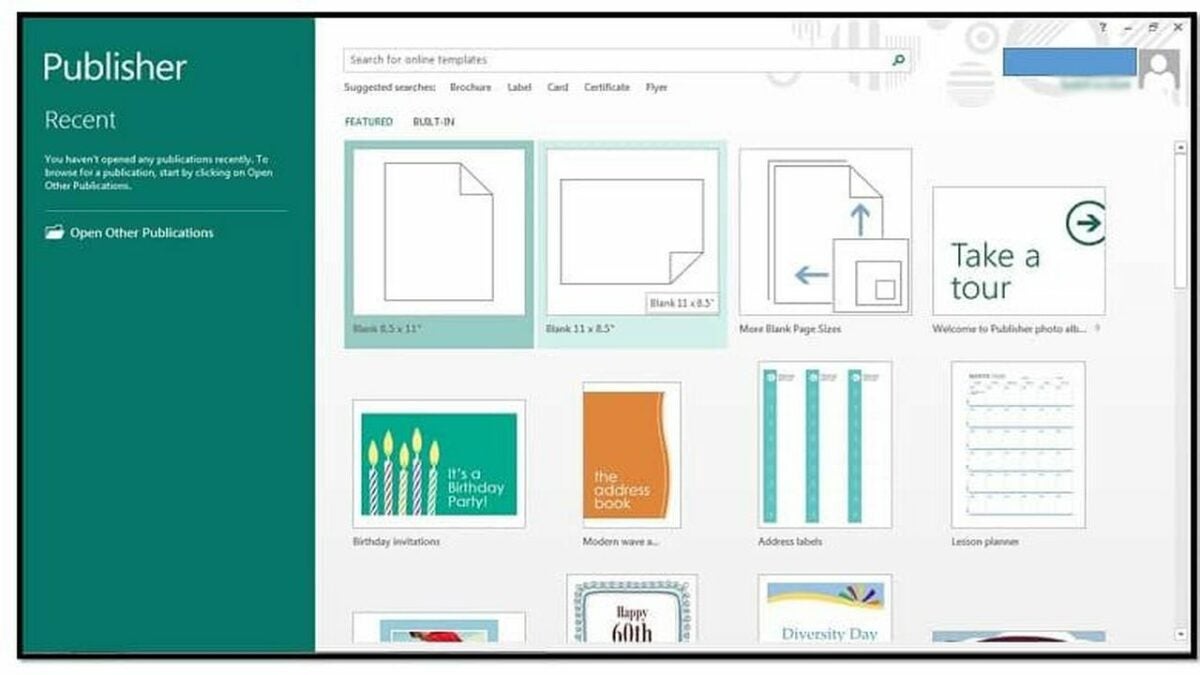
    Microsoft Publisher’s built-in templates.

    When you first open Microsoft Publisher, you’ll see the start screen displaying a list of common project styles that you can choose. You can also use the search bar to find a more customized template online.

    Below the search bar, you can see the default page is showing the Featured templates. If you want to come up with your own layout, use one of the blank templates here on the Featured page.

    If you want to use a preset, click on the Built-In tab beside the Featured tab, and Publisher will show you a list of folders sorted by publication types, like Newsletters, Business cards, etc. Inside these folders, you’ll see thumbnails for all Publisher’s built-in template styles.

    Select one that resembles the project you have in mind. You can customize the size, orientation, color palette, and font scheme in the right panel with a live thumbnail preview. Once you’re happy with the preview, click Create at the bottom right to load the still fully customizable template.

  2. Get to know your workspace

    Ribbon toolbar in Microsoft Publisher.

    Publisher’s basic layout looks almost exactly like the layout of any other Microsoft Office app. You’ll see your project in the main workspace at the center of the screen and the main ribbon toolbar across the top of the screen. The ribbon toolbar is where you’ll find all the most important tools to design, edit, and review your project.

    One important difference in Publisher is that you’ll find a secondary toolbar on the left of your screen showing an overview of all the pages in your project. This Pages toolbar lets you select any page’s thumbnail to display that page in your main workspace.

  3. How to use objects

    Choosing objects such as pictures in Microsoft Publisher.

    Publisher treats everything you place on any page as individual objects. That includes text, pictures, shapes, borders, headings, etc. Any object can be arranged and edited separately from any other object, allowing you complete freedom to manipulate content.

    Each object has its own border outline with white circles called handles on each corner. You can use the handles to edit or move any object by clicking and dragging. Most of Publisher’s templates are made of combinations of preset objects in preset locations.

  4. How to add text boxes

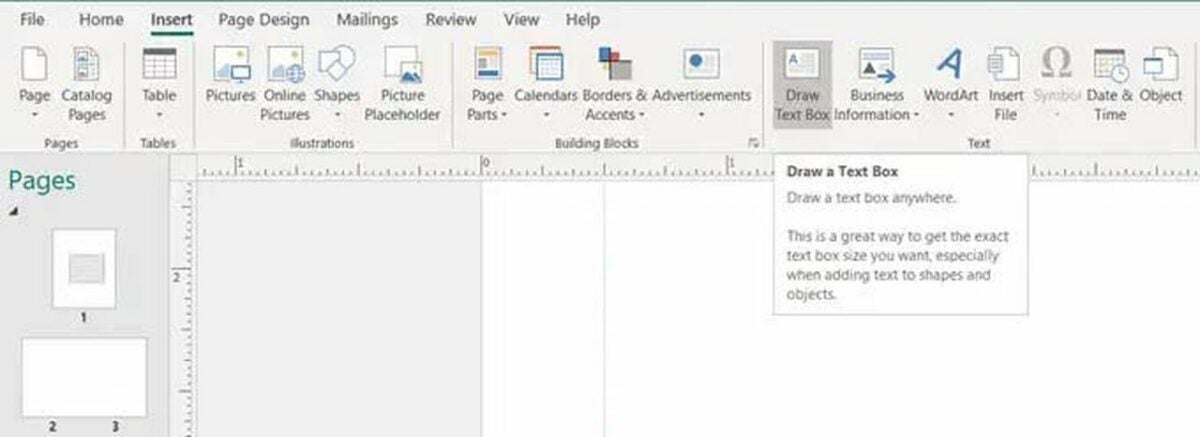
    Draw text box in Microsoft Publisher.

    Most templates come with prearranged text box objects containing generic text. You can click on any existing text to select the text box object and add your own words.

    If you want to insert your own text box, click on the Insert tab in the ribbon toolbar, and select Draw Text Box on the right side of your screen. Your cursor will show a crosshairs icon, which you can click and drag to draw your text box.

    If you need to edit your text box, select it, and click the Format tab that appears in the ribbon toolbar to customize the font, size, alignment, and color.

  5. How to add images

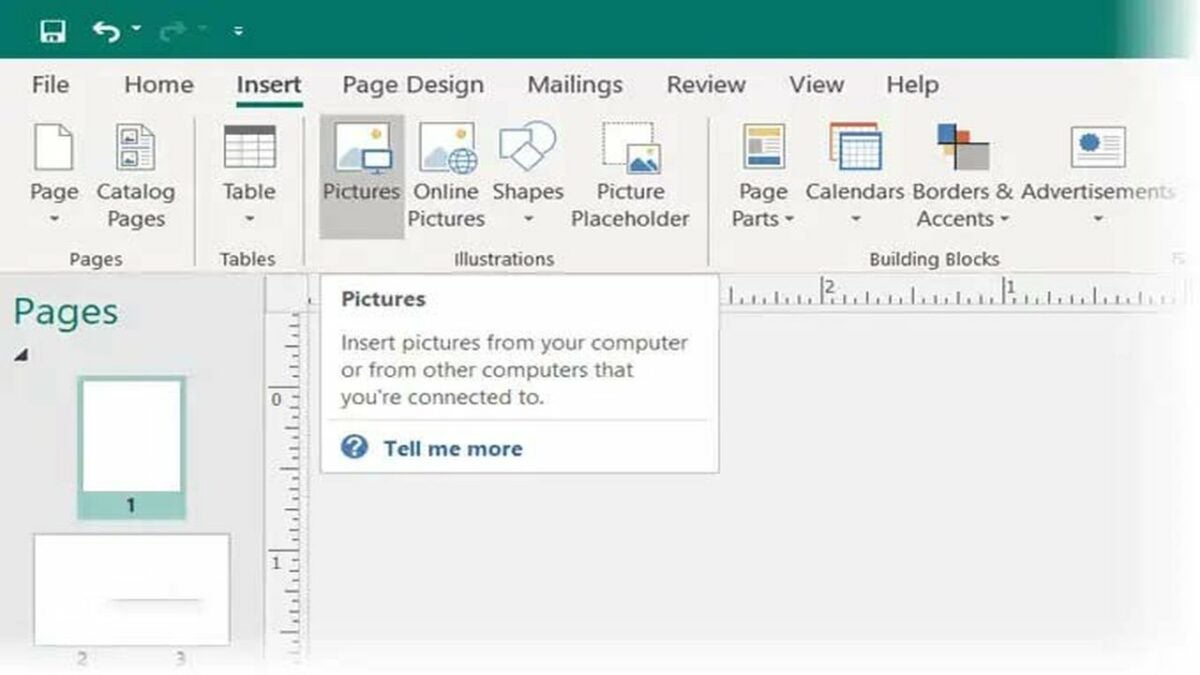
    Inserting picture in Microsoft Publisher.

    To add an image, click the ribbon’s Insert tab, and select Pictures. You’ll be able to choose any image from your computer, the cloud, or an internet search.

    Once you’ve placed your image on any page in your project, you can select the image and click on the Format tab in the ribbon to display Publisher’s built-in image editing tools. These include:
    • Corrections for brightness and contrast
    • Recolor
    • Picture border and effects
    • Wrap text
    • Crop
    • Flip
    • Rotate
    • Resize

    Click the tool you need, and then use the dropdown menus or the handles that will appear around your picture to make specific adjustments.

  6. How to add shapes and other objects

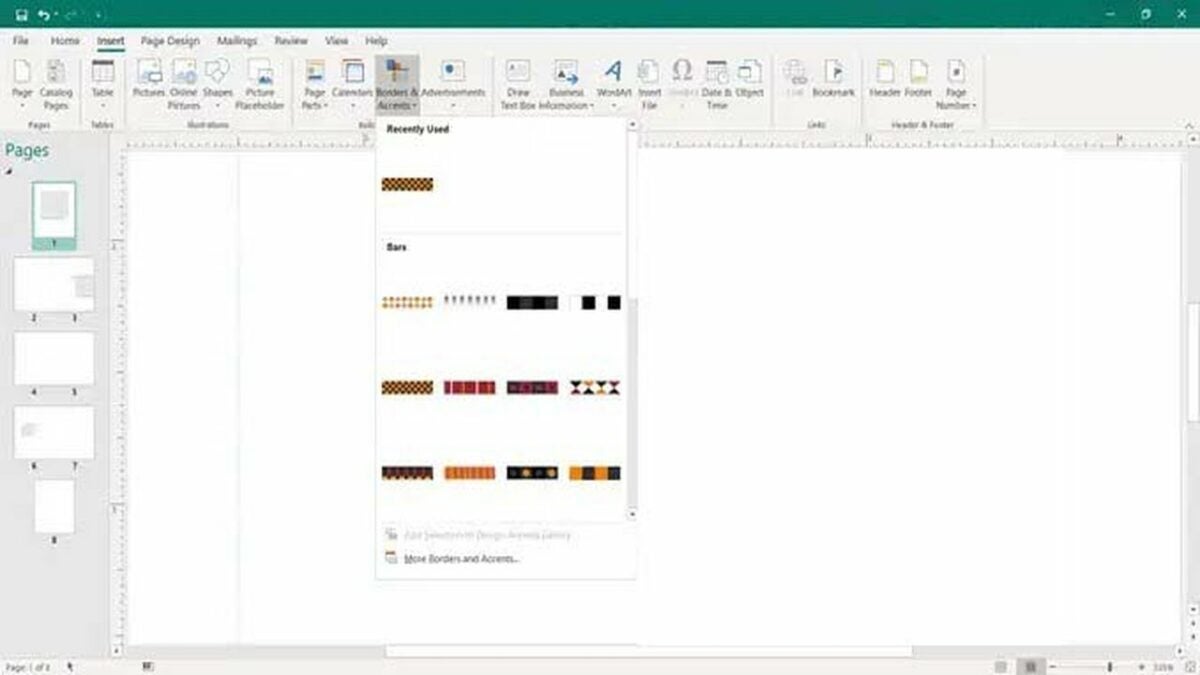
    Adding other objects in Microsoft Publisher.

    To the right of the Pictures button, you’ll find the Shapes button. This is where you can insert basic shapes into your project. These can come in handy to create logos and simple art.

    To the right of the Shapes button are a few more pre-formatted elements that you can insert and modify to match your overall design. These building blocks include borders, calendars, WordArt, date and time boxes, quotes, headers, footers, etc.

    When you insert one of these into your project, you can right-click on it and select Format Object from the popup menu to play with its colors, style, alignment, etc.

  7. How to use Design Checker

    Once you feel satisfied with your project’s layout, finish up by giving it a final automated inspection using Publisher’s Design Checker. You can find it by clicking File in the ribbon and then Info > Design Checker.

    A menu will appear on the right side of your screen displaying a list of design or layout issues Design Checker found in your content. Click on any specific one to see its full explanation along with Publisher’s suggestions on what to change.

  8. Save, export, and print your finished project

    While you work, you can save your project regularly by pressing CTRL + S. Once you’re happy with your design, you can export your project to your favorite file format, such as PDF or HTML, by clicking on File > Export. You can also print your design by selecting File > Print.

    Get started today by downloading and installing Microsoft Publisher. Want to test out another app? Check out these four alternatives to Microsoft Publisher.

How to shade with PaintTool SAI to give your characters depth

PaintTool SAI is a lightweight painting application that’s beloved by digital artists who specialize in animated characters. This software for Windows comes with a broad array of useful tools, most of which are easy to learn.

In this tutorial, we’ll show you how to separate a character’s outline and flat colors and use them as a mask to draw and then blend nondestructive shadows and highlights inside the lines. We’ve laid out a few simple tricks that you can use if you’re short on time as well as some more detailed methods if you prefer to do it yourself.

  1. It’s all about the layers

    Layer settings in PaintTool SAI.

    Once you’ve finished your characters’ outlines and filled in their basic flat colors, it’s time to bring them to life with shading. There are a few different ways to polish your characters and make them look at home in their environments. However, most of these methods involve creating a shading layer.

    – Start by merging the levels that contain your outlines and flat colors. Select the relevant layers, and click the bottom left button in the Layers Panel showing a plus sign and a down arrow. You can separate them later if you need to.

    – Select this merged layer, and click its Preserve Opacity box, which is displayed in text above the Layers Panel. Preserve Opacity locks all the lines and fills you’ve already drawn, making it easier to keep your shading neatly inside the lines.

  2. Creating new shading layers

    Layer modes in PaintTool SAI.

    In general, more layers will give you more control over your shading. Here’s how to create new shading layers in PaintTool SAI.

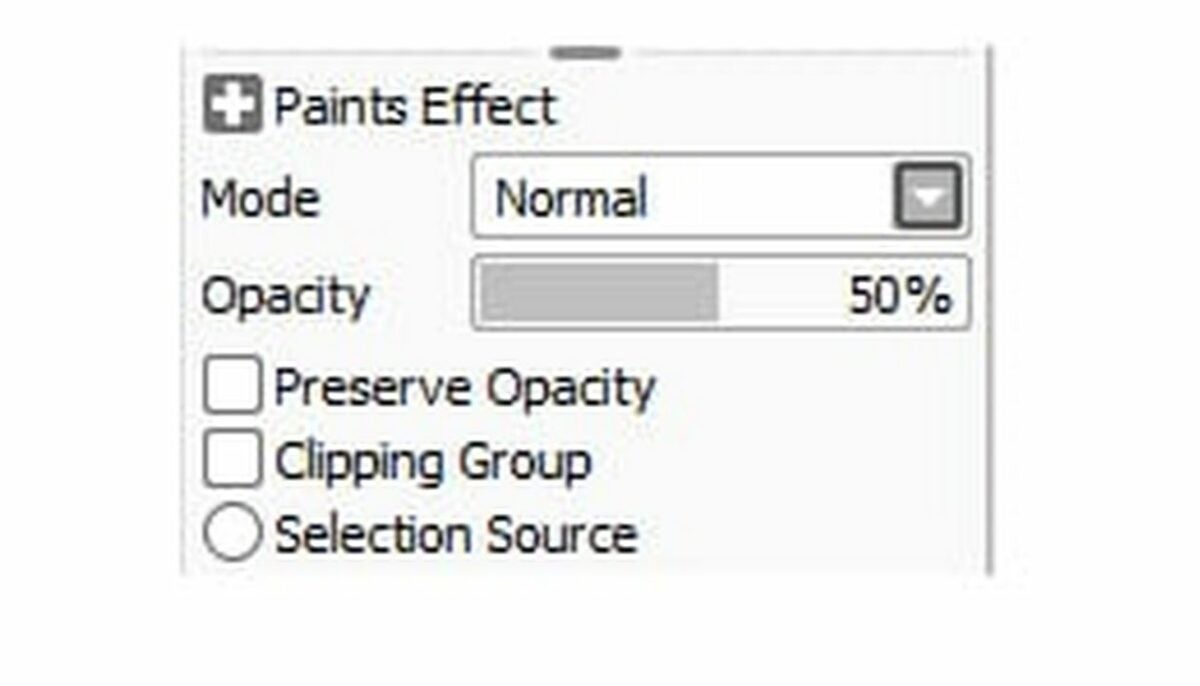
    – Click on the New Layer icon at the top left of the Layers Panel, which shows a blank piece of paper. This layer is where you’ll draw your shading, so make sure it’s above your outline layer. Leave Preserve Opacity off for this layer, but click the Clipping Group box right below it. That will clip your shading layer to the outline layer below so it can act as a mask when you shade.

    – Right above the Preserve Opacity box that you left unchecked, you can set the transparency of this shading layer. Anywhere from 10% to 50% opacity will let you see the outlines below clearly.

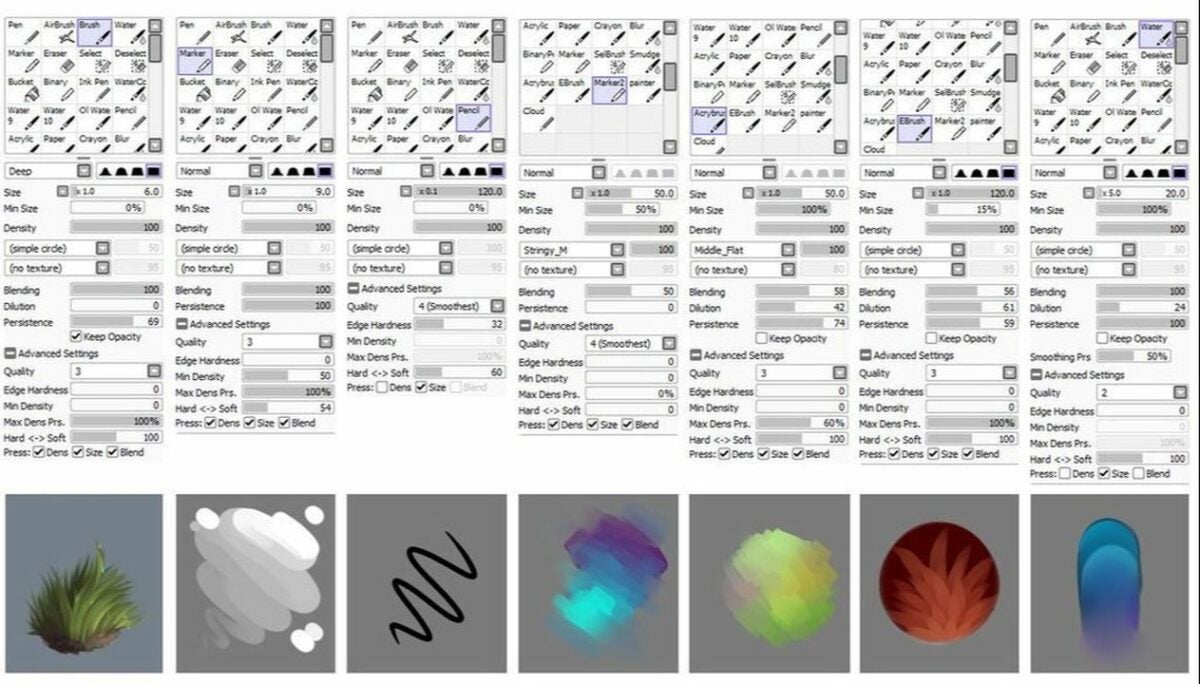
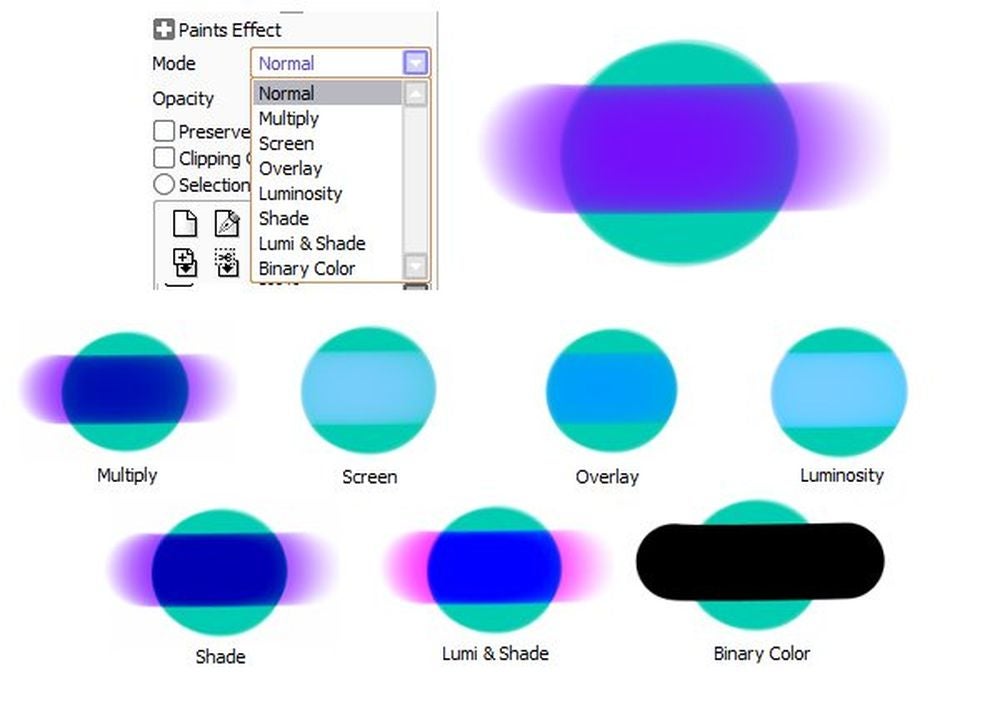
    – Above the opacity meter, you can set your layer’s mode, which is how this shading layer will blend with your outline layer. Normal Mode will completely cover the layer beneath it, but almost any other blending mode will work, depending on your shading style. The Multiply, Shade, Screen, and Luminosity modes are popular options to darken or lighten your characters. Overlay and Lumi&Shade work both ways, allowing you to make shaded areas darker and highlights lighter at the same time.

  3. Adding fringe effects

    Fringe effect in PaintTool SAI.

    For a quick shading, follow these steps for adding fringe effects.

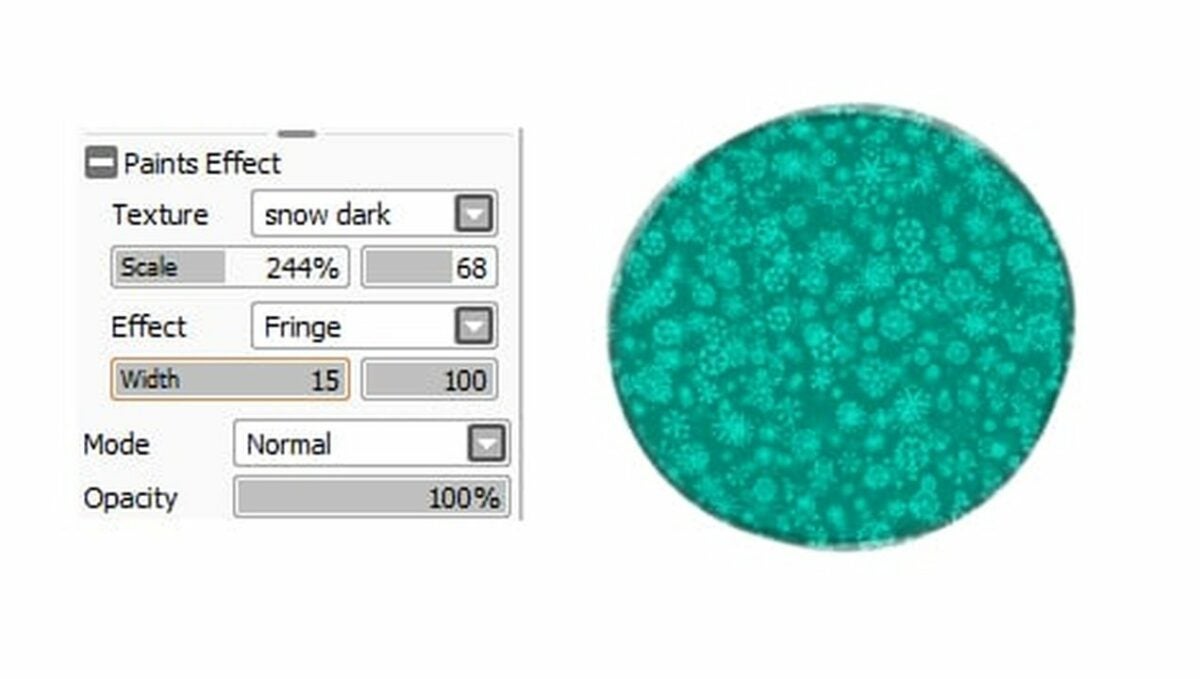
    – Open the Paints Effect drop-down menu, and select the Fringe Effect option. That will add a thin band of automatic shading to all your edges.

    – You can change the effect’s opacity and width to modify the darkness and length of the generated shadows.

  4. Adding shadows

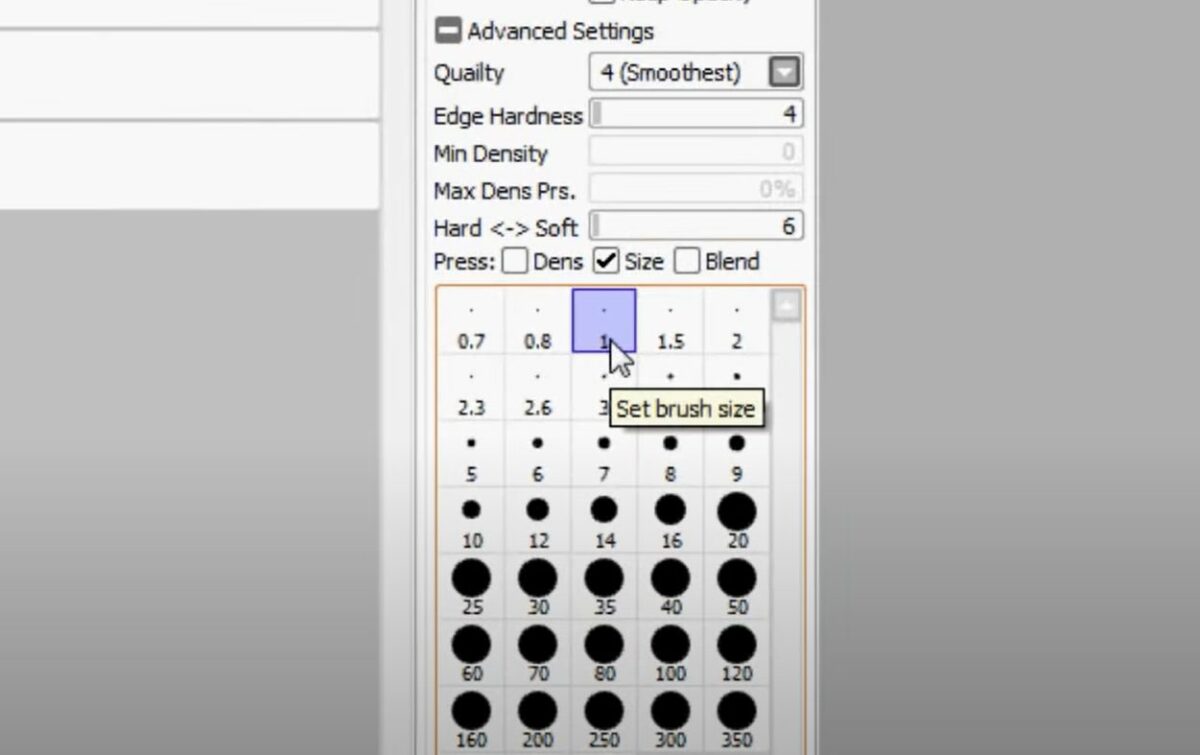
    Setting brush size in PaintTool SAI.

    If you want to add detailed shadows in PaintTool SAI, you can do so from the shading layer.

    – First, select a darkening mode like Shade or Multiply. Select a brush size and color that you feel comfortable with, and use it to darken the areas on your character opposite your light source.

    – Once you’ve painted on the shadows, you can smooth away any rough edges by giving them a once-over using the Oil Water brush.

  5. Add highlights

    Another great way to improve your visual dynamics is to add highlights in PaintTool SAI.

    – Add a new layer above your shading layer, and use a lightening mode like Screen or Luminosity.

    – Pick a thin brush size and a bright color to touch up the areas where the light hits your character.

    – You can also add thin dabs of white to make glossy or metallic surfaces shine. Use the Oil Water brush to blend the edges if necessary.

Develop your own shading style in PaintTool SAI

Once you understand the basics of using PaintTool SAI’s brushes and layer modes to blend in your shading, you can play with your technique and develop your own shading style.

If you like to get into the details, you can create separate layers for each flat color you work with and then clip new shadow and highlight layers directly to each color layer. This method lets you use specific color shades that are slightly darker and lighter than each original flat color.

If you prefer to keep it simple, you can leave all your colors in the same layer and add just a single layer for your shadows. Make sure your shadow layer is in Multiply mode, fill in all the shadows using a general-purpose color like gray or purple, and adjust the opacity till it looks good to you. If you want to add highlights, you can do this using another single layer set to Screen. Paint with a white brush, and blend and fade to taste.

Ready to try out some more PaintTool SAI design techniques? Check out our guide on how to do a disintegrate effect in PaintTool SAI.