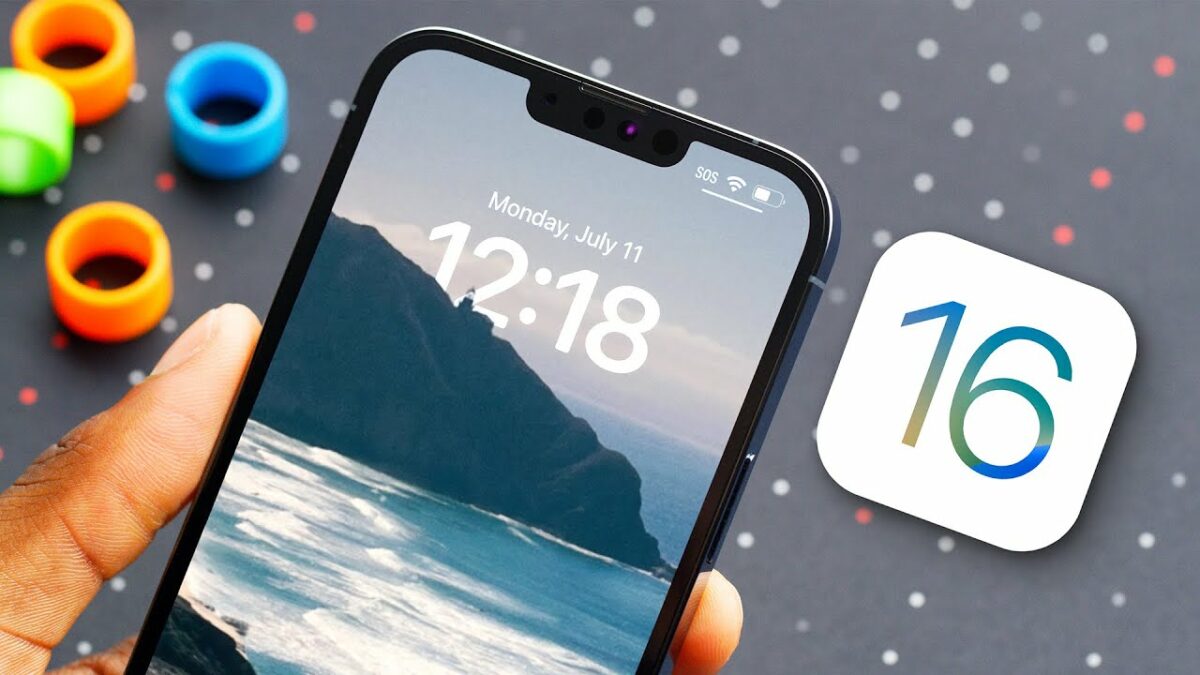
Top 5 tips to create a productivity ninja screen on your iPhone with iOS 16

Have you ever wanted to create a productivity ninja on your iPhone? With iOS 16 recently introduced, the iPhone is getting a brand new look. I hope these new tips and tricks can help you personalize your screen and improve your productivity.

iOS 16 DOWNLOAD

Overall, it’s a more efficient screen than in previous versions and has the potential to keep you on your toes. Here’s how to create a productivity ninja on your iOS 16 phone.

Interactive wallpaper

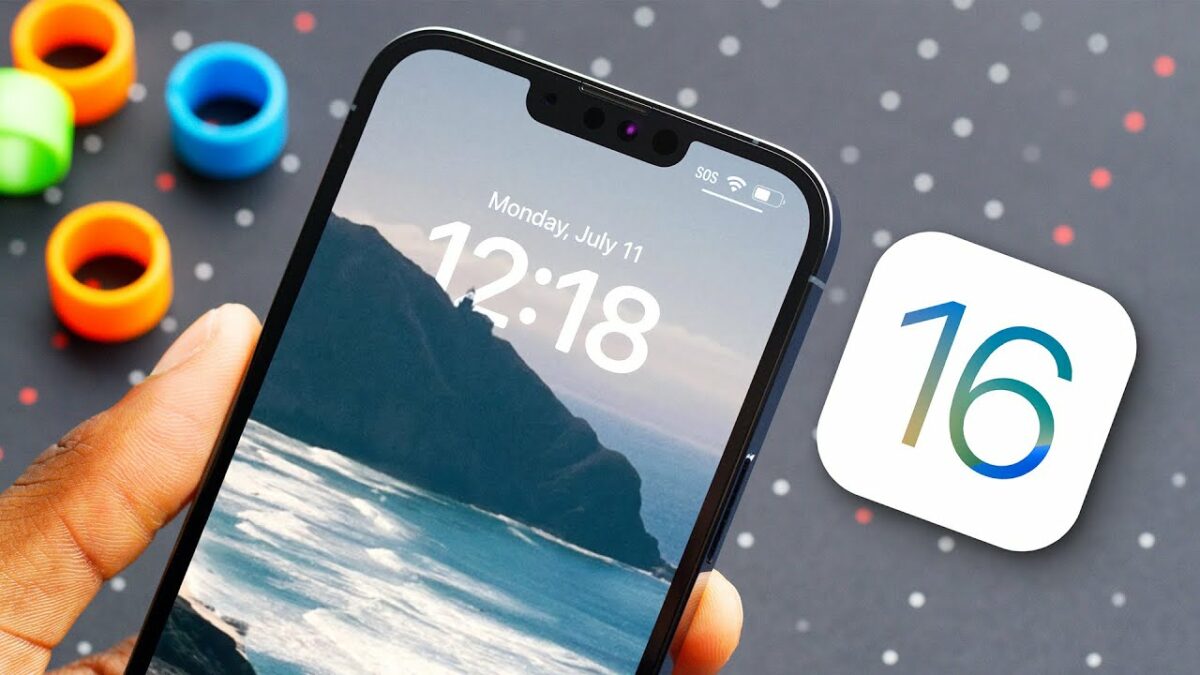
What better way to celebrate the new iOS than by setting up an interactive wallpaper that encourages you to work more efficiently? With iOS 16, Apple introduced a new feature called interactive notifications that allows you to customize the content of your notifications. So you can choose what kind of information you want to get in your alerts. You can even set up a custom notification for yourself!

Now you can use this new feature to set up an interactive background for your phone. This will help you stay focused on what’s important and make it look like you’re working hard. The interactive wallpapers are essentially static images that change based on how you interact with them. They can be used as an alarm clock or an image in a slide show. The possibilities are endless!

Here’s how to set up an interactive wallpaper:

  • From settings, go to wallpapers, then press and add new wallpaper
  • On the iOS 16 lock screen, press long to change your wallpaper.
  • From the gallery, tap the blue plus button, customize your home screen and pick out a picture you want to set.  

Productivity Ninja Screen On Your iPhone With iOS 16

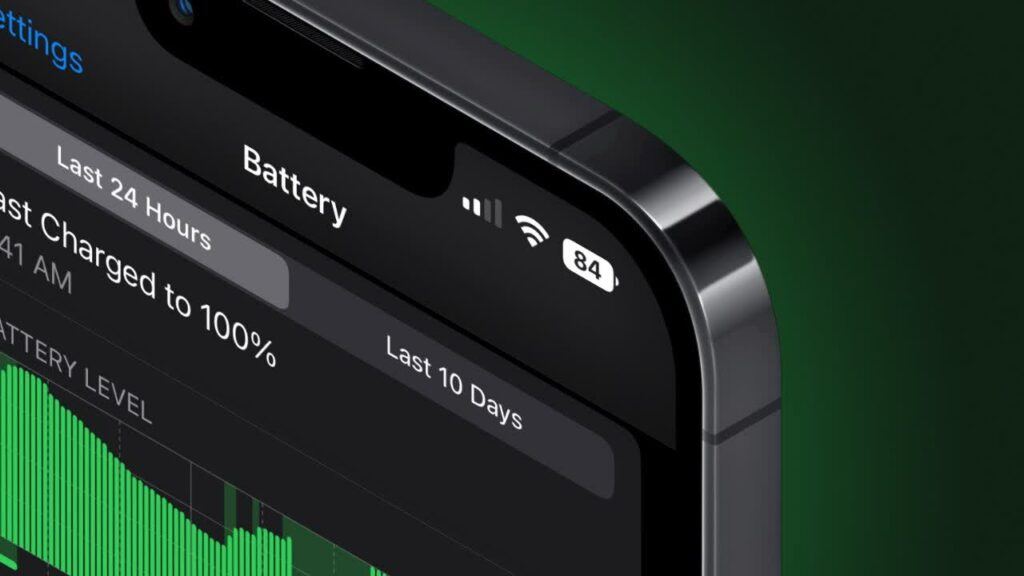
New battery percentage indicator

The battery percentage indicator is a new iOS 16 feature that shows the battery life in real-time. This means you can now take advantage of this feature to help improve your productivity on your device.

If you know that you need to get some work done and are looking for a new way to make it happen, consider using the new battery percentage indicator to help you stay focused. You’ll know when it’s time for a quick charge or find out where you stand with your remaining battery life by checking it on your phone!
Productivity Ninja Screen On Your iPhone With iOS 16

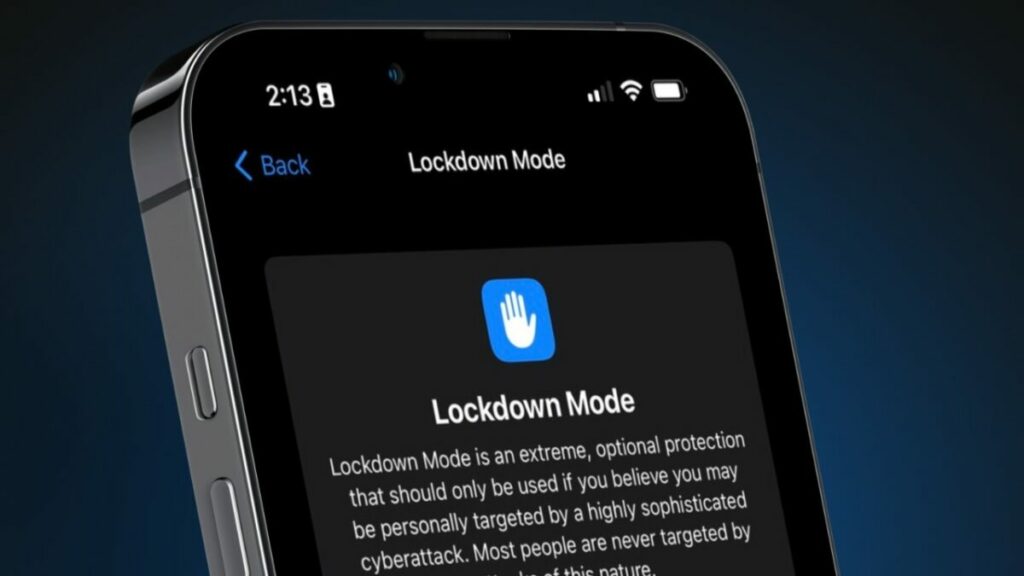
New iOS 16 lockdown mode

With the new lockdown mode, you can keep your device safe from hackers. Hackers are always looking for ways to get into your device and steal your information. How do you protect your device?

The new lockdown mode is a way to keep your device safe from hackers. This feature will lock down all apps until the user approves them. This means no matter what app or connection you have open; it will only work with those approved connections and apps. This makes it harder for hackers to access your data!
Productivity Ninja Screen On Your iPhone With iOS 16

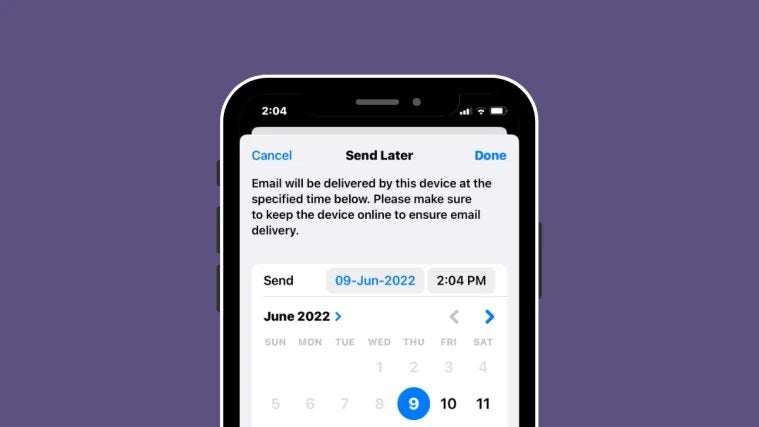
New email scheduling feature

Did you know that you can use the new email scheduling feature in iOS 16 to improve your productivity? With this new feature, you can set up recurring tasks that will automatically be sent to a specific email address at specific times. You’ll be able to send emails on your schedule rather than waiting for someone to ask for something or doing it from a browser, which means you’ll have more time for other things!

This feature can send reminders and updates about ongoing projects or tasks. It’s also a great way to keep everyone on the same page when communicating with clients and collaborators. The best part is that once you’ve set up recurring tasks, they’ll work no matter what device they’re sent from. So, if none of your team members has an iPhone, they can still receive their emails as scheduled.
Productivity Ninja Screen On Your iPhone With iOS 16

Share files quickly on iOS 16

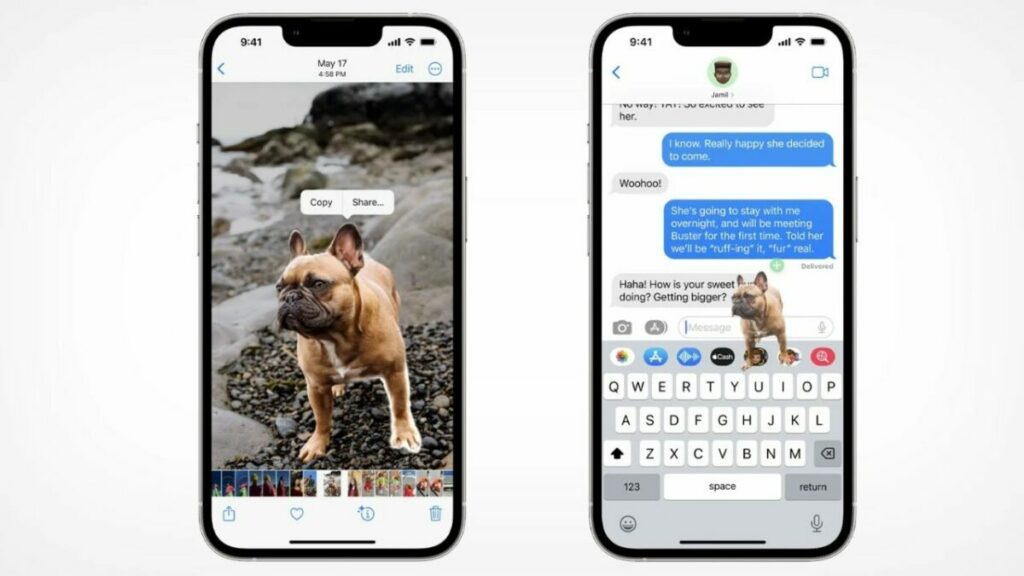
With the new iOS 16 shared photo library, you can share your entire digital library with anyone in seconds. iCloud Photo Library is a place where you can store all your photos and videos from all your devices, including those on your Mac or PC. You can use it to view and edit your photos, as well as share them with family members, friends, and even work colleagues.

With iCloud Photo Library on iOS 16, you can share your entire library with anyone in just a few taps. Simply tap the shared photo library to share your files quickly with others. You can also choose who gets access to which files by selecting specific categories or individual albums within the library.
Productivity Ninja Screen On Your iPhone With iOS 16

Protect your images and docs with Gallery Vault – Hide Pictures

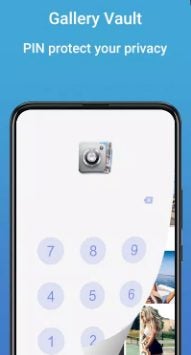
Gallery Vault is a new app that allows users to hide pictures and videos. This can be done so that only you can see these videos and pictures. These pictures are called Vaulted Pictures and disappear when you don’t want others to see them.

Gallery Vault - Hide Pictures DOWNLOAD

With a few clicks, you can secure your photos and videos from the most determined family members, hide files in multiple folders, and much more. But don’t take our word for it – see for yourself how Gallery Vault does everything you need to protect your personal data and give yourself peace of mind.

How to use Gallery Vault – Hide Pictures

  1. Hiding and Encrypting Photos and Videos

    How to Use GalleryV ault - Hide Pictures

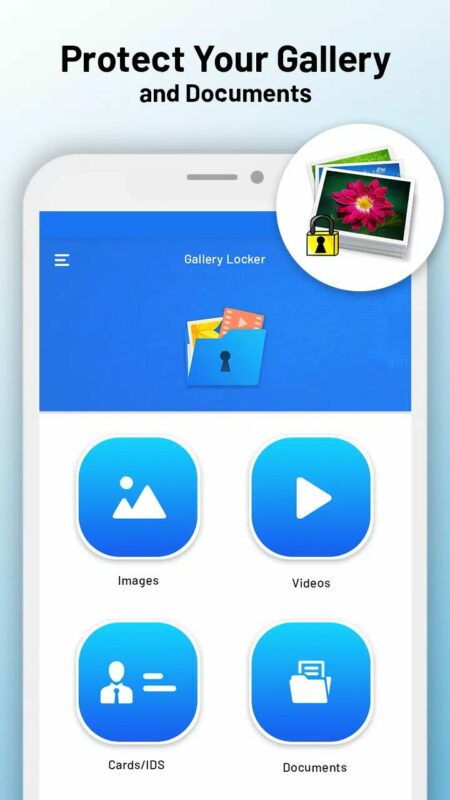
    Gallery Vault allows you to hide and encrypt your photos and videos. It’s a great way to protect your privacy, especially if you have anything sensitive in your photos or videos. The app has a simple interface that makes it easy to use and navigate through. You can choose what kind of content to hide from your phone and how long it should be hidden.

  2. Hide the Gallery Vault Icon

    How to Use GalleryVault - Hide Pictures

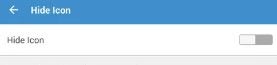
    Once the icon is hidden, you can launch the app using several methods. One is you could use your dialer. Set a pin when hiding the app, and then dial the pin from your dialer. This will launch the app. You can also launch it using your browser. Go to the Gallery Vault URL and hit enter. Your app will launch.

  3. Creating Folders

    How to Use Gallery Vault - Hide Pictures

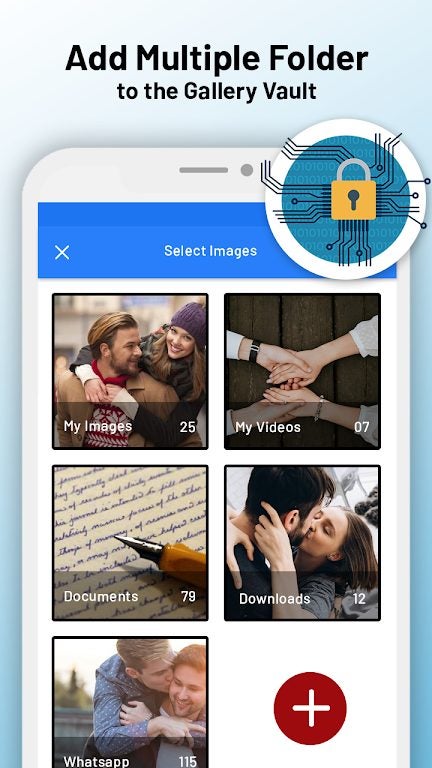
    Gallery Vault does not just allow you to save your personal files. You can even create folders and ensure no file is ever lost. Every smartphone today has at least 50-60 GB worth of personal data. It can be difficult to sort these files based on priority and needs. Gallery Vault allows you to do so with ease and keeps these files sorted even when you unhide them.

  4. Store Private Videos and Images

    How to Use Gallery Vault - Hide Pictures

    If you’ve been using Gallery Vault for a while, you know that the app is about keeping your private videos and images safe. The app has made it easier than ever to store videos and images in the Gallery Vault – a place where you can securely store personal videos and images without fear of them being accidentally shared with the world.

    With the new Gallery Vault, you’ll no longer need to keep a separate folder on your phone to store personal content. You can now use the Vault’s storage to hide any video or images and even make it so that only certain people can access those files.

User-friendly interface

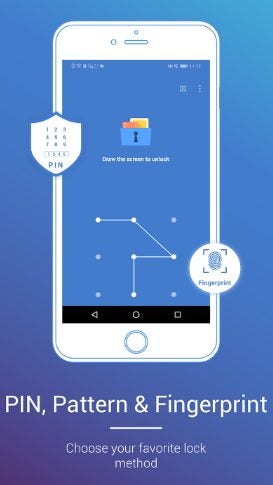
Gallery Vault is a powerful app with a fantastic interface. You no longer have to fumble around with the app for long. The steps to hide your images and videos are straightforward. You can even set up a fake and real pin for the app.

The fake pin is when you are using the app, and someone asks you to open the app to show what’s being hidden. When you enter the fake pin, the person can only see the images and video you have pre-selected when setting up the pin. This way, your hidden images and videos stay safe from prying eyes. When you enter the real pin, you can access all your hidden files.

How to Use Gallery Vault - Hide Pictures

Benefits of using Gallery Vault

Gallery Vault is a free tool that allows you to hide selected gallery content on your device. The app is easy to use and can be used by anyone with a smartphone or tablet.

The benefits of using Gallery Vault are many:

  • Hiding galleries prevents other users from seeing them unless they specifically request access to them. It also prevents them from going through your phone when you aren’t around.
  • You can quickly restore hidden galleries anytime by going into the app’s settings. This allows others to see all the images and videos you’ve hidden.
  • For anyone to see the hidden items in Gallery Vault, they will need a pin. If you’ve hidden the icon, they must unhide it using one of the acceptable methods. 
  • Gallery Vault can also be used to protect your private files and notes, so your private information is not compromised

Remember to always follow our 6 easy tips for staying safe online.

How to download and install iOS 16 public beta

iOS 16 is the latest software to hit the iPhone this fall. Apple is still working on this software update and will release it as soon as it is done. Apple has kept the tradition alive and released a software update near June. iOS 16 was previewed in June 2022 at the Worldwide Developers Conference.

iOS 16 DOWNLOAD

The new software looks promising and brings exciting updates, such as a custom lock screen. Many users, however, are not keen on waiting for the software’s official release. They would need the beta version. If you’re among them, this article is for you. We’ll walk you through the various steps on how to install the iOS 16 beta version on your iPhone.

Supported devices

iOS 15 could run on various devices; however, the device list for iOS 16 is short. Only iPhone 8 and above can upgrade to the latest iOS 16. This means older and popular versions such as the iPhone SE, iPhone 6s, and 7 Plus cannot run the new software. When it comes to the iPod, 7th generation devices cannot run on the latest software.

Steps to download and install iOS 16 beta version

If your device can accept iOS 16, continue reading to know how to get the beta version of the software. Before you begin anything, take a quick backup of your device. A backup helps you revert to the old operating system if the beta version doesn’t work as expected.

While there are various methods of backing up your device, downloading everything to a computer or laptop is usually advisable. Now let’s look at the steps.

  1. Signing up for iOS 16 Beta

    download and install iOS 16 public beta

    You first need to sign up for Apple’s beta program. You can do this by visiting Apple’s beta program page. You can sign up on any browser.

    Once signed up, you will receive instructions on how to download iOS 16. If you had already signed up with the Apple beta program, you would need to enter your Apple ID and continue with the instructions on the page.

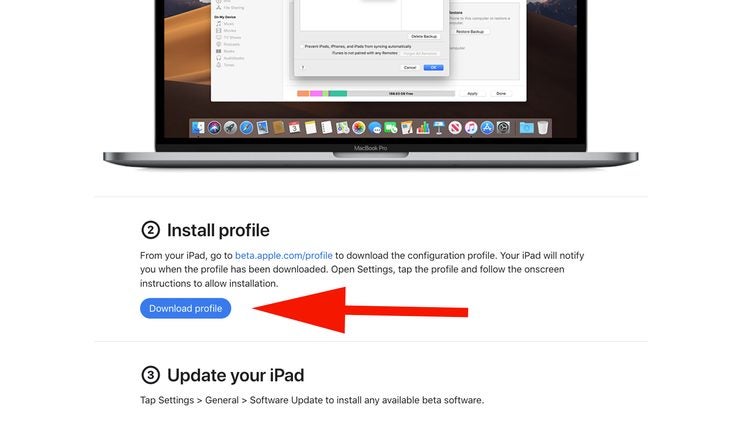
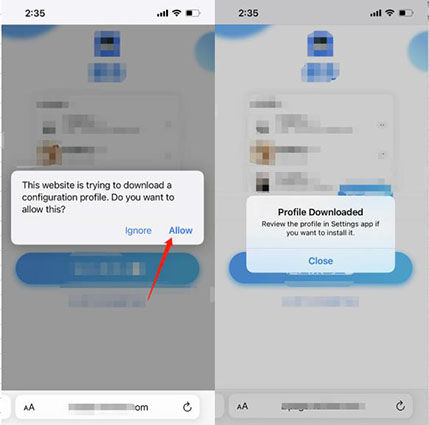
    When you complete signing up, you will enter the iOS 16 section. Upon scrolling down, you’ll see the ‘Download profile’ button. Whenever you’re ready, tap on download and install a configuration profile on your device.

  2. Access settings

    download and install iOS 16 public beta

    After you’ve completed downloading the profile, you need to head to your phone’s settings.

    On the settings page, you will see that a new profile has been downloaded.

    Upon tapping the profile, you’ll see what is included in the update. At the top right corner, you’ll also see an ‘Install’ button. Tap it. You’ll be asked for your passcode.

  3. Install and restart

    download and install iOS 16 public beta

    The next page will provide legal information (as with any new installation). Read through and accept it by tapping on ‘Install’ in the top right corner again.

    After tapping install, you’ll again be asked if you want to install the software. Click on install again to complete the installation process.

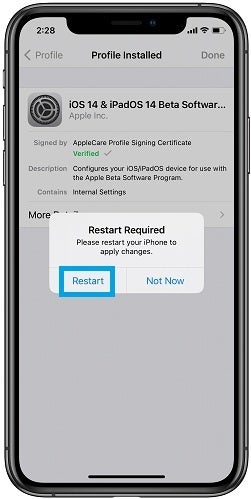
    Before completing the installation process, you’ll receive a prompt asking you to restart your device to start the process.

  4. Update software

    download and install iOS 16 public beta

    Once the restart has been completed, go back to your settings and tap on the ‘General’ option.

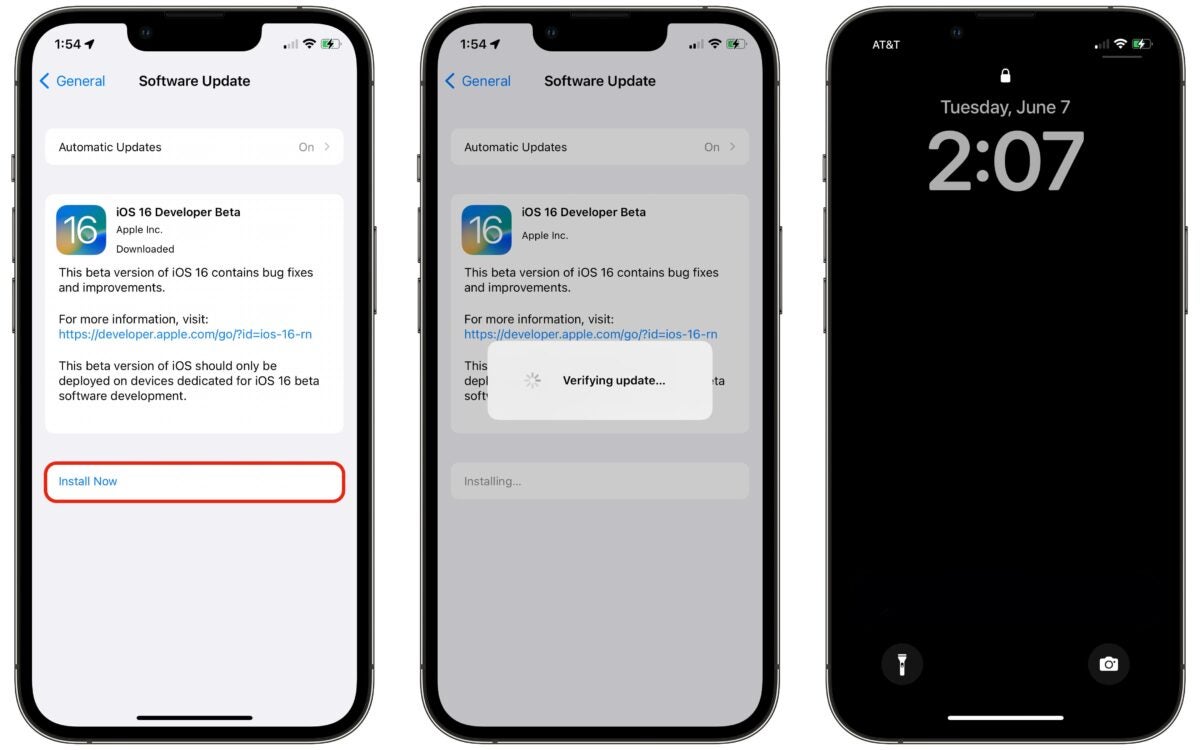
    Once inside, tap on ‘Software Update’ once again. You’ll then see the iOS 16 beta version ready for installation. Tap on ‘Download and install’ whenever you’re ready. 

    The installation process will begin. Your phone may restart a couple of times, and the update will be complete when the phone switches on again. Always remember that any future iOS 16 software updates will also happen through this process. Since this is a beta version, various versions will be available. Make sure you keep upgrading each version, so you enjoy the latest features of iOS 16.

What to expect from iOS 16?

The latest iOS version promises exciting updates like a custom lock screen. You can also edit texts within the messaging app. New mobile payment features have also been added. Other updates include better maps, photo-editing tools, and notes. The latest version also adds a Lockdown mode.

iPhones free Photoshop-like upgrade READ MORE

This is an advanced security feature. The lockdown mode comes in handy in case of lost or hacked devices. We also heard that iOS 16 may let you bypass CAPTHA verifications. A new screenshot font is also available in the latest version.

If you managed to successfully install the updated operating system, check our guide on how to use the iOS 16 improved Home app.

Share your photo-editing skills with Snapseed on Android

Today, most people are busy turning their passion into their professions. One such passion is photography. If you’ve ever tried your hand at photography, you would’ve used Snapseed. It makes it so much easier to edit photos on your phone.

Snapseed DOWNLOAD

You should check out this amazing image editing app if you haven’t. Today, we’ll look at using the Snapseed app effectively on your Android device.

  1. Using the Main Menu

    using Snapseed on Android

    The initial Snapseed app didn’t have the best interface. However, the app has now transformed and delivers a very user-friendly interface. The minimalist menu is ideal for beginners.

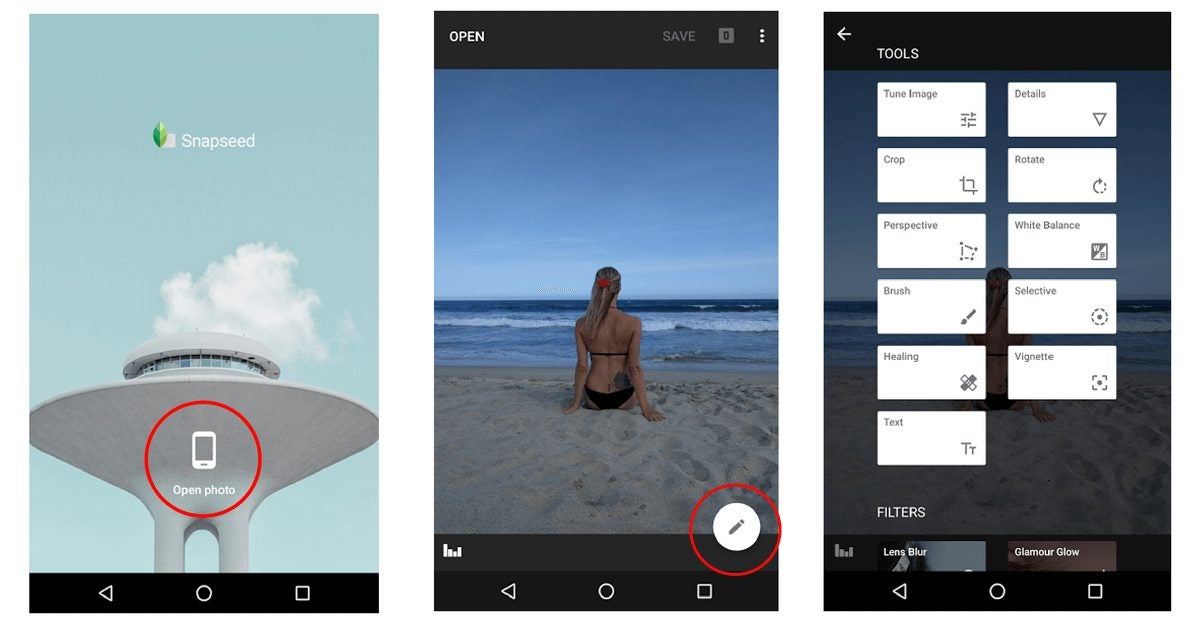
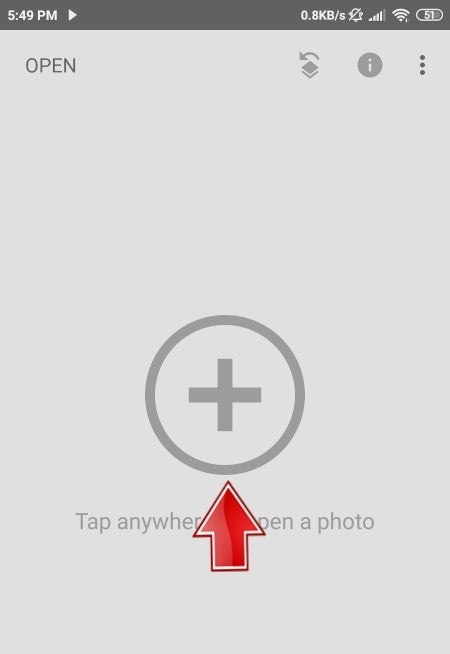
    Upon opening the app, you must tap the plus icon in the middle of the screen. This will load any image you want. You can also add an image by tapping the OPEN button on the top left of the screen.

  2. Image Tools

    using Snapseed on Android

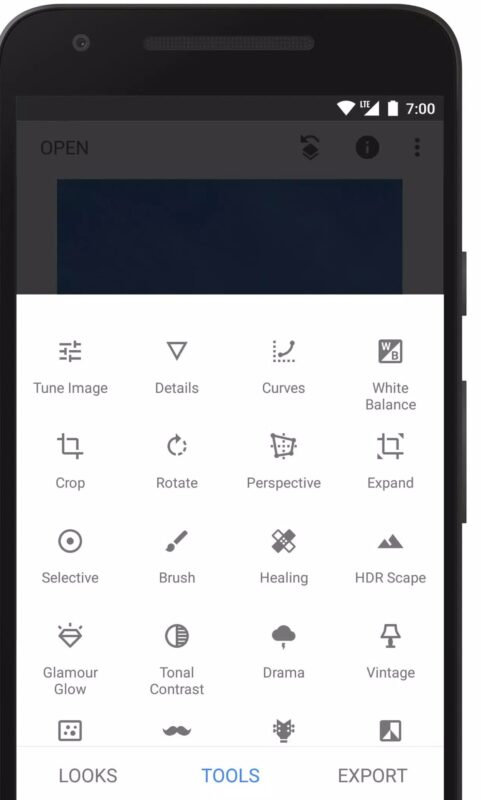
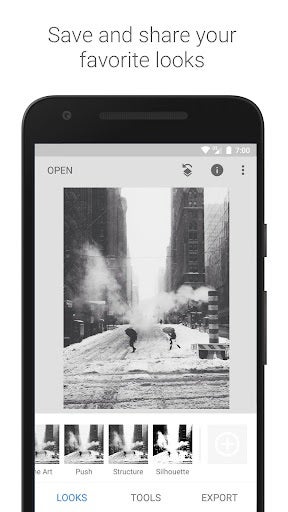
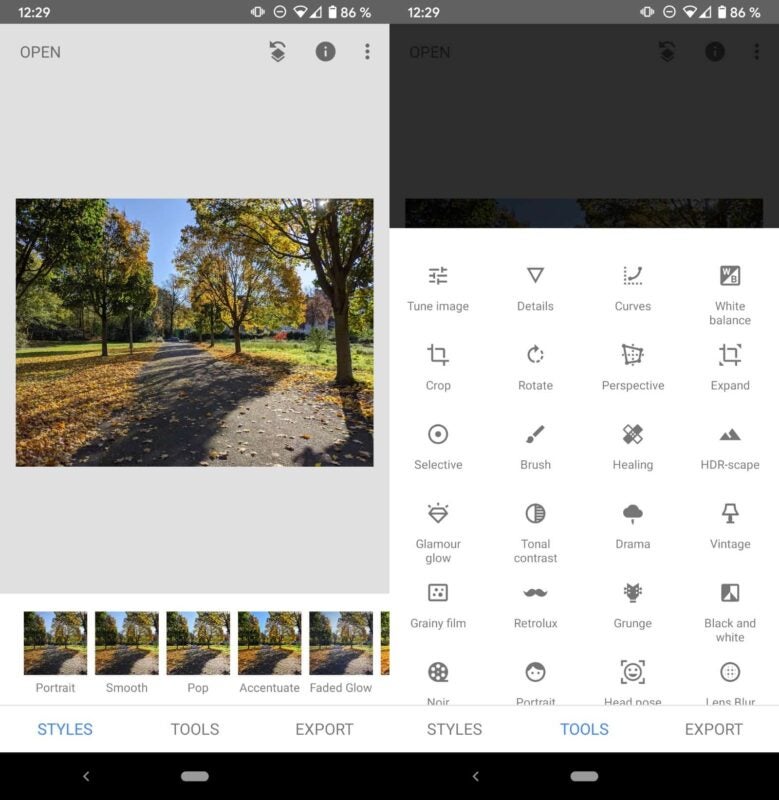
    After loading an image, you’ll see three buttons below it – Styles, Tools, and Export.

    Styles

    Styles is a collection of filters that can change the look of your image. There are various presets available in black & white and color.

    Tools

    Tapping on tools will give you access to various image editing tools. Apart from the standard crop and rotate tools, you can also find tools such as Portrait, Healing, Expand, and Vintage. There are a total of 28 tools at your disposal.

    Export

    Tapping on export allows you to share your edited image from Snapseed or save it on your phone. You can export to a folder, save a copy of the image, or share it using any other app (WhatsApp, Facebook, etc.).

  3. Learning to Edit Your Image

    using Snapseed on Android

    Now that you know the basics of Snapseed, let’s look at how you can use various tools to edit the image.

    Tune Image

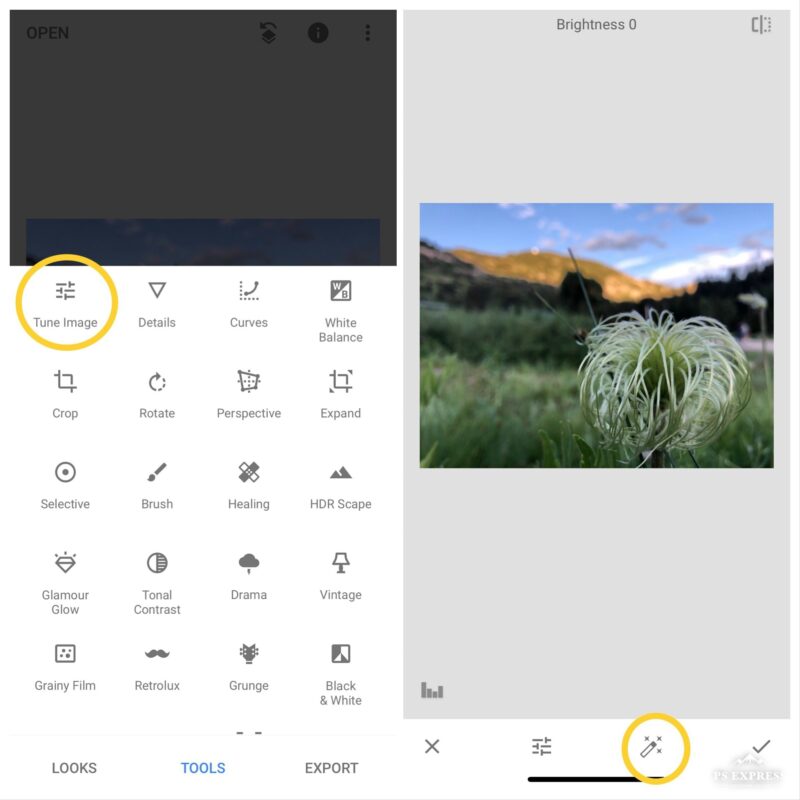
    Tapping on the tune image allows you to change the basic aspects of the image. This includes brightness, contrast, ambiance, and so on. You can also tap on the magic wand next to the settings icon, and the image will auto-adjust. 

    Details

    Details allows you to change the structure and sharpness of the image. You must use the slider at the top of the screen and adjust the image accordingly.

    Curves

    The Curves setting allows you to change the image colors. All you need to do is move the S-curve and adjust the image colors per your liking.

    White Balance

    White balance allows you to change the colors in the image to match reality. You can adjust the temperature and tint of the image. You can adjust the settings using the slider at the top of the screen. 

    Rotate

    The rotate setting allows you to rotate the image using your fingers. You can use the angle at the top of the screen as a guide.

  4. Setting The Mood

    using Snapseed on Android

    Now that you’ve learned how to adjust and edit your image, let’s look at the Snapseed tools that allow you to set the right mood. These are preset and help set the image mood right.

    The most popular tools are:

    Drama: Provides several filter options and helps you set a bright or dark look for the image.

    Vintage: This tool contains vintage-inspired gradients that help you achieve a classic look.

    Grainy Film: This tool allows you to add different film grain sizes to your image.

    Retrolux: This tool can add smears and dust to your image. It gives your image an old/aged appearance.

    Grunge: Using this filter allows you to add saturated filters and overlays of random smears and patterns.

    Black & White: This option contains different black & white presets ranging from bright and dark to high contrast.

    Noir: Noir is also a variation of the black & white look; however, it adds a cinematic look.

    Each option comes with an overhead slider allowing you to adjust accordingly.

  5. Fine-Tuning Your Images

    using Snapseed on Android

    Apart from editing your image, Snapseed also provides tools to beautify your image. Some of the most popular tools include:

    Selective: You can select specific points in the image and adjust the brightness in those areas.

    Brush: You can add smears to your image using this tool. You can change the temperature, exposure, and saturation using this tool.

    Expand: As the name suggests, you can enlarge your image by pinching it out. Alternatively, you can pinch inward to minimize the image.

    Healing: Use this tool to cover the blemishes in the image.

    HDR Scape: This tool allows you to change the image color by choosing strong or fine, located at the bottom.

    Tonal Contrast: You can adjust the image tone using the slider at the top of the screen. You can pick from high, medium, and low tones.

Take your first artistic steps into Procreate

Are you dying to express your inner artist, but you don’t have paper or your drawing tools nearby? Procreate is an outstanding app that lets you design with many features, but you’ll need to learn how to use it first.

Procreate DOWNLOAD

You’re about to be taught the first steps for creating your canvas masterpiece in Procreate on your device. In this blog post, you will discover how to start making art with this fun and exciting app. Let’s start with the basic steps for Procreate.

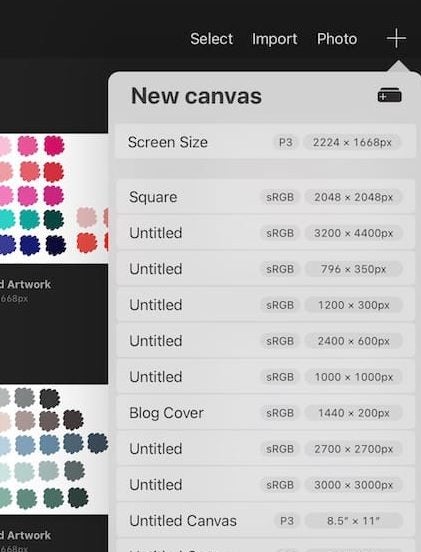
Creating a canvas on Procreate

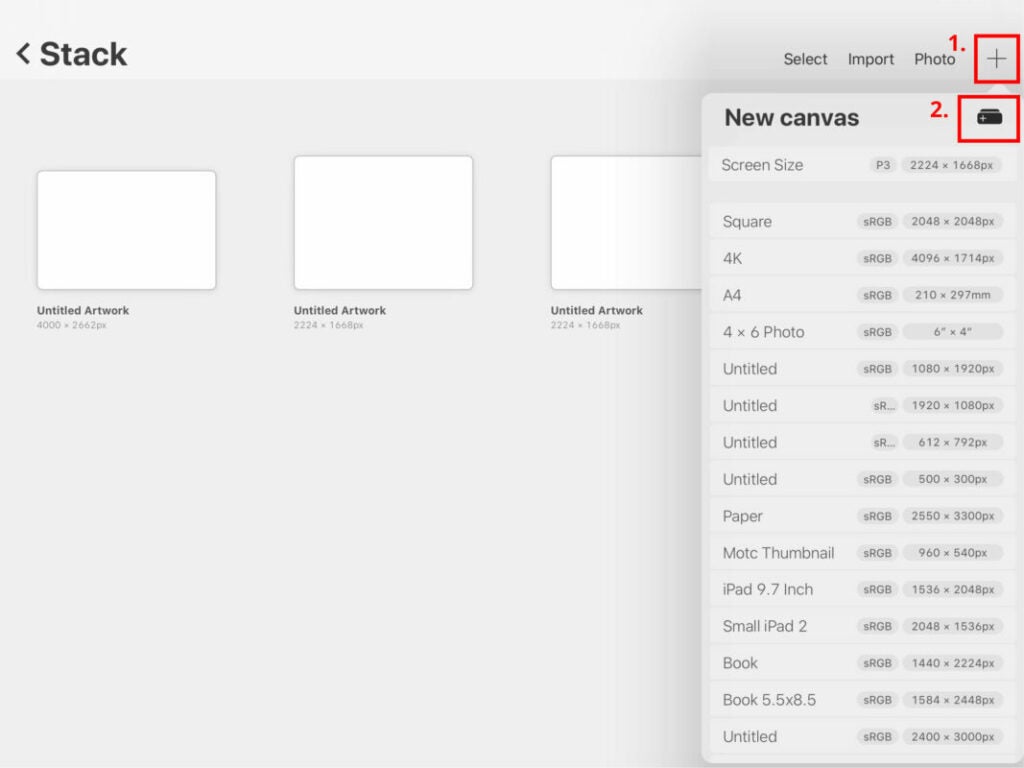
To do this, you need to click on the + symbol within Procreate. You will see this in the gallery in the top right corner. You can pick from various canvas sizes. Just tap on the right size and begin. You can also choose to import other materials using the + symbol.

Procreate first steps 2

Create a custom canvas size

If you’re not happy with the canvas sizes on Procreate, you can also create a custom canvas size. Now just click on the + symbol. This will open a new window where you can adjust the various settings. You can change the dimensions, time-lapse, color, and other canvas properties. It’s best to title your canvas, which will help you find it later.

Procreate first steps

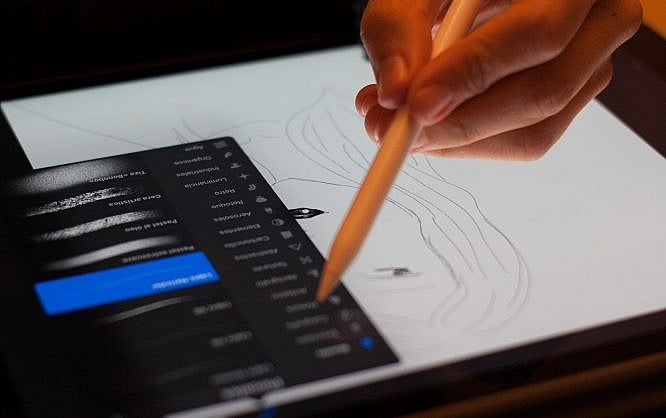
Choosing the right brush

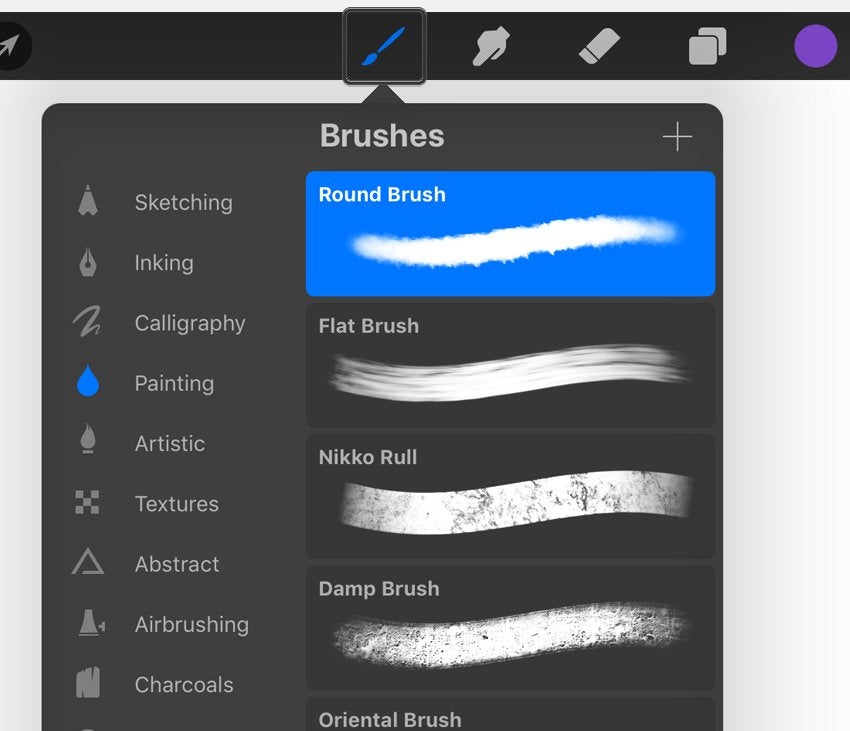
Now that your canvas is ready, you must pick the right brush. In the upper right corner of the Procreate app, you will see a brush tool.

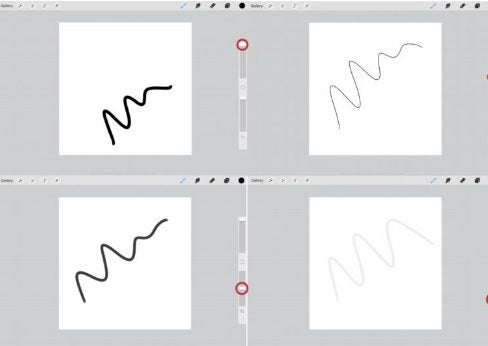
You then need to adjust the brush settings. There are various functions to try, like adjusting the opacity and size. You can do this with the help of sliders to the screen’s left.

Procreate first steps 2

Choose colors

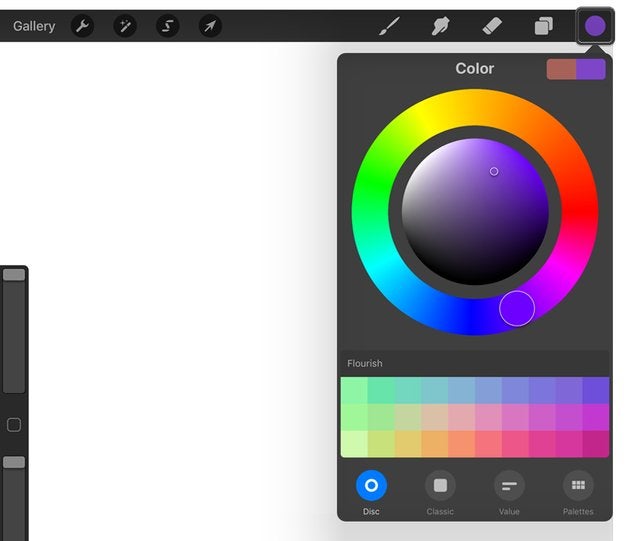
Once you’re ready to draw on Procreate, choose your preferred color. You will see the circle in the top right corner. Upon clicking the circle, you will see the color panel. Pick the color that you prefer and begin creating your masterpiece.

Procreate first steps 2

Basics of Procreate

Let’s learn about the basic tools in Procreate. Each section below delivers an explanation about a specific function or feature, which will assist you in your first steps with this artistic app.

Brushes

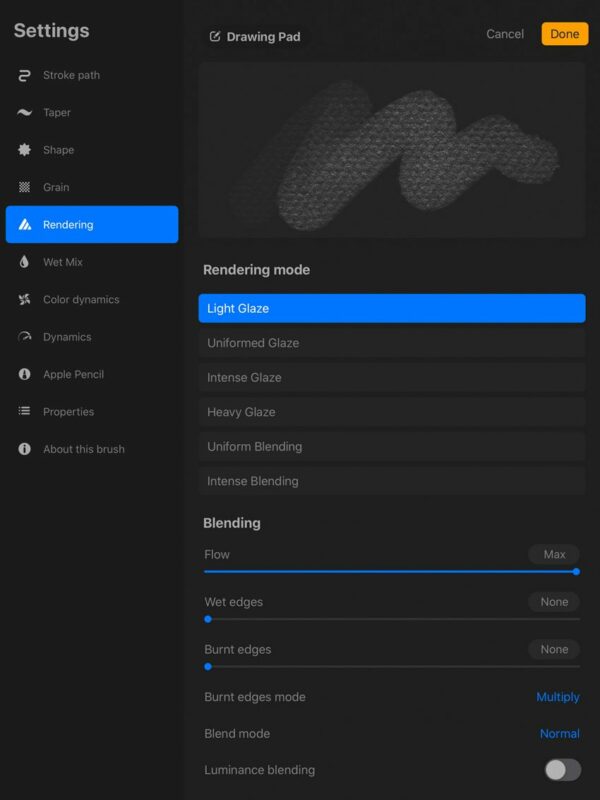
As we’ve seen above, you can adjust the settings for your Procreate brush. Let’s look at this in detail and how to adjust your brush per your preference. You need to find the brush tool in the upper right corner of the screen.

You can even import your brushes or create custom brushes. Another option is to select the thickness of your strokes. You can even pick how light or dark you want your strokes.

Procreate first steps

Color customization

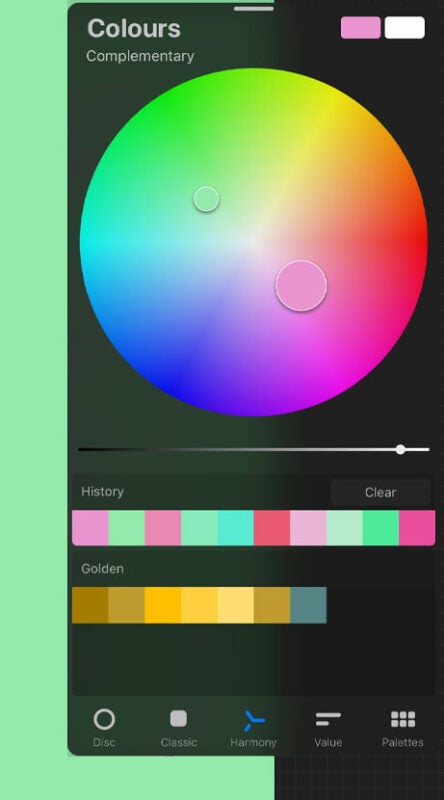
Besides selecting colors, you can also customize them based on your choice. The harmony tool lets you pick a color based on your choice. The value tool allows you to define specific colors in the palette. You can even save these colors.

Procreate first steps

Layers

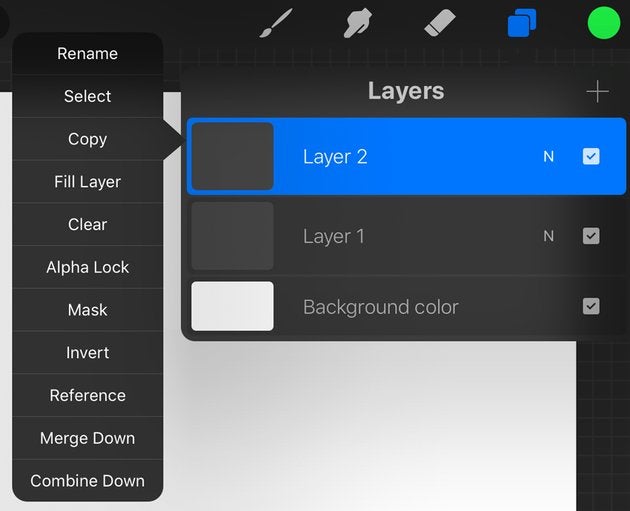
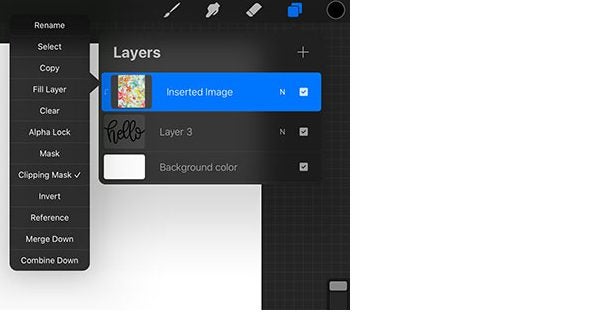
You will see an icon that has overlapping squares. Tapping this will open the layers panel. Various layers will open based on the pixels. You can insert more layers by clicking on the + symbol.

You can edit independent layers and delete, lock, or duplicate them. Also, you can name individual layers.

Procreate first steps

Clipping mask

You can convert individual layers into a clipping mask. Any changes made to the clipping mask will only affect the layer below it. Another way to use the clipping mask is to create a layer under it.

Procreate first steps

Procreate Settings

To open the settings menu, you need to tap the wrench icon. This panel will allow you to adjust your canvas settings. You can also add text or photos to your canvas from the settings menu. Also, save your finished project when you’re here.

You can even choose to record your painting process. Do this by tapping on the video and then choosing time-lapse. Once completed, you can export your recording.

Procreate first steps

Magic wand

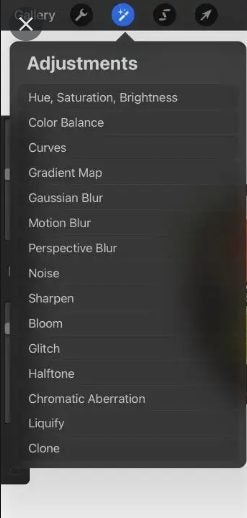
You can also apply different filters to your completed image. These filters can be found in the top left corner. All you need to do is tap the magic wand icon.

Procreate first steps

Other Procreate tools

The selection tool is represented by an S in the top left menu. The selection tool can help you cut image parts or create duplicate areas.

You can blur a part of your image using your finger icon. Located next to the finger is the eraser tool. You can choose the opacity and size of the eraser tool as per your preference.

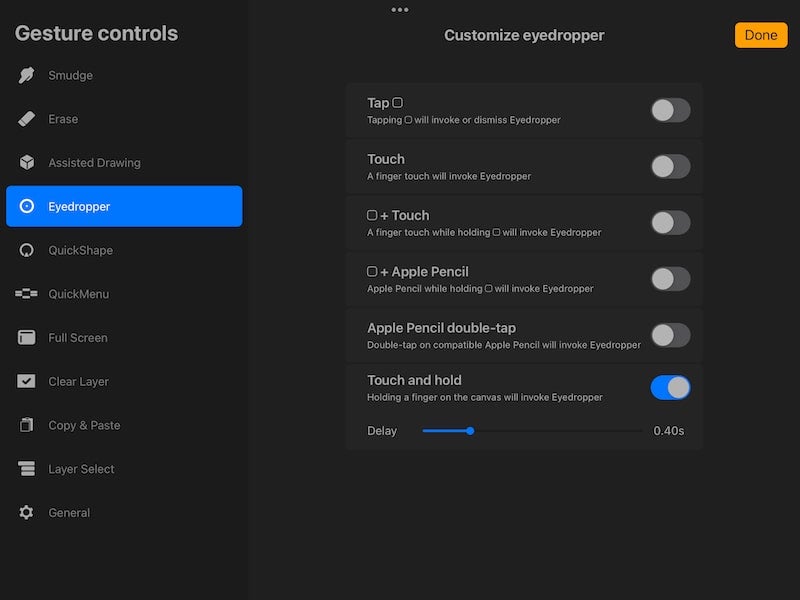
You will see an eyedropper tool upon tapping and holding onto the canvas. This tool allows you to pick colors from images. If you need to rotate your image, you need to tap it with two fingers and rotate it. You can also zoom into the image using your fingers.

Procreate first steps

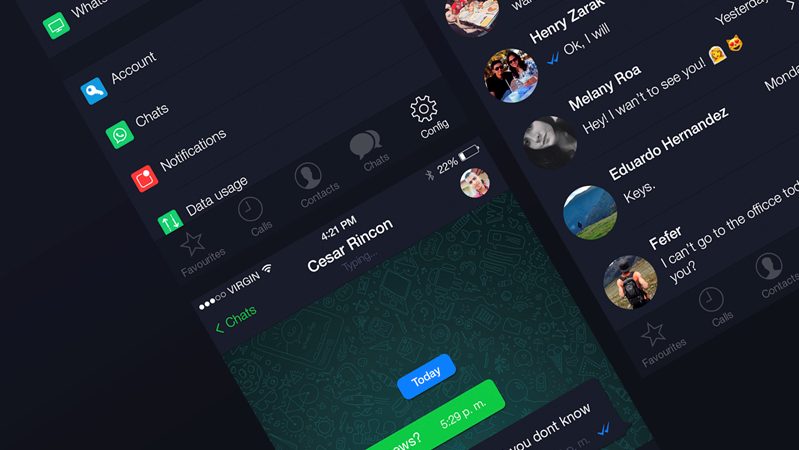
How to activate dark mode in WhatsApp and Messenger

This quick and simple guide will show you how to activate the dark modes on the two biggest messaging apps in the world

Have you ever wondered how to activate dark mode in WhatsApp and Facebook Messenger? Are you confused by the different colors of your chats in different messaging apps? What if we told you there’s a way to change the theme on your Whatsapp and Facebook Messenger?

WhatsApp DOWNLOAD
Messenger DOWNLOAD

You can, according to Google, also save battery life on your smartphone if it has an OLED screen by activating smart mode, and of course, it’ll save your eyes should you be using your device at night.

Why Do People Activate Dark Modes?

People with dark modes activated on their phone messengers will typically be in low-light conditions, such as at night or in a poorly lit room. The absence of light can affect the battery life of the phone, which is why people turn on the dark mode.

In addition, people may also turn on dark modes because they are prone to eye strain due to bright lights or staring at a screen all day. Dark modes can help alleviate this problem by reducing the light that hits your eyes and reducing the strain on them.

How to Activate Dark Mode in Whatsapp and Facebook Messenger

Activating Messenger and WhatsApp dark mode

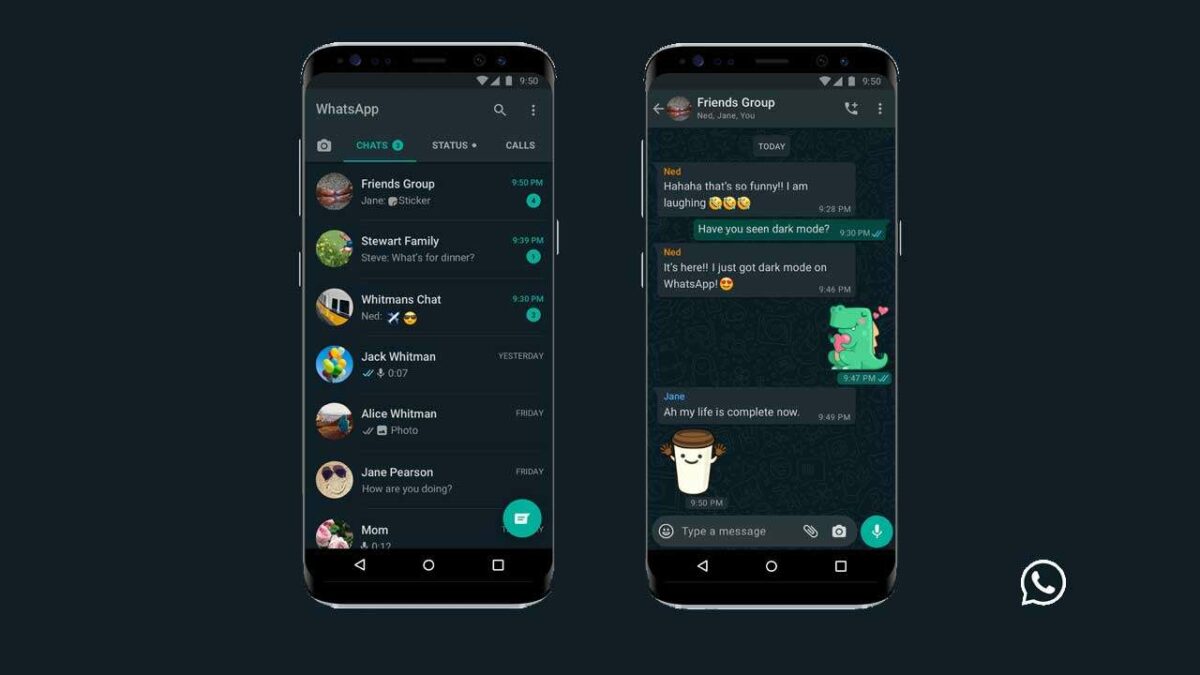
Below we’ll give you quick and simple instructions on how to activate the night mode on Facebook and WhatsApp for both iOS and Android devices. Dark mode means that instead of having a light background with dark text, everything is flipped, with the text being white or sometimes other lighter colors like blue and the background being black or sometimes dark blue.

  1. Activating Dark Mode on Whatsapp

    How to Activate Dark Mode in Whatsapp and Facebook Messenger

    If you have been searching for a way to activate dark mode on Whatsapp, then you are at the right place. Here we will give you some easy steps.

    –  Open the settings on your WhatsApp messenger app by clicking the three dots on the top right corner of the app.

    –  From there, click on Chats.

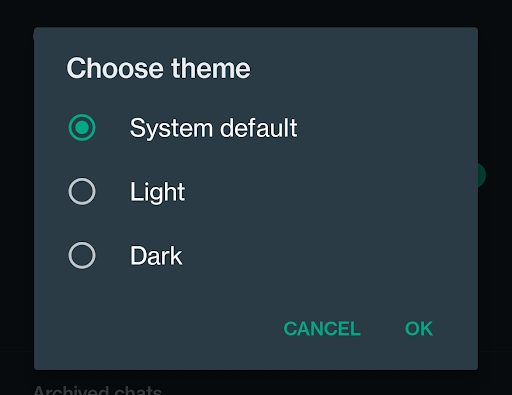
    –  Once you’ve done that, click on the theme option.

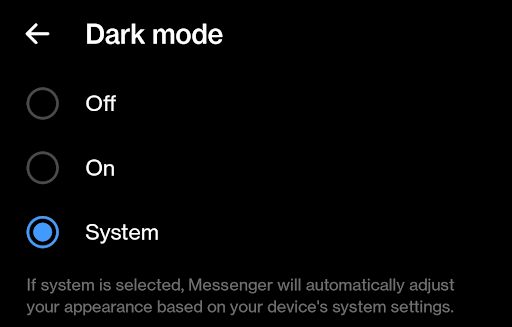
    –  From there, you need to select one of the options. Note that if your system is set to a dark theme, your WhatsApp messenger will automatically be set to dark mode. If not, you need to select dark under the themes option.


  2. Activating Dark Mode on Facebook Messenger

    How to Activate Dark Mode in Whatsapp and Facebook Messenger

    Open Messenger on your phone or through Facebook

    Click your profile photo at the top left of your screen.

    –  You need to scroll down until you reach the profile section. Under the profile section, you will see dark mode as one of the options.

    – It will come switch themes when you click on dark mode. Note that if your system is set to a dark theme, your Facebook messenger will automatically be set to dark mode. If not, you need to select dark under the themes option.


What’s new in WhatsApp besides dark mode?

Threats have been on the rise recently for several chatting applications. To make sure you feel secure, WhatsApp has boosted some of its privacy features. You can also now choose who can see that you’re online.

A full emoji keyboard is now available for WhatsApp message reactions. When you hold in a chat from someone else, you’ll see a new window open on your device with several emojis. This feature makes chatting to your friends more entertaining without having to type LOL every now and again.

Of course, these aren’t the only new features we’ll see this year. We have a complete guide on the top 10 expected new WhatsApp features in 2022 for you to read.

Top 10 Expected New WhatsApp Features READ MORE

How to use WhatsApp’s voice-to-text feature

Use this feature and send messages even faster!

WhatsApp voice notes are great, aren’t they? They enable us to send long messages when we haven’t got a free hand or two to do the typing. Voice notes also come with their fair share of limitations, however. You can’t search for voice notes based on the content of the message like you can with regular text-based chats.

WhatsApp DOWNLOAD

The perfect midpoint here is voice dictation. If you can talk into your phone like you do for voice notes and have the message written out like with a standard chat, you’ll have the best of both worlds. Thankfully, WhatsApp Dictation is available for WhatsApp both on Android and iOS devices.

Why is WhatsApp voice dictation helpful?

WhatsApp voice dictation is a great way to make your life easier. Here are just a few reasons why:

  • It allows you to take notes while you’re on the go, which will help you remember things better. You can also use it as a way to write down what someone has said who is talking too fast.
  • You can speak into your phone without holding it up to your ear. Instead, just speak directly into your phone and have it transcribed by the app. This means it’s convenient to make notes if you’re driving or using public transit (such as a bus or train).
  • It will help with spelling and grammar errors. If there’s something wrong with how someone pronounces something when they speak, then WhatsApp voice dictation will help correct those mistakes later on! 

Is the WhatsApp voice dictation feature accurate?

The WhatsApp voice dictation feature is reasonably accurate and can be used to type messages and notes. WhatsApp’s voice dictation feature is available on Android and iOS mobile devices. The software is always listening for specific phrases and will transcribe what you say into text for you to review, send, or reply to. 

You can also use the dictation function to dictate numbers, addresses, or other information when sending an SMS message or calling someone through WhatsApp.

How to use WhatsApp Dictation

  1. Install the latest version

    How to use WhatsApp’s voice-to-text feature

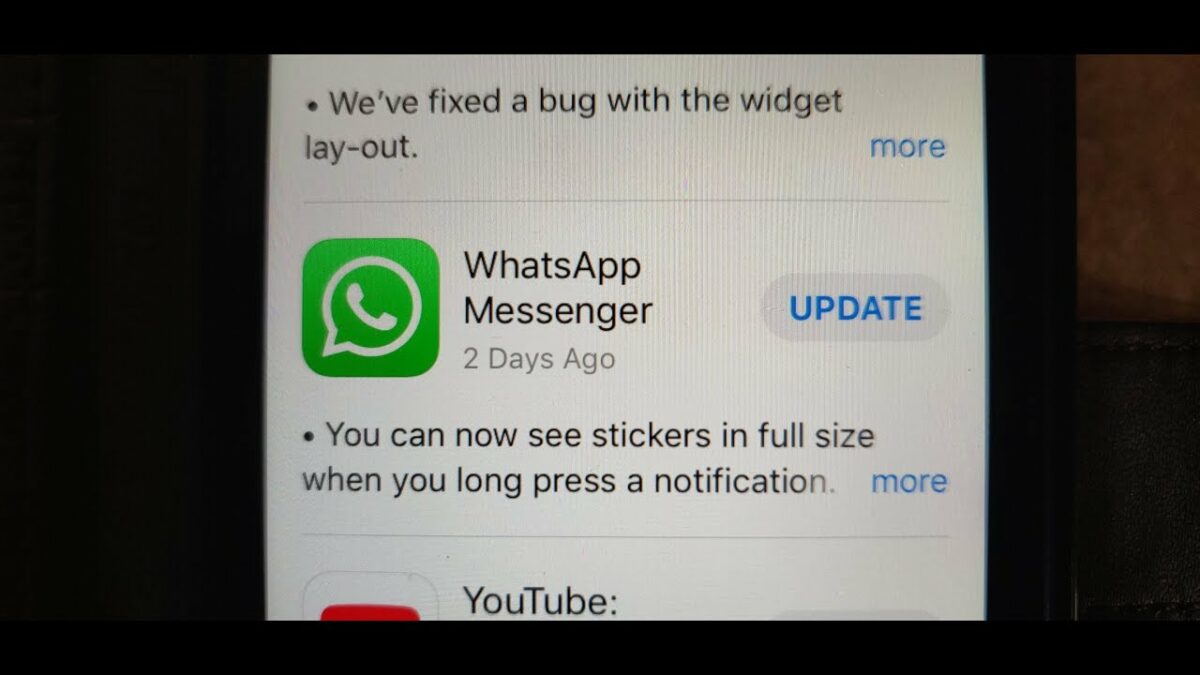
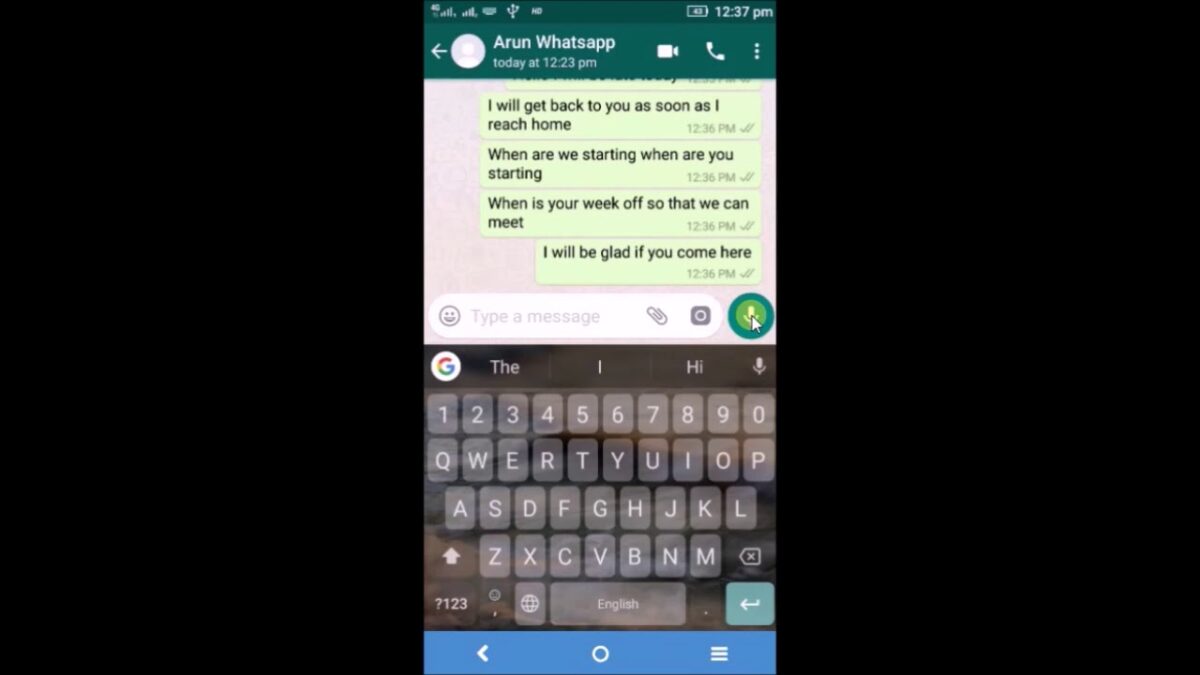
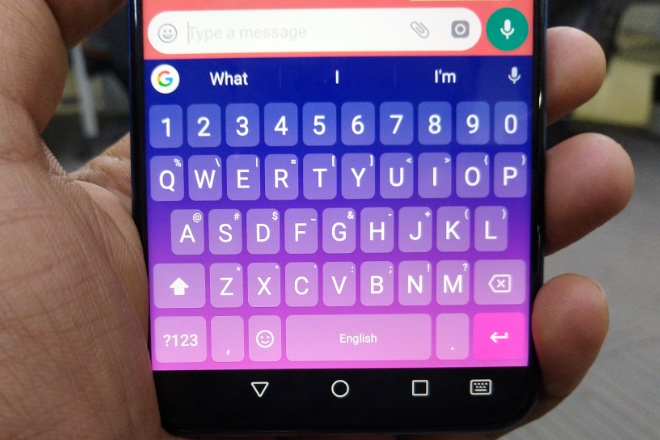
    To be able to use WhatsApp Dictation, you will need the latest version of WhatsApp. Once you have it, using WhatsApp Dictation is very simple. Inside a chat look for the new microphone icon.

    On Android, you’ll find it in the top-right of the keyboard, just below the voice note icon, and on the iPhone, you’ll find it in the bottom-right of the keyboard.

  2. Using WhatsApp dictation

    How to use WhatsApp’s voice-to-text feature

    To use WhatsApp Dictation, you open a chat, hit the text bar, and then tap the keyboard microphone icon. This will activate the microphone and will begin dictating everything you say.

    The microphone will continue to listen, and WhatsApp will continue to dictate as long as you’re talking. It will deactivate after a few seconds of silence. Once WhatsApp has written down everything you’ve said, you send your message in the normal way.

  3. Important notes

    How to use WhatsApp’s voice-to-text feature

    There are a couple other things to note when you use WhatsApp Dictation. First, you can use questions and commas by saying “comma” and “question mark” when you want WhatsApp to place one in the sentence you’re dictating.

    Second, it is recommended that you speak slowly and clearly to give WhatsApp the best chance of dictating your message correctly. Doing so in a quiet environment will also help in this respect.

Does the WhatsApp voice dictation feature recognize all voices and accents?

Yes, the Whatsapp voice dictation feature will recognize all voices and accents. The company claims this feature has been designed to work with various languages and accents, including English, Spanish, French, and Portuguese.

Can you use the voice dictation feature to create personal notes and reminders?

Yes, you can use Whatsapp voice dictation to record personal notes, reminders, and messages. To do so, you will need to download the latest version of Whatsapp on your mobile phone and open it up.

The procedure to activate voice dictation is the same. You should now be able to speak into your mobile phone’s microphone and dictate what you want to say to create personal notes or reminders.

How to use WhatsApp’s voice-to-text feature

Does the voice dictation feature read your messages aloud?

The WhatsApp voice dictation feature reads your message aloud, but it’s not always 100% accurate. For example, if you’re typing in a foreign language, the voice will read “I’m sorry” instead of “I’m ready.” This can be frustrating when you’re trying to send a message in English but accidentally type “I’m sorry” instead. We recommend that you always double-check your message before sending it.

The WhatsApp Voice Dictation Feature is available on all Android smartphones and iPhones running iOS 10 or later. The feature requires that you have an Internet connection and use the latest version of WhatsApp on your device. It’s a WhatsApp feature that can help you be more productive by saving you time.

Don’t miss out on other WhatsApp features you simply must try!

Top 10 Expected New WhatsApp Features in 2022 READ MORE

10 WhatsApp features you might have missed

When it comes to messaging, Whatsapp is by far the most popular messenger around. Over a billion people use it regularly. It’s free, fast, personal, and receives tons of updates and new features.

WhatsApp DOWNLOAD

With all the latest features that have appeared over the years, we don’t blame you if you haven’t used them yet. Here are some cool features you might have missed when using WhatsApp!

Sending conversation history

One of the Whatsapp features you might have missed is sending the entire conversation history to another person. This means you can send all your messages without selecting them individually.

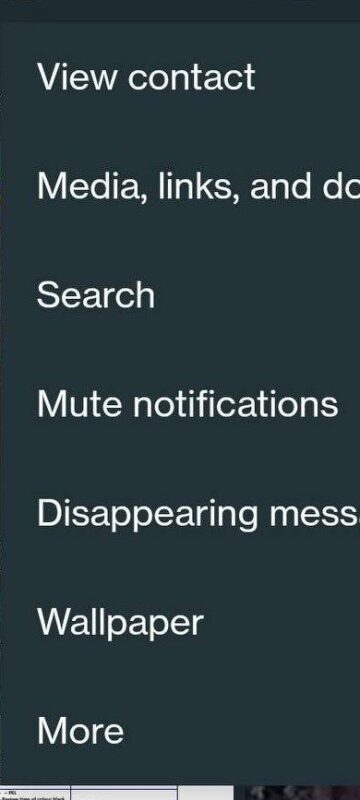
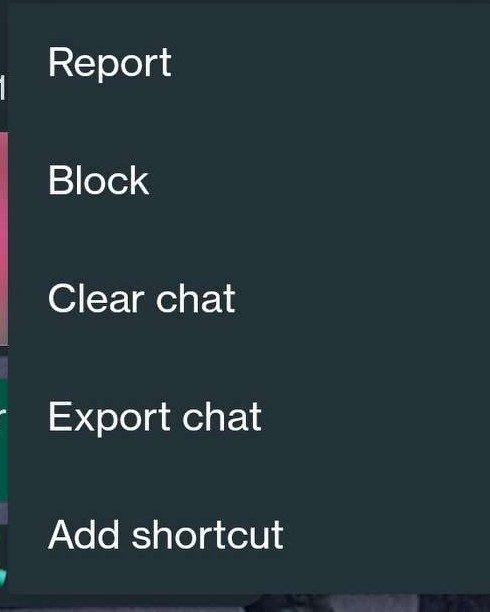
To do this, head over to any chat you want to share. Tap on the three dots on the top right of the screen and click more. After that, click on export chat. Once you do that, you’ll be given the option to send the chat with or without media. Pick your option and share the chat using any of your sharing methods.

10 WhatsApp features you might have missed

Change your chat wallpaper

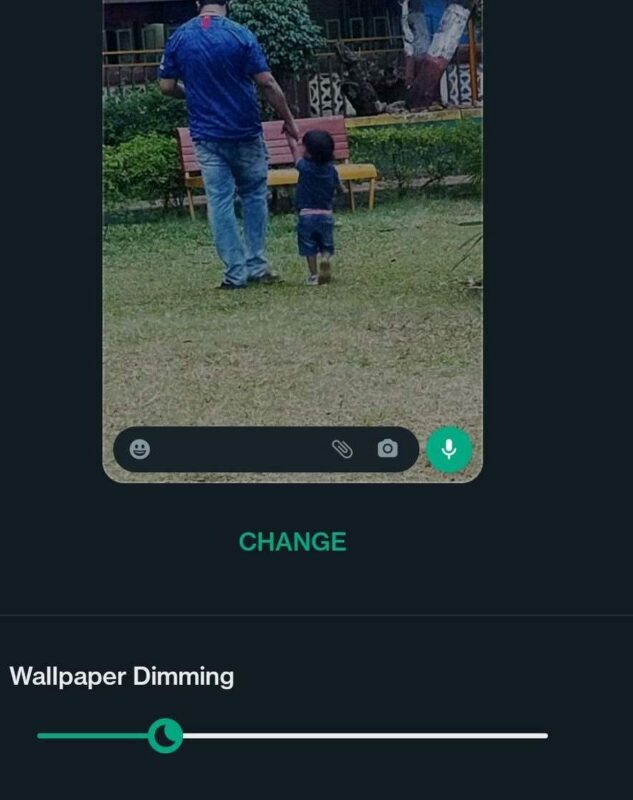
If you are among the users who have used WhatsApp on their phones, you might have already noticed that there is a feature called “Chat Wallpaper.” It is a feature that allows you to change the background image of your chats. This can be done by going to a chat and clicking on the three dots in the top right corner. Then click on ‘wallpaper’ and set the wallpaper you want.

10 WhatsApp features you might have missed

Save all photos that you receive

If you are a WhatsApp user, you might have noticed an option in your settings that lets you save all the photos you receive. Click on settings and then click storage and data. When in there, choose the options you want under media auto-download.

10 WhatsApp features you might have missed

Backup your Whatsapp conversations

Tap on “Settings” from the top-left corner of the screen and choose chats. Under chats, scroll down and click on chat backup. This menu will display all your previous backups. You can set the frequency of your backups and select which account you want the chats backed up to.

10 WhatsApp features you might have missed

Press enter to send WhatsApp messages

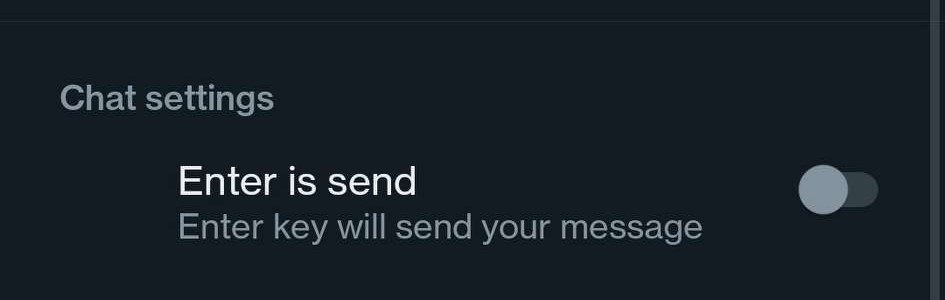
If you are a WhatsApp user, you must be aware of the feature that lets you press enter to send a message. This feature allows users to send messages without tapping the send button. This feature makes it easier for people who have stubby fingers and can’t manage to tap the send button. For this, you must enable the ‘enter is send’ option under chat settings.

10 WhatsApp features you might have missed

Create shortcuts to conversations

One of the Whatsapp features you might have missed is the ability to create shortcuts to conversations. This lets you access conversations quickly.

Click on a chat and press the three dots in the top right corner. Then click on more, and after that, click on add shortcut. This will allow you to add a shortcut to your phone’s home screen.

10 WhatsApp features you might have missed

Choose your WhatsApp profile picture

To change your profile picture, go to Settings and click on your profile picture at the top of the page. Once there, click the camera icon to select your profile picture by clicking a picture or choosing one from your gallery. You can also delete your profile picture by clicking the bin icon.

10 WhatsApp features you might have missed

Send files, documents, and videos apart from texts

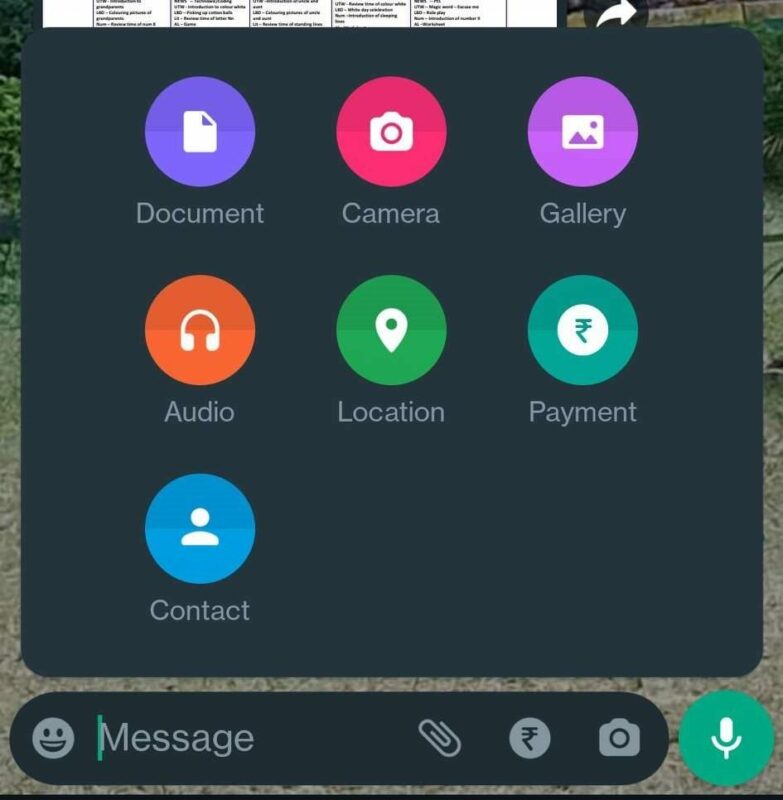
It’s one of the WhatsApp features that you might have missed. You can send more than a text message with WhatsApp. You can now send a document, audio files, your location, a payment, or contact details of someone else to any chat. All you need to do is tap on the paper clip icon at the bottom of any chat.

10 WhatsApp features you might have missed

Change your WhatsApp status

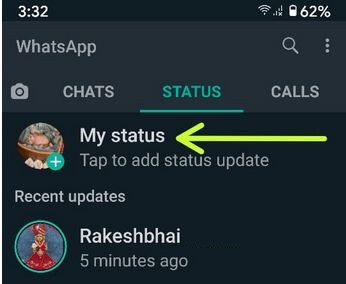
Do you know that you can change your status on WhatsApp? Yes, it is true. Click on the three lines at the top of your screen and then click on settings. Then click on your name at the top of the screen and select the pen icon next to the about section. Choose your status accordingly.

10 WhatsApp features you might have missed

Broadcast messages to multiple contacts

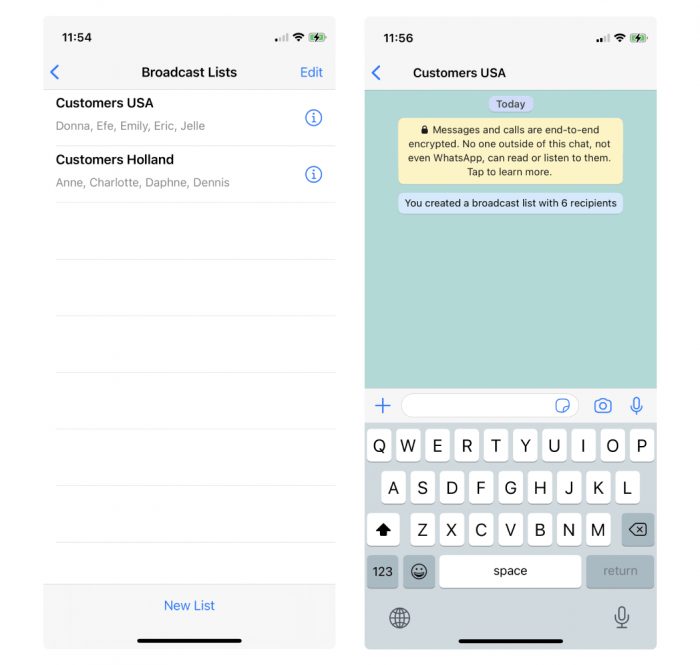
If you love chatting with friends, family, and business associates on WhatsApp, you might have missed one of the most valuable features: broadcast messages. This allows users to send out a single message to multiple contacts simultaneously.

All you need to do is click the three dots on the top of the screen. From there, click on new broadcast. Select the contacts you want to add, and then click on the tick at the bottom of the screen. You can then type out a message or paste a message you would like to broadcast.

The benefit of broadcast messages is that they allow you to communicate with more than one person at once – which is hard to do through other instant messaging methods.

10 WhatsApp features you might have missed

How to: Deauthorize all computers in iTunes

iTunes is the leading music and video software for your Mac or PC. You can buy and download all kinds of movies, TV shows, and music from iTunes. But before you do that, make sure you have iTunes on your computer because if not, you won’t be able to use it at all.

itunes DOWNLOAD

You can deauthorize all computers in iTunes using the iTunes software. This way, you can unauthorize all your devices from iDevice sync and control the iTunes media library. The next time an update for your iPhone or iPad is released, you can quickly redownload the latest version on your computer by logging back into your iTunes account.
What does authorizing your computer mean?

Authorizing your computer means that you’re giving Apple the right to remotely access your computer and use it to download updates or software updates for programs, such as iTunes. These updates are necessary for your computer to work correctly. If you don’t authorize your computer in iTunes, then it won’t be able to receive any updates from Apple and may end up breaking down.

What does deauthorizing your computer mean?

Deauthorizing your computer means you want to remove access to your iTunes account from a specific device.

This can be useful if you have a computer that is no longer in use and want to prevent someone else from using it. It also allows you to track how much storage is being used on your device, which might help determine whether you should upgrade your storage space.

How to deauthorize all devices in iTunes

  1. What are the steps to deauthorize all your Macs?

    Deauthorize all computers in iTunes

    If you want to deauthorize all your Macs, follow these simple steps.

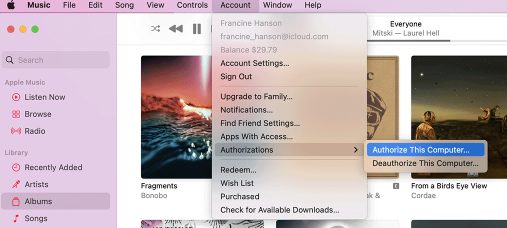
    – You first need to open your Apple music or TV app. When there, select your account and sign in using your Apple ID.

    – Once you choose your account, click on authorizations. The next step would be to authorize or deauthorize that particular computer you’re using.

    – Once again, you should ensure you are signed in using your Apple ID.

    • Once you’ve selected the appropriate action, click authorize or deauthorize.
  2. Check how many computers are authorized

    Deauthorize all computers in iTunes

    To check how many computers are authorized, follow the below steps.

    – As always, you must first open your Apple Music or TV app.

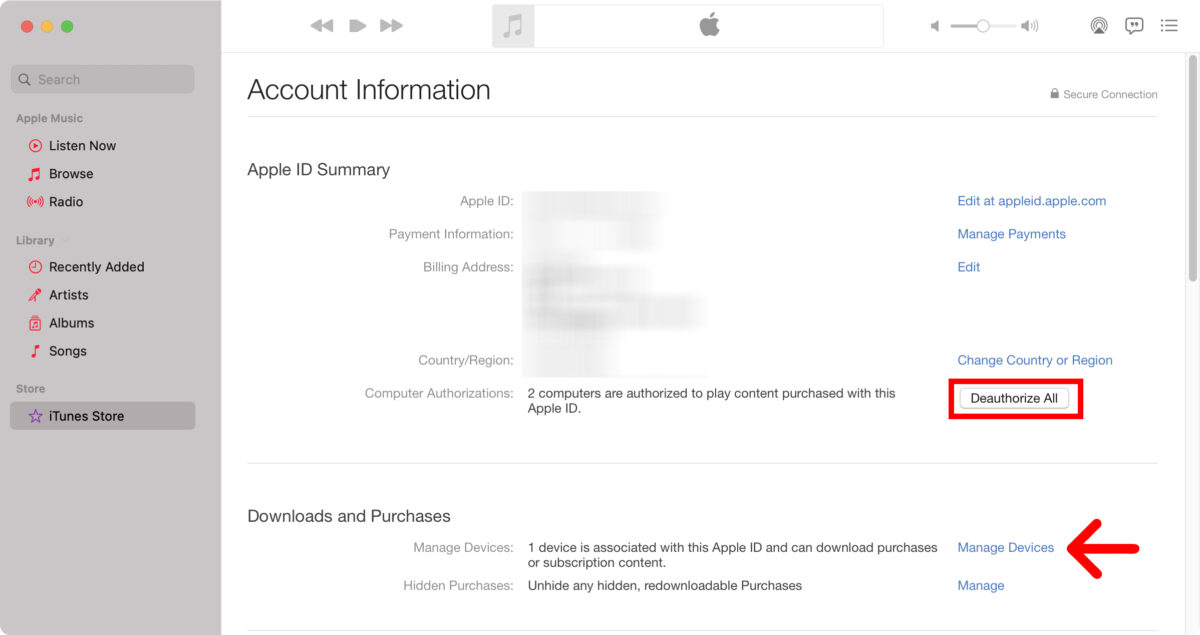
    – You need to select your account and then your account settings.

    – Before doing any of the above, you must ensure you’re signed in using your Apple ID.

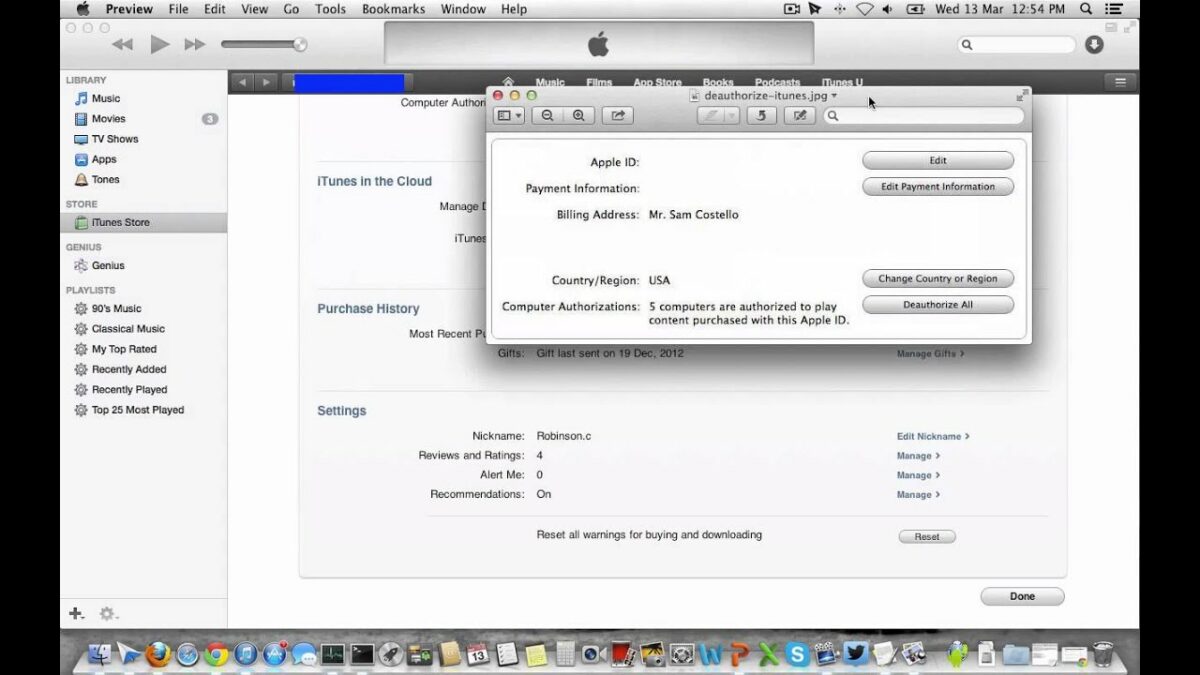
    • When you are on the account information page, check the top of the screen. There, you will see the computer authorizations section, and you will get to see how many devices are authorized.
  3. How to deauthorize a computer without having access to it?

    Deauthorize all computers in iTunes

    If you don’t have access to a particular computer and want to deauthorize it, you will need to deauthorize all your computers. Once that is done, you need to authorize the computers you prefer. Before doing this, you must note that you can deauthorize all your computers only once in a calendar year. Follow the below steps to deauthorize all your computers.

    – Open your Apple Music or TV app

    – Once logged in, please select your account and head to account settings.

    – At this stage, you’ll be asked to sign in using your Apple ID.

    – When you reach your account information page, you will see the Apple ID summary section at the top.

    – There, you will see all computer authorizations. Next to that, there will be a button to deauthorize all. Click it.

    • Once done, you need to authorize each computer based on usage.
  4. What are the steps to deauthorize your computer?

    Deauthorize all computers in iTunes

    To deauthorize your Windows computer, follow the below steps.

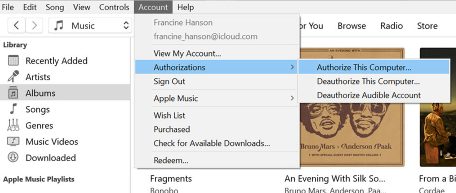
    – Log in to iTunes with your Apple ID on your computer. You will see the account section at the top of the screen when logged in.

    • Click on account and then click on authorizations. Once done, click the option to authorize or deauthorize that computer.
  5. How to check which computers are authorized?

    Deauthorize all computers in iTunes

    If you’re looking to check which computers are authorized on iTunes, follow these simple steps.

    – The first step is to open iTunes.

    – Once done, you need to click on your account section at the top of your screen.

    – At this point, you will be asked to sign in using your Apple ID.

    • Once you are on the account information page, you can see how many computers are authorized or deauthorized.

How to DJ with a laptop: iTunes playlist problems

If you’re looking for DJing tutorials, you’ve come to the right place. We’ll show you how to DJ with a laptop – that is, play tracks from your iTunes library on iTunes (or any other software program) and mix it with music that’s playing through your speakers.

iTunes DOWNLOAD

Nowadays, most people are using laptops for their audio recording and mixing processes. These laptops can play media files directly from the hard drive or a portable flash drive. The main problem is that the iTunes playlist files created on these devices are incompatible with popular DJing apps such as Mixxx.

  1. Using DJing app Mixxx

    How to DJ with a laptop iTunes playlist problems

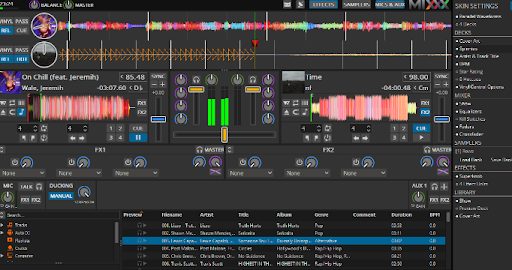
    DJing app Mixxx is a free, cross-platform app with modular effects and an innovative drag-and-drop interface. It’s also available on mobile platforms, meaning you can mix tracks on your phone while you’re out at the club. The app features more than 100 effects and instruments, including reverbs, delays, filters, and more. You can even use it to play real instruments if you want to learn how to play the drums or guitar.

  2. iTunes playlist incompatibility

    How to DJ with a laptop iTunes playlist problems

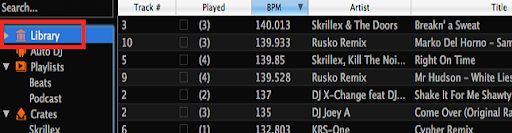
    The main problem that arises with Mixxx is the playlist format for iTunes is incompatible with it. The best thing to do in such a scenario is to convert the files to M3U format. However, there aren’t too many programs that help with this conversion. This means you cannot use your current iTunes playlist within Mixxx. You need to manually add all tracks to Mixxx and then drag and drop to create a new playlist within Mixxx.

  3. Playlist order

    How to DJ with a laptop iTunes playlist problems

    Once the tracks are added, Mixxx will not necessarily play the tracks in the order you’ve picked. Mixxx will change the order and arrange the tracks alphabetically.

    Another problem with Mixxx is it does not autoplay your tunes. This means you would need to start each track manually. While it may not seem like too much of a hindrance, it does get annoying after a while. You’ll also have to play the tracks manually per your order. You would have to remember the order or write it down. You cannot rearrange the playlist within Mixxx.

  4. External tag editor

    How to DJ with a laptop iTunes playlist problems

    It is possible to sort iTunes playlists by date or name, but this approach has a few problems. First, you must manually change each song’s metadata in iTunes – which can be time-consuming, especially if you have a large music library. Second, you may not always know what metadata to change to sort your playlists.
    For example, if you want to sort your songs by album name instead of the artist name or vice versa, or if all the songs on an album have been given different names from when they were first released (e.g., “The Beatles – Abbey Road” instead of “The Beatles – A Hard Day’s Night”). Instead of relying on iTunes’s built-in tools for sorting your playlist library, try using an external tag editor. If you like coding and want to design your own playlist, an external tag editor can help you sort your iTunes playlist more efficiently.
Why use iTunes if it has so many problems?

iTunes is a software application that allows users to play music and audio files. It has many features, including creating playlists, using filters, and searching functions to find specific songs or artists. It also allows users to organize their music by albums, artists, and genres.
With iTunes on your computer or laptop, you can play music from CDs or downloads directly onto your computer’s hard drive without inserting the CD into your computer first. You can also import MP3 files from your digital music collection into iTunes so that you can organize them by artist name or album title according to how you like them best categorized.

Is there an alternative?

There is no alternative to iTunes for laptop DJs. iTunes has become the de facto standard for managing, organizing, and playing music on computers and mobile devices. It’s an excellent choice for laptop DJs because it’s easy to use and fast, allows you to organize your music library in any way you want, and will enable you to sync your music across devices.