How to Get Free UC in PUBG Mobile in 3 Methods

PUBG or Player Unknown’s Battleground is an online multiplayer battle royale style game. In PUBG, the goal is to survive until the end and kill as many enemies as possible. All players start off the game with nothing.

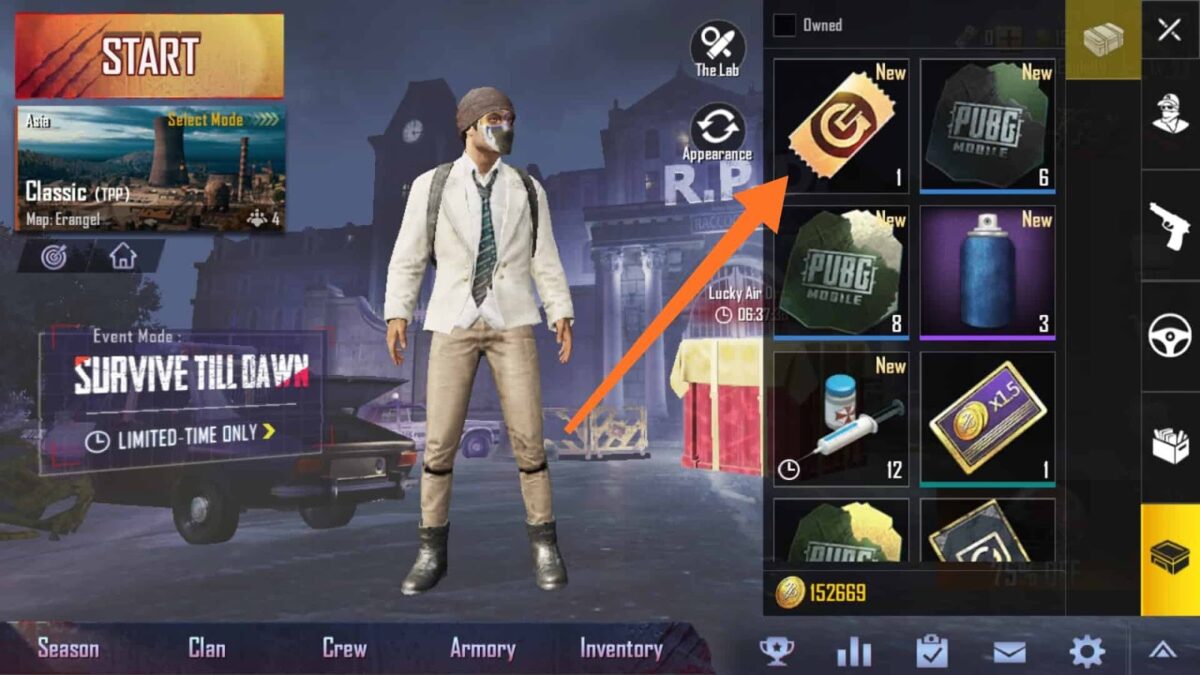
However, you can use UC (Unknown Currency), the in-game currency, to buy premium items and help your player have an edge on the battleground. You can purchase this currency using real money or earned during the game.

But, if you want to save yourself cash, we’ll show you how you can earn free UC in PUBG Mobile. While hacks and tricks are possible to get free UC, these methods are considered illegal. The methods we share below are all legitimate ways of getting free UC in PUBG mobile.

How to Get UC Free in PUBG Mobile

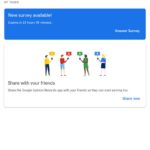
Method 1: Use Google Opinion Rewards

You can download the Google Opinions Reward App on your android phone from the Play Store. You can then use this app to answer survey questions in exchange for rewards. The rewards are usually in decent sums of Google Play Balance, which is exchangeable for UC once you have enough. 

You can exchange your Google Play Balance in-game as well. You just need to purchase UC and then select your Google Play Balance as the form of payment.

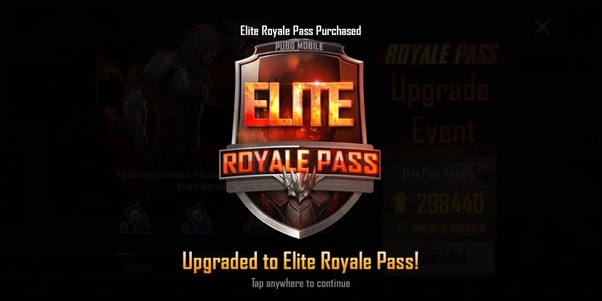
Method 2: Get an Elite Pass

This method is not technically 100% free. You’ll still need to buy the Elite Pass. But, once you have it, you can win different prizes for completing seasonal tasks, one of which is UC.

Method 3: Check out AppKarma

AppKarma rewards users with free Google Play gift cards when they complete the tasks set out in the app.

You will need to download AppKarma and register yourself on the app. Once done, you will have to complete specific tasks on the app to earn points.

You can redeem these points for Google Play Gift Cards and use the gift cards to buy UC in-game. This means you won’t have to spend your own money.

Simple enough?

As you can see, there are a few legitimate ways to earn free UC to spend later in PUBG mobile. Just try one of these methods now, so you can get enough UC to enhance your gaming experience further.

Who knows? Maybe you can get a big sum of UC and leave the battlegrounds scorned.

If you enjoyed playing PUBG, try out Freefire or Call of Duty Mobile.

GTA V How to Register as CEO in 3 Fast Steps

GTA V is part of the Grand Theft Auto franchise. Like the other games in the franchise, GTA V offers extensive open-world gameplay with stunning graphics and an appealing storyline. GTA V also offers both online and offline gameplay modes.

One added perk of playing GTA online is that you can register as a VIP and CEO, so you can reap the benefits and power from within the game.

But, do you know how become a CEO in GTA Online?

We’ll show the steps below, so you can hire bodyguards and executive assistants to drive you around. Once you’re a CEO, you can enjoy the added perk of getting access to new vehicles when you buy recently premiered offices or buildings, including boats and even planes.

Steps to Register as a CEO

Step 1: Buy an office

To register as a CEO, you will first need to buy an office.

The cheapest office available for purchase is $1 million and is situated at Maze Bank West. You can buy an office using your in-game phone. Then go to the Dynasty 8 Executive website and spend the cash.

Step 2: Hire staff and customize your office

After buying your office, you will be able to hire staff and customize your office space by adding features such as living quarters, gun lockers etc.

You can even sign on assistants to do small jobs for you, like driving you around. There is also the possibility of getting your online friend to be associates or bodyguards.

Step 3: Register as a CEO

Head to the interaction menu and choose ‘SecuroServ’ and register to be a CEO.

That is the simple process of registering as a CEO.

Registering as a VIP is similar, except that you do not need to buy an office. You just need a balance of at least $50 000 to sign up as a VIP through the interaction menu and by selecting ‘SecuroServ’.

The benefit of being a VIP is that you, too, can also hire your online friends as bodyguards. 

Start your boss life

Now that you are registered as a CEO, you can take full advantage of the power, privilege, and perks in the game. These benefits make GTA V worth playing again and again.

If you enjoyed GTA V, you might also enjoy GTA San Andreas or GTA 4.

How to Disable Quick Chat in Among Us in 5 Easy Steps

Innersloth has recently added a new feature to Among Us on PC, Android, and iOS called Quick Chat. It’s been designed for a specific age group, with unique features to accompany your message. 

However, not everyone is fond of this option and has been looking for how to disable Quick Chat in Among Us.

In this quick guide, we’ll show you how to perform this task on the PC version of the title. Let’s dive in!

How to disable Quick Chat in Among Us

If you’re over the age of 13, the Quick Chat option won’t be available.

However, you can’t merely change your age once you’ve set it. There’s a way around this dilemma, fortunately.

Step 1: Change your age

First, you’ll need to change details inside a file that stores your age. Here’s what you’ll need to do:

  • Search for ‘C:\Users\(your-username-folder)\AppData\LocalLow\Innersloth\Among Us’ in Windows Explorer.
  • Open your Hidden Files setting and find the ‘App Data’ folder.
  • Use NotePad to open the file ‘playerPrefs’.
  • There are a string of variable that indicates your birth date as month, day, and year. Change this so that it appears that you’re over 13 years old.

Step 2: Open Among Us

The above step is only necessary if you’ve set your age as below 13.

It’s now time to open Among Us on your PC.

If it’s your first time playing the title, make sure that you make your birth date older than 13.

Step 3: Open the Settings

Go to the gear symbol to access the settings.

Step 4: Select Quick Chat

Open the Data tab and click on ‘Chat Type’. ‘Free or Quick Chat’ will be available, but when you try to choose ‘Quick Chat,’ you’ll see that it’s disabled.

Step 5: Play Among Us with Quick Chat disabled

Now you can freely run around as a crewmate or imposter with the Quick Chat disabled.

Silence among crewmates

While there will still be chats available, at least the Quick Chats feature will be disabled.

You can enjoy running around completing tasks or killing the crewmates, finding new ways to play the game.

How to Change Your Gender in Rust in 5 Easy Steps

Rust has grown in popularity at a staggering rate since its release onto PC and Mac. Its beautiful graphics and fun, in-depth gameplay make it a go-to choice for many gamers.

However, the developers’ decision to auto-generate a player’s avatar when users first use the game hasn’t been a hit. If you’re like many of the other players, you’ll want to choose your avatar’s gender and customize it to your liking. 

Luckily, we have you covered!

Here’s a quick 5-step breakdown that lets you regain control and shows you how to change your avatar’s gender in Rust. 

How to Change Your Gender in Rust

First off, this is not an actual hack. This means you won’t get banned for using it. However, it does go against the original idea that developers had in mind.

But, if you don’t mind that, let’s get started!

Step 1: Head to your Steam Profile

Make sure that you have Rust installed in your Steam Library. Then, go to your Steam Profile.

Step 2: Edit your profile

Click on Edit Profile in the top right-hand side of your profile window.

Step 3: Change the Privacy Settings

Under Privacy Settings, set your profile to Public.

Step 4: Open Properties

Now, go to your Steam Library, right-click on Rust, and select Properties.

Step 5: Enter codes 

Go to Launch Options and type in one of the following codes:

  • Female: -gdr20f
  • Male: -gdr20m

And, voilà!

Customization is possible 

Most players who have used this method have been successful in changing their avatars’ genders. From time to time, it does get patched. Luckily, though, you have other mods that let you choose the gender.

Gamers, in general, are a very resourceful bunch of folks. Although the developers may have had an original intention by excluding the possibility of gender customization, the gamer community can rest assured that they now have the upper hand.

Mobile Legends Yun Zhao Build

Mobile Legends is a popular online multiplayer game. You battle in the arena in teams of 5. Each member of the team chooses their hero to play with. These heroes come from different classes, and each one has its own sets of skills, strengths, and weaknesses.

More about Yun Zhao (Zilong)

Yun Zhao (Zilong) is a dual-class hero and falls into both the fighter and assassin classes. He is a very durable hero with a strong attack and fast attack speed. He is a powerful hero to use if you enjoy the fighter/ assassin classes. Although he is easy to play with, he is a difficult hero to master.

Since Yun Zhao (Zilong) is such a long-lasting hero with strong offensive skills, only a few heroes can counter him on the battlefield. The best heroes to counter Yun Zhao (Zilong) are Alucard and Odette.

Mobile Legends Yun Zhao Build

Now, let’s look at the best skill builds for Yun Zhao (Zilong) that you can get the most out of this powerful hero.

Best Item Skill Builds

When using items to build Yun Zhao‘s skills, go for these items first:

  • Swift Boots
  • Berserker’s Fury
  • Scarlet Phantom
  • Endless Battle
  • Windtalker 
  • Blade of Despair

When you combine these above item skills building with the assassin emblem set, you are sure to end up with a very strong Yun Zhao (Zilong) to use in your battles.

Start Building Skills Now

Why not start building up Yun Zhao‘s skills now and master this hero. Once you do, you will have a powerful fighter/ assassin hero at your disposal.

How to Fix GTA V Game Memory Error in 4 Easy Steps

GTA V is the latest game in the Grand Theft Auto franchise. GTA V was released in 2013 and is not a dead game as it remains popular. 

GTA V also has additional mods and add-ons available for the game. This means that there is still so much you can do even after finishing the game’s main story.

GTA V can be a demanding game when it comes to your computer setup and game memory. They recommend that your computer have the following specs: 64-bit Operating System (OS), i5 Processor, 8GB RAM (memory), 2GB Nvidia GTX Video Card, and at least 64GB of hard drive space. However, the game works fine with the minimum specs: 64-bit OS, i3 Processor, 4GB RAM, and 2GB Nvidia GTX Video card. When using the minimum specs, you will not be able to play GTA V in HD quality.

What is the Game Memory Error?

This error pops up when you try starting the game on your computer or laptop. The message will usually read: Out of Game Memory. Please reboot and restart the game. 

Here are some reasons why this could be happening with GTA V:

  • Improper mods or add-ons
  • Outdated or corrupt video/graphics drivers
  • Certain versions of DirectX
  • Wrong video card options (when using multiple video cards)
  • A system in error state

Fear not; this error does not mean that you will never be able to play your game. There are ways to fix this.

How to Fix GTA V Game Memory Error

First off, you should try precisely what the game recommends, restart your computer, and try again. This is known as the ‘please reboot’ fix and is the easiest place to start. However, if that doesn’t work, you can try the below solution.

Step 1: Turn off your computer

Shut down your computer correctly.

Step 2: Remove power cable/battery and extra peripherals

If you have a desktop, remove the main power supply cable. For a laptop, you will need to remove the battery. Also, remove any additional connections such as the mouse and/or keyboard.

Step 3: Press and hold the power button

Press and hold the power button for at least 30 seconds to flush out the static charge and excess power.

Step 4: Wait and then restart

Give the system between 3-5 minutes before restarting your computer and trying the game.

Problem solved

This should solve the game memory error. And once fixed, you should be able to continue enjoying GTA V or any of the earlier GTA games such as GTA San Andreas or GTA Vice City.

Mobile Legends Alucard Builds – Top 3

Mobile Legends is an online multiplayer game where teams battle each other. The teams are all made up of five heroes each. 

Alucard is a fighter class hero and one of the strongest heroes in the game, making him a good hero to choose. He can inflict a significant amount of damage and is also very mobile. He is also if used correctly, almost impossible to kill and escape from. However, he is weaker early in the game and needs time to build his skills. He is also not good at crowd control.

Although a powerful hero, Alucard has weaknesses, and some heroes can counter his strong attacks. These heroes are Eudora and Freya. You can add a buff to Alucard, although it is not necessary.

Mobile Legends Alucard Builds

There are three main builds for Alucard, and they all have different perks. Choosing which of the three is best will depend on your preferred style of gameplay. Let’s look at the three ways and what each brings to the table.

Build 1: The Demon Hunter build

This build is great for players wanting to focus on building damage and sustainability. This will allow Alucard to stay alive much longer and cause significant damage to others. This build also focuses on the lifesteal skill. To achieve this build, activate the following skills in this order:

  • Warrior Boots
  • Endless Battle
  • Haass Claws
  • Berserker’s Fury
  • Blade of Despair
  • Queen’s Wings

Build 2: The Pure Damage Build

This skill build focuses mainly on building your damage and getting that as high as possible. When using this build, you may start to hear the words ‘Maniac’ or ‘Savage’ when making a kill. To achieve this build, activate the following skills:

  • Blade of Despair
  • Berserker’s Fury
  • Queens Wings
  • Endless Battle
  • Scarlet Phantom
  • Malefic Roar

Build 3: The Jungle Fury Build

The purpose of this build is to collect gold and experience faster than the enemy team. This will also allow you to build up your item set much faster, and soon you can wreak havoc on the enemy team and their base. To activate this build, you need to select the following items:

  • Raptor Machete
  • Swift Boots
  • Haass Claws
  • Berserker’s Fury
  • Malefic Roar
  • Blade of Despair

Which build do you prefer?

Now that we have given you a few builds for Alucard, give them a try. Once you’ve tried all three, you can make alterations to match your playing style.

How to Fix the Steam Load Error in Rust in 3 Easy Steps

Rust has gained a massive following since its launch in 2013 onto Windows and Mac, owing to its beautiful graphics and complex gameplay. There’s something so appealing to being able to build yourself a massive base with functioning turrets and a massive treasure hoard in the basement that tempts all noobs to run straight into your fortress of death. 

One of the most common errors that players run into pops up on the loading screen where the game refuses to start because it says that Steam isn’t open, even if it is. In this guide, we’ll show you a fast and straightforward way to fix this annoying error.

How to Fix the Steam Loading Error in Rust

Step 1: Close Steam and Rust

Make sure that the game is closed and that Steam isn’t running. Make sure to check your Task Manager for any Steam processes and end them.

Step 2: Find the Rust folder

Navigate to the Rust folder in your Steam directory. This should be located in your Steam folder, then Steamapps → Common → Rust.

Step 3: Delete Steam dll file

Now click RustClient_Data → Plugins → x86_64 and delete the steam_api64.dll file. This will force the game files to verify when you try to start the game through Steam and fixes whatever was causing the error.

Back to Being the Ultimate Survivor

This is the solution that works most of the time, but we all know that sometimes the best solution doesn’t work for everyone. Many people have said that a fresh installation of the game, or Steam, has helped. We all know how frustrating it can be to buy a new game and go through the long process of downloading it only to start it up and be met with an error that prevents you from playing the game. Luckily, this quick solution should have you back in-game in no time and on your quest to becoming the Ultimate Survivor.

How to use ShareIt App on PC with Bluetooth in 5 Steps

SHAREit is an incredibly useful app to share files between devices and all leading operating systems, namely Windows, Android, Mac, and IOS. However, if you want to share the app with others without the need for the App Store, then you’ll want to take a look below.

SHAREit DOWNLOAD

You’ll learn how to send the SHAREit app to someone else via Bluetooth. Ready to see how? Let’s check it out!

What are the benefits of using SHAREit for file sharing?

The SHAREit app makes it easy and convenient to share apps even without using Bluetooth or an active internet connection. This is one of the features that sets it apart from many other file-sharing apps that require an internet connection or active Bluetooth to share files.

Another benefit is that there is no file size limit. This is incredibly useful as those who frequently share files rarely share small ones. Many creative and digital industries share files frequently, such as graphic design, animation, and more.

Not only do they share files with the clients, but co-workers also share files to work on different parts of the project or check the final copies before sending them to the client. These files can be pretty image-heavy, which in turn makes the file size big. Therefore, having an app that allows sharing files no matter the size is very useful.

Another helpful feature is that you can share files with up to five different devices simultaneously. Again, in a professional setting, this is extremely important. Transferring the same file to each user needing it one by one takes up a lot of valuable time. Being able to send to multiple users simultaneously speeds up the process, leaving more time to actually work with the files.

How to send the SHAREit app to someone Else using Bluetooth

How to Send the SHAREit App To Someone Else Using Bluetooth

This method is very effective, because of how quick it is. Sometimes, with the Google and Apple App Stores, loading times can be long and tiring. Some workplaces have also banned access to the app stores through their networks, so being able to share this useful app via Bluetooth is an easy solution.

This sure method completely works around that, so both you and your friends can enjoy the app freely. However, in order to use this method, at least one person already needs the app installed on their device

  1. Start and Invite

    Send the SHAREit App To Someone Else Using Bluetooth

    Start up your SHAREit app and tap on the Invite button at the top of the screen.

  2. Turn on Bluetooth

    Send the SHAREit App To Someone Else Using Bluetooth

    Now tap on the Bluetooth sharing option and allow SHAREit to switch on your Bluetooth (if it’s not already on).

  3. Pair devices

    Send the SHAREit App To Someone Else Using Bluetooth

    Now, make sure that the receiving phone (where you want to send the app) has its Bluetooth switched on.

    Pair the two phones by selecting the sender’s phone from the list of available devices.

  4. Accept file transfer

    Send the SHAREit App To Someone Else Using Bluetooth

    Select the receiver’s phone in the SHAREit app on the sender’s phone. A window will pop up on the receiver’s phone.

    Tap on Approve. Once you do that, the file will begin to send.

  5. Send file and run installation

    Send the SHAREit App To Someone Else Using Bluetooth

    Once the transfer is complete, simply tap on the notification and run the installation.

FAQs

Let’s take a quick look at some of the frequently asked questions about the SHAREit app.

Is the SHAREit app free?

The SHAREit app is entirely free to use. Also, if you share files using wireless tethering, there are no mobile costs involved in using the app. Bear in mind, though, that other ways of sharing might incur costs.

Can I install SHAREit on a PC?

The app is available on Android, iOS, Windows, and Mac. This means you can install it on PCs and mobile devices for easy cross-platform file sharing.

What other features does the app have?

This app is very much a jack-of-all-trades. Although its main feature is file sharing, there are also others that make the app quite useful. For example, the app has a file manager you can use to keep organized. You can also listen to music or stream videos directly from the app.

There’s even a feature that allows you to play games directly from the app. The music and video players work offline, meaning you can watch videos or listen to music while transferring files – without needing the internet!

What are the downsides of the SHAREIT app?

One thing that we should mention is that there are quite a lot of ads. While this is often to be expected in a free app, this does feel a bit excessive. However, for the number of features you get as well as the unlimited transfer size, it could be worthwhile if you can bear the advertisements.

Friday Night Funkin Unblocked Games in 3 Easy Steps

Friday Night Funkin is an entertaining game where you play as the Boyfriend trying to get the Girlfriend by beating her Dad and his minions in singing competitions. While you can play it on Windows and Mac browsers, most schools and government offices block sites like this to prevent students and workers from playing it. Fortunately, you can access Friday Night Funkin Unblocked Games to bypass the security systems and still enjoying the song-tapping experience.

Friday Night Funkin Unblocked Games

Step 1: Access the site

The first thing you’ll want to do is head to the Unblocked Games site for Friday Night Funkin.

Step 2: Choose your game

Next up, select which game you want to play, such as Week 2. You’ll see there’s a specific chapter you can access.

Step 3: Play without restrictions

Now that you’ve gained access, you can tap away and let the Boyfriend win the girl.

Sing your heart out

Gaining access to the game might only allow you to play a specific portion at a time, but at least you can have fun doing it. Be sure to also check out how to install the Friday Night Funkin’ Vs Whitty mod safely.