How to Drop Items in Roblox in 3 Easy Ways

Roblox has a way of baffling its players with the simplest of issues. 

For example, how to type uncensored numbers into the chat or how to trade items can seem a bit challenging.

But then, there’s the matter of how to drop an item on the ground.

Once you know the trick, it’s actually straightforward. However, it’s not that obvious at first sight.

In this brief guide, we’ll show you how to drop items on the PC, mobile, and Xbox versions of the game. Check it out below!

How to Drop Items in Roblox

This entire mechanic revolves around one key on all platforms: the Backspace key.

It could sometimes get patched and not work, but if you give it a week or so, you’ll find that it’s available again. 

PC

Make sure that you have the item you want to drop equipped and open your chat window.

Press Backspace a couple of times.

The item should drop out of your character’s hand onto the ground. To pick it up again, just run over it.

Android

This one seems to be a bit more stubborn but works rather similarly to the PC method.

Equip the item that you want to drop and open your on-screen keyboard.

Tap on the backspace button a few times, usually around seven intents. The item should drop.

Some users have suggested that if this doesn’t work, then first tap the return key and begin spamming the backspace button.

Xbox

There’s one glaring problem that we run into when we want to recreate our previous methods on Xbox: there’s no backspace key to press here.

Before you give up, let us reassure you that there is still a magic button.

In this case, though, it would be the down button located on the d-pad.

Press it a few times, and your item should drop. Make sure that you remembered to equip the item before spamming your down button.

The Magic Key

As you read through this guide, you may laugh at how incredibly simple it is to do something so basic. Yet, like with many games, sometimes even the easiest of actions can cause hours of frustration.

Fortunately, this only requires a few presses of one button before you enjoy the gaming experience. 

What is Anydesk and how to use it

Anydesk is a popular software application that allows multiple users to have remote access to a computer system, its files, and documents. Or it can allow two devices to be connected for file-sharing or for IT staff to iron out bugs in a remote computer, for instance. It’s ideal for long-distance collaboration in the current scenario in which more and more companies have employees working remotely. The German software is used worldwide and has been downloaded more than 500 million times, according to the developers.

Anydesk is distributed by Anydesk Software GmbH. It’s free for personal use. Businesses are charged a monthly fee. Before you download it for yourself or your company, let’s take a detailed look at what Anydesk is and how to use it.

What is Anydesk and what is it used for?

Anydesk allows you to access your office computer when you’re out of the office. You can easily access data from your office computer, manage your files and transfer them or print them from a remote computer or mobile device. You can even turn your office screen black by enabling privacy mode in the security settings if you don’t want other people in your office to look at what you’re working on from a remote location.

How does Anydesk work?

The developers of Anydesk say its secure connection, which is encrypted and has a proprietary codec, ensuring trouble-free transmission. It allows connections between different kinds of devices, no matter which platform they’re operating on. The software also allows private users to access their home computers if they’re somewhere else. Business IT personnel can also use it to access staff members’ devices to solve problems if they’re out of the office.

How to use Anydesk?

Before you can use Anydesk, you need to download and install it. Here are the steps to follow.

Step 1: Download the Anydesk app

Choosing your preferred device format lets you start this journey by downloading the Anydesk app for free from a trusted provider. You can follow the easy links provided on top for quick installation.

Step 2: Fire up your new Anydesk app

You can now launch the Anydesk app by clicking on the file. It’ll start running instantly. Under the heading ‘Remote Desk,’ you can type in the name of the remote device you want to access.

Step 3: Green is for GO

Once you’ve linked your devices, you press the green ‘Connect’ button, and you’re ready to go. This app is truly as simple as that. 

How to give control to Anydesk

In your Anydesk setting, you can find the Access Control List under the security tab.

If you want to give more access to your remote device, you have to unlock the security tab. You can press the + button to add more entries.

How to share files on Anydesk

You can copy one or more files to your clipboard on either the remote or local device.

When the pending file transfer request appears on the other device, you click on the ‘File Transfer’ button in the ‘Accept’ window.

A suitable safety protocol to follow when you’ve completed your file transfers is to disable Anydesk when not in use, especially if you’re accessing your remote device via a public WiFi connection.

How to use Anydesk on mobile

Using Anydesk you can access your personal computer from your mobile phone or tablet if you’re away from home. You will have to download Anydesk on your PC. Also, download the Anydesk app on your phone. Open it and enter the address or ID of the device. Tap the red arrow to use it.

You press the red button again to end the session. To communicate between the PC and the mobile device, you’ll have to have them connected to the same network. You’ll be prompted to select a name for your connection. If your PC is on, you can now access and use it from your mobile device.

More Anydesk guides

For more information on Anydesk, visit the following links:

Sharing connections

Anydesk provides an excellent opportunity to access your PC remotely and grab those important files you need. Don’t let all the functions intimidate you, as it’s easy to use.

How to Reinstall Safari on Mac in 5 Easy Steps

Safari is Apple’s offering to the world of internet browsers.  It works on Mac and Windows, although the Windows version is no longer supported.

Sometimes, we make mistakes, though, and we accidentally uninstall programs, or we uninstall it only to want it back later.

What happens if you delete Safari and it was the only web browser on your Mac? You can’t download the installation file because you need a browser to access the internet.

Fortunately, there is a way to reinstall Safari, but it involves reinstalling your entire macOS. This guide will help you to do this safely and efficiently.

How to Reinstall Safari

While you will be reinstalling your operating system, this process doesn’t affect any of the data that you’ve saved on your Mac. It’s always smarter to make a backup of any critical files to be on the safe side. With that out of the way, let’s begin.

Step 1

Switch your Mac off and then back on while holding down the Command and R keys. When the Apple logo appears on the screen, release the keys and wait for it to load.

Step 2

Enter the details for the Mac’s admin account and click Next.

Step 3

You’ll see the Utilities menu.

Select the Reinstall macOS option and follow the instructions on-screen.

Step 4

Now you’ll need to select the drive that you want to install the operating system onto; this will usually default to the drive that currently houses the operating system.

Double-check it to be safe because this can cause problems if not done correctly.

Step 5

When the installation’s finished, log in as you usually would.

You’ll find that everything will be just as you left it, and Safari should now be restored to your machine.

Rewinding the clock, so to speak

Apple managed to accomplish what Windows never could in that most people are happy to use Safari. In fact, some people prefer it over other browsers.

That’s why it can be a little frustrating if you happen to delete it by mistake or if you uninstall it purposefully but now have no way to get it back.

But now there’s a fairly simple way to restore it, though, while still retaining the data stored on your machine.

How to Rotate Items in Sims 4 in 3 Easy Ways

One of the most exciting features in The Sims 4 is building homes on your Windows or Mac computer.

You can lay the floor or walls as you please, so long as you have enough funds to do just that. However, one of the most frustrating aspects that have annoyed many gamers (us included) is working out how to rotate items in The Sims 4.

Surprisingly, it’s not that difficult in hindsight. We’ll show you how. 

How to Rotate Items in Sims 4

The Sims 4 has a default setting for item placement and the direction that it faces. It also remembers your last saved preference. If you don’t want the shower door stove facing into the wall, here’s what you need to do.

Method 1: Using your mouse

The easiest method to rotate an item is by using your mouse. All you need to do is select it with the left button and then right-click. It will rotate the furniture or appliance clockwise at 45° angles until you have the correct placement.

Method 2: Using the keyboard

If you’re averse to using the mouse, there are two keyboard buttons you can use instead. The comma and period keys, ‘,’ and ‘.’, rotate objects clockwise and anti-clockwise. That means that you can swing it both ways.

Method 3: The Sims 3 camera

Finally, there’s the option to switch to The Sims 3 camera to rotate objects more smoothly. You’ll need to input Ctrl + Shift + Tab to access this mode.

By holding ‘Alt’ after selecting an item, you can move your mouse around to drag and rotate.

Turn your home around

Now that you know the most effective ways to rotate objects in The Sims 4 in build mode, you can go about freely decorating your home as you wish.

You don’t need to settle for flat placements against walls and can create some beautiful disorder if you wish.

If you want to add more content, you can also read some of our other guides such as how to install mods and custom content.

How to Install Sims 4 Mods in 5 Easy Steps

The Sims 4 provides an enjoyable simulated life experience for Windows and Mac gamers. The developer constantly adds new game and stuff packs, improving your gameplay experience.

However, the fun begins when you learn how to install Sims 4 mods and introduce new content. 

How to Install Sims 4 Mods

If you’re looking for content that’s not available in the standard edition or DLCs, be sure to look around for The Sims 4 mods with those specific items. 

You’ll just need to follow a few steps before you can install them.

Step 1: Update to the latest version or patch

Before you can enjoy any mods, you should make sure that you have the latest The Sims 4 updates. They may not work or you’ll have trouble viewing the content in the game.

Step 2: Install an extraction file

The Sims 4 mods are generally available in compressed files, such as .zip and .rar.

To extract these folders and make use of the game files, you need an extractor. There are plenty of free extractor programs available, some of which are built-in with Windows and Mac operating systems

Step 3: Enable mods in Sims 4

When you play with the default settings, The Sims 4 has mods disabled. To fix this, perform the following tasks:

  • Start The Sims 4
  • Select the Menu button
  • Choose Game Options
  • Tick the ‘Enable Custom Content and Mods’ box
  • Save the changes

Step 4: Download mods

Now you’re ready to find and download the mods you’re looking to play in The Sims 4.

Once you have the files, you’ll need to extract them and paste them in the mods folder, which is usually located at Documents/Electronic Arts/The Sims 4/Mods.

Step 5: Play with Sims 4 mods

When you play The Sims 4 again, all your installed mods should now be readily available.

If you can’t see it, you may need to extract the files and copy them over again.

Modifying your simulation life

You can have plenty of idle fun playing The Sims 4 as it is, but many gamers out there enjoy having a more fulfilling experience.

There’s so much content available made by other content creators that you could spend days installing new items. Be sure to read our other guide on how to make Sims 4 custom content.

How to Fix Error 524 in Roblox in 3 Easy Steps

Roblox is a massively open-world sandbox game that has maintained a vast player base. It continues to attract new players because of its fun and simplistic gameplay and the idea that you are only limited by your imagination.

Whether you choose to play it on PC or Android, this game is bound to keep you busy for days on end because you’ll never run out of things to do…

… if you can join a server to play on, that is.

Many players run into a wall when they receive the error 524 when joining a server to play or while already playing on a server. When that happens, you’re booted from the game and have to stare longingly at the launcher, wishing to be allowed in.

Luckily, this error is straightforward to fix. With this guide, you’ll be able to get back to the game in no time. Just take a look!

Why are you seeing error 524?

This error pops up when you do not have permission to access the server you’re trying to use. Many people make VIP or Private servers, and you’ll need to request permission to join those servers from the server owner.

Fortunately, most people are accommodating and will approve your request quickly.

How to Fix Error 524 in Roblox

Step 1: Access Settings

First, go to the Roblox website and log into your account. Then click on the Gear icon in the top-right corner of the screen and select Settings.

Step 2: Change privacy settings

Now navigate to the Privacy tab and scroll down until you see the “Who can invite me to VIP servers?” option. Set this to “Everyone” and save the changes.

Step 3: Join a server

Click on the Games tab at the top of the screen and search for a player who’s already on the server that you’re trying to join. Send them a message requesting to join the server.

Then, just sit tight and wait for a reply; this shouldn’t take too long. If they send you an invitation to the server, you’ll be able to join it and begin playing.

Open Sesame

It can be very frustrating when you’re trying to complete a specific game mode, only to be met with an error that locks you out of the game.

However, you’re in luck. The Roblox community is very active and accepting in most cases and will give you access in no time.

How to Change Your Character in Rust in 3 Easy Steps

Rust is a top-rated online multiplayer survival game. The game had its full release in February 2018 but has gained the interest of many gamers.

Your objective is to survive the harsh and post-apocalyptic world. You can work with other players, gathering resources, crafting items, and building bases. Or you can try and go it alone.

However, when it was released, you could only play as one single character – a white male. Since then, a few updates have allowed some variation to your character’s skin color, race, looks, and gender. These are basic and completely randomized. 

So, if you’re looking to mix it up, we’ll show you how you can change your character in Rust.

Rust Download
9

How Can I Change My Character

The only way you can ‘change’ your character in Rust is by using a different Steam account. It is also important to note that if you don’t like the looks of the character generated with the new Steam account, then you will have to repeat this process.

This can become quite tedious and leave you with multiple steam accounts.

Step 1: Set up a new Steam account

Set up a brand new account on Steam

Step 2: Link your Steam accounts via Steam Family Share

This helps you keep track of your different Steam accounts, especially if you plan to use multiple accounts until you end up with a character you like.

Remember, you will need to play Rust with this account. This character won’t be available on your other accounts.

Step 3: Start a game in Steam from your new Steam account

If you start a game from your new Steam account, you will be given a new, randomized character.

Looks don’t make the character

Rust is a game that focuses on the survival and player vs player aspects of the game, not the characterslooks.

Regardless though, you are still able to enjoy the other parts of the game. And you can buy or sell skins from FacePunch Studios, Steam Marketplace, or other players to bring in some personalization.

If you enjoy Rust, you should also try Ark: Survival Evolved and DayZ.

7 Cool Facts About World of Warships That You Might Not Know

1) World of Warships is FREE to play!

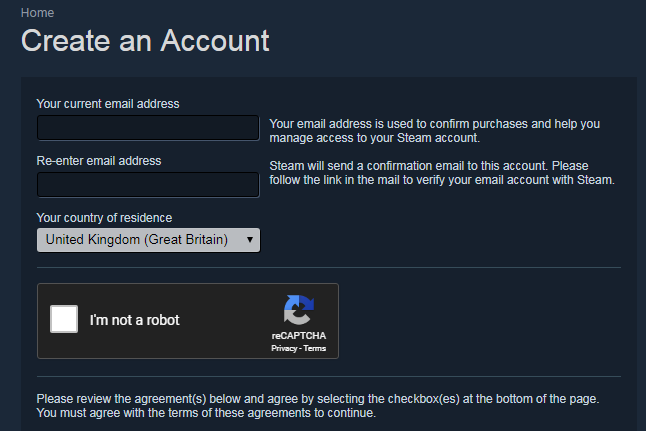
All you need to do to get started is click the orange PLAY FOR FREE button. If you already have a Wargaming account, just download the game. If not, just provide an e-mail address and choose a username, and you’re good to go!

2) You can play with friends in Divisions and Clans, or play alone.

Join a team and engage in battles against bots or real players. You can also invite your friends to form your own Division or join a Clan to find like-minded Captains to conquer the seas with. Team up and take advantage of a wide array of in-game features! If you prefer the lone-wolf playstyle, you can always join the fight individually.

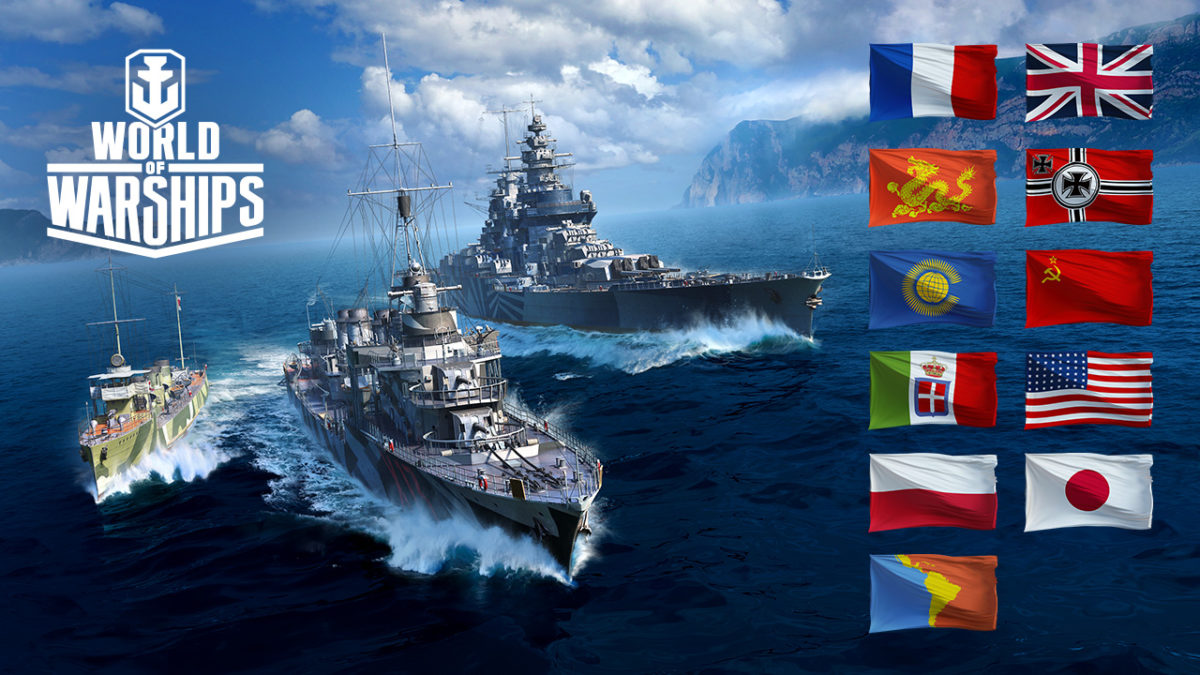
3) You can control ships from 11 different Naval powers.

Choose the flag you want to sail under. In World of Warships, you can pick from the world’s leading naval forces.

Study each nationality’s strong points and quirks, weigh up their gameplay possibilities, and use them to your advantage in battle when developing your own tactics!

  •  USSR

The naval powers of the Russian Empire and U.S.S.R. are represented by destroyers and cruisers. Most of these high-speed gunships have light armor and remarkable main battery guns. Famous ships in the game include Aurora, Kirov, Tashkent, Mikhail Kutuzov, Derzki, and Gnevny.

  • U.S.A.

One of the main maritime powers is represented in the game across four ship types. Versatility is a common attribute of all-American ships. Famous ships in the game include: Iowa, Midway, Des Moines, Cleveland, Benson, and Gearing.

  • JAPAN

The Japanese fleet is the polar opposite of the U.S. Navy. These original ships rely on speed and powerful armament instead of thick armor. Famous ships in the game include: Yamato, Fuso, Shokaku, Nagato, Akizuki, and Myoko

  • U.K.

The Royal Navy fields some of the most renowned warships of the first and second World Wars, which work best when used tactically to outmaneuver the enemy. Famous ships in the game include: Leander, Hermes, Warspite, and Cossack.

  • Germany

The main merits of German ships are their armor and shell-penetration efficiency. German ships excel at taking a punch while rushing toward key locations. Famous ships in the game include: Bismarck, Tirpitz, Nürnberg, Admiral Hipper, Gneisenau, and Leberecht Maass.

  • France

Known for their high speeds and rate of fire, French battleships and cruisers are excellent at putting pressure on weaknesses in enemy formations. Famous ships in the game include Dunkerque, Richelieu, and Algérie.

  • Poland

Błyskawica is a multipurpose destroyer, combining the best attributes of American and Soviet destroyers.

  • Pan-Asia

Ships from Indonesia, the Republic of China, Thailand, and the Republic of Korea are distinguished from others by the short reload time of their Smoke Generator consumables and their powerful deep-water torpedoes. Famous ships in the game include Anshan and Lo Yang.

  • Commonwealth

Australia, Canada, and New Zealand are represented by cruiser Perth and destroyers Vampire and Haida.

  • Italy

With relatively good speed, powerful artillery, and excellent ballistics, Italian ships have their own “temperament” and are also pleasant to look at. Famous ships in the game include Roma and Duca degli Abruzzi.

  • Pan-America

The pioneer of this nation in the game is light cruiser Nueve de Julio from Argentina, with fifteen rapid-fire main battery guns, powerful AA defenses, and high speeds.

4) You can customize the exterior of each warship as you wish.

In World of Warships, you can customize your ships how you want, with dozens of different historical and themed camouflages at your disposal, as well as a variety of special flags to decorate your masts with.

5) You can choose from four types among more than 400 warships available.

In World of Warships, you can take control of a vast amount of ships of different shapes, sizes, and specializations. Ships are divided into four distinct classes: destroyers, cruisers, battleships, and aircraft carriers.

  • Destroyers

Small, light, and unassuming—destroyers make use of stealth and speed to surprise enemy warships with small quick-firing guns and spreads of torpedoes.

  • Cruisers

Larger than destroyers yet smaller than battleships, cruisers are often called upon to carry out all manner of auxiliary duties.

  • Battleships

Large, well-armored warships brandishing massive main guns along with numerous secondary and defensive AA batteries; battleships are some of the most powerful ships in the game.

  • Aircraft Carriers

Aircraft carriers are basically floating airbases: transporting, servicing, launching, and recovering planes in battle.

6) You can be rewarded for inviting friends with the Referral program.

“Play with Friends” is a referral program currently in effect in World of Warships, granting bonuses simply for inviting other people to join the game.

Any player with at least Level 3 in their Service Record is eligible for the Program.

If a Veteran Player succeeds in bringing new players to the game or getting former players back into battle, both the Veteran Player and all their invitees receive a reward.

7) You can enjoy new features every few weeks.

In World of Warships, the machinery never stops; the development team is constantly working. Every four weeks the game is updated with new content, ships, and events that you can take part in and be rewarded with big bonuses.

ACTION STATIONS!

How to Fix Error Code 279 in Roblox in 3 Easy Methods

Roblox is a delightful online multiplayer game. However, getting an error code when trying to play can be highly frustrating. 

Take error code 279, for example. This error code seems to pop up frequently out of nowhere, but what does it mean? We`ll explain why it appears and, more importantly, how you can fix it to continue enjoying your favorite Roblox games.

What Is Error Code 279?

You may be wondering what does error code 279 mean? This error code usually comes up when there is a connection failed error, and the client (that is, you) cannot connect to the game server.

However, do not confuse error code 279 with error code 274. When you get error code 274, it is because developers have shut down the server for maintenance. Error code 279 indicates that there are other connection issues.

Error 279 will usually appear with the message: Failed to connect to the game, ID: 17, Error code 279. 

There are three different IDs that can be associated with this error.

  • ID 17
  • ID 146
  • ID 148.

Of these three IDs, ID 17 is the most common one.

Below are the most frequent causes of the 279 error rode on Roblox:

  • Slow internet connection
  • Windows Firewall
  • Badly scripted game

How to Fix Error Code 279 in Roblox

Method 1: Turn Off Your Firewall

Try turning off your firewall first and see if the problem continues.

If you do not get the same error when going back into Roblox, it is most likely your firewall blocking the game. Knowing this, you can then allow Roblox access in your firewall settings. This solution will not be possible if you play on your mobile, iPad, or mac.

Method 2: Use a Supported Browser

If you are playing on the computer through a browser, make sure you use a supported browser. Roblox does not support some browsers.

If you use Firefox or Chrome, which are supported, and you still get this error, update your browser to the latest version.

Method 3: Disable Browser Extensions

Active browser extensions can sometimes cause this error. Disable your browser extensions to see if the game works better.

Which One Worked for You?

As you can see, there are a few simple ways you can go about resolving this issue. There is no reason why an error 279 should prevent you from having a fun gaming experience.

If you’re a fan of Roblox, check out some of the other similar titles like Minecraft or Fortnite.

How to Update Minecraft Bedrock in 5 Ways

The developer takes time and effort to perform some beta tests to ensure that all the latest bugs and errors are fixed. The patch files can include new mob attacks, graphical improvements, and gameplay mechanic changes.

However, you won’t be able to enjoy these alterations if you don’t know how to update Minecraft Bedrock Edition.

We explain below. Let’s go!

How to Update Minecraft Bedrock

Each platform has a different way of updating Minecraft Bedrock.

We’ll look at each one to make sure you have all bases covered. If you’re unsure if you have the latest version, just check the bottom of the home screen when you’re in the game.

Method 1: Minecraft Launcher for PC

Whether you’re running the official Minecraft Launcher or an alternative like TLauncher, the game should automatically update.

If it doesn’t you can click on the arrow next to the play button and select the latest release for download.

Method 2: Windows 10

If you bought Minecraft for Windows 10 in the Microsoft Store, it should also automatically update.

Failing that, you can click on the three menu icons on the game page and select ‘Downloads and updates’ to see if there are any new releases for you to install.

Method 3: Mobile

Mobile devices have Minecraft: Pocket Edition, but you can also check for updates. Simply head to the app on your device’s App Store and click on the update section to see if you’re missing the latest fixes.

Method 4: PlayStation 4 or 5

Minecraft won’t update automatically if you have the setting switched off on your PlayStation console. You can either turn it on, or you can select the game, press the Options button, and ask it to check for updates.

Method 5: Xbox One or Series X

For Xbox consoles, you’ll need to go to the apps and games section to Minecraft and press the Options button.

When the list appears, choose ‘Manage game & add-ons’ and then find the updates selection. It will check to see if you’ve missed any patches.

The latest Minecraft fixes

Having the latest Minecraft Bedrock version will ensure that you have the maximum player experience without missing any fixes.

If you’re a beginner and want to learn how to build items, check out our Minecraft crafting guide.