How to Change Default Font on Microsoft Word in 3 Easy Steps

Microsoft Word is part of the Office suite that lets you create various document types, such as reports, menus, and tickets. In order to make them look elegant, you may want to play around with the selection of fonts available. If you’re like us, you can change the default font on Microsoft Word to one that you’re planning to use more often.

How to Change Default Font on Microsoft Word

You can change the default font on Windows and Mac, as the feature is available for both platforms. While we’ll show you the method on Windows, the process is the same for Mac devices.

Step 1: Access the Font Launcher

When you select the Home tab on the main menu, you’ll see a Font Dialogue Launcher on the left side. There’s a small square icon that will let you access all the font settings. 

Step 2: Select font type and size

Once you’re in the Font Launcher, you can change the settings for the way you want the default font to look. Fiddle with the type, size, style, and effects until you achieve the desired effect. You can also see view the result in the preview pane.

Step 3: Set as default

At the bottom left of the MS Word Font Launcher, you’ll see a ‘Default’ button. Selecting this will let you establish your settings as the default font on Microsoft Word. Whenever you open a new document, you’ll see that your settings have been changed and you won’t need to alter your font to the preferred one again.

Saving the world, one font setting at a time

Once you’ve changed the default font on Microsoft Word, you’re going to save the time and frustration of doing so whenever you start a new document. It’s essential for when you need to create batch menus or tickets within a few days, eliminating the need to alter the font every time. Of course, if you work in different styles and sizes for different occasions, you’re on your own.
Effortlessly Resize and Optimize PDFs with Adobe Acrobat Pro

Adobe Acrobat Pro is a powerhouse for managing PDF files on both Mac and Windows. Despite its vast feature set, resizing and optimizing your PDFs is straightforward. This guide walks you through the process, helping you keep your documents easy to share and store.

Adobe Photoshop Plans GET YOURS NOW

Streamlining Your PDFs with Adobe Acrobat Pro

Large PDFs can be a hassle, slowing down transfers and taking up too much space. Adobe Acrobat Pro makes resizing your PDFs a breeze, ensuring they remain efficient and easy to handle.

Getting Started with Adobe Acrobat Pro

First things first, you need Adobe Acrobat Pro. This functionality isn’t available in Adobe Reader. If you’re only tackling a few PDFs, take advantage of Adobe’s 7-day free trial. For ongoing needs, a subscription is the way to go. Once you’ve installed and activated Adobe Acrobat Pro, you’re ready to roll.

Step 1: Select Your File

  1. Open Adobe Acrobat Pro: Launch the application.
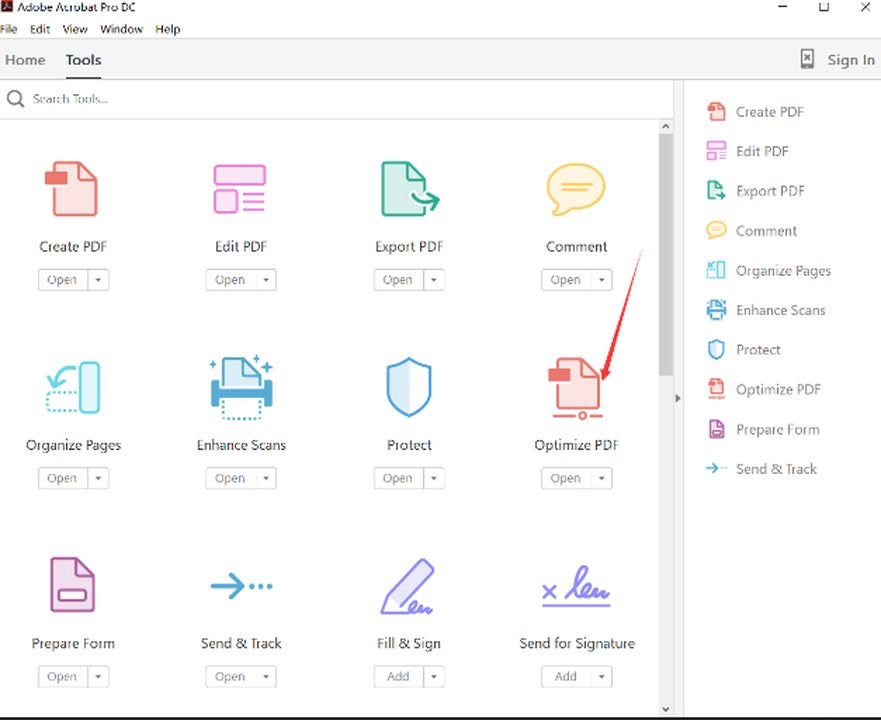
  2. Optimize PDF Tool: Head to the Tools pane and select “Optimize PDF.”
  3. Choose Your File: Use the file selector to find and open your PDF.
Click on optimize PDF to begin the process.

Step 2: Resize Your PDF

  1. Access Resizing Options:
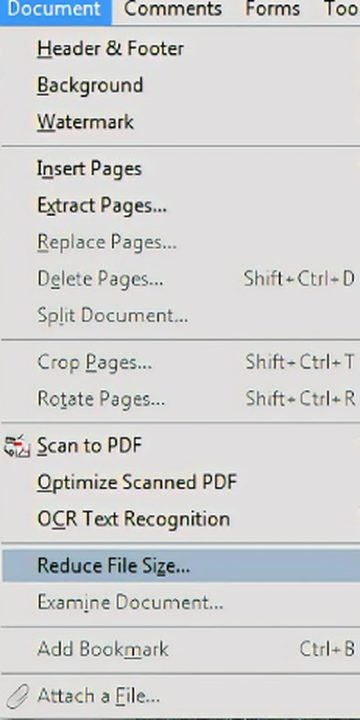
    • Quick Method: Click “Reduce File Size” on the toolbar.
    • Alternative Method: Go to “File” > “Save As Other” > “Reduced Size PDF.”
  2. Advanced Optimization:
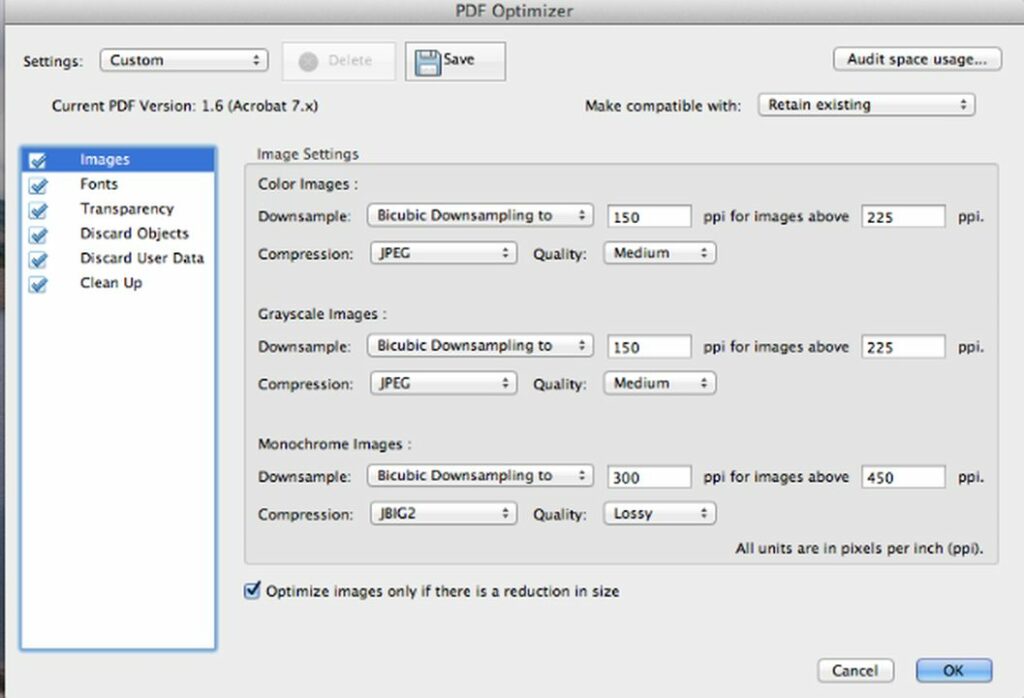
  • Images: Compress and adjust image resolution. Downsampling refers to reducing the number of pixels in images, making them smaller in size while trying to maintain quality.
  • Fonts: Optimize embedded fonts. This means reducing the size of fonts embedded in the PDF, which can help decrease the overall file size.
  • Discard Objects: Remove unnecessary elements. This includes:
    • JavaScript: Scripts embedded in the PDF that might not be needed.
    • Embedded Page Thumbnails: Small previews of pages that are often not necessary and can be removed to save space.
    • Form Fields: Interactive elements that can be flattened into static elements to reduce size.
  1. Fine-Tune Settings: Ensure “Optimize images only if there is a reduction in size” is checked to preserve image quality.
Reduce file size from this drop-down menu.

Unlock the Full Power of Adobe Acrobat Pro

Beyond resizing, Adobe Acrobat Pro offers a suite of tools to enhance your PDF management:

  • Password Protection: Secure your documents by navigating to “File” > “Properties” > “Security” and setting a password.
  • Editing and Annotating: Easily edit text, add comments, and mark up your PDFs.
  • Exporting PDFs: Convert PDFs to formats like Word, Excel, or PowerPoint for flexible usage.
Use this screen to adjust what you want compressed.

Experience the Benefits of Adobe Acrobat Pro

Discover the full potential of Adobe Acrobat Pro today. Whether you need to resize PDFs, secure sensitive documents, or convert files to different formats, Adobe Acrobat Pro has you covered.

Adobe Photoshop Plans GET YOURS NOW

Start your free trial now and experience seamless PDF management:

With Adobe Acrobat Pro, managing your PDF files has never been easier. Take control of your documents today and unlock the full suite of powerful features at your fingertips.

Caves & Cliffs Update Announced at Minecraft Live

Minecraft Will Receive a Massive New Update For Caves and Cliff

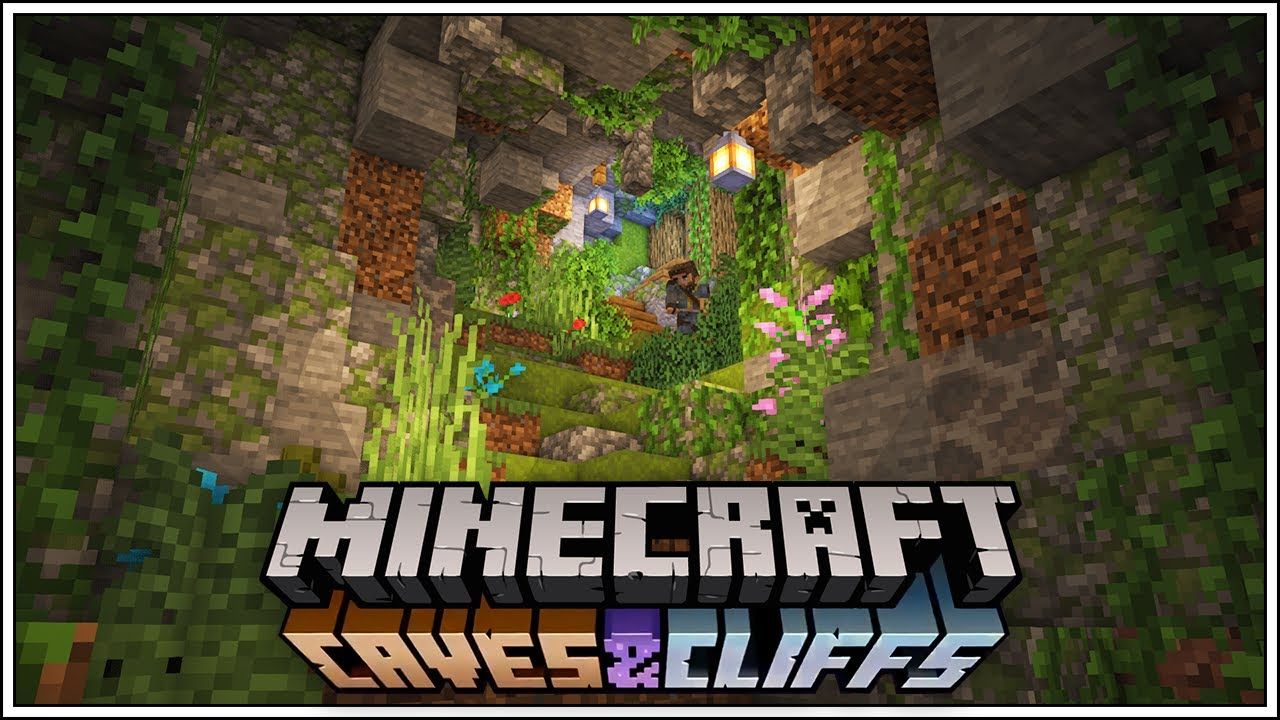
One of the top sandbox games, Minecraft, is set to receive one of its largest updates yet! Called the Caves & Cliffs update, it’ll impact world generation and the vast landscape that’s created when you start a new map. Even your saved games will be affected, as it’ll change the entire structure of the Overworld.

However, the Minecraft Caves & Cliffs update is too massive to ship in one single download. The developers are worried about the effect it will have on overall performance. Therefore, you can expect the first release in the summer and the second during the holiday season.

Besides technical considerations, the team is also looking after each member’s health. There are so many changes to be made, that developers and designers will be working around the clock to ensure that both releases arrive on time. You can look forward to new cute mobs, blocks, and items. 

How to Install Vs. Zardy Foolhardy Mod in 4 Fast Steps

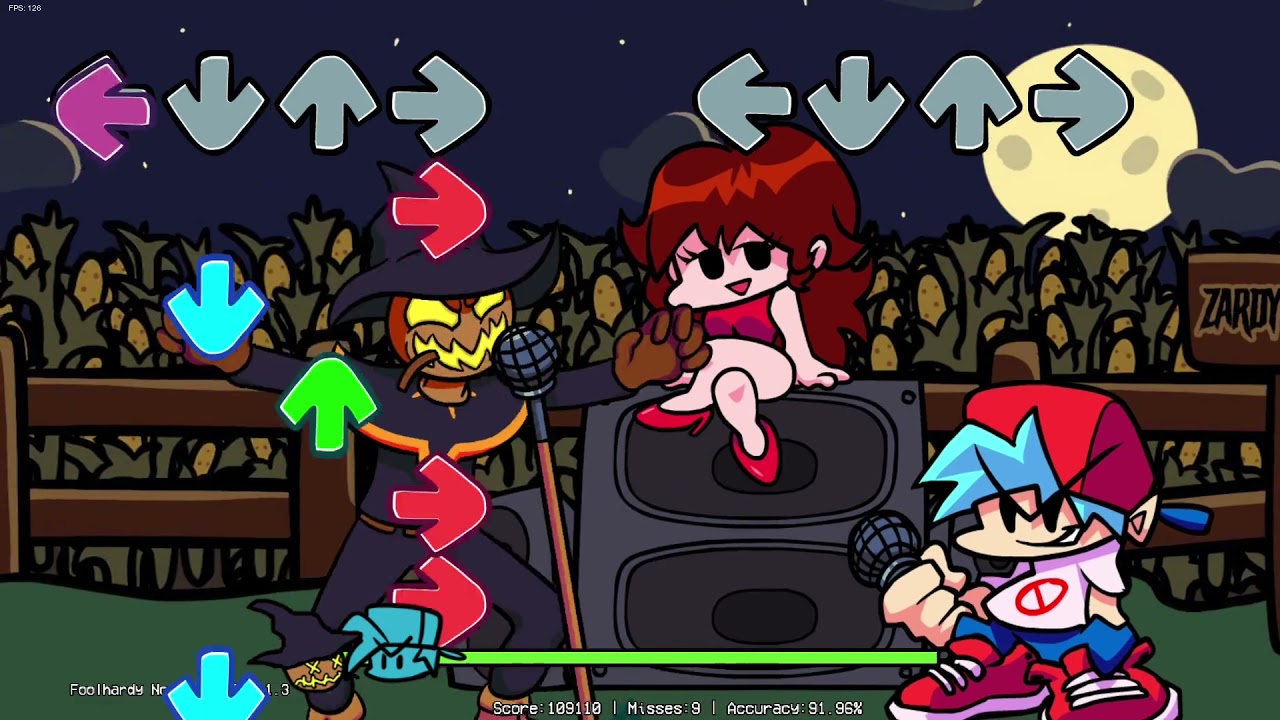
In the latest release for this sensational music game, the Vs. Zardy Foolhardy Mod combines Friday Night Funkin with another popular game Zardy’s Maze. In the modification, you’ll be challenged to beat Zardy Foolhardy in a musical battle.

Beware, though, as this is one of the most difficult, and rewarding, modifications for FNF. Although there are three different difficulty settings for you to choose from, even the easiest of them is a challenge to complete. However, the creators have released many different mods for you to try.

How to Install Vs. Zardy Foolhardy Mod

This modification fits seamlessly into your current Friday Night Funkin game, giving you a few new features such as a chance to face a new antagonist with new music without disrupting the storyline or flow of the original game. Here is how you can install the mod.

Step 1: Have Friday Night Funkin Installed

Make sure that you already have FNF installed on your computer. If you don’t, first download and install it.

Step 2: Download the Vs. Zardy Mod

Download the Vs. Zardy Mod from a reputable website.

Step 3: Extract the Mod Files

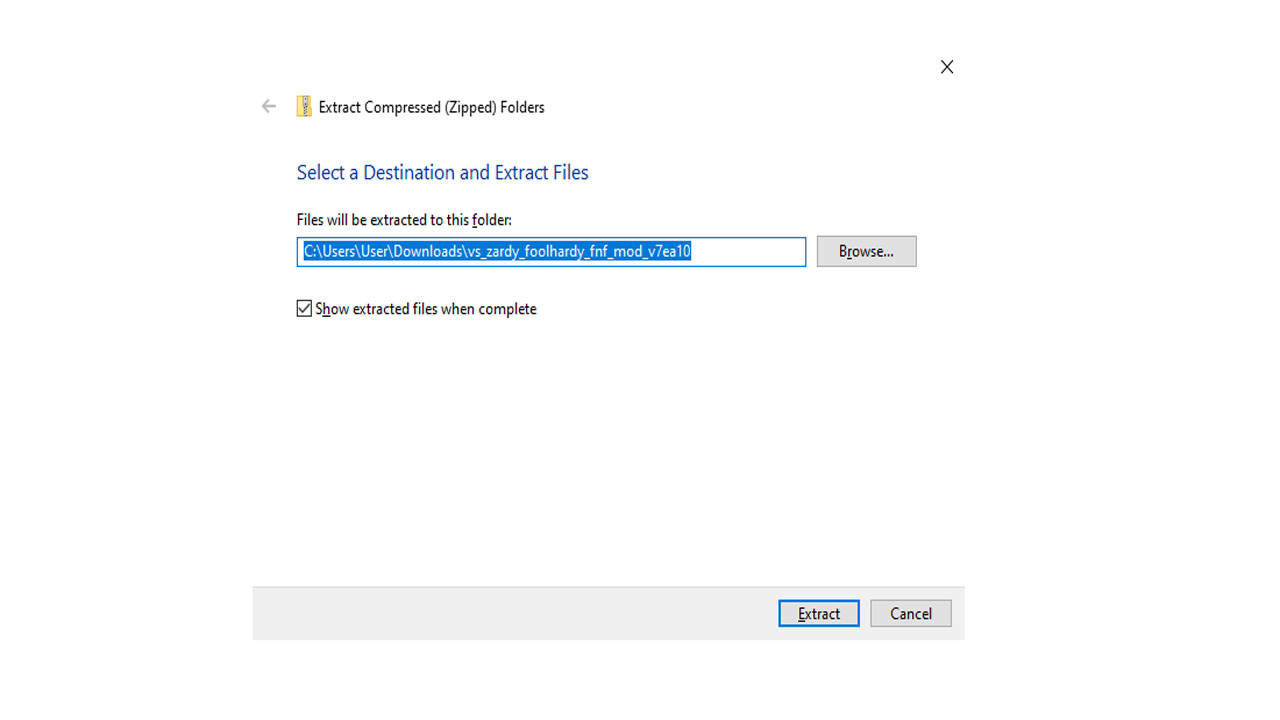
Next, you need to extract the Mod files. Although you don’t need to install this mod into a specific file, we do recommend that you extract it to the same location as your Friday Night Funkin game so that you can easily find it.

Step 4: Play Vs. Zardy Foolhardy Mod

Now you can play the mod by double-clicking the executable file from the mod you downloaded. A .exe file extension will represent it.

Enjoy this challenging mod

This modification is one of the most challenging and enjoyable mods for FNF. Make sure to give it a go once you’ve downloaded the mod. You will thank us, even if your fingers don’t.

If you enjoy the Vs. Zardy Foolhardy mod, why not also try the Whitty mod or even the Tricky mod.

Facebook Announces Live Audio Rooms

Facebook Introduces a Sound Studio in Your Pocket

Facebook has been paying attention to the continuous rise of audio on its platforms, which includes the likes of Messenger and Whatsapp. The one challenge it discovered among its users is finding the right tools for audio creation, whether it’s sending voice notes or sound clips. It believes it has found a solution in the latest Live Audio rooms being developed.

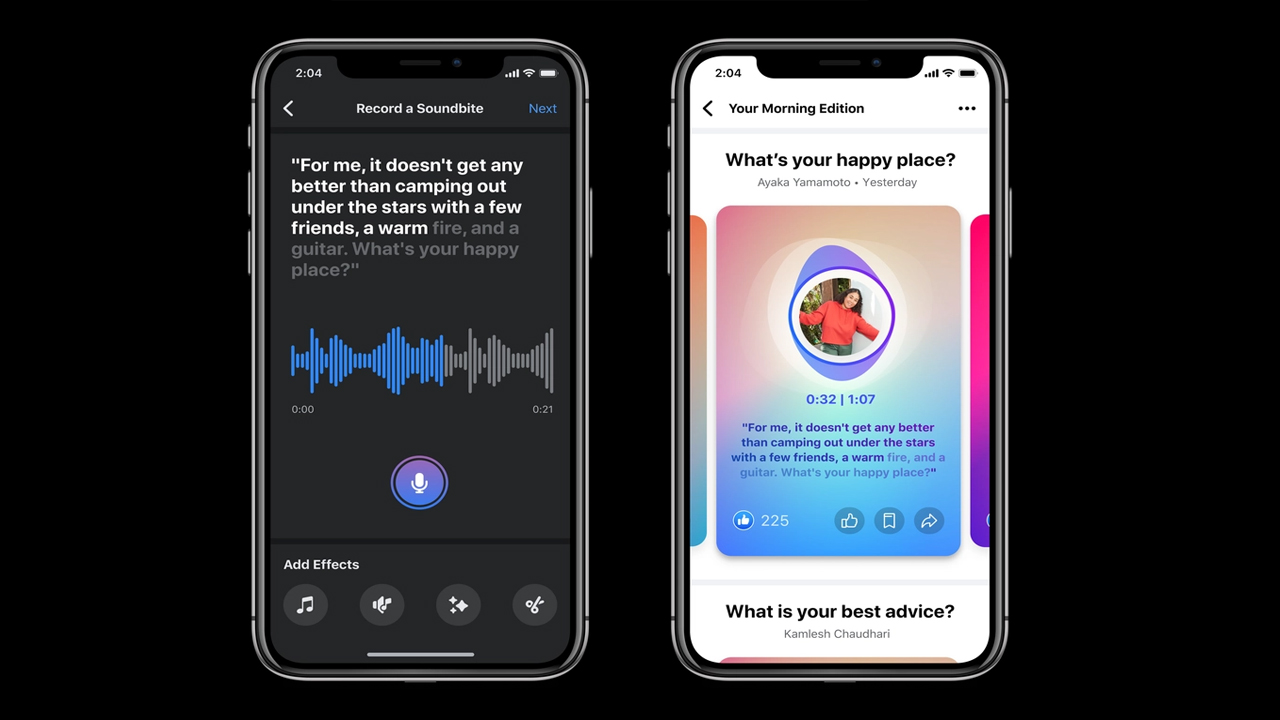
 As with Facebook’s diverse range of tools when it comes to images and videos, it wants you to feel like a professional when creating audio content. It’s steadily been investing in technology, such as voice morphing and speech-to-text, which will become available within Facebook applications. You can also access the Sound Collection library to add some music in the background.

While Facebook claims the new Live Audio Rooms connected to this advancement is inspired by user content, it’s not a far stretch to see the social media giant threatened by Clubhouse. With this feature, you can engage with others in verbal discussions about your favorite topics. Even public figures will be able to engage with followers in open interviews or chats

How to Download and Play We Become What We Behold in 3 Easy Steps

We Become What We Behold is a short little new game that creator Nicky Case developed. The game is currently available for free on Windows and has a simple 5-minute browser version.

We Become What We Behold revolves around the toxicity of social media and the often unexpected effects that social media can have on society. The reality and truth based on this can be pretty disturbing, but the message remains vital.

How to Download and Play We Become What We Behold

Although you can play We Become What We Behold directly in your browser through the website, you can also download the game for even better results. Let’s take a look at the steps to download it.

Step 1: Head to the Download Page

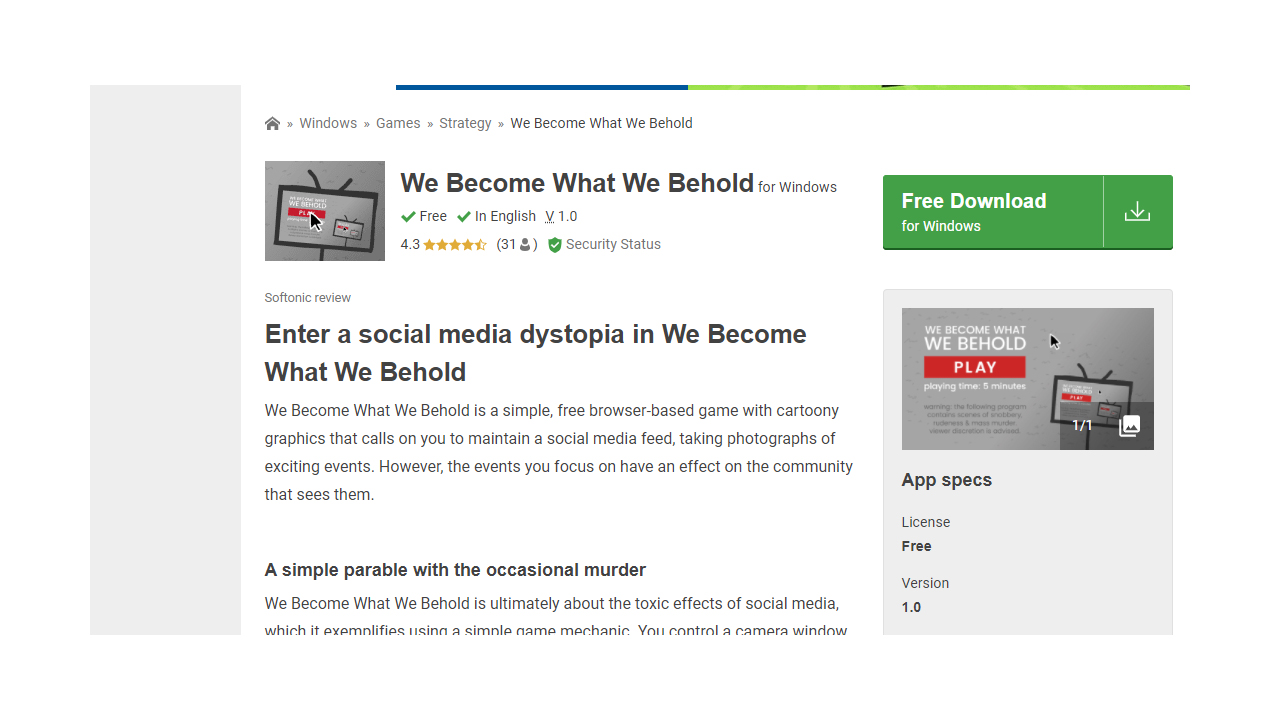
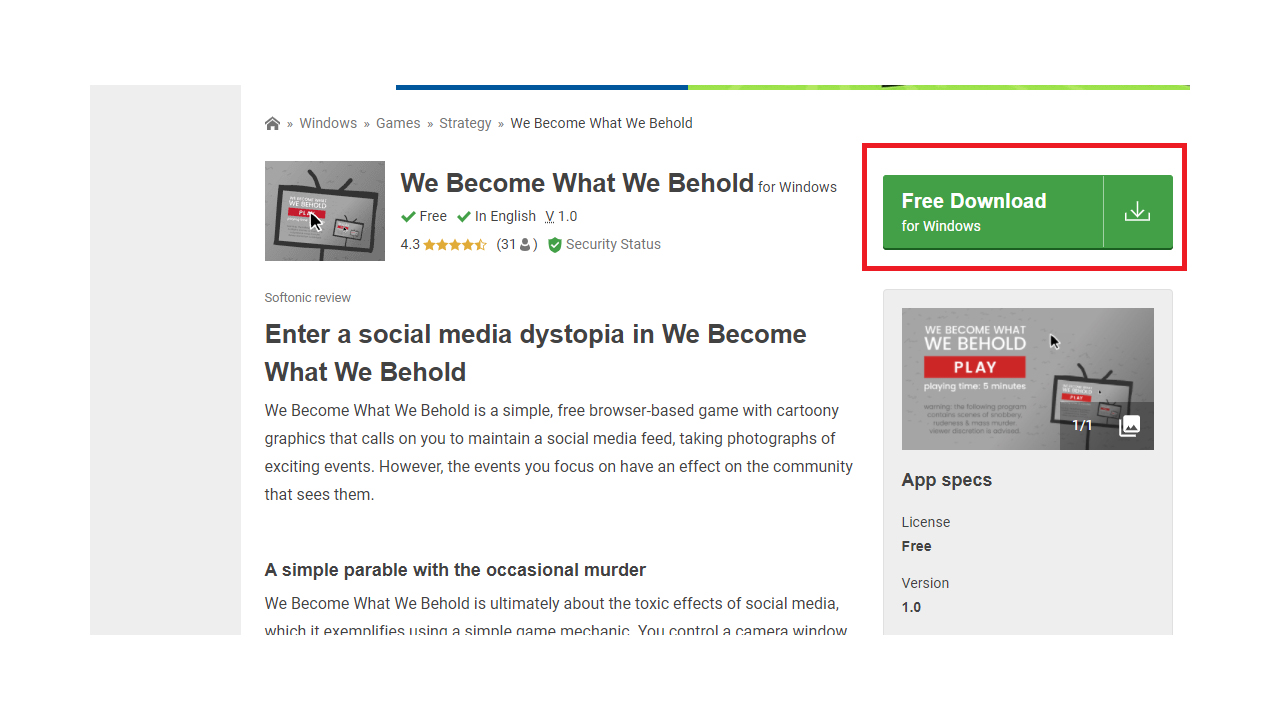
Head on over to this page to download the game directly on computer.

Step 2: Click on the Download Button

Click on the green ‘Free Download for Windows’ button. And wait for the game to download.

Step 3: Head to Downloads and Run the Game

Go to your downloads file, and double click on the game to start installing it. Once installed, you can start playing the game on your computer.

How to Play We Become What We Behold

This is a straightforward game to play and lasts about 5 minutes in total. There are a few different outcomes so that you can retry it. This game is 100% free to play, and there are no in-game purchases or any other areas where you may need to spend money to enjoy the game.

Once you start playing, your screen will be filled with cute cartoon characters. You watch these tiny characters as they go about their business and can take a picture of them doing anything interesting by clicking on the screen.

This image, along with a hashtag, will then be broadcasted. You will soon see the cartoons acting differently based on the image you shared.

Start This Quick Game Now and See The Effects of Social Media

This may seem like a silly little game from developer Nicky Case, but the message beneath it is much more serious than the cute miniature cartoon images relay. This is a fun little game that can keep you occupied for about five minutes, so why not try playing it now.

How to Use Windscribe in 3 Easy Steps

Windscribe is a virtual private network that you can use to hide your online activity and safely browse shows from other countries. While it has robust security tools, it’s not straightforward to install and use. You can use the GUI, but Windows PowerShell is more secure. 

Windscribe (Windows) Free Download
7

How to Use Windscribe using Windows PowerShell

Before you proceed you’ll need a pro account to obtain your login credentials. Without this information, you won’t be able to use Windscribe on your device. 

Step 1: Execute Command in PowerShell

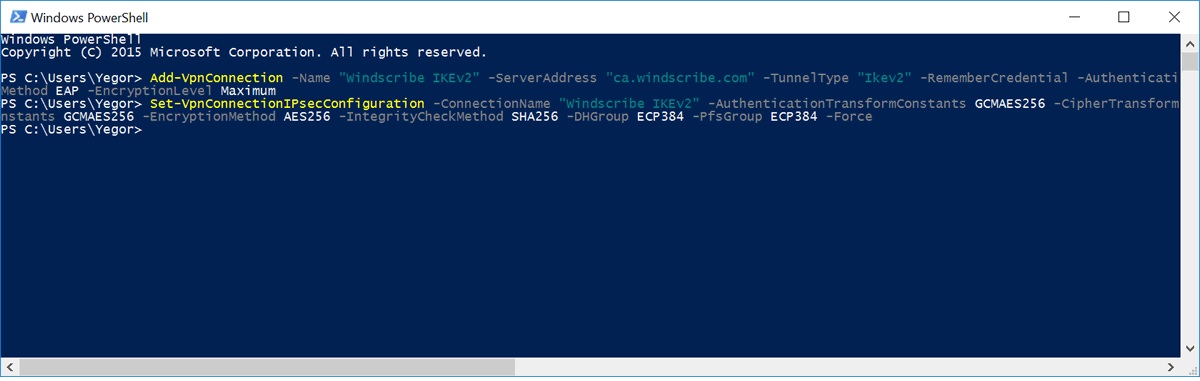
First, you’ll need to open your Windows PowerShell program by clicking on Start and searching for ‘PowerShell.’ Here is the command that you need to execute. Remember to use the details you obtained from your Windscribe pro account.

Add-VpnConnection -Name “Windscribe IKEv2” -ServerAddress “SERVER.WINDSCRIBE.COM” -TunnelType “Ikev2” -RememberCredential -AuthenticationMethod EAP -EncryptionLevel Maximum

Next, enter this command for stronger encryption:

Set-VpnConnectionIPsecConfiguration -ConnectionName “Windscribe IKEv2” -AuthenticationTransformConstants GCMAES256 -CipherTransformConstants GCMAES256 -EncryptionMethod AES256 -IntegrityCheckMethod SHA256 -DHGroup ECP384 -PfsGroup ECP384 -Force

Step 2: Connect to Windscribe

Now that you have PowerShell set up, let’s connect your computer network to Windscribe:

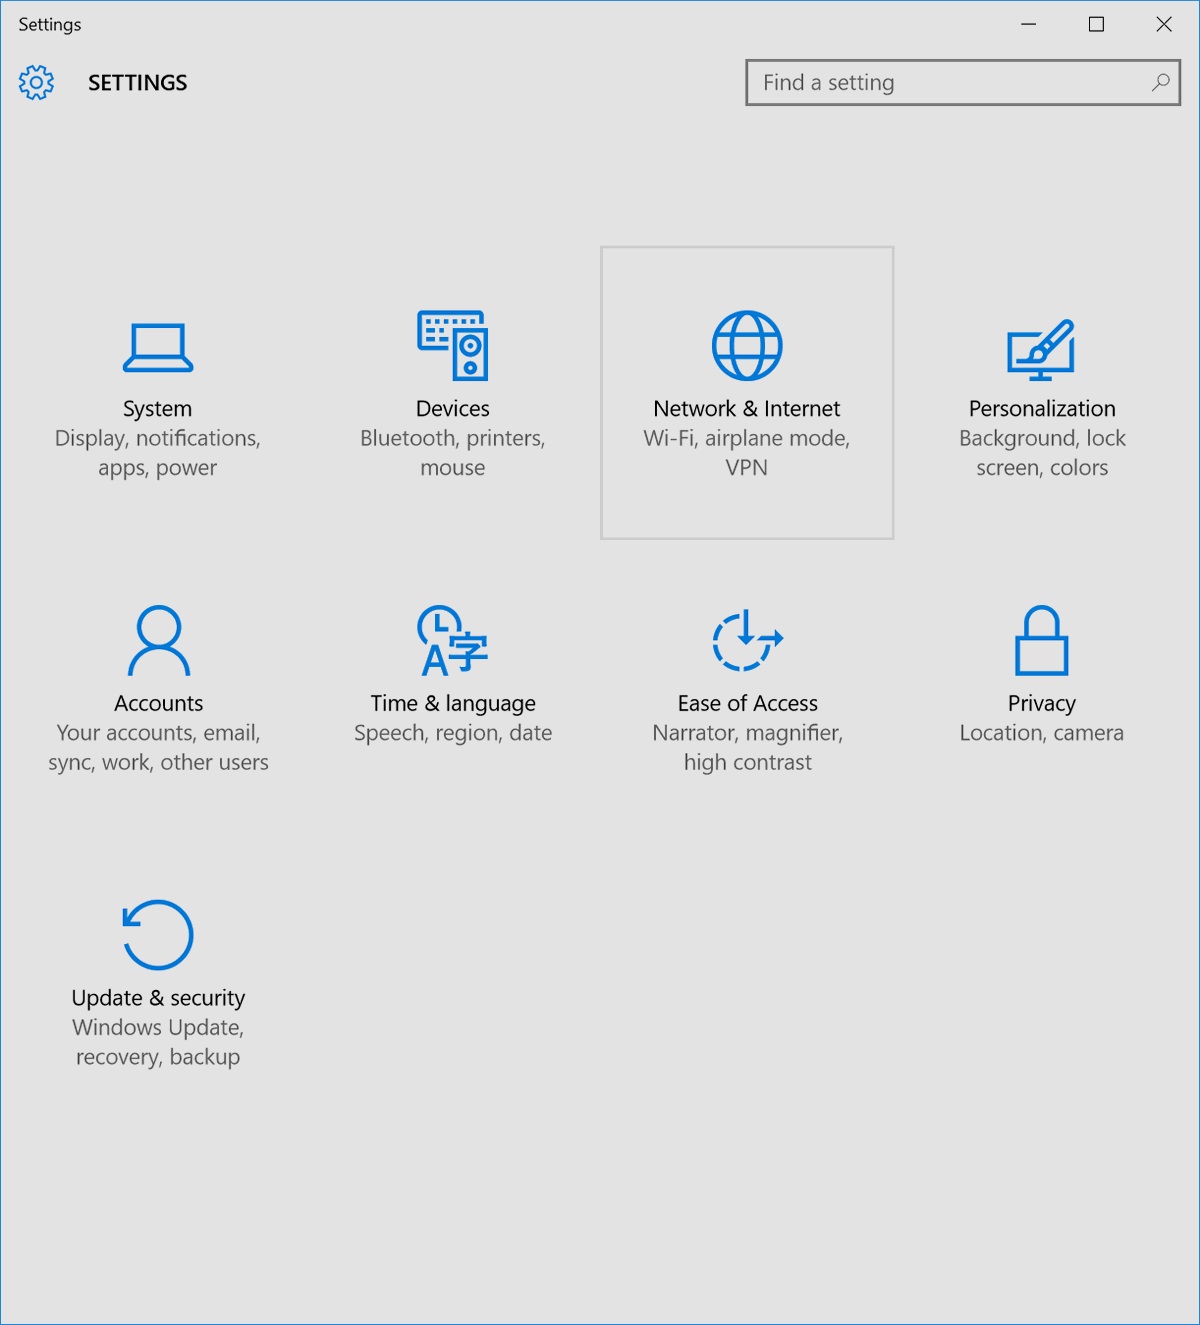
  • Open Start
  • Search for ‘Settings’
  • Open ‘network and Internet’
  • Select the VPN tan
  • Find Windscribe among the select and connect

Step 3: Sign in to Windscribe

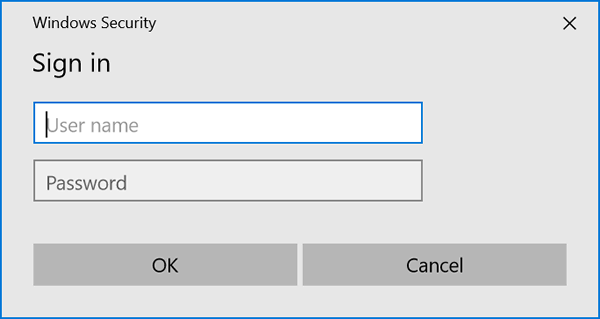
When you created your pro account, you were provided with a Windscribe Profile Generator username and password. You’ll need to insert these here to finalize the setup.

Browse the internet safely

As you can see, the steps to use Windscribe can be challenging but are pretty easy once you know how. You can now safely browse the internet and watch international content without any threat from phishing or hacking. Remember to configure Windscribe to optimal settings for streaming or gaming.

How Do I Change The Year on Google Maps?

Google Maps links to Google Earth so that you can view images of your house as uploaded on the site or taken by satellite. However, you may want to see what the land looked like a few years ago.

Google Maps DOWNLOAD

One of the most fun things about the utility is its ability to take you back in time and see what an area used to look like. This feature can be handy if you’re trying to find an old building that used to be there but isn’t now or if you want to picture your neighborhood as it was when you moved in. Here’s how to change the year on Google Maps.

How to change the year on Google Maps?

Unfortunately, Google Maps doesn’t make it easy to do this. There is no tool for changing the date on Google Maps, so you’ll have to dig independently. It’s a simple process, but it does require an active internet connection.

  1. Find the location

    How to change year on Google Maps

    To change the date on Google Maps, you’ll need to first go to the website maps.google.com. Find the location where you’d like to change the year and enter it in the search bar (make sure it’s exact). Once you’ve arrived at your desired location, look for the red marker on the map—that’s where you’ll be making your edit.

  2. Locate the street view feature

    How to change year on Google Maps

    You will see a  little orange guy icon in the bottom right corner of the screen. Drag that orange guy to the red marker on the map. After you let go, a new screen will open in place of your original map. Locate the “street view” feature in the top left corner of the screen.

  3. How to change the year

    How to change year on Google Maps

    Click on the clock icon. You’ll see a slider in the street view block—this is what we will use. By dragging the slider back and forth, you can change the year and choose what year you want to view. The year will change instantly in street view, letting you click around, and you’ll be able to see how things have changed over time.

    Google creates a snapshot of a place at one point in time and preserves it forever. Sometimes it’s nice to take a trip down memory lane, and Google Maps can be a great way to do that. Maybe you want to remember where your favorite restaurant used to be or where you lived in college. Whatever the case, changing the year on Google Maps is easy.

How to Create a Restaurant Menu in Microsoft Word in 4 Easy Steps

So, you’ve fulfilled a lifelong dream of opening your own restaurant or cafe and need to create your menu but aren’t entirely sure how to get started. You’ve probably heard of design programs such as Photoshop or Dreamweaver but you don’t need any of those to create a beautiful and professional menu. No, the only program you need is one that you probably use every day; Microsoft Word. In this guide, we’ll answer that question and show you how to create a restaurant menu in Word.

How to Create a Restaurant Menu in Microsoft Word

You will need a licensed version of Word to follow this process, you can buy Office from Microsoft’s website, or follow this link to buy Word. Now, let’s begin!

Step 1: Search for Menu

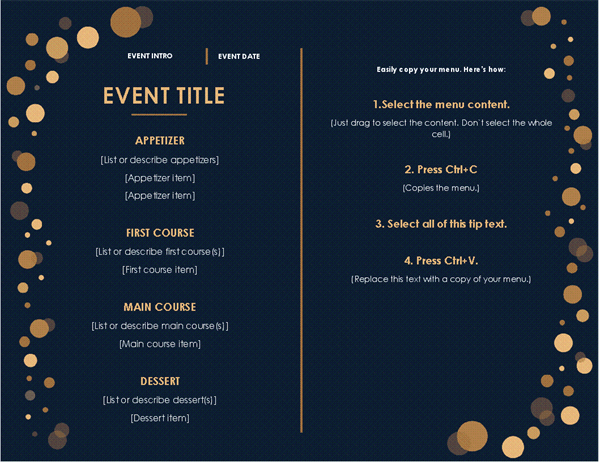
Open up your Word and select File then New. Type “Menu” into the search bar at the top of the screen and press Enter. This will give you a list of available menu templates; you can also browse available templates on Microsoft’s website and download them into Word.

Step 2: Create a new menu

When you find a design that you like, click on it and then select Create. This will open up the template for you to edit.

Step 3: Edit template

Now you can fill in all of your dishes, drinks and specials and replace any of the stock images with your own. Basically, let your creativity run wild and create a menu that does justice to your establishment.

Step 4: Customize the menu

Make sure to add your own color scheme to the menu to match the restaurant’s theme. To do this, select Design from the menu at the top of the screen and then click on Colors. This will give you a list of available color schemes and allow you to create your own if you so choose.

Bon Appétit!

While it is possible to create a menu from scratch on Word as well, using a template allows you to skip the laborious formatting portion of the process to the fun and creative part of adding in your delicious dishes, your own images, and anything else that adds to the charm of your restaurant. If you want to streamline the process even more, then check out our list on Keyboard Shortcuts in Word here, which allows you to work even faster and more efficiently.

How to Markup a PDF in Adobe Reader in 4 Easy Steps

While almost everyone uses Adobe Reader to view PDFs, it’s a common misconception that you can only edit those PDFs if you buy Adobe Pro. There’s actually quite a lot that you can do with a PDF in Reader, such as fill in a form with your details or add your digital signature or add comments and notes to the document. While you won’t be able to convert the PDF back to Word unless you own Adobe Pro, you can still edit and add your own personal touch to the document while it’s still in PDF format. But how do you do this? 

How to Markup a PDF in Adobe Reader.

If you don’t already have the program installed, you can download Adobe Reader for the Windows version or this link if you’re working on a Mac. When you have everything up and running, you can proceed with the guide.

Step 1: Open the document

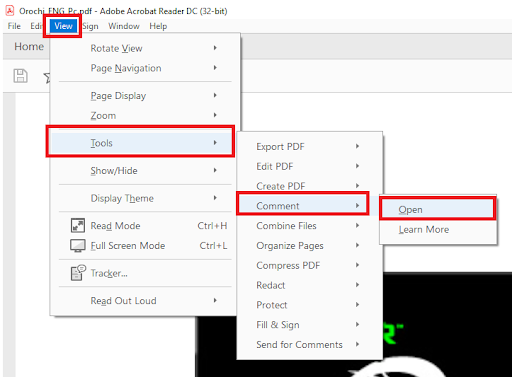
Open up the PDF that you want to edit and select View from the top menu. Then select Tools → Comment → Open. This displays the Comment bar on the left-hand side of the screen and gives you access to the markup tools at the top of the screen.

Step 2: Mark the file

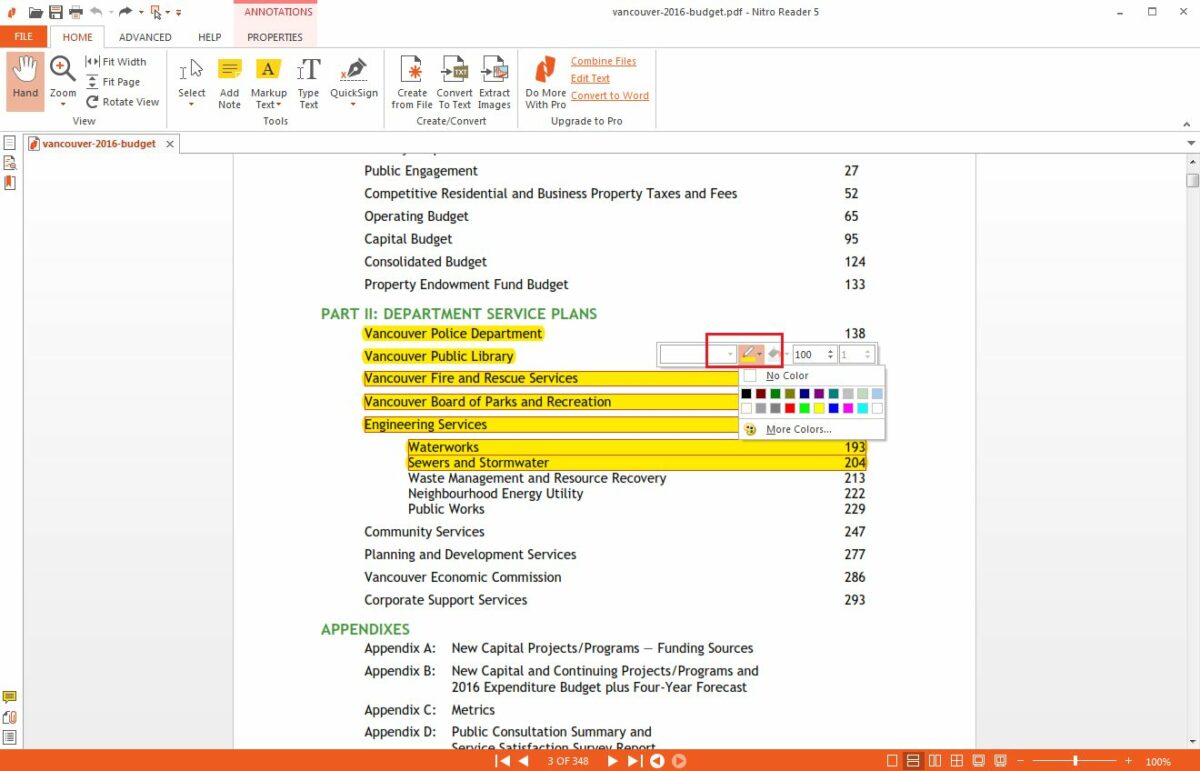
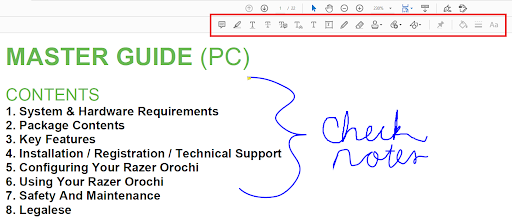
Now use the toolbar just above your document to edit, draw and mark your document.

Mark the file

Step 3: Add comments

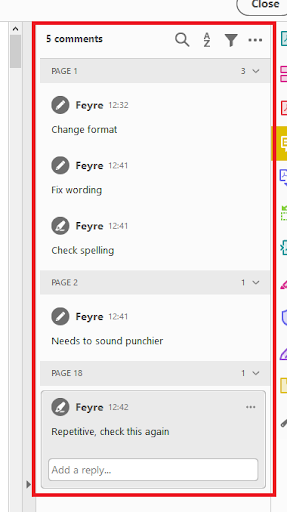
Any changes and markups that you make will add a comment to the comment box on the screen’s right-hand side. Here you can add additional comments, and someone else can reply to the comments to allow for easy communication.

Step 4: Save the file

Once you’ve made all of the desired changes, save your PDF. Now you can send it to others and allow them to make changes as well, or you can keep the edited version for yourself, depending on your needs.

The Perfect Tweaking Tools

Many people don’t know that the free version of Adobe Reader has so many editing tools, though, which allows for so much customization and effortless collaboration with others. Overall, Adobe has so many features that define it as the best PDF reader around, whether you’re working on PC, iPhone or Android.